> For the complete documentation index, see [llms.txt](https://help.manu.co/llms.txt). Markdown versions of documentation pages are available by appending `.md` to page URLs; this page is available as [Markdown](https://help.manu.co/learn/manual/triggers.md).
# Triggers
For animations, Game Flow and state machines to work in your game, you need to set triggering conditions for them and trigger them when those conditions are met. These conditions are tracked by objects called triggers.
Triggers consist of conditions. Such conditions can be either one or several. Several conditions can be combined with each other using Boolean logic to make more complex triggers.
### How to add a trigger?
* Trigger as an object. It is used to create Game Flow trigger nodes and as a condition in other triggers. Such a trigger can be reused throughout the project where it is needed
* Trigger with animation. This trigger is used to start animations in which it is created.
* State machine state transition trigger. This trigger is created in the trigger panel of the state machine connectors.
* Complementary Game Flow node-to-node communication trigger
#### Trigger as an object
To add a trigger as an object:
* Select the desired hierarchy in the scene tree Click the Trigger icon in the main toolbar
* The trigger will be created in the selected hierarchy
* Open the trigger panel by selecting the trigger
* In the trigger panel that opens, you can add conditions.
Trigger as an object can be created together with the creation of a node in Game Flow, to do this:
* Create a Game Flow by clicking in the main toolbar
* Open the Game Flow editing window Select the Trigger node creation tool in the Game Flow toolbar
* Click on the canvas and select Create New
* A Trigger node will be created on the canvas
* A new trigger is created in the scene tree as a child of this Game Flow which can be reused throughout the project
* The trigger can also be edited by double-clicking on the trigger node
* In the trigger panel that opens, you can add conditions
#### Animation Trigger
To add a animation trigger
* Select the desired hierarchy to create an animation
* Hold down a click on the Animation icon in the main toolbar From the drop-down submenu, select Animation with Trigger
* An animation with trigger will be created
* Select the animation and go to Animation mode
* In the tab above the timeline, click the Trigger icon. In the trigger panel that opens, you can add conditions.
#### State Machine state transition trigger
To create a State Machine state transition trigger:
* Create a State Machine by clicking in the main toolbar
* Open the edit window of the State Machine
* Create a states and link them
* Click on the link between the states
* In the trigger panel that opens, you can add conditions
#### Additional trigger in the link between Game Flow nodes
To create an additional trigger in the link between Game Flow nodes:
* Create a Game Flow by clicking in the main toolbar
* Open the Game Flow editing window
* Create the nodes and the link between them
* Click on the link In the trigger panel that opens, you can add the conditions
## Trigger condition types
There are many types of trigger conditions in MANU that follow events in the game. The list of conditions is constantly growing. In the current version of MANU there are the following types of conditions:
* [On Launch Scene](https://app.gitbook.com/s/-Lt-sE9MYKe9pZOcHwg5/~/changes/166/learn/manual/triggers/on-launch-scene)
* [Key](https://app.gitbook.com/s/-Lt-sE9MYKe9pZOcHwg5/~/changes/166/learn/manual/triggers/key)
* [Collision](https://app.gitbook.com/s/-Lt-sE9MYKe9pZOcHwg5/~/changes/166/learn/manual/triggers/collision)
* [Animation](https://app.gitbook.com/s/-Lt-sE9MYKe9pZOcHwg5/~/changes/166/learn/manual/triggers/animation)
* [State Machine](https://app.gitbook.com/s/-Lt-sE9MYKe9pZOcHwg5/~/changes/166/learn/manual/triggers/state-machine)
* [Comparsion](https://app.gitbook.com/s/-Lt-sE9MYKe9pZOcHwg5/~/changes/166/learn/manual/triggers/comparsion)
* [Game Flow](https://app.gitbook.com/s/-Lt-sE9MYKe9pZOcHwg5/~/changes/166/learn/manual/triggers/game-flow)
* [Trigger](https://app.gitbook.com/s/-Lt-sE9MYKe9pZOcHwg5/~/changes/166/learn/manual/triggers/trigger)
* [Object Enabled](https://app.gitbook.com/s/-Lt-sE9MYKe9pZOcHwg5/~/changes/166/learn/manual/triggers/object-enabled)
* [Network](https://app.gitbook.com/s/-Lt-sE9MYKe9pZOcHwg5/~/changes/166/learn/manual/triggers/network)
You can learn about each type of trigger event in its own section.
## Trigger Logic
Triggers can have two states: TRUE and FALSE. If the condition specified by the trigger is met, the trigger state will be TRUE. When this condition is not met, then the trigger state will be FALSE. All transitions of triggers from one state to another (from TRUE to FALSE and from FALSE to TRUE) activate the trigger logic. If, for example, the trigger is set to collide one object with another, then as long as there is no such collision, the trigger has the FALSE state. When a collision occurs, the trigger changes its state to TRUE. When the trigger state is TRUE, it sends the command “animation play”. When the trigger state is FALSE, it gives the command “animation stop”. Animation continues to play, even when the play event is sent again (state true). Animation ignores these commands until it finishes its playback. While the animation is playing, it does not accept new play commands. When the animation play period stops, the object listens to the trigger command again. Animation will stop if the stop command is sent (state false). It stops at the moment when this command appears, even before finishing its playback.
#### One-time trigger
A one-time trigger exists for an instant. For example, Collision Started is a one-time trigger, it registers the moment of objects’ collision when it has just happened. Other examples of one-time triggers: Collision Ended, Key Down, Key Up, State Machine State Start, State Machine State Stop, Animation Started, Animation Ended.
#### Long-running trigger
For example, Collision Continue is a long-running trigger, its state is long in time and exists as long as the interaction of objects continues. Other examples of long-running triggers: Animation Continue, Key Pressed, Collision Continue, State Machine State Continue.
Note: It is very important to distinguish a one-time trigger from a long-running trigger, especially if you group or combine them to launch the animation. To know more, go to the Scene (link).
### Trigger chain
In MANU, you can use as many triggers as you want to launch animations, thus creating a chain of triggers. The concept of a trigger logic chain allows you to:
* combine several triggers with the help of common logical operators (AND, OR, NOT) such that the output result of the trigger logic chain will depend on which triggers are used, as well as on the meaning of the operator.
* set the calculation sequence in the trigger chain by grouping triggers
* give a more complex condition for triggering the animation.
All these options, offered by MANU, open up more opportunities for the user compared to the usage of only one trigger to start and stop the animation. Creating trigger chains, remember that the calculations in the chain occur sequentially, from left to right. The calculation algorithm checks each trigger and operator in order. If one of the triggers changes its state, even for a fraction of a second, the mechanism for checking the trigger chain will start again. The chain checking does not always occur, but it is triggered every time an event occurs. The new event causes the trigger state to change from TRUE to FALSE. The combination of trigger states (TRUE and FALSE) defines the logic of the trigger chain. If, after all calculations, the trigger chain output is TRUE, then the animation starts. If the output is FALSE, then the animation does not play. When, during the animation playback, a new event occurs, it activates the checking of the trigger logic chain. The animation playing will stop if the output of the checking is FALSE. If the output of checking is TRUE, then the running animation continues to play. The animation does not start again, it just keeps playing, ignoring the TRUE value.
### Grouping triggers
The trigger chain allows you to create complex conditions for the activating animation. Triggers in the chain are calculated sequentially. If you want to set the order in calculation of triggers you should use the grouping of triggers. You can combine multiple triggers into groups and create multiple groups. Using the trigger groups helps to control the order of calculation.
### Logical operators
#### OR
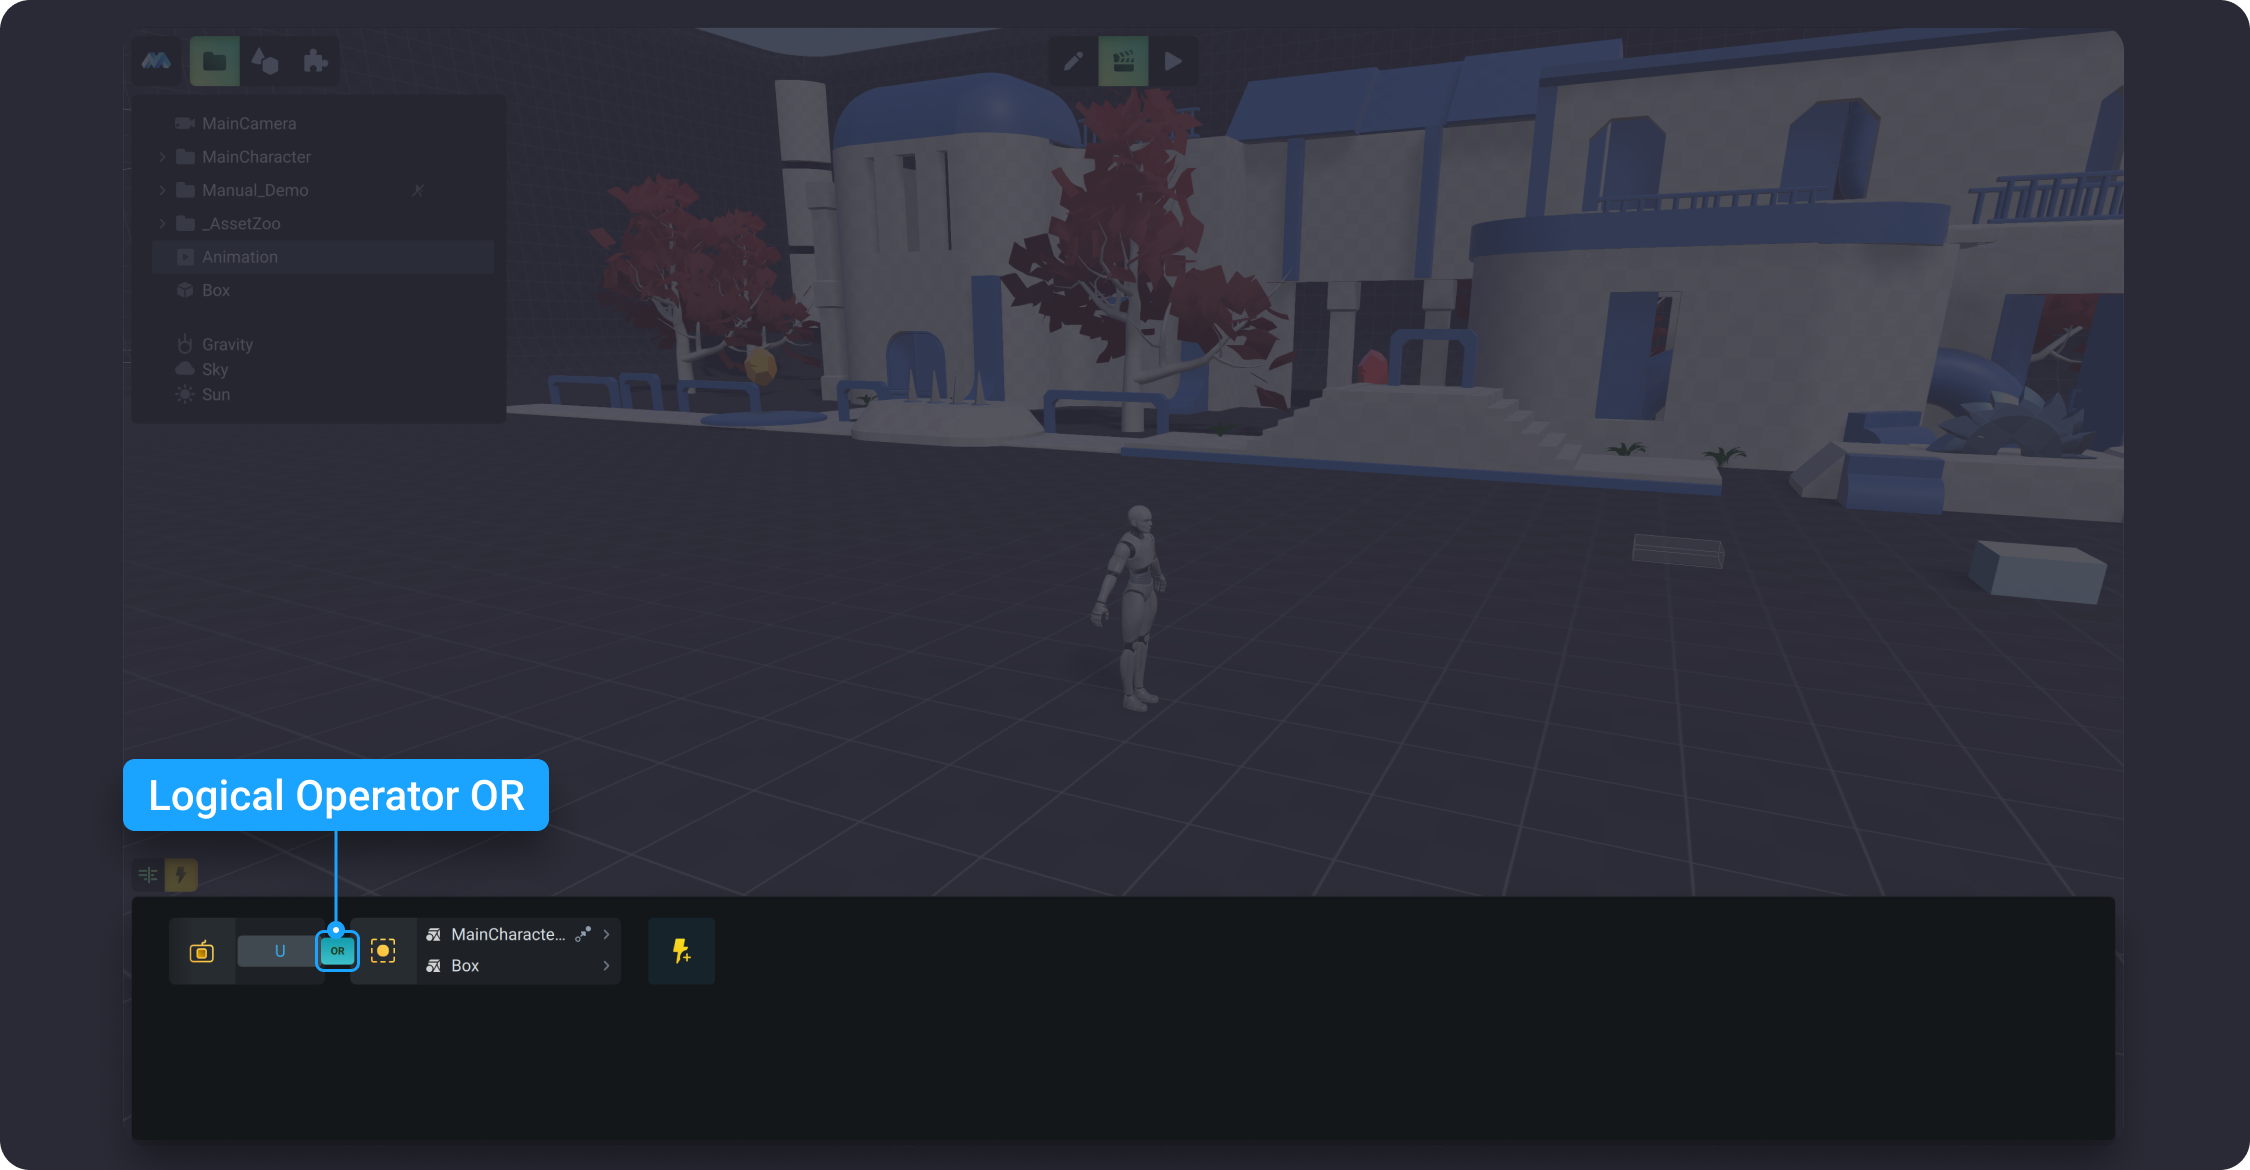
OR returns TRUE value if any of the arguments/elements are TRUE, in the opposite situation, it will return FALSE. You need this logic operator if you want to initiate the animation by two or more triggers in condition that only one or more triggers are activated. By default, when you add a trigger, it joins the existing ones by OR.
#### AND
AND returns a TRUE value if both elements are TRUE and returns FALSE otherwise. If you want that more than one trigger launches an animation, provided that both/all triggers have to be activated, then you need AND as a logical operator to create a chain of triggers. By default, when you add a trigger, it joins the existing ones by OR. You can change it simply by clicking on the AND Icon.

#### NOT
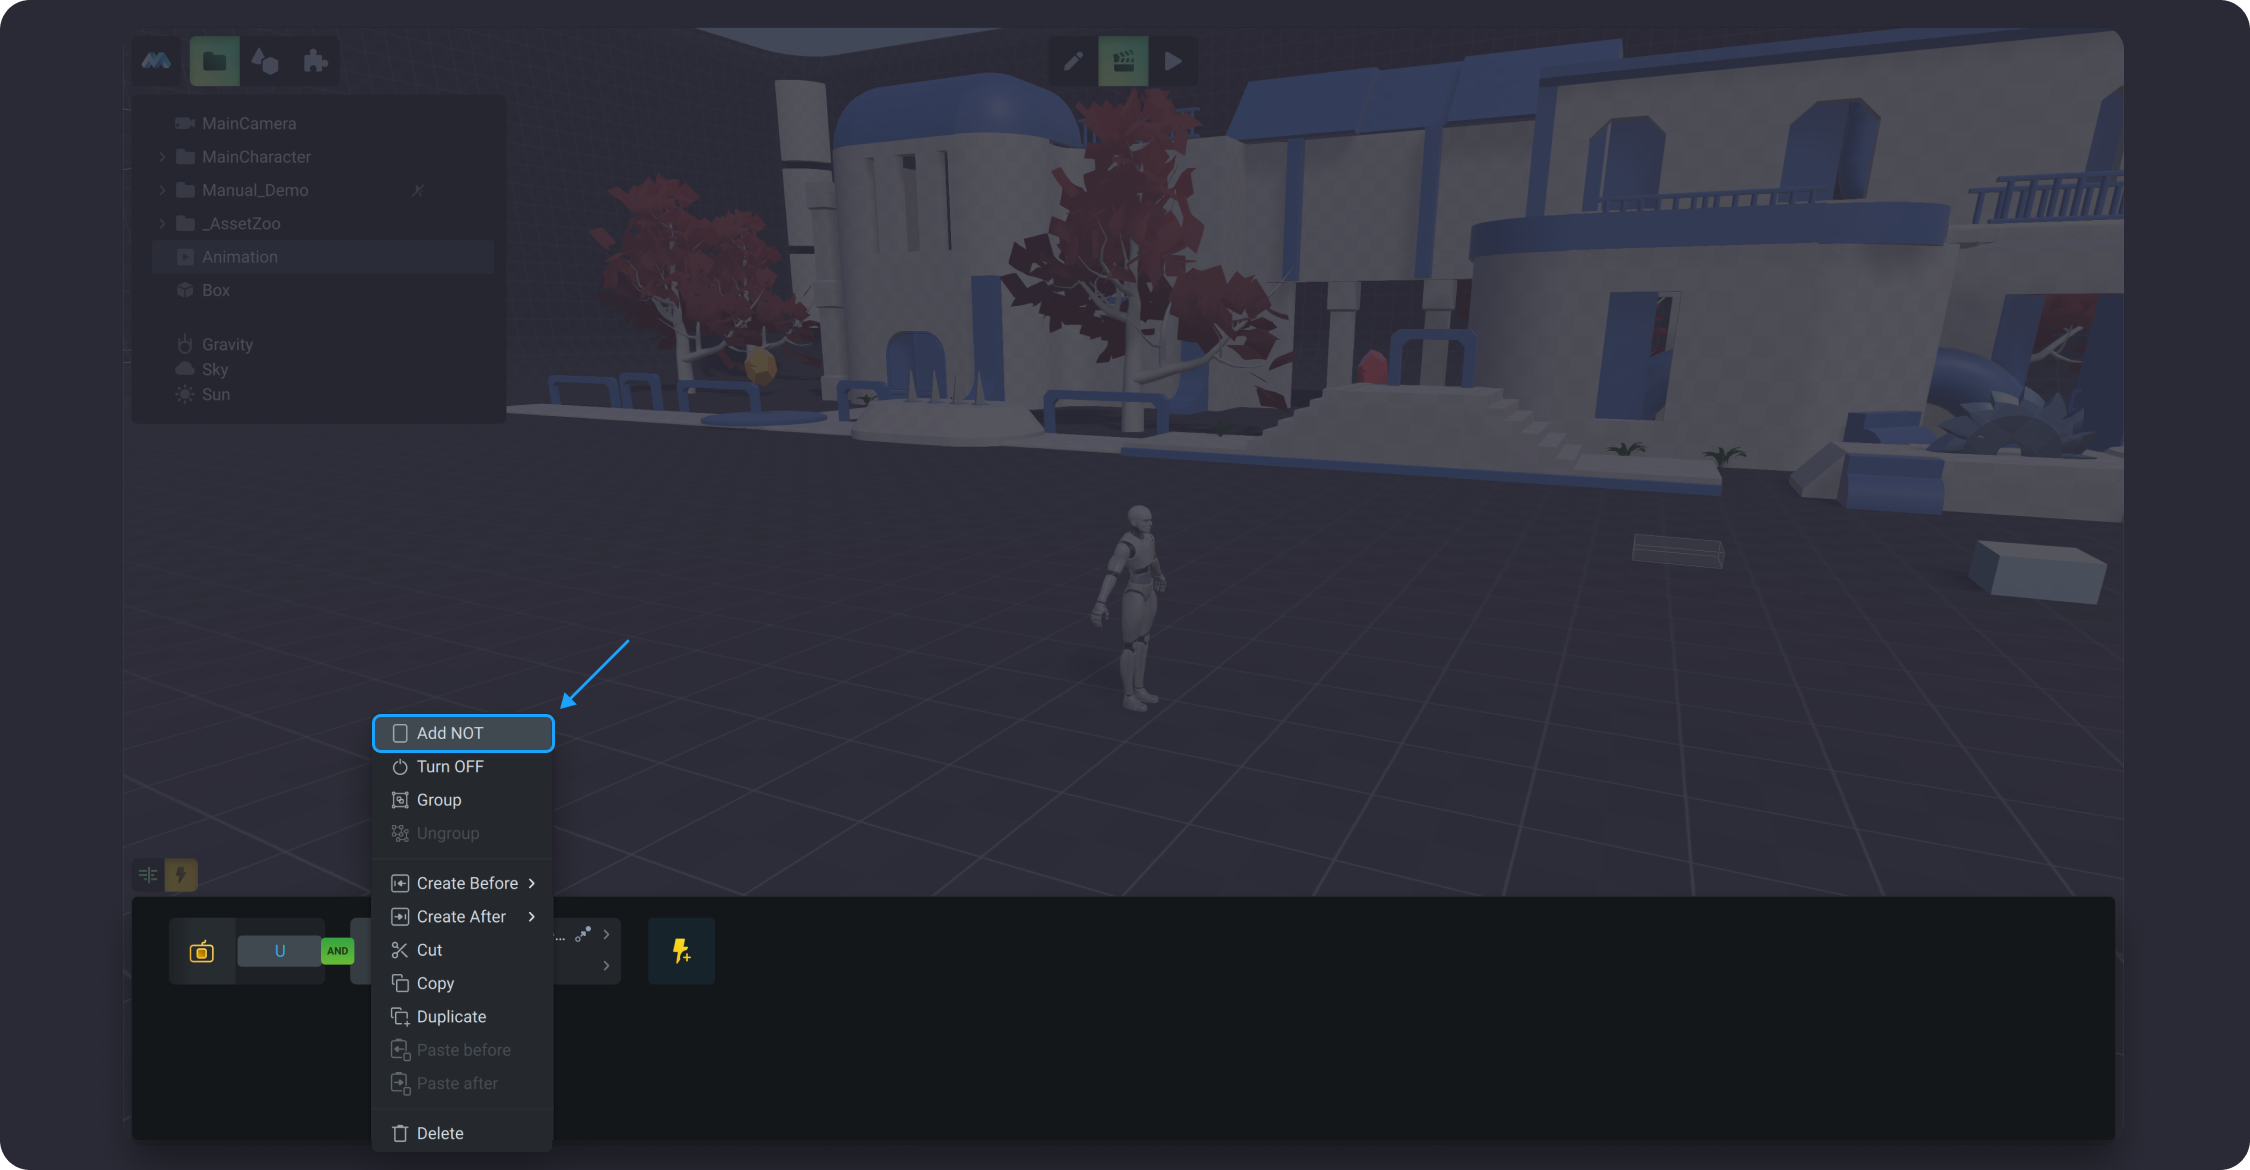
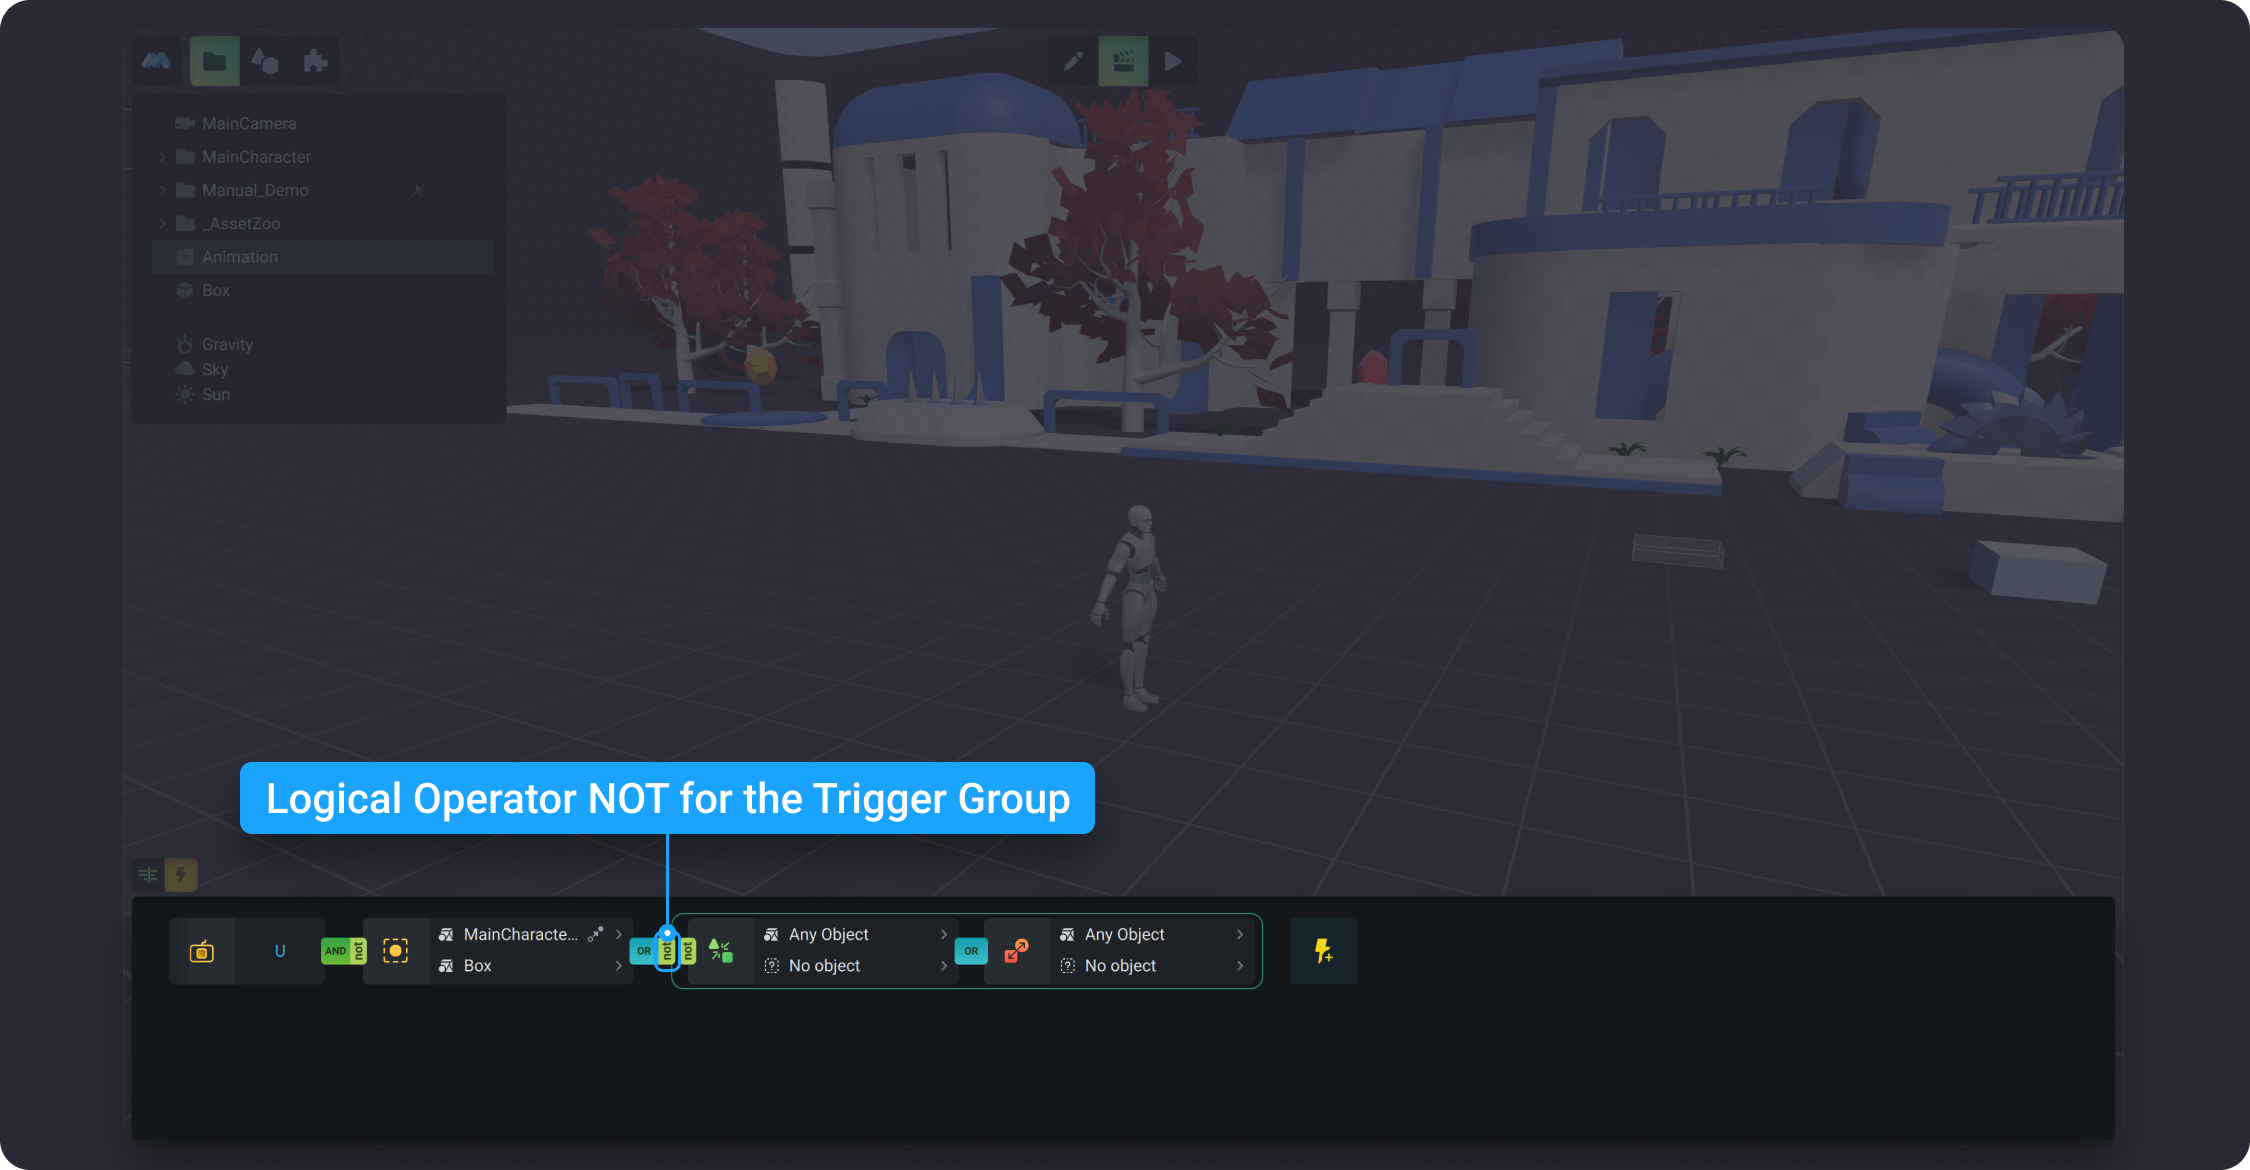
NOT performs a logic negation by inverting TRUE to FALSE and FALSE to TRUE. By hovering over the added trigger, you will notice that it is highlighted a little bit. After that click on the right mouse button and choose from the dropdown list Add NOT. If you have changed your mind, just click Remove NOT on that list. NOT can be set not only for one trigger, but also for the trigger group.

### Truth table
| Trigger 1 | Operation | Trigger 2 | Result |
| --------- | --------- | --------- | ------ |
| YES | `OR` | YES | YES |
| YES | `OR` | NO | YES |
| NO | `OR` | YES | YES |
| NO | `OR` | NO | NO |
| | | | |
| YES | `AND` | YES | YES |
| YES | `AND` | NO | NO |
| NO | `AND` | YES | NO |
| NO | `AND` | NO | NO |
### Managing triggers
You can manage triggers using a dropdown list which appears when you hover over the selected trigger and click on the right mouse button.
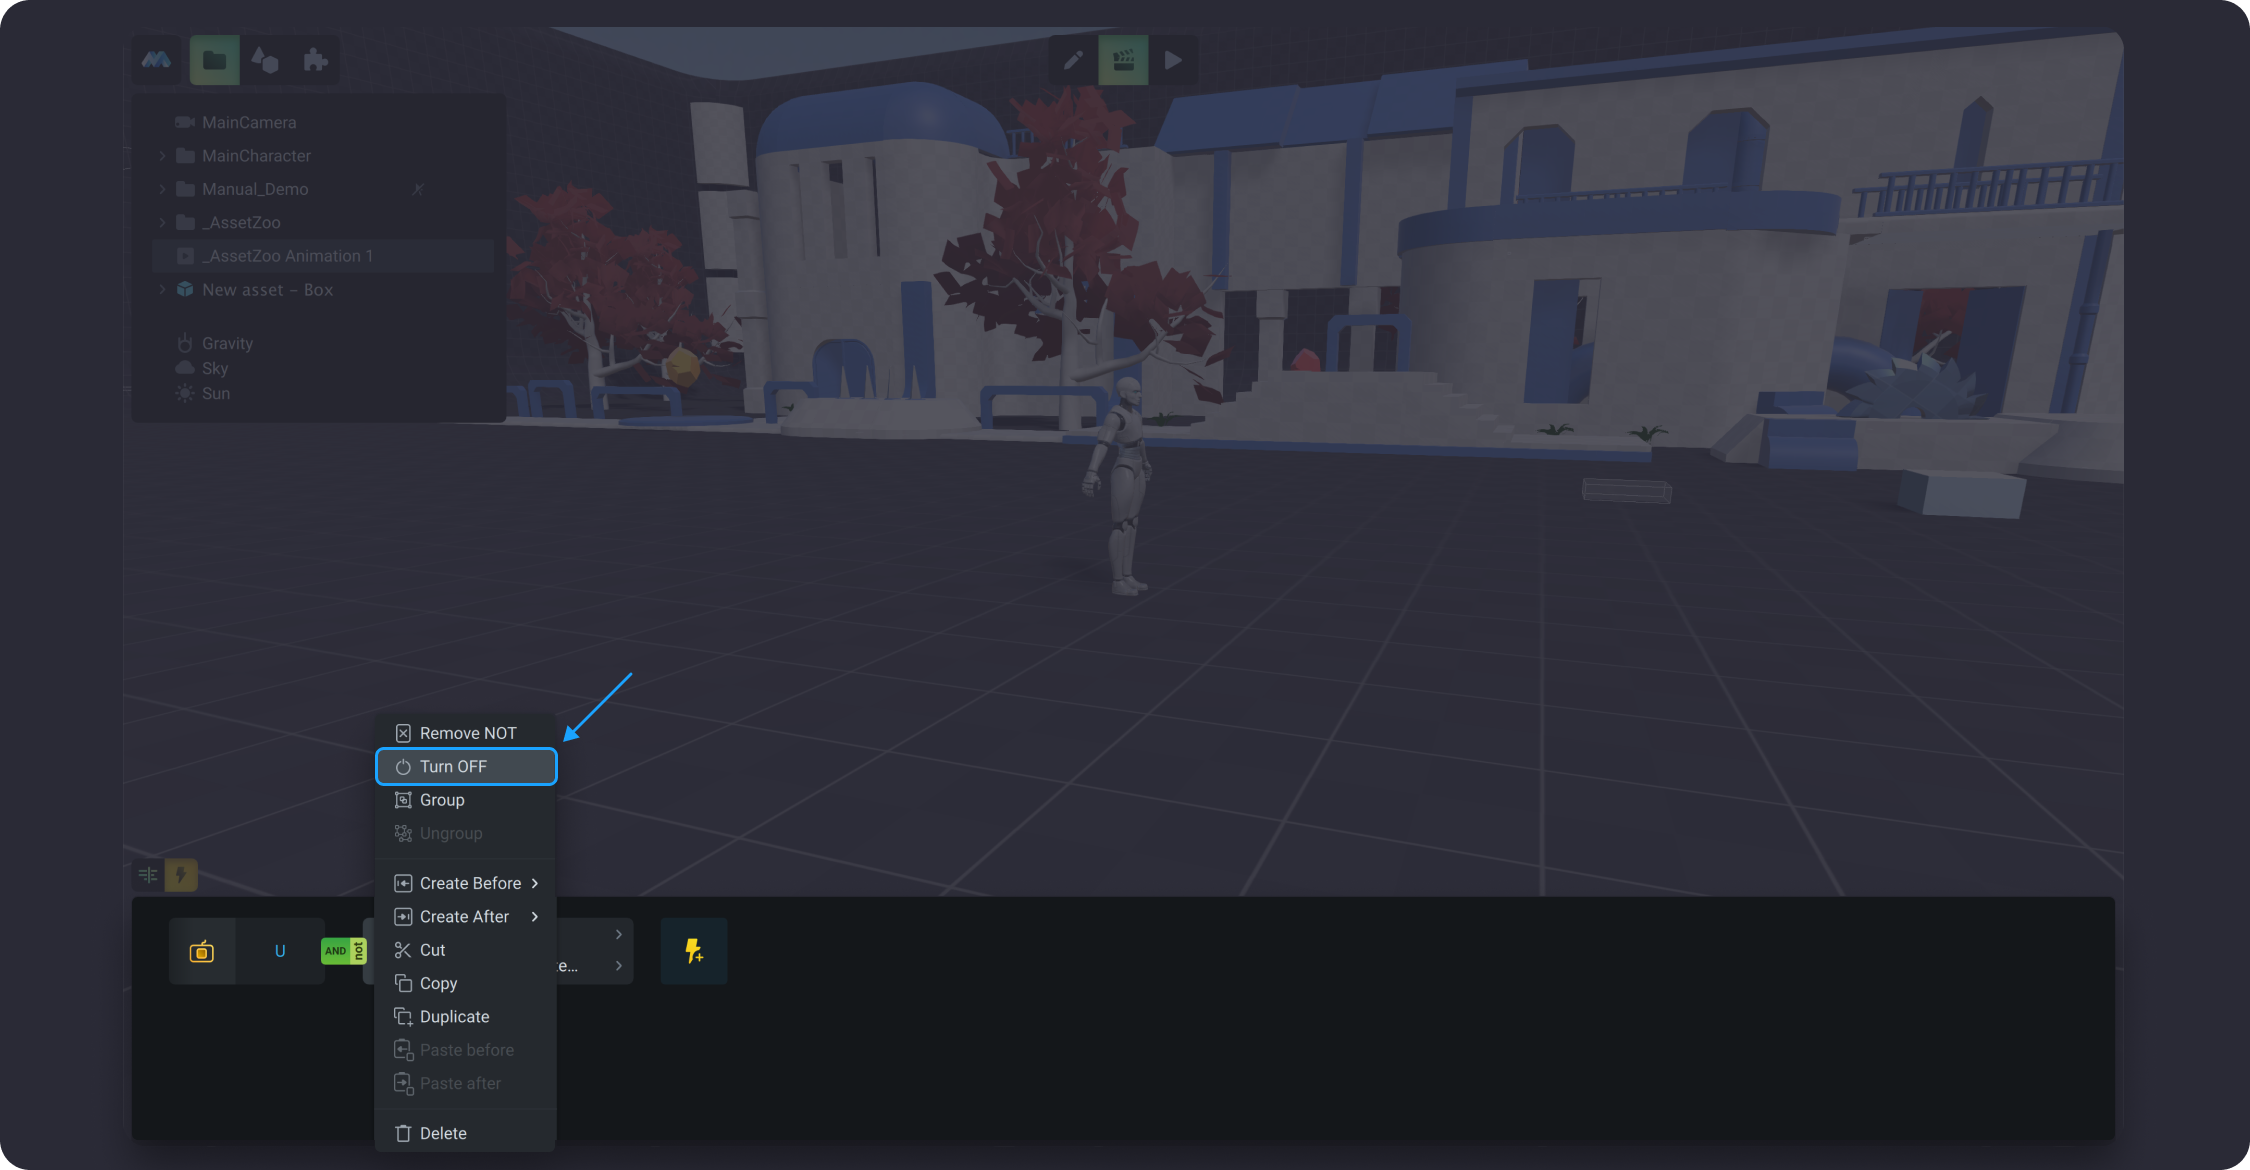
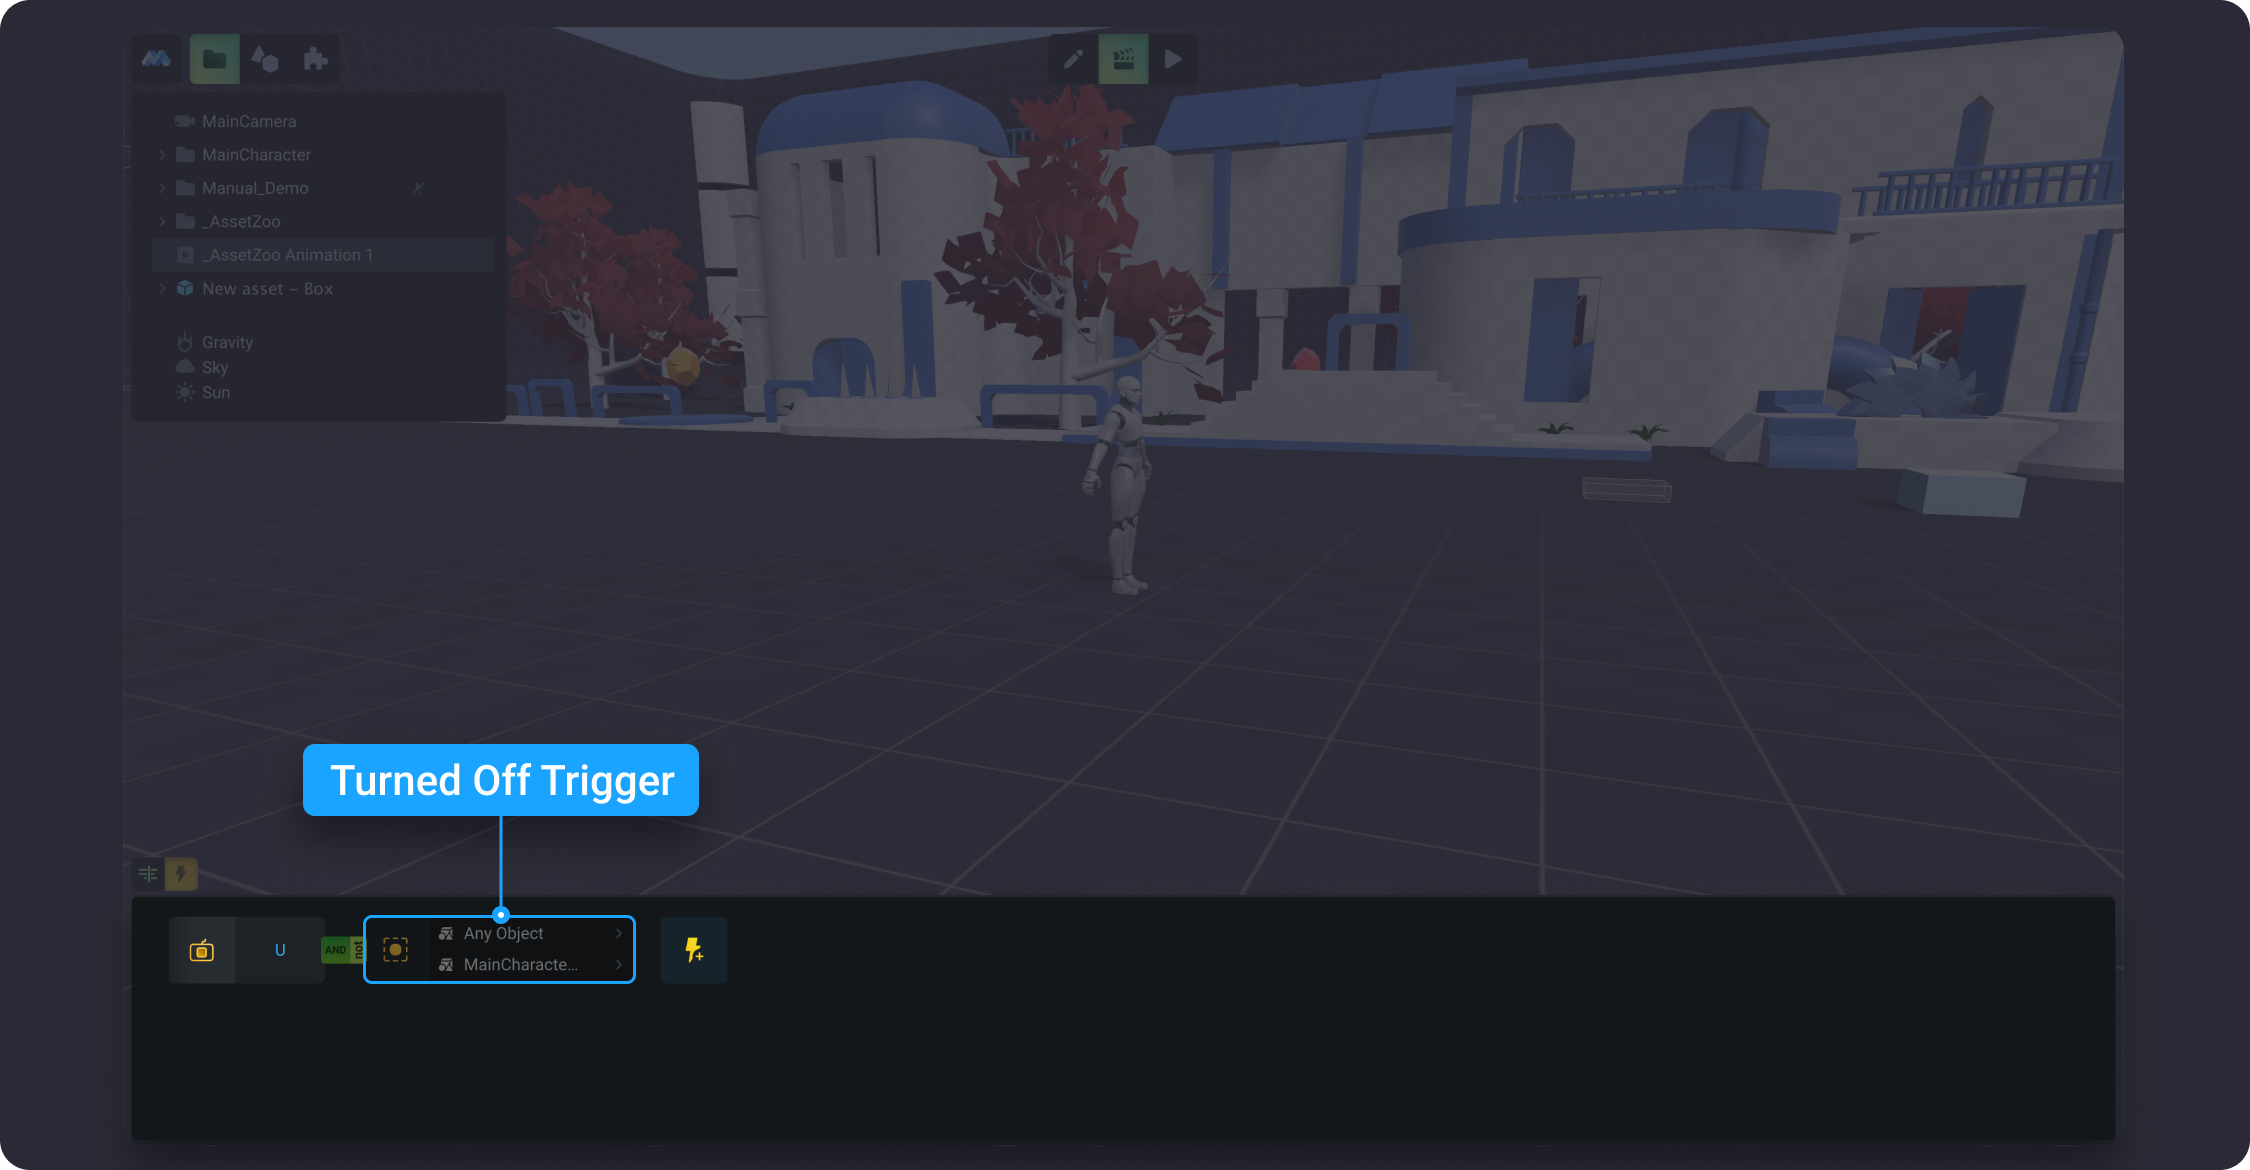
#### Turn Off/On
The Turn Off/On option is used to check the logic of trigger chains. This option is necessary for testing and finding errors in the trigger logic. For example, when a chain of 6 triggers does not work, you can turn them on and off in sequence, and then perform a check. The turned off triggers are ignored during the chain checking process. Note that along with the turned off triggers, the logical operators in front of them are also turned off and ignored.
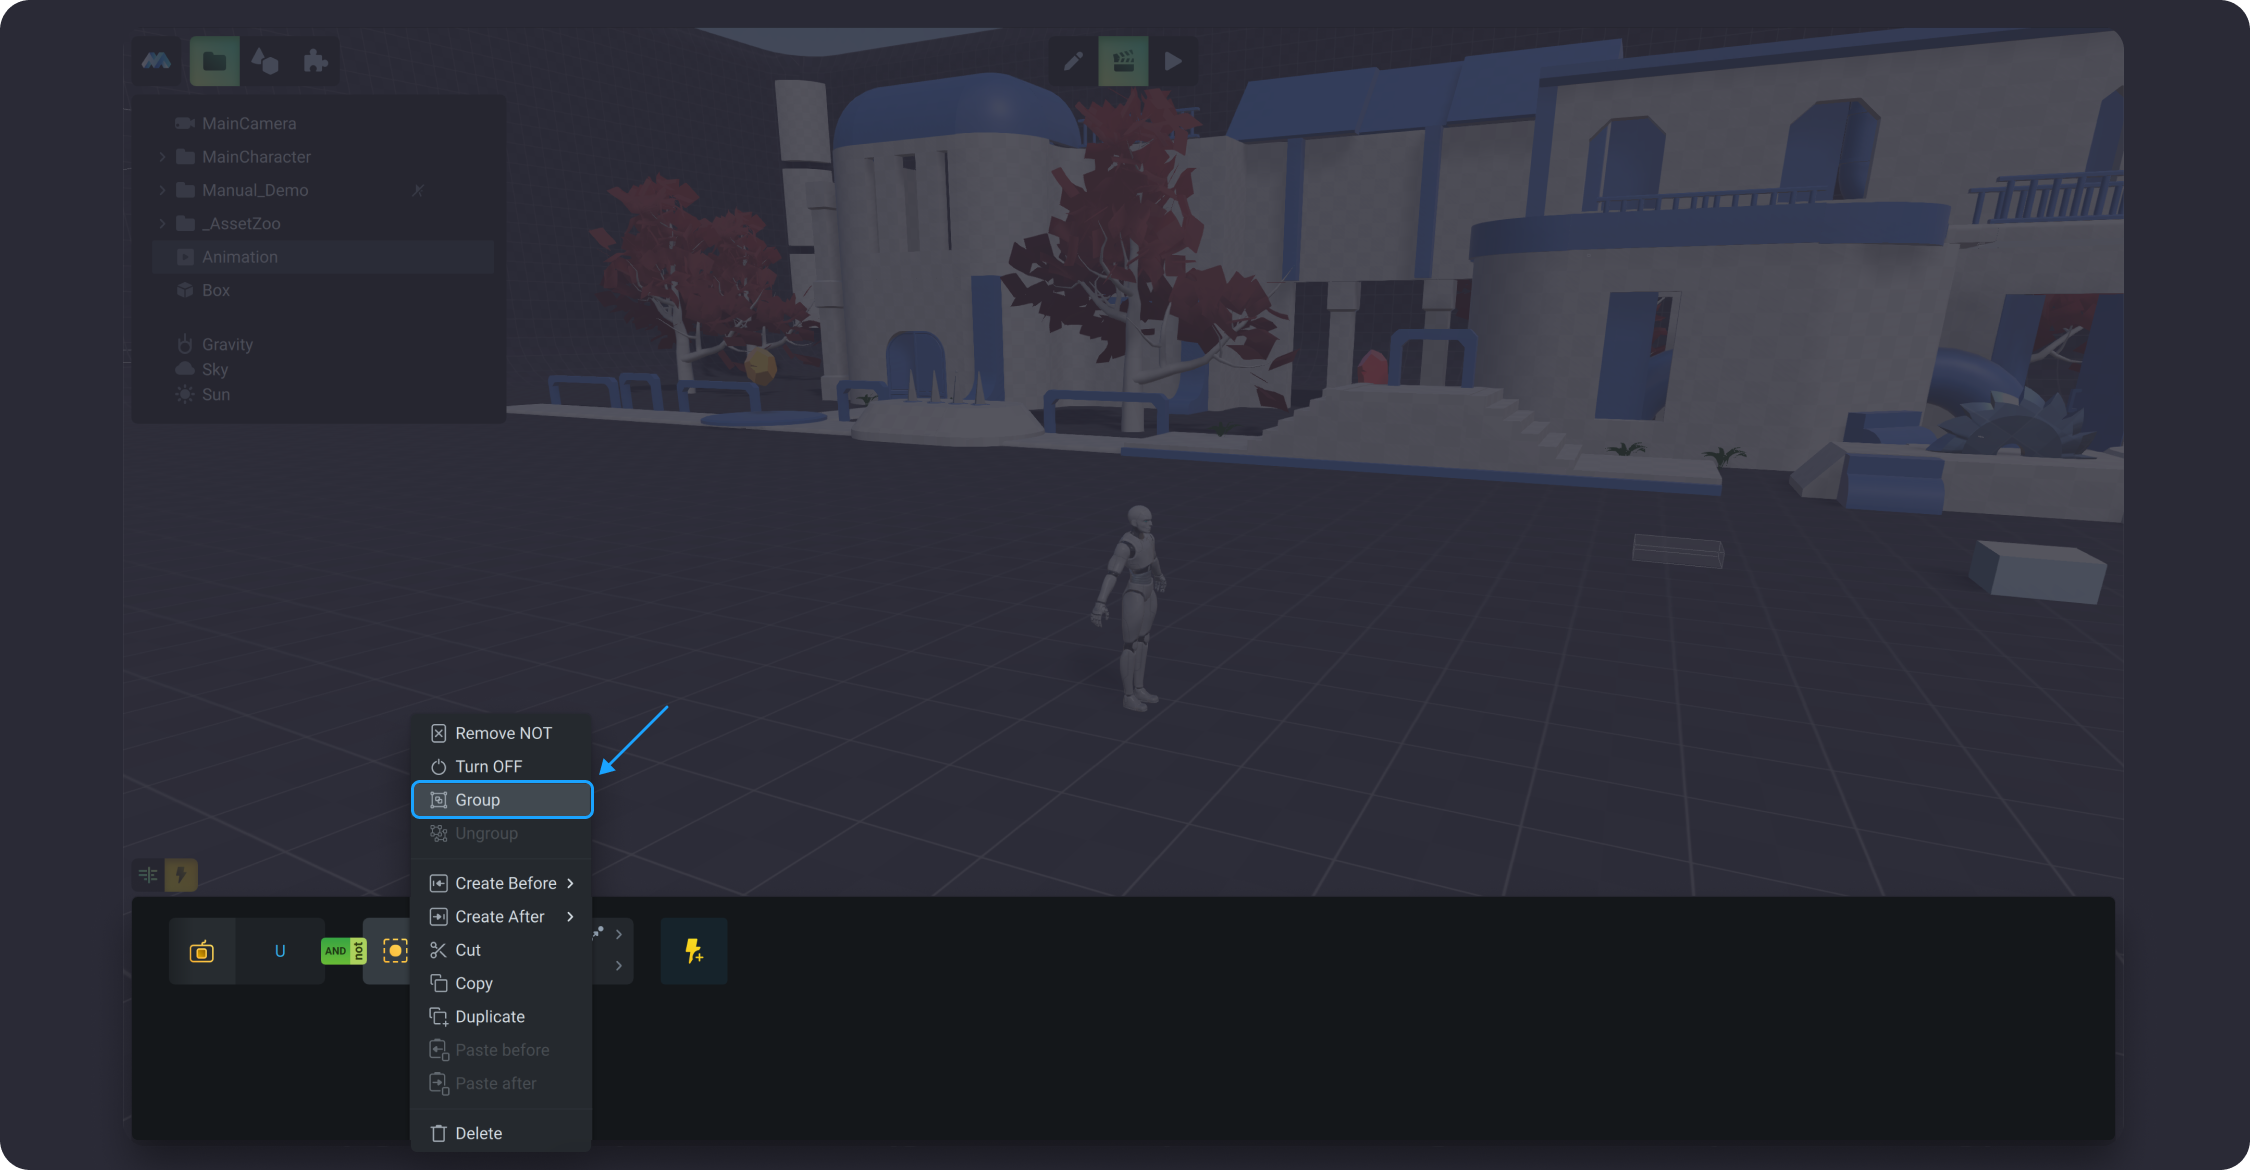
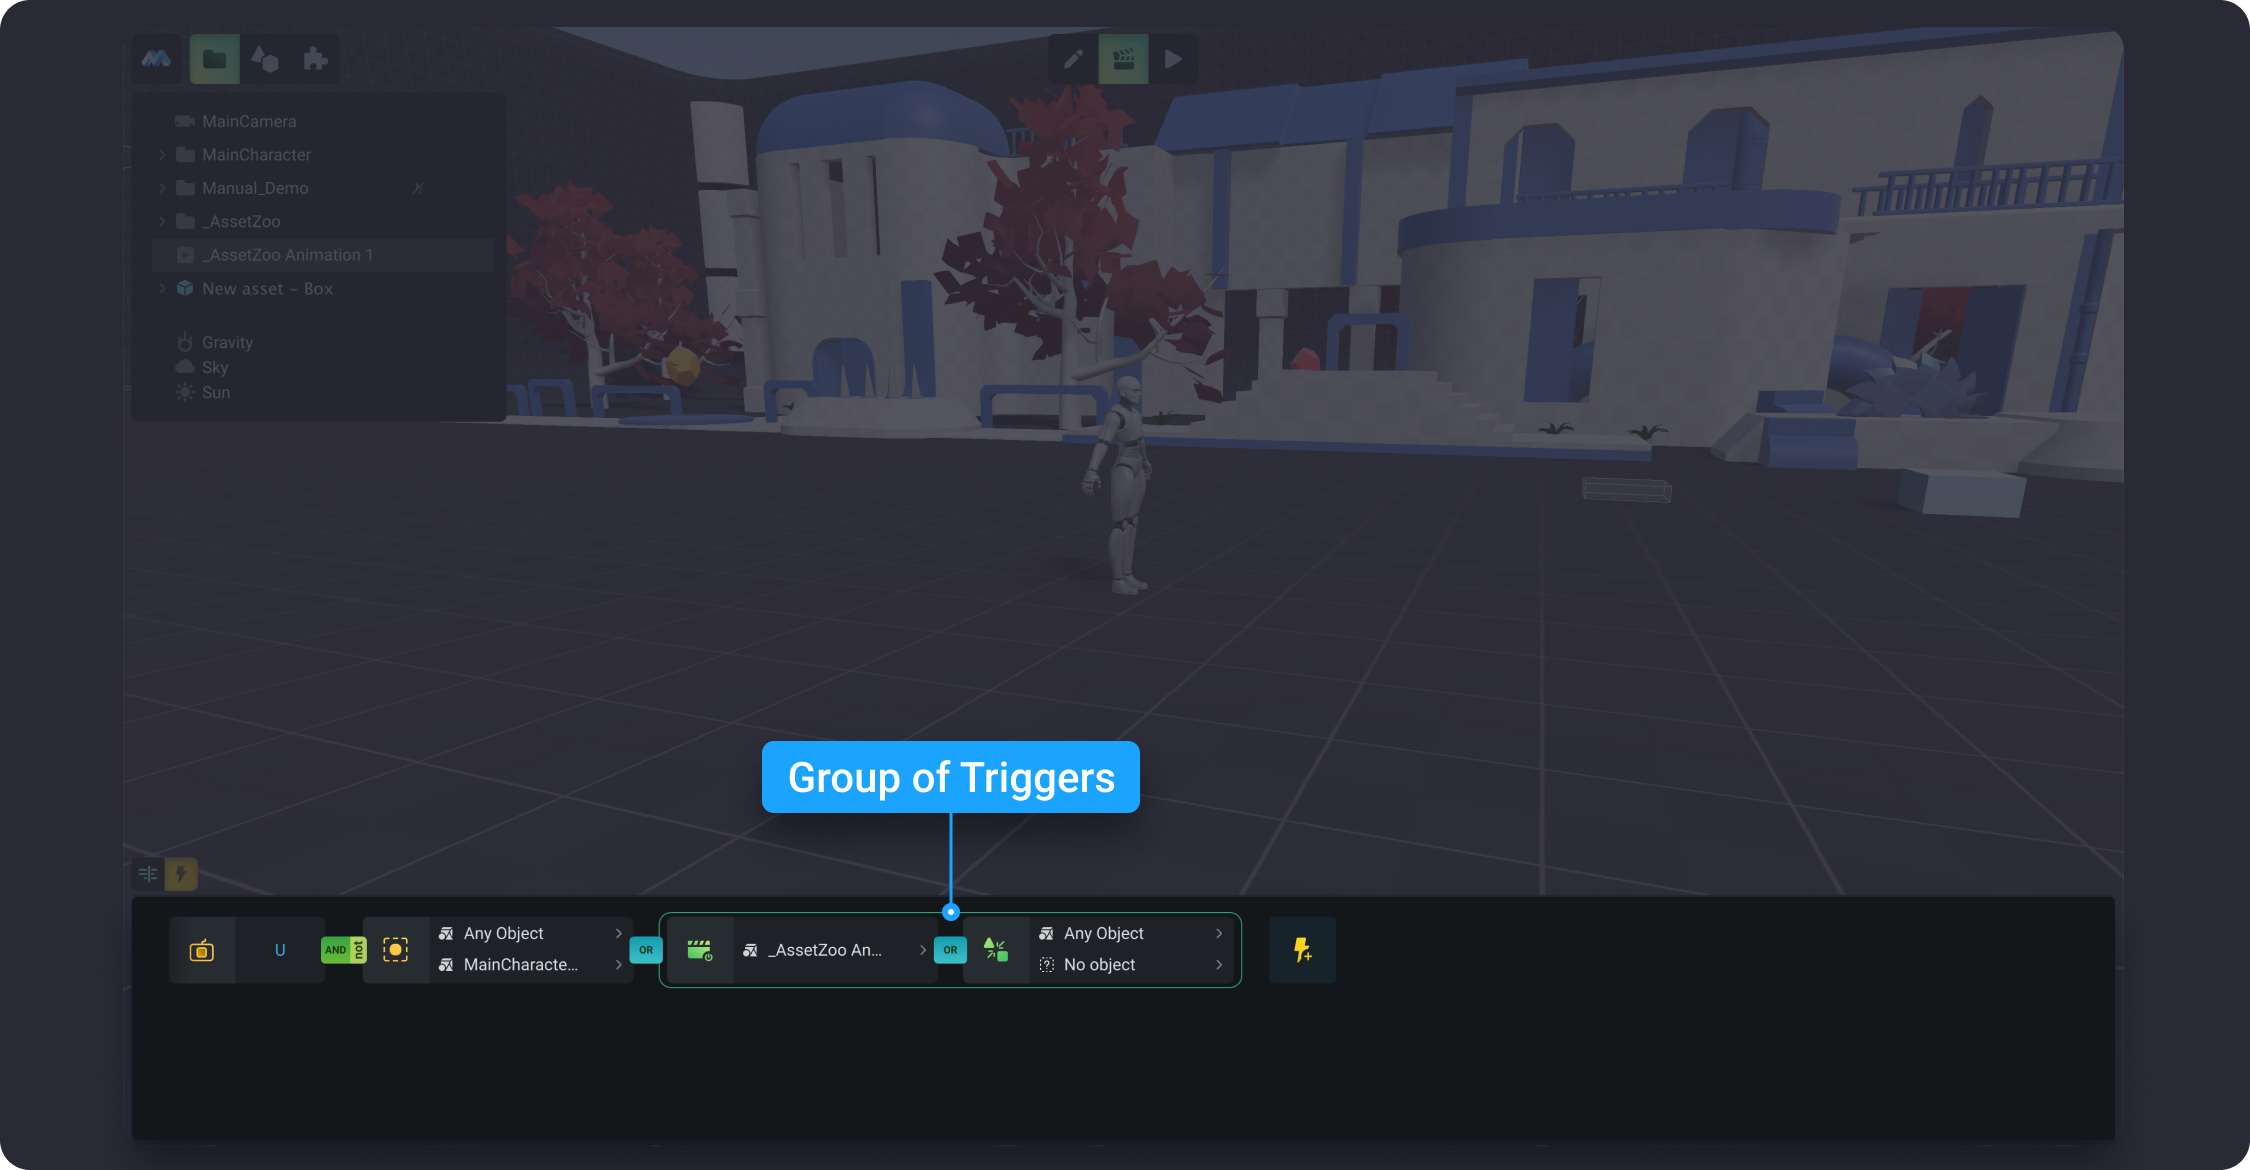
#### Group
To create a group of triggers, move the mouse cursor over the desired trigger and select Group from the drop-down list. A green border will appear around the selected trigger, which changes its color to white if you hover the mouse cursor over it. Next, add the necessary triggers to the group using the Create *After/Before* or *Paste After/Before* options for cut or copied triggers. You also can use *Duplicate* if you need the same trigger in your chain.
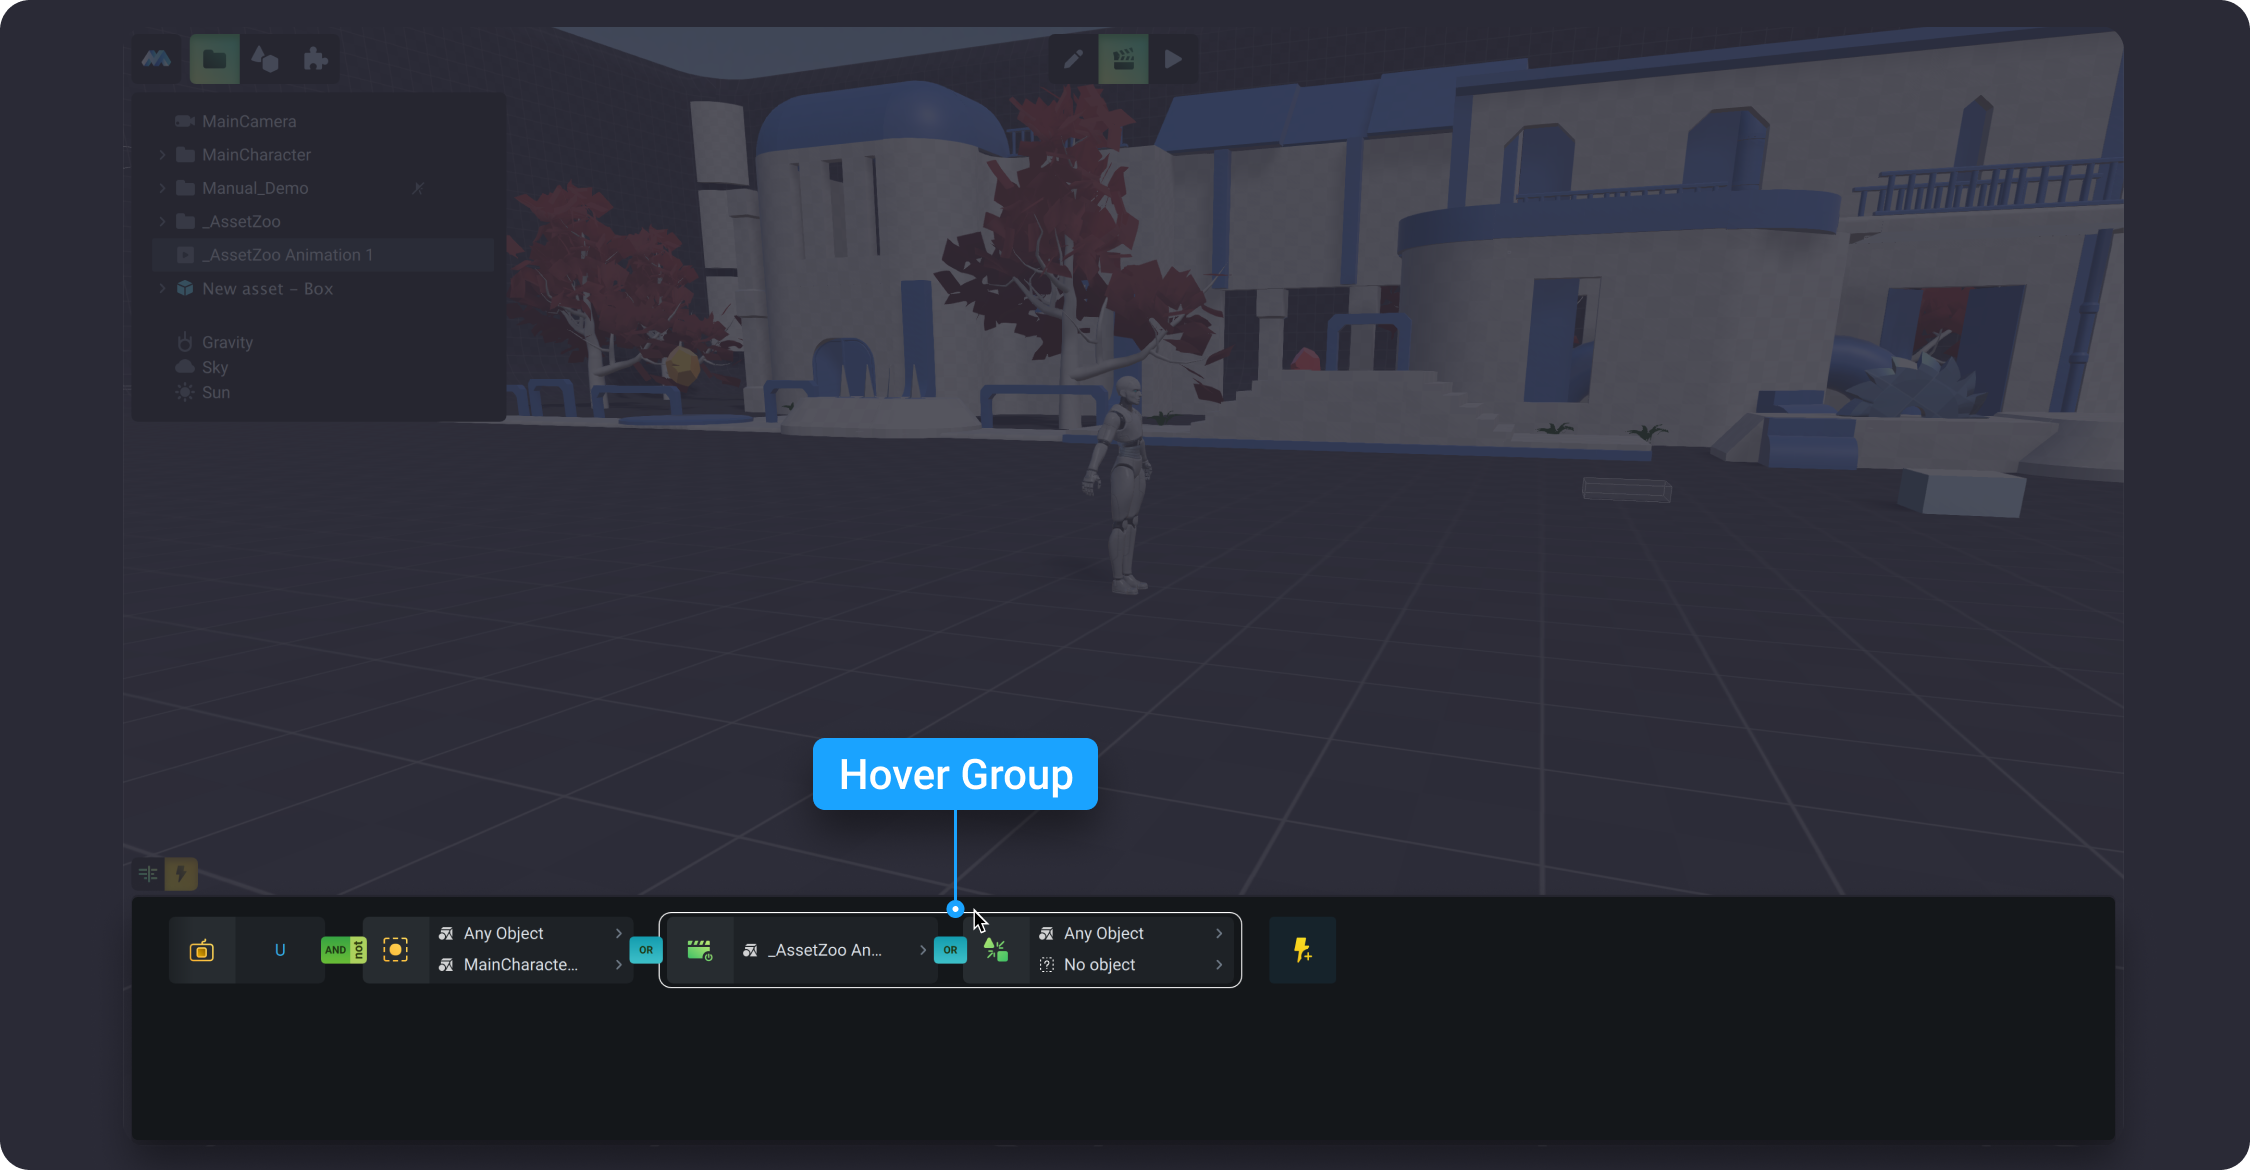
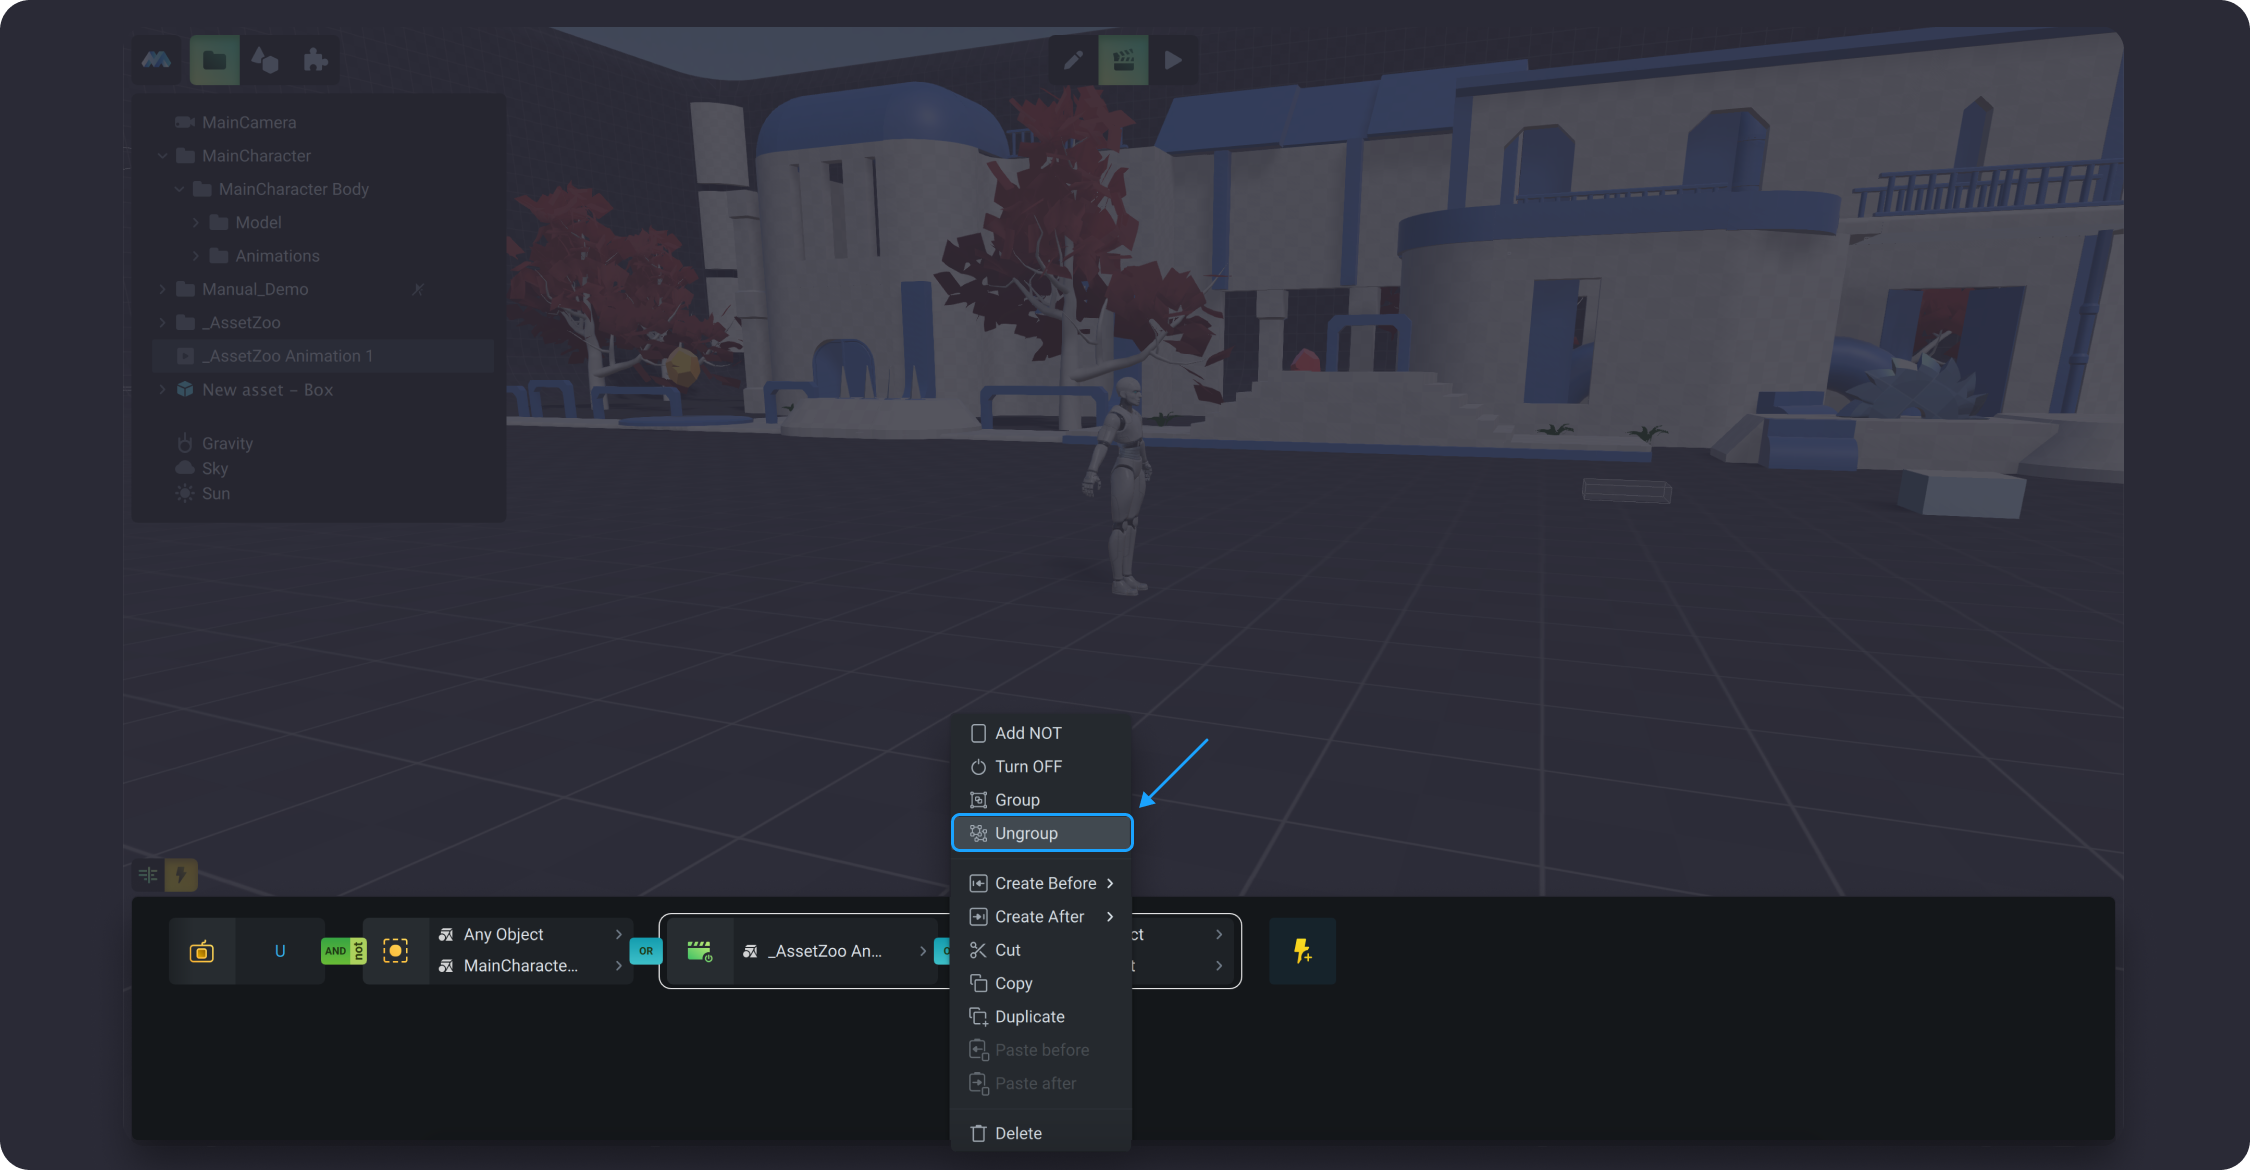
#### Ungroup
Hover the mouse cursor over the green border around the trigger group, and it will immediately change color to white. Then, click the right mouse button and select *Ungroup* from the dropdown list.
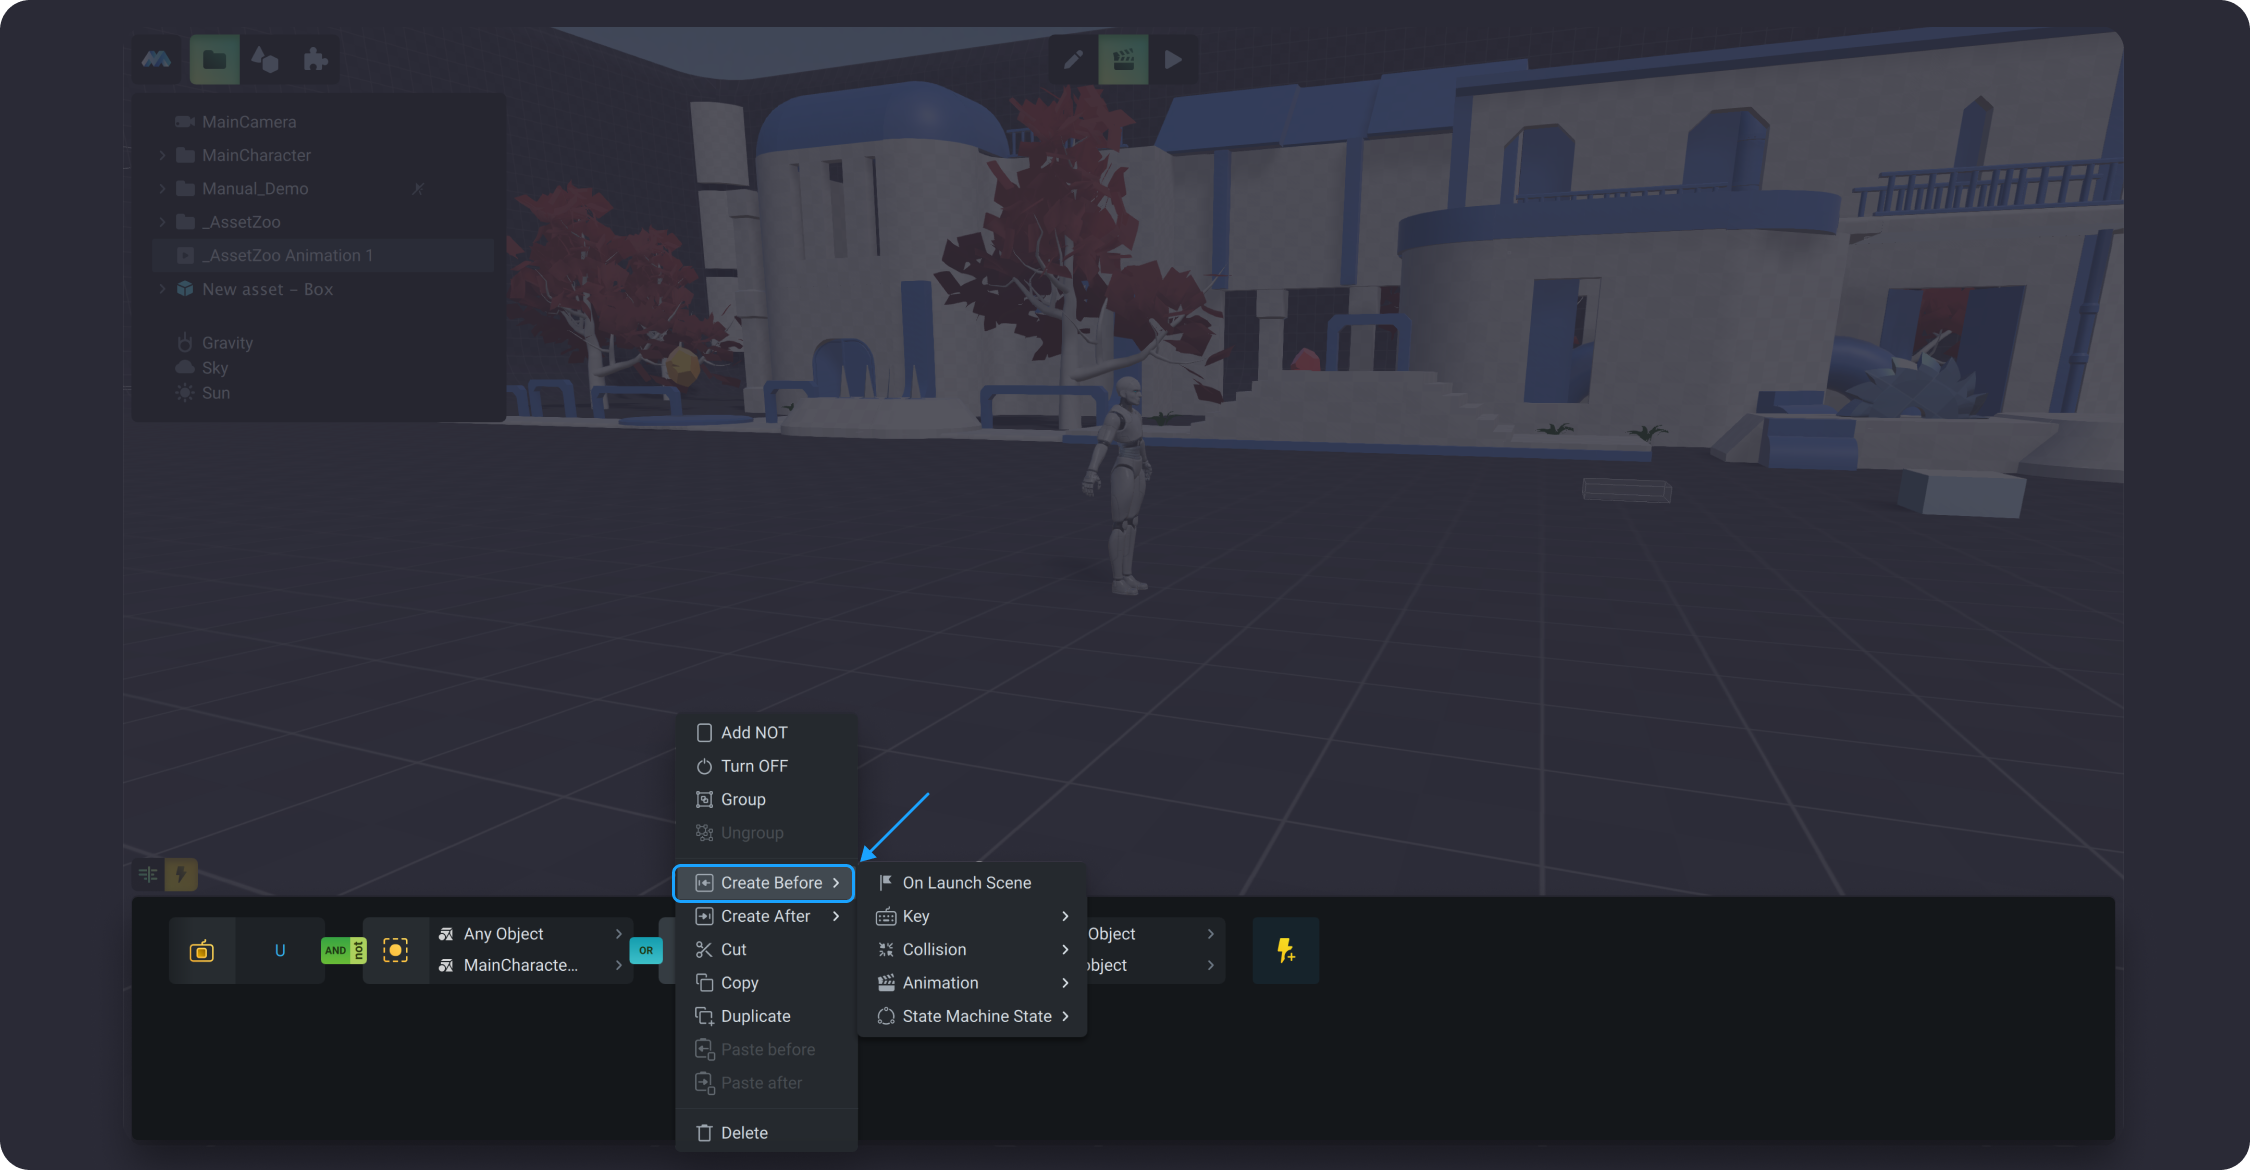
#### Create Before/Create After
*Create Before* and *Create After* allow you to create a trigger at a specific location in the trigger chain. Just hover over the trigger after or before which the new trigger should go, and then click on the right mouse button to invoke the dropdown list. Both options have dropdown lists where you can choose all types of triggers that MANU offer.
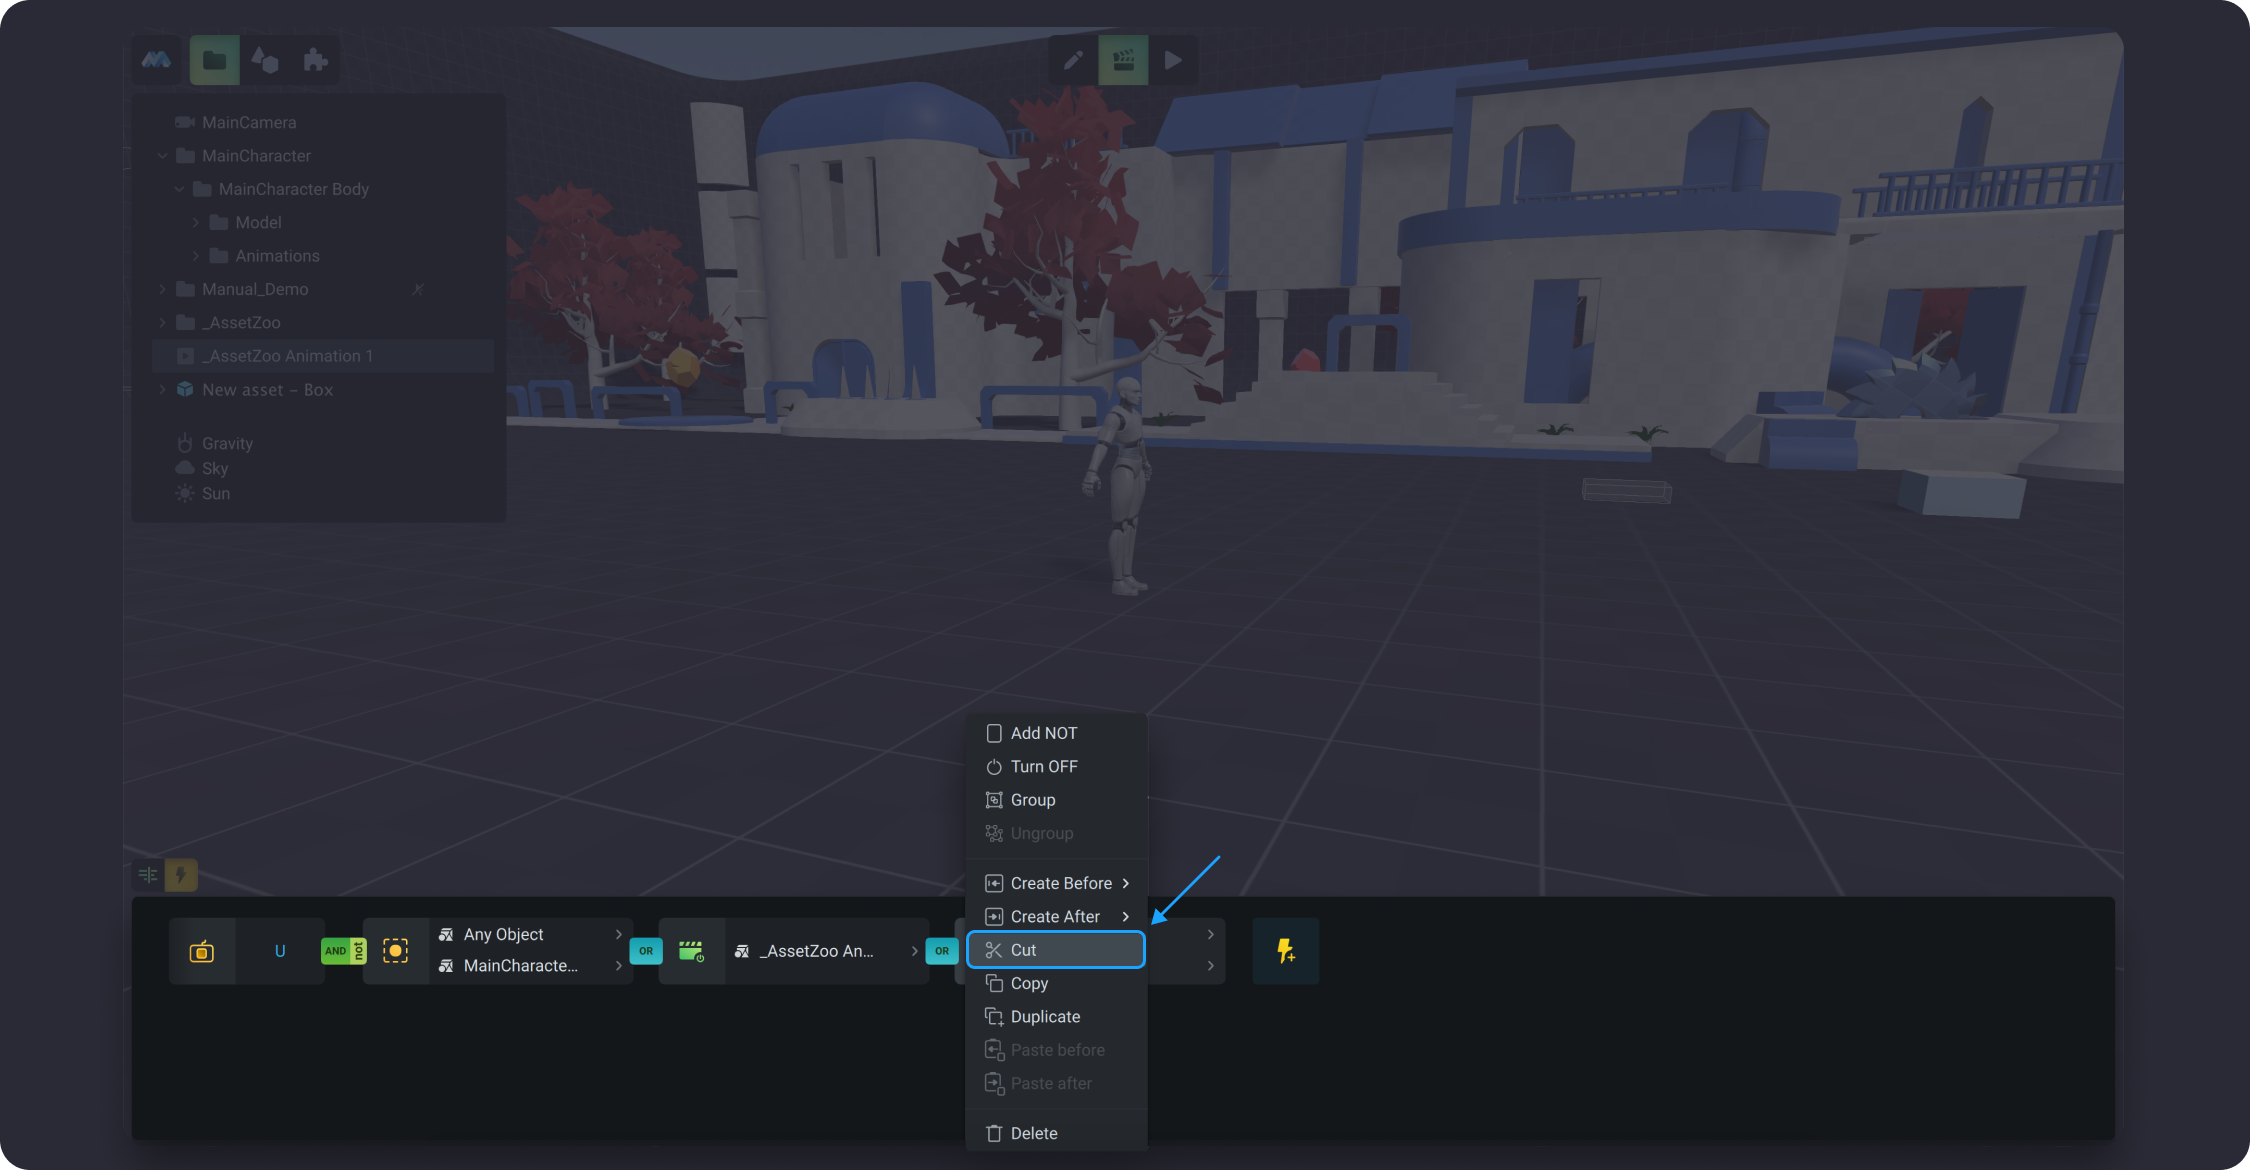
#### Cut
The Cut option temporarily removes the currently selected trigger from the trigger chain. After you cut the trigger, you can place it to a different location in the current trigger chain, or to a different animation. Simply click *Paste Before/Paste After* options from the dropdown list or click on the area between triggers and you will see the Paste option, which allows you to put the trigger at the end of the trigger chain.
#### Copy
When you press *Copy*, the selected trigger remains in its original location. To put the trigger on the desired place use *Paste Before/Paste After* options from the dropdown list. By pasting the copied trigger, you actually duplicate it.
#### Duplicate
With the *Duplicate* option you copy and paste the selected trigger in one click. The new trigger will follow the selected one.
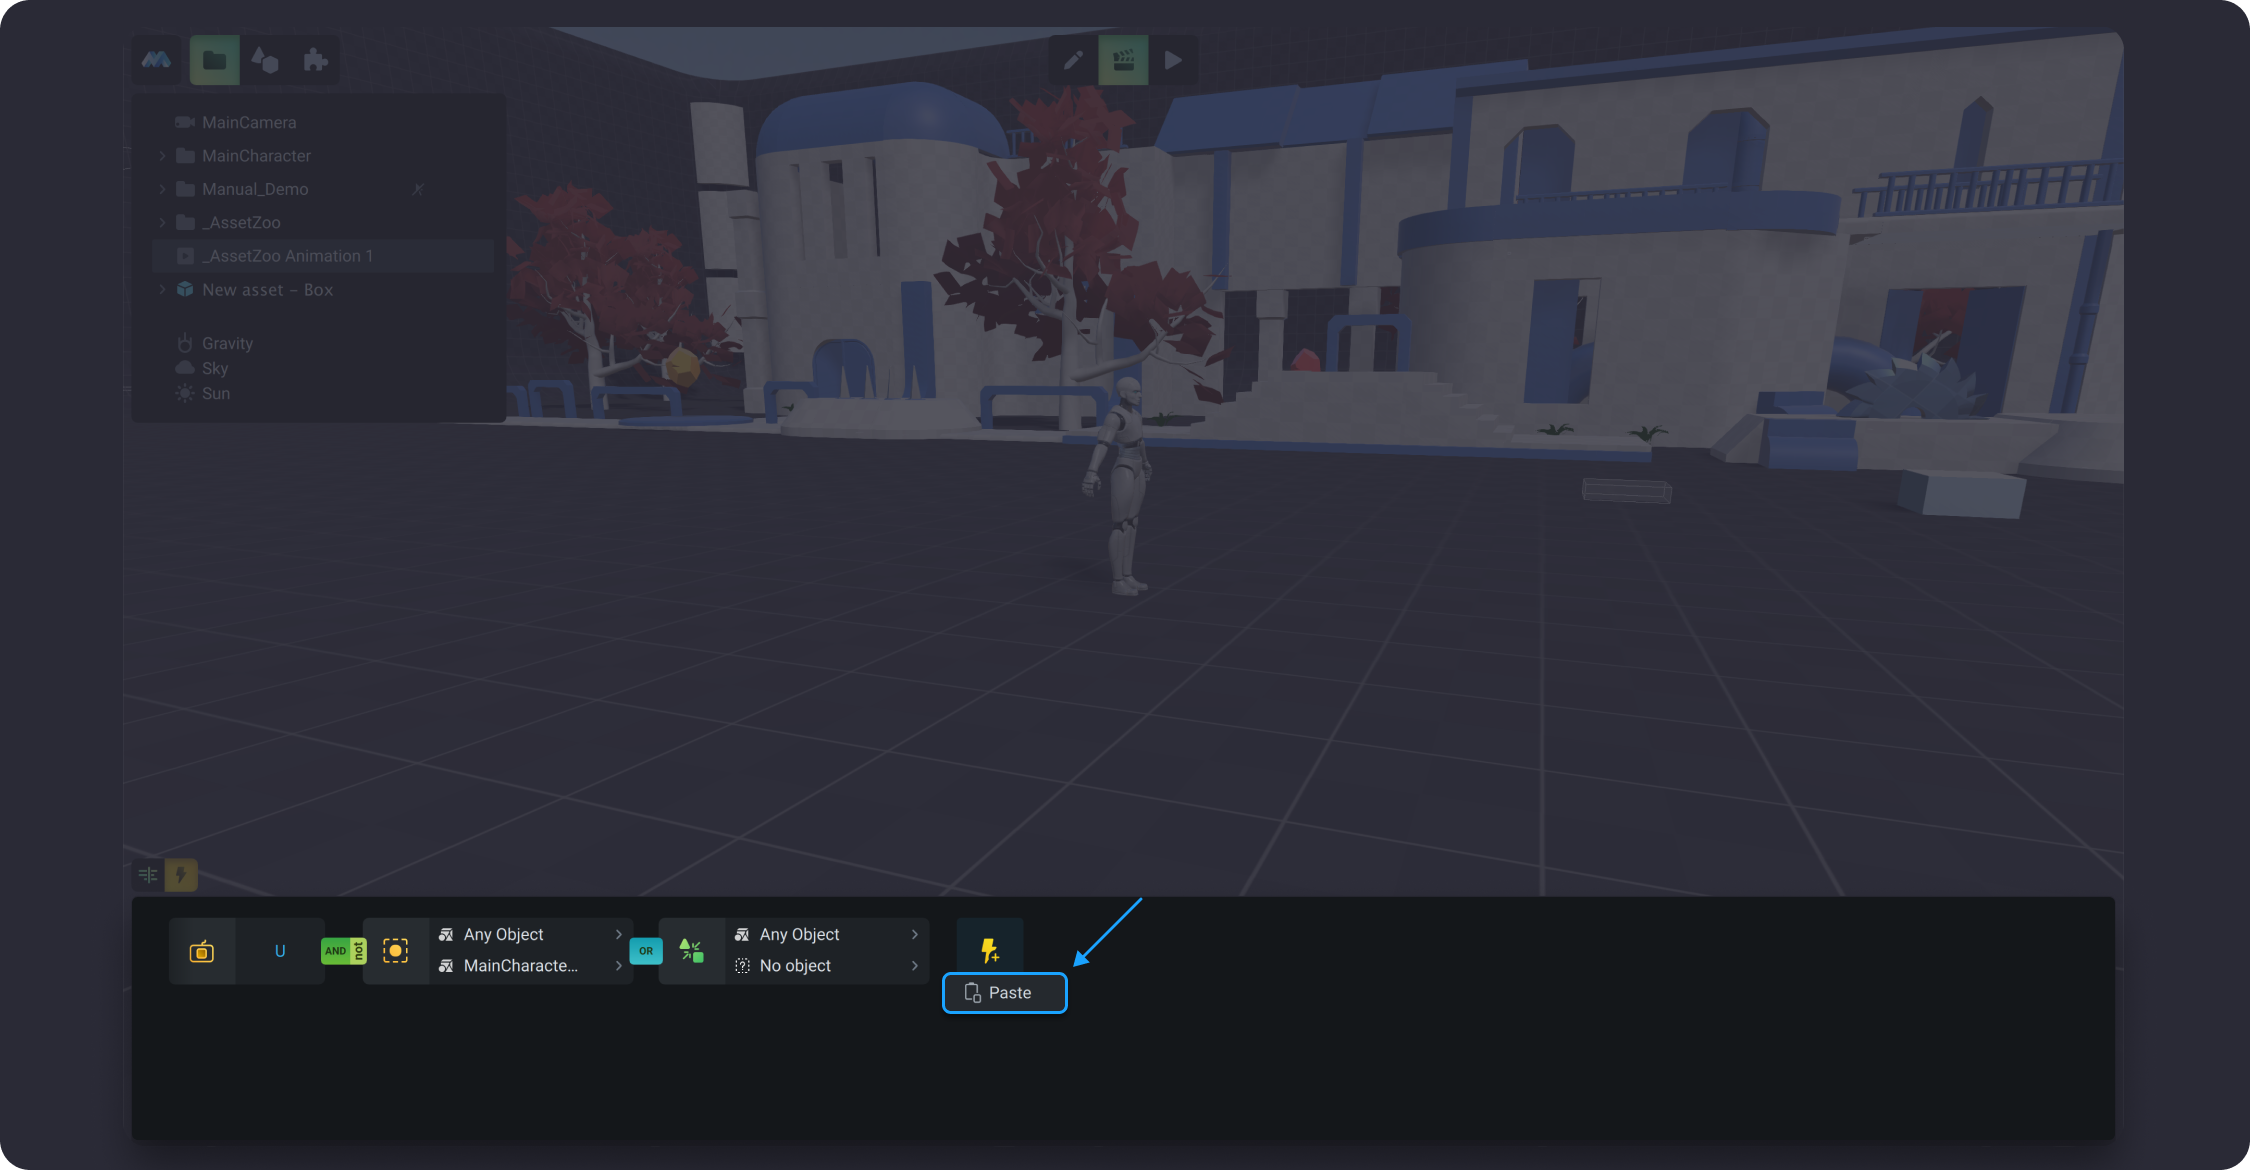
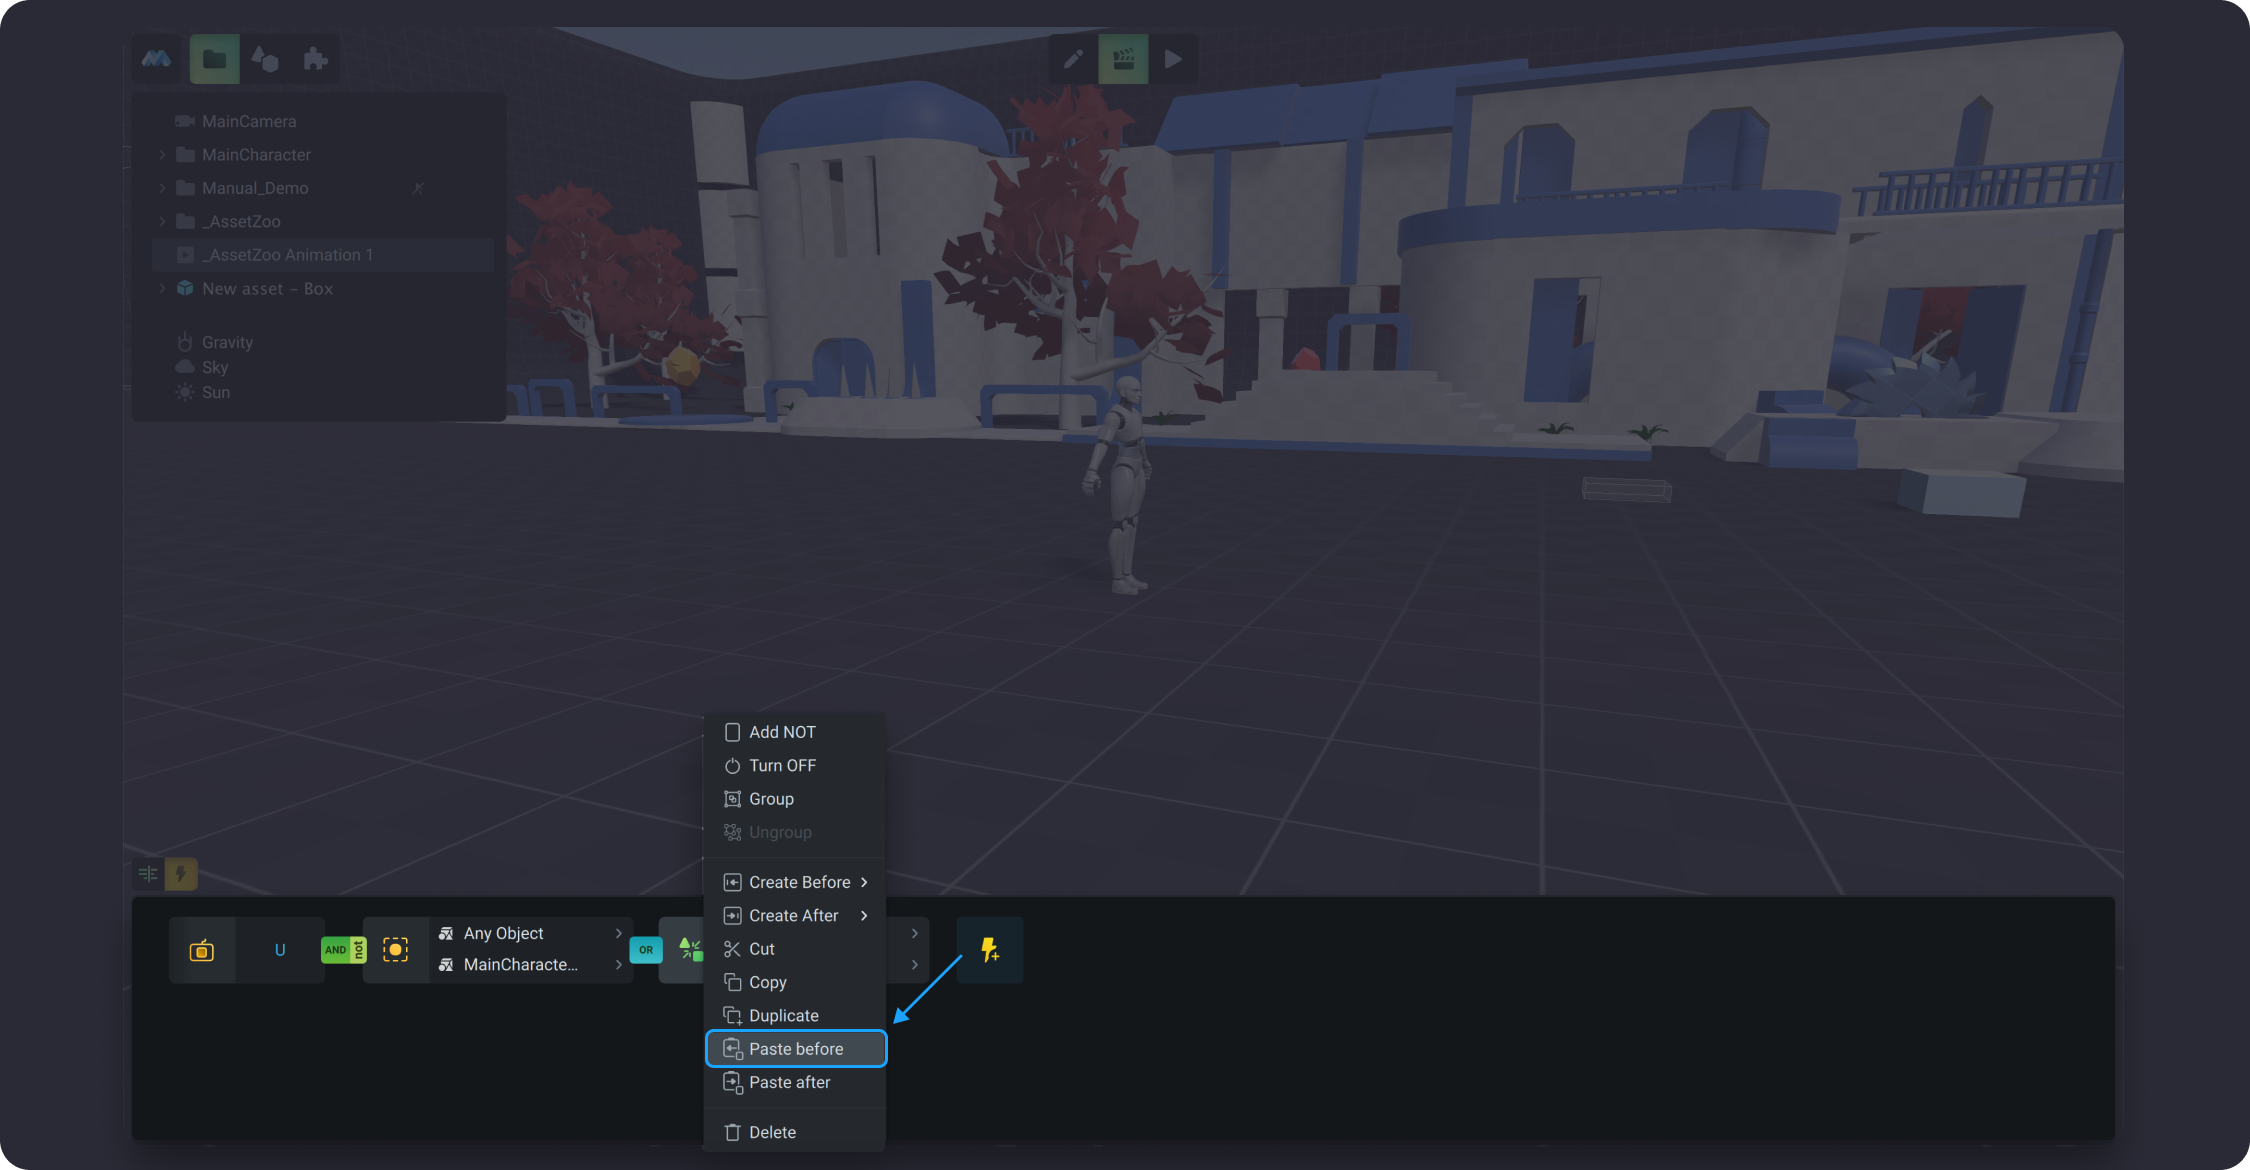
#### Paste Before/Paste After
The *Paste Before/Paste After* options allow you to place the cut or copied triggers anywhere in the trigger chain. You can paste triggers multiple times or in several places without copying it again.
#### Delete
With *Delete* you can remove all undesired triggers from your logic trigger chain.
