Animation Timeline
Overview
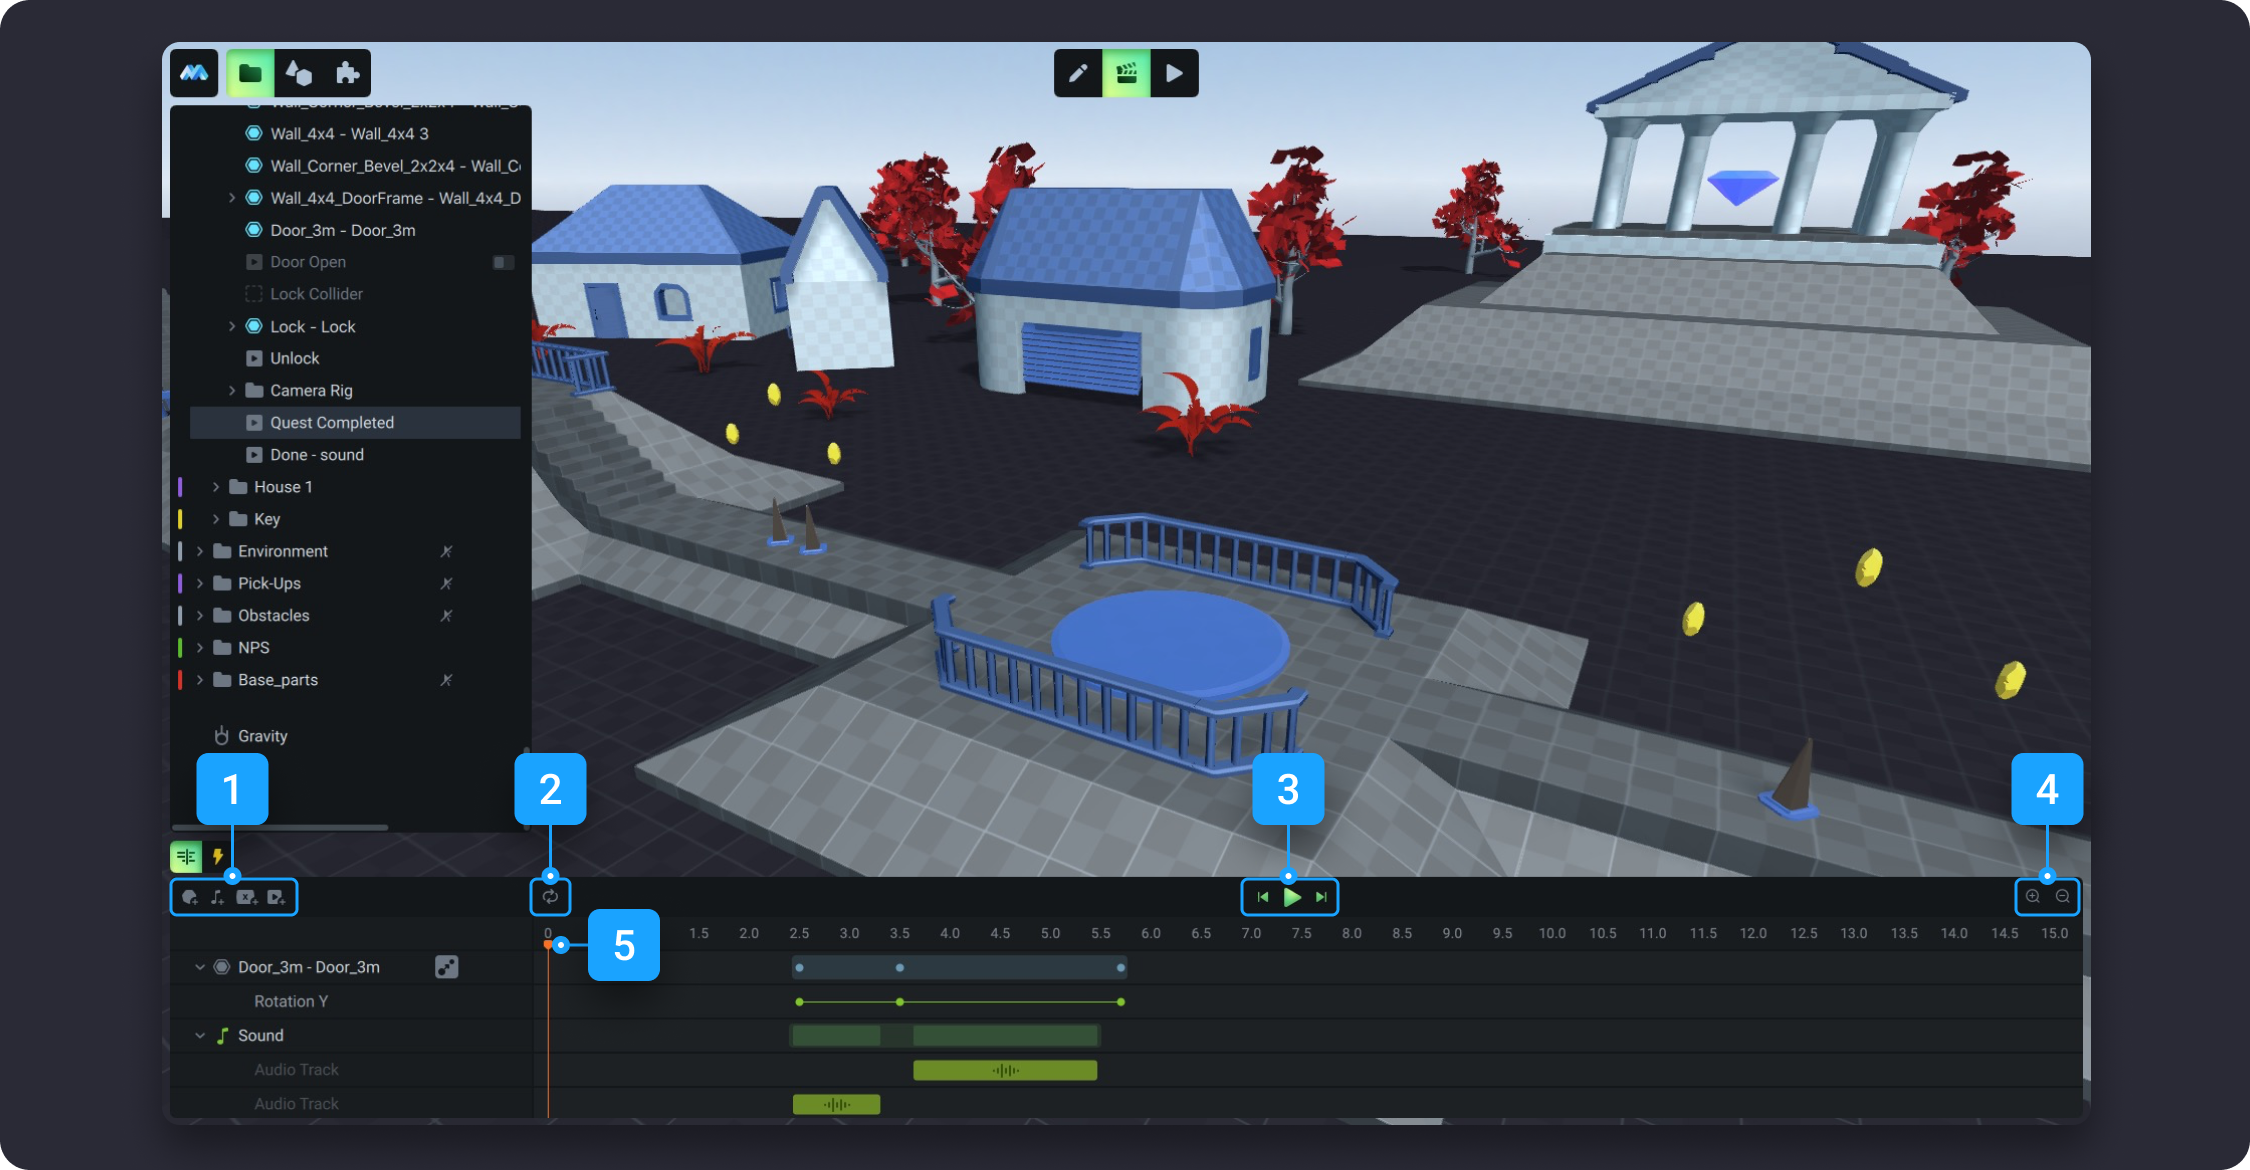
When you select an animation from the Scene Tree in the Animation mode, you see a Timeline panel at the bottom of the window. This Timeline panel consists of the following elements:
Buttons for adding different types of tracks.
Animation looping button.
Animation playback button and the buttons for moving the playhead to the beginning or to the end of the keyframe.
Zoom-in and zoom-out buttons for changing the time scale of the timeline.
Timeline Playhead for moving to the exact point in time being previewed in the Timeline window.
Adding an animation
You can add animations either in the Edit Mode or in the Animation Mode. To add an animation, go to the Library tab and select Animation.
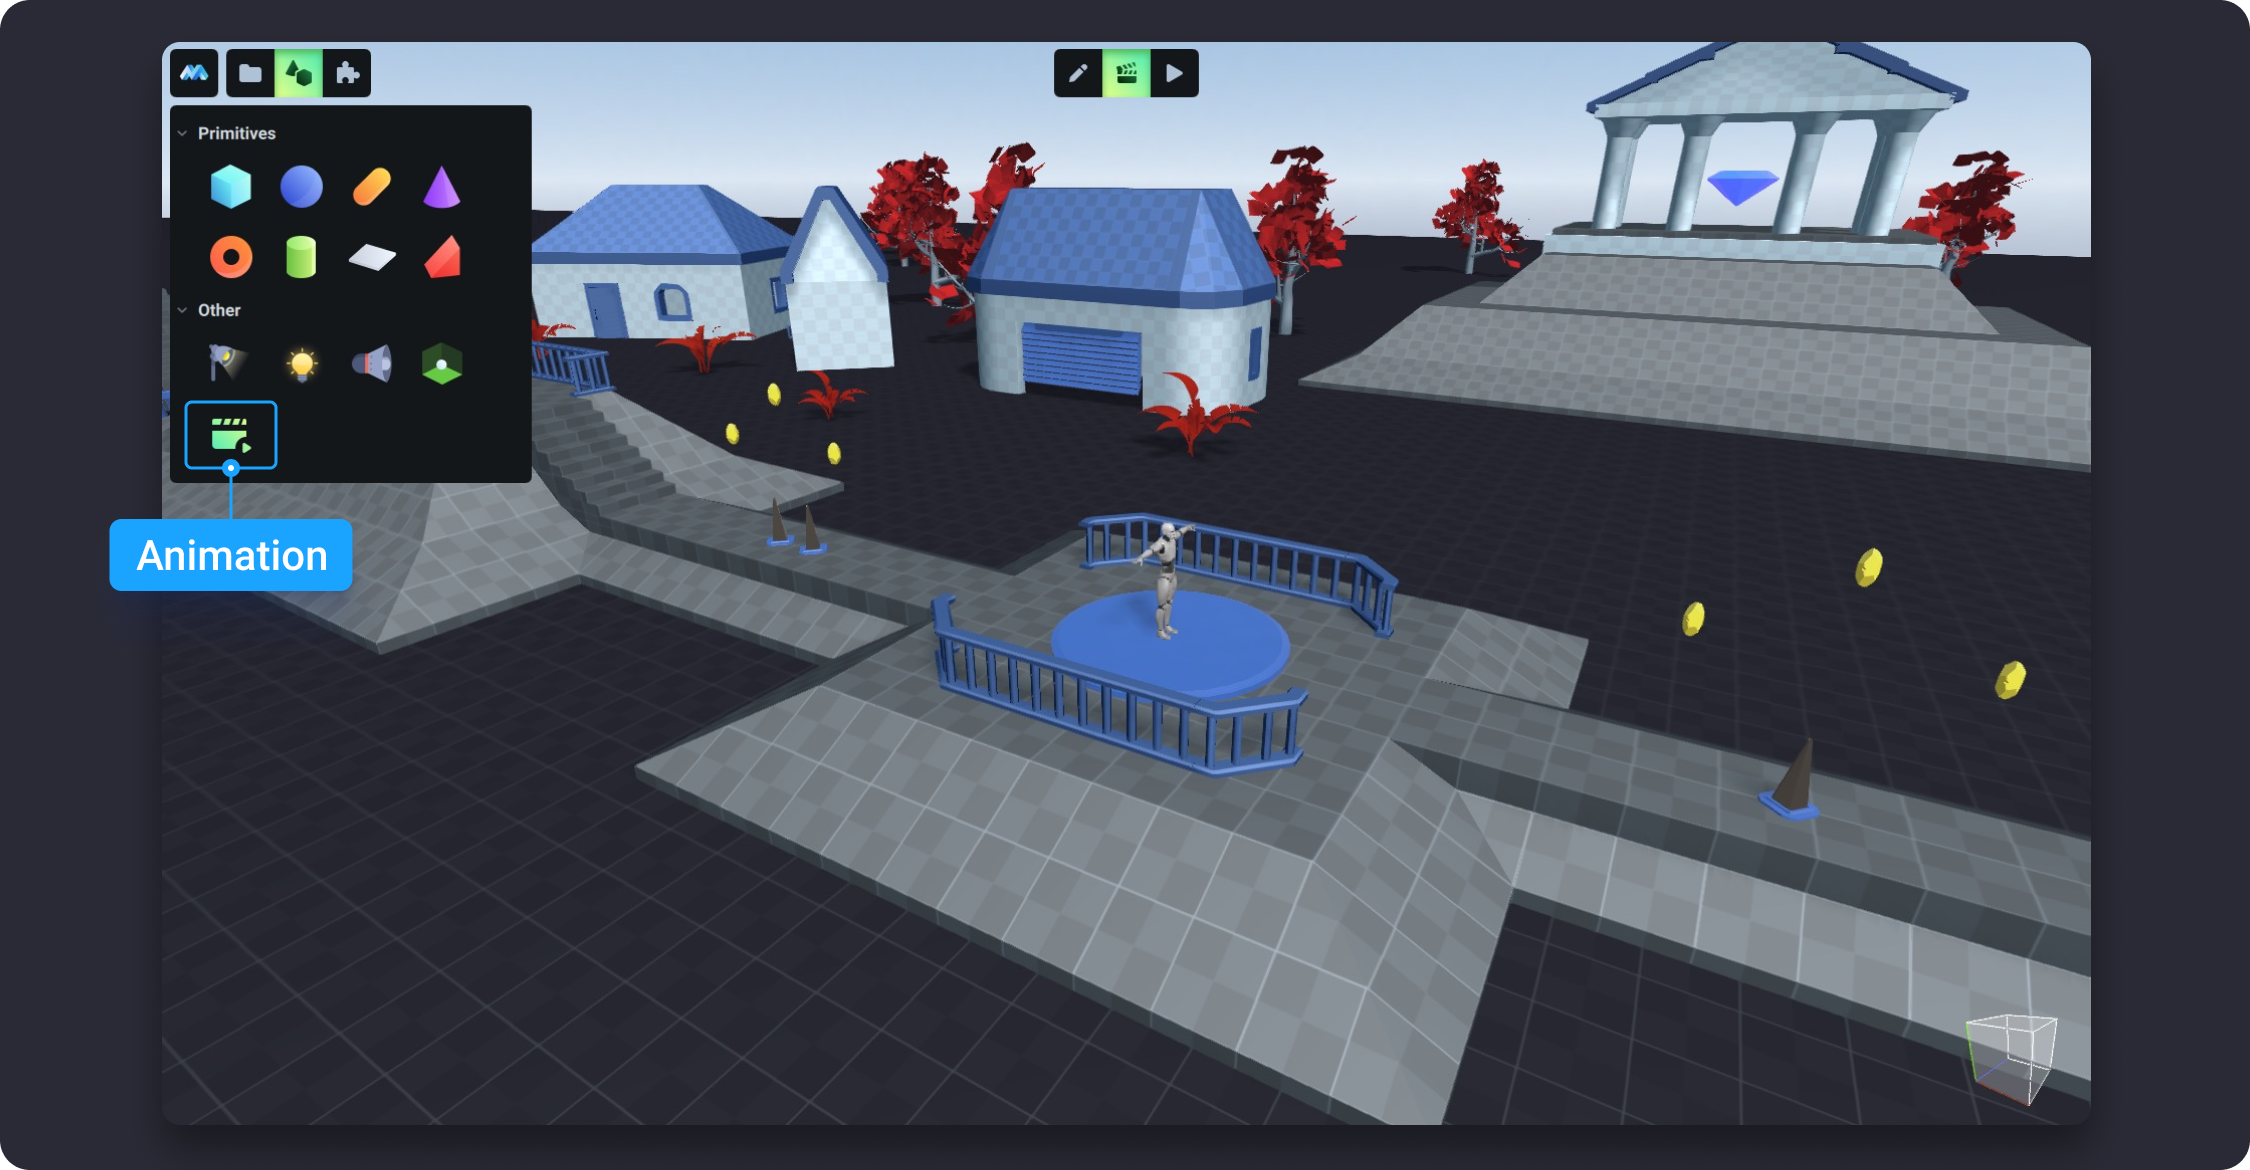
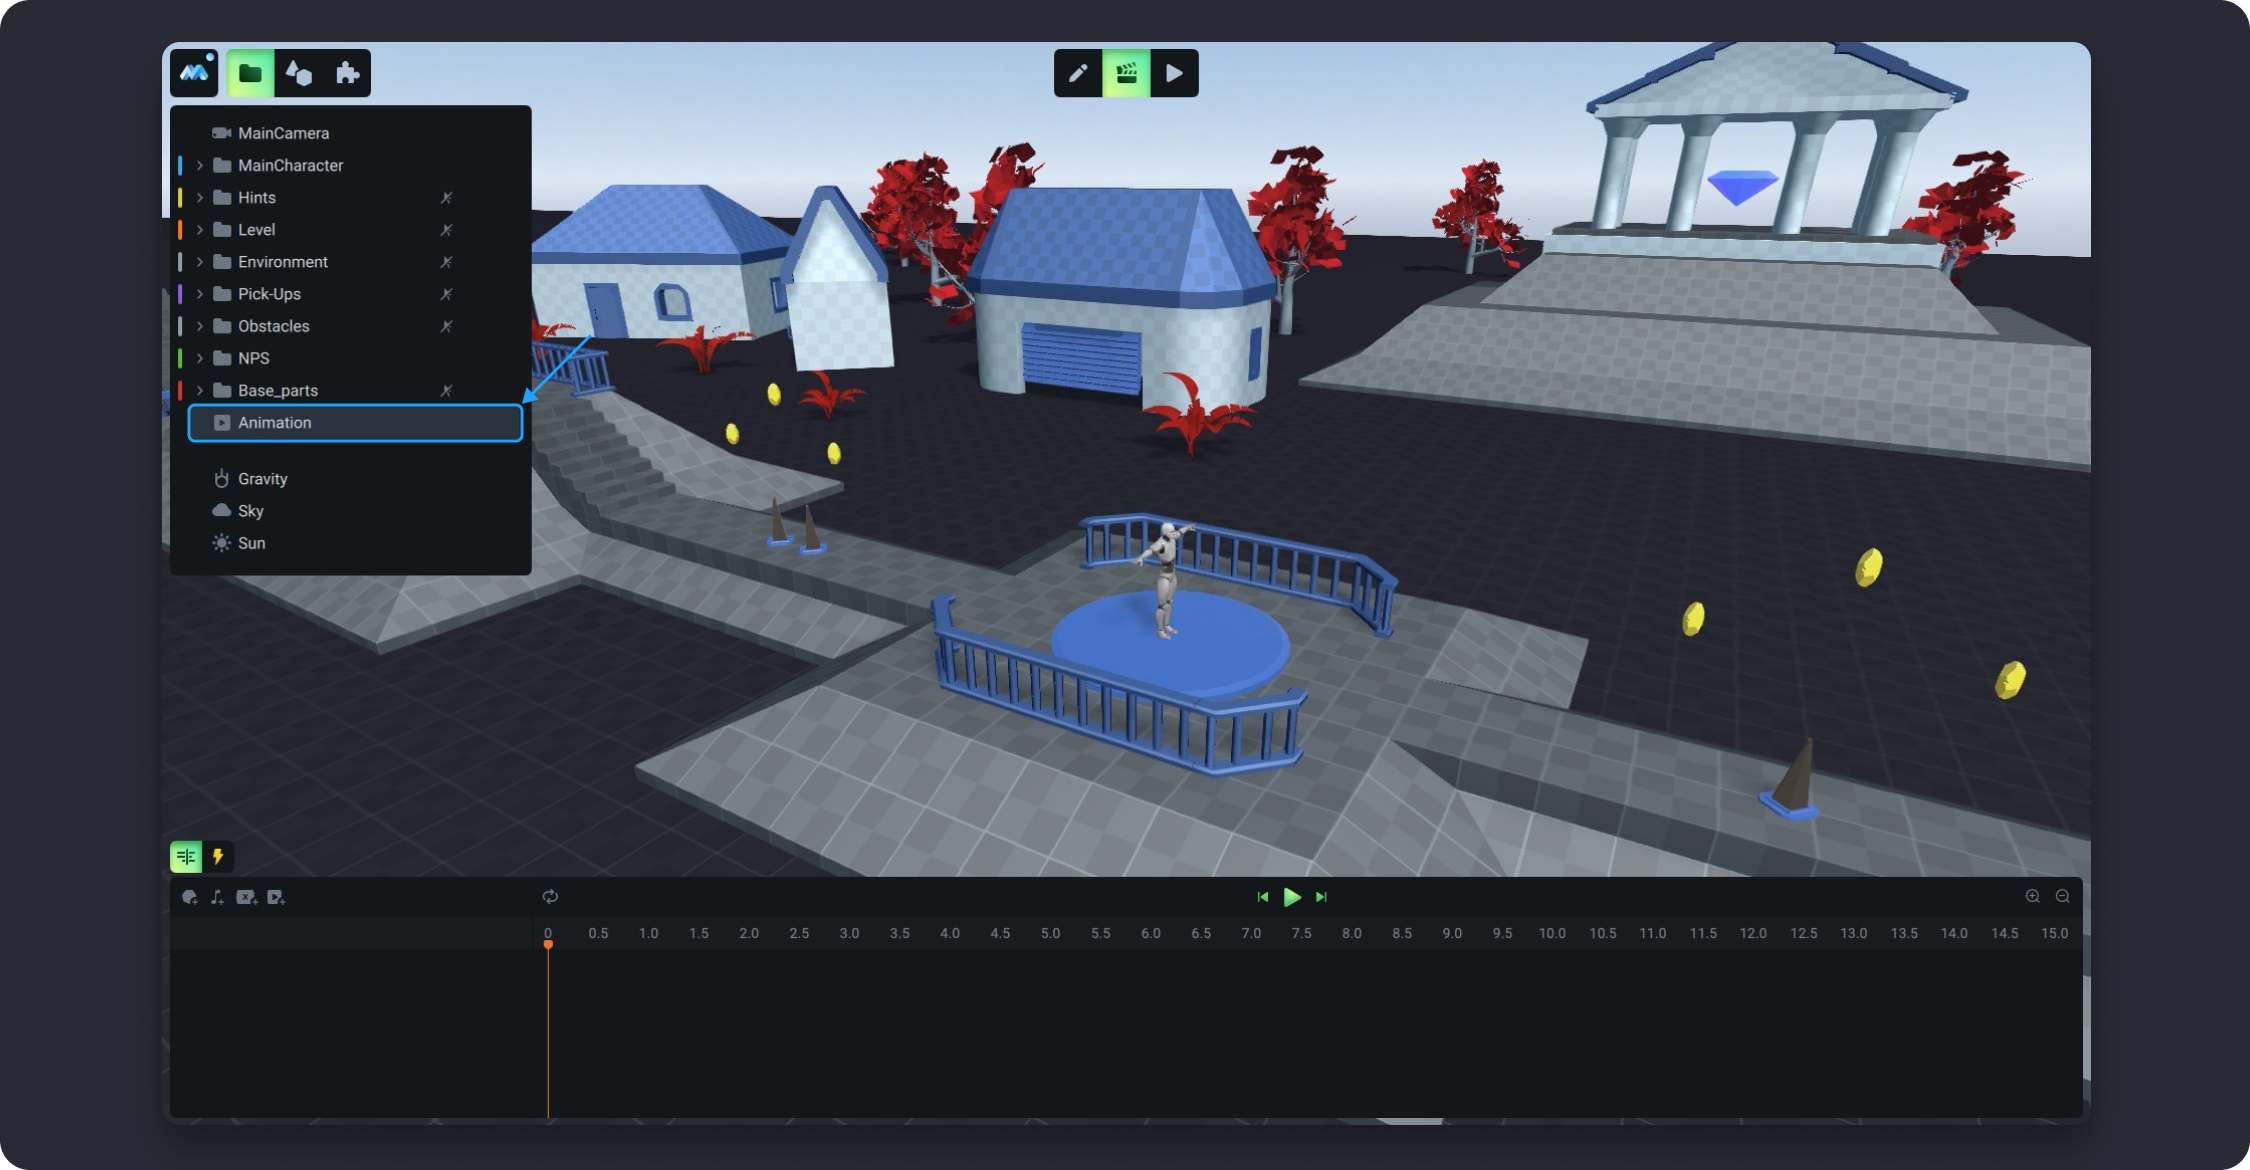
A new animation will appear in the Scene Tree. By default, new objects are added at the end of the list.
Second way. You can add an animation in the Animation mode, select the object you want to animate in the Scene Tree, right-click on it, and then select Create Animation.
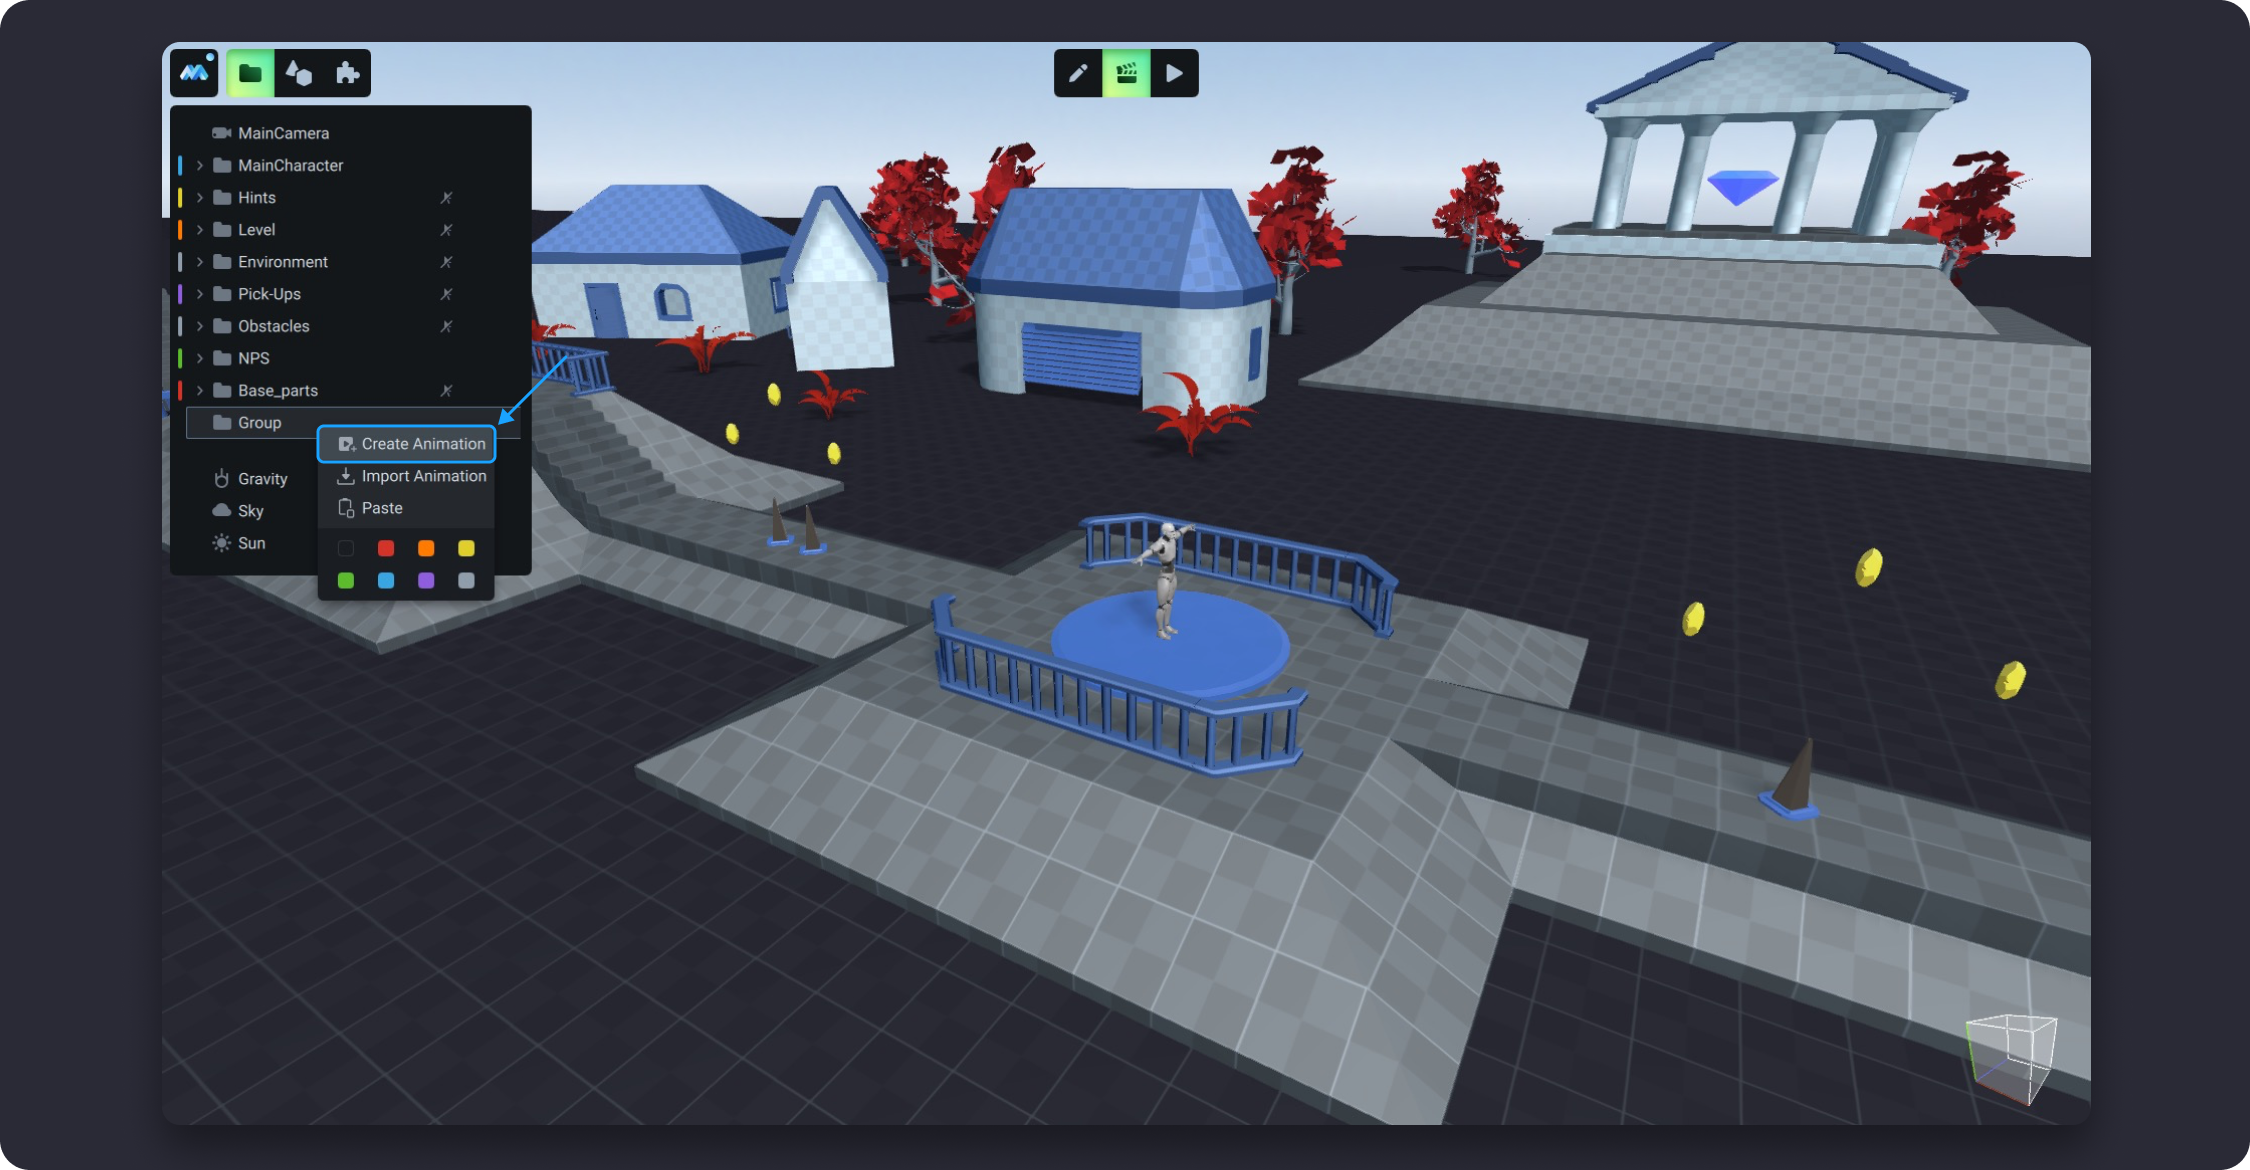
A new animation will be created within the object.
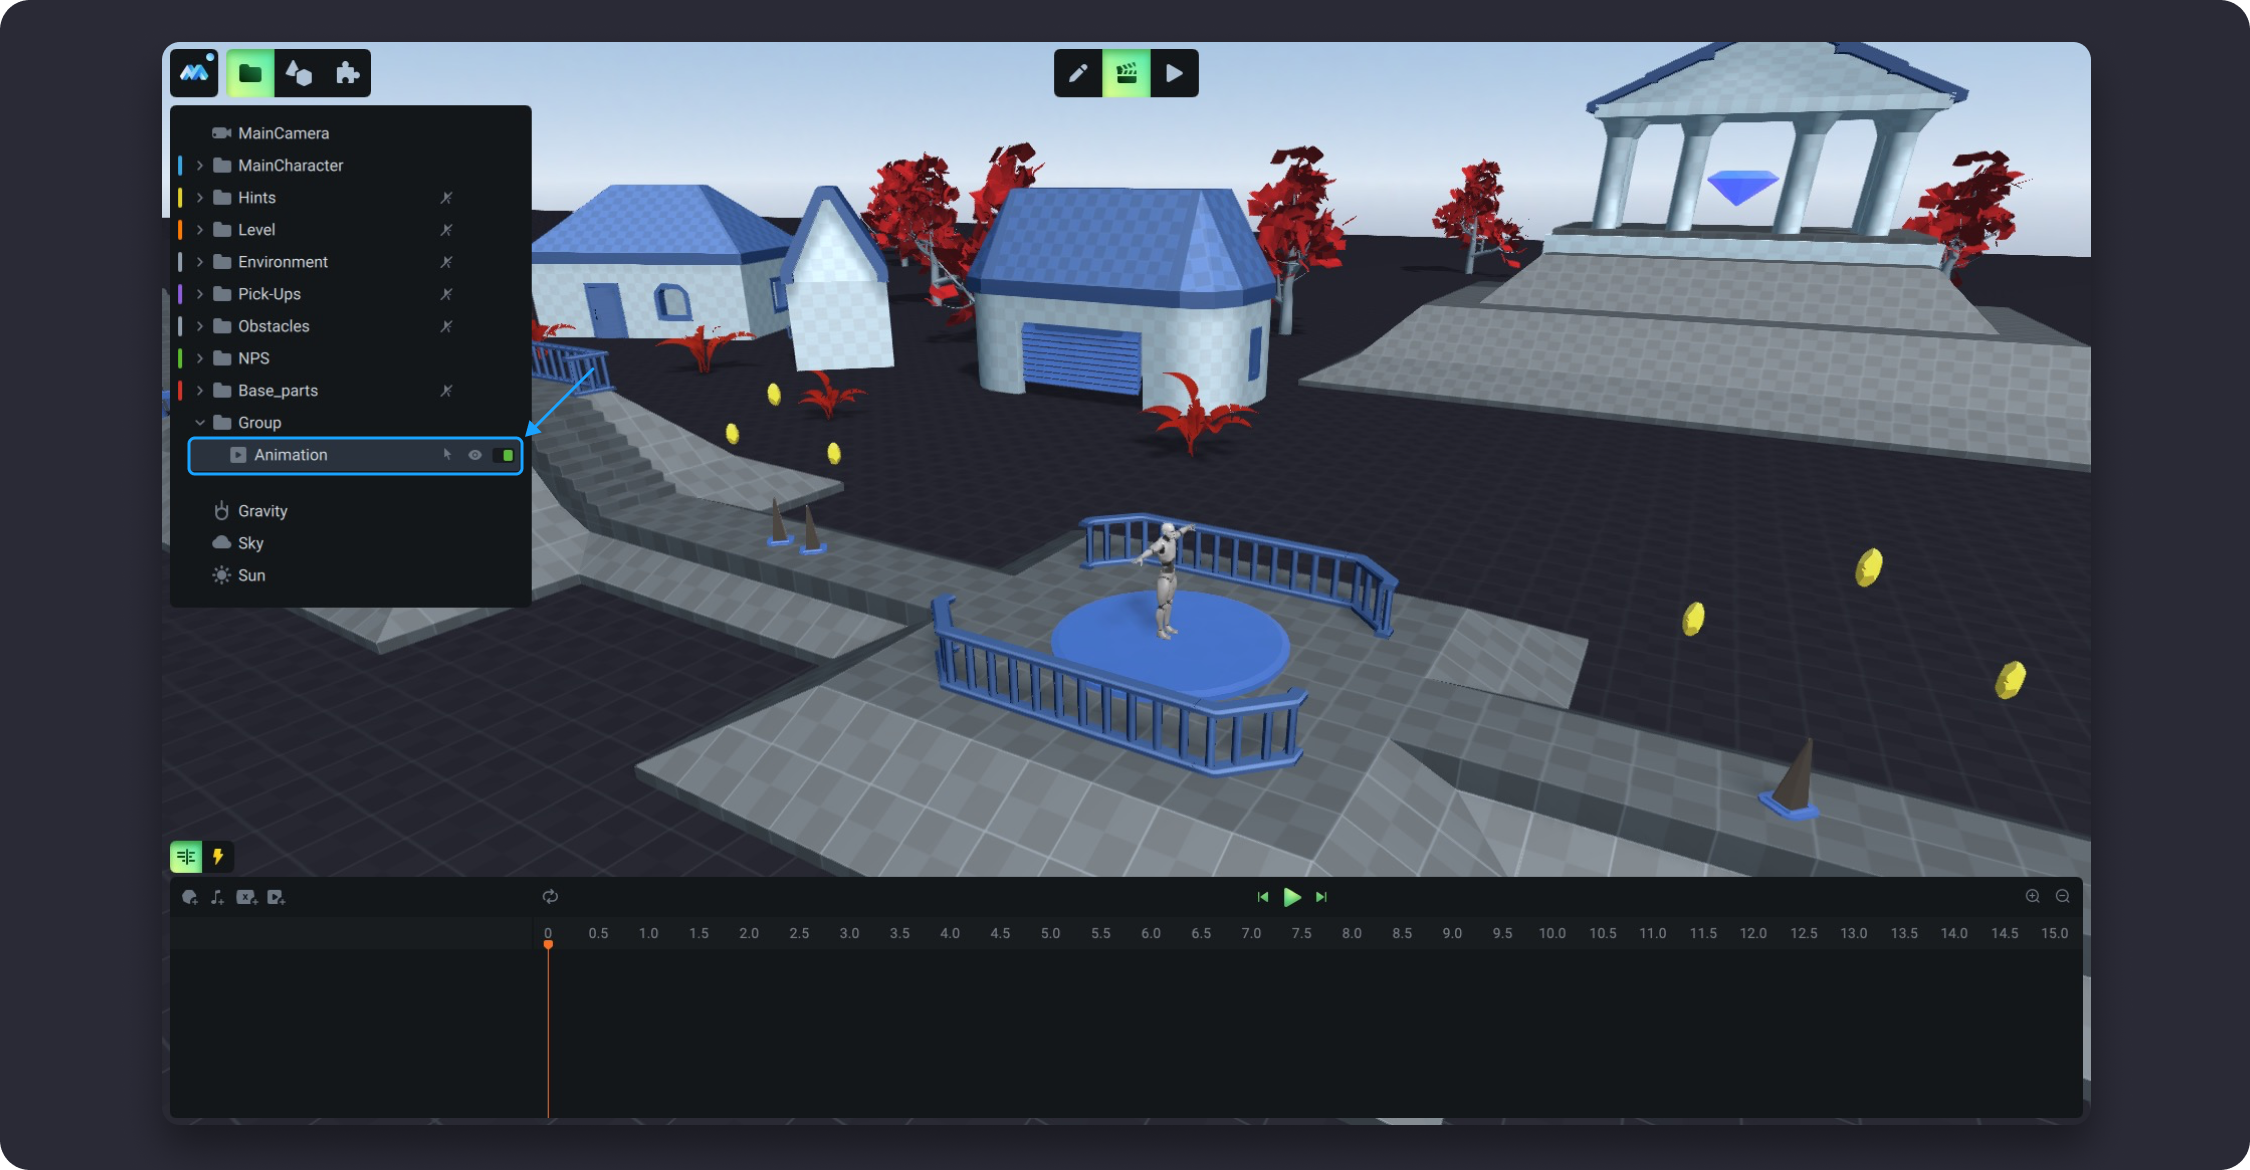
Adding an object to the Timeline
To be able to add an object to the existing timeline, switch to the Animation mode and select the necessary timeline. You can add an object to the timeline in two ways.
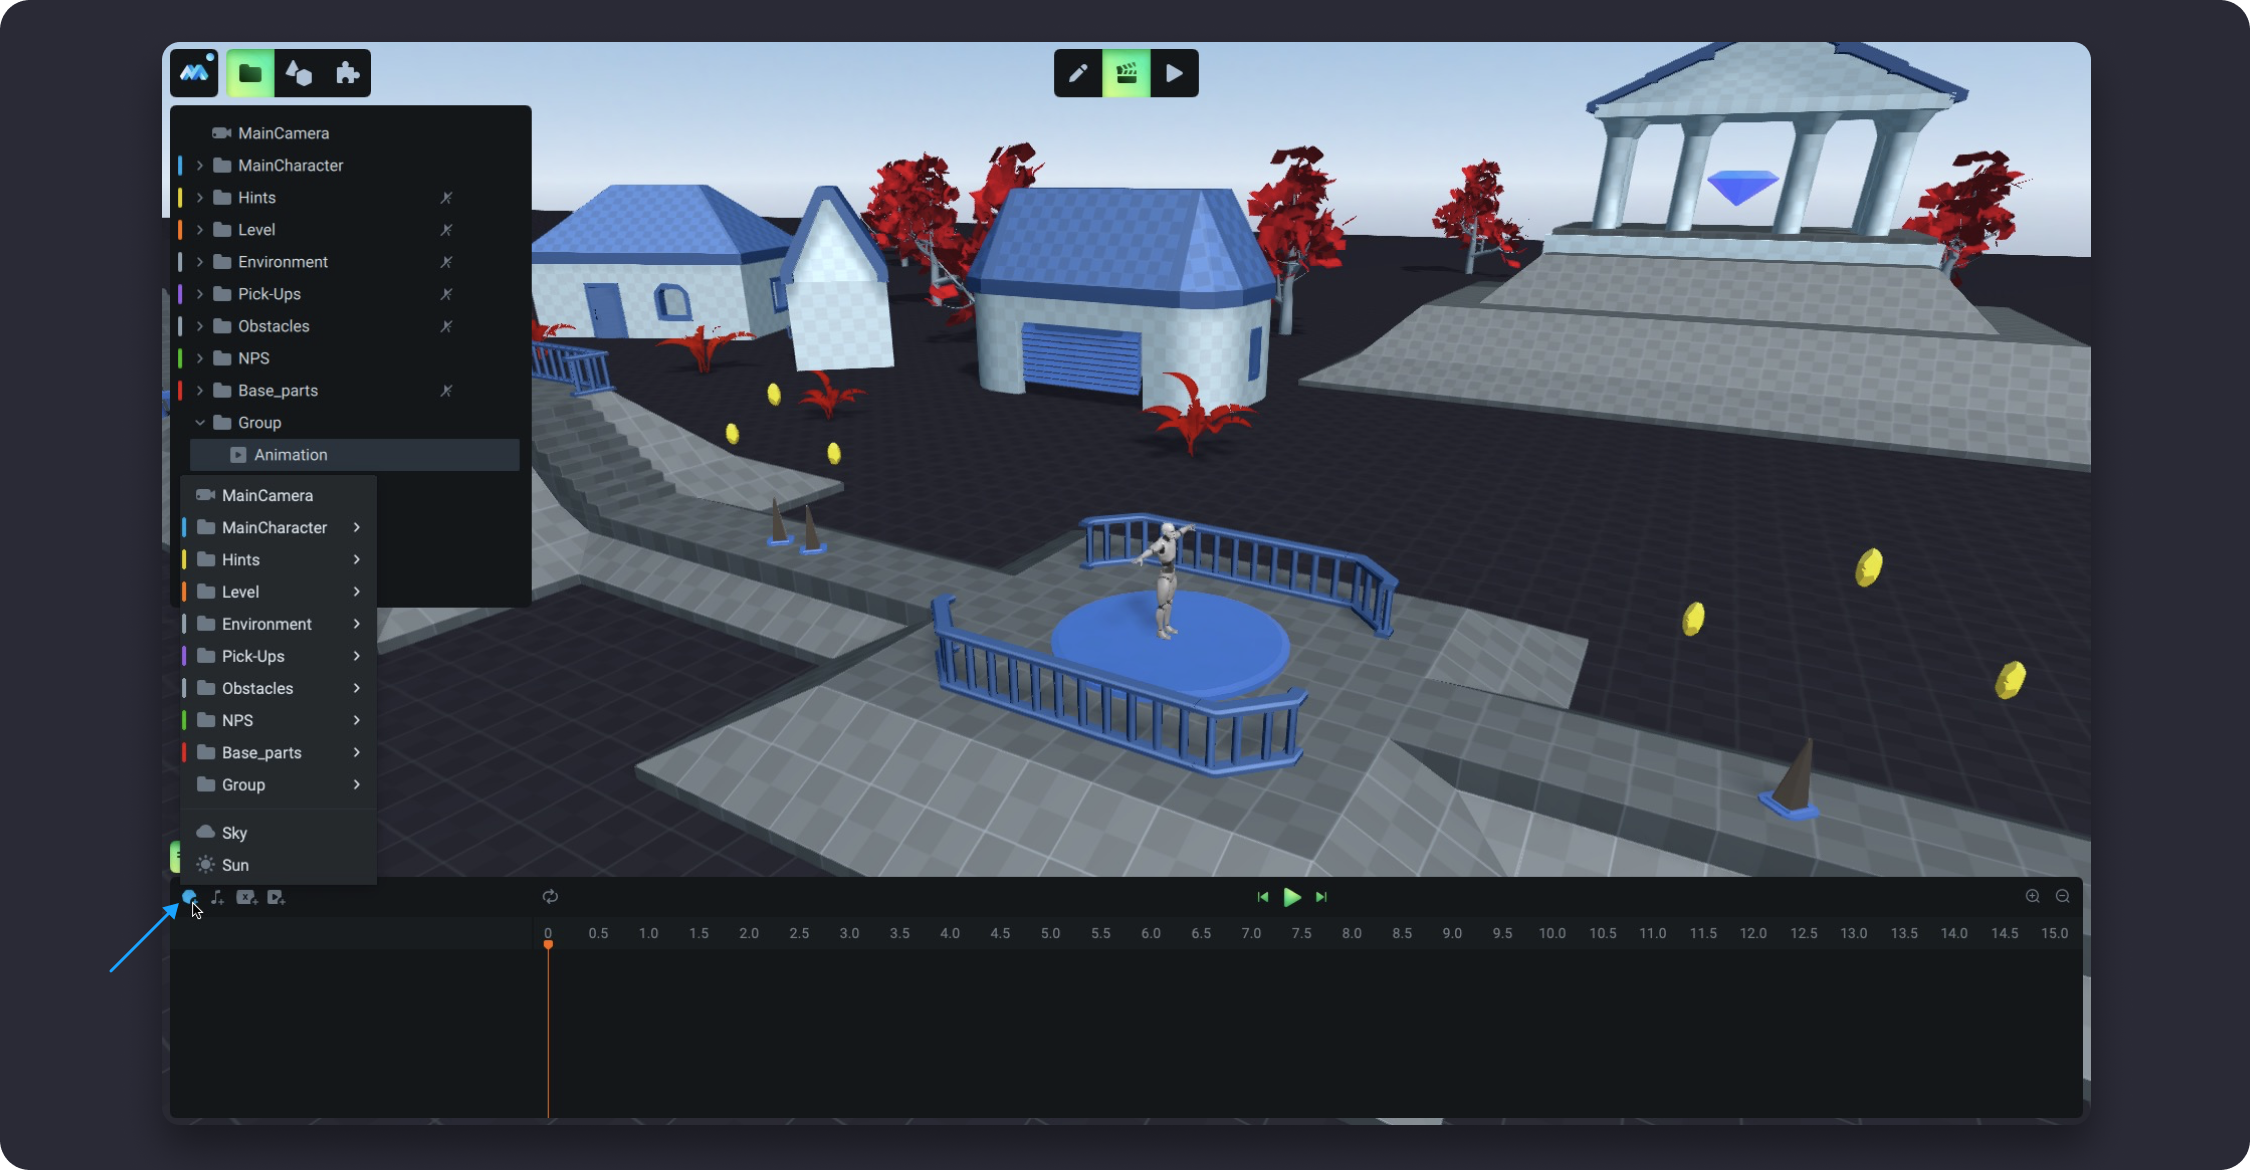
First way. Click the Add Object button on the timeline panel and select an object from the pop-up list
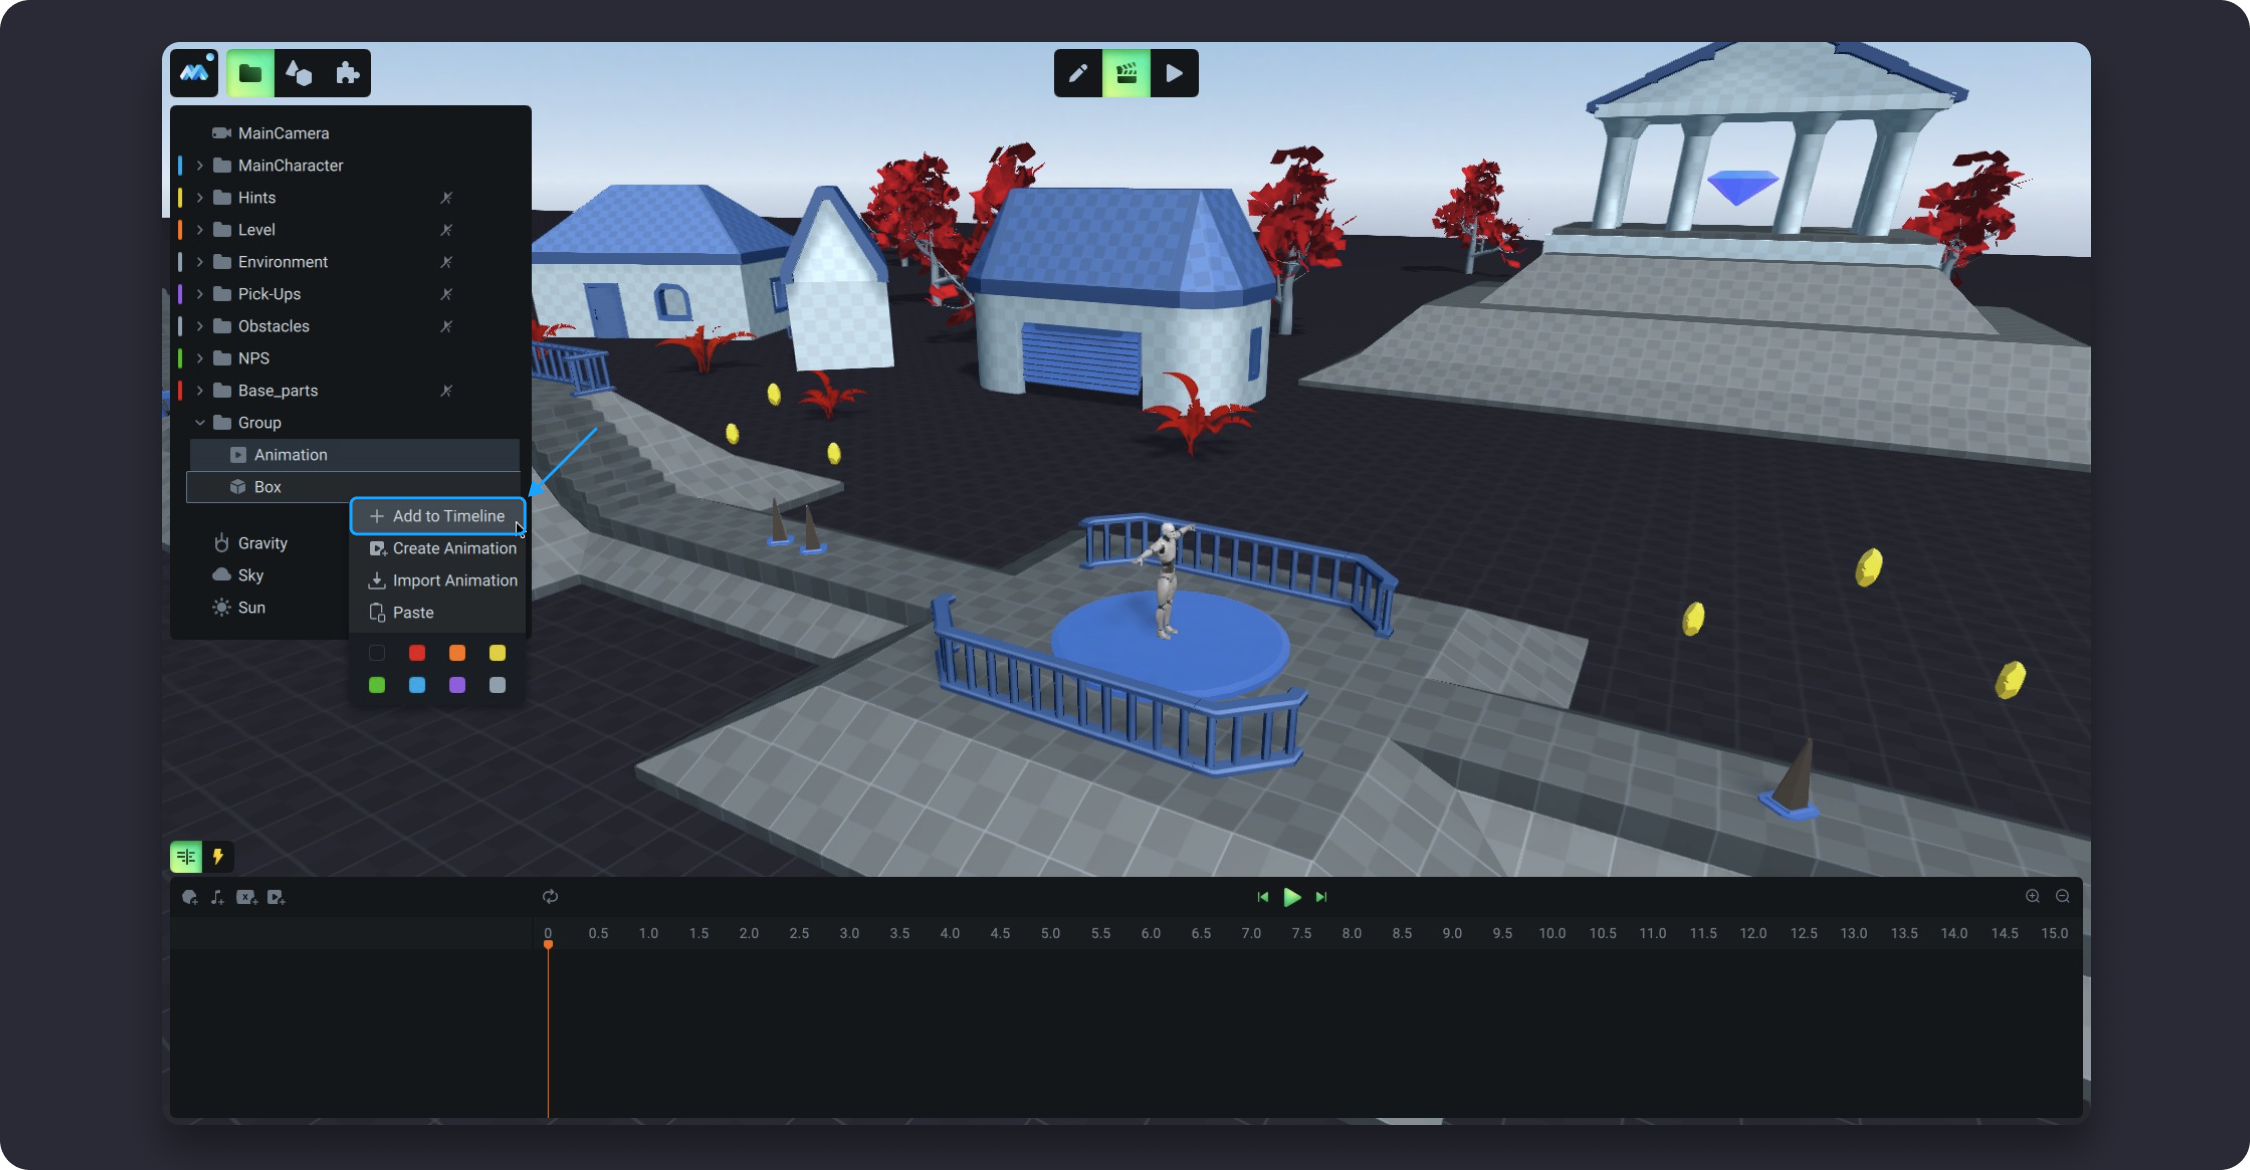
Second way. Right-click an object in the Scene Tree and select Add to Timeline
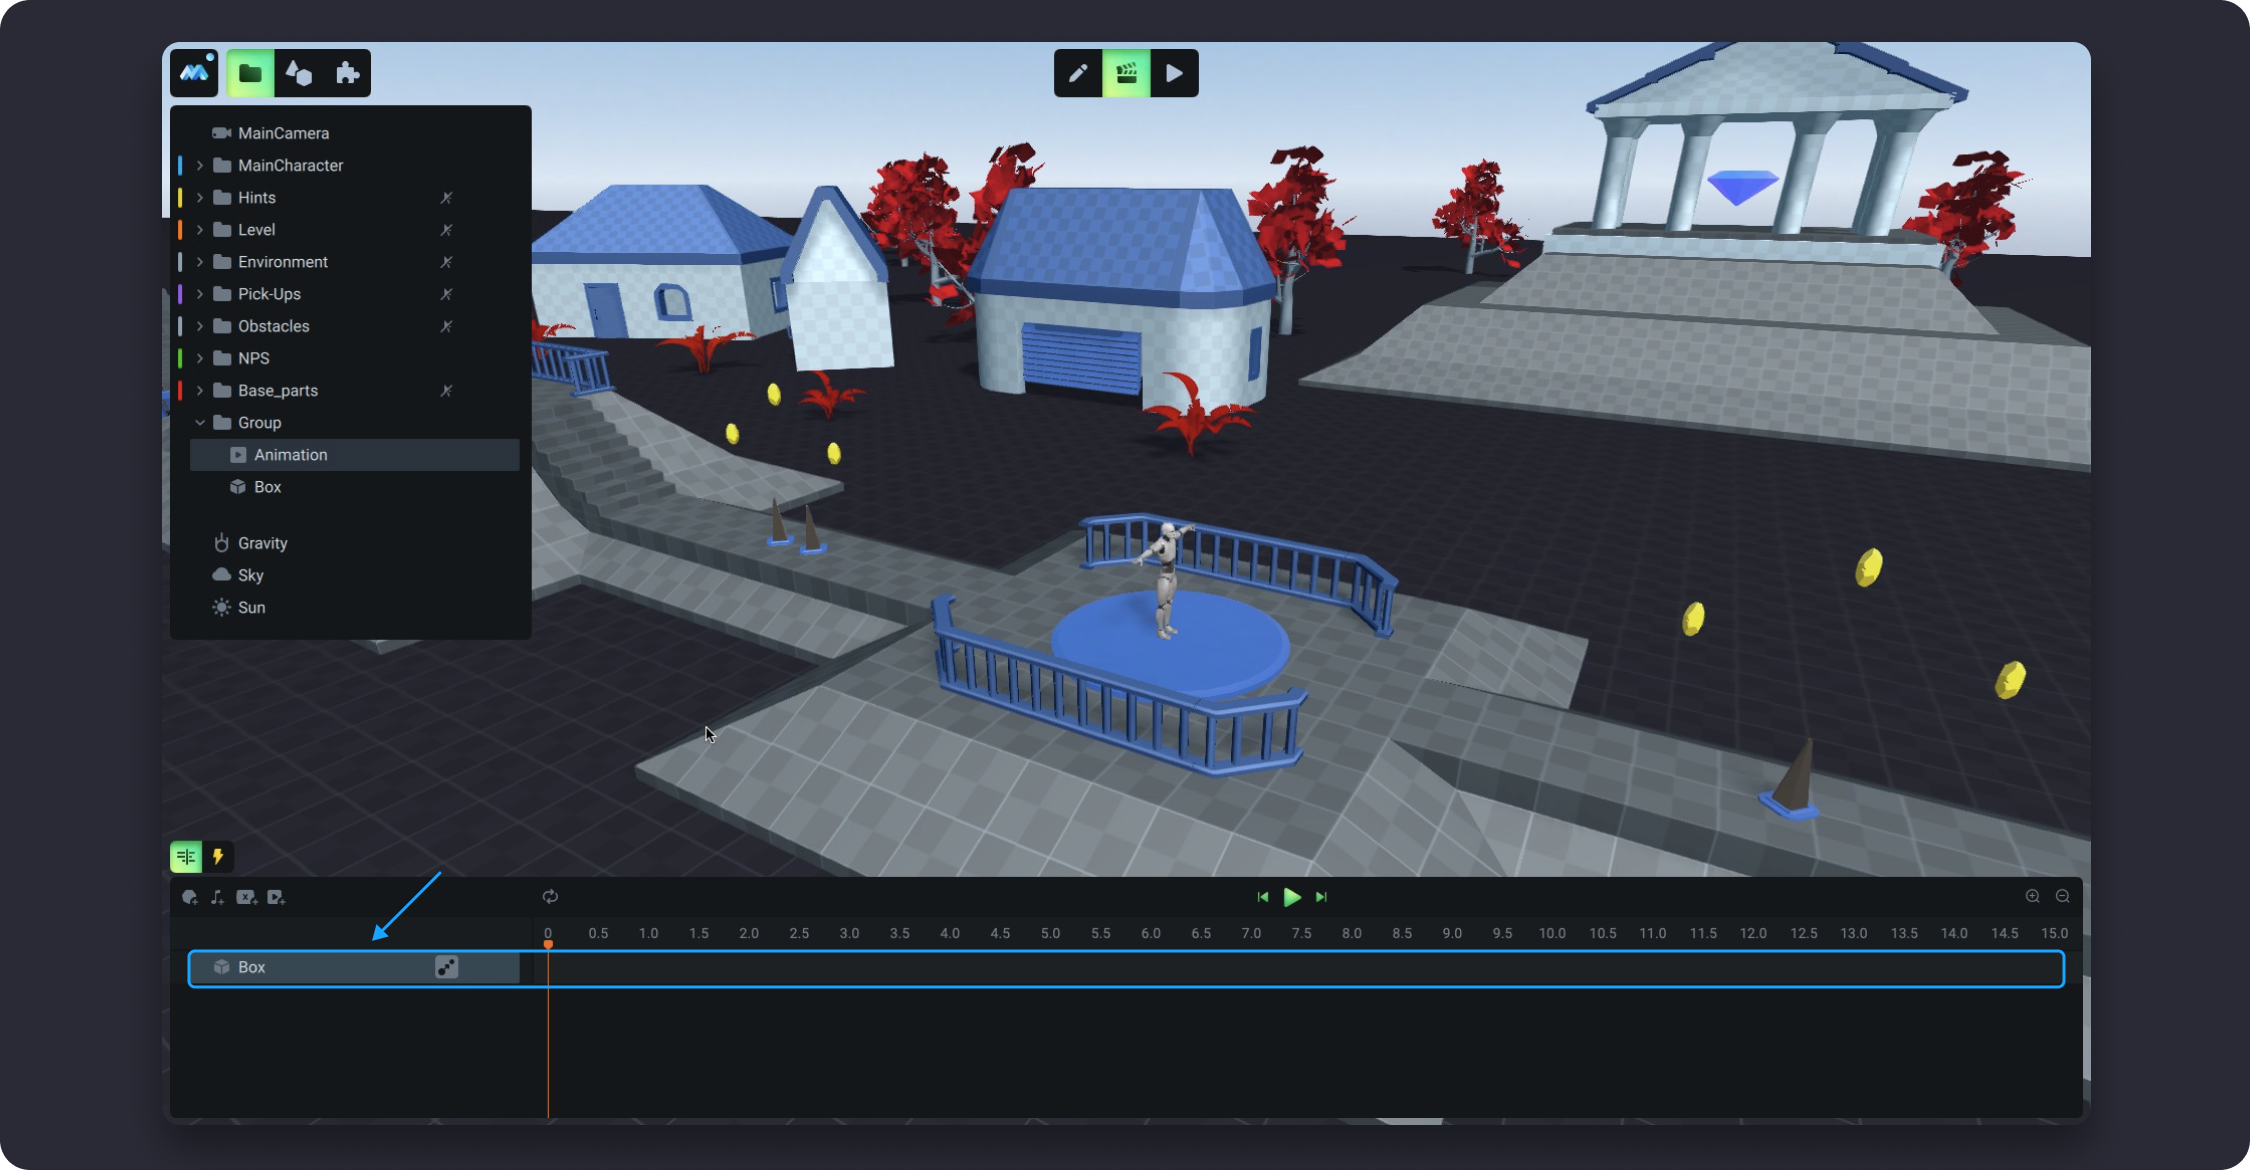
Once you add an object to the timeline, a corresponding track will appear on the timeline panel.
Adding object’s parameters to the Timeline
Once you add an object to the timeline, you can select the parameters of the object you want to animate. To do this, click on the Add animated parameter next to the object in the timeline tree and select a parameter from the pop-up list. Every parameter can be selected only once.
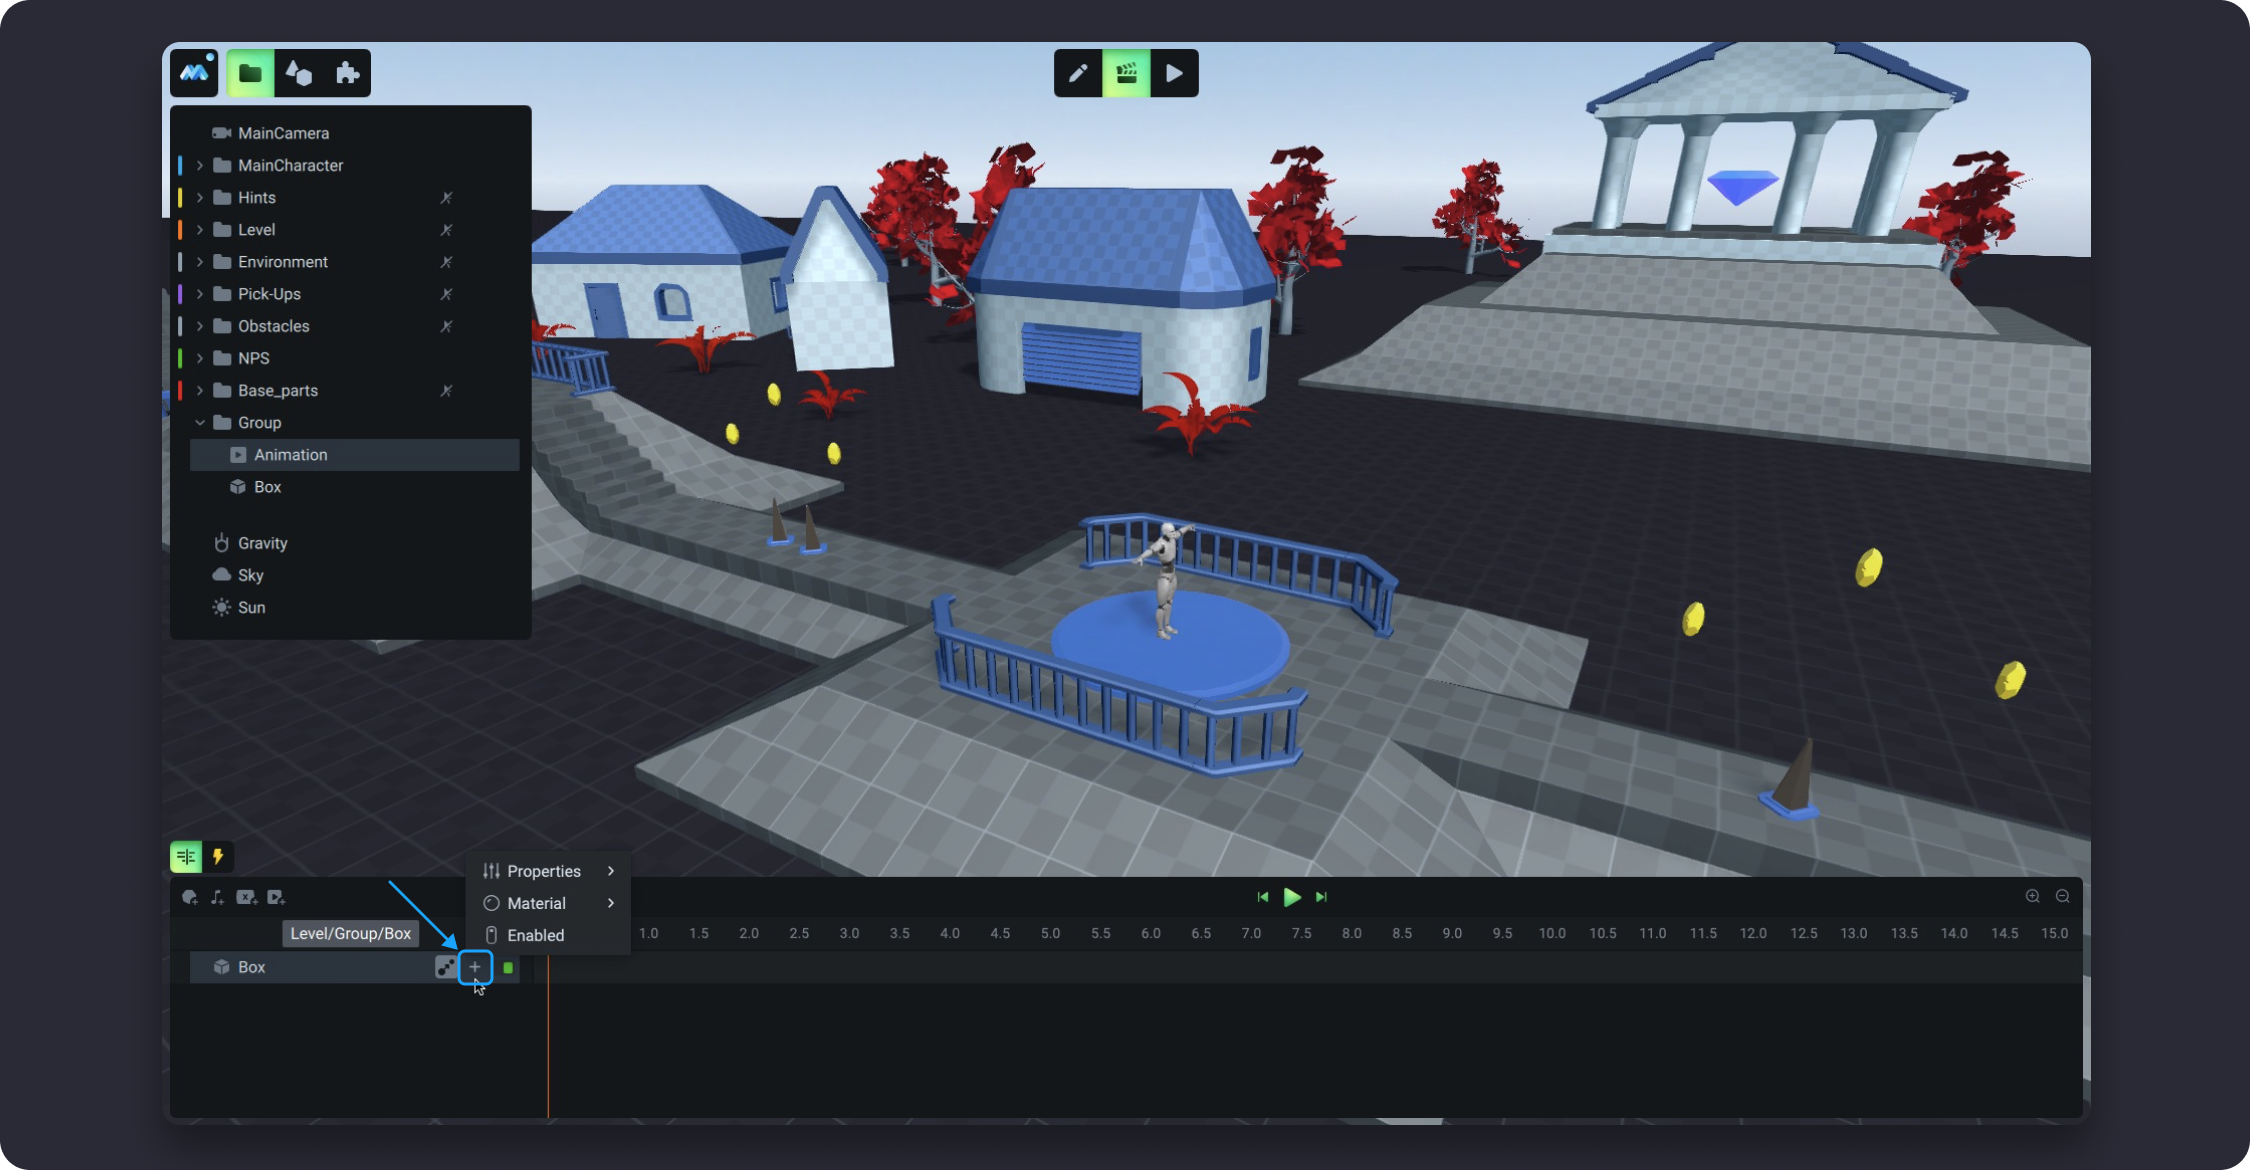
Once you select a parameter, a corresponding track will appear on the timeline.
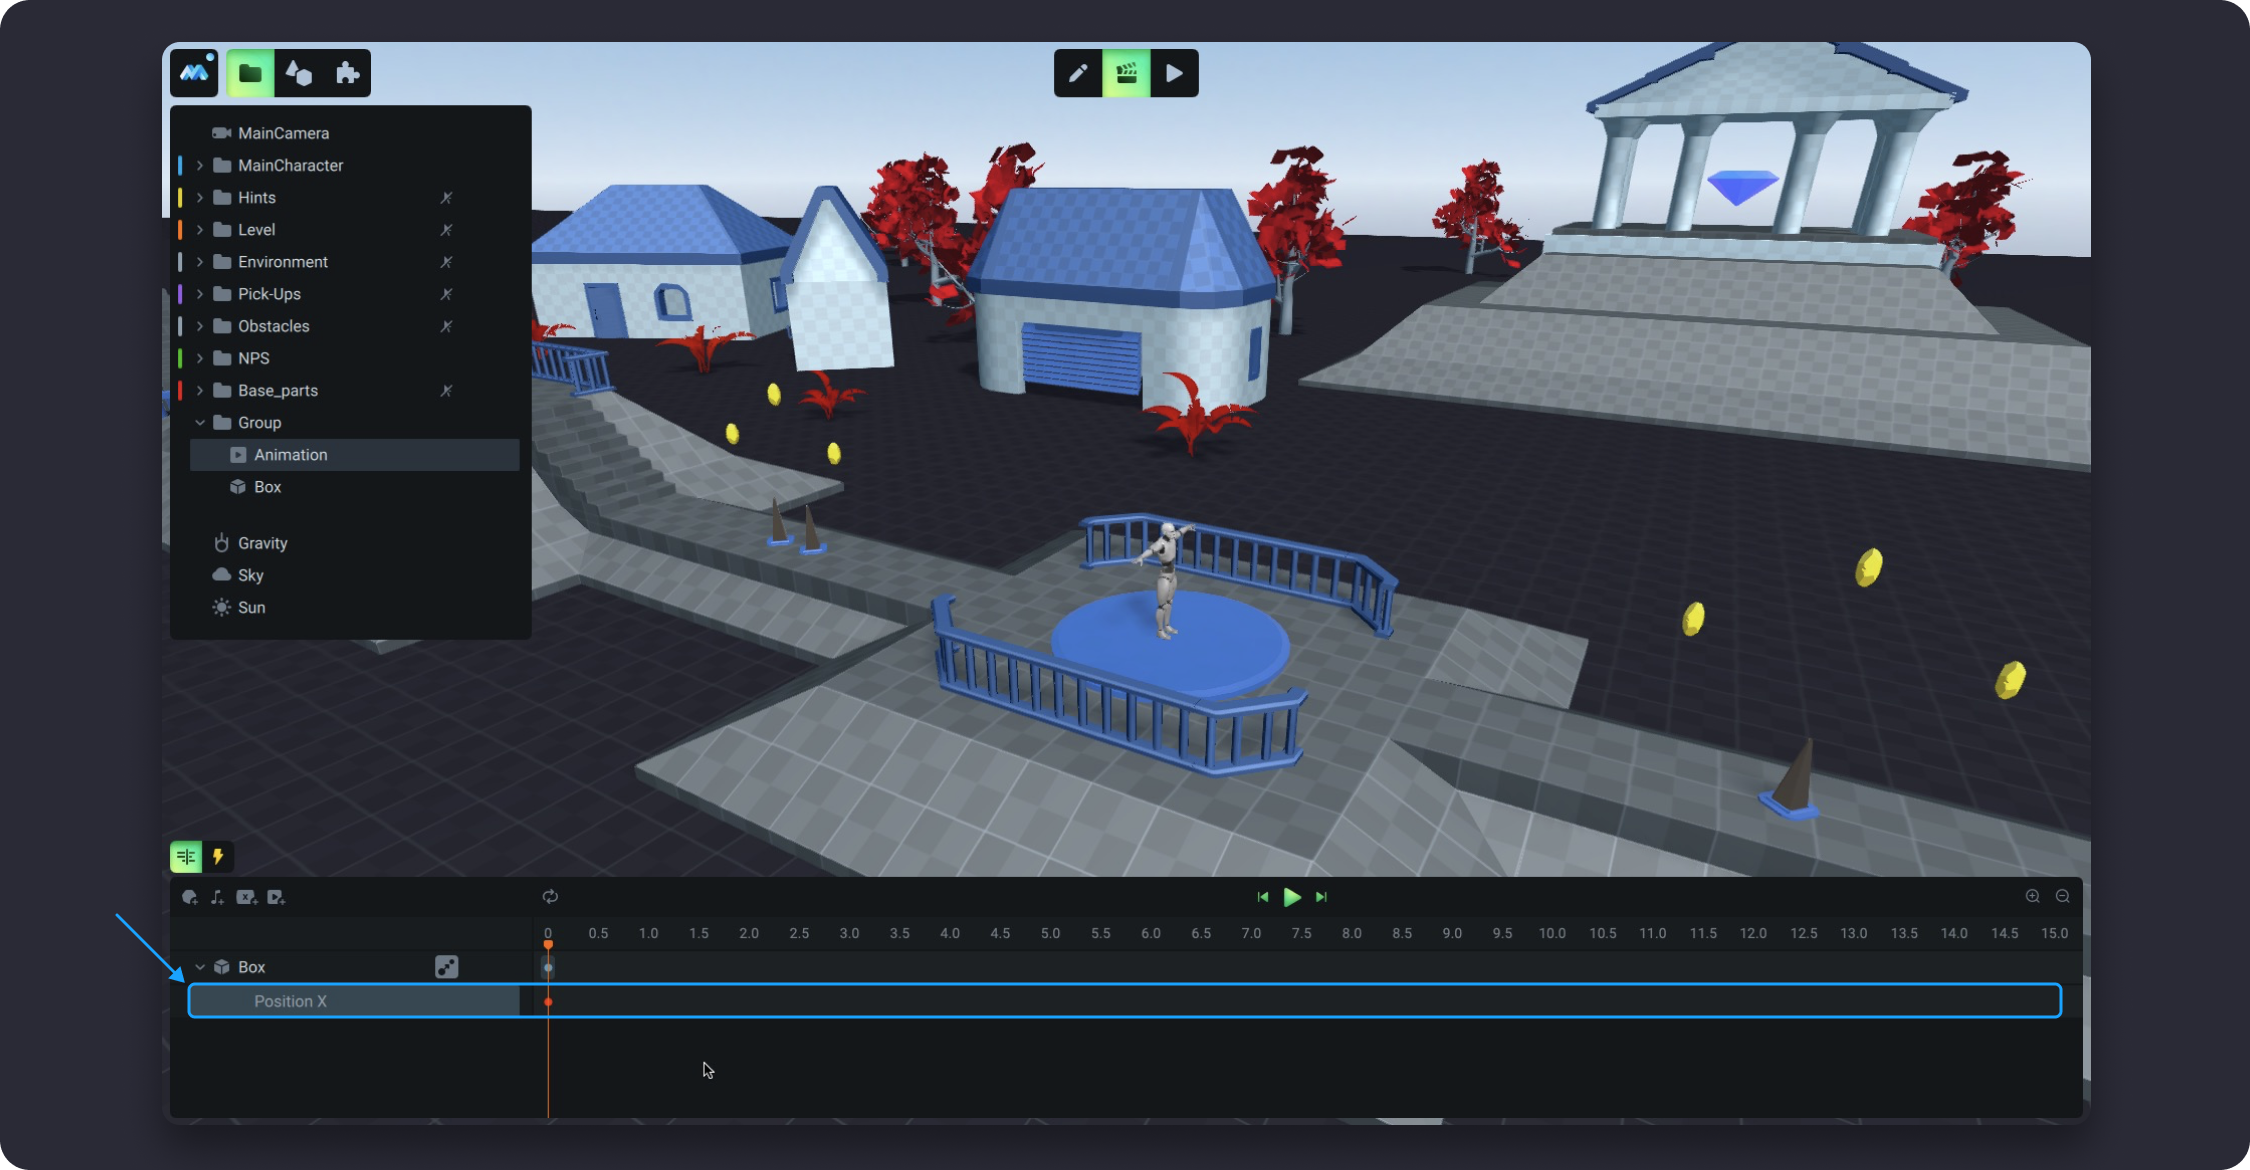
Adding keyframes to the Timeline
Once you add a parameter to the timeline, you can add a keyframe to it.
Keyframes are used to assign different parameter values to an object at specific points in time to animate a certain aspect of the given object. Keyframes are what animations are made of.
To add a keyframe for parameter, follow a few steps. Hover over the parameter’s track on the timeline. Click the point on the timeline for which the keyframe should be added. A pop-up window with the parameter value input field and the Transition picker will appear.
Transition picker is used to specify how the transition between keyframes should be performed over time. Note that picking transition type is available only for digital parameters and the color parameter. More information about types of transitions described below.
Specify the value of the animated parameter at the selected point in time and pick the Transition type, if necessary. By default, Linear transition is used, which means that the value of a parameter will change evenly over time.
Once you add a keyframe, you can click on the playback button to play the animation that you have created.
Types of Keyframed Parameters
Depending on their type, parameters that you keyframe take on different values. These value are as follows:
A digital value or a formula for calculating a digital value (for example, the value of a Position X parameter)
A boolean value (for example, YES and NO values of the Enabled parameter)
Choice from dropdown menu (for example, the Rigidbody Type parameter)
Color value (for example, the Base Color parameter)
Transitions Between Keyframes
When you set up a digital value or a color for a keyframe, the pop-up window will also contain the Transition picker. You can use this Transition picker to specify how the transition between keyframes should be performed over time.

If you click on the transition type in this pop-up window, you will see a choice of three graphs: No interpolation, Linear, and Ease. In these graphs, the X axis represents the time and the Y axis represents the value. There are many transition types available. To see all of the available transition types, hover over More in the Graphs menu and choose the graph that will suit your animation logic.
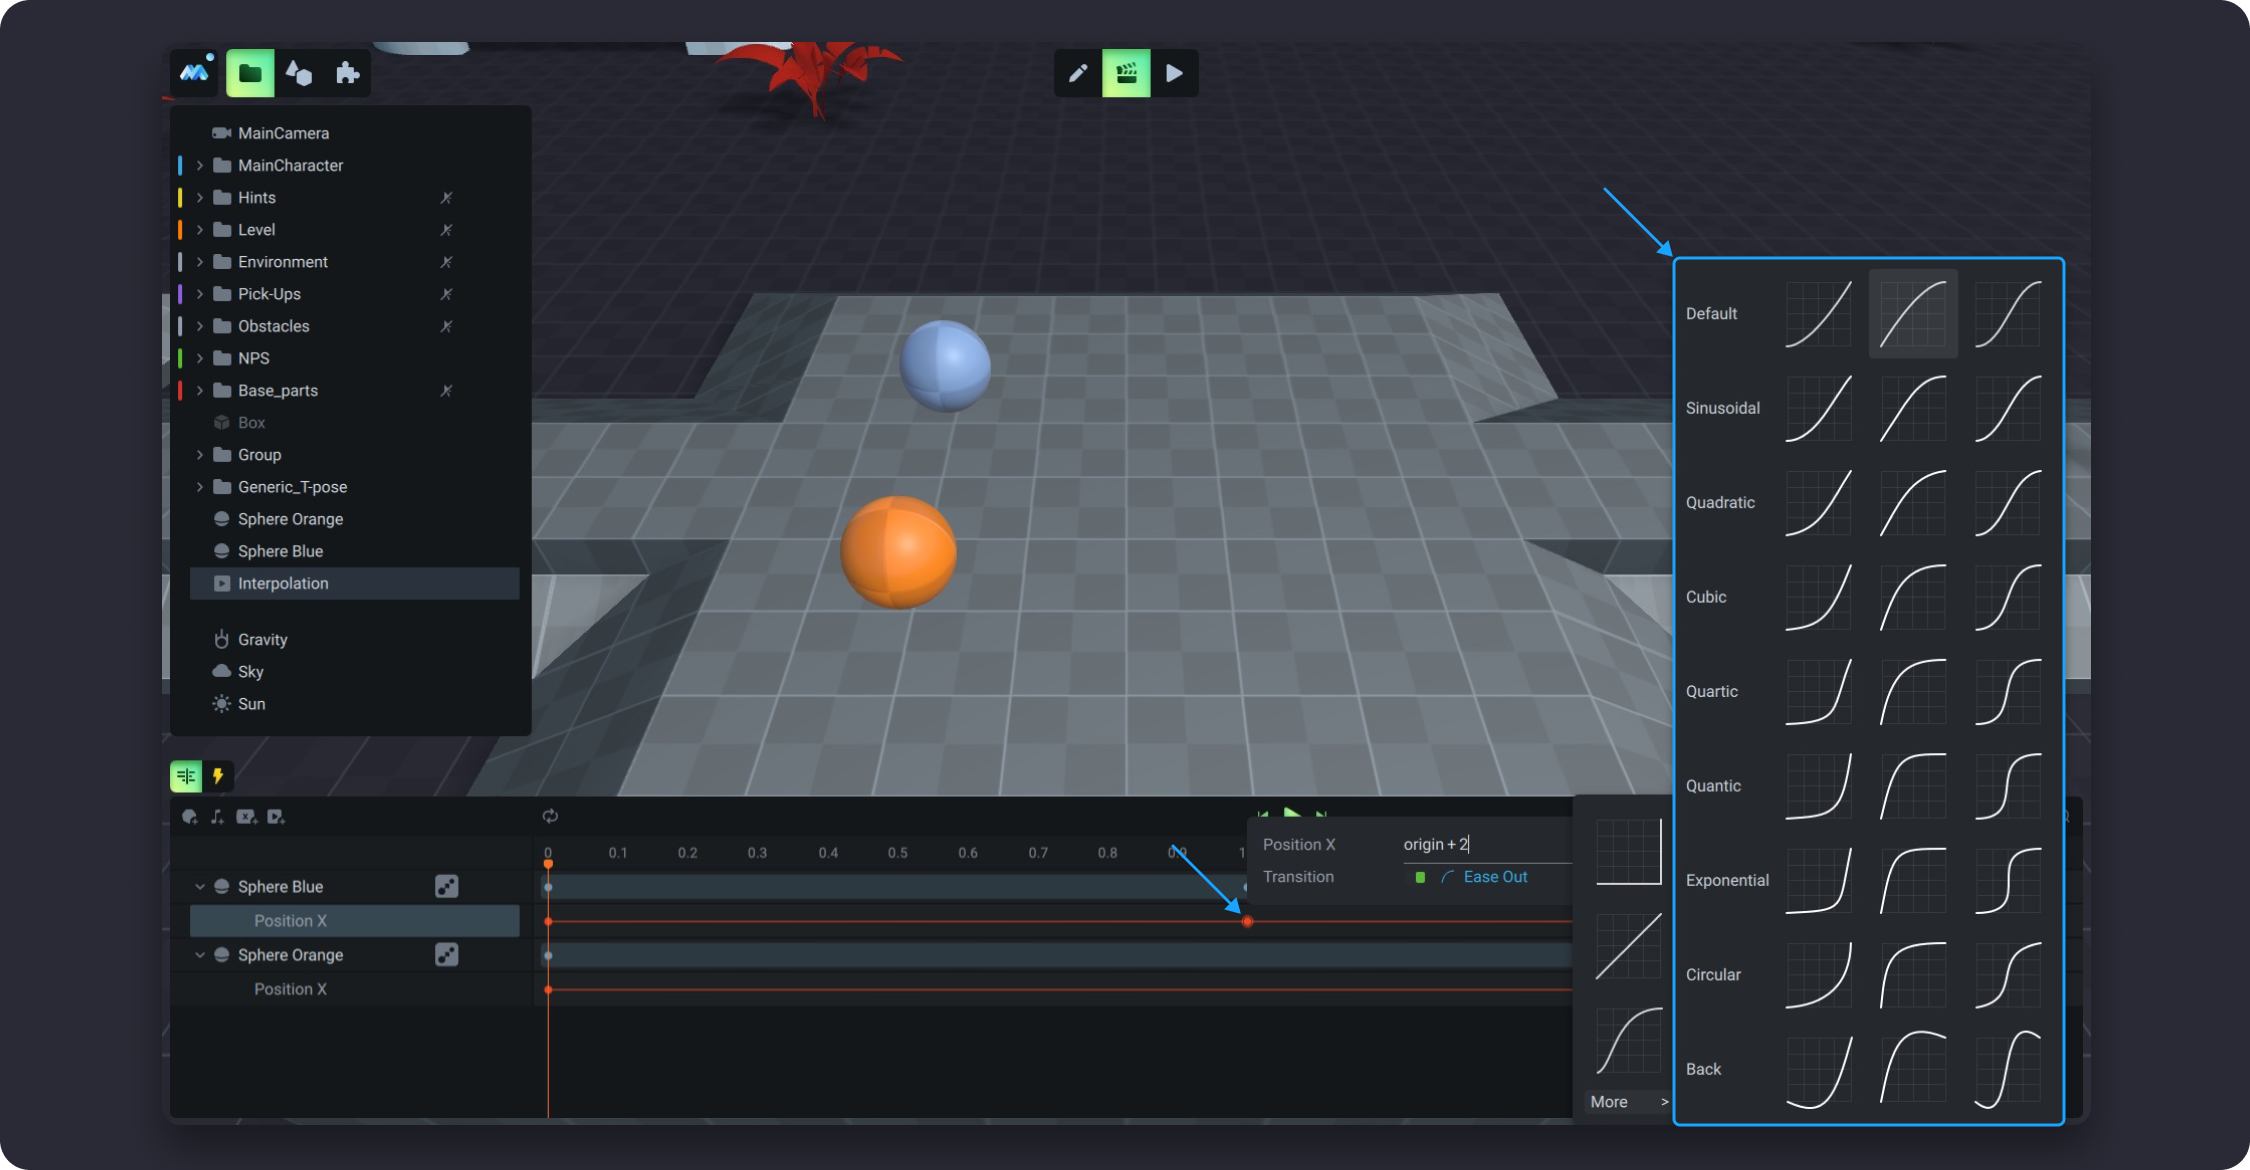
If you don’t need to perform any calculations between two keyframes for some reason, you can switch off transition using the toggle switch. In this case, the calculation between the two given keyframes will not be performed.

Transitions
Bulk dragging of keyframes
Every keyframe that exists on the timeline is projected on the common track at the top of the timeline panel.
You can use this common track to move several keyframes forwards and backwards simultaneously. If you locate several keyframes at the same time point on the timeline, they will be combined into a single point on the common track at the top.
In this way, by moving this single point on the common track you will move several keyframes simultaneously on the timeline. Plus, you can drag this common track as a whole and move all of the existing keyframes backward and forward in the timeline.
Adding Audio
Audio clips can be added to the timeline in two ways.
Inside of the Sound track
In this case, the audio will be played with the same volume wherever the Main Character is.
If you add a Sound track to the Timeline, an empty audio track will be created for it by default. Hover over this track to select a time point at which your audio clip should be played. Select a clip in the window that opens.

Inside of the Speaker track
In this case, an added audio clip will be played as a surround sound that will be heard only in a certain place of the scene. The closer the Main Character is to the speaker, the louder the sound will be.
To add an audio clip to the Speaker track, click the Add animation track next to it and select Audio Track. Hover over this track to select a time point at which an audio clip should be played. Select a clip in the window that opens.

You can add as many audio clips as you want and move them forward and backward in the timeline one at a time or all at once using the common track on the left of the Sound track.


By right-clicking an audio clip, you can duplicate it inside the same audio track or copy it and paste it inside another audio track.

Audio tracks also allow you to adjust their volume using the volume slider next to them.

When you click an audio clip in the timeline, a pop-up window appears in which you can set up the volume and the pitch of the given audio clip. The Pitch setting is used to change the highness of the sound of the audio clip. The Pitch setting also affects the length of the audio. If you increase the Pitch value, the length of the audio will decrease. And vice versa, if you decrease the Pitch value, the length of the audio will increase.

This window also displays the following properties of the audio clip: Name of the file; Type of the file, either mono or stereo; Frequency; Length.
Adding a local variable
To add a local variable to the timeline, do the following: Click the corresponding icon on the top left of the timeline panel; give your local variable a name, for example "X"; select the type of value this local variable should have, either Number or Boolean; specify the value; click Create
A corresponding track will appear on the timeline.

Local variables work only inside a single timeline. This means that if you create a variable with the same name in another timeline, it will be a completely different variable. Changing the value of a local variable in the timeline will not affect the value of the variable with the same name in another timeline.
Insert an animation
In MANU, you can play animations via other animations. To add an animation inside another animation, do the following:
Click the Add Animation on the top left of the Timeline panel. An Inserted Animation with an Animation Track will appear on the timeline.


If you need more than one track inside an inserted animation, click the Add new track next to the Inserted Animations element. The number of animation tracks you can add is not limited.


Hover over the Animation Track to select a time point at which you want to insert an animation. Select an animation you want to insert into a given animation from the pop-up list that opens.The inserted animation will appear on the timeline.

You can use inserted animations to, for example, create a sequence of animations that will be played in a certain order at certain points in time independently of any triggers.
Disabling animation or track
When you create an animation, it is enabled by default. However, if you need to disable an animation you can do it by hovering over the animation in the scene tree and switching off the toggle switch on the right of the animation. After that this animation will not play in Game mode.
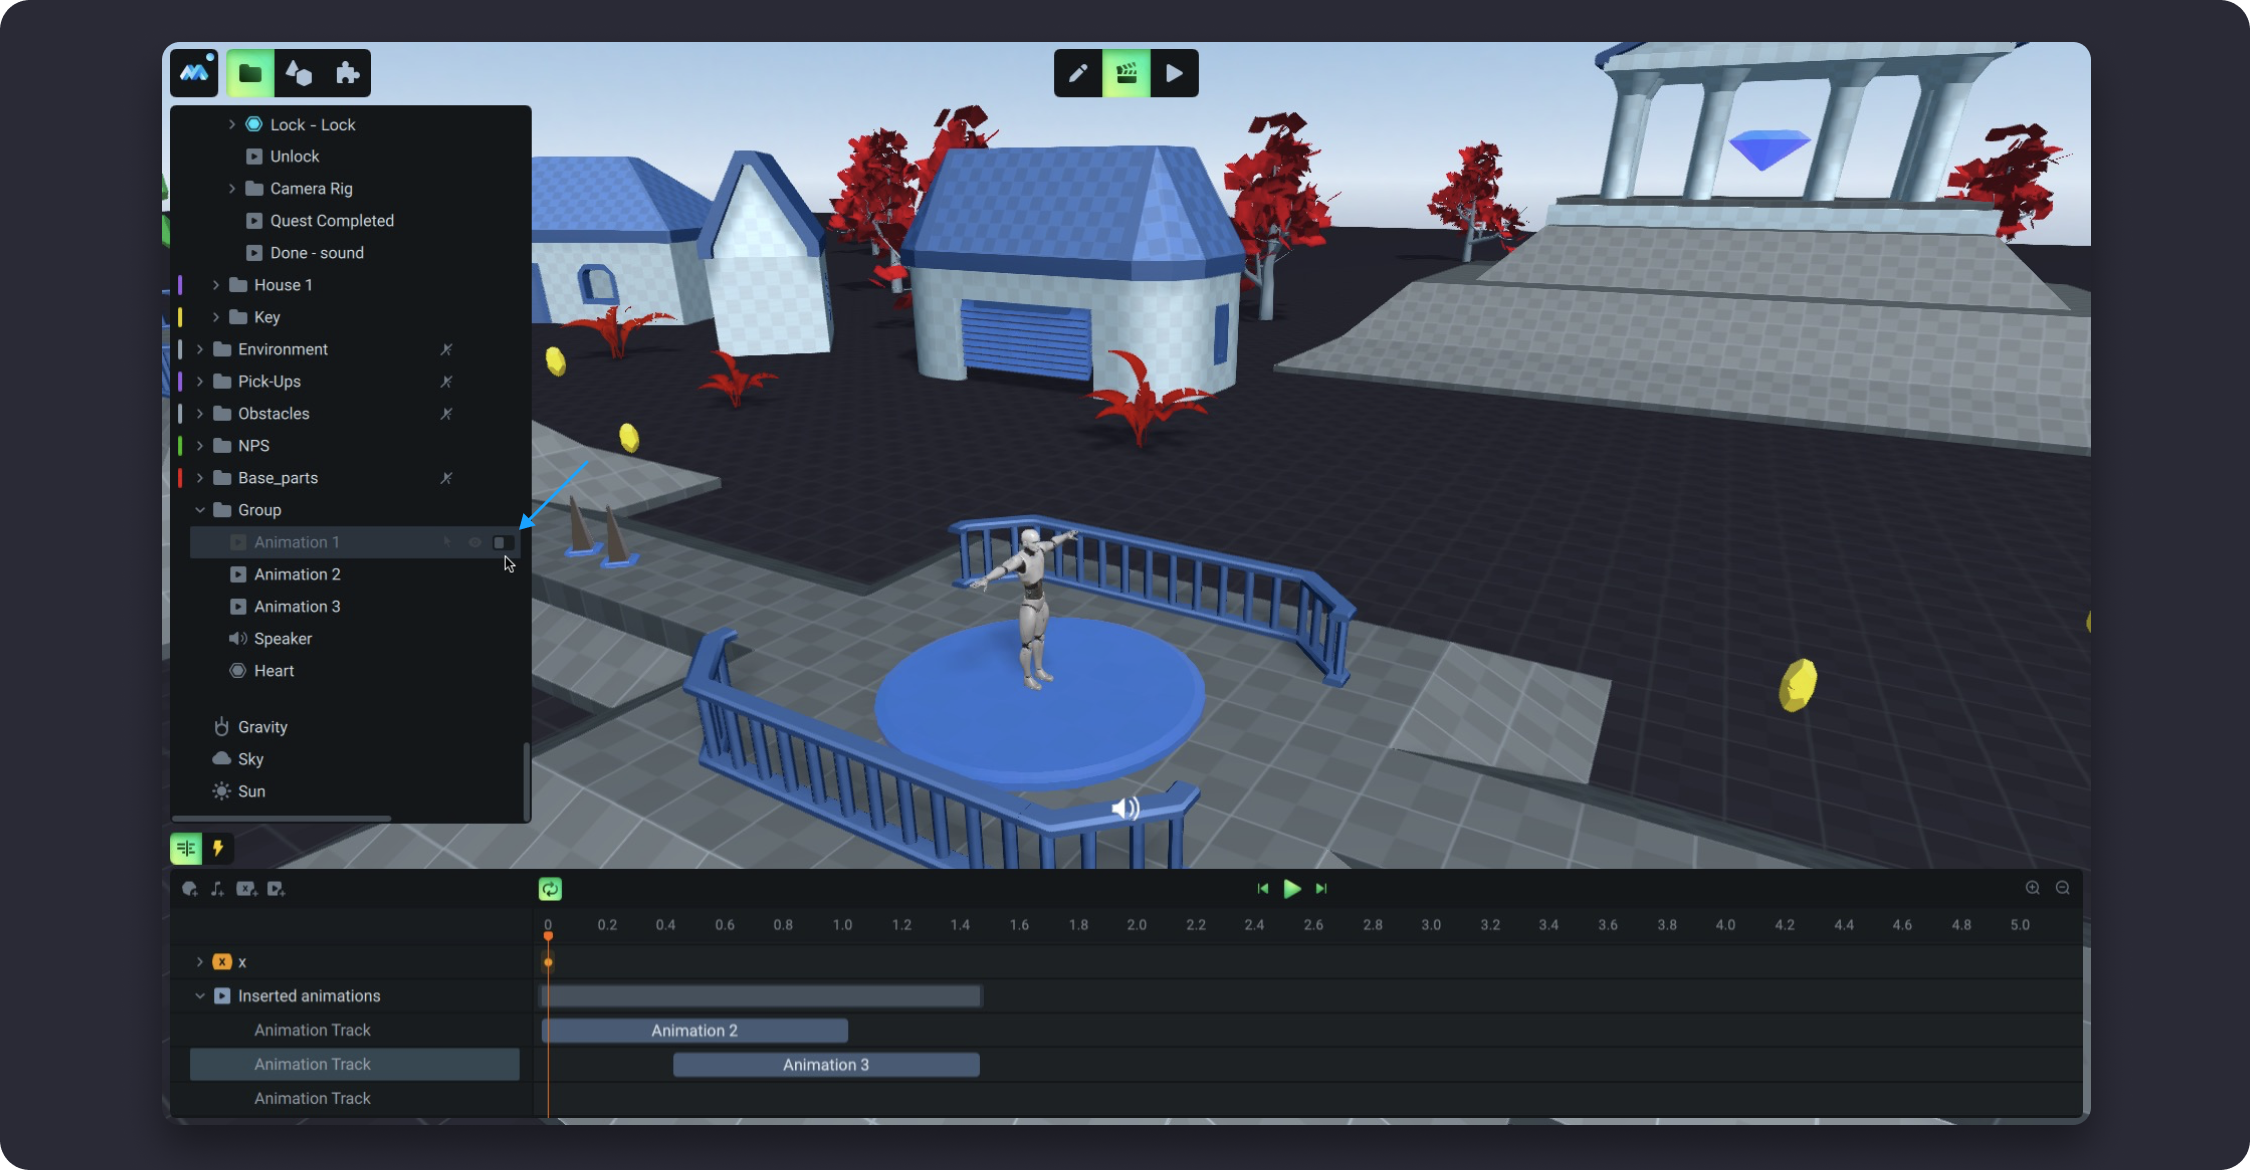
The same works for tracks inside an animation in the timeline panel. If you need to disable a track with a certain parameter, use the toggle switch on the left of the track.


If inserted animation is disabled in the scene tree then it still play through active animation. See video below.
How to launch animation in game
For an animation to be launched in the game, you have to set up a trigger for it. Triggers are set up in the Triggers tab, which is located next to the timeline tab.

For more information about Triggers, please refer to the Triggers.
Last updated