# Quick Start Guide

Hi there! In this article, you will read introductory information about playing and creating the game in MANU.

When you download and install the MANU engine. Launch it and press **Create New**.  You can create new project from one of our templates. To know how to open the existing projects, go to [Welcome Screen](/learn/manual/welcome-screen).

<figure><img src="https://4240499350-files.gitbook.io/~/files/v0/b/gitbook-x-prod.appspot.com/o/spaces%2F-Lt-sE9MYKe9pZOcHwg5%2Fuploads%2F42ksfnAi1NTNsPNOHnKi%2FGroup%2050.png?alt=media&amp;token=3776c51b-a235-43f6-8767-3111c1a28637" alt=""><figcaption></figcaption></figure>

This time choose **Platformer Kit** from **Platformer** category. After that, you will open a project that already has game objects and customized animations. You can test the **Game Mode** and even modify the project as you want. So, let’s start!

<figure><img src="https://4240499350-files.gitbook.io/~/files/v0/b/gitbook-x-prod.appspot.com/o/spaces%2F-Lt-sE9MYKe9pZOcHwg5%2Fuploads%2F5Ud6jQnAe0Ha8cdeUofr%2FGroup%2051.png?alt=media&amp;token=144f6c77-89f9-4fe6-9094-8900105f4230" alt=""><figcaption></figcaption></figure>

## Overview of UI

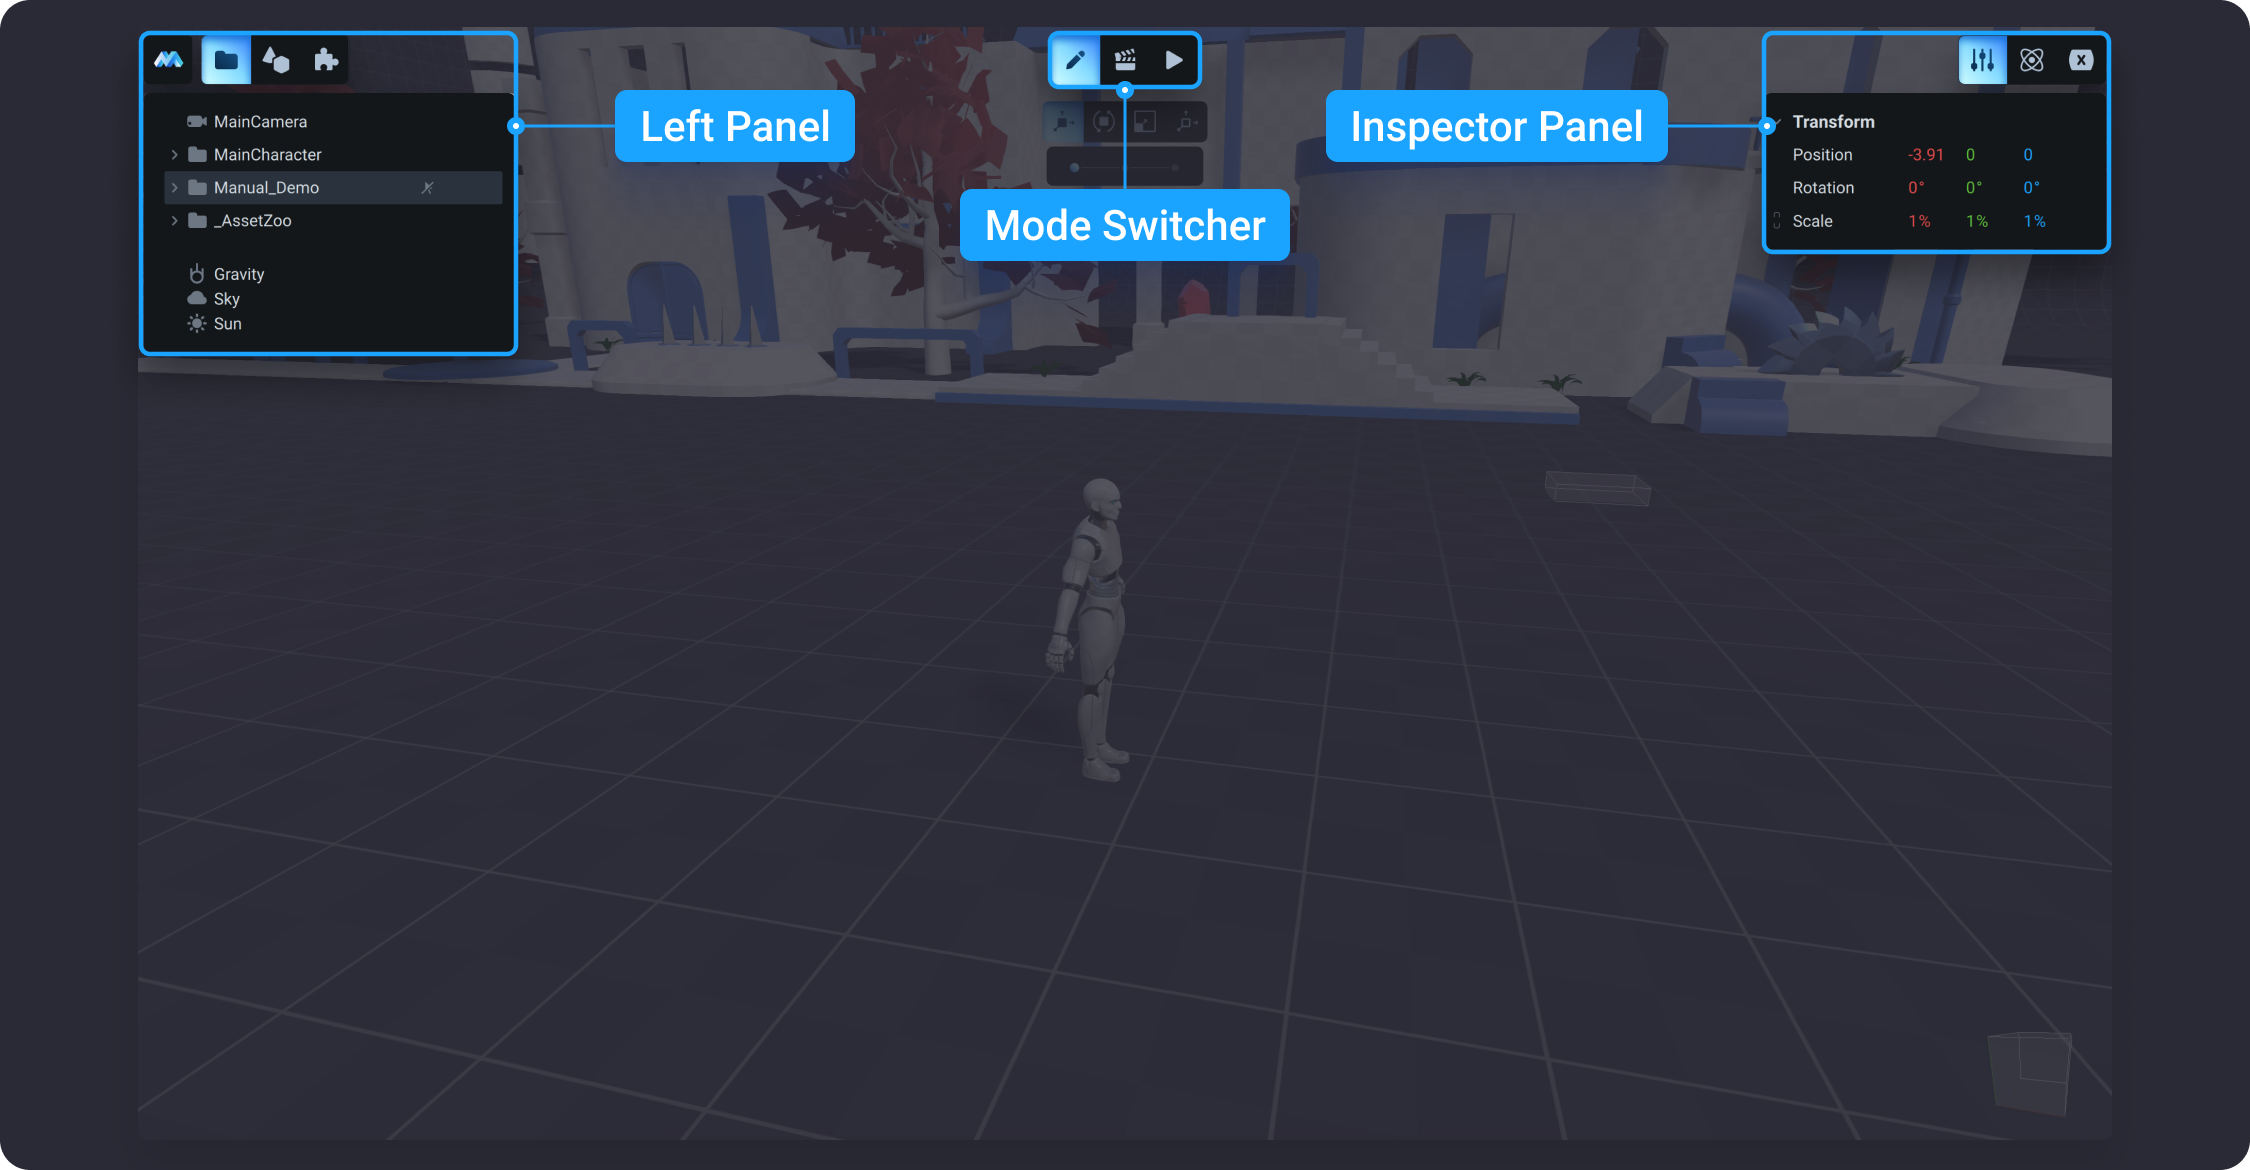
In MANU, by default, all projects open in *Edit Mode*. The central panel on the top of the workspace has 3 different tabs with different modes of the game: *Edit Mode*, *Animation Mode* and *Game Mode* (to know more, go to [Workspace Modes](/learn/manual/workspace-modes)).

<figure><img src="https://4240499350-files.gitbook.io/~/files/v0/b/gitbook-x-prod.appspot.com/o/spaces%2F-Lt-sE9MYKe9pZOcHwg5%2Fuploads%2FitlrQUbUrNknLO4RkeJf%2FGroup%2070.png?alt=media&amp;token=dd045eef-8220-499a-8bcc-71b673df6208" alt=""><figcaption></figcaption></figure>

The left panel contains the main menu button with the program options, a toggle for the **Project Panel** and the **Scene Tree** with all scene objects. The button opens **Asset Browser**, which contains all prefabs created in the project or imported from Asset Store. And a button that opens the **Game Flow** and **State Machine** editor canvas.

<figure><img src="https://4240499350-files.gitbook.io/~/files/v0/b/gitbook-x-prod.appspot.com/o/spaces%2F-Lt-sE9MYKe9pZOcHwg5%2Fuploads%2FrSmHkUhDpYVvFv1qhdwW%2FGroup%201.png?alt=media&amp;token=d9b87e7b-9b93-4794-8055-1d85256f472f" alt=""><figcaption></figcaption></figure>

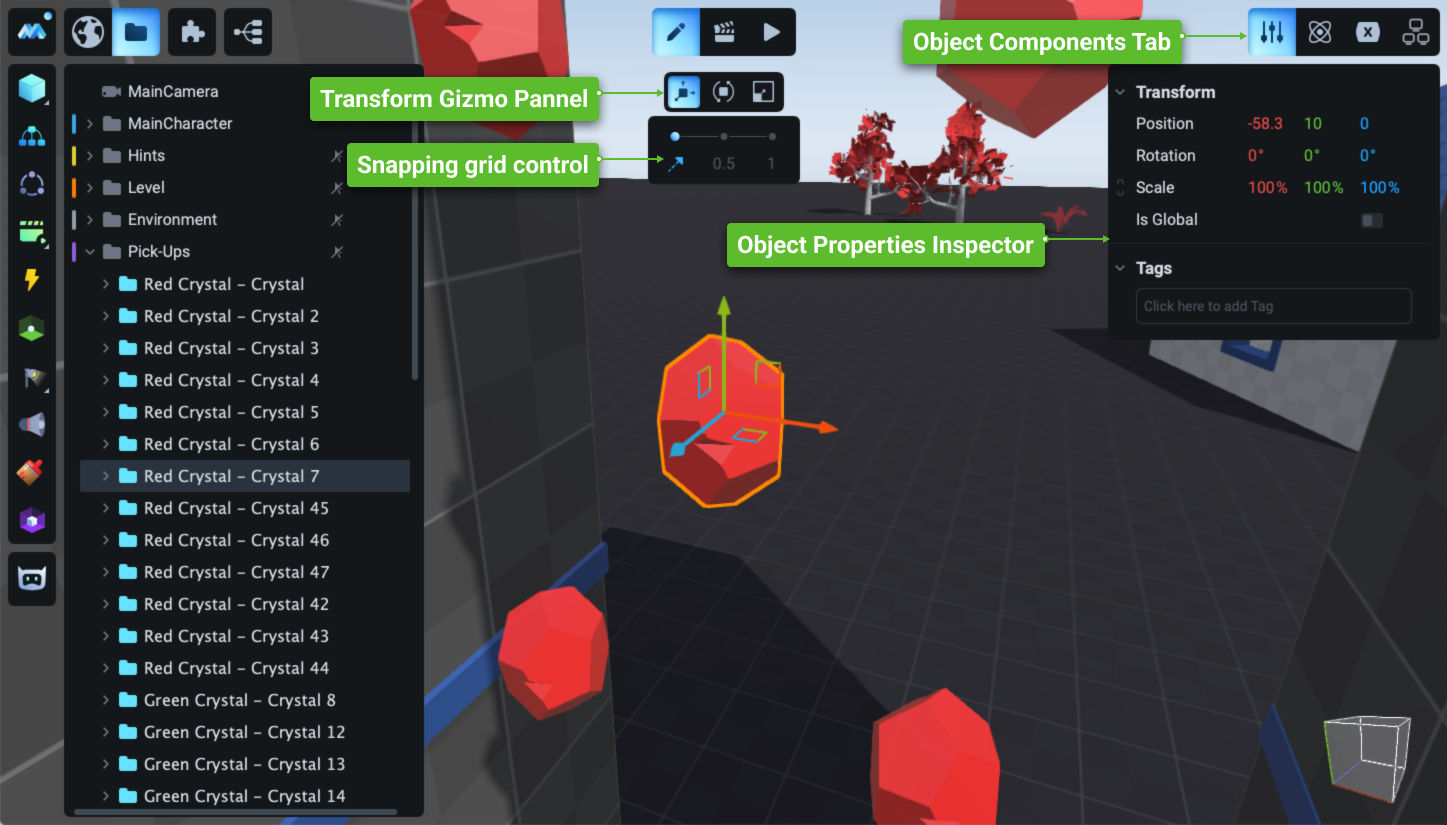
Whenever you select any object in the scene, the **Inspector** and **Transform Gizmo Panel** appear with the Snapping grid control. The **Inspector** contains all the information related to the selected object: [Properties](/learn/manual/workspace-modes/edit-mode#properties), [Material](/learn/manual/materials), [Physics](/learn/manual/physics), [Variables](/learn/manual/variables). To know more about each related tab, click on them.

<figure><img src="https://4240499350-files.gitbook.io/~/files/v0/b/gitbook-x-prod.appspot.com/o/spaces%2F-Lt-sE9MYKe9pZOcHwg5%2Fuploads%2F8sPfxiXjqvExTmlhiFIJ%2FGroup%202.png?alt=media&amp;token=eda056b9-78e5-488e-b42b-53cf42f5def3" alt=""><figcaption></figcaption></figure>

The **Gizmo Panel** is used for switching between gizmo types: **Move**, **Rotate**, **Scale**, and **Collider**. Gizmos allow you to manipulate selected objects right in the scene. By default, the **Move Gizmo** is selected, which also includes move by step settings: **Move smoothly**, **Move by 1** and **Move by 10**. *Move smoothly* is selected by default; you can change it as needed. The **Rotate Gizmo** also includes settings which allow you to adjust the rotation by selecting different options. To know more about the **Gizmo Panel**, visit [Using 3D Gizmo to Manipulate Objects](/learn/manual/workspace-modes/edit-mode#using-3d-gizmo-to-manipulate-objects).

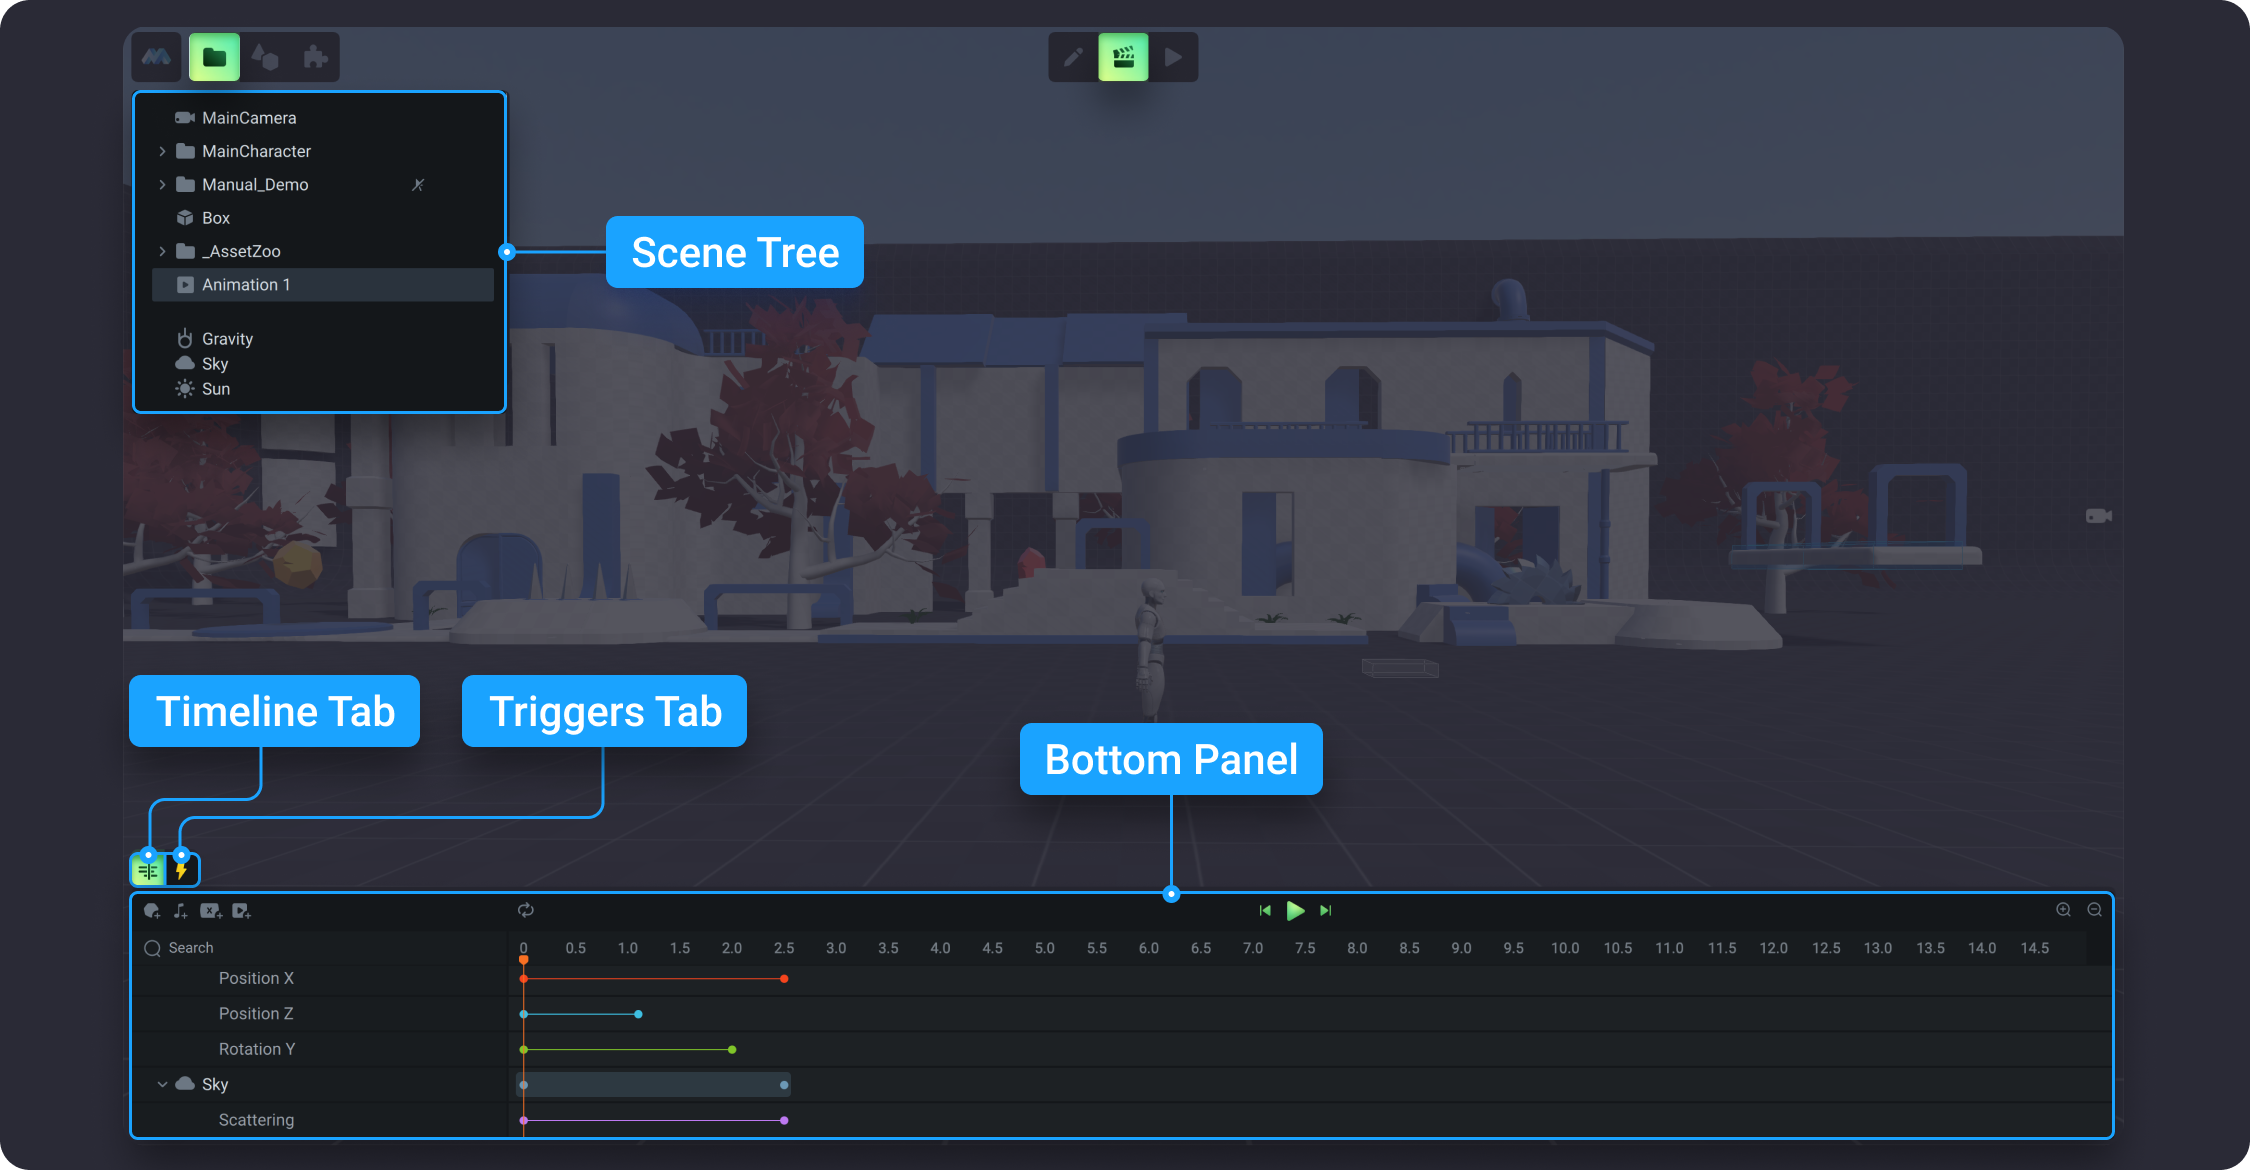
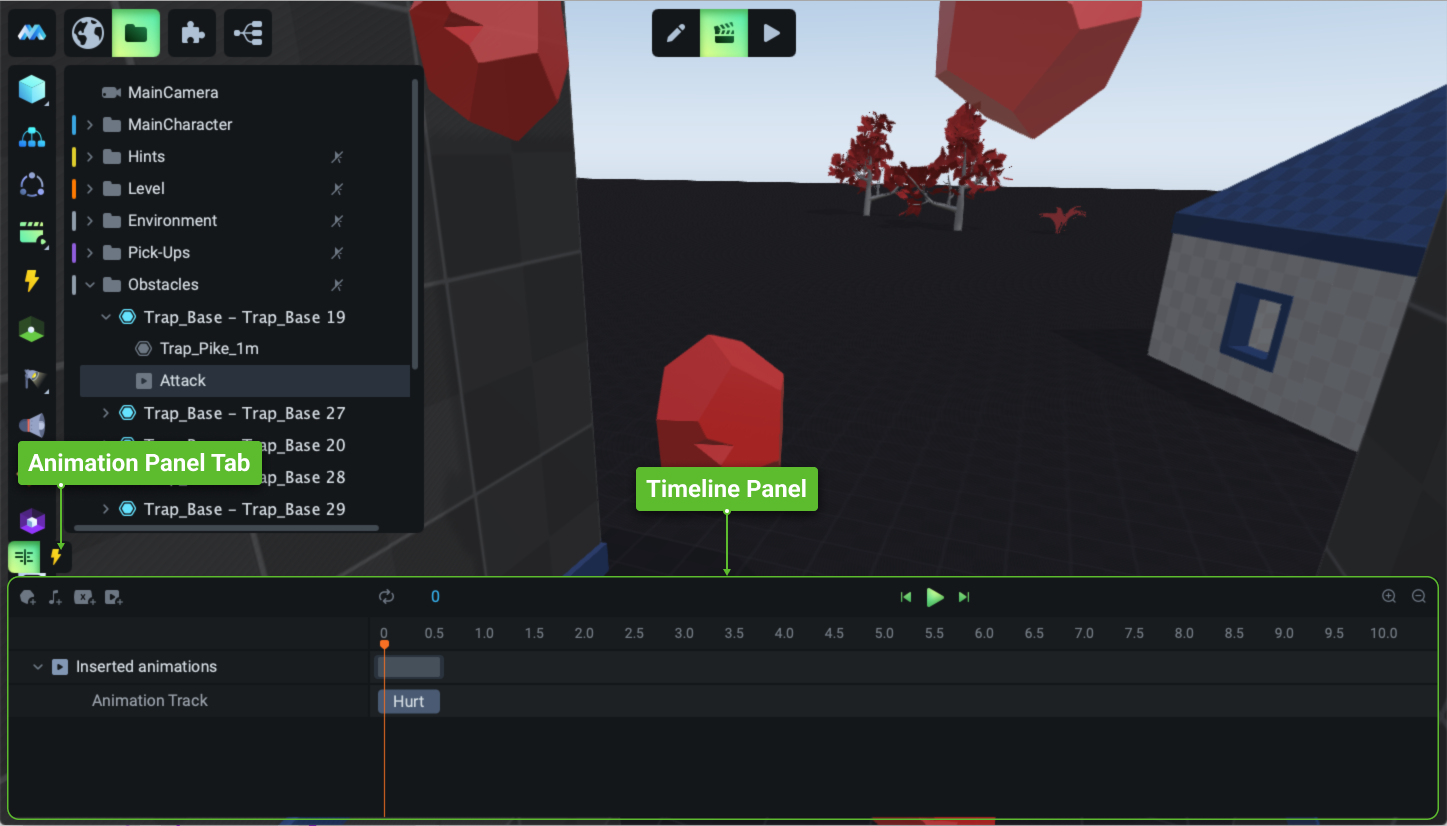
In **Animation Mode**, you can see 2 panels. The left panel is the same as in the **Edit Mode**. However, there are some options that are only available in **Animation Mode** and do not work in **Edit Mode**; and vice versa, options that are available in **Edit Mode** do not work in **Animation Mode**. You can find all available animations in the **Scene Tree***.* The bottom panel is contextual and only visible when you choose the animation from the list. It has 2 tabs **Timeline** and **Triggers**. Both are related to the selected animation. To know more, go to [Timeline](/learn/manual/timeline) and [Triggers](/learn/manual/triggers).

<figure><img src="https://4240499350-files.gitbook.io/~/files/v0/b/gitbook-x-prod.appspot.com/o/spaces%2F-Lt-sE9MYKe9pZOcHwg5%2Fuploads%2FxgPWw3swm3CrwGFjaDDx%2FGroup%204.png?alt=media&amp;token=fb7d0300-c1a2-4be0-8850-a2f804696fcf" alt=""><figcaption></figcaption></figure>

<figure><img src="https://4240499350-files.gitbook.io/~/files/v0/b/gitbook-x-prod.appspot.com/o/spaces%2F-Lt-sE9MYKe9pZOcHwg5%2Fuploads%2FLieD7D3opJEoF8kcxogG%2FGroup%203.png?alt=media&amp;token=4f4194df-0665-4bec-bef4-2919900b01e9" alt=""><figcaption></figcaption></figure>

## How to control the scene view camera

The usage of the scene view camera will help you to see the scene from multiple angles. MANU offers several ways to move the camera around:

* To orbit around the selection object, use `ALT + LMB Drag`&#x20;

{% embed url="<https://dl.dropboxusercontent.com/s/lafox2aipt346ll/v009.mp4>" %}

* To zoom, just use the mouse wheel
* To pan and move in any directions, use `SPACE + LMB Drag`

{% embed url="<https://dl.dropboxusercontent.com/s/hudreerqh0xnn36/v010.mp4>" %}

* To focus on the selected object, double click on it in the *scene tree* or press `F`

{% embed url="<https://dl.dropboxusercontent.com/s/05ksbr26lgqgzef/v011.mp4>" %}

Now is your turn, try to play around with the camera. More shortcuts for controlling the camera you can find here [Keyboard shortcuts](/learn/keyboard-shortcuts).

## Game Time

MANU provides *<mark style="color:green;">Platformer Kit</mark>* as one of templates, that you can use as a great starting point to develop your own game project. The template is designed for playing in the genre of side-scroller platformer. It contains basic objects, from which more complex objects are created. The template represents a polygon based on which you can create a new level of the game.

In **Game Mode**, you will see the **Main Character** who can move left or right. To know more, see the article about [Main Character](/learn/manual/main-character).

The main character's task is to pass all the obstacles, collect crystals, find the key and free his friend from the house with the key. At the top of the main character's head, you will see hints on how to overcome obstacles and cope with tasks.

![](https://4240499350-files.gitbook.io/~/files/v0/b/gitbook-legacy-files/o/assets%2F-Lt-sE9MYKe9pZOcHwg5%2F-MYy7TiEEp6_ff74mOu-%2F-MYzn0-gIwaiT11wYc9e%2F007.png?alt=media\&token=036a4ed7-cfc5-48f4-a716-6d4cf81aa998)

The walking mechanic is controlled by the `Right arrow` and `Left arrow` keys in the *Game Mode*. The jumping mechanic is controlled by a `SPACE` key. To double jump, hit `SPACE` twice. To complete the wall jump, hold the `Right arrow` or `Left arrow` keys and hit `SPACE`. To use the crouch mechanic, hit `C + Right arrow` or `C + Left arrow`. That’s all you need to know to pass this level successfully. Let’s play!

{% embed url="<https://dl.dropboxusercontent.com/s/31tvjkanvxr4b4e/v001.mp4>" %}

## From the Template to a New Game Project

You can use this template for your Game Project. But first, let’s observe some components of the *Scene*.

![](https://4240499350-files.gitbook.io/~/files/v0/b/gitbook-legacy-files/o/assets%2F-Lt-sE9MYKe9pZOcHwg5%2F-MYy7TiEEp6_ff74mOu-%2F-MYzn2nB2Kk03joiMbe4%2F008.png?alt=media\&token=9af07ac8-e846-40de-bd9b-d64d2476f378)

![](https://4240499350-files.gitbook.io/~/files/v0/b/gitbook-legacy-files/o/assets%2F-Lt-sE9MYKe9pZOcHwg5%2F-MYy7TiEEp6_ff74mOu-%2F-MYzn4bs2jmCVFvBS9F6%2F009.png?alt=media\&token=3a64a26c-6021-4983-9477-fb269d35c12d)

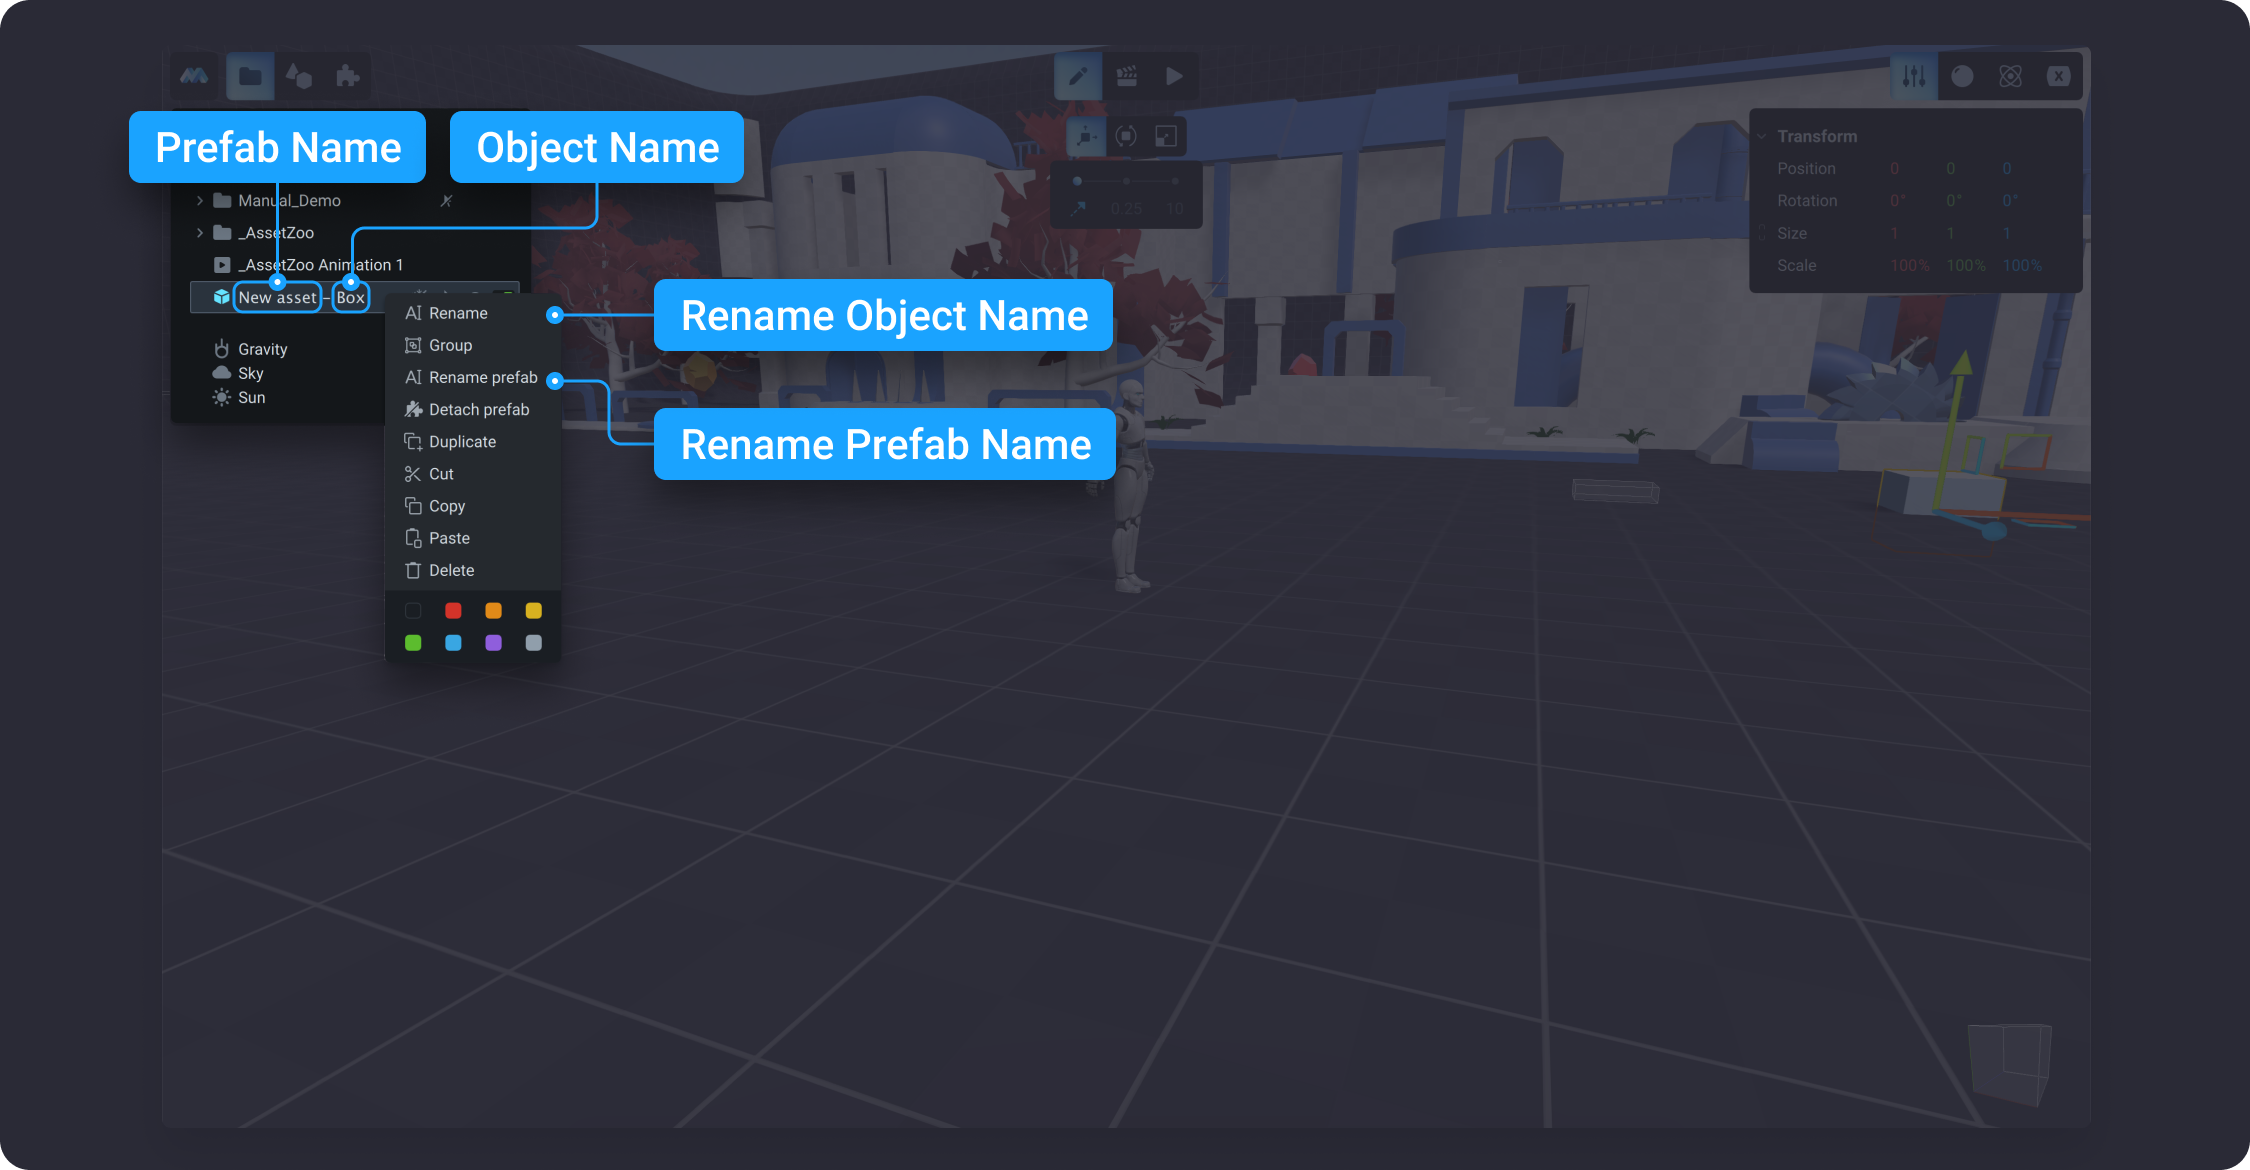
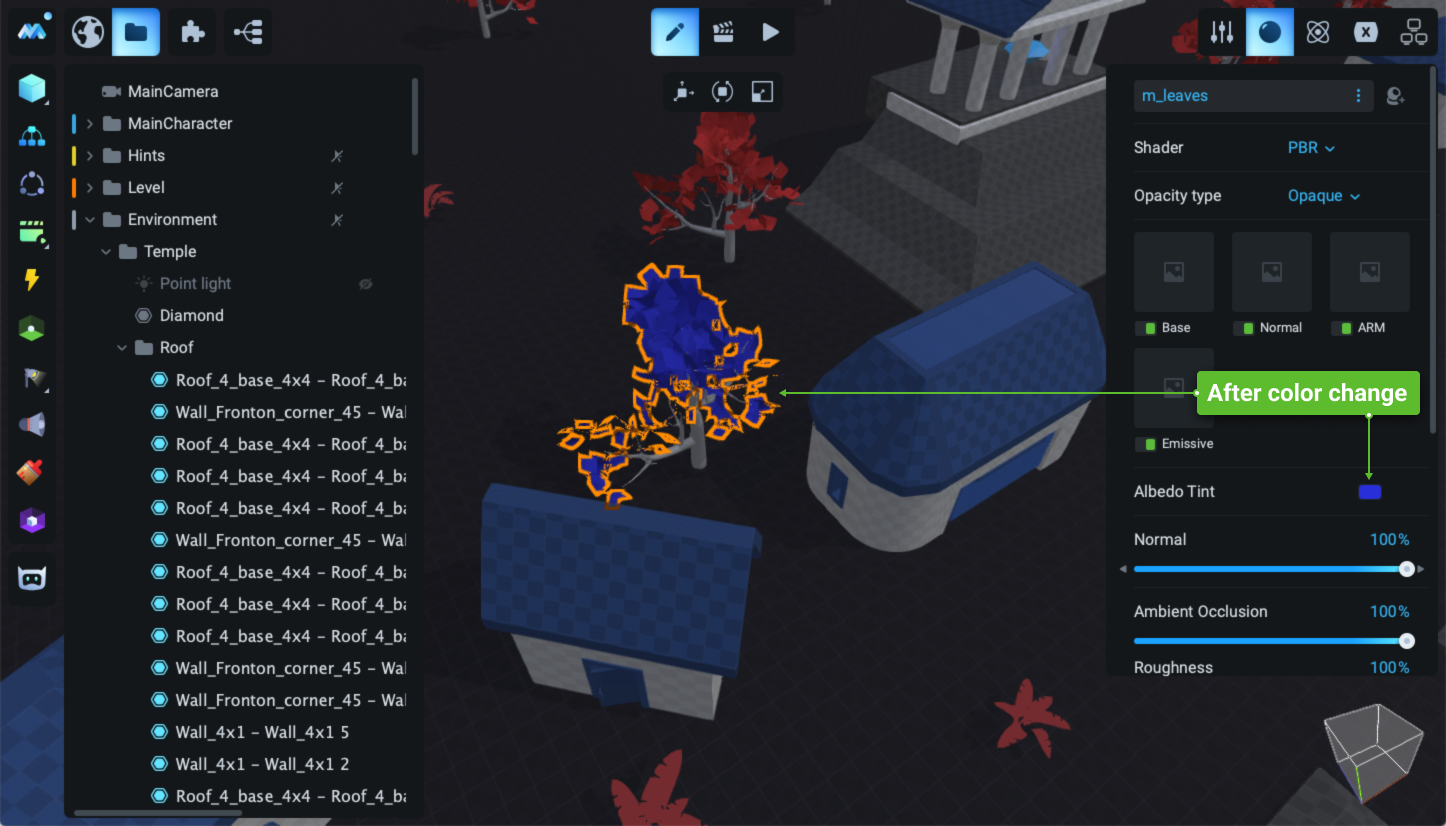
The example level is created from prefab objects as it is easy to modify them. The **Prefab** object is kind of a template from which you can create new **Prefab** instances in the scene. To know how to create **Prefabs** and to know more about them go to [Assets](/learn/manual/assets). When an object is converted to a *Prefab*, all its properties are synchronized between all the prefab instances. If you make changes to any copy of the prefab, then the changes will affect all interrelated prefabs. For example, if you decide to change the color of one tree, then the prefab trees will sync with the modified tree.

<figure><img src="https://4240499350-files.gitbook.io/~/files/v0/b/gitbook-x-prod.appspot.com/o/spaces%2F-Lt-sE9MYKe9pZOcHwg5%2Fuploads%2FAXxgeei4Owd0M3mznMrc%2FGroup%206.png?alt=media&amp;token=99fc897e-713a-4230-832e-a66106a087de" alt=""><figcaption></figcaption></figure>

<figure><img src="https://4240499350-files.gitbook.io/~/files/v0/b/gitbook-x-prod.appspot.com/o/spaces%2F-Lt-sE9MYKe9pZOcHwg5%2Fuploads%2FGmyUpgUBGhBLAiTL2d5B%2FGroup%207.png?alt=media&amp;token=44bf57fc-3551-4daa-a6f8-d9b87ce25728" alt=""><figcaption></figcaption></figure>

## **How to build a house?**

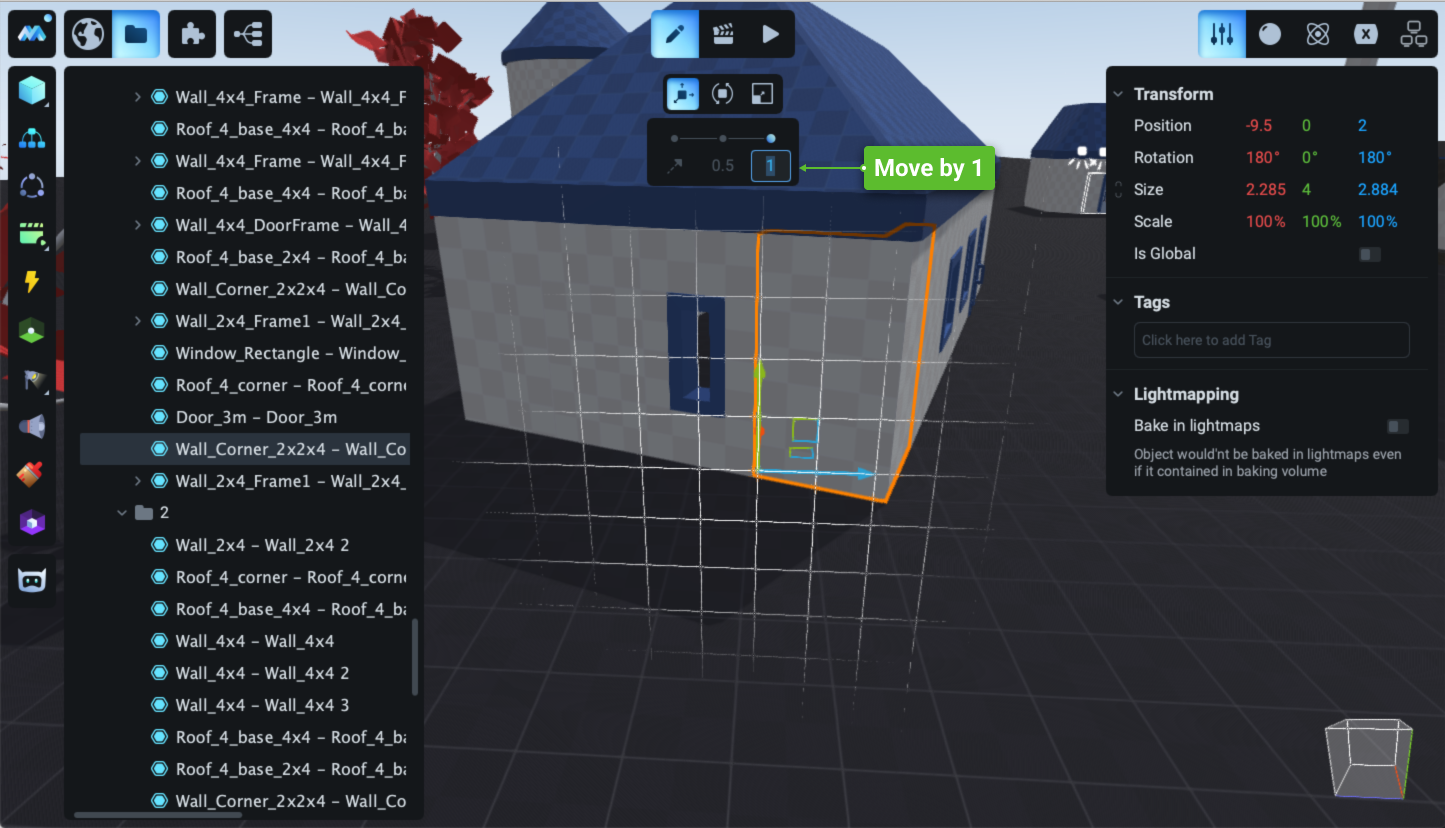
The houses and trees perform mostly a decorative function in the scene. The process of building a house is creative and largely depends on your preferences. You can easily copy the existing one or you can use the components that are located at the right of the scene. All parts of the house are modular and easy to join to each other. Use gizmos on the **Gizmo Panel** to perform manipulations with selected objects. You can also adjust the **Move Gizmo** settings by selecting either **Move** **smoothly**, **Move by 1** or **Move by 10**. If **Move smoothly** is selected, it will move the object around the scene smoothly. **Move by 1** and **Move by 10** options allow you to define the distance for movement. For example, if you choose **Move by 1***,* the selected object will move in increments of 1 meter. After selecting the number, use gizmo arrows to connect parts of the house together.

<figure><img src="https://4240499350-files.gitbook.io/~/files/v0/b/gitbook-x-prod.appspot.com/o/spaces%2F-Lt-sE9MYKe9pZOcHwg5%2Fuploads%2FLd6YWez7AP7xKClPv1dD%2FGroup%208.png?alt=media&amp;token=a08ddc81-eb96-4d68-b132-dab9d9abc6b5" alt=""><figcaption></figcaption></figure>

**Physics** is not applied to the parts of the house; therefore, the **Main Character** can simply walk through the house, if you decide to build it on his way. However, if you add **Physics** to it (you can easily do it if you go to the right panel and click on the **Physics tab**), thеn the **Main Character** won't be able to go through the house; he will have to jump over it.

{% embed url="<https://dl.dropboxusercontent.com/s/1do32x82n48enlz/v002.mp4>" %}

However, there is no need to enable physics for the whole house. Moreover, a large number of physical objects in the Scene can lead to high CPU usage. If you need to make a certain wall impassable, we recommend that you add a **Collider** with the **Static** type of rigid body and place it next to the desired wall. For example, the **Collider** was used to build **House 1** in this template.

{% embed url="<https://dl.dropboxusercontent.com/s/lwj4dq617cb28xt/v003.mp4>" %}

## Blocks with physics

Blocks with physics are used to create the obstacle course for the **Main Character**. He can jump on the block, but he can't pass through it, because the block has the Static type of rigid body. All objects with physics will be impenetrable to the **Main Character** except objects with the *Ghost* rigid body. To know more, read [Physics](/learn/manual/physics).

Let’s copy a block with physics "Floor\_4x4\_Block" and put it on the main character’s way. As you can see, the **Main Character** can’t go through it.

{% embed url="<https://dl.dropboxusercontent.com/s/lvd2mc0er580rsi/v004.mp4>" %}

The **Physics** tab contains a list of physical properties of an object, such as type of the rigid body, collider, friction, bounciness and other parameters. The block we selected is a static object; it has certain friction and bounciness values, collider; and it is possible to hang on it. You can change all these properties according to your preference. To know about types of Physics and their settings, go [here](/learn/manual/physics).

<figure><img src="https://4240499350-files.gitbook.io/~/files/v0/b/gitbook-x-prod.appspot.com/o/spaces%2F-Lt-sE9MYKe9pZOcHwg5%2Fuploads%2F2N3RQuzxR066YSHoYEfE%2FGroup%209.png?alt=media&amp;token=14111e98-0d1d-454d-9e54-071b316aa3de" alt=""><figcaption></figcaption></figure>

## **Hierarchy in the Scene Tree**

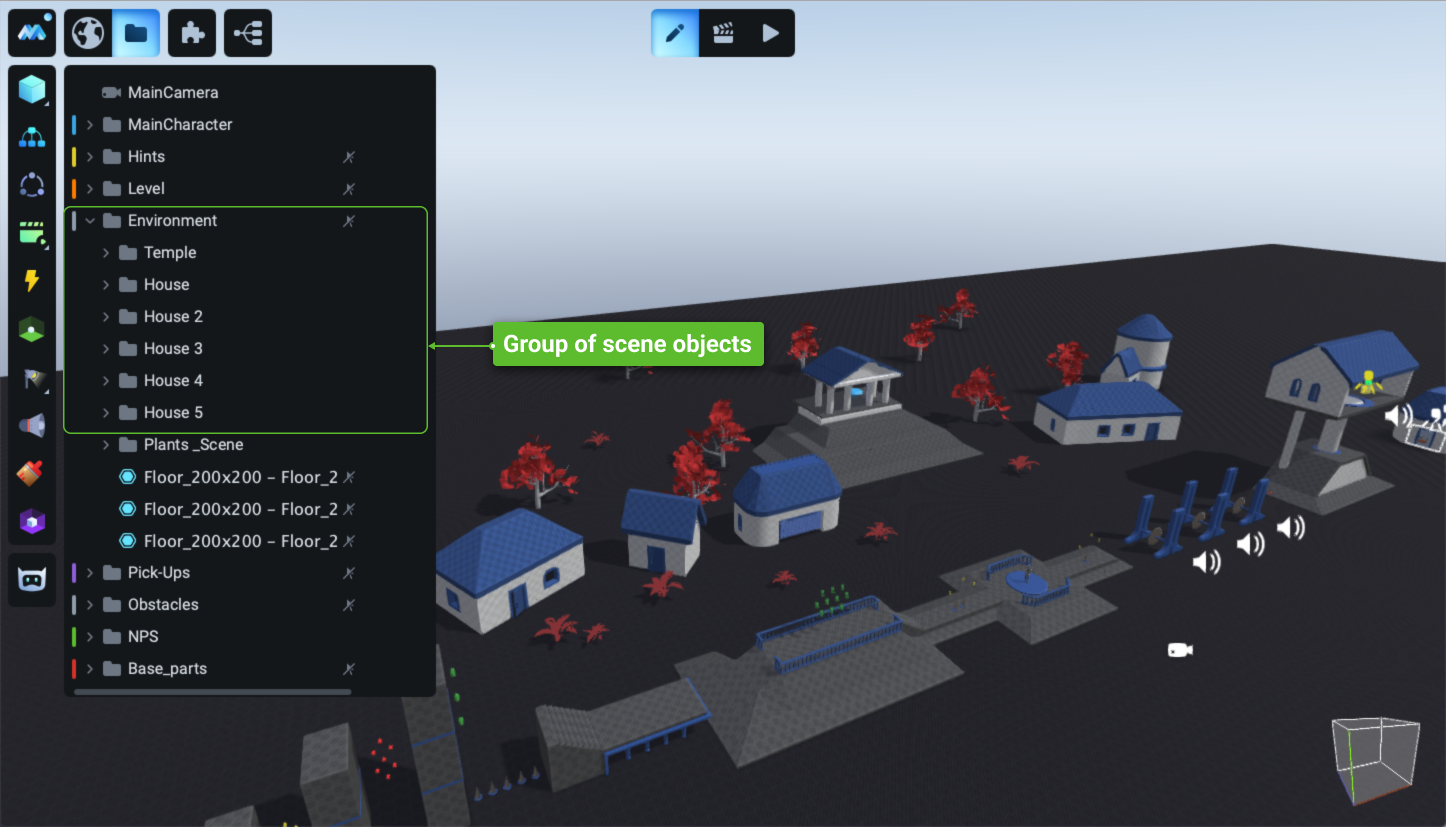
Creating a hierarchy in the **Scene Tree** allows you to move/copy/duplicate everything that is included in a single folder, such as "House" or "Trap Base". For example, "Trap Pike", "Animation" and "Attack" are nested in the "Trap Base". Try to move the "Trap Base" using the gizmo arrows; and you will see how the entire structure of the "Trap Base" moves with everything that is included in it. Hierarchy allows you to establish parent-child relationships between objects in the *Scene*. To know more, go to [Scene Tree](/learn/manual/scene-panel).

{% embed url="<https://dl.dropboxusercontent.com/s/d6n3aifaxyjauyd/v005.mp4>" %}

The "Trap Saw" is also an example of using a hierarchy. Select "Trap Saw" in the "Scene Tree" by double-clicking; and you will see that you can move the entire structure, everything that is placed in the "Trap Saw" folder.

<figure><img src="https://4240499350-files.gitbook.io/~/files/v0/b/gitbook-x-prod.appspot.com/o/spaces%2F-Lt-sE9MYKe9pZOcHwg5%2Fuploads%2F0O8EUD2lpiV6e9RIz2WJ%2FGroup%2010.png?alt=media&amp;token=106d64e0-95f3-446b-9068-70ed68bec57f" alt=""><figcaption></figcaption></figure>

Houses are compound objects as well. They consist of walls, roofs, windows and doors. All objects of one house are placed in the House folder. If you make any manipulations with the House folder in the **Scene Tree**, it will also affect the whole building. If you delete the main House folder, the house will disappear from the *Scene*.

<figure><img src="https://4240499350-files.gitbook.io/~/files/v0/b/gitbook-x-prod.appspot.com/o/spaces%2F-Lt-sE9MYKe9pZOcHwg5%2Fuploads%2Fh8jYQAFpAjWm4HgPeKdz%2FGroup%2011.png?alt=media&amp;token=6f3e05cf-3fe2-4df1-99da-c0aa908663b3" alt=""><figcaption></figcaption></figure>

## **Animated objects and their modifications**

There are plenty of animated objects in the **Scene**, such as pikes, saws, crystals, the key, the elevator and the door. Let's look at the main objects and their animations.

Some objects are grouped together and represent the model. Now let's see how the main models are assembled and how their animations work.

### **Crystals**

Let's look at the crystal and what kind of animations it has. Switch to **Animation Mode** and open "Yellow Crystal" in the **Scene Tree**. The folder contains 2 animations: "Idle" and "Picked". The "Idle" animation has 2 tracks: **Position Y** and **Rotation Y**.

<figure><img src="https://4240499350-files.gitbook.io/~/files/v0/b/gitbook-x-prod.appspot.com/o/spaces%2F-Lt-sE9MYKe9pZOcHwg5%2Fuploads%2F0g8BtVRePiKDw66Rf2PM%2FGroup%2024.png?alt=media&amp;token=eb73b595-efb1-4b89-b987-cef8aee72cfa" alt=""><figcaption></figcaption></figure>

**Position Y** sets the movement of the object up and down. All keyframes here have the specific coordinate values of the crystal on the Y-axis. If you hover over the keyframes on this track you will see their absolute values.

<figure><img src="https://4240499350-files.gitbook.io/~/files/v0/b/gitbook-x-prod.appspot.com/o/spaces%2F-Lt-sE9MYKe9pZOcHwg5%2Fuploads%2FvEoimyKx045cER6Bk61t%2FGroup%2025.png?alt=media&amp;token=4307702c-af5e-429b-a606-6391e5a16169" alt=""><figcaption></figcaption></figure>

**Rotation Y** launches the rotation of a crystal around its axis. This track has a more complex animation method. It uses the formula `origin+180` to assign the value to the following keyframe. `origin` value is equal to the current value from the scene. The use of this formula leads to the rotation of the crystal.

<figure><img src="https://4240499350-files.gitbook.io/~/files/v0/b/gitbook-x-prod.appspot.com/o/spaces%2F-Lt-sE9MYKe9pZOcHwg5%2Fuploads%2Fq7a39bkzYU07jXaqlSeS%2FGroup%2026.png?alt=media&amp;token=76390501-d0ac-4270-b38e-eefb169a3bcc" alt=""><figcaption></figcaption></figure>

Let's move on to the "Picked" animation. "Picked" launches what should happen when a character grabs a crystal. The crystal will disappear and make a sound.

<figure><img src="https://4240499350-files.gitbook.io/~/files/v0/b/gitbook-x-prod.appspot.com/o/spaces%2F-Lt-sE9MYKe9pZOcHwg5%2Fuploads%2FcgweOuCkFb1UUNbRWD86%2FGroup%2027.png?alt=media&amp;token=7589ceb3-4609-4426-adb2-0389242320e0" alt=""><figcaption></figcaption></figure>

As you can see, "Picked" has a sound track with specific audio that is output to the master channel.

{% embed url="<https://dl.dropboxusercontent.com/s/2a4kkreakd0pkc7/v006.mp4>" %}

### Saw

Now let's look at the construction of "Trap\_Saw".&#x20;

<figure><img src="https://4240499350-files.gitbook.io/~/files/v0/b/gitbook-x-prod.appspot.com/o/spaces%2F-Lt-sE9MYKe9pZOcHwg5%2Fuploads%2FPUmcm7lBVLq6d9g8aPgF%2FGroup%2012.png?alt=media&amp;token=4fb2fc4c-0e04-4ef7-a919-e63e5ddd7c61" alt=""><figcaption></figcaption></figure>

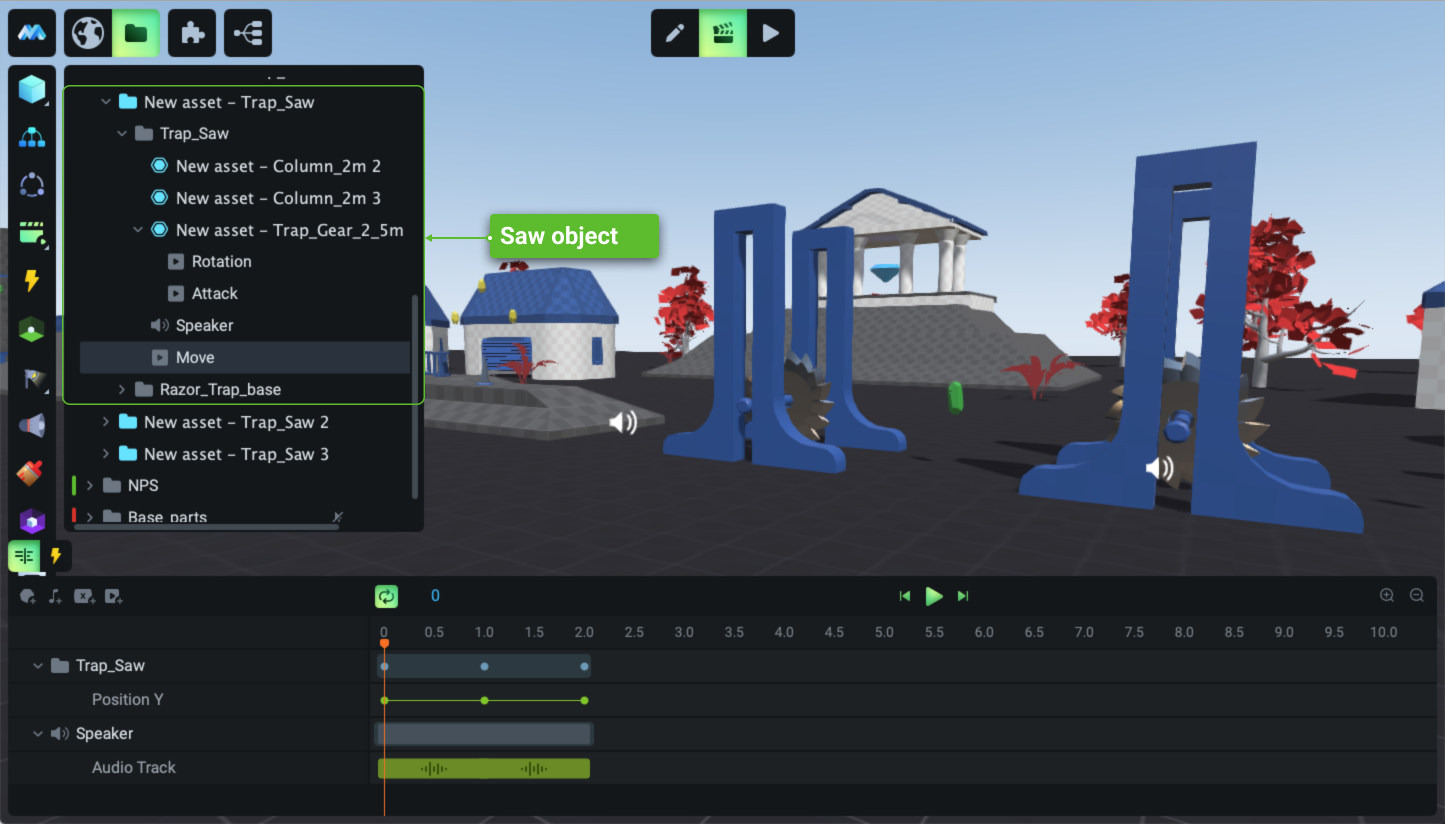
It includes "Trap Saw" and "Trap Razor" folders. Two "Columns" and "Trap Gear" are placed in the "Trap Saw". Here, the "Columns" are used as the saw axle. The whole folder is animated by the "Move" animation. All three objects move together because they are all inserted in one folder. If you need to animate several objects, it is reasonable to put them in one folder and animate this folder. It makes sense to combine objects into folders when you need to subordinate several objects to some actions, such as animation.

<figure><img src="https://4240499350-files.gitbook.io/~/files/v0/b/gitbook-x-prod.appspot.com/o/spaces%2F-Lt-sE9MYKe9pZOcHwg5%2Fuploads%2FnsuFdEJJ3HgLCOICQmKd%2FGroup%2013.png?alt=media&amp;token=c96c9f8d-f5b3-4c01-9b99-dcf6546b28c3" alt=""><figcaption></figcaption></figure>

The "Move" animation has 2 tracks. The *Position Y* track sets the movement of the "Trap Saw" by using keyframes with absolute values. The audio track has a sound that is output to a specific speaker located in the same hierarchy/folder as the "Saw". Therefore, you will be able to hear the sound when the main character is near the "Saw".

<figure><img src="https://4240499350-files.gitbook.io/~/files/v0/b/gitbook-x-prod.appspot.com/o/spaces%2F-Lt-sE9MYKe9pZOcHwg5%2Fuploads%2FSujw6T3FzAgyUNWufBc4%2FGroup%2014.png?alt=media&amp;token=ffd2b0da-64d9-4dc6-891b-3678c6807972" alt=""><figcaption></figcaption></figure>

{% embed url="<https://dl.dropboxusercontent.com/s/shwvbw6x94a7huz/v007.mp4>" %}

### **Pikes**

Let's look at the **"**&#x50;ike" and what it is made of and what kind of animations it has. The pike consists of 2 objects. It has a "Trap Base" and a "Trap Pike". The "Trap Pike" is inserted into the "Trap Base". Let's see the "Attack" animation.

<figure><img src="https://4240499350-files.gitbook.io/~/files/v0/b/gitbook-x-prod.appspot.com/o/spaces%2F-Lt-sE9MYKe9pZOcHwg5%2Fuploads%2F9Jo3YKwMm8wcFPaWMg8Q%2FGroup%2015.png?alt=media&amp;token=a81718bf-ea2c-4de5-a236-847234d2b25b" alt=""><figcaption></figcaption></figure>

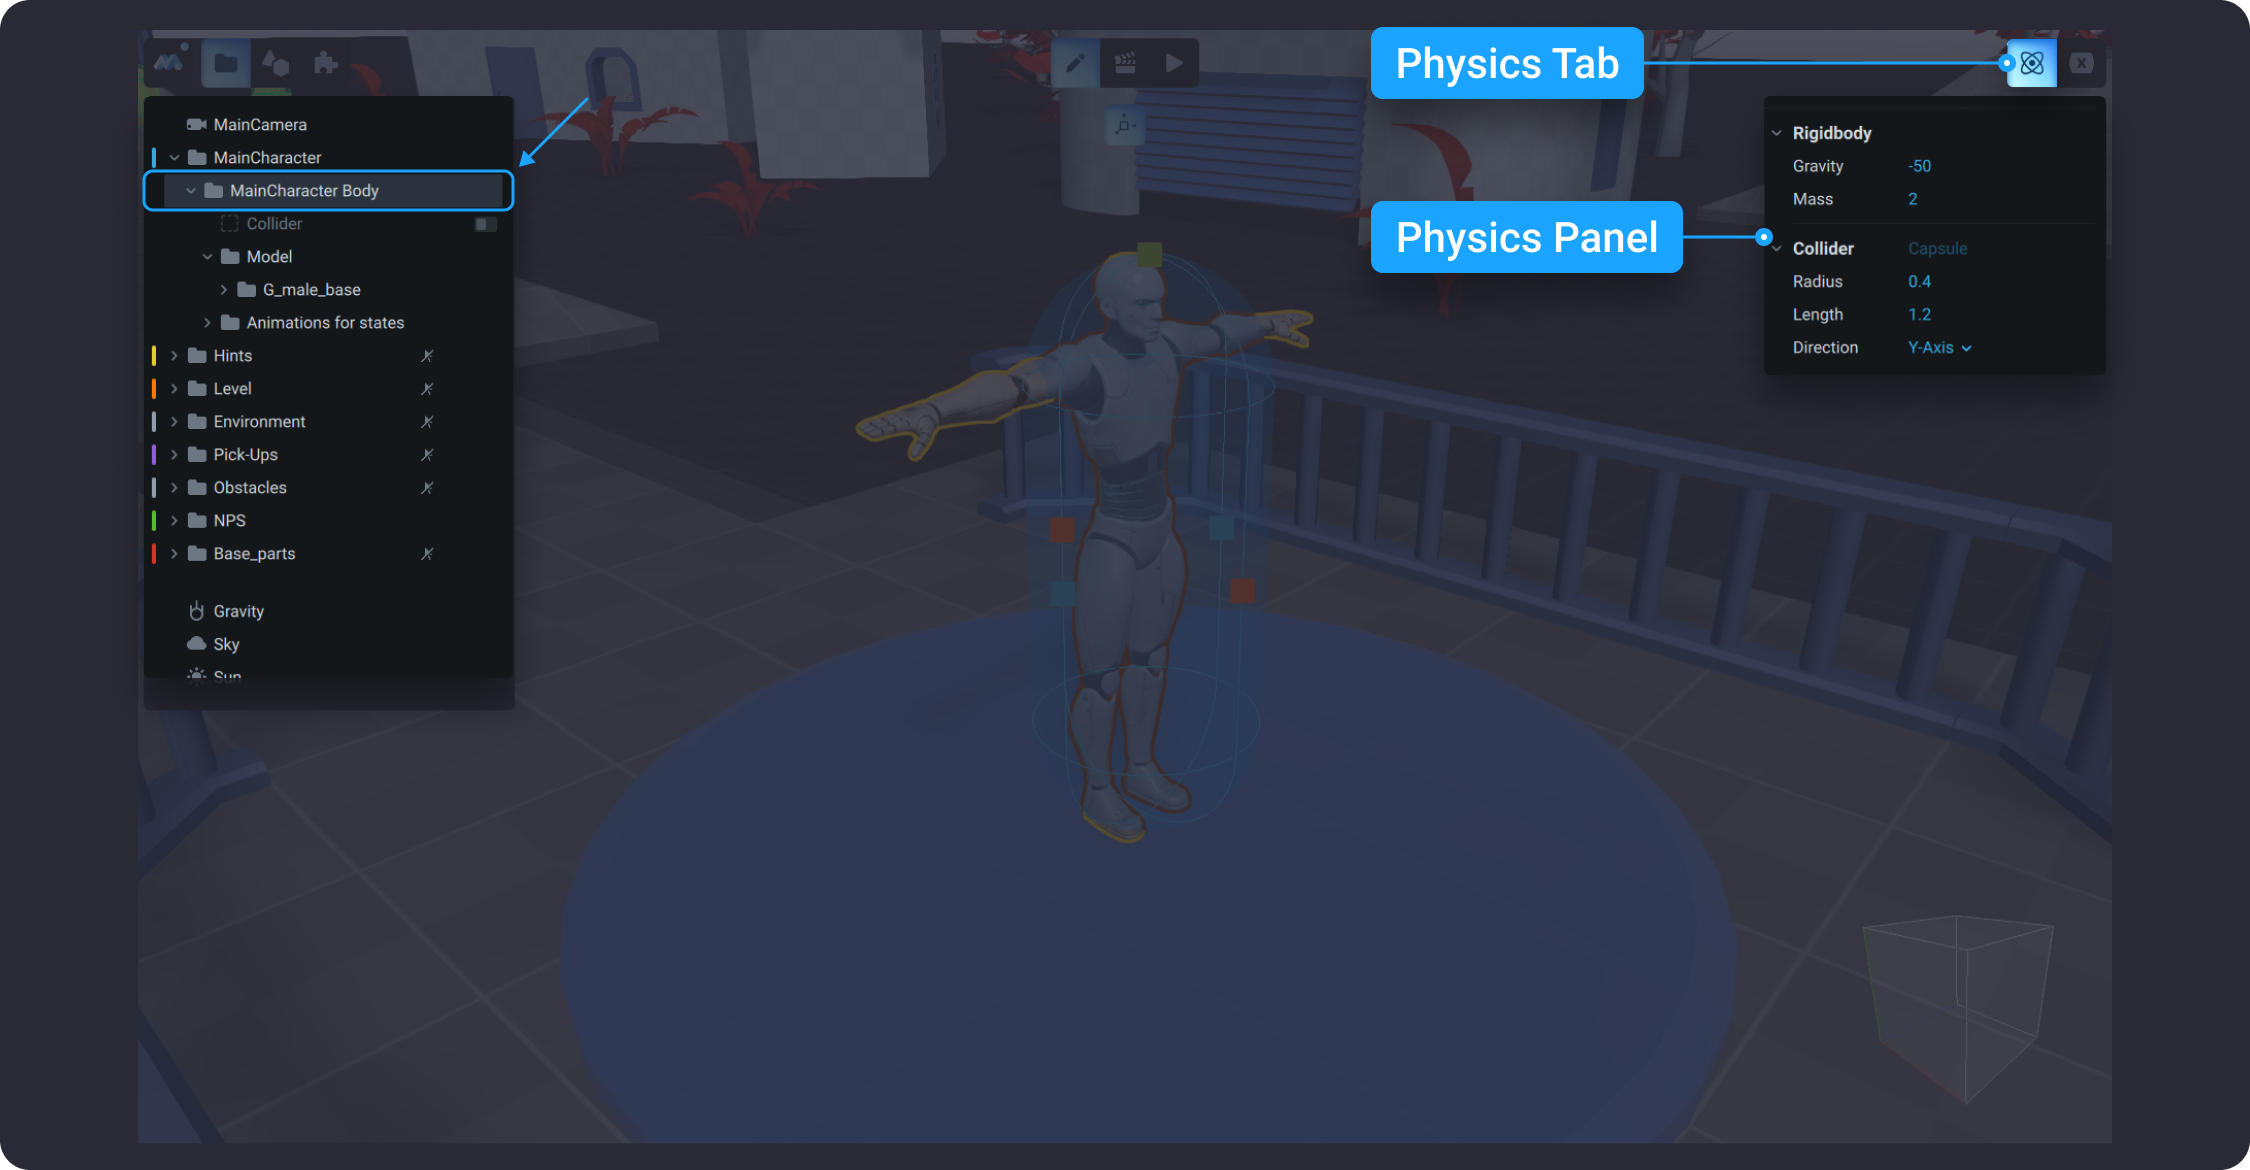
Let's see what the "Attack" animation includes. As you can see, in this animation, another animation is played. The "Attack" consists of the *inserted animation* "Hurt", to view it you need to go to the "Main Character" folder. Follow this path to find it: "Main Character" / "Main Character Body" / "Animations for states" / "Hurt". In this case, "Attack" plays the "Hurt" animation.

<figure><img src="https://4240499350-files.gitbook.io/~/files/v0/b/gitbook-x-prod.appspot.com/o/spaces%2F-Lt-sE9MYKe9pZOcHwg5%2Fuploads%2FvVXskkUQGBS1PKk09PLC%2FGroup%2016.png?alt=media&amp;token=e3e3629a-aa6f-49c3-96c1-989f231e437a" alt=""><figcaption></figcaption></figure>

### **Key**

Let's look at the animation that was created for the **"**&#x4B;ey". Find the key in scene and click "Follow" animation in the **Scene Tree**. "Follow" animation uses system formulas and launches what should happen to the key when it is picked up by the "Main Character". The key will start moving with the "Main Character" above his head in the scene. To know more about formulas, which you can use in the keyframes to set up custom behaviours, go [here](/learn/formulas).

If you hover over keyframes, you can see the system formulas that were used to create the animation "Follow".

<figure><img src="https://4240499350-files.gitbook.io/~/files/v0/b/gitbook-x-prod.appspot.com/o/spaces%2F-Lt-sE9MYKe9pZOcHwg5%2Fuploads%2F4FAf6TUZx8Ak87hBIkqF%2FGroup%2017.png?alt=media&amp;token=24edd437-daff-4ca8-af4d-fb095e167333" alt=""><figcaption></figcaption></figure>

### **Quest Completed**

Now, we suggest you take a look at the **"**&#x51;uest Completed" animation. Here, "Quest Completed" is a cut-scene animation where the "Main Character" saves another character. Go through the animation panel, and you will see what you can do in MANU. You can create large complex animations using different types of animation tracks.

{% embed url="<https://dl.dropboxusercontent.com/s/l7wwyb5066r5my5/v008.mp4>" %}

## **Import and create animation for custom model**

Now let’s create the animation for a new object.&#x20;

{% file src="/files/-MY\_iRx-UE9TeadepPLV" %}
coin\_with\_star\_icon
{% endfile %}

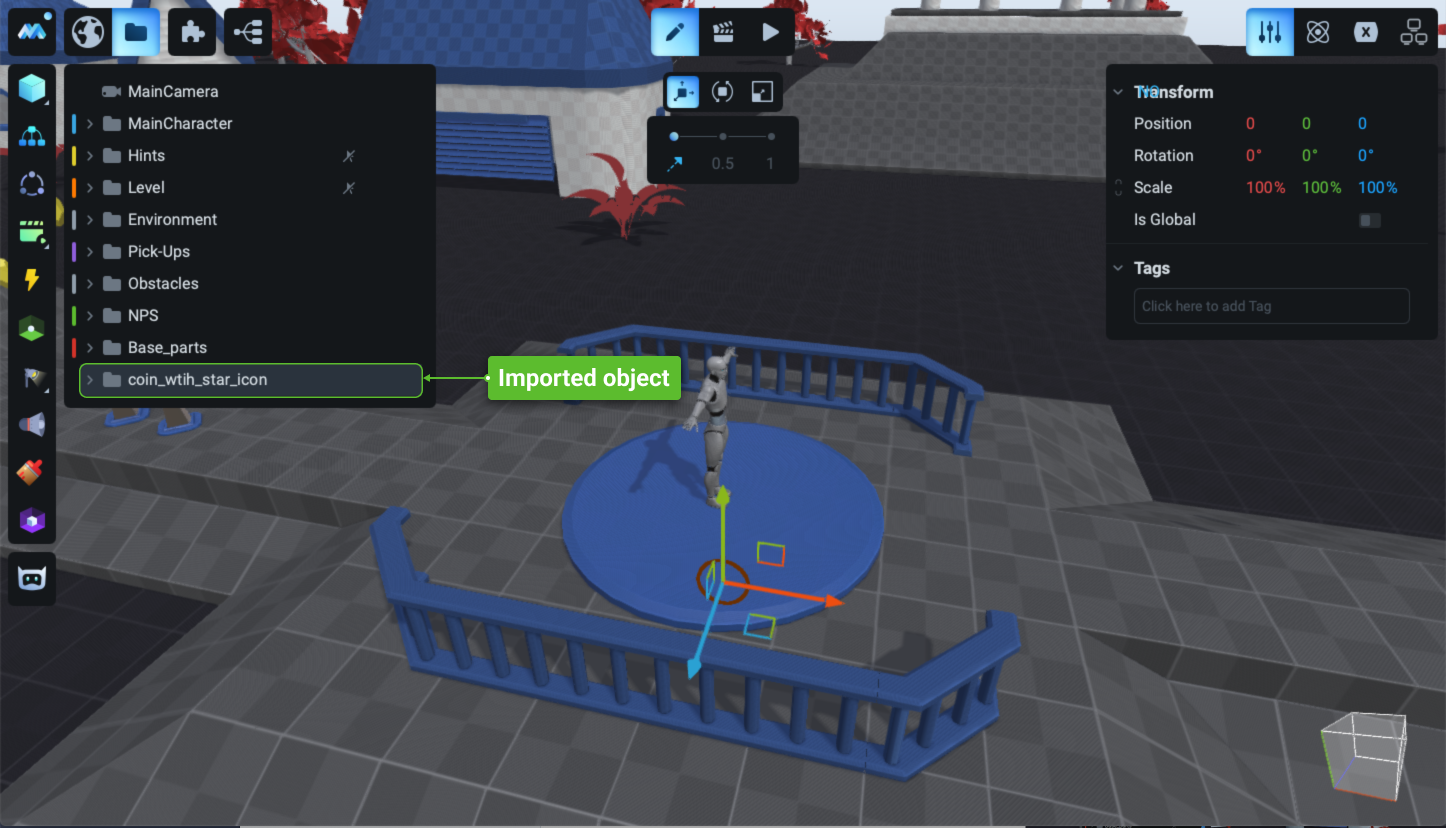
In **Edit Mode**, deselect all objects. Hit the `Main Menu` button and import the "coin\_with\_star\_icon.obj" from your computer . To know more about how to do it, go here [How to Import the Object](/learn/manual/importing-3d-objects).

The imported object will appear right in the center of the Scene in position 0,0,0. Click on the folder "coin\_with\_star\_icon" in the *Scene Tree* and use *Move Gizmo* to transfer it wherever you need it in the scene.

<figure><img src="https://4240499350-files.gitbook.io/~/files/v0/b/gitbook-x-prod.appspot.com/o/spaces%2F-Lt-sE9MYKe9pZOcHwg5%2Fuploads%2FP6chhEiPCvXzvoREmZvd%2FGroup%2018.png?alt=media&amp;token=e3595472-cce2-42a4-b61f-ac4fcd4587f0" alt=""><figcaption></figcaption></figure>

<figure><img src="https://4240499350-files.gitbook.io/~/files/v0/b/gitbook-x-prod.appspot.com/o/spaces%2F-Lt-sE9MYKe9pZOcHwg5%2Fuploads%2FuHDZ0DIiam8pISrkoafK%2FGroup%2019.png?alt=media&amp;token=bbb4c8fe-e28b-4e7c-91e8-c8b56ac0d48d" alt=""><figcaption></figcaption></figure>

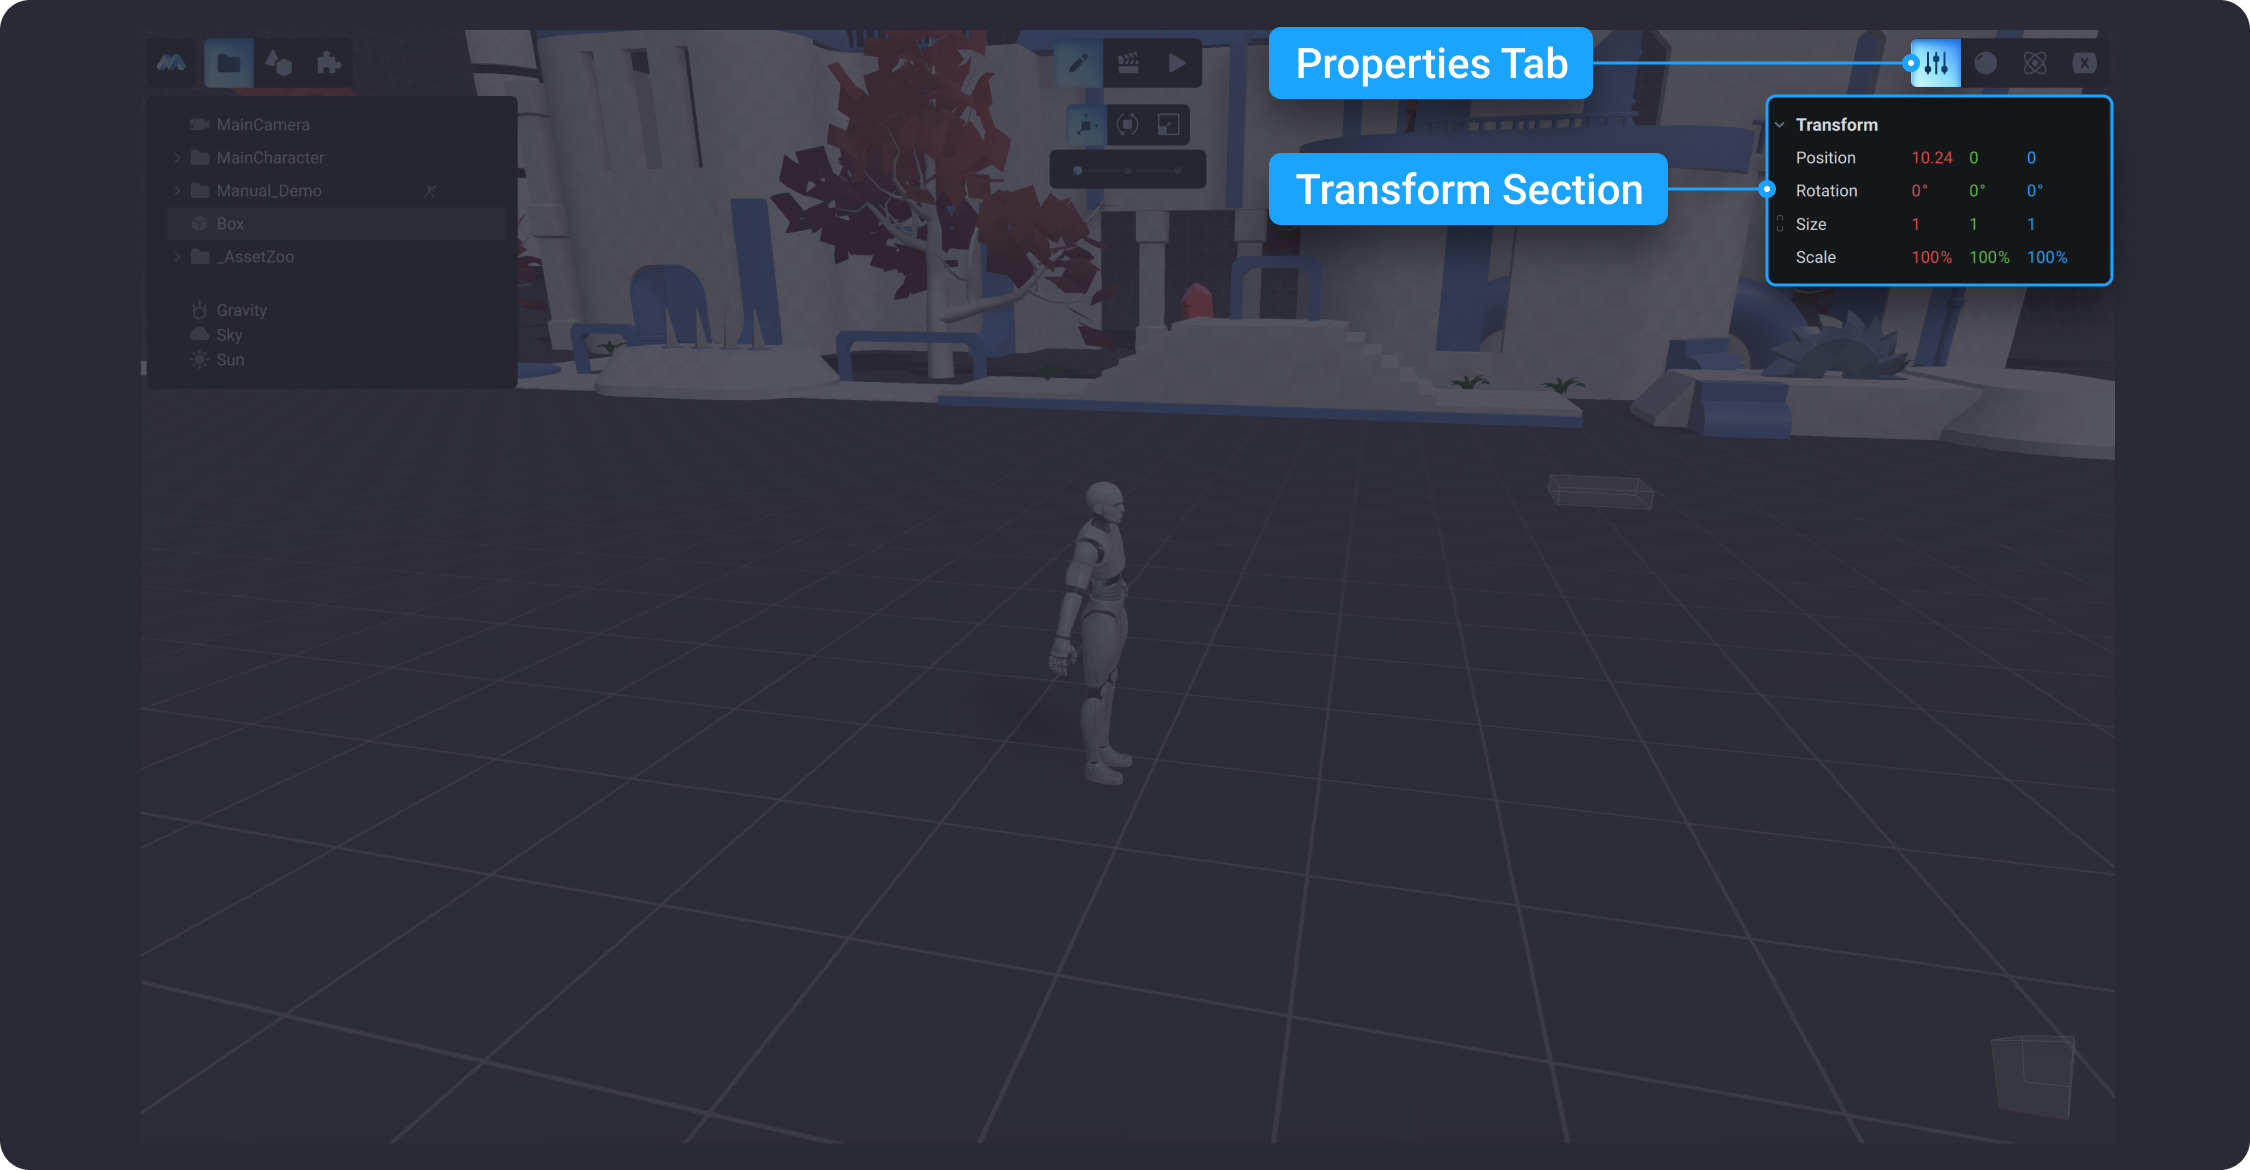
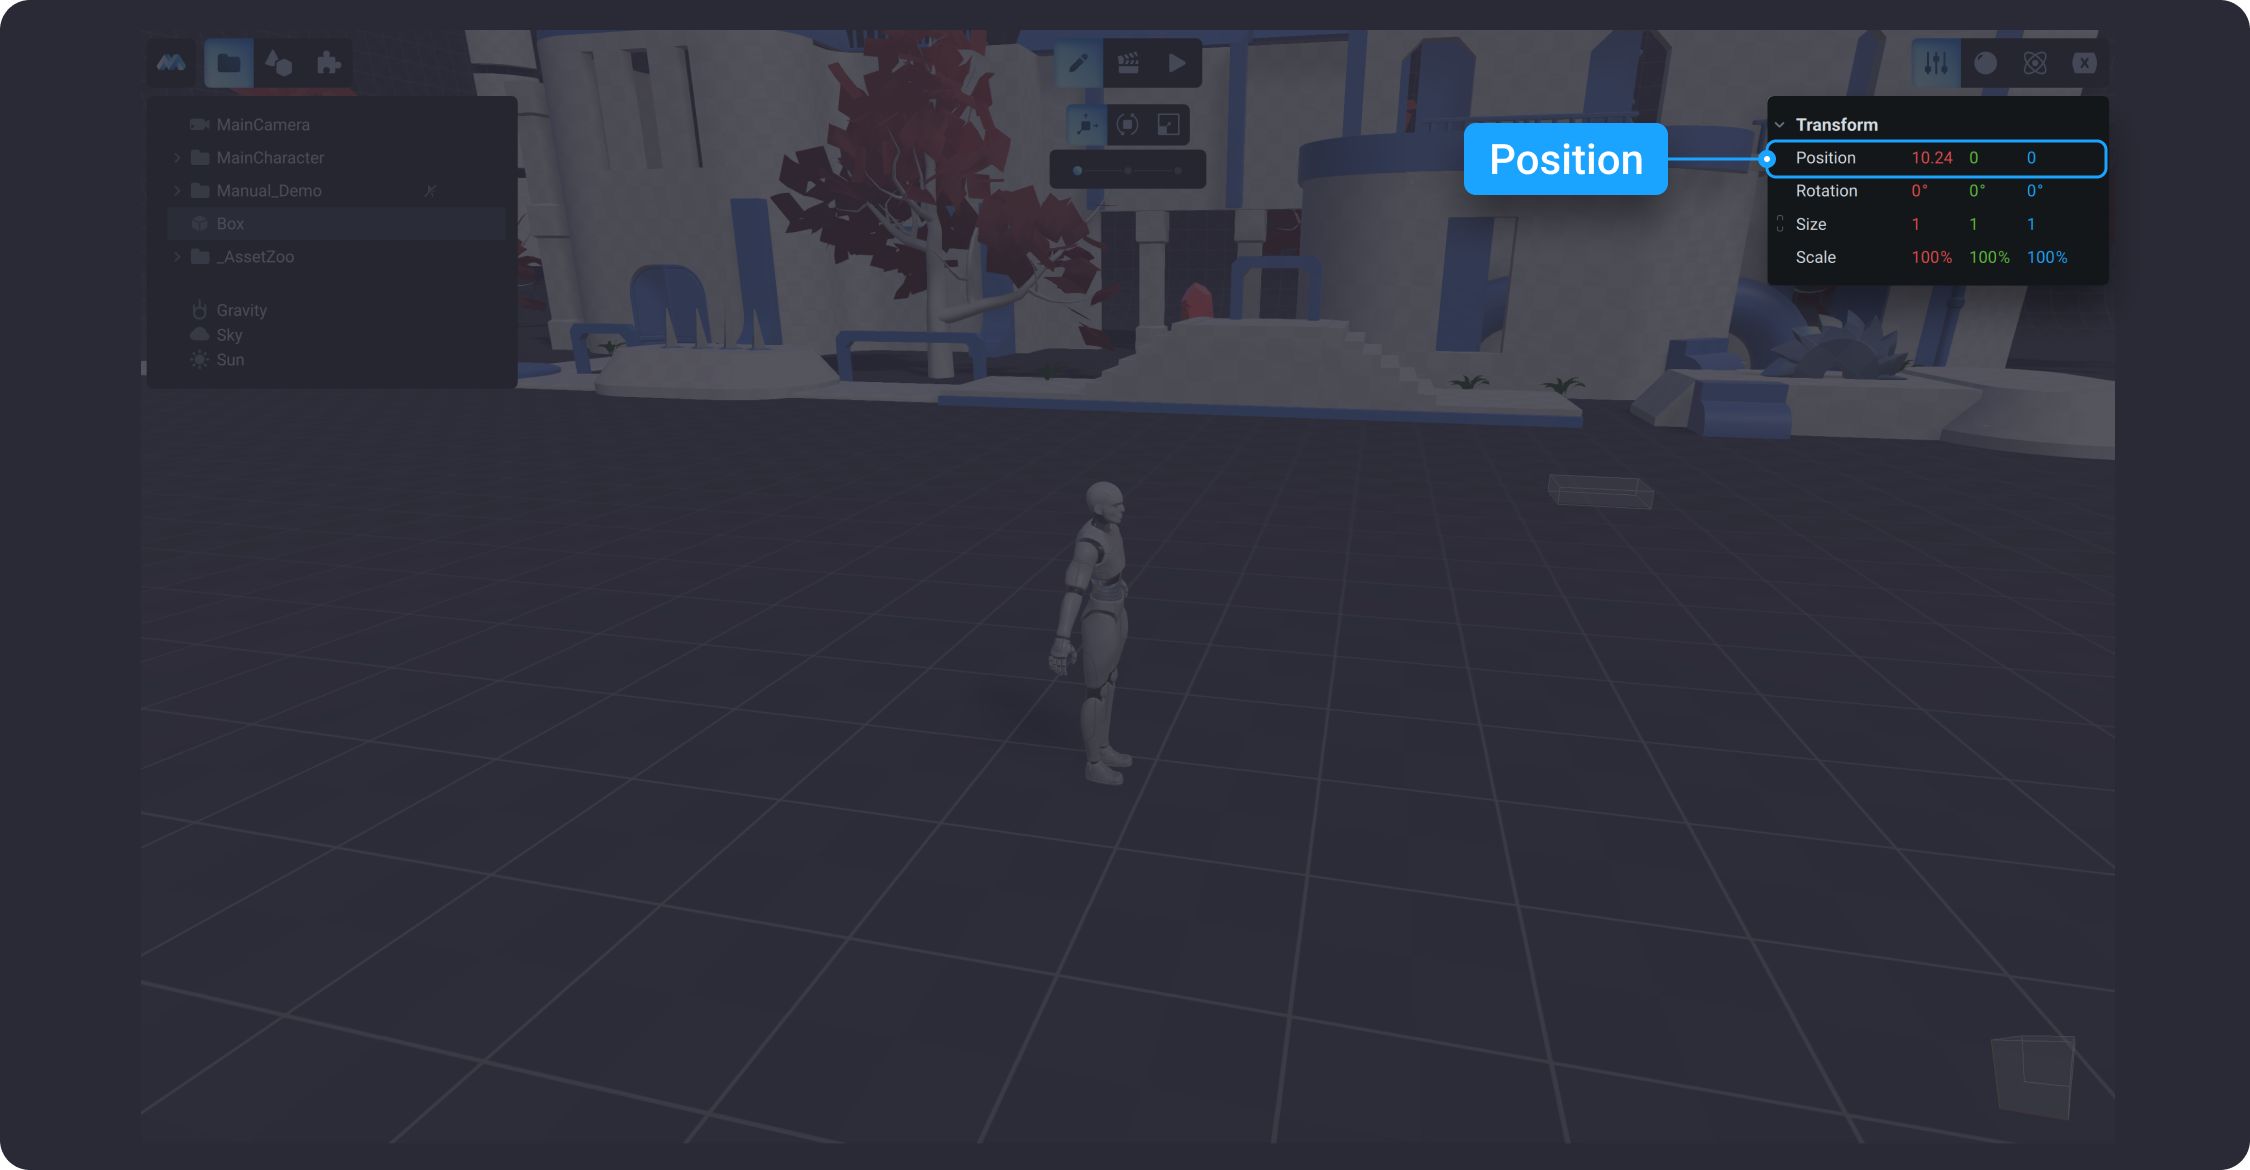
Let's put it in front of the "Main Character". Look at the *Inspector* , and you will see that position values for the "coin\_with\_star\_icon" have changed. Then select "coin" and let’s see and remember **Position Y** for the "coin".

<figure><img src="https://4240499350-files.gitbook.io/~/files/v0/b/gitbook-x-prod.appspot.com/o/spaces%2F-Lt-sE9MYKe9pZOcHwg5%2Fuploads%2FgZJnAuH1sUijubRk0uCM%2FGroup%2020.png?alt=media&amp;token=826be542-8e3e-41e0-b09e-70c8de66d5a2" alt=""><figcaption></figcaption></figure>

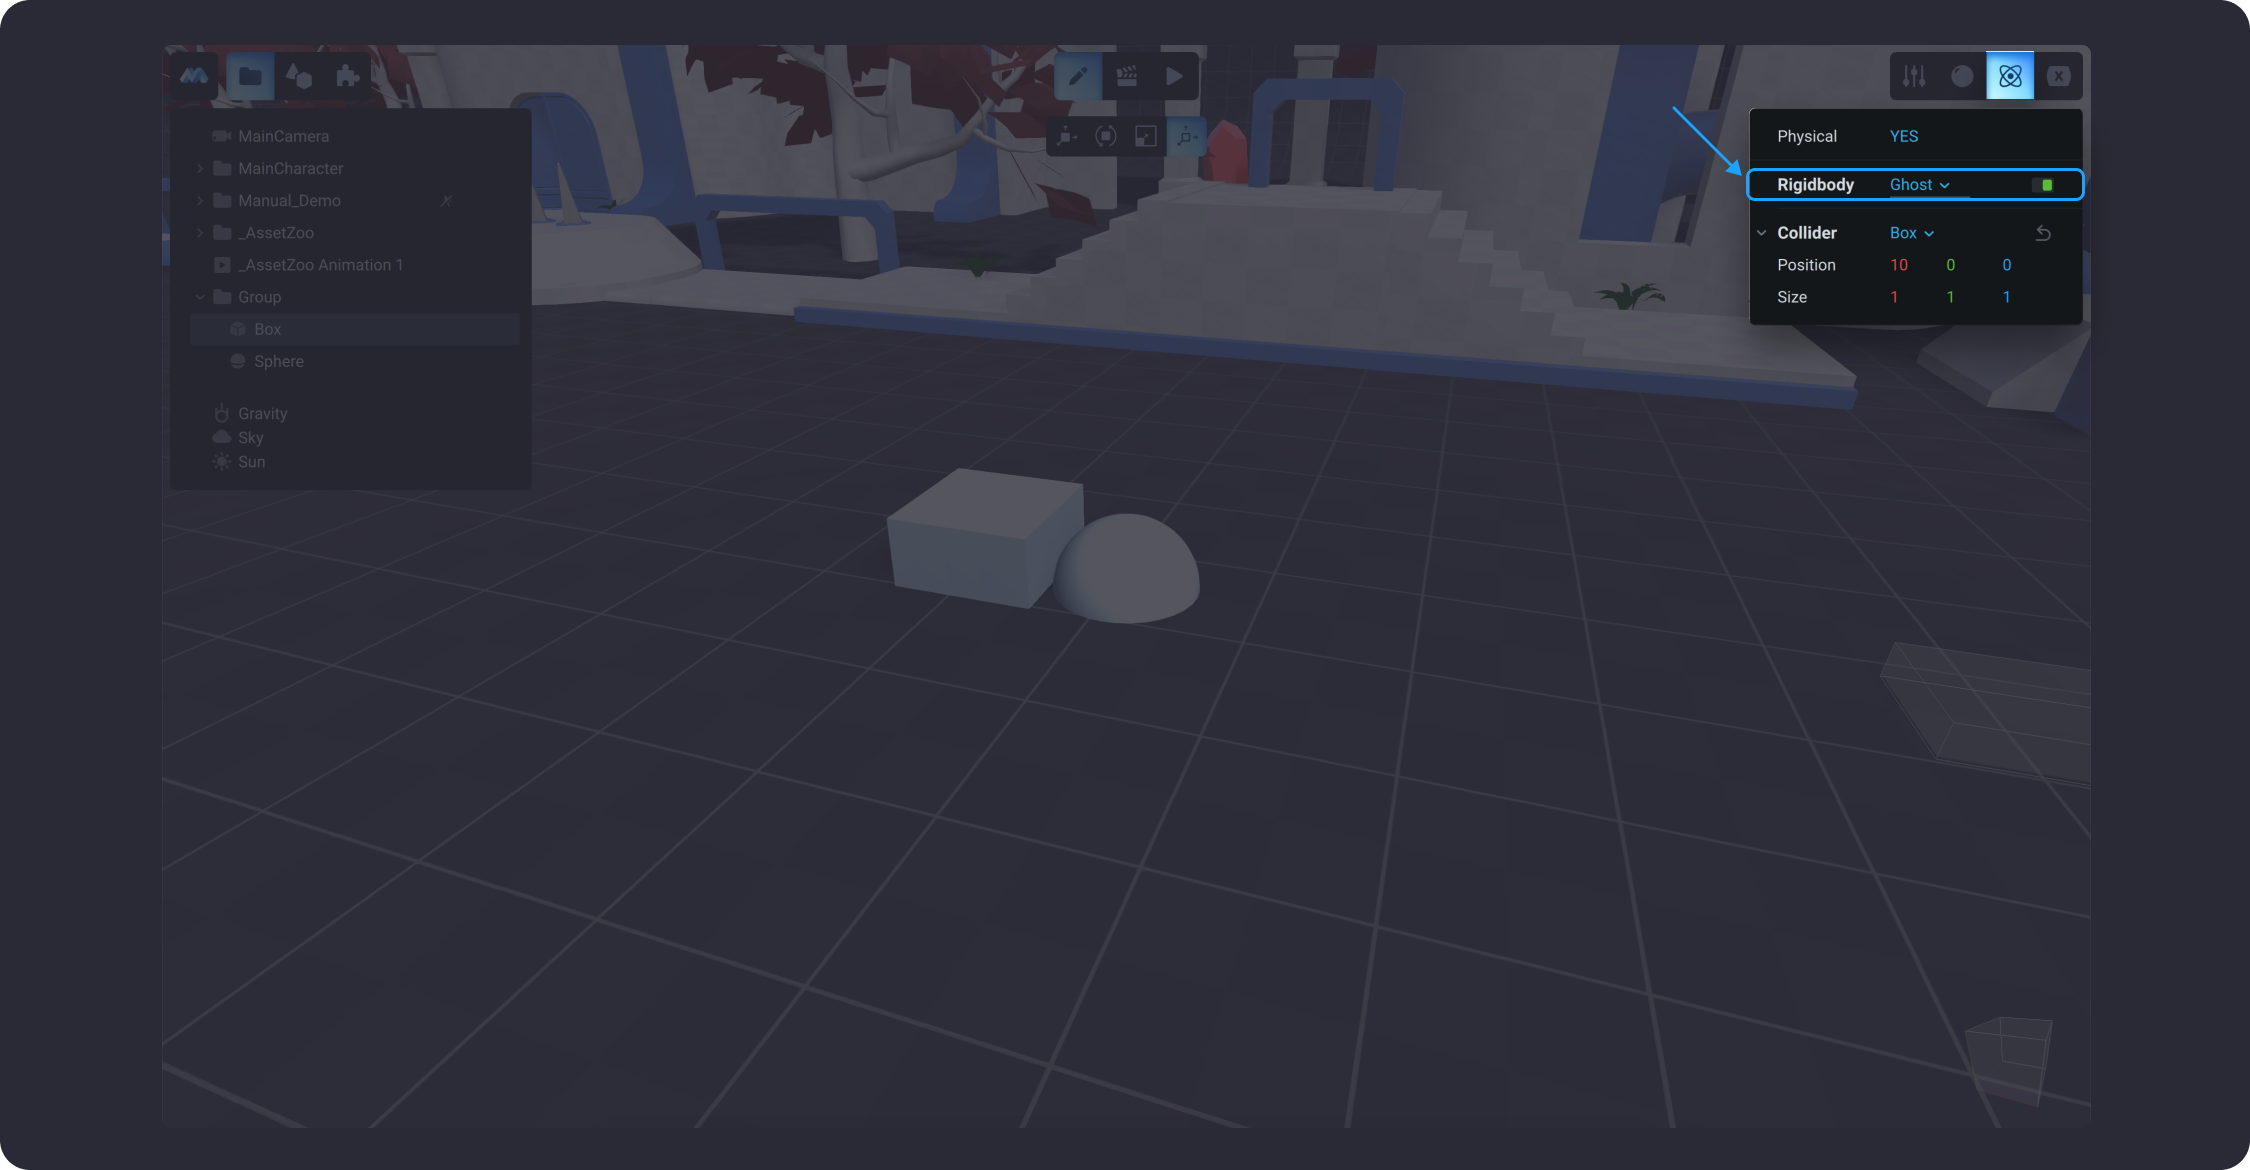
Now hit the **Physics** tab on the **Inspector** to enable physics for the new object and choose **Ghost** for its rigid body. Note, only **Kinematic** and **Ghost** rigid bodies can be animated. For the ghost objects, you can choose a suitable collider and its size. To know more about physics, ghost objects and collider types, go to [Physics](/learn/manual/physics).

<figure><img src="https://4240499350-files.gitbook.io/~/files/v0/b/gitbook-x-prod.appspot.com/o/spaces%2F-Lt-sE9MYKe9pZOcHwg5%2Fuploads%2FmdpWEg4basYQ9OGz9YcR%2FGroup%2022.png?alt=media&amp;token=7cfae212-4a12-433b-9407-81e10734a613" alt=""><figcaption></figcaption></figure>

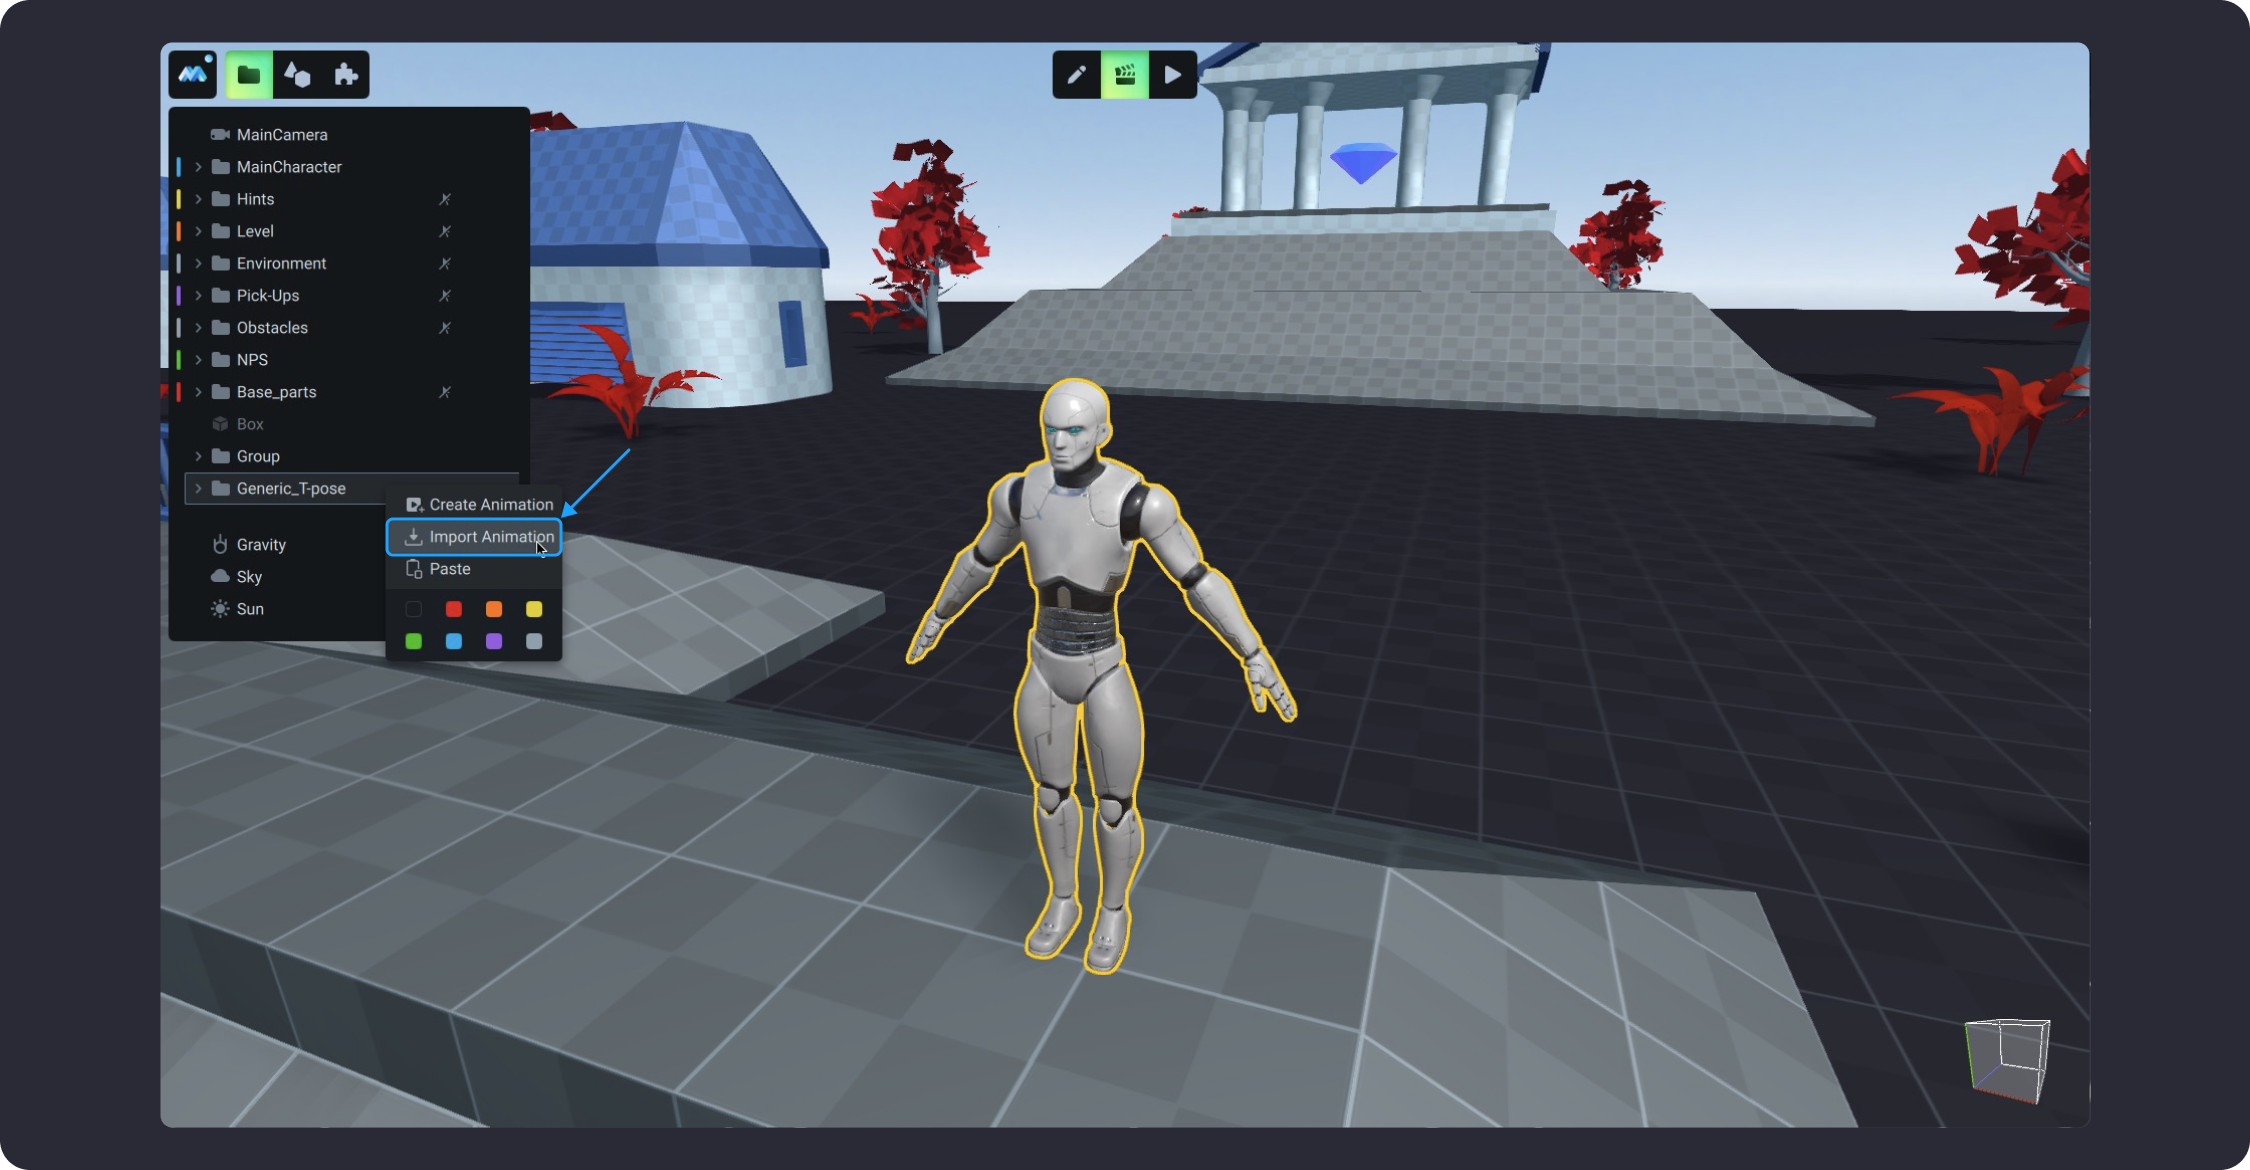
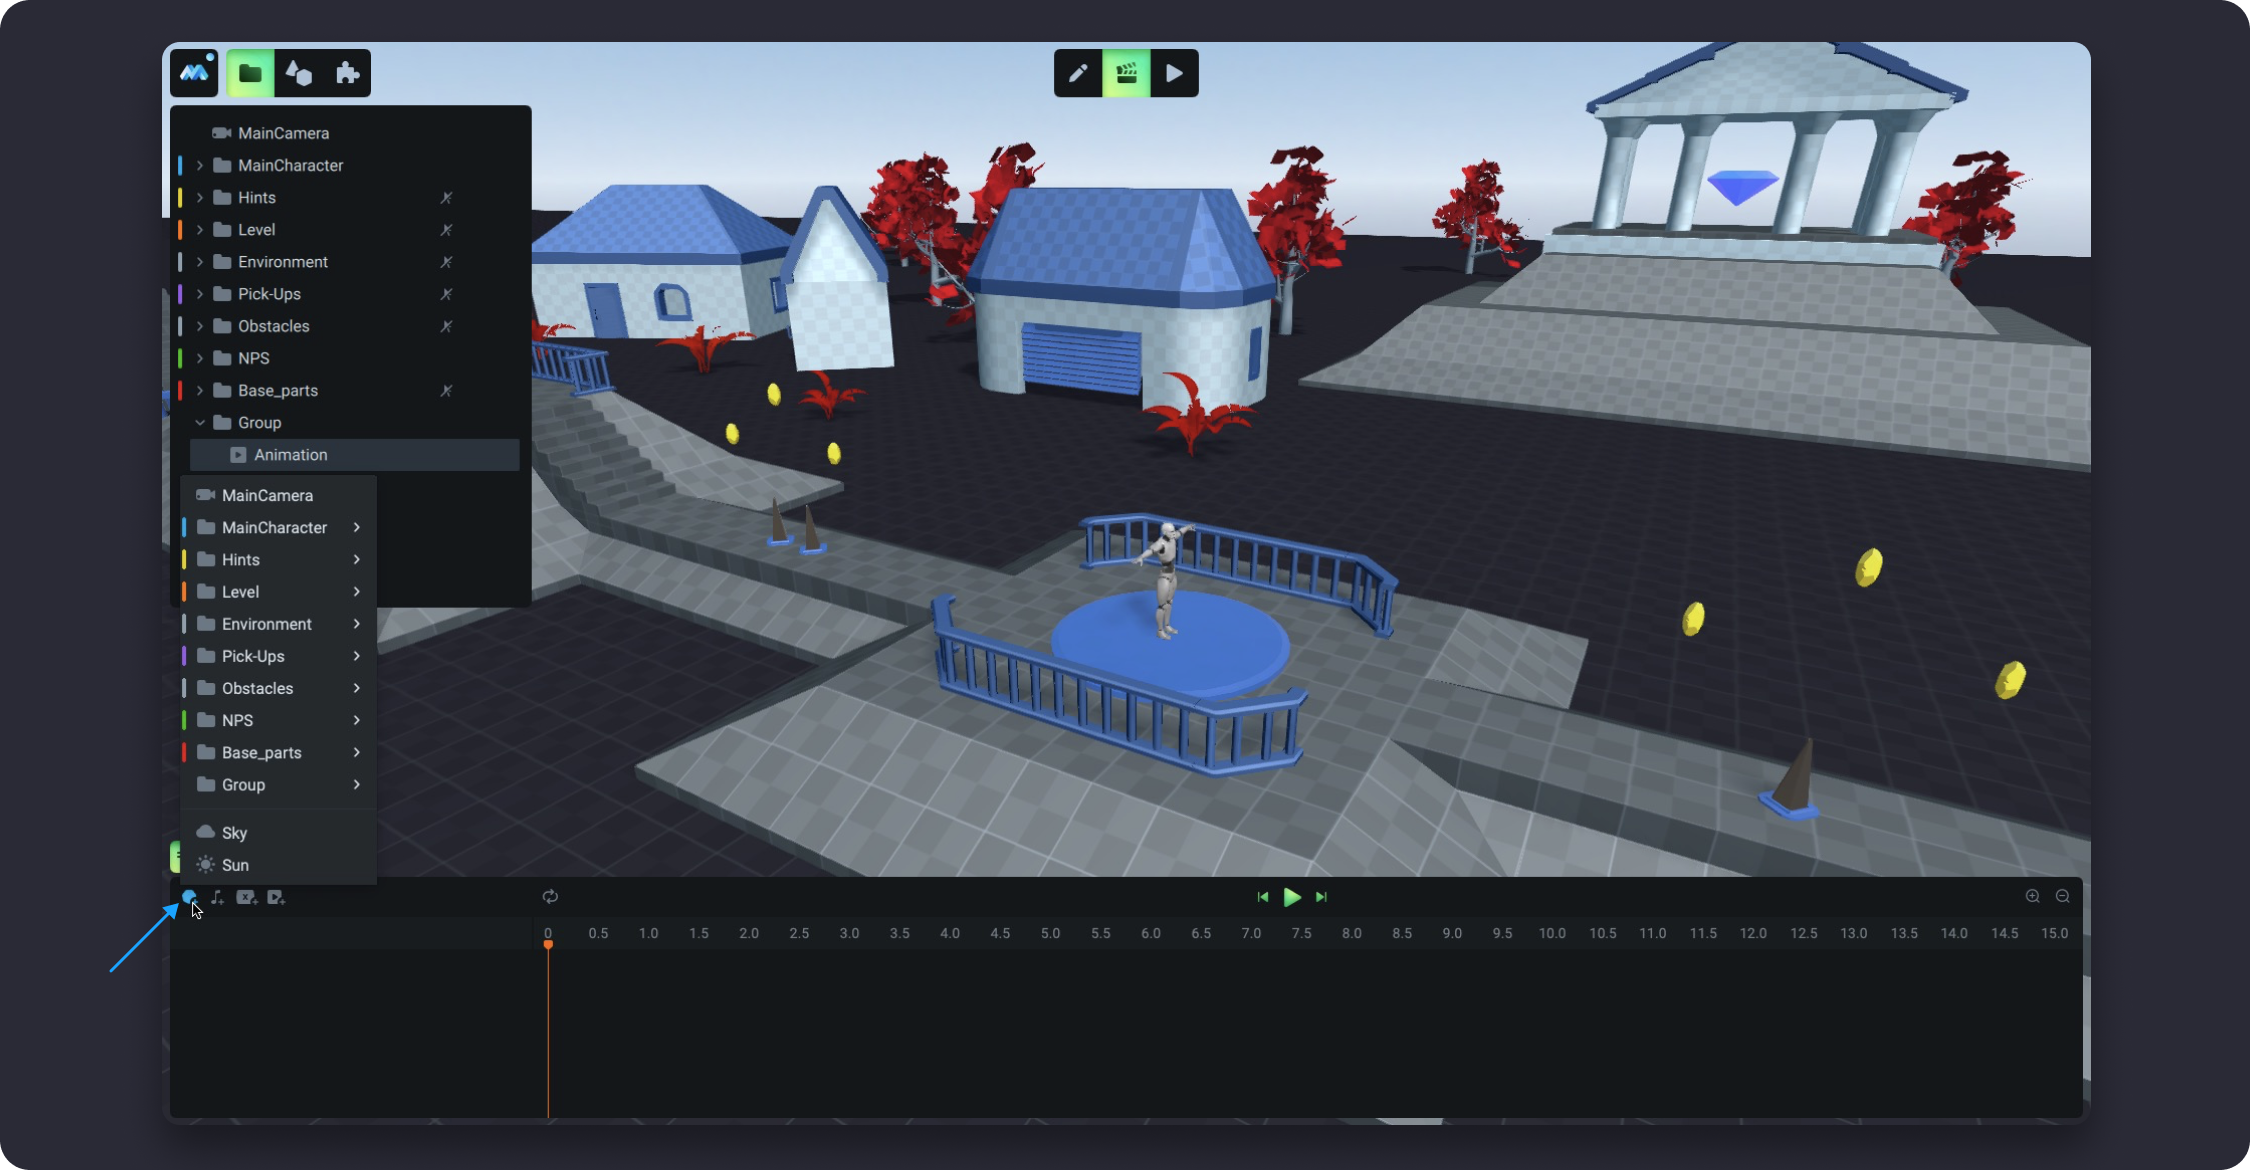
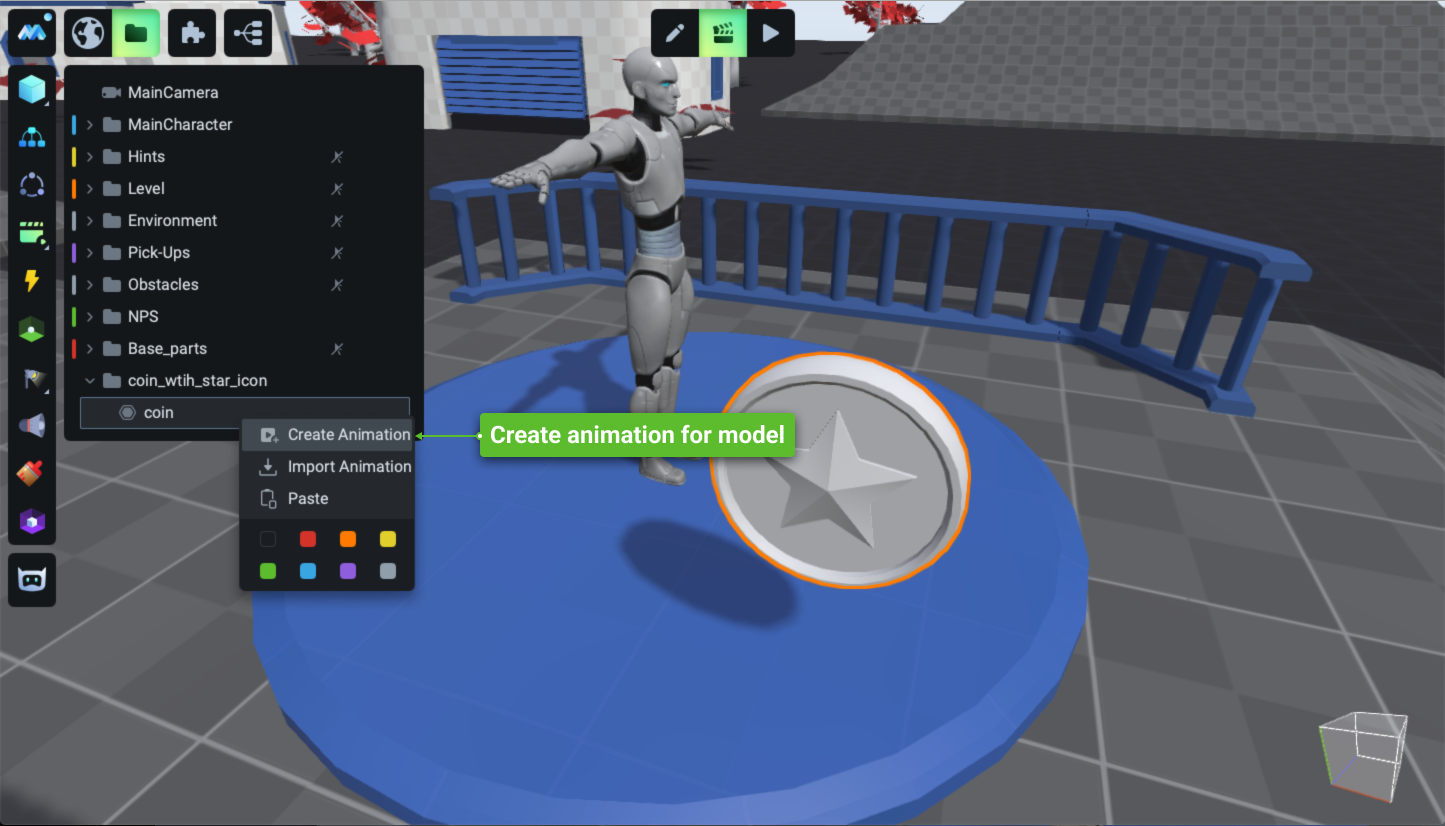
Switch to **Animation Mode***.* Select "coin\_with\_star\_icon" in the **Screen Tree** and by right-clicking choose `Create Animation`. A new  animation will be created within the folder and the Timeline panel will appear at the bottom of the screen.&#x20;

<figure><img src="https://4240499350-files.gitbook.io/~/files/v0/b/gitbook-x-prod.appspot.com/o/spaces%2F-Lt-sE9MYKe9pZOcHwg5%2Fuploads%2FPMPmfUbAmkdUGUQ6ylBD%2FGroup%2023.png?alt=media&amp;token=ea256358-bda8-4e0e-b378-3bca04acdac6" alt=""><figcaption></figcaption></figure>

We will animate "сoin"; therefore, hover over the "coin" on the **Scene tree** and by right-clicking choose `Add to Timeline`.

<figure><img src="https://4240499350-files.gitbook.io/~/files/v0/b/gitbook-x-prod.appspot.com/o/spaces%2F-Lt-sE9MYKe9pZOcHwg5%2Fuploads%2Fo5PH9TVSECN967nuKqM9%2FGroup%2039.png?alt=media&amp;token=e7a62538-10ec-4c79-86eb-6d357582f59e" alt=""><figcaption></figcaption></figure>

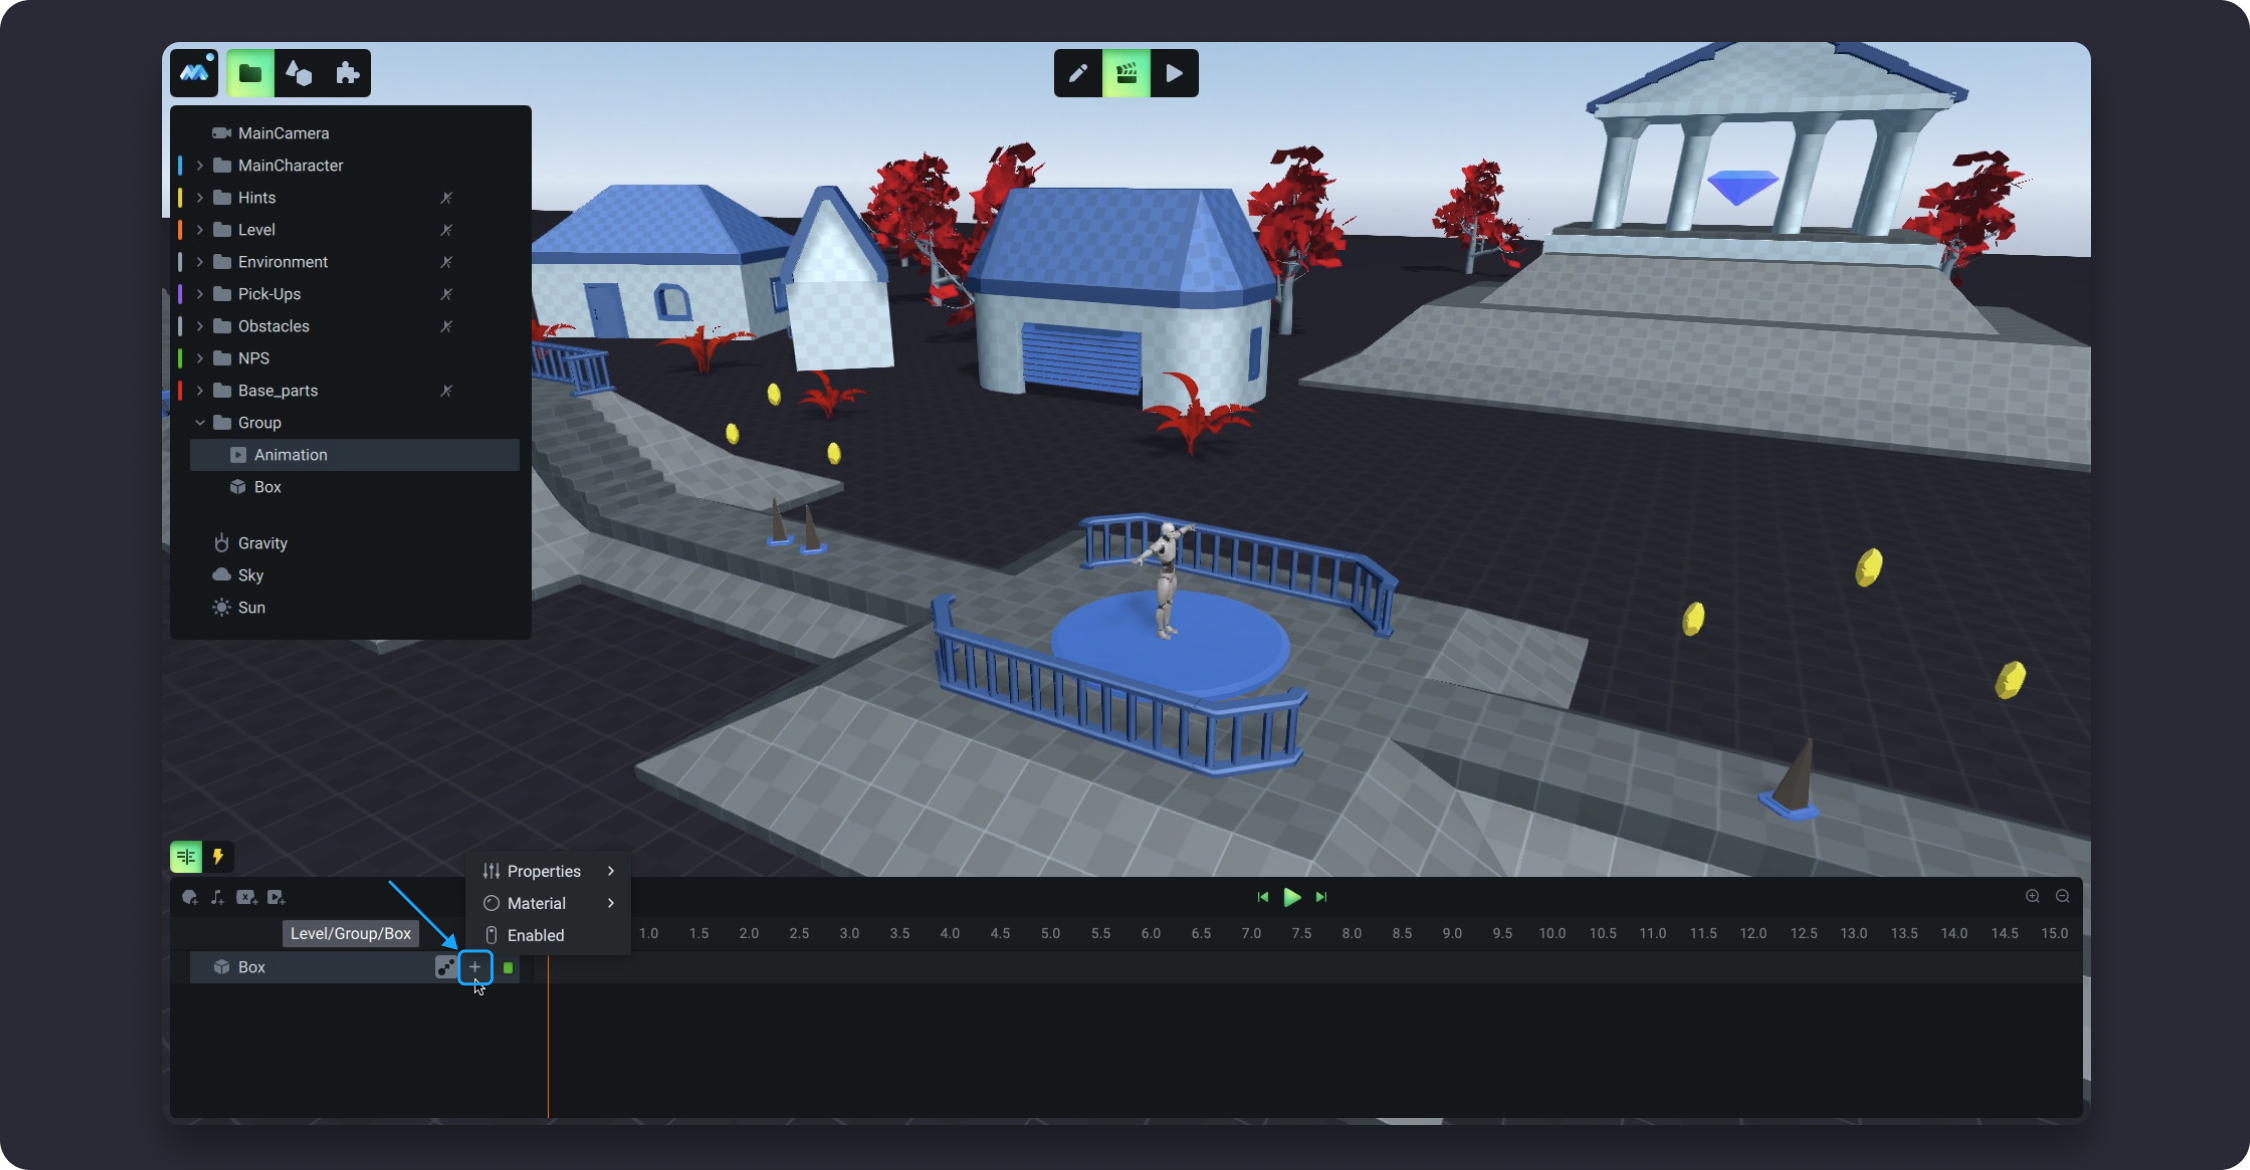
Let's make the "coin" move up and down. To do it, you need to add a track that will determine the moving of the "coin" along the Y-axis. If you hover over the coin track, a button `Add New Animated Track` will appear there.

<figure><img src="https://4240499350-files.gitbook.io/~/files/v0/b/gitbook-x-prod.appspot.com/o/spaces%2F-Lt-sE9MYKe9pZOcHwg5%2Fuploads%2F5igUGKo4vnSCMEo9xPJu%2FGroup%2038.png?alt=media&amp;token=24fee631-f235-45e8-8639-b21ddac2d0b3" alt=""><figcaption></figcaption></figure>

Then you need to select **Position Y** in **Properties**. Now, we can see its place on the Y-axis. The first keyframe shows the current value from the scene. If you hover over this point the word origin will appear. **Origin** value is equal to the current value from the scene. You can use the system formulas to create the animation. To make it clear, let’s set the absolute value for the keyframes on the track. Switch to the **Edit Mode** and click on the "coin"; then look at the **Inspector**  and what value is set for its **Position Y**. It is important to know since we will animate the coordinate values in which this coin is located (the values that we see in the **Inspector**). As you can see, the **Position Y** value is equal to `0`. Let’s use it for the first keyframe.&#x20;

<figure><img src="https://4240499350-files.gitbook.io/~/files/v0/b/gitbook-x-prod.appspot.com/o/spaces%2F-Lt-sE9MYKe9pZOcHwg5%2Fuploads%2FMyPWbTxbVFpgaLReT41z%2FGroup%2037.png?alt=media&amp;token=0eeed17f-772f-40ce-a8a4-ec7524070452" alt=""><figcaption></figcaption></figure>

So, switch to the **Animation Mode** again, find our animation in the **Scene Tree**, and instead of the word `origin` type `0`.

<figure><img src="https://4240499350-files.gitbook.io/~/files/v0/b/gitbook-x-prod.appspot.com/o/spaces%2F-Lt-sE9MYKe9pZOcHwg5%2Fuploads%2FgtPmaQrhUCyH31E9dDgp%2FGroup%2032.png?alt=media&amp;token=d3e4dcba-f533-45ec-a769-2ac15298d402" alt=""><figcaption></figcaption></figure>

<figure><img src="https://4240499350-files.gitbook.io/~/files/v0/b/gitbook-x-prod.appspot.com/o/spaces%2F-Lt-sE9MYKe9pZOcHwg5%2Fuploads%2FiKG0vole8sp8sF4UJJdn%2FGroup%2033.png?alt=media&amp;token=1fcde868-20a3-4328-a79e-48e72de19bae" alt=""><figcaption></figcaption></figure>

Hover over the animation track to select a time point at which you want to set another keyframe. Let's set the keyframe for 1 second. At the new time point set the value `1`, then, extend the track to 2 seconds and set `0` as the value of position Y. To loop the animation, the end of the animation must coincide with the beginning of the animation. To enable the loop for the animation, you need to click on the **Loop** button.&#x20;

{% embed url="<https://dl.dropboxusercontent.com/s/udi5dyxotw8kdln/v012.mp4>" %}

You can drag the keyframe to change the time value. The orange vertical bar is the **Timeline Playhead**; you can move it and see how the animation works at the exact time point. Hit the `Play` button on the timeline to see how the animation plays. To know more about the Timeline, go [here](/learn/manual/timeline).

Let’s make the "coin" rotate. Add another track that sets the rotation of the coin around its axis. Hover over the "coin" in the timeline and add Rotation Y properties. The first keyframe with origin value (current value from the scene) will appear.&#x20;

To set the second keyframe use the system formula: `origin + 360`. To know more about system formulas, go to [Formulas](/learn/formulas). Let's set the second keyframe for 2 seconds to make this track the same length as the first one.

{% embed url="<https://dl.dropboxusercontent.com/s/llwntoratpya3s0/v013.mp4>" %}

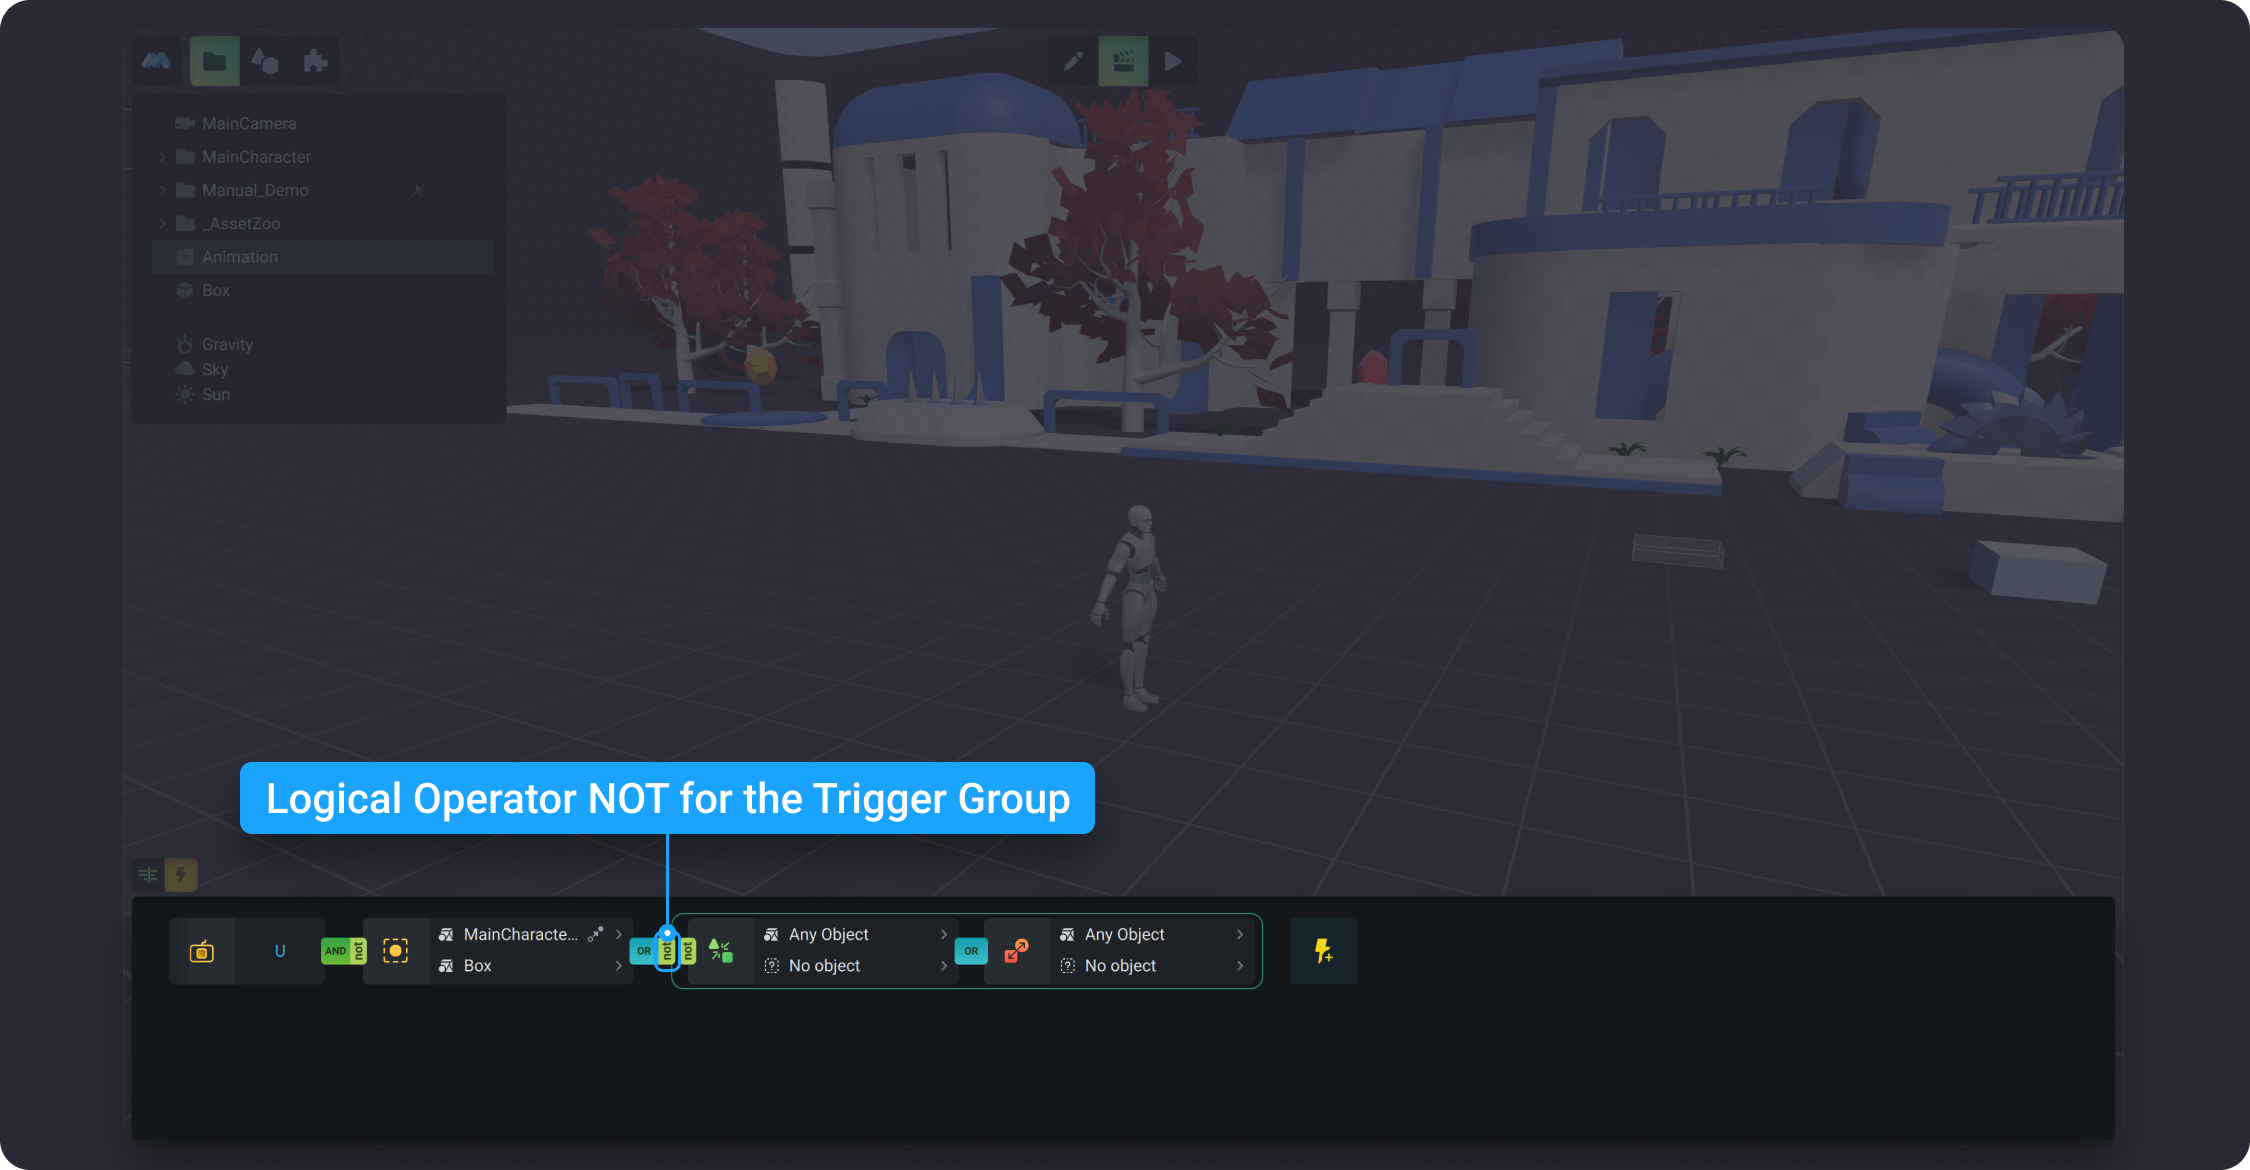
For an animation to be launched in the game, you have to set up a trigger for it. Triggers are set up in the **Triggers** tab, which is located next to the **Timeline** tab. Now let's try to set up a trigger that will trigger animation for the "coin". Hit the **Trigger** tab and you will see the **Triggers Panel**.

<figure><img src="https://4240499350-files.gitbook.io/~/files/v0/b/gitbook-x-prod.appspot.com/o/spaces%2F-Lt-sE9MYKe9pZOcHwg5%2Fuploads%2FwanS0w9PTfrgl8zug4hy%2FGroup%2034.png?alt=media&amp;token=648732b1-c207-4dbf-b50e-57d421dced83" alt=""><figcaption></figcaption></figure>

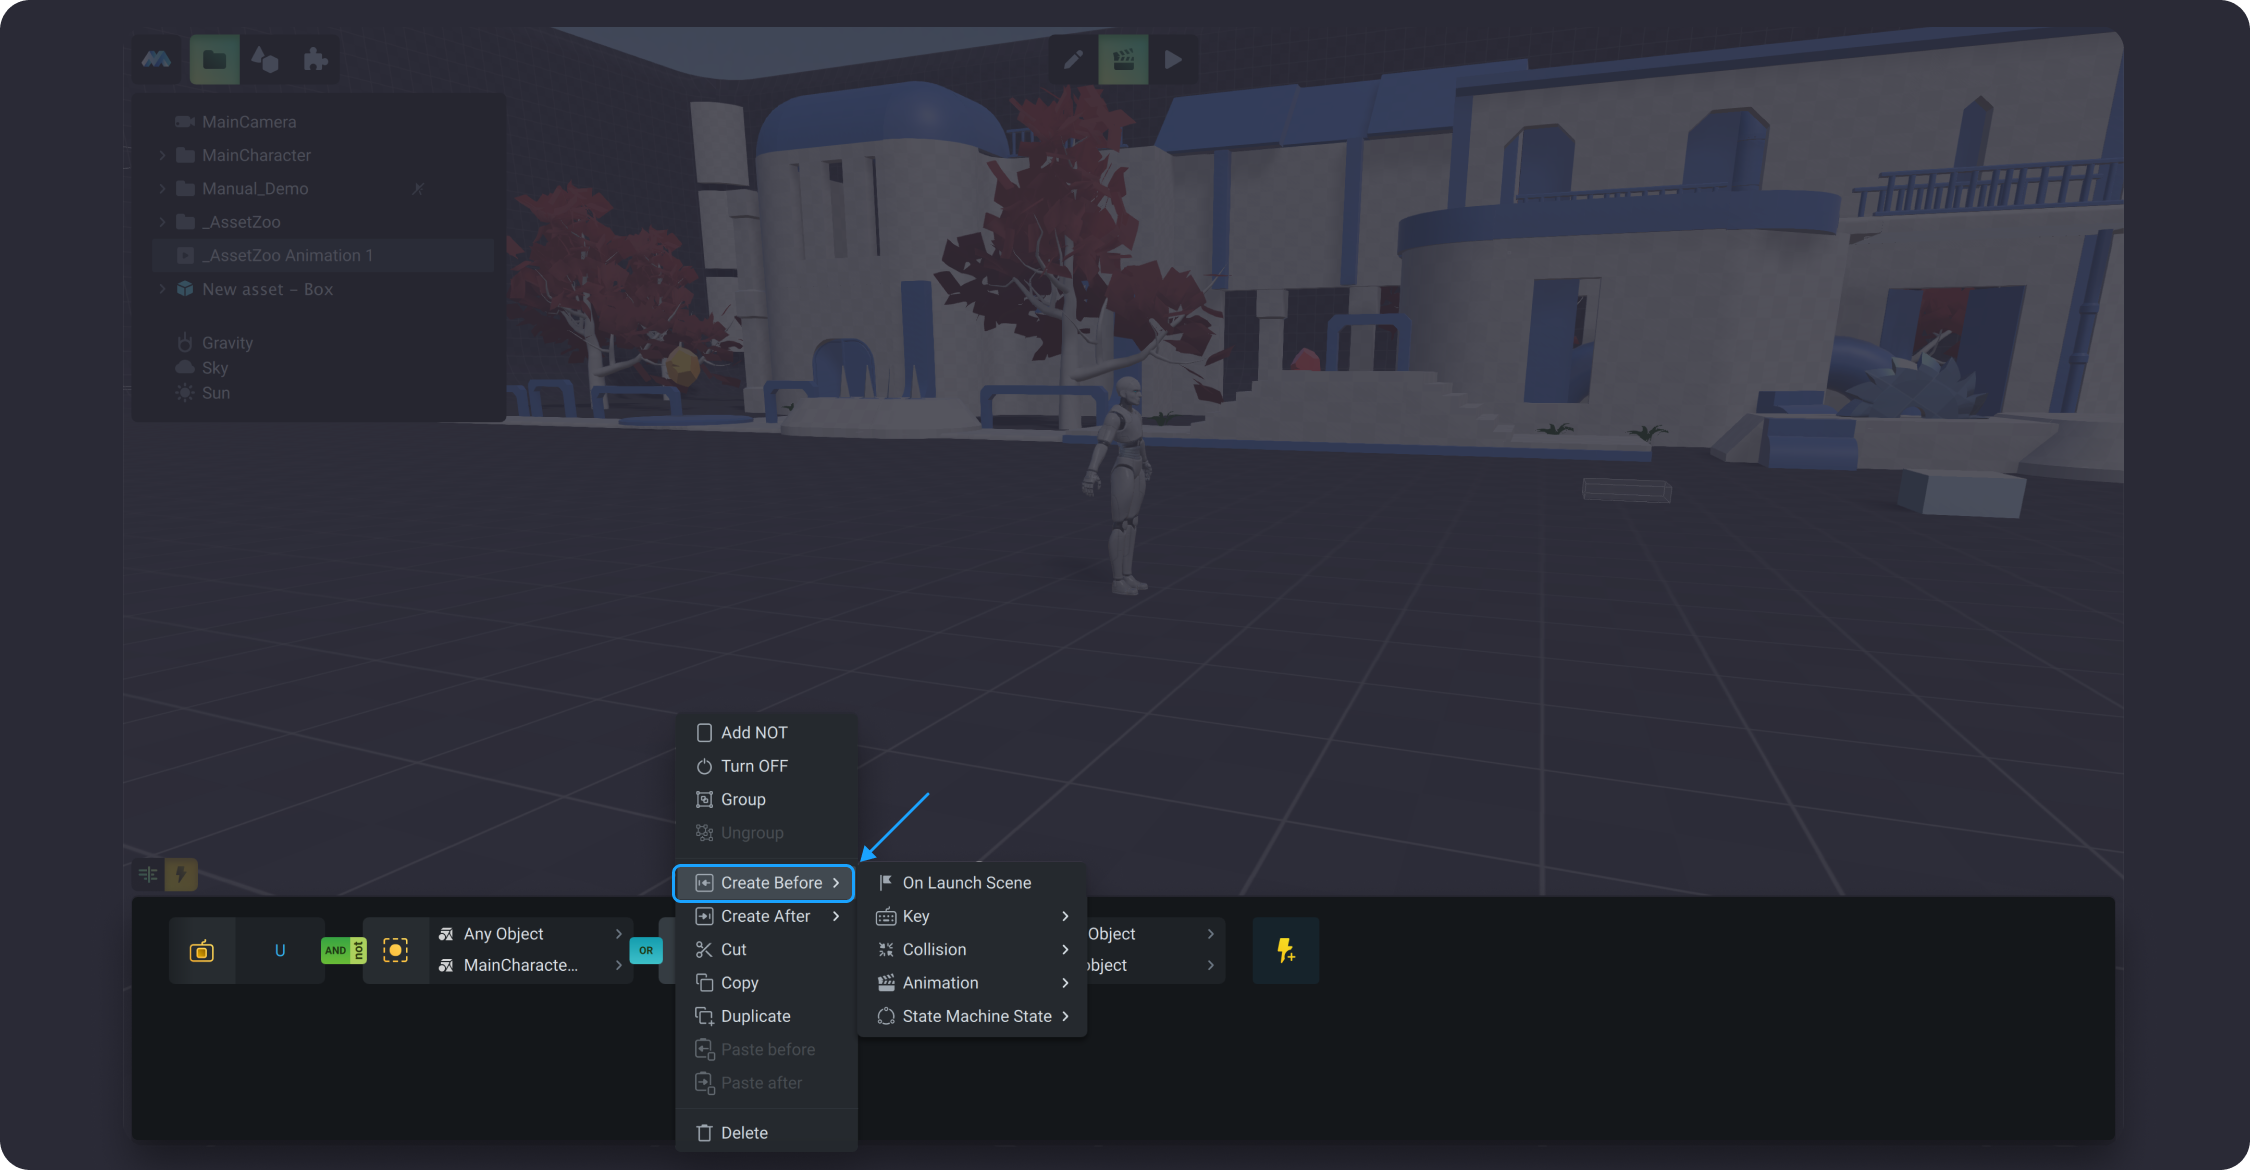
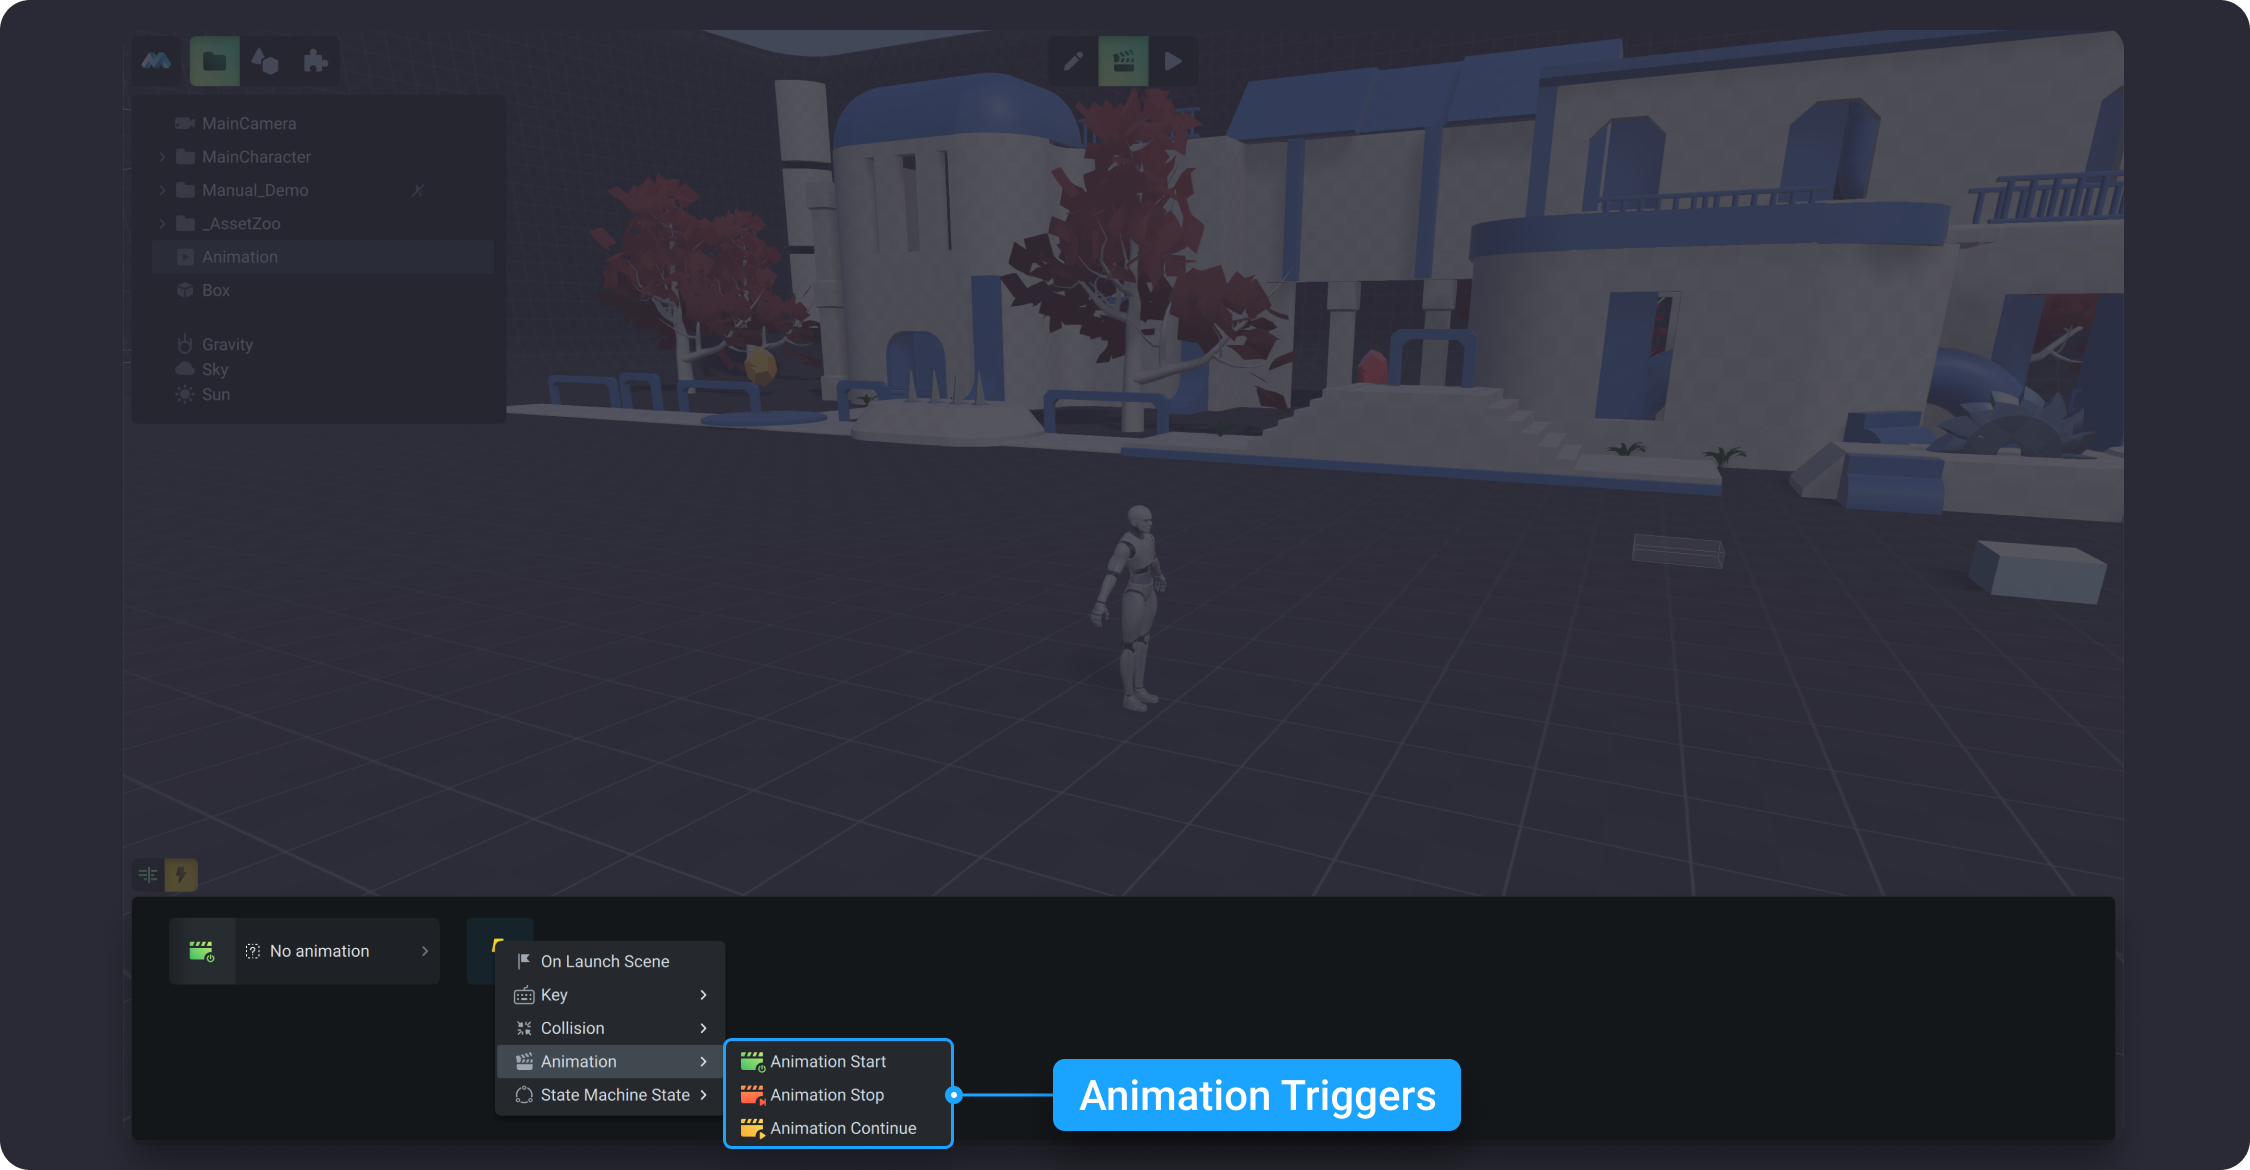
To add triggers, click on the icon `Add New Trigger` and you will see the types of triggers that you can use to start the animation. For more information about Triggers, please refer to the [Triggers](/learn/manual/triggers) section.&#x20;

<figure><img src="https://4240499350-files.gitbook.io/~/files/v0/b/gitbook-x-prod.appspot.com/o/spaces%2F-Lt-sE9MYKe9pZOcHwg5%2Fuploads%2FbnzqBZhdr5u5wTKT03nJ%2FGroup%2035.png?alt=media&amp;token=667870e4-f7bc-4721-9bfe-7d5bb8a0b6f1" alt=""><figcaption></figcaption></figure>

To start the animation, we have created, select the `On Launch Scene` trigger, which means that our animation will start as soon as the game starts. Let's now launch the game and see what we've got.

<figure><img src="https://4240499350-files.gitbook.io/~/files/v0/b/gitbook-x-prod.appspot.com/o/spaces%2F-Lt-sE9MYKe9pZOcHwg5%2Fuploads%2F9vasM0sZqmVSfuv8I9ck%2FGroup%2036.png?alt=media&amp;token=aa666180-339a-4f7c-bd5e-2a23ec556802" alt=""><figcaption></figcaption></figure>

{% embed url="<https://dl.dropboxusercontent.com/s/n7tvoyy1w0zja8m/v014.mp4>" %}

Now, try to experiment with the "coin" and create your animation for it.

After you finish with the animation set up you can turn the "coin\_with\_star\_icon" into a prefab. Prefabs allow you to create, configure, and store an object complete with all its components, property values, and child objects as a reusable asset. More information about prefabs [here](/learn/manual/assets). To create a prefab, in **Edit Mode**, go to the **Scene Tree**, hover over "coin\_with\_star\_icon", and select `Create Prefab` from the contextual menu by right-clicking.

<figure><img src="https://4240499350-files.gitbook.io/~/files/v0/b/gitbook-x-prod.appspot.com/o/spaces%2F-Lt-sE9MYKe9pZOcHwg5%2Fuploads%2F5rC1NgFEiVEFzDaCvMVp%2FGroup%2031.png?alt=media&amp;token=29741fc8-5ab0-4586-9657-51d78e9d4cef" alt=""><figcaption></figcaption></figure>

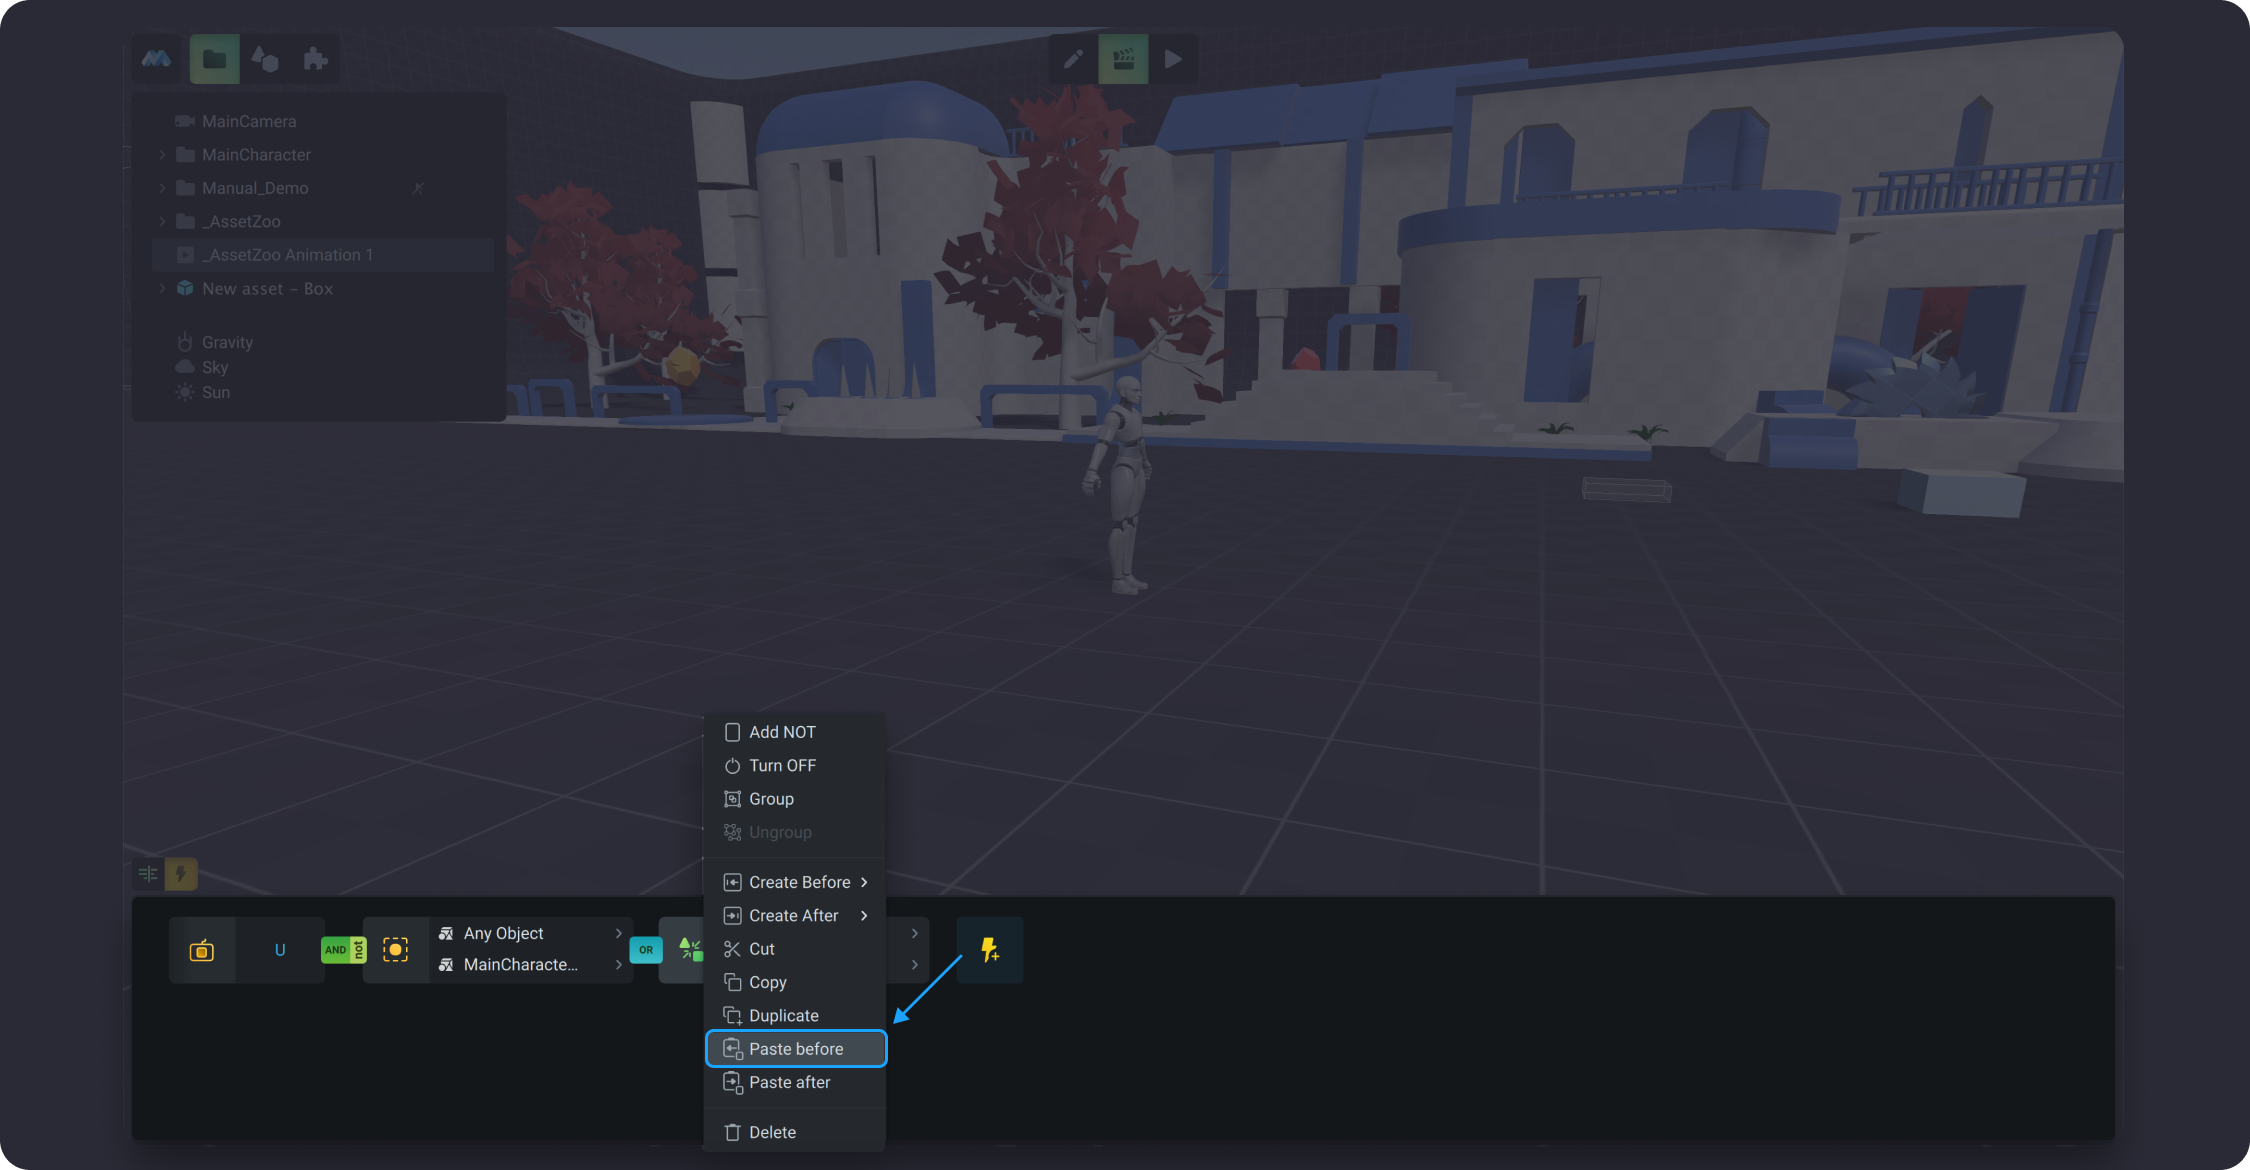
Now you can duplicate the prefab and move the prefab’s instances by **Move Gizmo**. To duplicate a prefab, select the prefab and choose the `Duplicate` option from the contextual menu.

<figure><img src="https://4240499350-files.gitbook.io/~/files/v0/b/gitbook-x-prod.appspot.com/o/spaces%2F-Lt-sE9MYKe9pZOcHwg5%2Fuploads%2F82siGlnVT8Uuaaw9NiOj%2FGroup%2030.png?alt=media&amp;token=0753593d-1bb2-4c13-baab-b935ab50971a" alt=""><figcaption></figcaption></figure>

As you can see the prefab and its copies have the same folder contents. Now try to change the color of one "coin". To do it select "coin" in any copy of prefab, go to the **Materials** tab. All changes completed to material and physics settings will be automatically applied to all other instances of a prefab group. However, you can freely place different prefabs instances around the game, because it does not apply to the transform settings.

<div data-full-width="false"><figure><img src="https://4240499350-files.gitbook.io/~/files/v0/b/gitbook-x-prod.appspot.com/o/spaces%2F-Lt-sE9MYKe9pZOcHwg5%2Fuploads%2F0cDibpCIJ8FxWoxHu6vu%2FGroup%2029.png?alt=media&amp;token=92e8bfa1-01a1-4478-b5d5-78ad01e3249a" alt=""><figcaption></figcaption></figure></div>

## **Next level game project**

A few more tips before you go to create your game project.

To select an object, press `ALT` and click on the object (without `ALT`, a group of objects will be selected). To place the selected object in the center of viewport, click on `F` or double-click on the object on the *Screen Tree*.

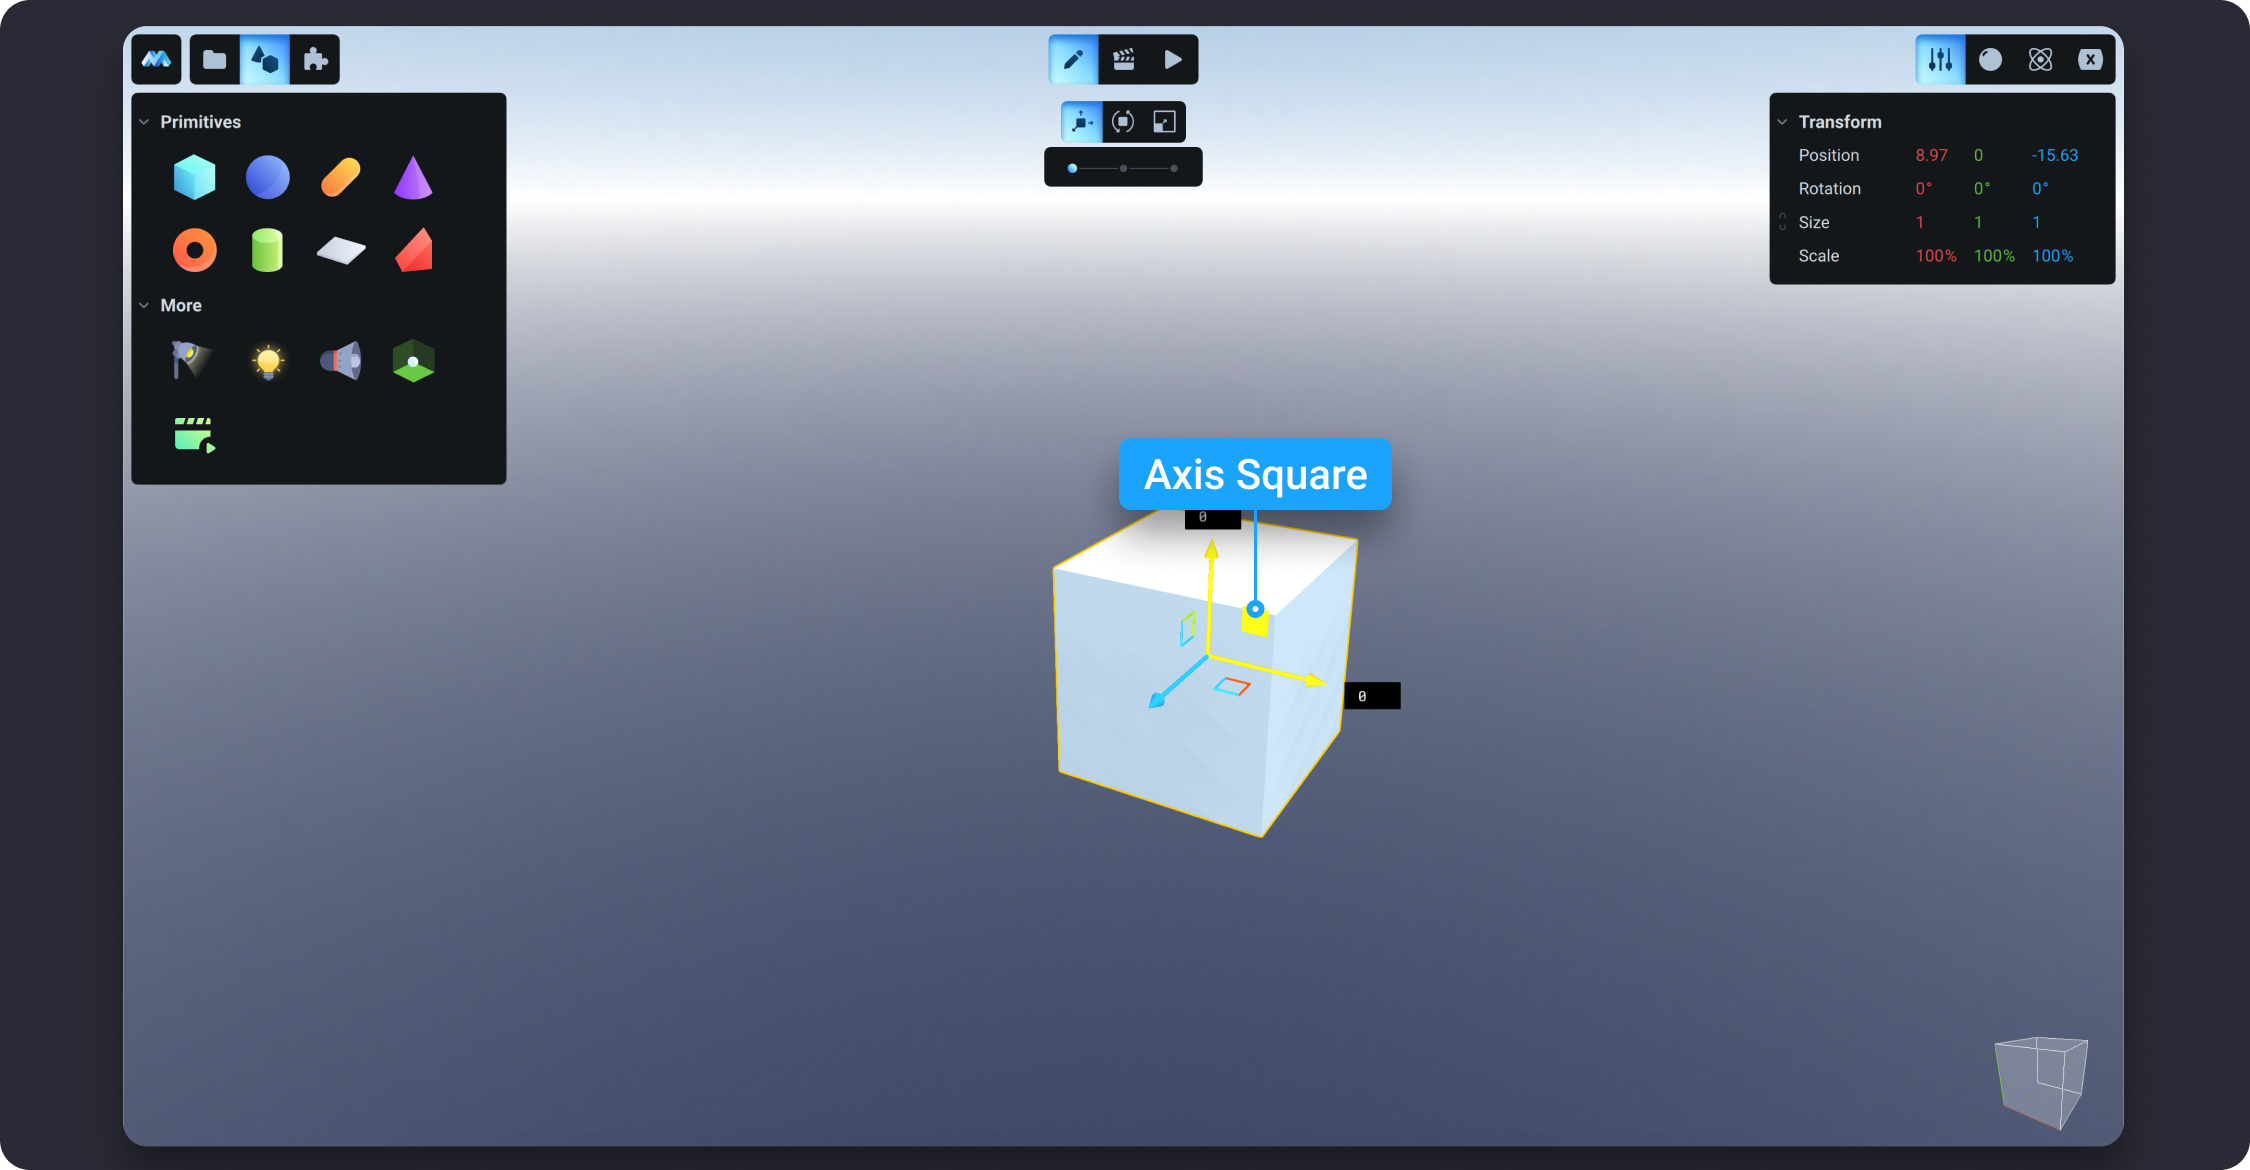
To move the object, simply select it in the scene, switch to **Move Gizmo** on the top center and use arrows. You also can use the **Transform Section** in **Inspector** to move precisely. To move the object in two directions at the same time, just hit the square of the specific sides and move your mouse. To know more about **Gizmo Panel**, go to [Using 3D Gizmo to Manipulate Objects](/learn/manual/workspace-modes/edit-mode#using-3d-gizmo-to-manipulate-objects).

To remove objects, select them in the scene and press `DELETE` key or select them in the **Scene Tree** and choose the `Delete` option by right-clicking. You also can copy and duplicate them in the *S***cene Tree**.

To add new objects, go to the **Library** on the left panel or import them using the **Main Menu**.

Now you know everything about how to diversify this example project and make your own game. Try adding more pikes, animate them as you want, drag the saws, delete or duplicate crystals, add new objects and swap existing ones. By means of MANU tools, you can easily do it, just use your imagination. Nail it!

## Save and export project

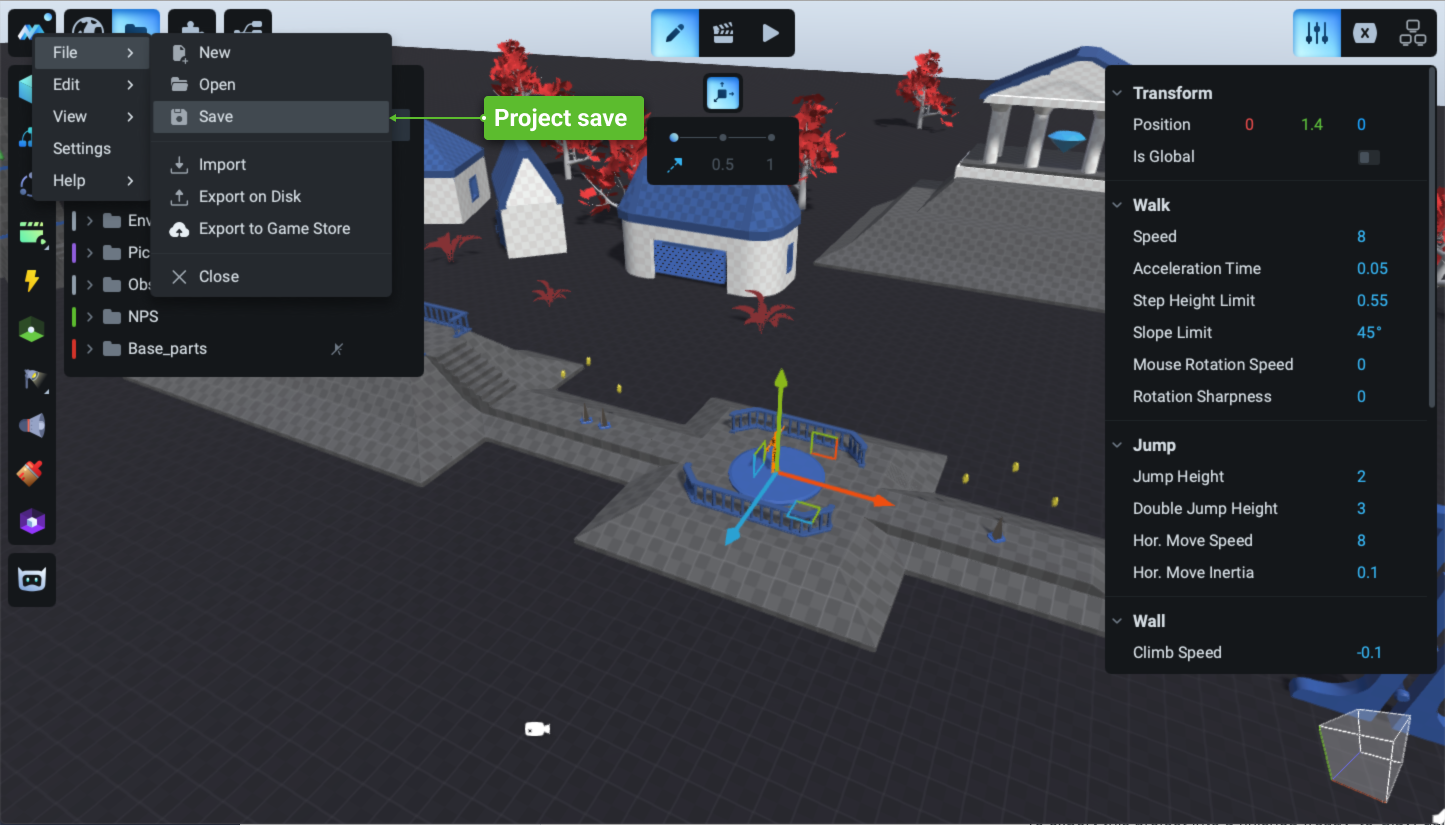
To save the current project, go to `Main Menu` > `File` > `Save` or use shortcut `CMD + S` on macOS / `CTRL + S` on windows.

<div data-full-width="false"><figure><img src="https://4240499350-files.gitbook.io/~/files/v0/b/gitbook-x-prod.appspot.com/o/spaces%2F-Lt-sE9MYKe9pZOcHwg5%2Fuploads%2Fsmdu8WAUPBvsflw8LUs0%2FGroup%2028.png?alt=media&amp;token=386bc1c8-d23e-48a6-9740-a1fcc2d8f8f9" alt=""><figcaption></figcaption></figure></div>

To export this project into a finished (ready-to-play) game go to `Main Menu` > `File` > `Export to Game Store` or use shortcut.

<figure><img src="https://4240499350-files.gitbook.io/~/files/v0/b/gitbook-x-prod.appspot.com/o/spaces%2F-Lt-sE9MYKe9pZOcHwg5%2Fuploads%2FlRIxhXnGiRbaTuHIkN8n%2FGroup%2040.png?alt=media&amp;token=b9380ec3-5377-4e4f-a7bb-bcd822ba3cb8" alt=""><figcaption></figcaption></figure>

In the export window that opens, you will be prompted to enter your game's **Manu Marketplace** download code. Please follow the link provided in the instructions or the link [manu.org](https://manu.org)

<figure><img src="https://4240499350-files.gitbook.io/~/files/v0/b/gitbook-x-prod.appspot.com/o/spaces%2F-Lt-sE9MYKe9pZOcHwg5%2Fuploads%2FXgwQslxw5fsrVp9cT0Wz%2FGroup%2041.png?alt=media&amp;token=dda4292b-e583-4256-8895-4f95303a4764" alt=""><figcaption></figcaption></figure>

If you're not already registered with **Manu Markeplace**, it shouldn't take more than 30 seconds. Then click on the profile icon, in the upper right corner next to your nickname. From the drop-down menu, select **Games**.

<figure><img src="https://4240499350-files.gitbook.io/~/files/v0/b/gitbook-x-prod.appspot.com/o/spaces%2F-Lt-sE9MYKe9pZOcHwg5%2Fuploads%2FxVXae4GFEp7NCRIYBd38%2FGroup%2042.png?alt=media&amp;token=0937986c-05d9-41f6-998e-53e7466024a5" alt=""><figcaption></figcaption></figure>

Click **Create new game** to create a new game profile.

<figure><img src="https://4240499350-files.gitbook.io/~/files/v0/b/gitbook-x-prod.appspot.com/o/spaces%2F-Lt-sE9MYKe9pZOcHwg5%2Fuploads%2FznbMAqRgnGSztEJ5jgto%2FGroup%2043.png?alt=media&amp;token=de093c11-d3a4-4dda-9529-ebdbbbdf5f88" alt=""><figcaption></figcaption></figure>

Create a game profile by filling out the "*Game Name*", "*Categories*" fields and add a description for your game in the "*Description*" field. After that, click on the **Generate** icon in the "Generate code for export from Manu" field and copy it to the clipboard using the **Copy to clipboard** button next to it.

<figure><img src="https://4240499350-files.gitbook.io/~/files/v0/b/gitbook-x-prod.appspot.com/o/spaces%2F-Lt-sE9MYKe9pZOcHwg5%2Fuploads%2Fy26wsuiECTxqff57OSsQ%2FGroup%2044.png?alt=media&amp;token=88d58808-1c13-4522-b3e8-b05e8f488065" alt=""><figcaption></figcaption></figure>

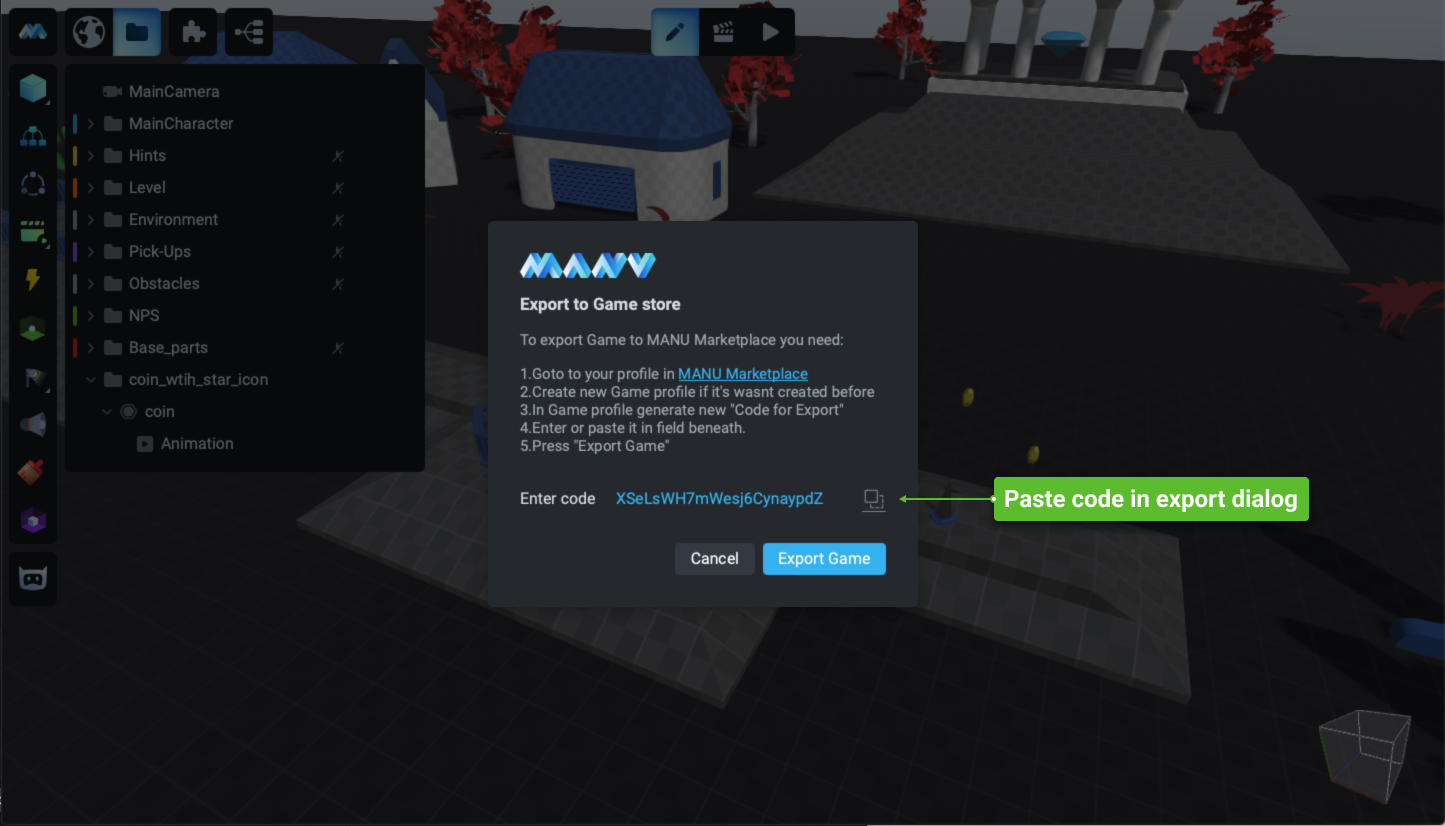
Go back to the Manu export window and paste the copied code into the "*Enter code*" field by clicking on the **Paste from clipboard** icon to the right of the field. Click on the unlocked **Export Game** button.

<figure><img src="https://4240499350-files.gitbook.io/~/files/v0/b/gitbook-x-prod.appspot.com/o/spaces%2F-Lt-sE9MYKe9pZOcHwg5%2Fuploads%2FhdvBpcVBT0TKzS0BrZWJ%2FGroup%2045.png?alt=media&amp;token=f0c1977c-6544-41dc-b14c-e5de9fa20e6e" alt=""><figcaption></figcaption></figure>

Wait for the game to upload to Manu Marketplace.

<figure><img src="https://4240499350-files.gitbook.io/~/files/v0/b/gitbook-x-prod.appspot.com/o/spaces%2F-Lt-sE9MYKe9pZOcHwg5%2Fuploads%2FdIxuRKNJycLDsPmlQ0Pt%2FGroup%2046.png?alt=media&amp;token=2453a3fb-4fb7-43d2-bd5f-63880c248419" alt=""><figcaption></figcaption></figure>

<figure><img src="https://4240499350-files.gitbook.io/~/files/v0/b/gitbook-x-prod.appspot.com/o/spaces%2F-Lt-sE9MYKe9pZOcHwg5%2Fuploads%2FoKo66X475LW78rNp5LL7%2FGroup%2047.png?alt=media&amp;token=9a11f6ba-1f20-4ffa-addd-98783e6dcbbf" alt=""><figcaption></figcaption></figure>

Go back to your game's profile on **Manu Marketplace** and in the game file management block that appears, you'll see that a **Launch** button has appeared, and under it a **Publish** switch. Once the **Publish** switch is enabled, your game will become available to other users.

<figure><img src="https://4240499350-files.gitbook.io/~/files/v0/b/gitbook-x-prod.appspot.com/o/spaces%2F-Lt-sE9MYKe9pZOcHwg5%2Fuploads%2F2oJm2KIbF8nn0nW3VST9%2FGroup%2048.png?alt=media&amp;token=b6c8ed6e-e2a7-4a65-957e-035bd18baeb5" alt=""><figcaption></figcaption></figure>

You can find your game in the catalog in the category specified in your profile.

<figure><img src="https://4240499350-files.gitbook.io/~/files/v0/b/gitbook-x-prod.appspot.com/o/spaces%2F-Lt-sE9MYKe9pZOcHwg5%2Fuploads%2FwD68sOQCbLR0EouvcnUM%2FGroup%2049.png?alt=media&amp;token=e59b8ea3-e31e-4ec0-872c-eac2fb08a456" alt=""><figcaption></figcaption></figure>

Any wants to play your game, including you, must to download Manu Game Launcher first. You will find it on [Launcher download page](https://manu.org/launcher) on Manu Marketplace.∂

## Sharing results and receiving feedback

Now, you can share your results with your friends. Suggest them to play the game that was created by you. Don't forget to share with us as well. Publish your game project on [Discord](http://download.manu.co/JoinDiscord) and social media. Don’t forget to use the hashtag **#madewithmanu** and you will definitely receive feedback and comments from us! Keep up to date with all MANU news, connect and stay in touch by following us on social media.

* [Facebook](https://www.facebook.com/manuvideogamemaker/)
* [Youtube](https://www.youtube.com/channel/UCS9N0xkRVt5KA6CDEmlkmKQ)
* [Instagram](https://www.instagram.com/manuvideogamemaker/)
* [Twitter](https://twitter.com/manugamemaker)
* [Reddit](https://www.reddit.com/r/manuvideogamemaker/)

Congratulations on your first achievement with MANU! Way to go!


# Manual


# Installing MANU

Guidelines for installing MANU on Windows and MacOS

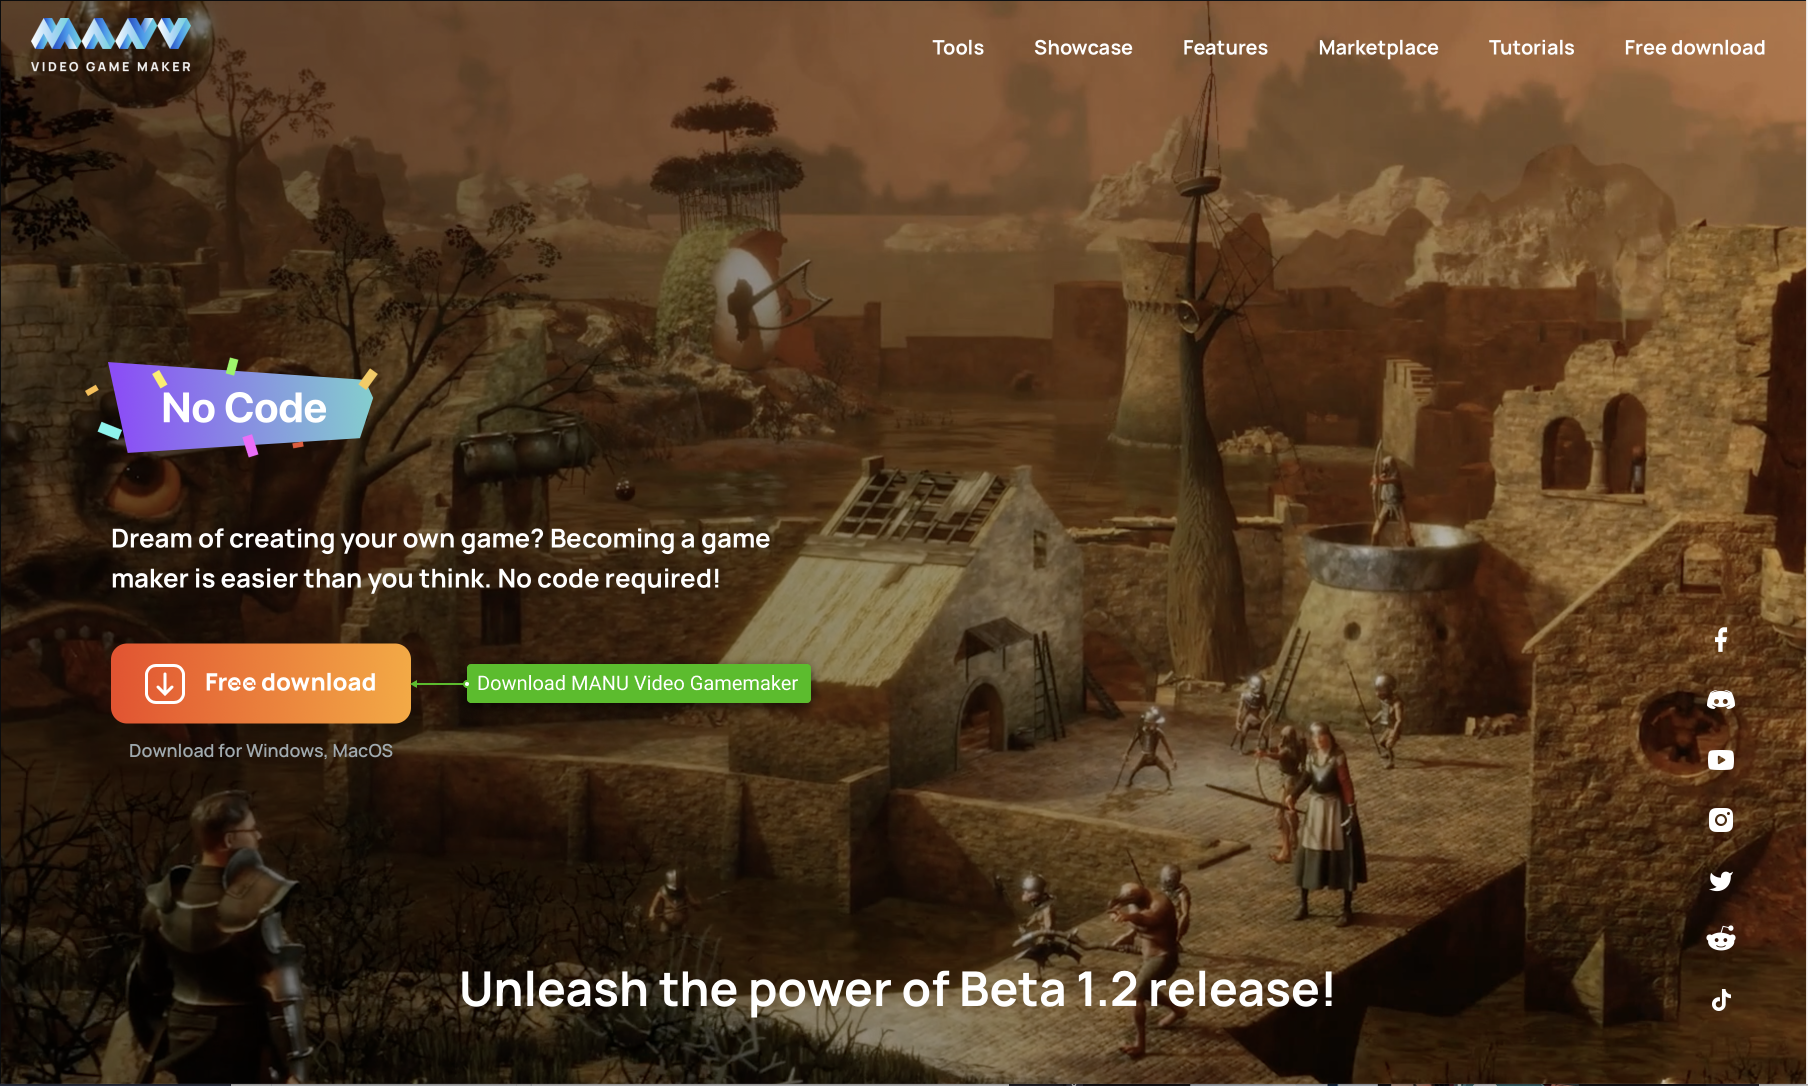
To install the MANU application, go to our[ website](https://manu.co/), click on the **Free download** button.

<figure><img src="https://4240499350-files.gitbook.io/~/files/v0/b/gitbook-x-prod.appspot.com/o/spaces%2F-Lt-sE9MYKe9pZOcHwg5%2Fuploads%2FuOaMbGHTANESeapI7Kdv%2FGroup%201647.png?alt=media&amp;token=dee9776a-eb04-45f5-a2c2-8a256229cde0" alt=""><figcaption></figcaption></figure>

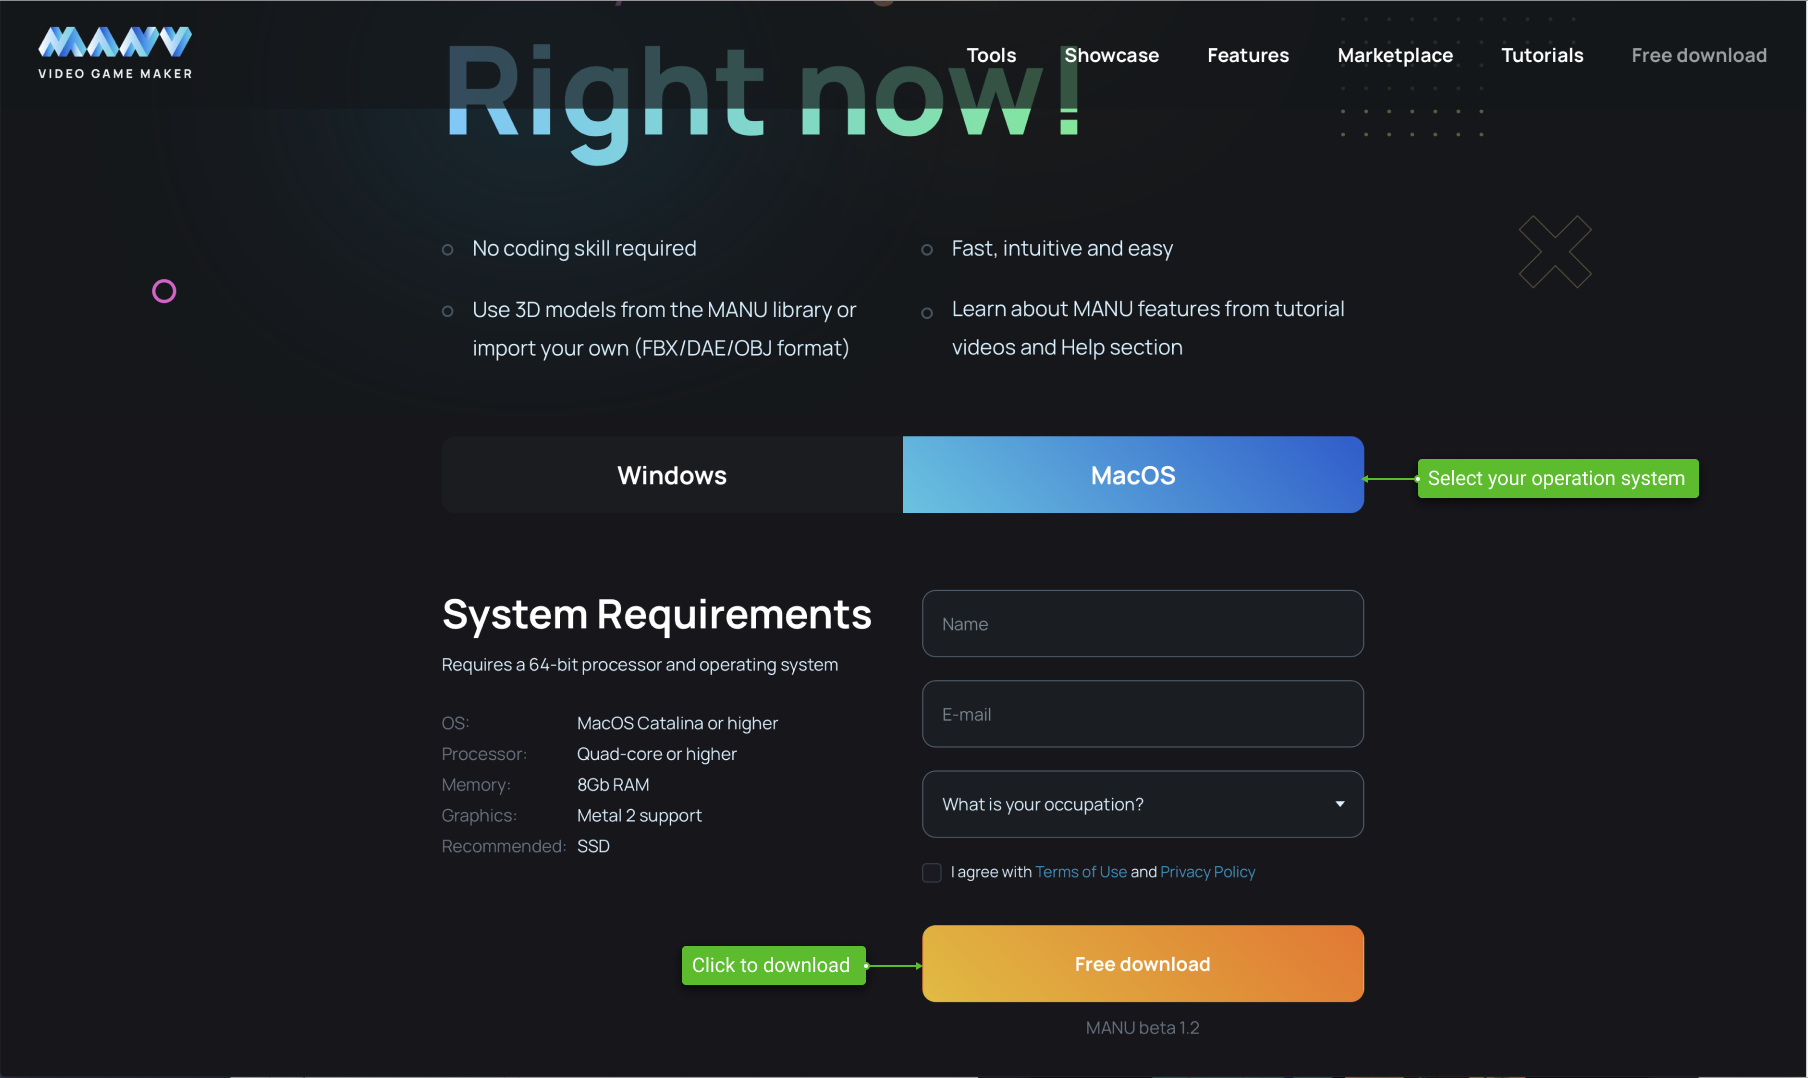
Then, select your operating system, fill out the sign-up form, then click on **Free Download**

<figure><img src="https://4240499350-files.gitbook.io/~/files/v0/b/gitbook-x-prod.appspot.com/o/spaces%2F-Lt-sE9MYKe9pZOcHwg5%2Fuploads%2FaIW5ediObIH5RJdNyRBF%2FGroup%201648.png?alt=media&amp;token=f5422bfb-90a6-4332-b969-f21feb1314b2" alt=""><figcaption></figcaption></figure>

{% tabs %}
{% tab title="Windows" %}
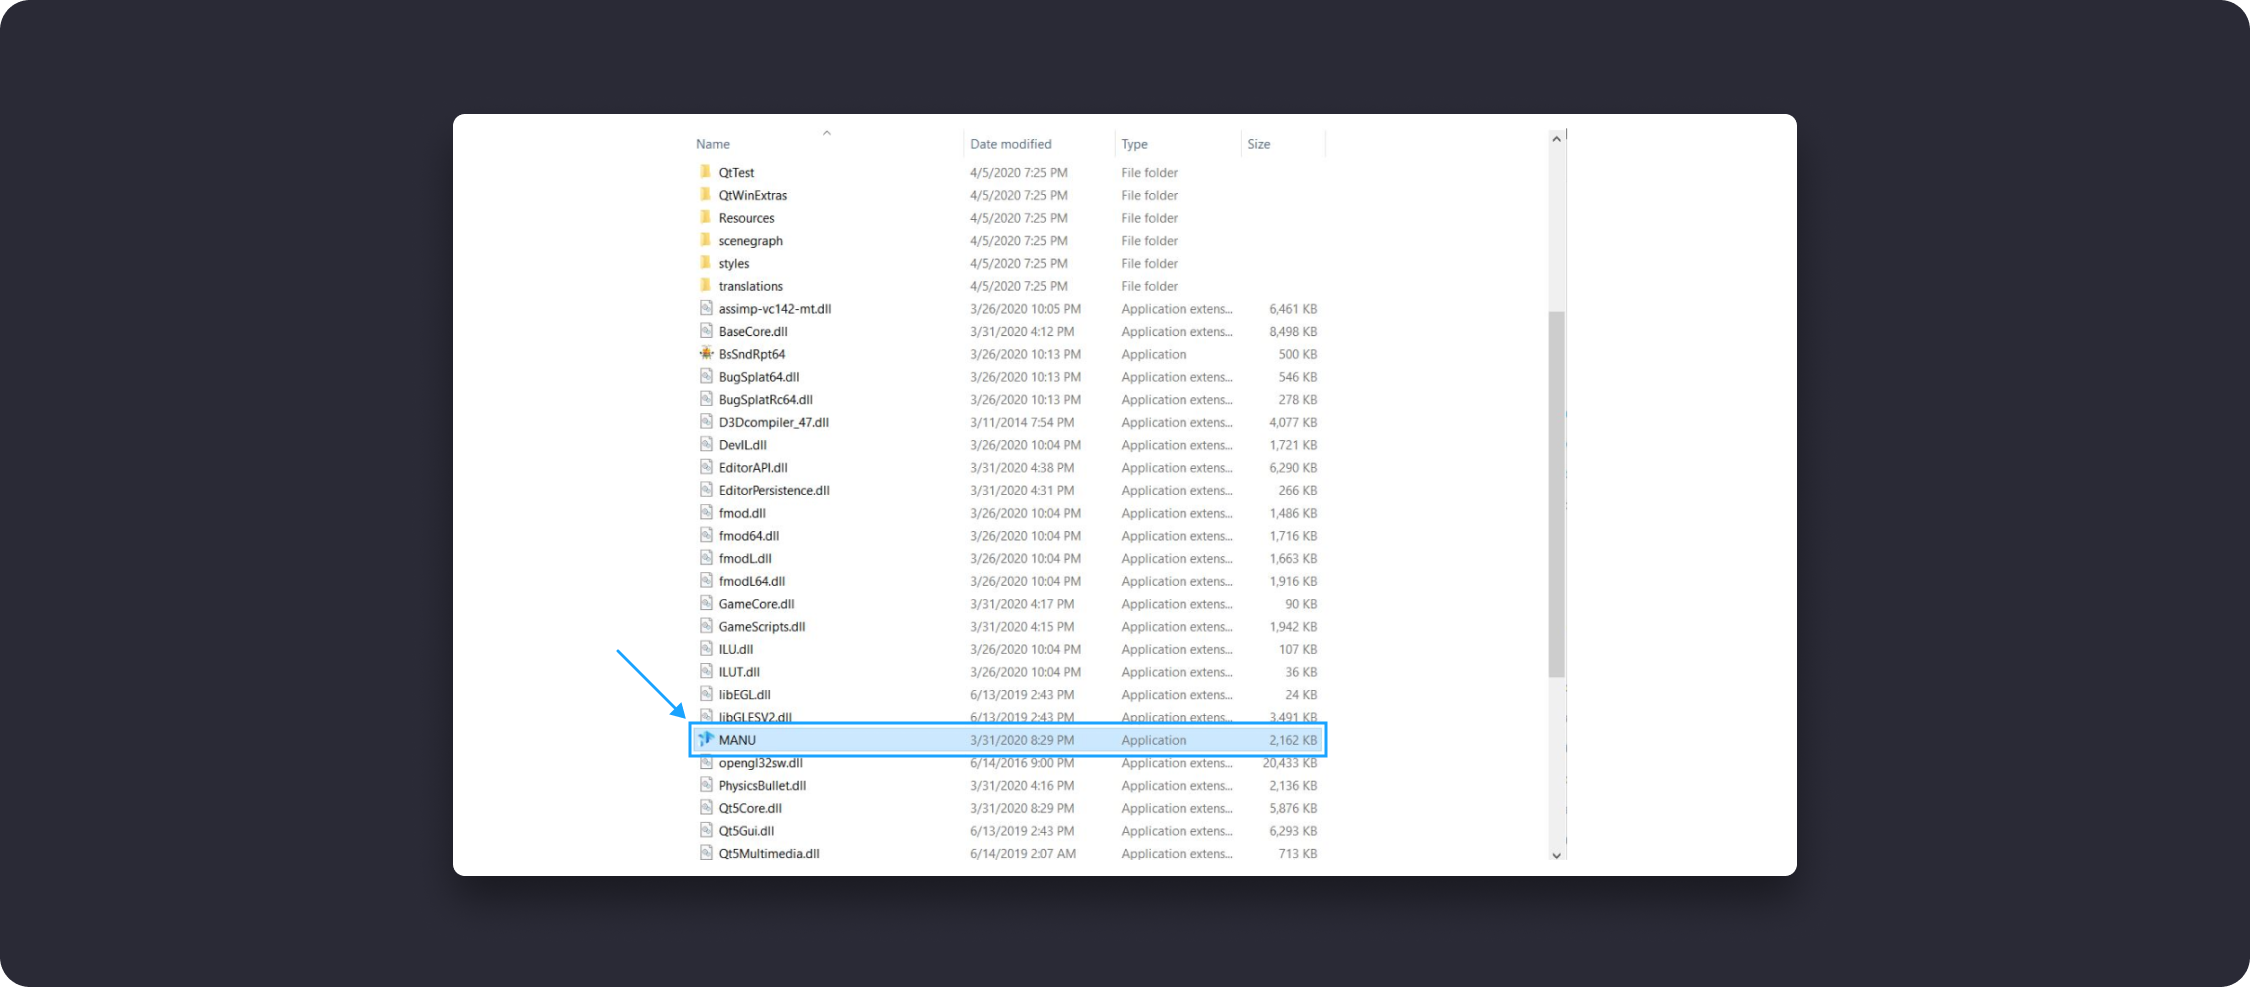
Once you downloaded the MANU archive, extract the files from the archive to any folder, and run the MANU.exe file.&#x20;

![](https://dl.dropboxusercontent.com/s/oywisdco6d2bsc8/004.png?dl=0)
{% endtab %}

{% tab title="macOS" %}
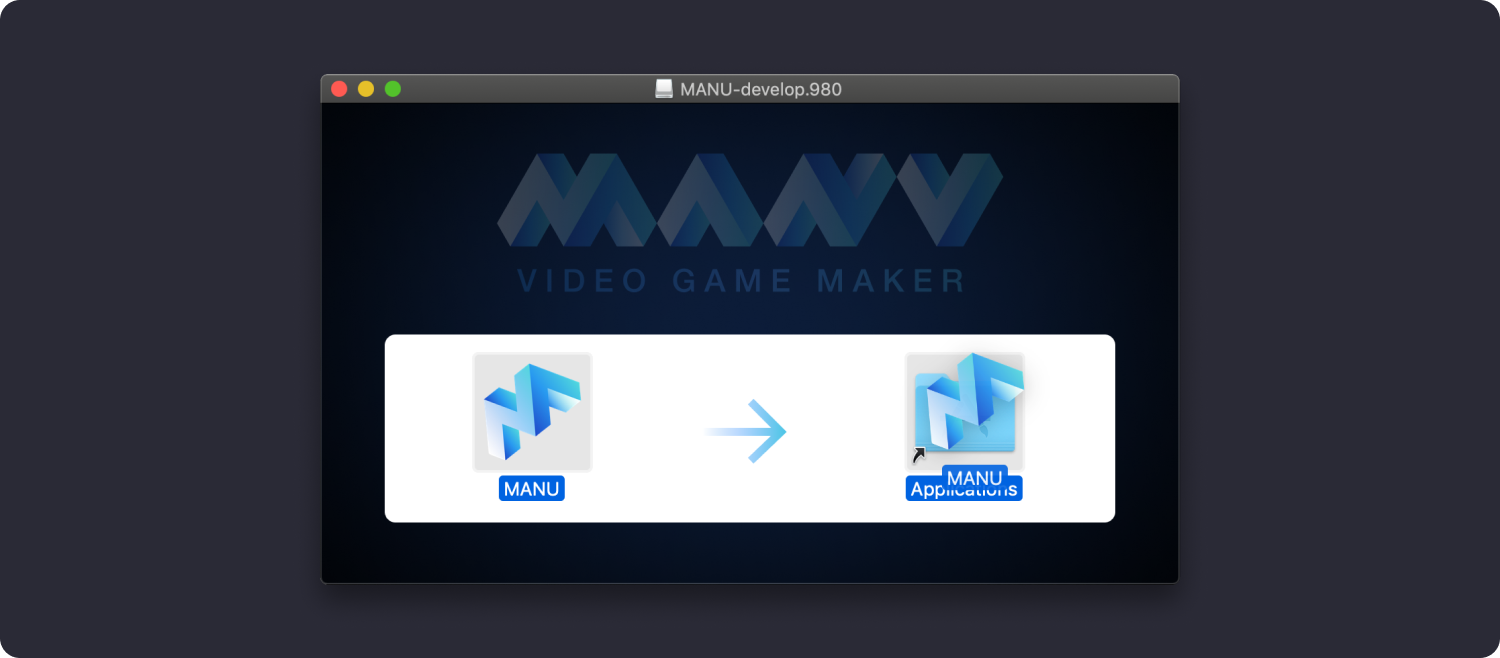
To install an Application from a DMG file, please follow the steps below:

* Double click the DMG to make it's content available.
* Drag the MANU application to the Applications folder (may need an administrator password).
* Wait for the copy process to finish.
* Eject the DMG (by clicking the eject button in the Sidebar).
* You can delete the DMG from Downloads.
* Launch app. More information here <https://support.apple.com/guide/mac-help/open-a-mac-app-from-an-unidentified-developer-mh40616/mac>
![](https://dl.dropboxusercontent.com/s/z9qd1b3rswlaqp5/005.png?dl=0)
{% endtab %}
{% endtabs %}


# Welcome Screen

This is a quick overview of the Welcome Screen menu in MANU Game Maker.

Welcome Screen is designed to help you get started with MANU.

## Interface Overview

<figure><img src="https://4240499350-files.gitbook.io/~/files/v0/b/gitbook-x-prod.appspot.com/o/spaces%2F-Lt-sE9MYKe9pZOcHwg5%2Fuploads%2FsJY9vqZz1SHitfoh0RfG%2FGroup%2052.png?alt=media&amp;token=51594f9d-33b4-4b4e-908c-703a8f427c39" alt=""><figcaption></figcaption></figure>

The header of the Welcome Screen includes the version and build number of the MANU application you are currently using. You can use this information if you would like to report a bug or issue with MANU. The MANU version and build number changes as we release new updates.

The left panel of the Welcome Screen shows a list of recent projects. Please note that if you open the MANU app for the first time, the fields for recent projects will be empty.

<figure><img src="https://4240499350-files.gitbook.io/~/files/v0/b/gitbook-x-prod.appspot.com/o/spaces%2F-Lt-sE9MYKe9pZOcHwg5%2Fuploads%2FQAj5P5Ksx9YPlMDdCNCC%2FGroup%2053.png?alt=media&amp;token=3eba4261-80e4-43de-b60f-5bca390a7d89" alt=""><figcaption></figcaption></figure>

The left panel of the Welcome Screen screen contains four sections with links to **Game Store**, **Asset Store**, **Video Tutorials** and **MANU** **Manual**. These sections are designed to help you get started with MANU.

## Creating a New Project

To create a new project, click the **Create New Project** button.

## Opening Existing Project

To open an existing project, click **Open Existing Project** button.

## Game Store

In the MANU Marketplace you can play games created on the MANU engine. You can also post your games and make them available to the community of players and game creators.

## Asset Store

Use the Assets created by the MANU development community to create games faster, learn the mechanics and algorithms needed to create game objects. Share your work with the community by uploading your tapes.

## Video Tutorials

Watch a video tutorial that explains basic and advanced game creation techniques in MANU in an easy to understand way. Use them to quickly get started creating games.

## Manual

In the manual you will get comprehensive information on the MANU engine and all its features, tools and functionality.

## Social Networks

In MANU our community means a lot to us. Stay connected with us by joining our social media groups.&#x20;

Leave your impressions of using MANU, share your skills and ideas, report any bugs you find.

* [Facebook](https://www.facebook.com/manuvideogamemaker/)
* [Discord](http://download.manu.co/JoinDiscord)
* [Youtube](https://www.youtube.com/channel/UCS9N0xkRVt5KA6CDEmlkmKQ)
* [Instagram](https://www.instagram.com/manuvideogamemaker/)
* [Twitter](https://twitter.com/manugamemaker)
* [Reddit](https://www.reddit.com/r/manuvideogamemaker/)
* [Email](mailto:manu@manu.co)


# Workspace Modes

This is an overview of workspace modes in MANU Game Maker.

This section introduces a general overview of each mode and how to navigate within them. The `Main Menu` button is available in each mode to access the program options.

MANU workspace offers three major modes:

1. Edit mode.
2. Animation mode.
3. Game mode.
![](https://dl.dropboxusercontent.com/s/xv375azev2bt8wn/001.png?dl=0)


# Edit Mode

Edit mode is a workspace where you can add objects into your game and modify their properties.

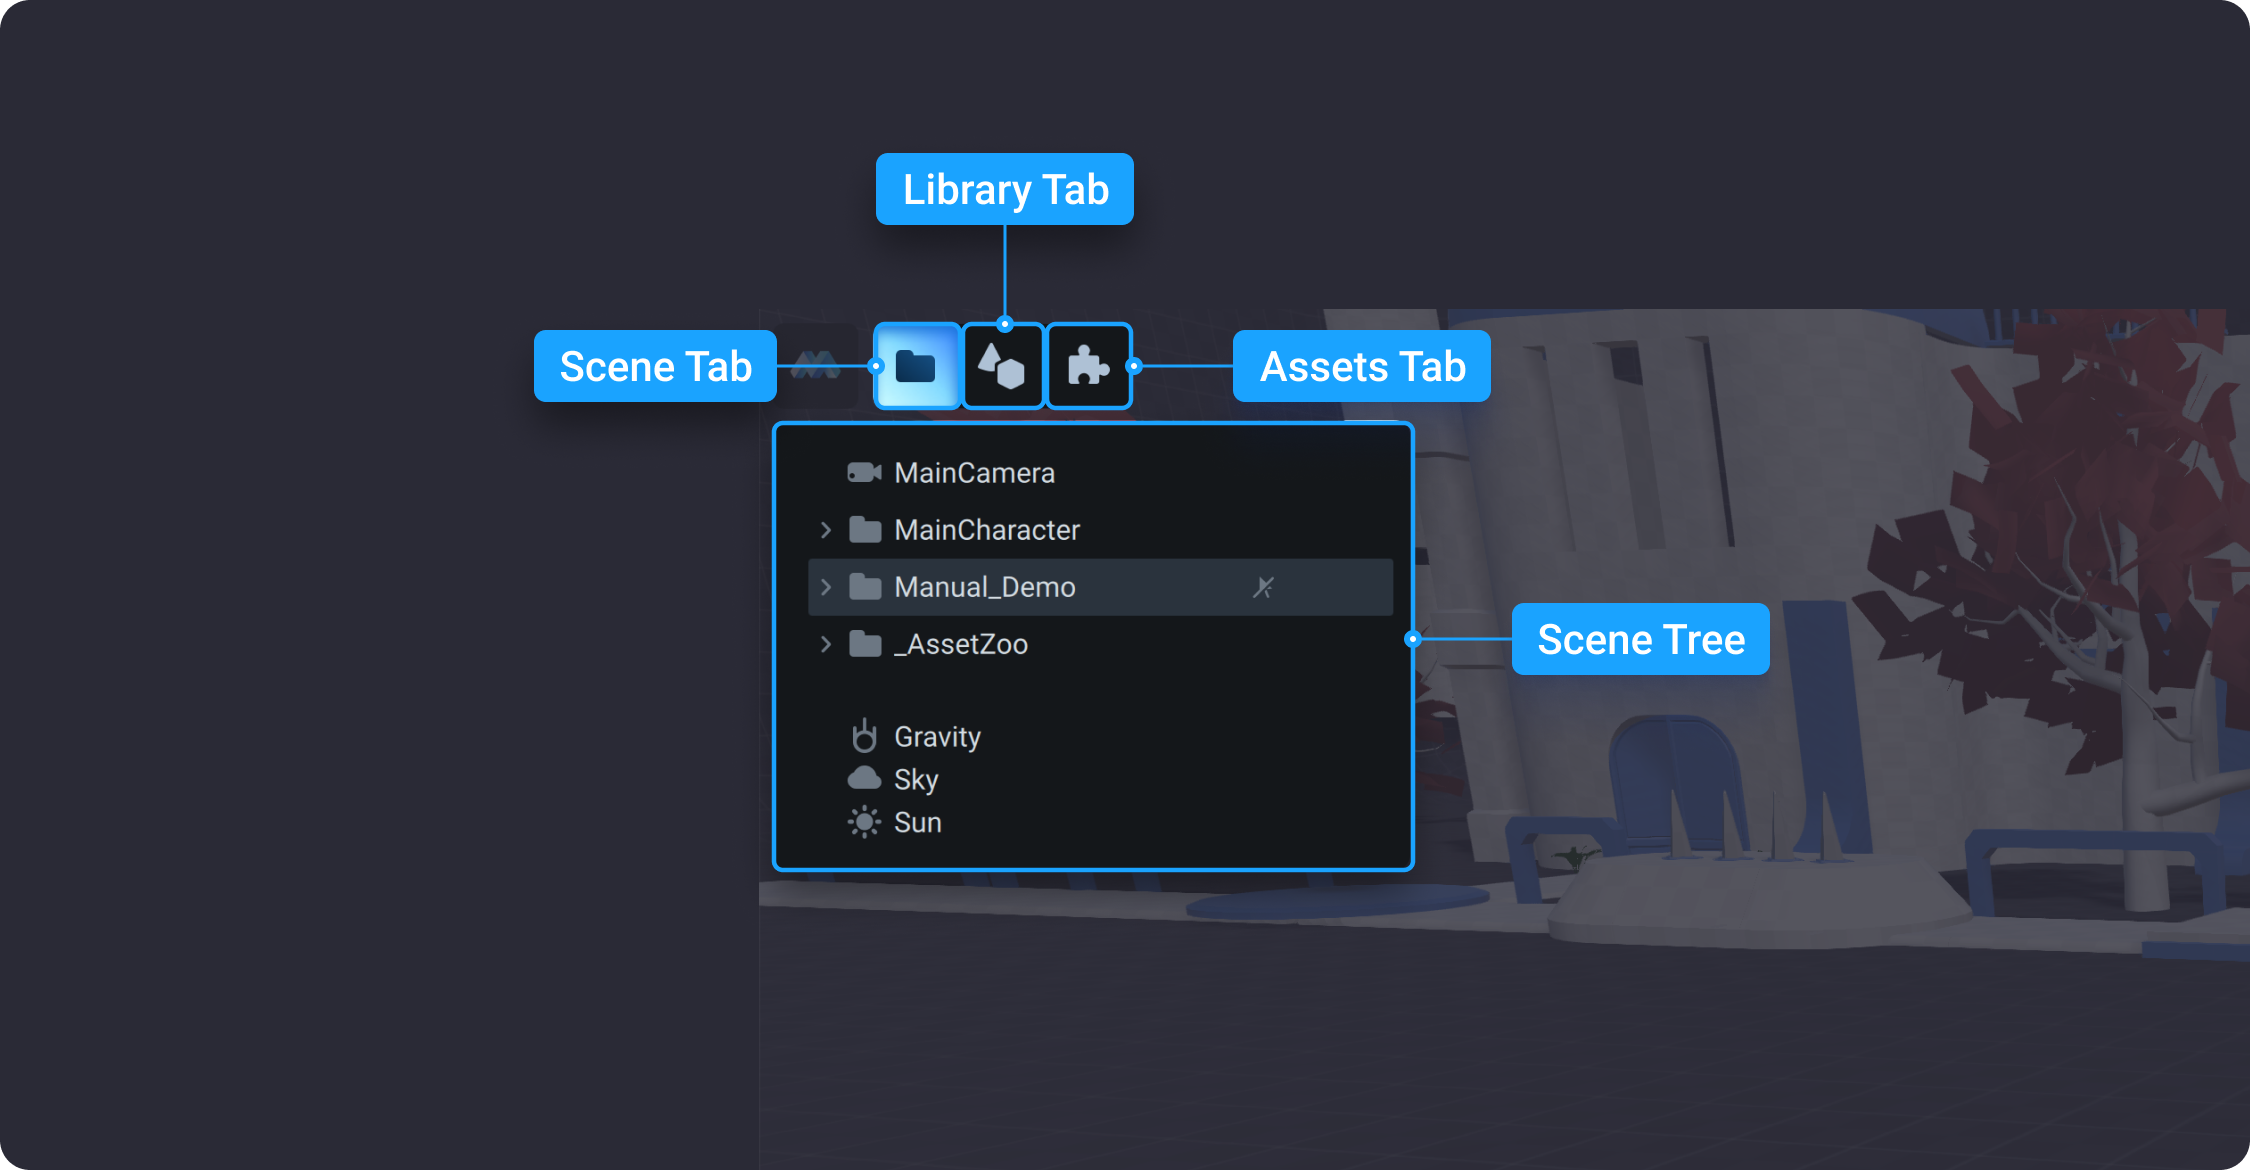
The left panel in Edit mode contains the Scene Tree that includes a list of all objects in the scene, the Library tab used to insert default objects into the scene, and Assets include a list of meshes, textures, sounds, and prefabs used in the project.
![](https://dl.dropboxusercontent.com/s/x9rpxswp4dymvy2/002.png?dl=0)

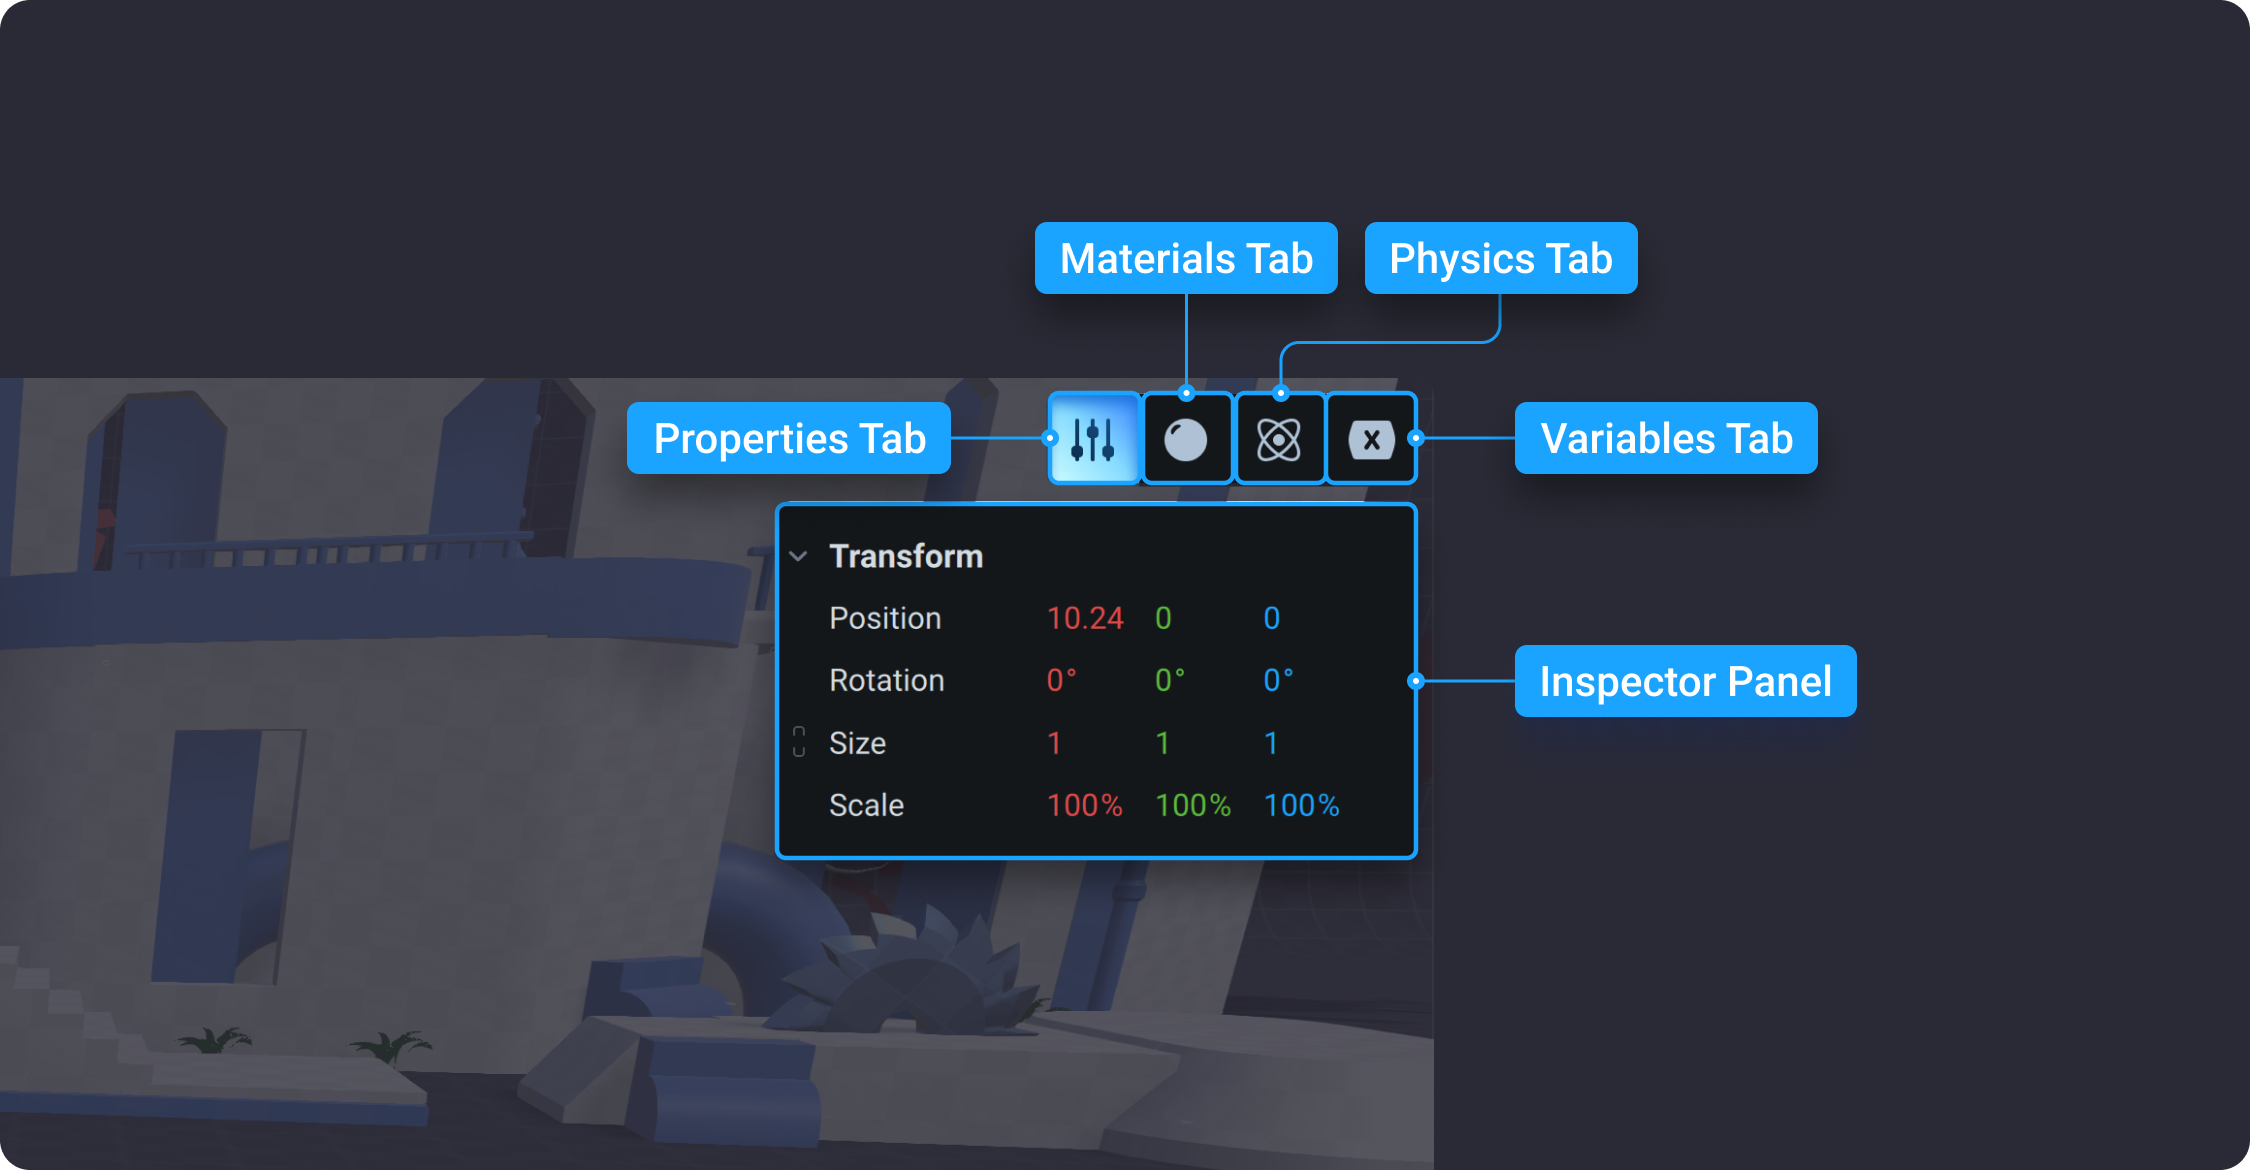
The Inspector panel is located in the right side of the workspace. The Inspector panel is contextual, it appears when a supported object in the scene is being selected. The view of available parameters and tabs displayed in the Inspector panel changes, depending on what type of object is being selected. Generally, the Inspector panel includes four tabs:&#x20;

1. Properties
2. Material
3. Physics
4. Variable
![](https://dl.dropboxusercontent.com/s/wvxx9405ta7o36z/003.png?dl=0)

&#x20;Let’s have a quick look at each of them.

### Properties

Properties represent a list of properties of a particular object selected in the scene.
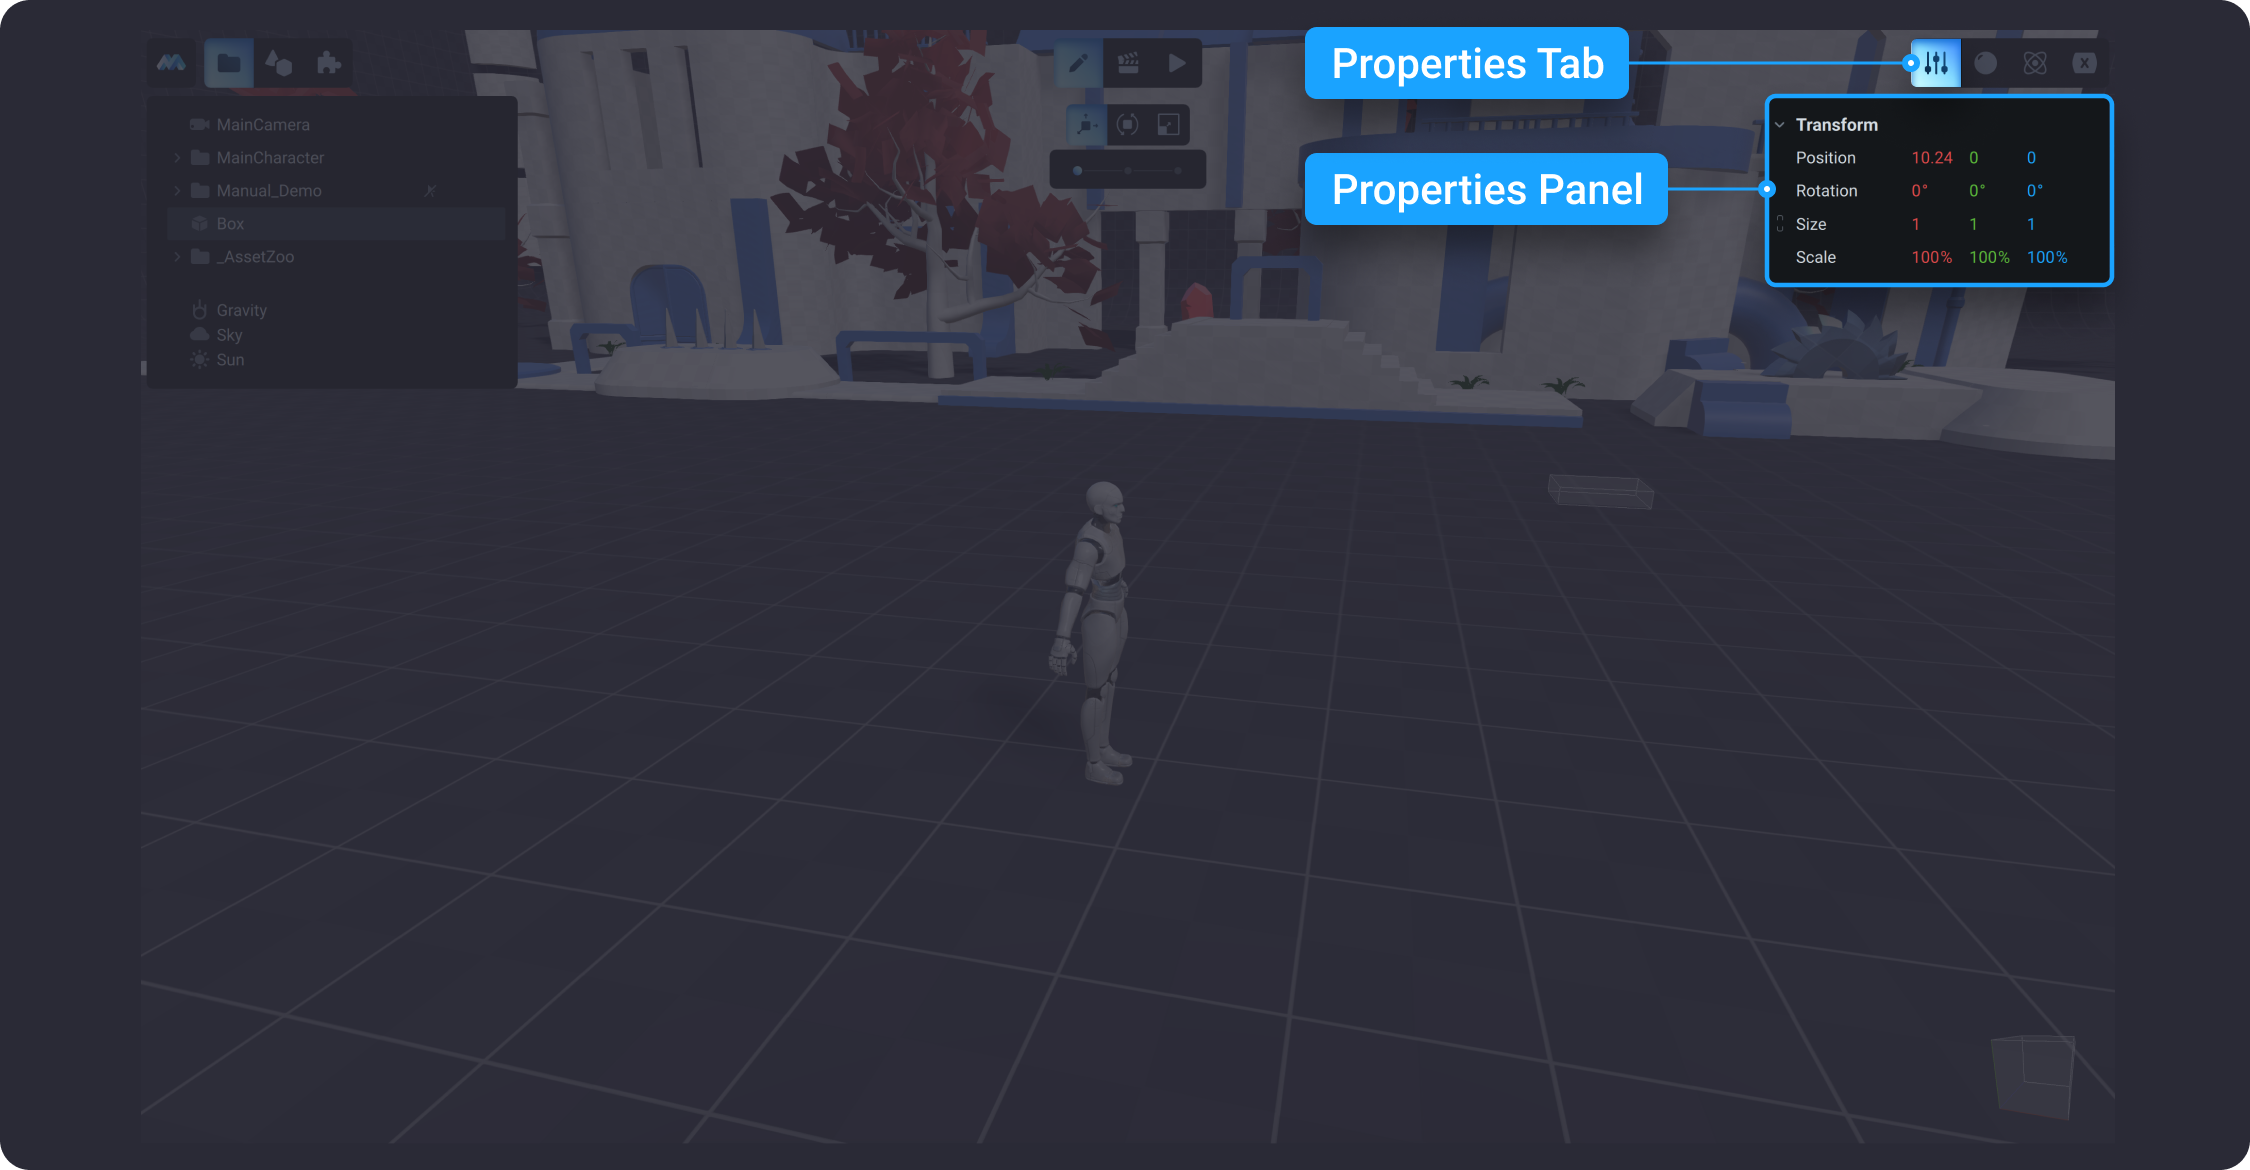
![](https://dl.dropboxusercontent.com/s/9o8avyixxxvw75r/004.png?dl=0)

### Material

The Material tab includes material properties of an object, such as color, shader, and texture.
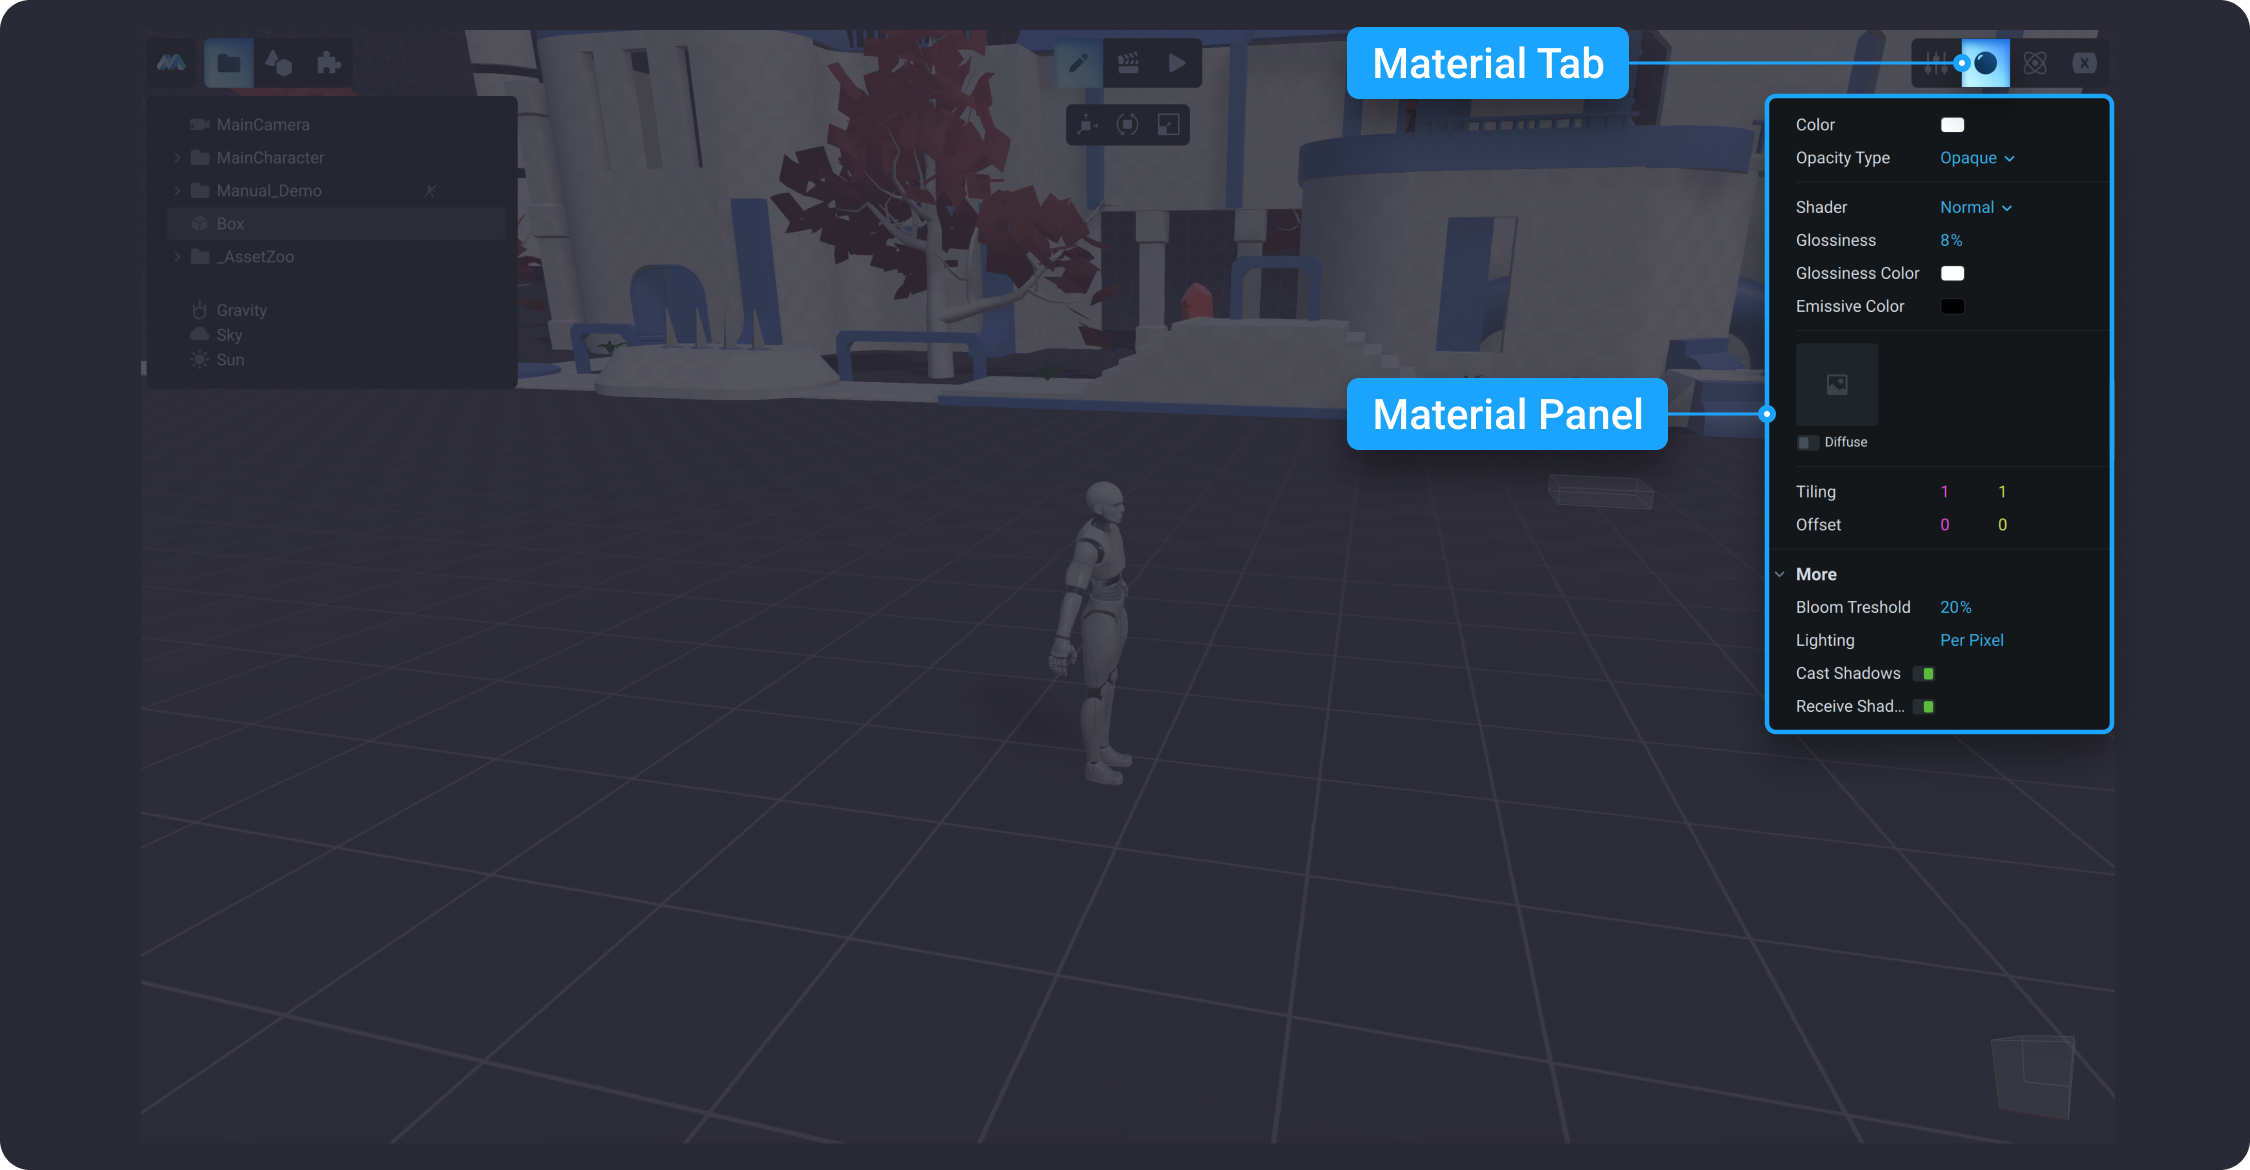
![](https://dl.dropboxusercontent.com/s/erbpq3ymyok88cx/005.png?dl=0)

### Physics

The Physics tab contains a list of physical properties of an object, such as type of the rigid body, collider and other parameters.
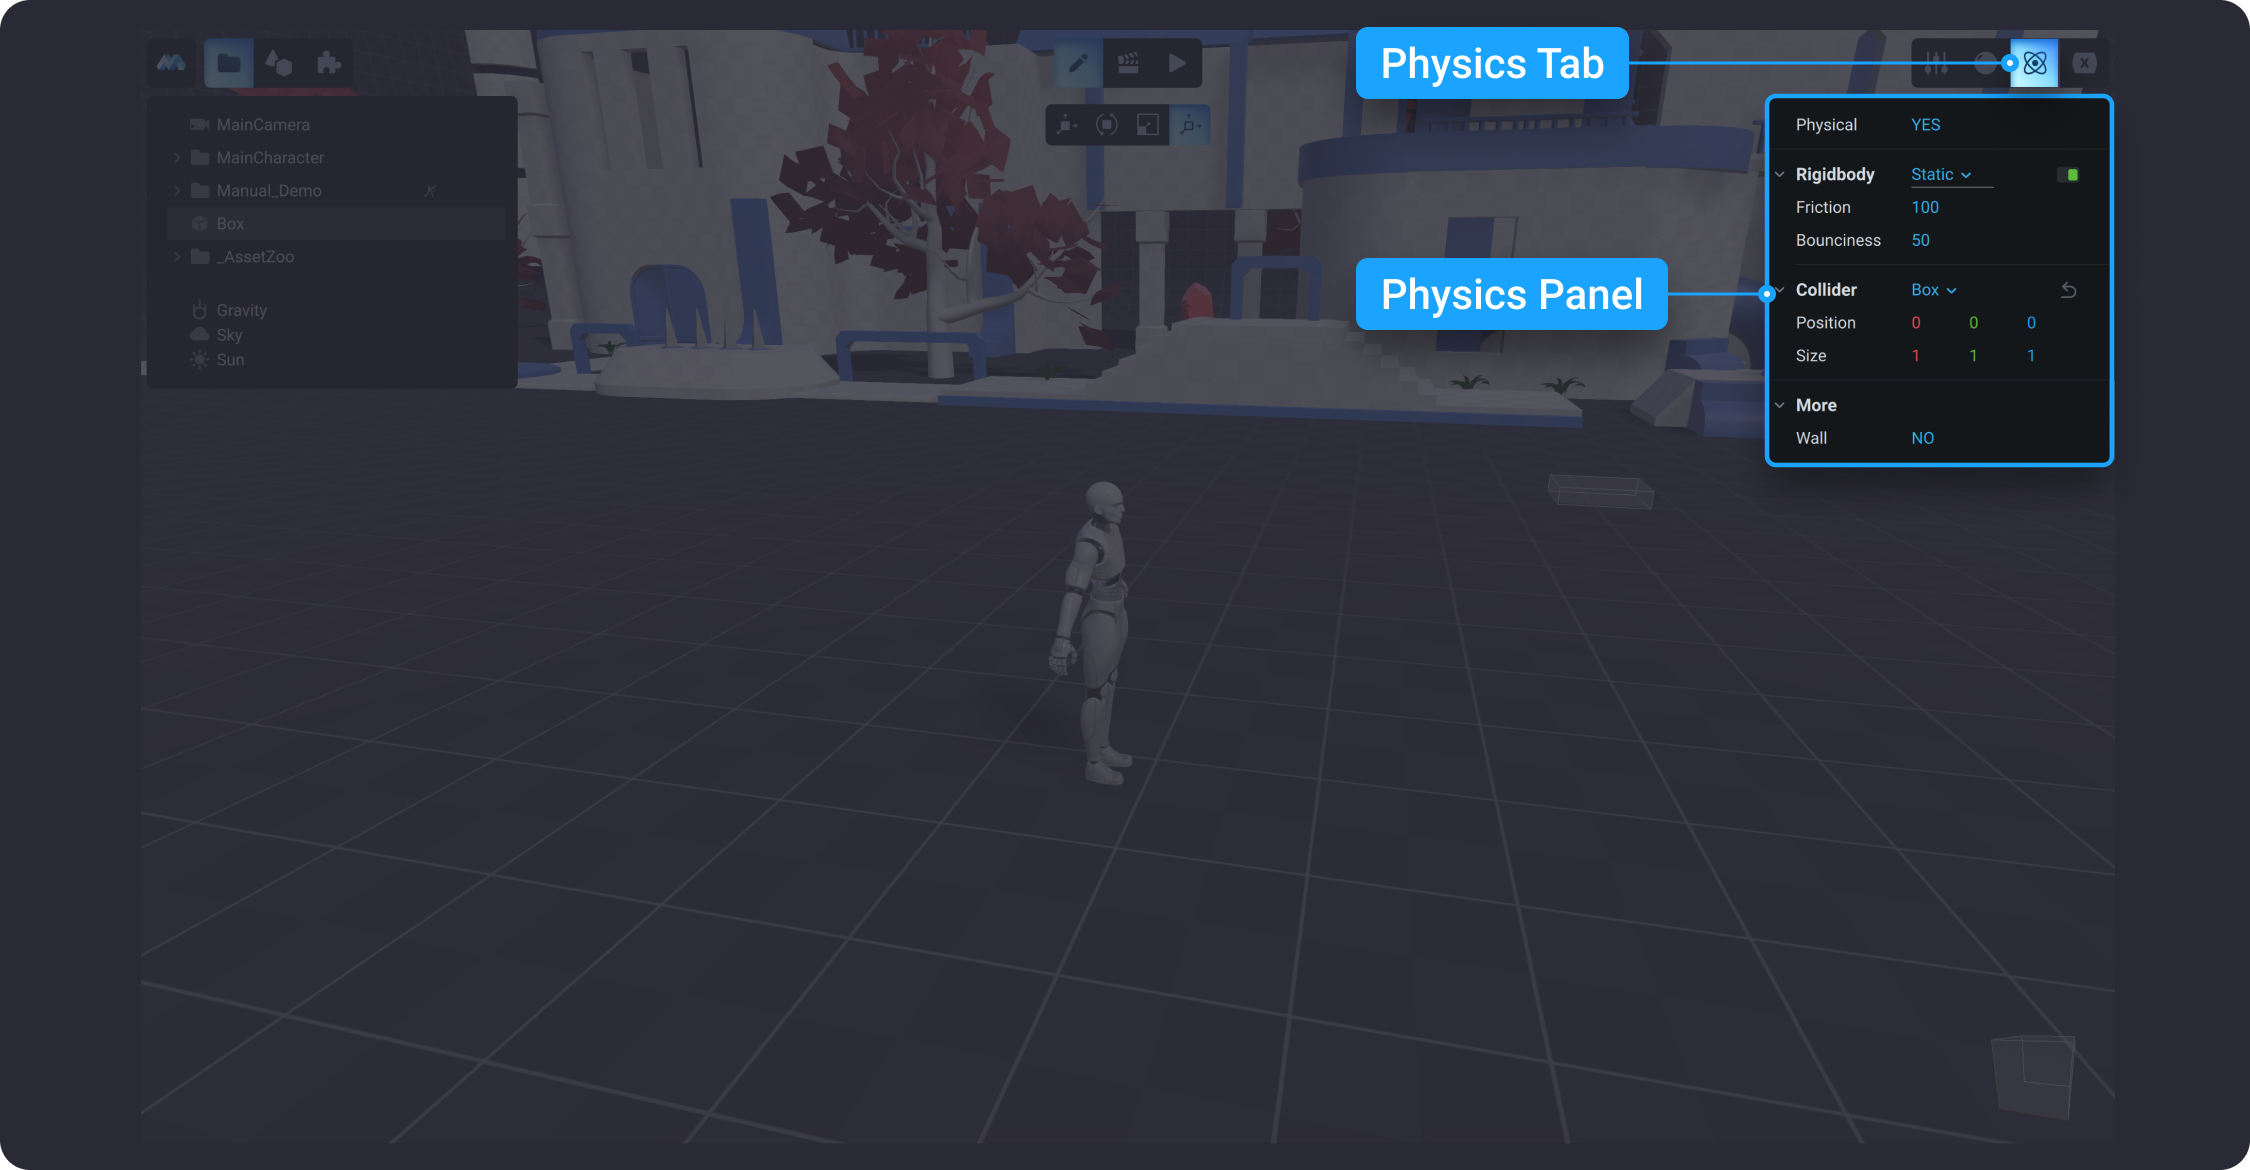
![](https://dl.dropboxusercontent.com/s/q0yato3xu6f9eeq/006.png?dl=0)

### Variables

The variables tab is designed to add a custom variable to an object. Any object can have a custom variable of your choice that you can apply in the animation timeline.
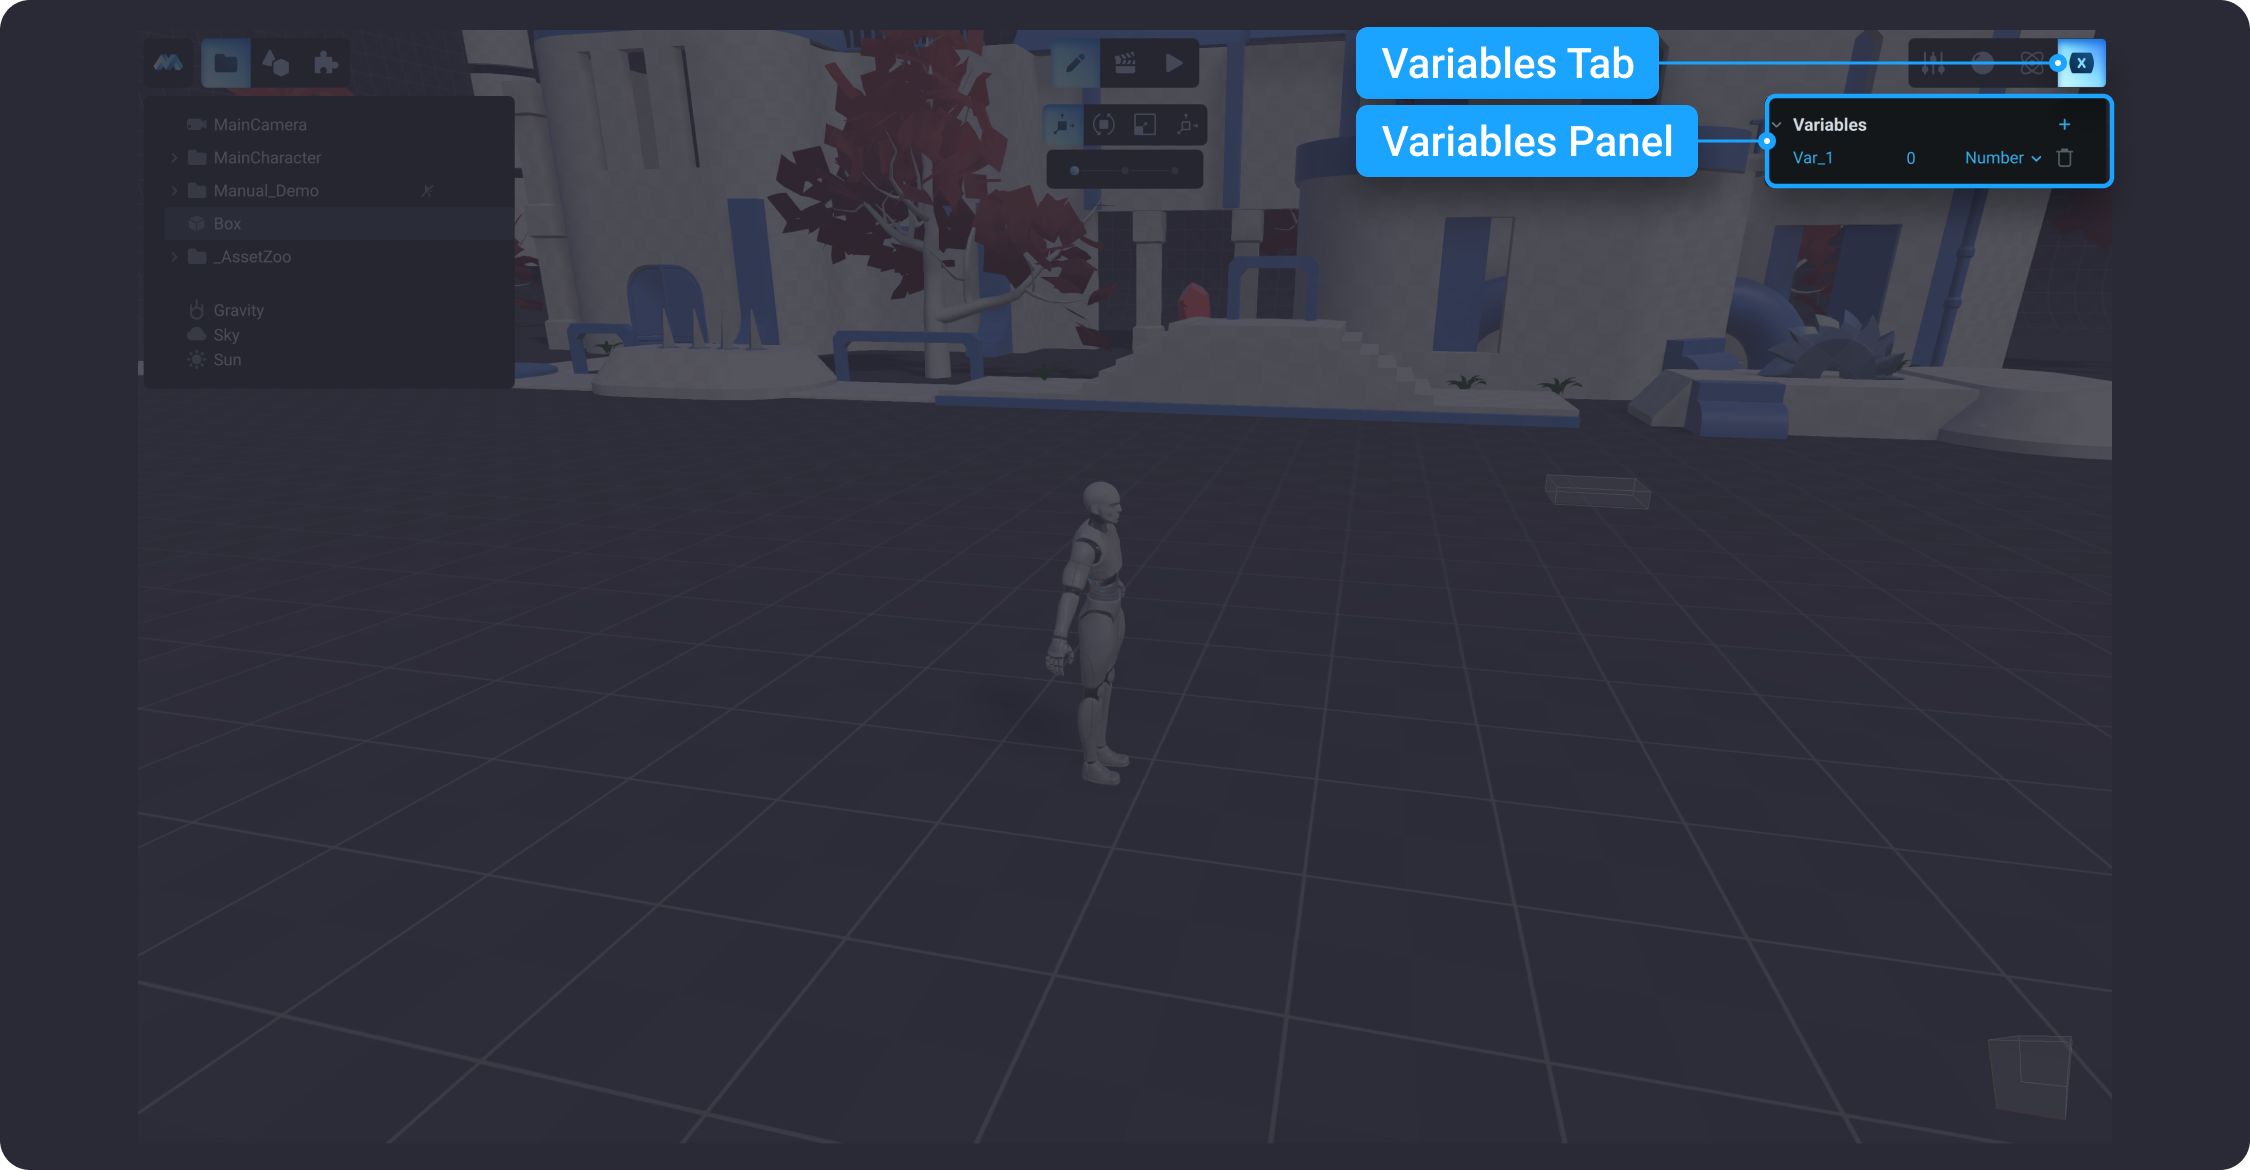
![](https://dl.dropboxusercontent.com/s/5ps5367rff3svcj/007.png?dl=0)

## Navigation in the 3D Space

There are a variety of ways in which to navigate the 3D space within the Edit mode, also known as MANU viewport. A viewport is your window into the 3D game worlds you create in MANU.&#x20;

Note, that the camera viewport changes, depending on what type of the main camera projection is selected. There are two types of projection in MANU: Perspective and Orthographic. To learn more about projections, go to [Main Camera](broken://pages/-MIO0PWrhxuQ4WC1hCM6). In MANU, the default type of projection is perspective.&#x20;

Camera viewport can be navigated entirely with the mouse, with the keyboard, with the trackpad, or with a variety of combinations between them. It can also be managed in both the Edit and Animation modes. There are multiple ways of controlling the camera viewport that apply to both types of projection. These controls include camera pan and zoom, camera fly rotate, camera fly orbit, camera alignment and focusing. Let’s have a closer look at navigation controls for each of them.

### Camera Pan and Dolly Zoom

Panning moves the camera either horizontally or vertically from one side to another on a central axis. Use `A` or `D`  to pan the camera viewport horizontally, and `Q` or `E`  - to move it vertically. Alternatively, hit `SPACE+ LMB Drag`.

Dolly Zoom is the type of effect where the camera simultaneously moves towards a target object and zooms out from it. To dolly zoom, the camera viewport, use the mouse `WHEEL UP` or `WHEEL DOWN` or `TWO FINGER SCROLL` on the touchpad. &#x20;

### Camera Fly Rotate

To rotate the camera using a mouse, use `RMB + Drag`. Alternatively, hold `SHIFT + W/A/S/D` to orbit the camera up, left, down, and right respectively.

### Camera Fly Orbit

To orbit the camera around the selected object, select the object, hold `ALT + LMB Drag`. To perform the same action using a keyboard, hold `ALT + W/A/S/D` keys to orbit the camera up, left, down and right respectively.

### Camera Viewport Alignment

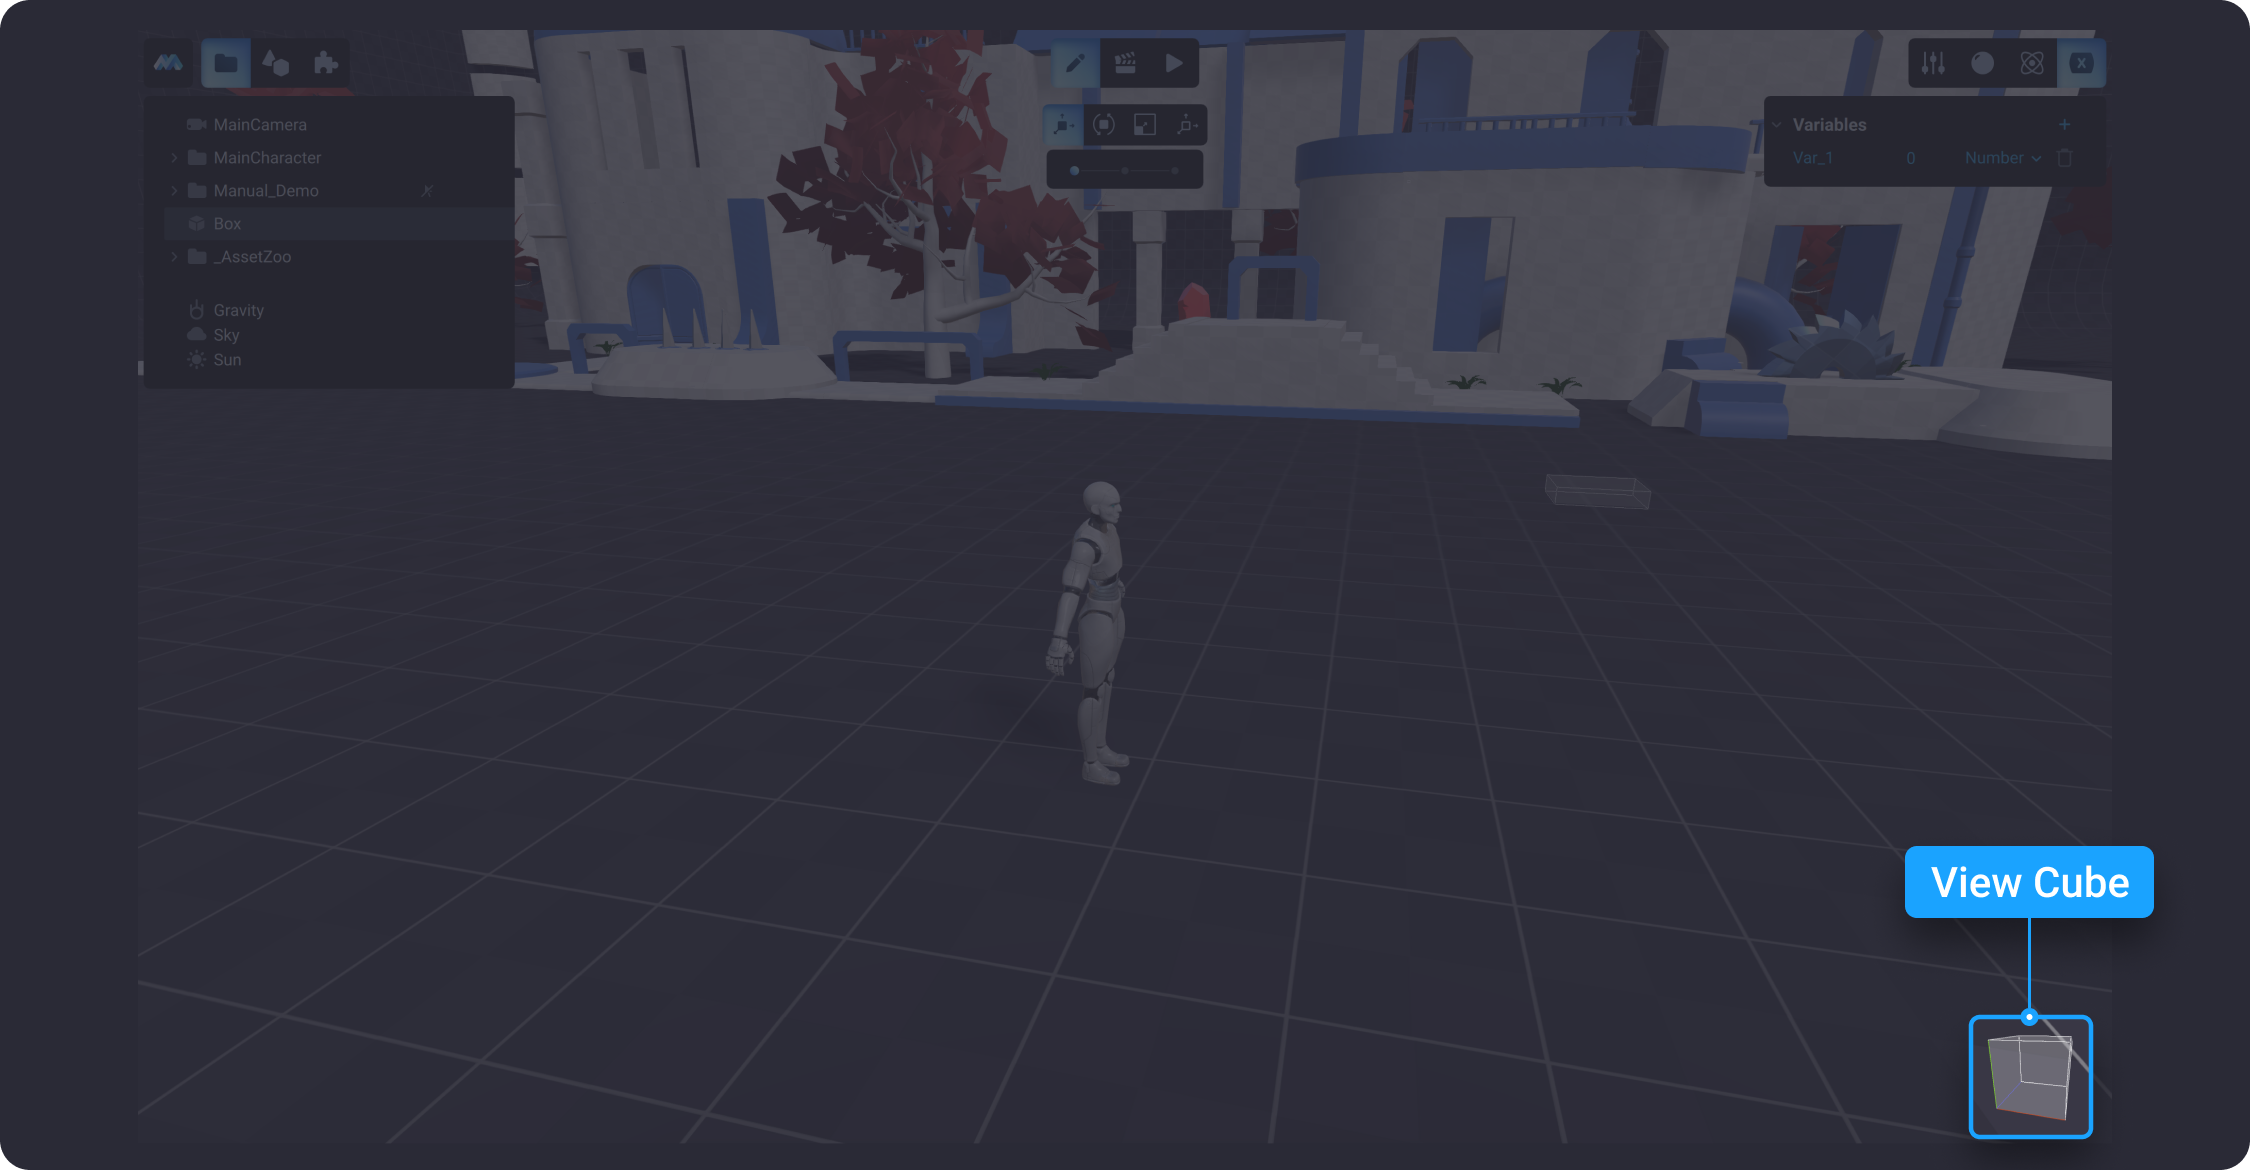
In addition to the navigation controls described above, there is another viewport control you can use to align the camera to Top, Side, and Front - a View cube. It is available at the bottom right corner of the Edit mode. Hold `ALT` and clicking on the edges or faces of the view cube rotates the camera viewport around the target object. It also allows you to use `LMB + Drag` the cube's faces to rotate the viewport to any custom angle.&#x20;

![](https://dl.dropboxusercontent.com/s/veykab31x8rwirg/008.png?dl=0)

### Focusing

In MANU, you can focus on any object in your scene by double-clicking on it in the scene tree. Also you can select object and press `F` .

## Using 3D Gizmo to Manipulate Objects

3D Gizmo is used to give visual setup aids available in the Edit mode. In MANU, 3D gizmo provides help to manipulate selected objects right in the scene along a 3D axis or plane. There are various types of gizmo that can be selected in the 3D gizmo panel, such as Move, Rotate, Scale, and Collider.
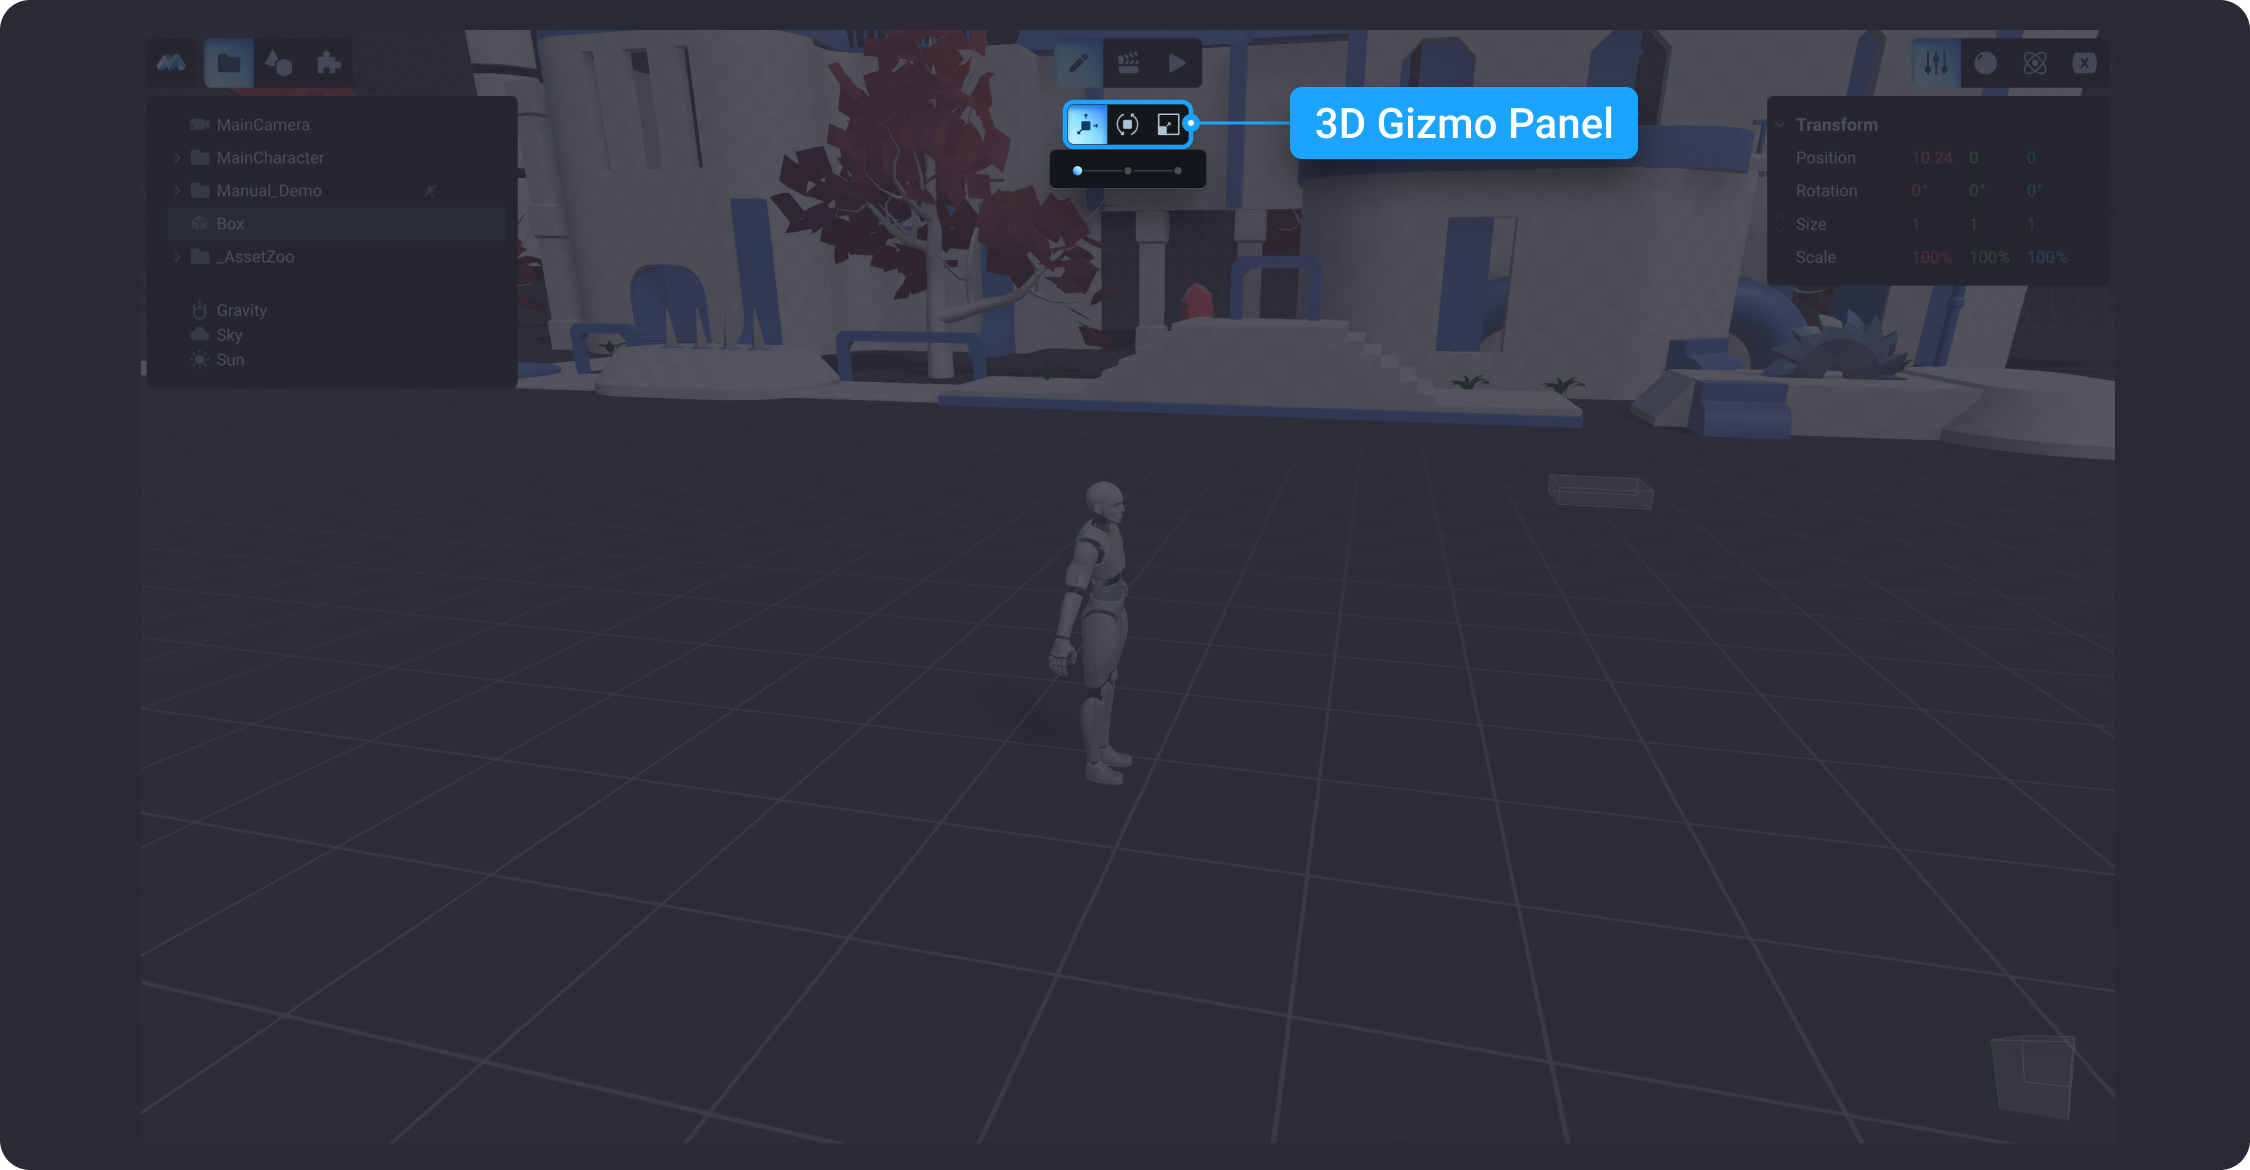
![](https://dl.dropboxusercontent.com/s/iscib7k7f6en2ne/009.png?dl=0)

By default, gizmos are displayed automatically when you select an object in the Edit mode. To select the object, click on it in the scene or select it from the Scene tree.&#x20;

{% embed url="<https://dl.dropboxusercontent.com/s/40gnsxyi6mcr47i/v001.mp4>" %}

Since gizmos constrain modifications along specific axes, they help ensure more predictable results. You can specify which gizmos are displayed when an object is selected using the 3D Gizmo panel.

Note, that if one of the 3D gizmos is selected: Move, Scale, or Rotate, the Properties tab will be displayed in the Inspector. Also, if you select the properties tab, the previously selected 3D gizmo will be displayed in the Edit mode.

{% embed url="<https://dl.dropboxusercontent.com/s/xftl4xbrs3keuup/v002.mp4>" %}

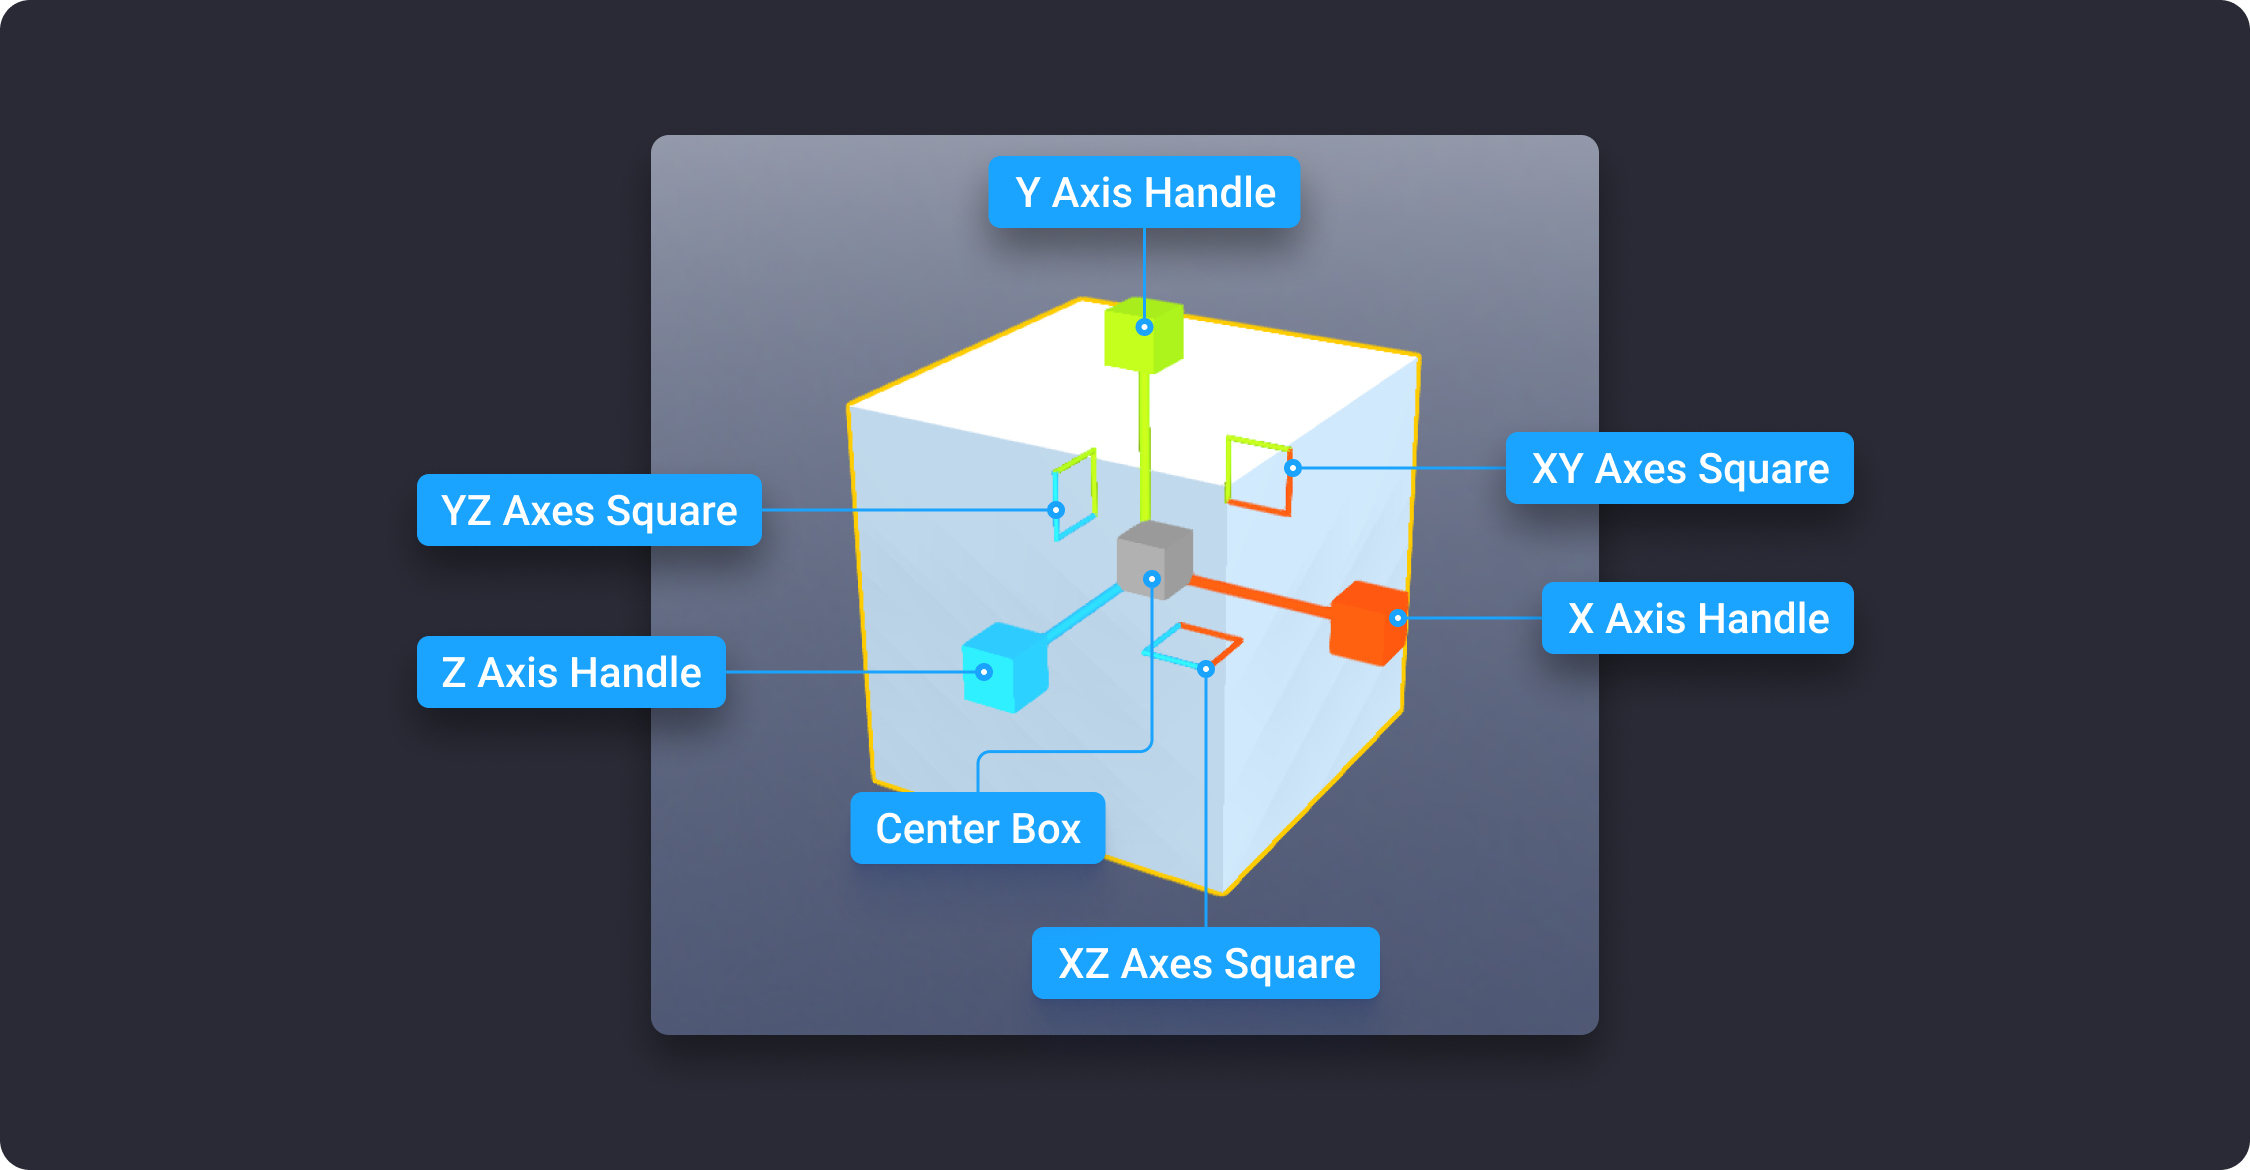
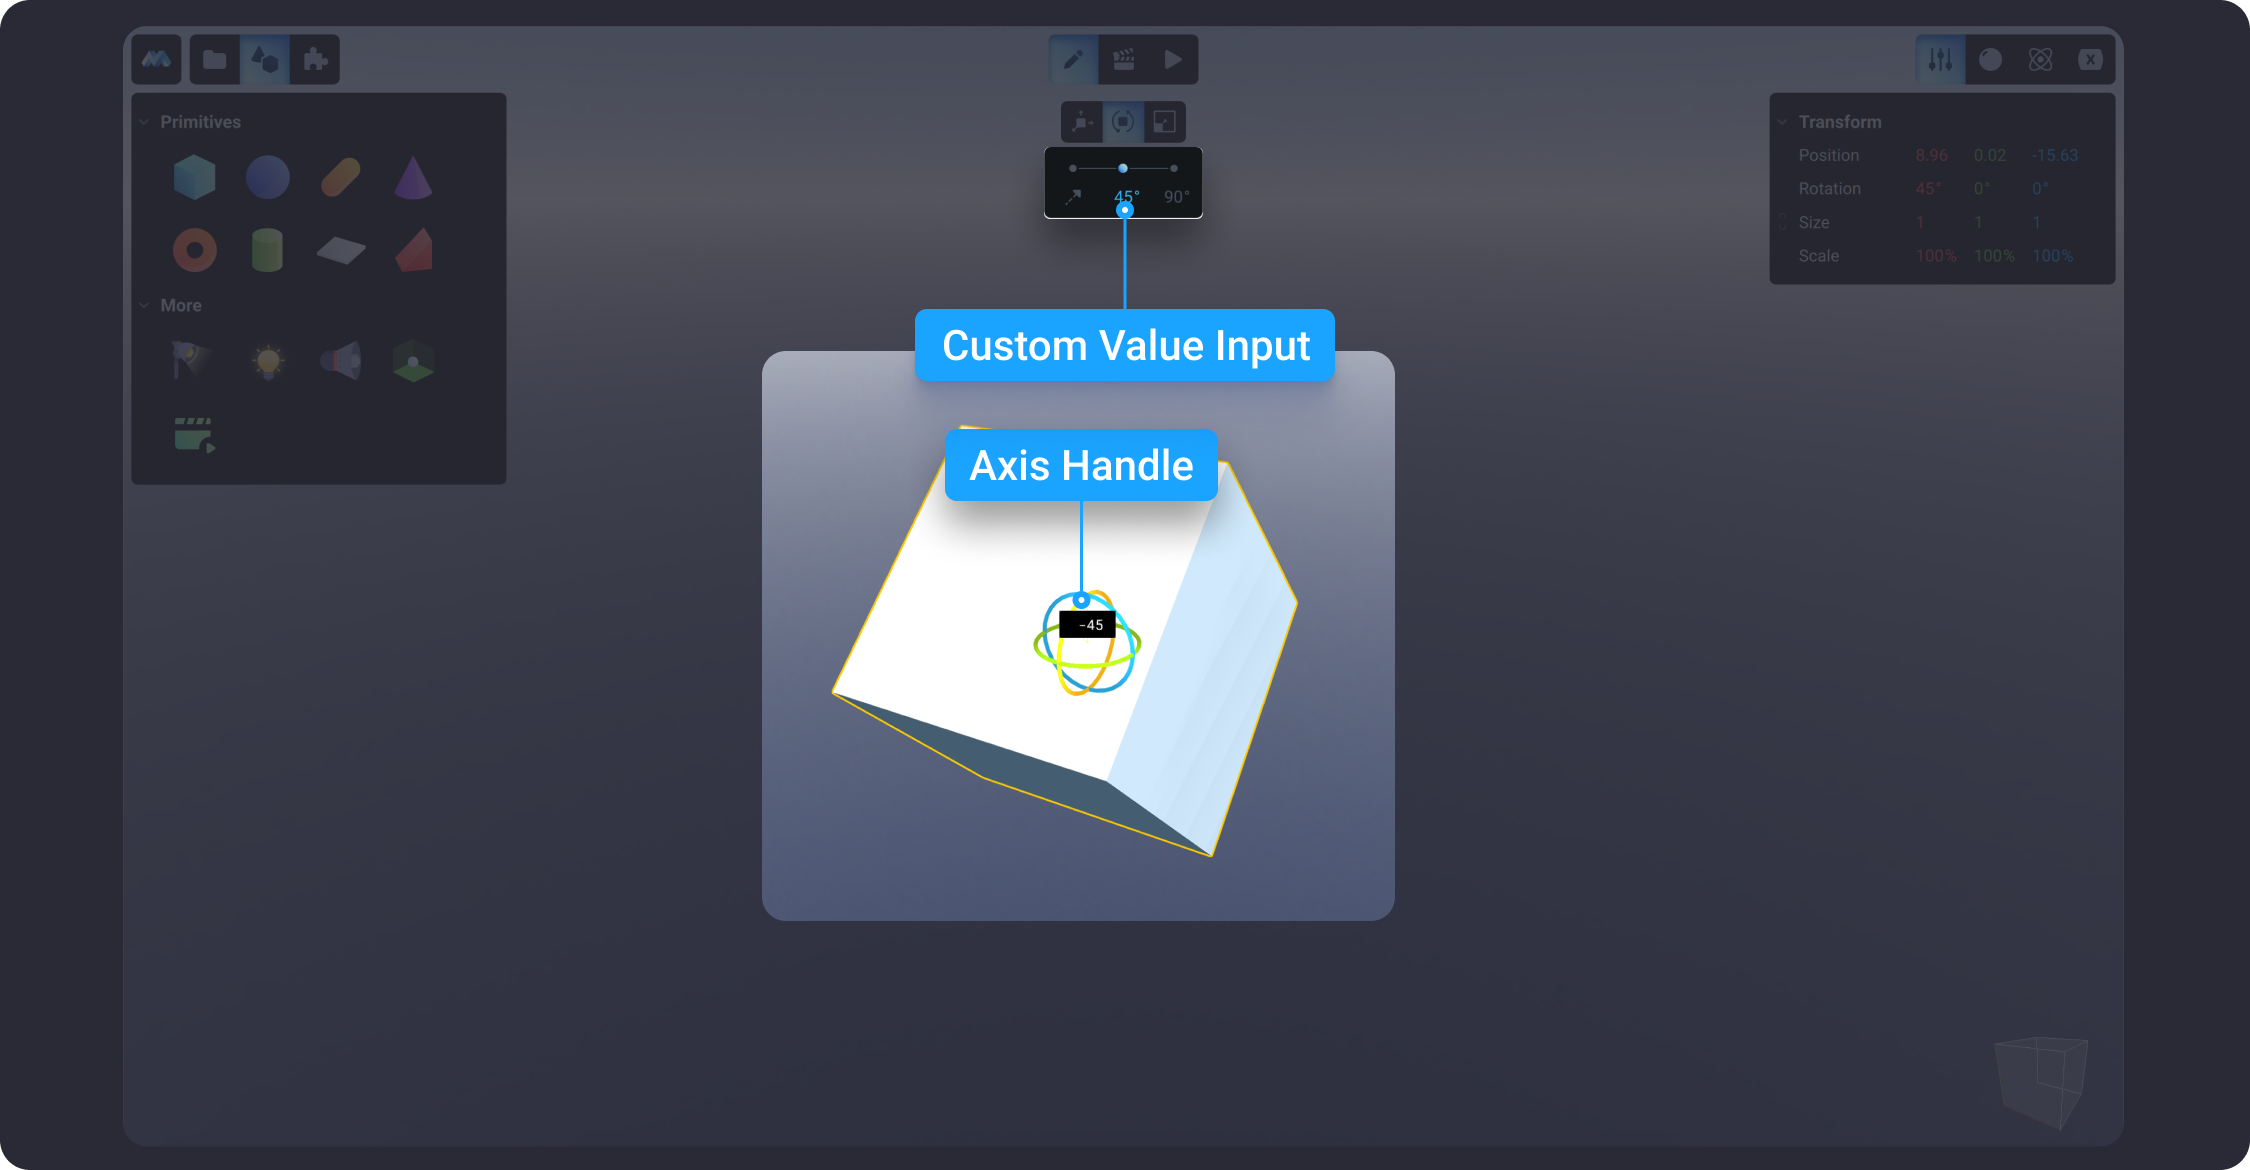
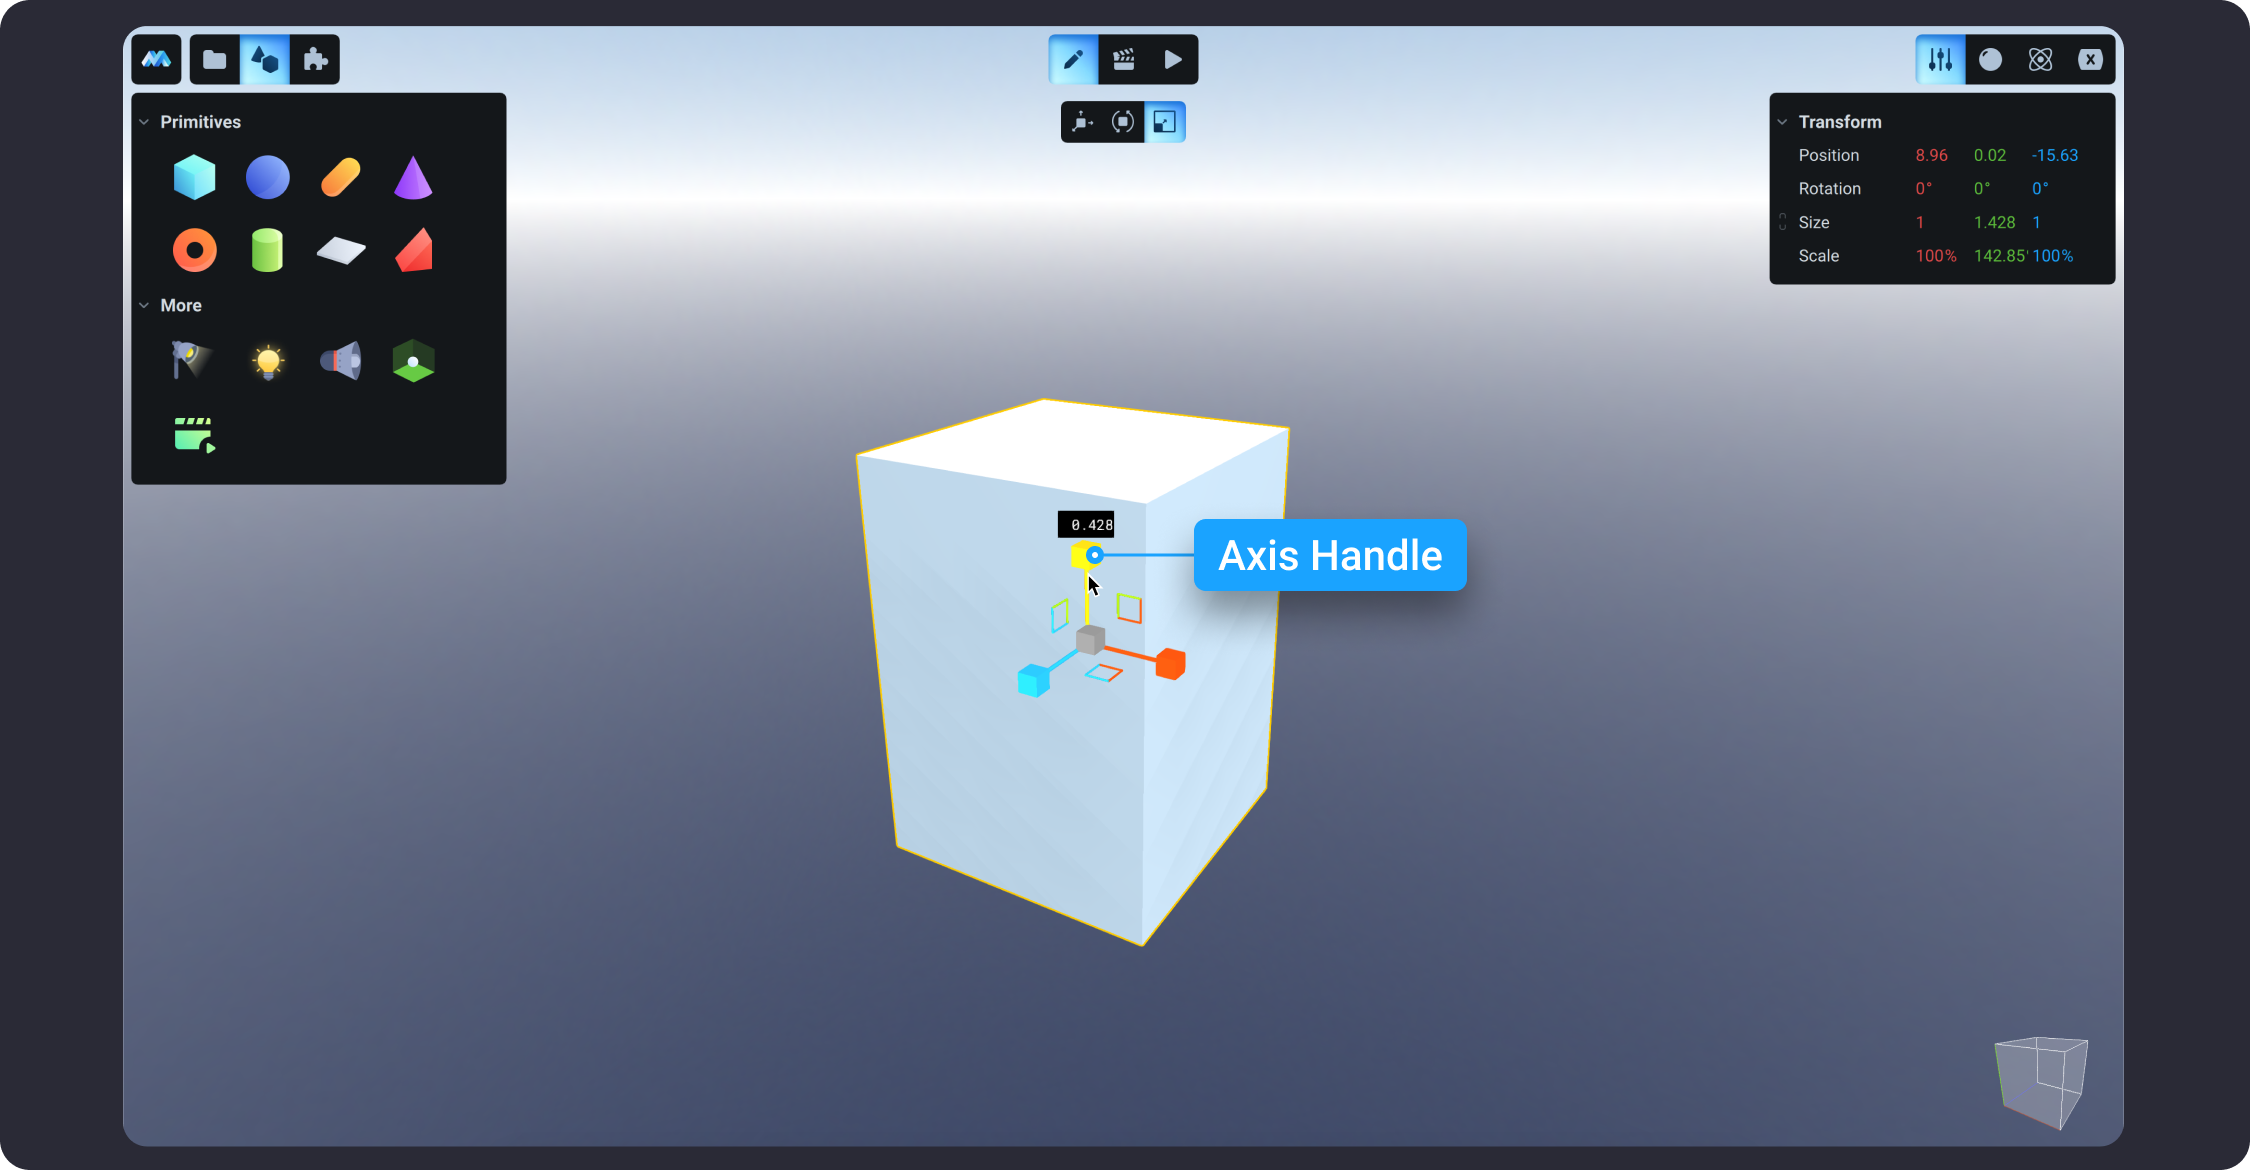
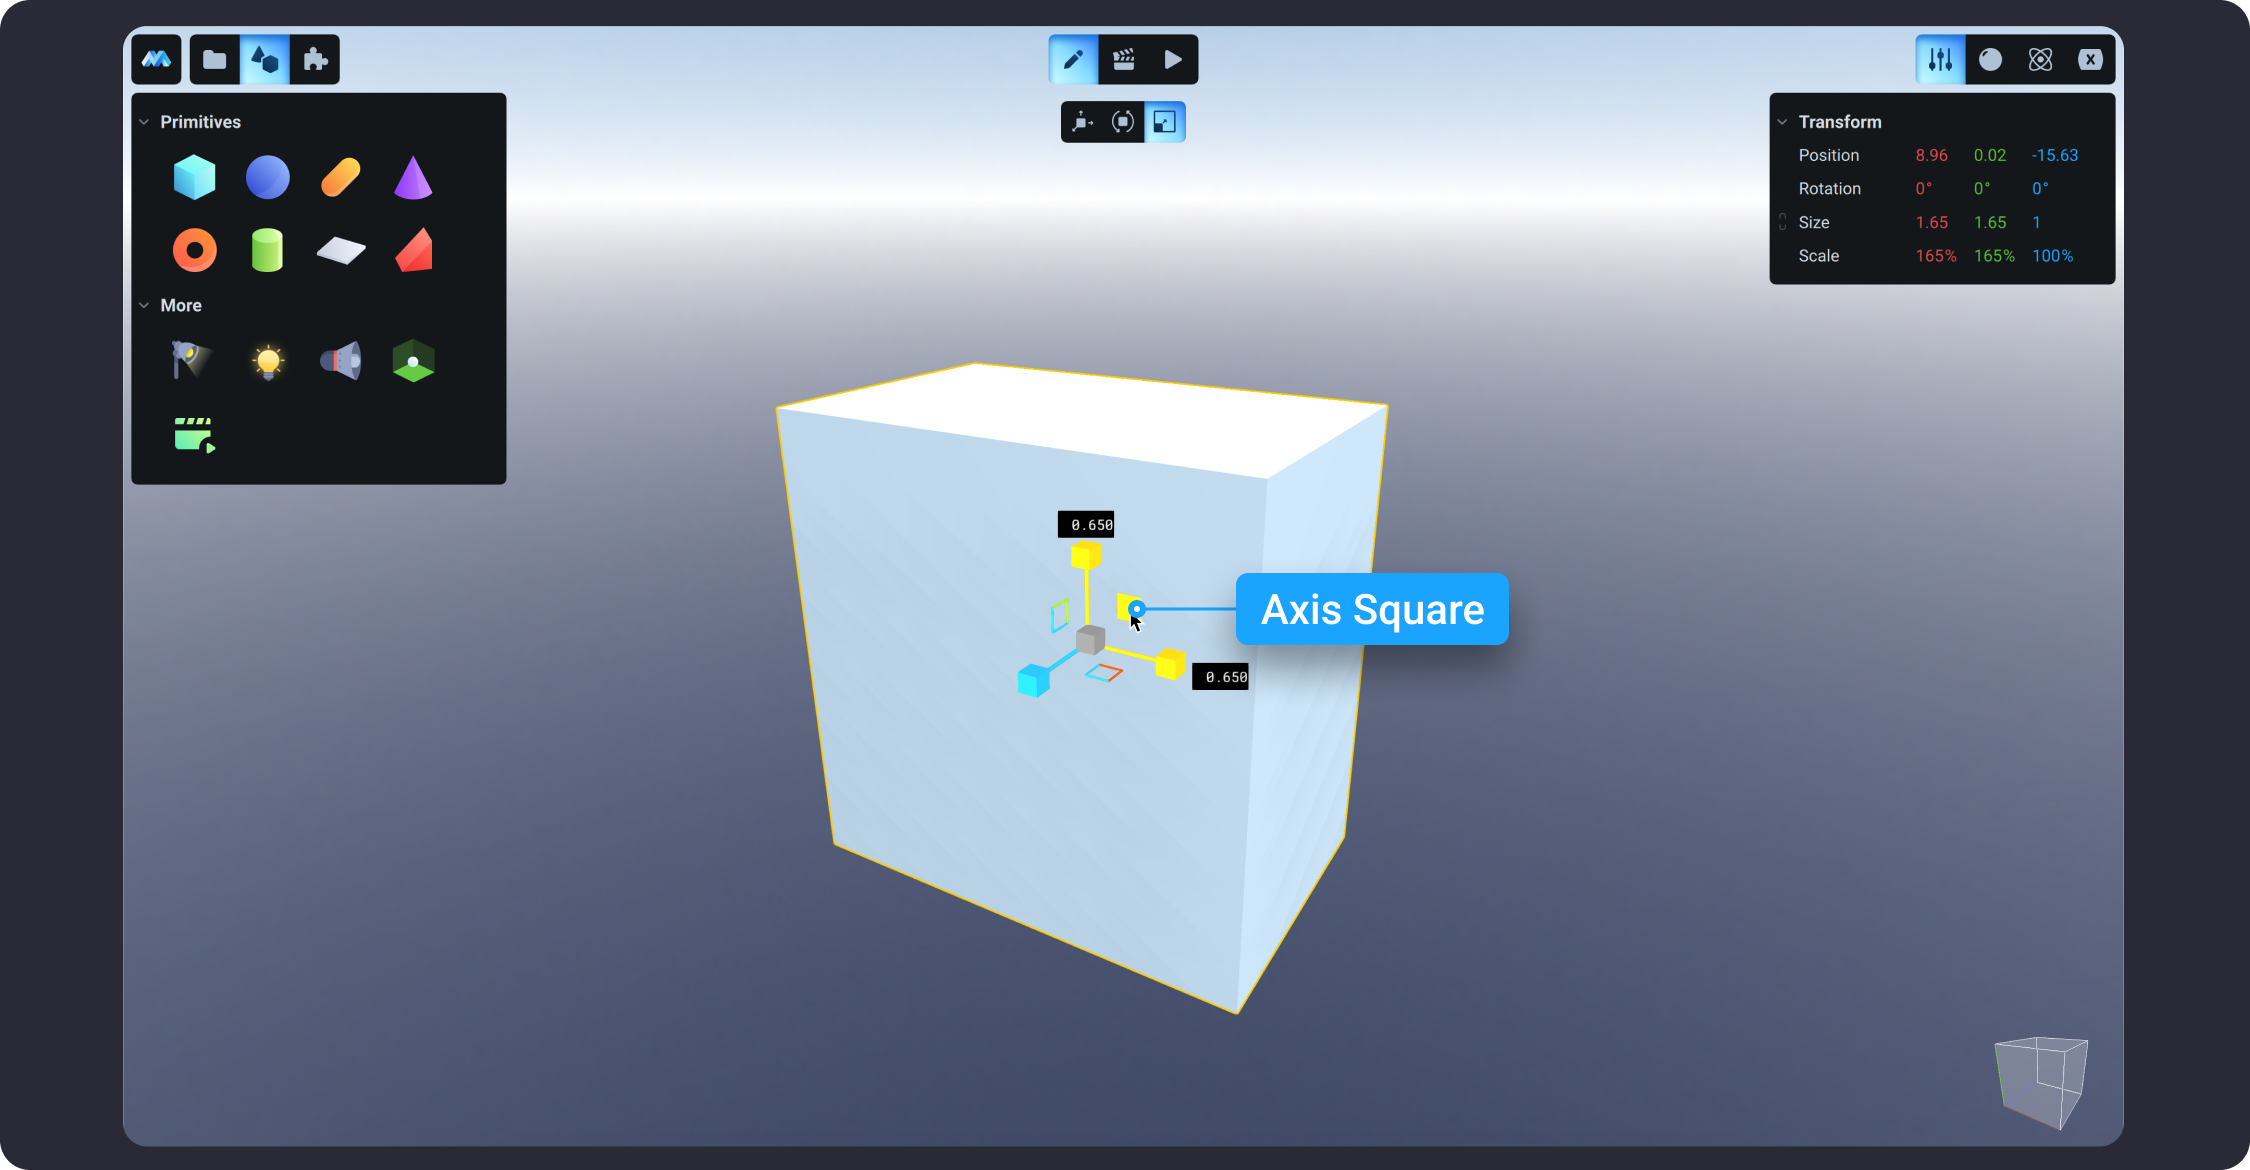
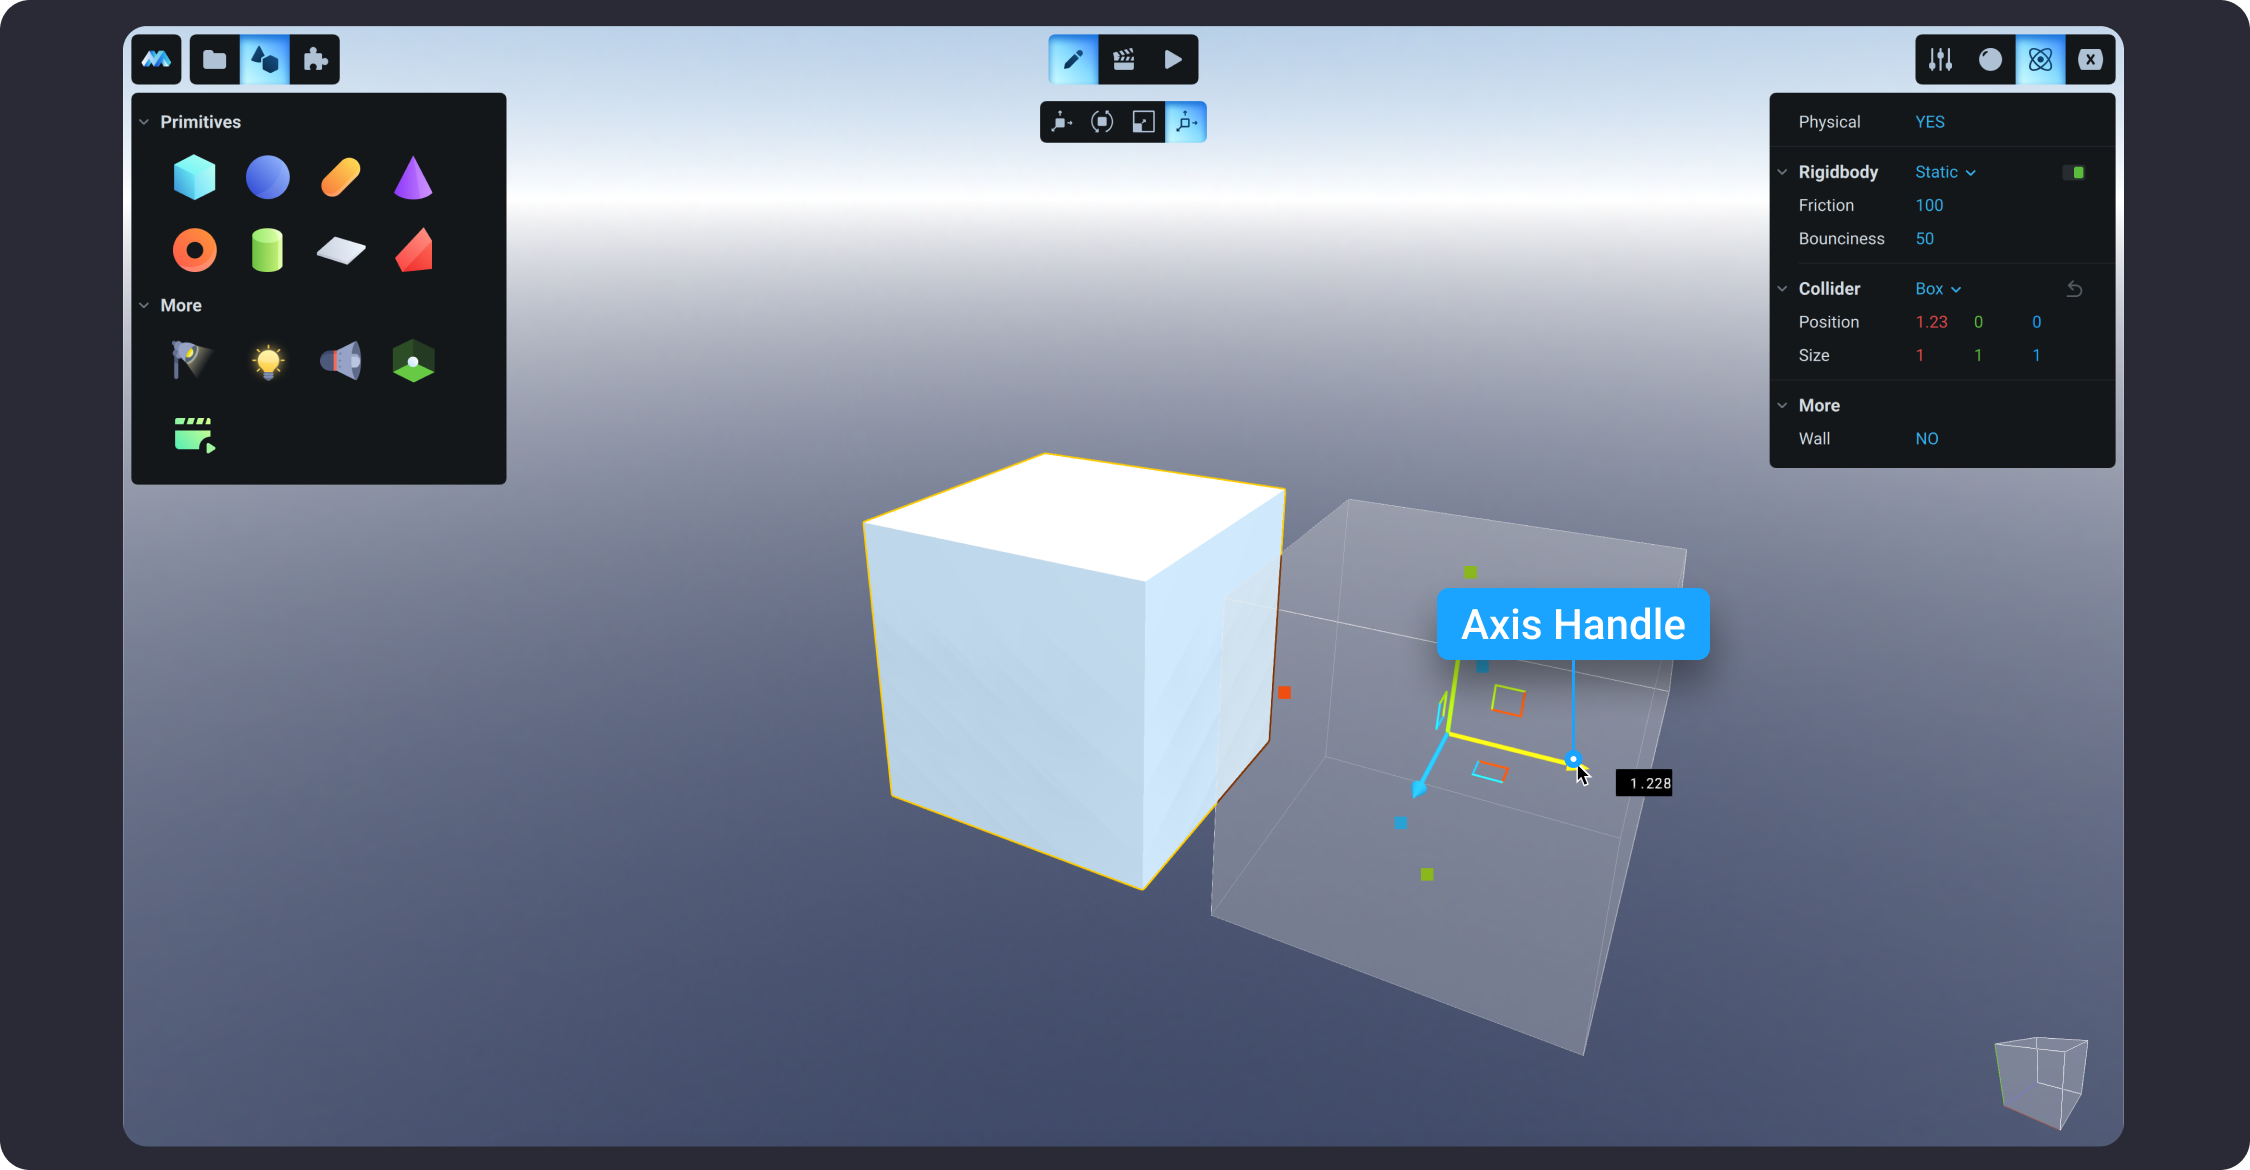
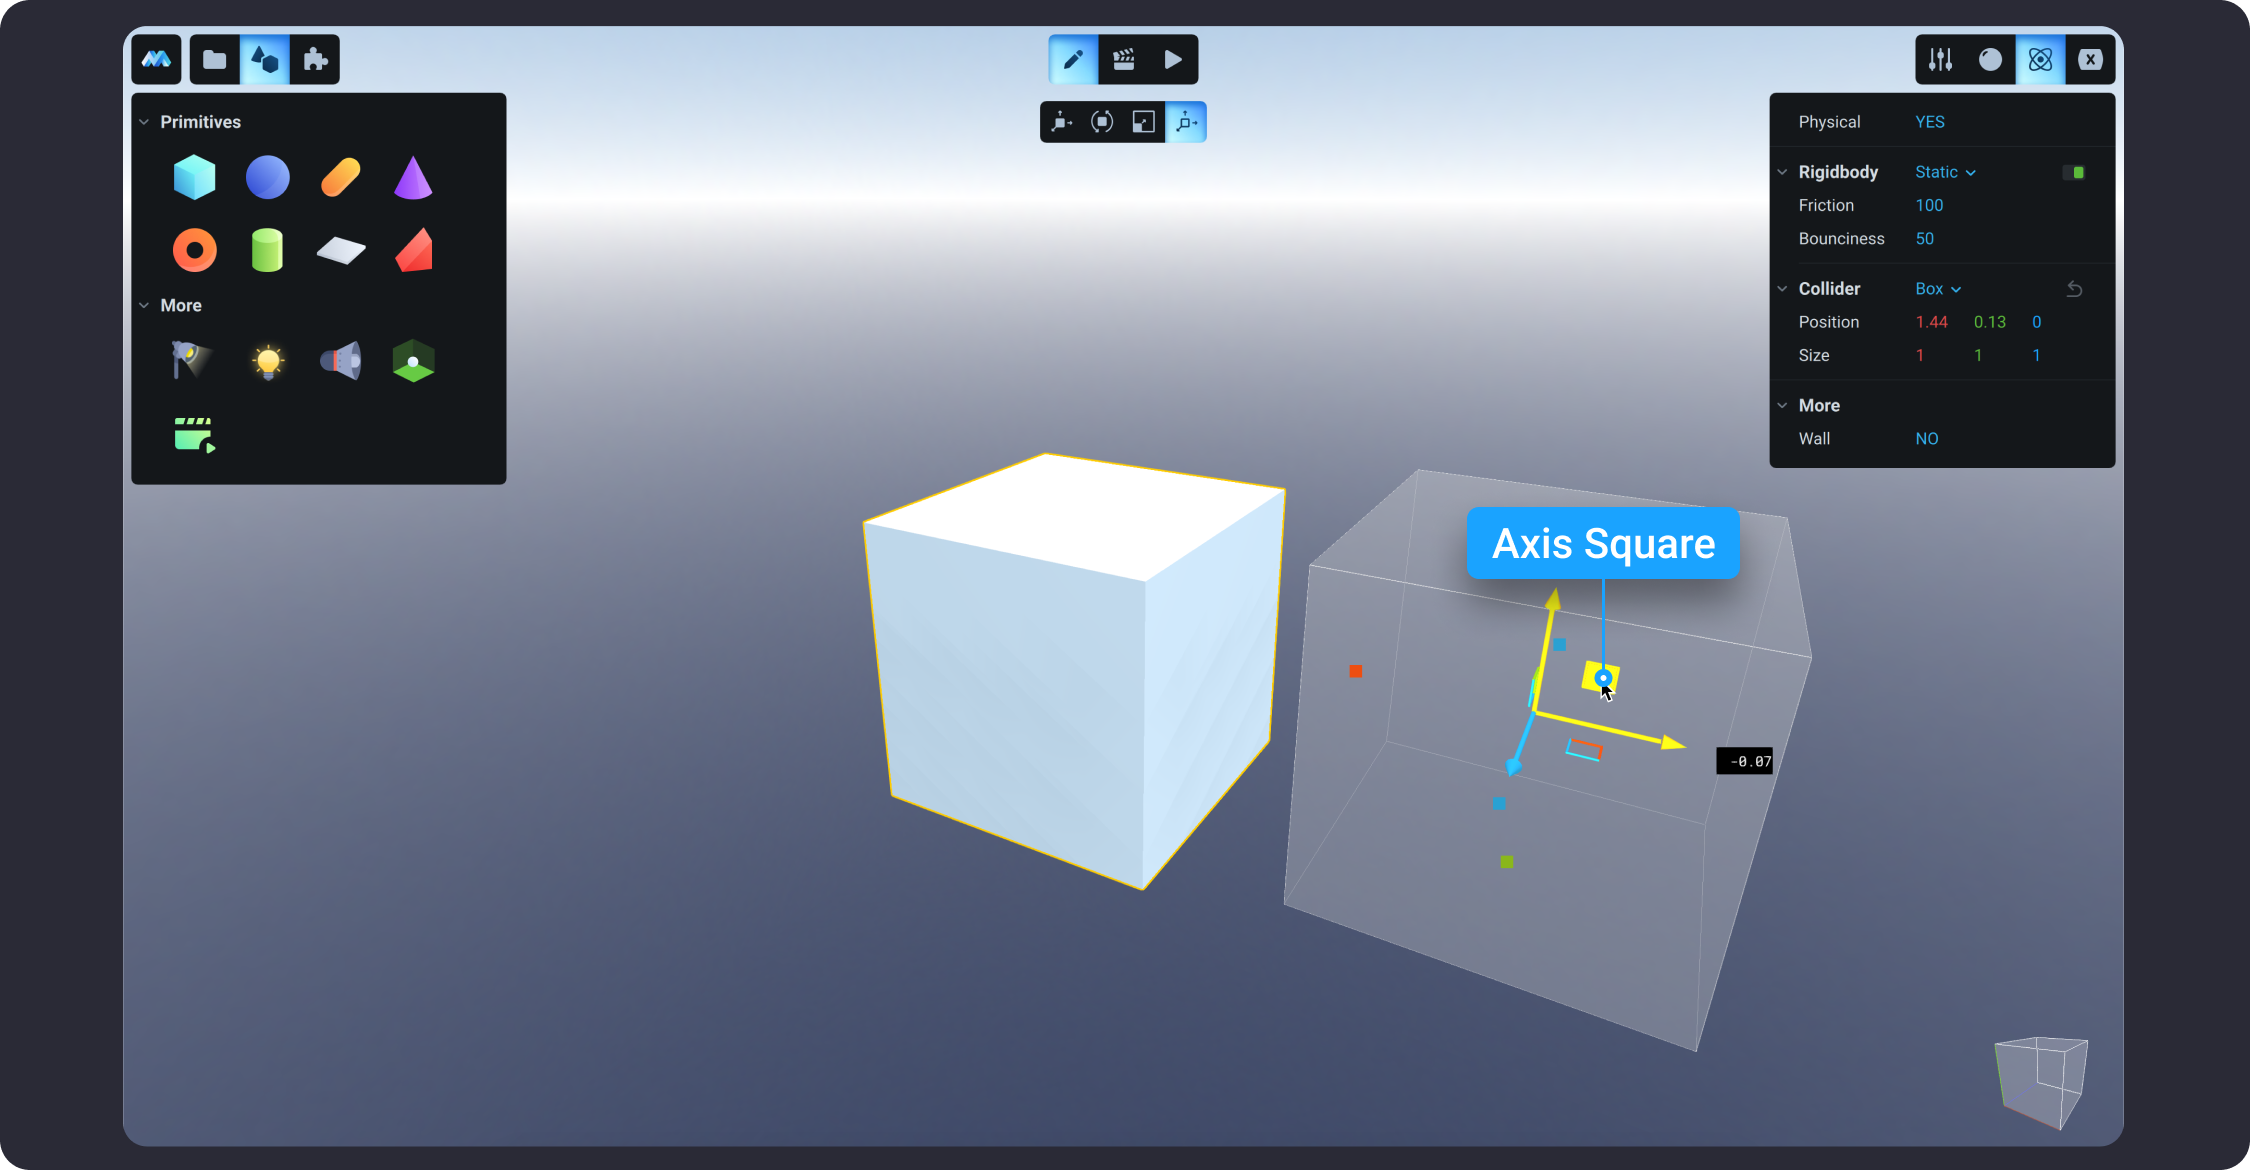
By default, the gizmo is initially placed in the center of the selected object or a group. The center box of the gizmo sets the base point for object modification. The axis handles on the gizmo constrain the movement, scale, or rotation to an axis (X, Y, Z). The axes square on the gizmo constrains the movement or scale to two relative axes (XY, YZ, XZ).
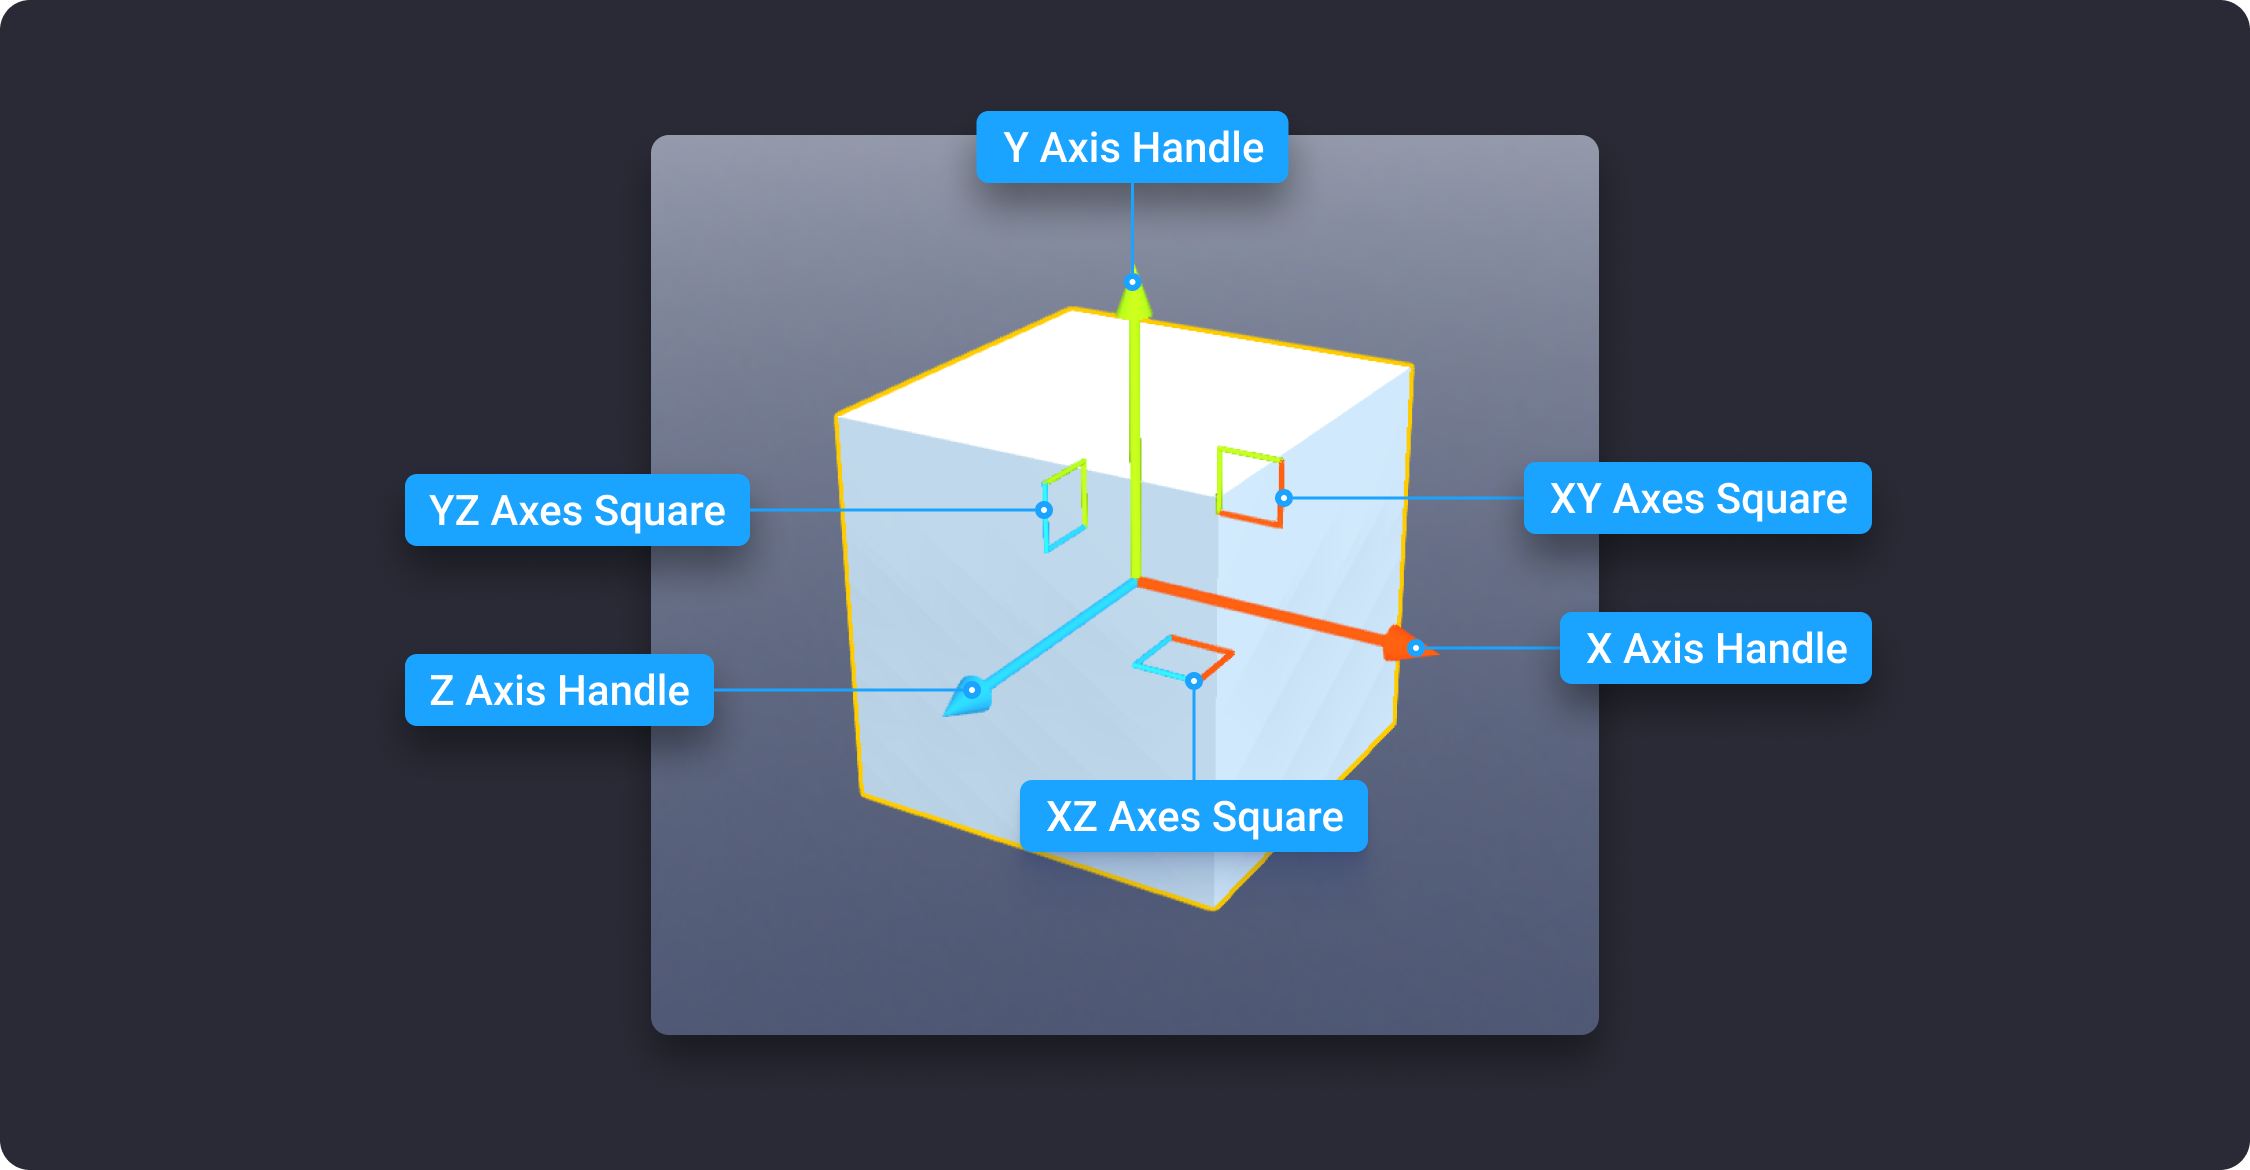
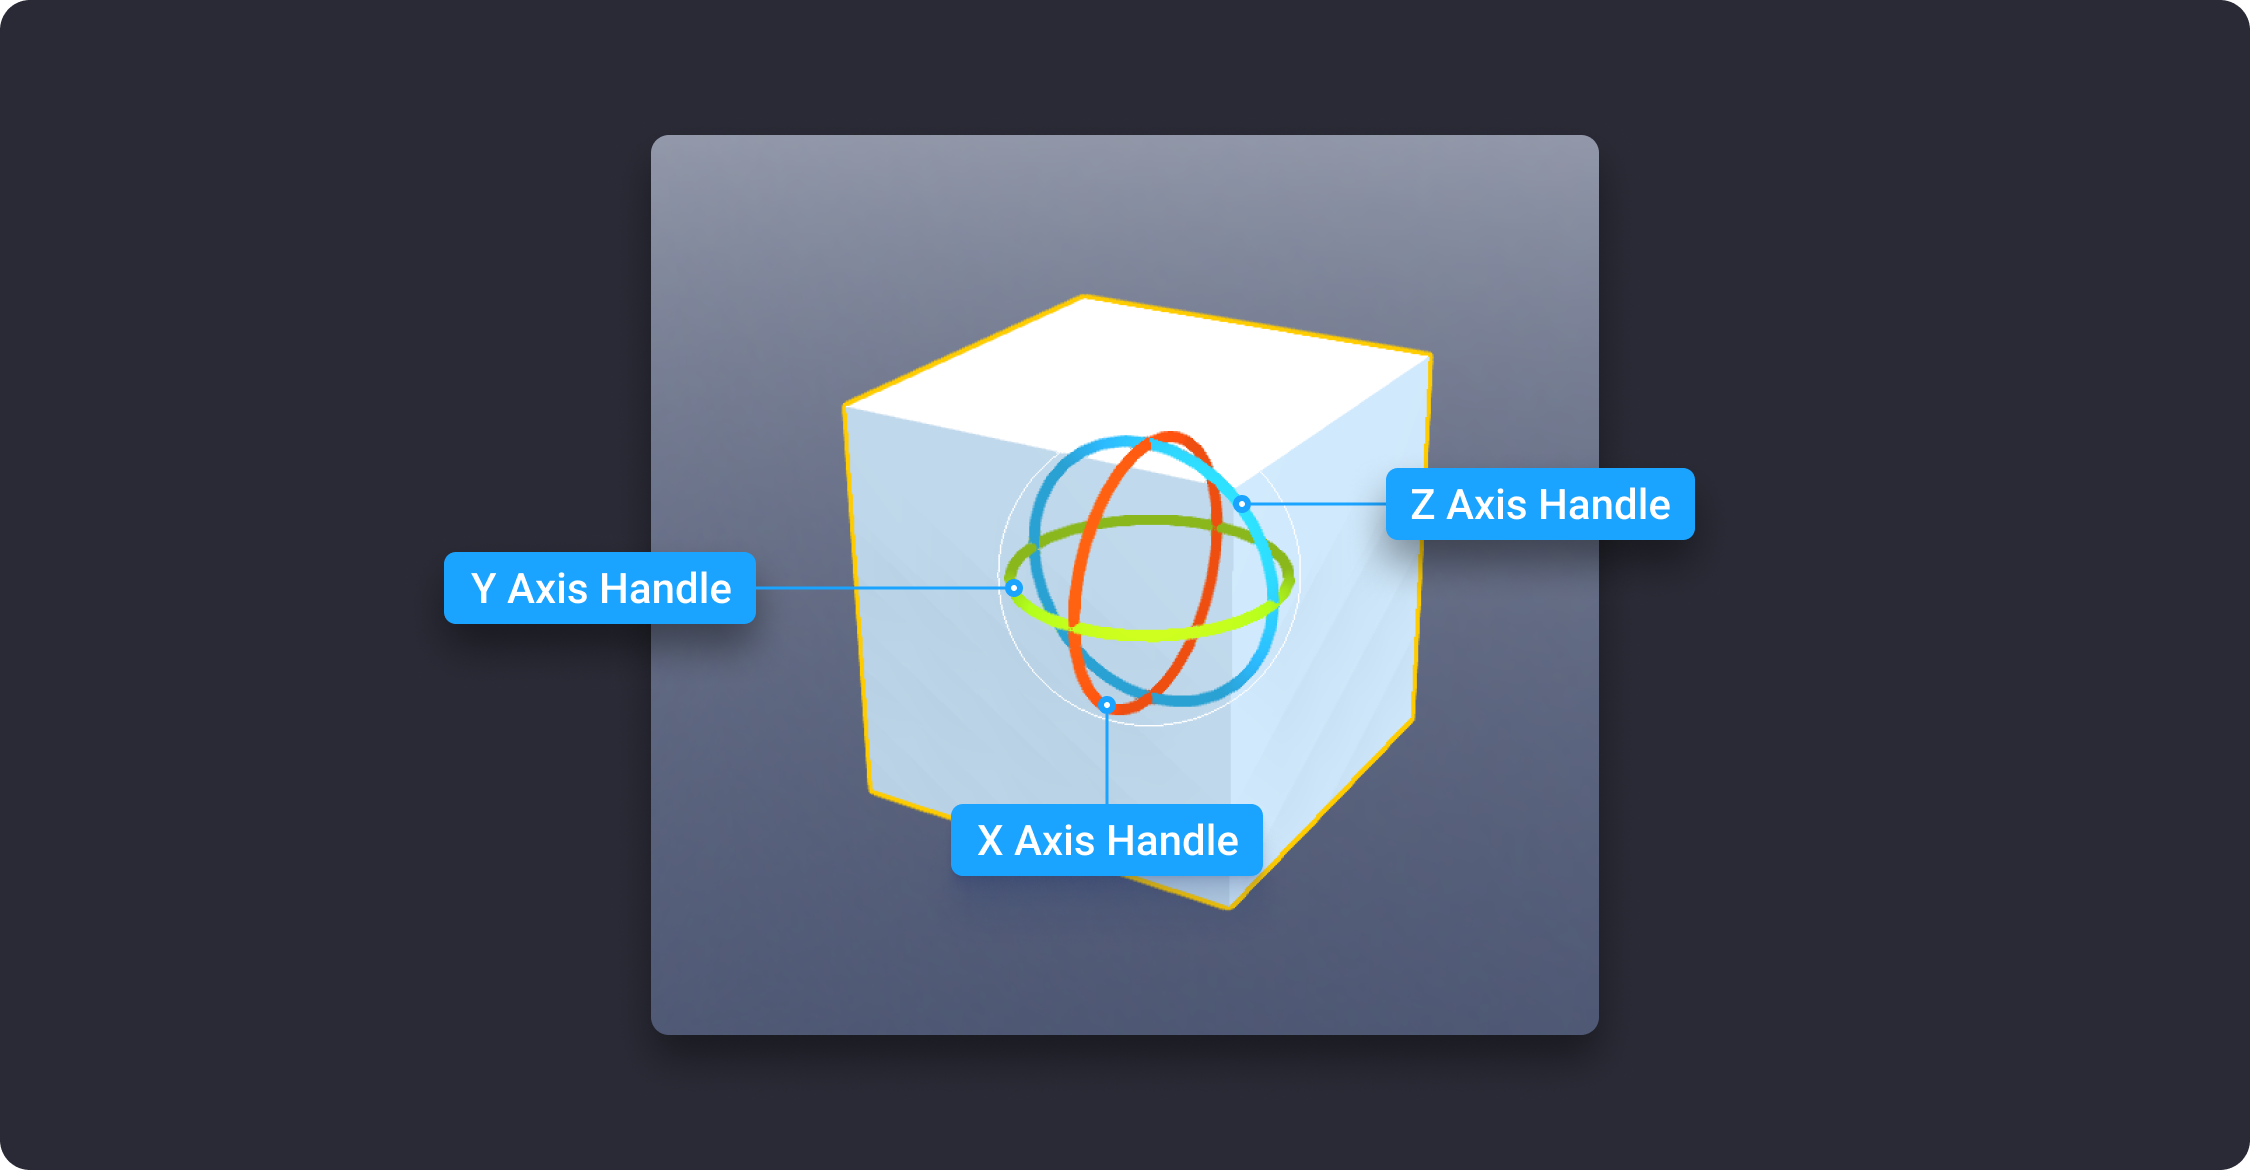
![](https://dl.dropboxusercontent.com/s/bmgxlnvxfh8g5kb/012.png?dl=0)

![](https://dl.dropboxusercontent.com/s/4q85i7dvz1vlrfw/012-1.png?dl=0)

![](https://dl.dropboxusercontent.com/s/j4wfmcc3ovqox4x/012-2.png?dl=0)

It is worth noting that some Library objects do not have the default 3D Gizmo. For example, if you add a spotlight into the scene, it will have Move and Rotate gizmo in Edit mode. Similarly, a point light would display a Move gizmo only. Generally, the displayed types of available 3D Gizmo depend on the type of selected object. Let’s have a closer look at the description below about each 3D Gizmo.&#x20;

### Move Gizmo&#x20;

Move Gizmo is a default type of gizmo in MANU. Move gizmo relocates selected objects along an axis or plane. You can use this gizmo to constrain the movement to an axis or plane.

To use Move gizmo, select the object in the scene, switch to Move gizmo in the 3D Gizmo Panel. As the cursor hovers over an axis handle on the gizmo, the specified axis turns yellow. Click the axis handle. As you drag the cursor using the LMB, the movement of the selected objects and subobjects is constrained to the highlighted axis.&#x20;

![](https://dl.dropboxusercontent.com/s/0x9l9fg34hbiqd5/013.png?dl=0)

You can use the 3D Move gizmo to constrain the movement to a plane. Each plane is identified by an axes square between the respective axis handles. You can specify the plane of movement by moving the cursor over the axes square. When the square turns yellow, click it. As you drag the cursor, the selected objects and subobjects move only along the highlighted plane for XY, YZ, or XZ axes.&#x20;

![](https://dl.dropboxusercontent.com/s/2482wxjd4pvkbuu/014.png?dl=0)

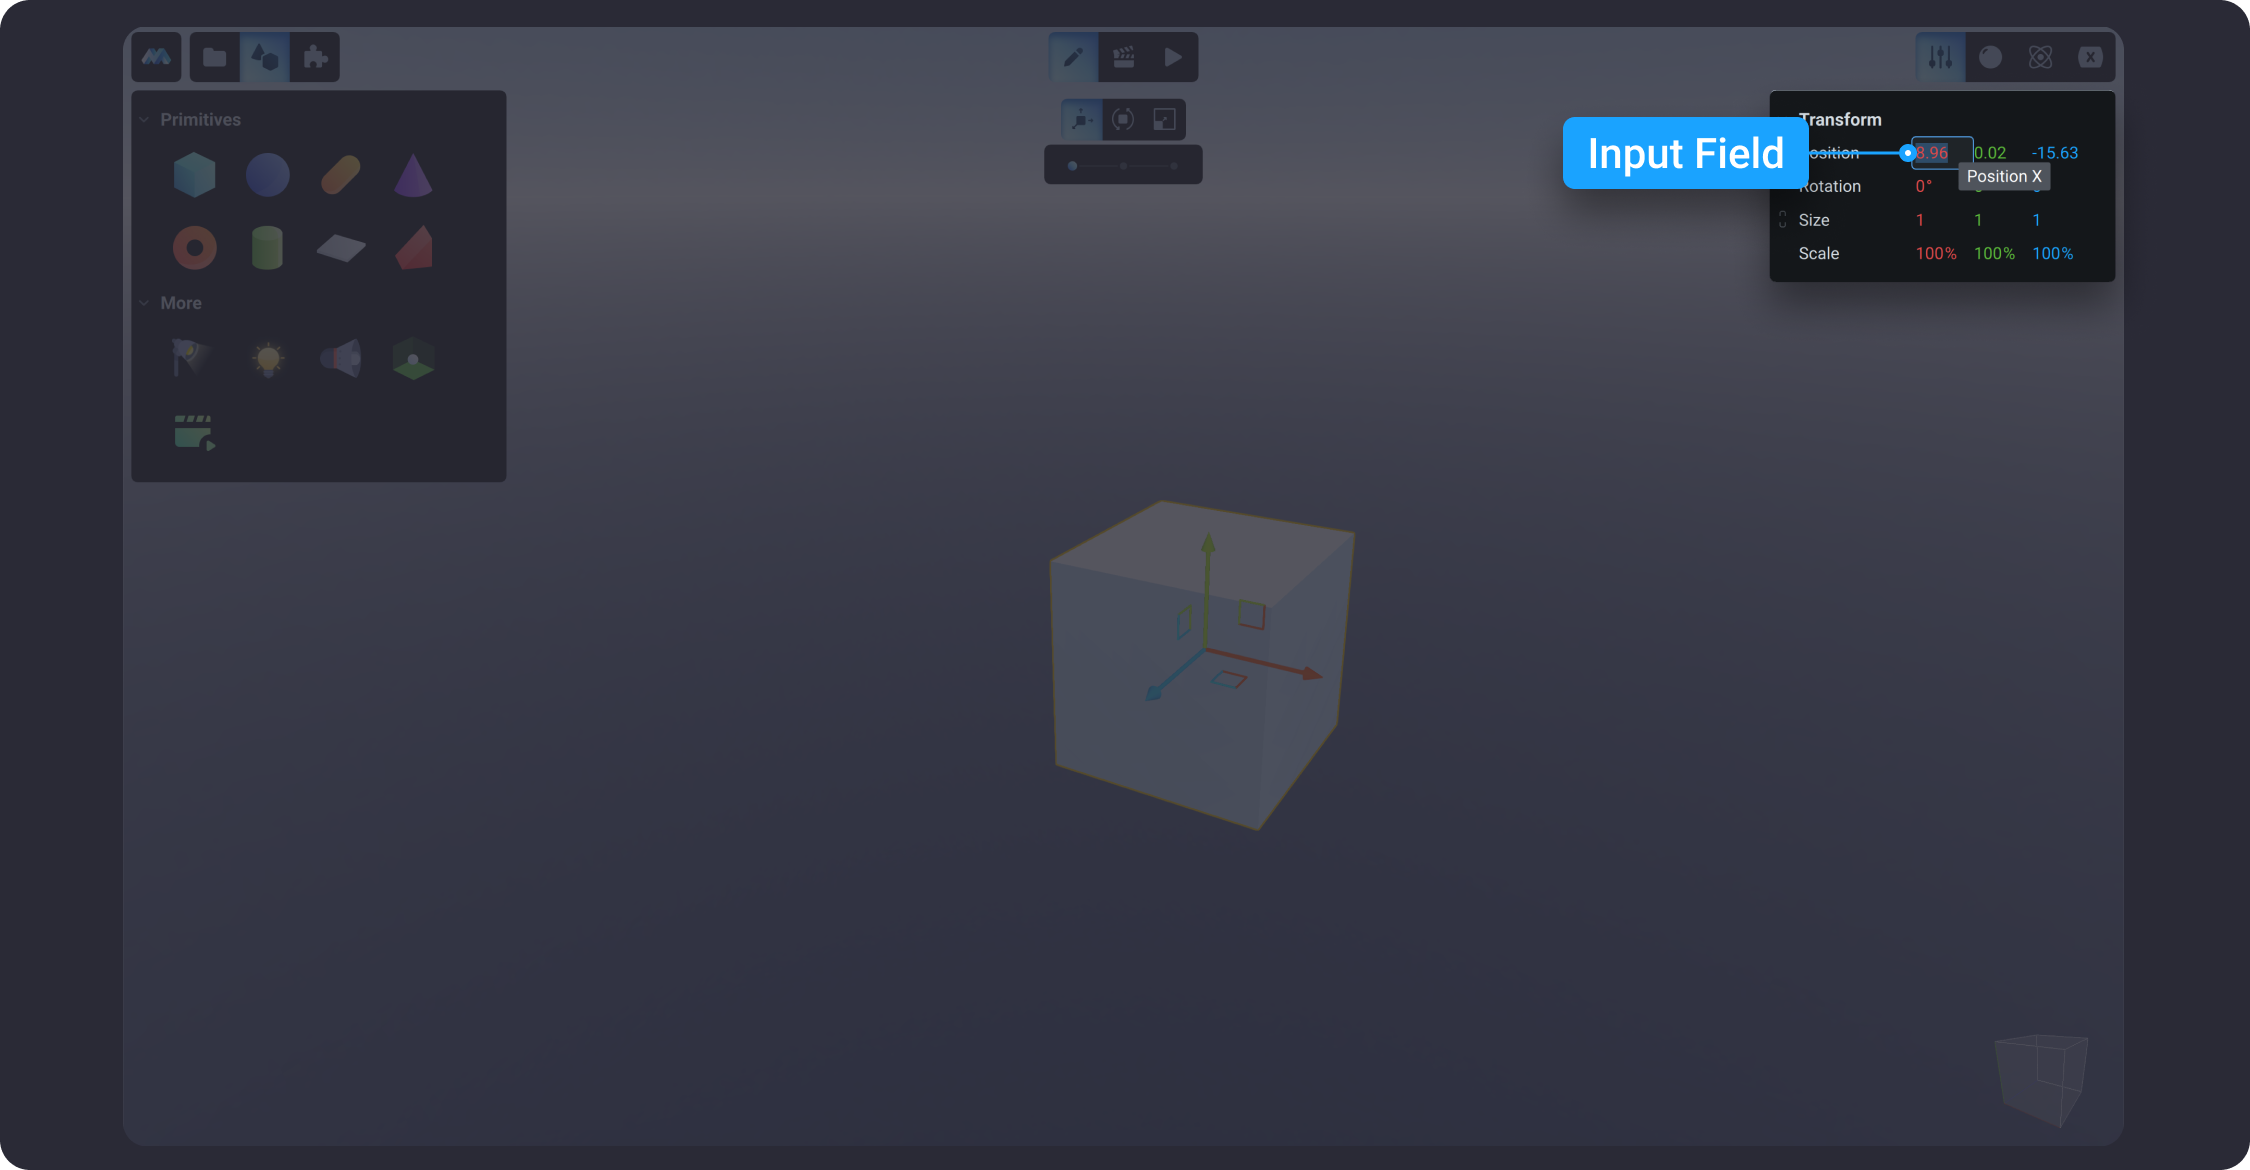
To move the object precisely, input the position values for XYZ axes in the Transform panel.

![](https://dl.dropboxusercontent.com/s/2892m1mcw7zlzje/015.png?dl=0)

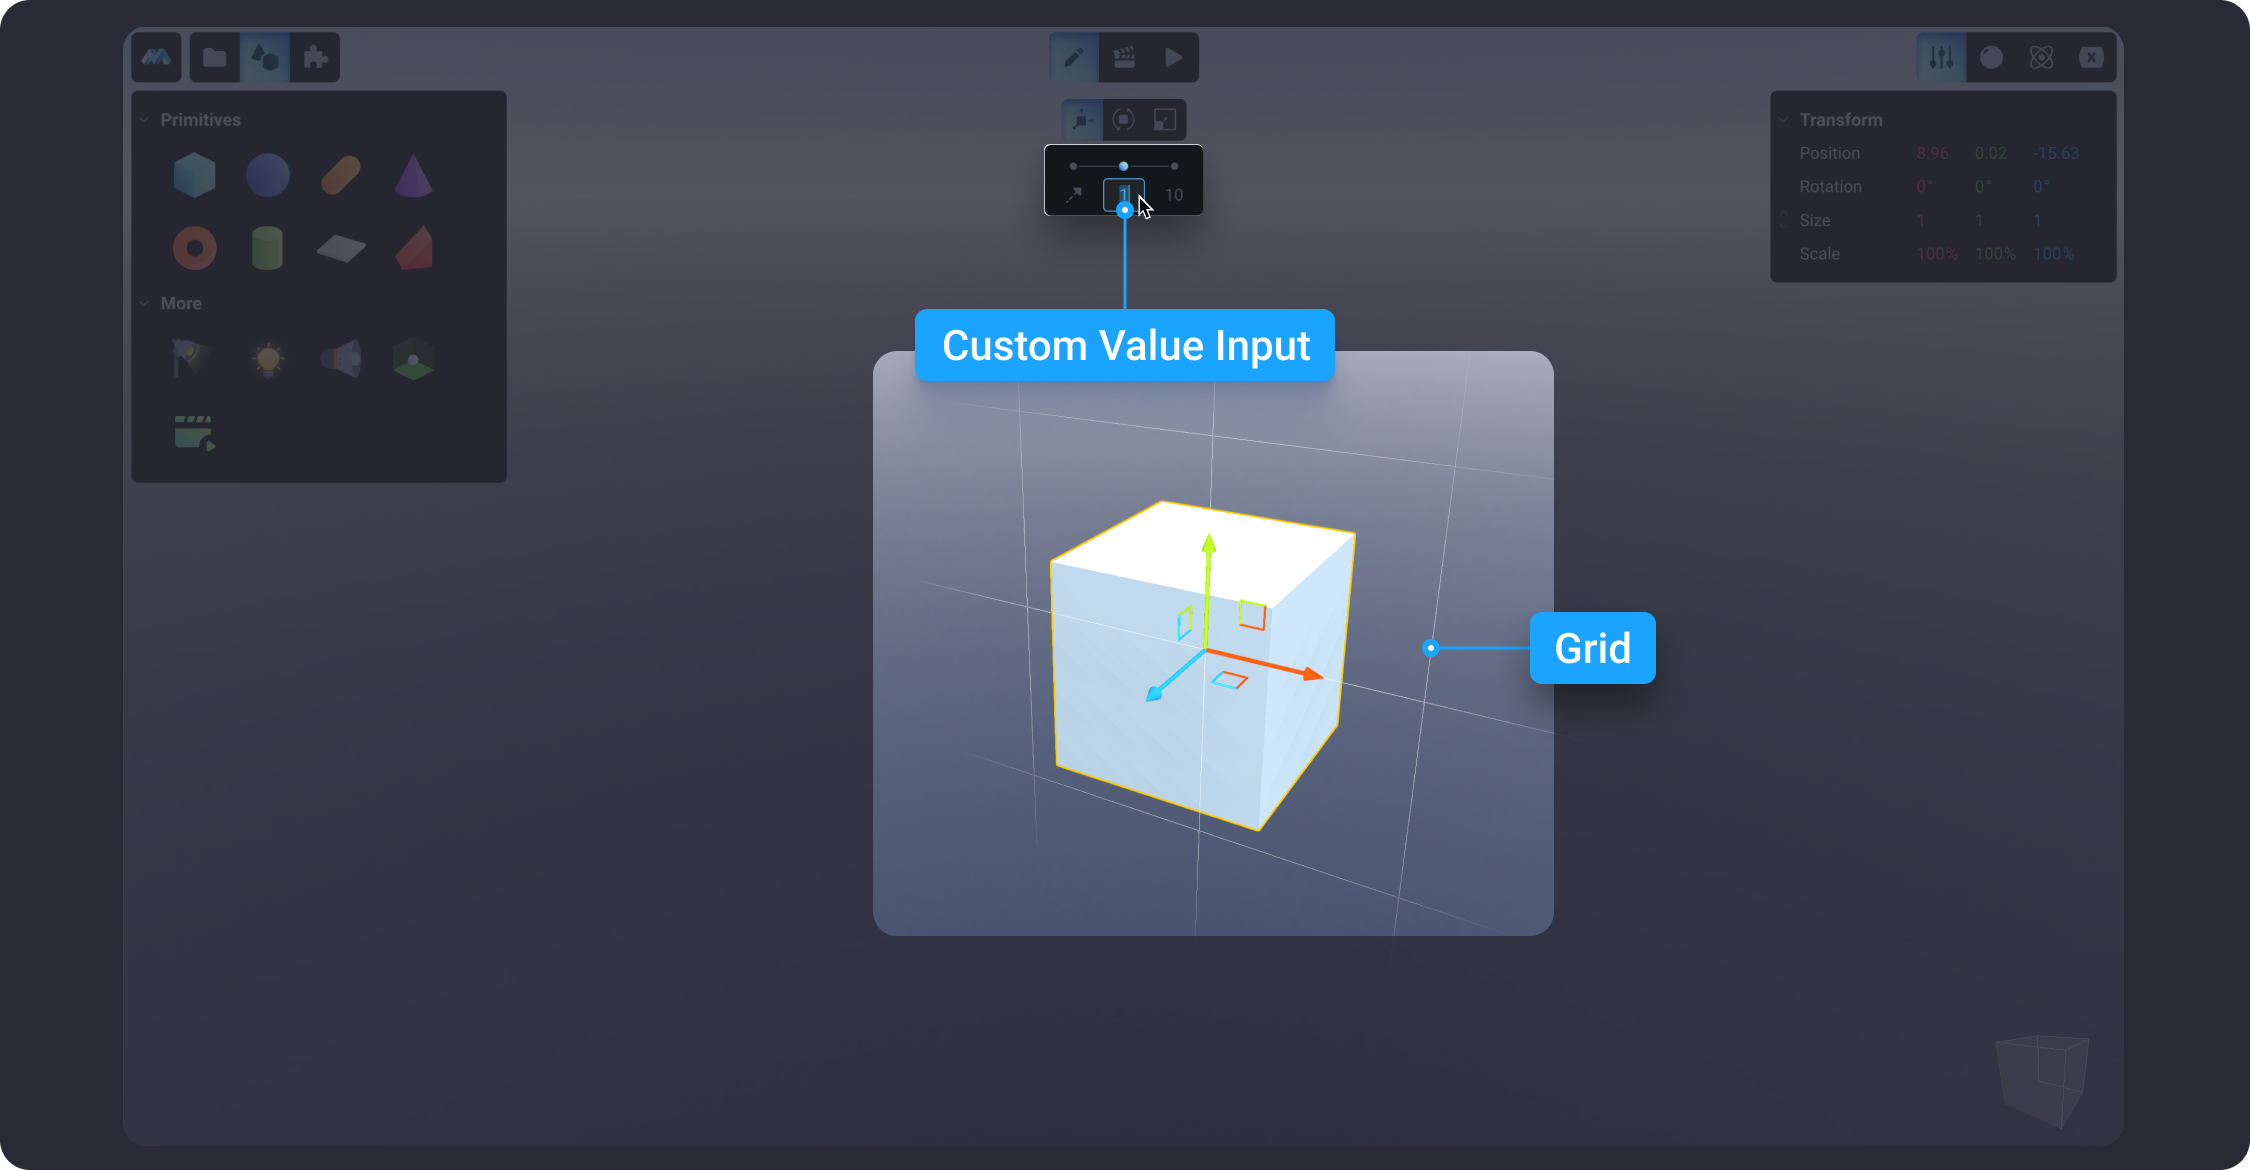
You can also adjust the Move gizmo settings by selecting either Smooth opting or entering a custom value of your own. If smooth is selected, it will move the object around the scene smoothly. Entering the custom values (in meters) allow you to define the distance for movement. For example, if you put “1”, it will move the selected object by 1 meter. This feature is helpful if you are working on a big scene, it allows you to move objects around the scene quicker as opposed to using the smooth option.

![](https://dl.dropboxusercontent.com/s/bw16ngtu7jxyx1r/016.png?dl=0)

### Rotate Gizmo&#x20;

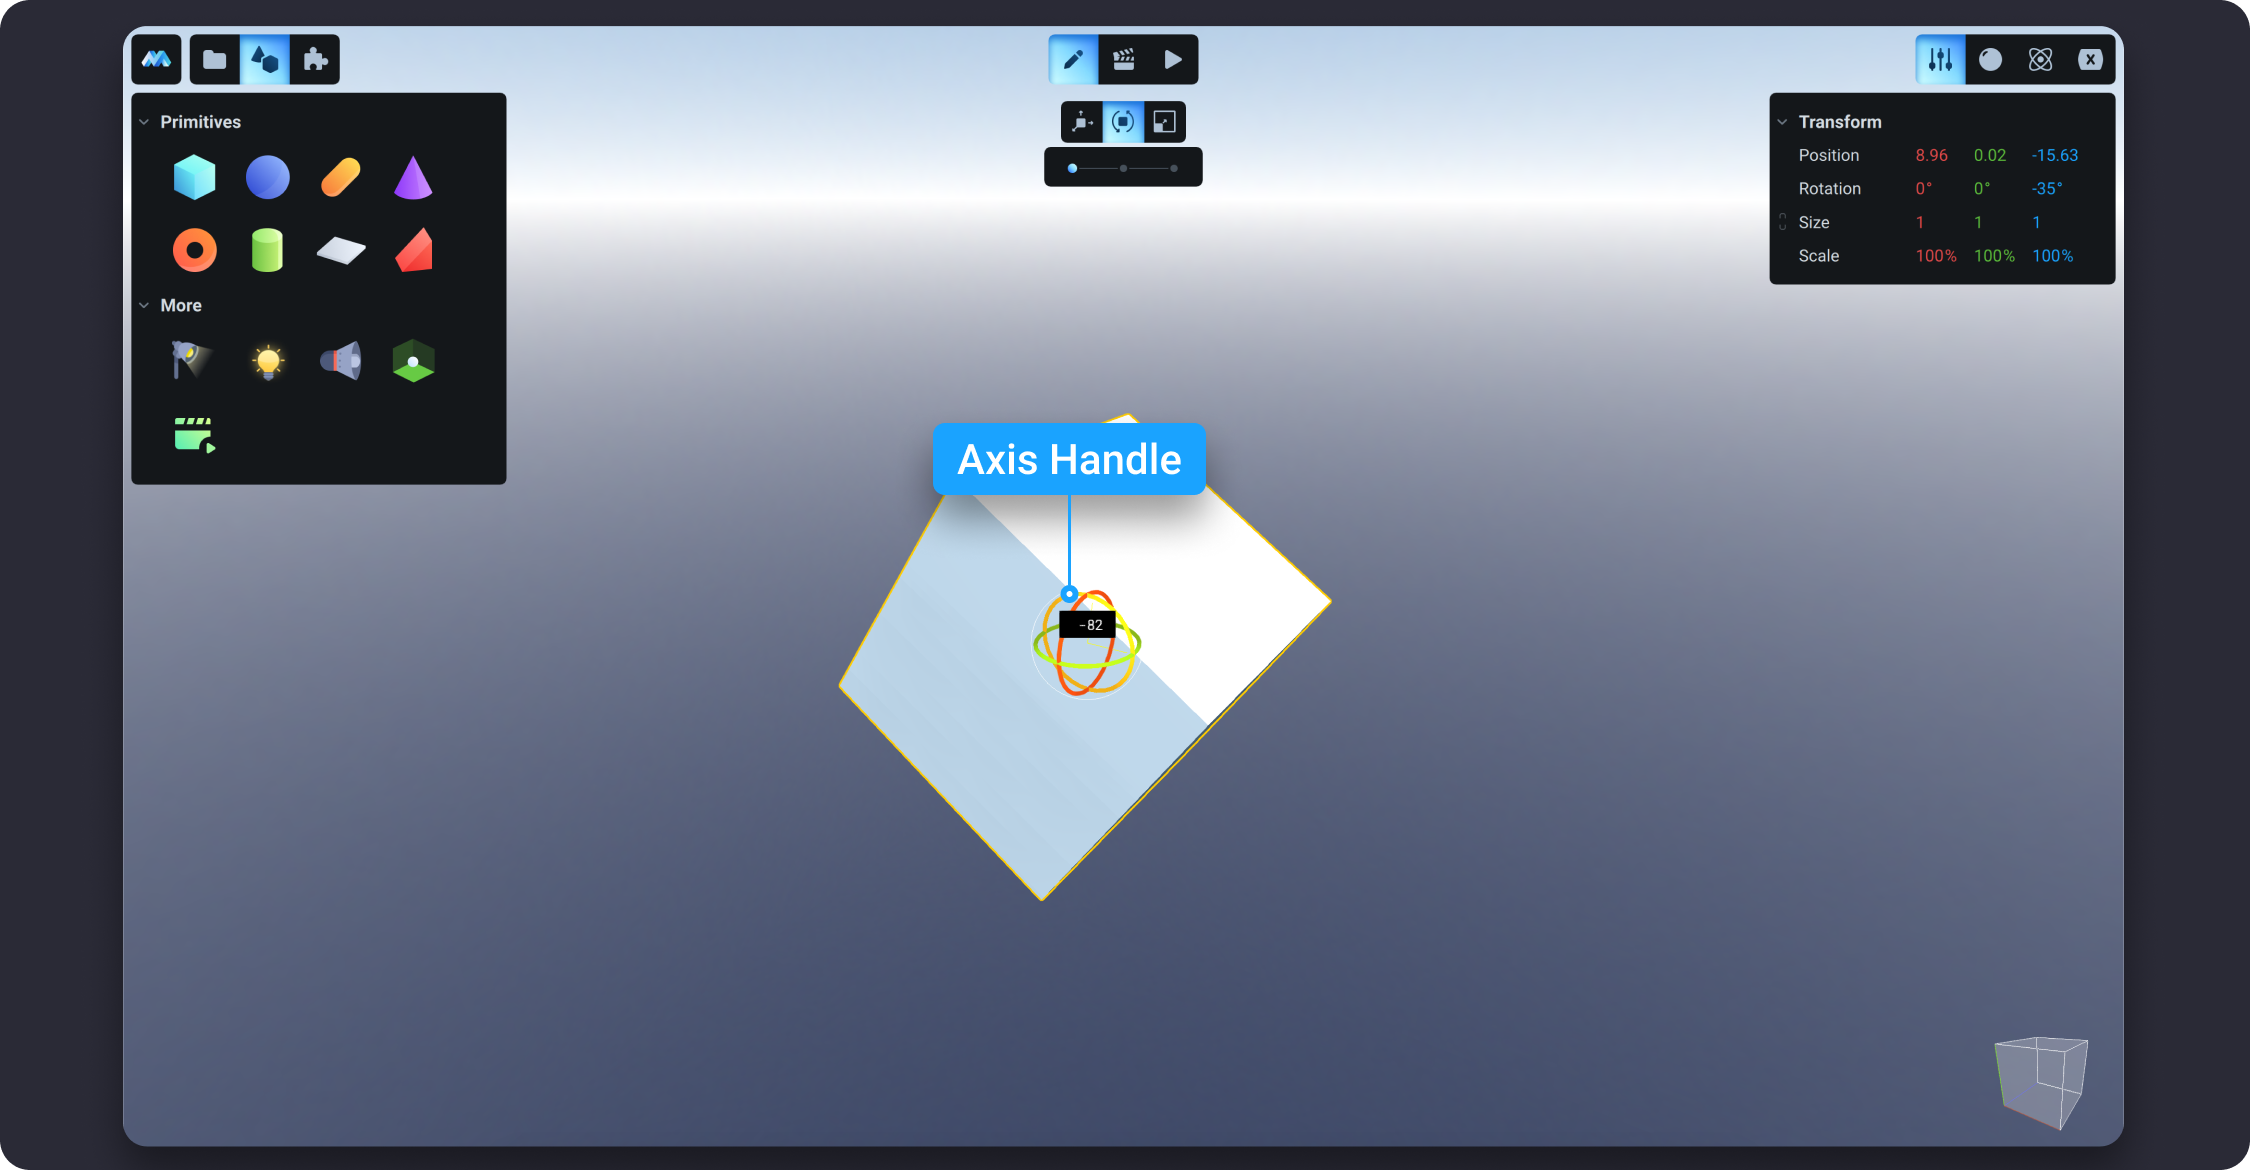
Rotate Gizmo rotates selected objects about a specified axis. It allows you to constrain the rotation of 3D objects and subobjects to an axis. To rotate the object, select it from the 3D view or scene tree, then switch to the Rotation gizmo in the 3D Gizmo panel. After you select the rotation, 3D gizmo is displayed at the center of the selection set. You can constrain the rotation to a specified axis. As you move the cursor over the rotation paths on the 3D Rotate gizmo, a vector line representing the axis of rotation is displayed. Specify an axis of rotation by clicking the rotation path when it turns yellow. When you drag the cursor using the LMB, the selected objects and subobjects rotate about its base along the specified axis (XYZ).

![](https://dl.dropboxusercontent.com/s/sgahge8fb3bwnuh/017.png?dl=0)

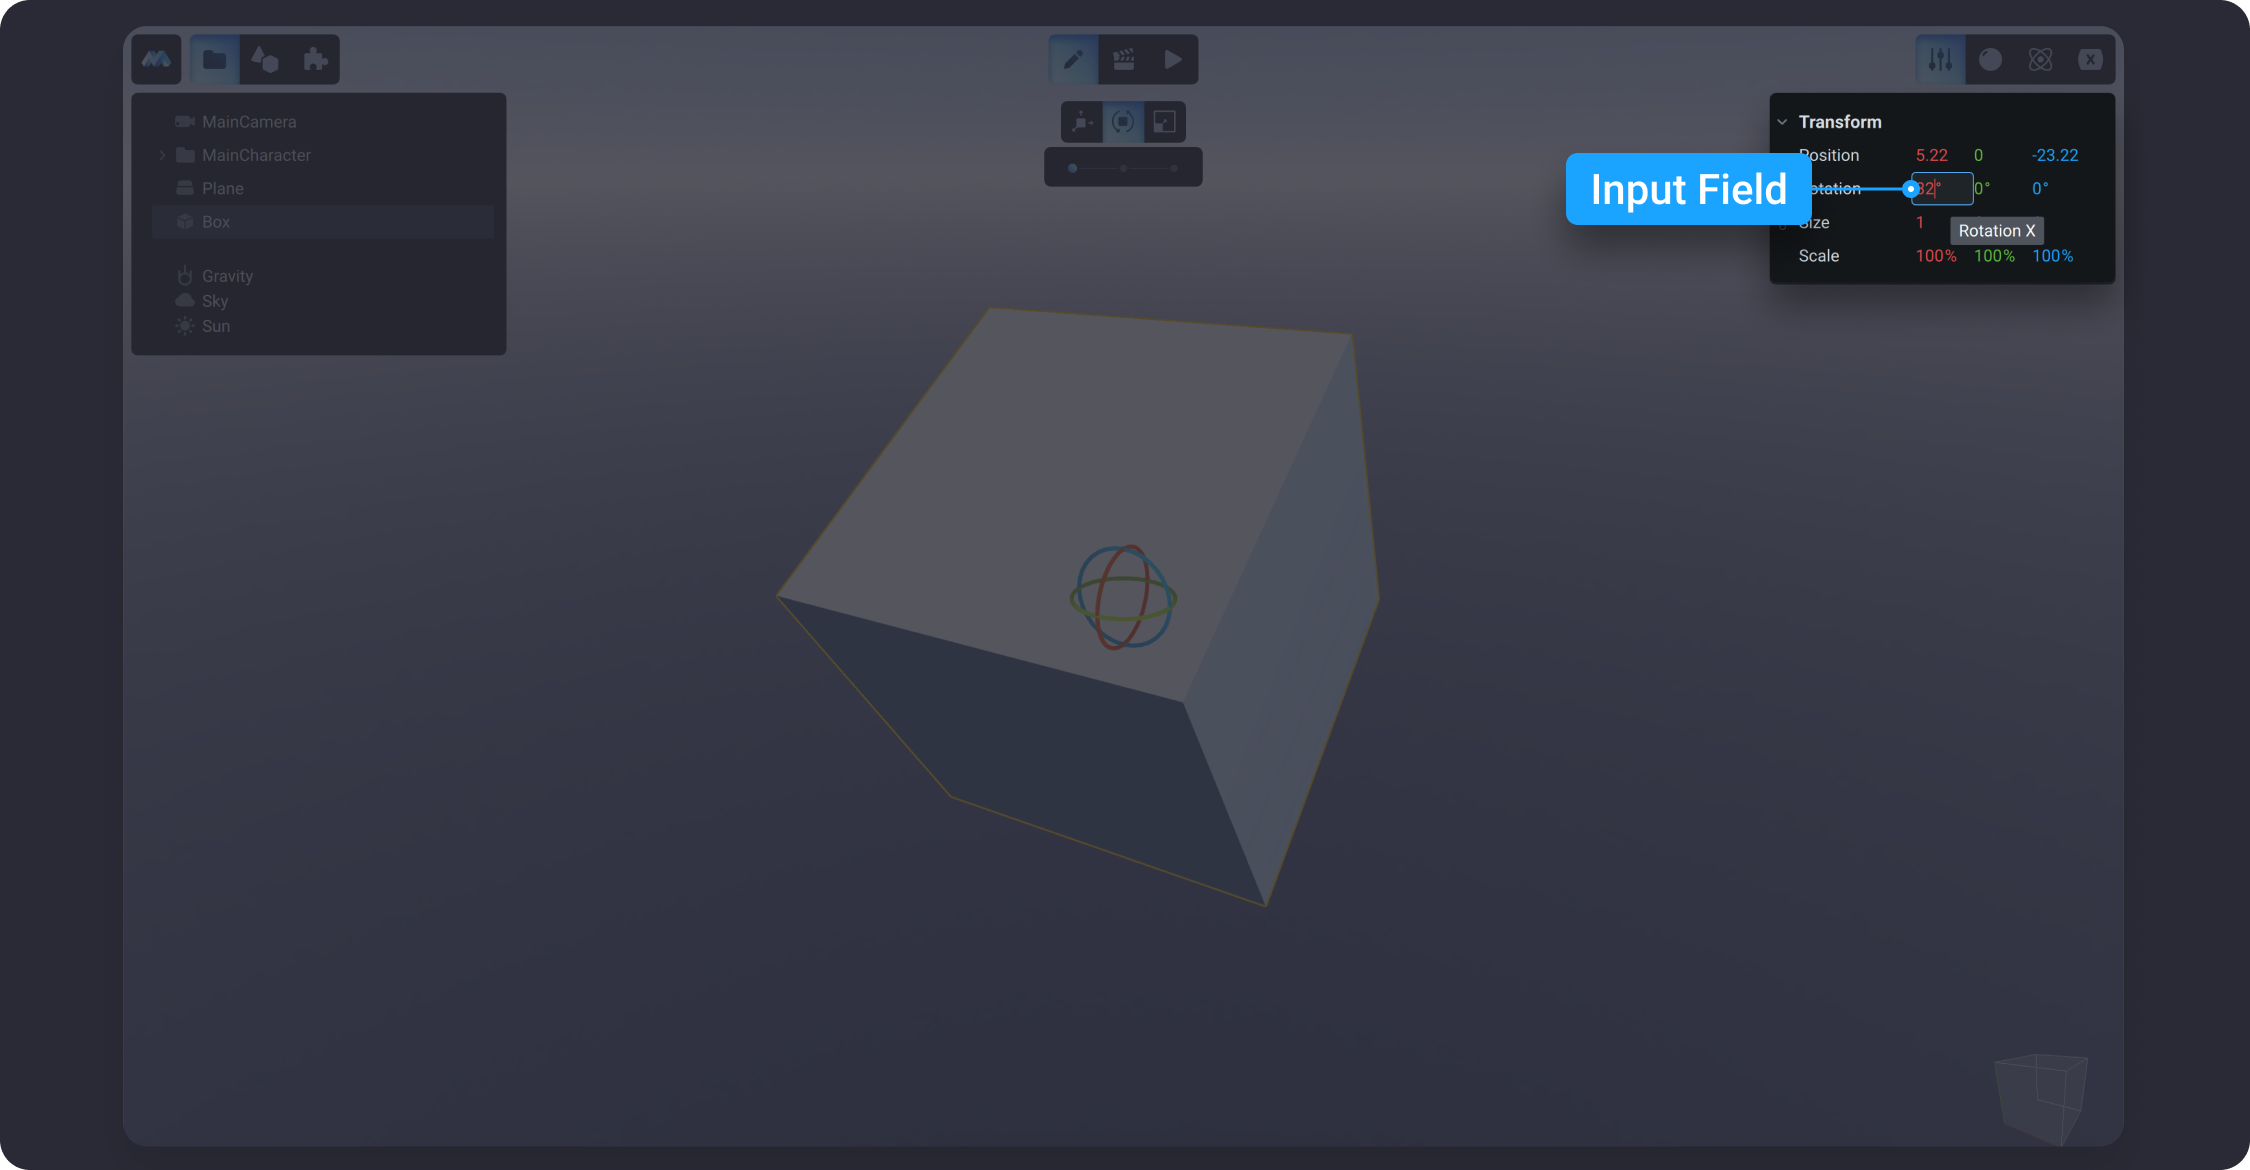
For precise rotation, go to the Inspector tab and input the rotation values for XYZ axes.

![](https://dl.dropboxusercontent.com/s/v14bijtk8b28v6k/018.png?dl=0)

Similarly to Move gizmo settings, there are Rotation gizmo settings. You can use them to adjust the rotation by selecting either Smooth option or entering a custom value of your own. If smooth is selected, it will rotate the object around its base smoothly. Entering the custom values allow you to define the degree for rotation. For example, if you put “45”, it will rotate the selected object by 45 degrees.

![](https://dl.dropboxusercontent.com/s/qf087g3ion30192/019.png?dl=0)

### Scale Gizmo

Scale Gizmo scales selected objects along a specified plane or axis, or uniformly along all 3 axes. To scale the object, select it from the scene tree or in the 3D view and switch to the Scale gizmo in the 3D Gizmo panel. After you select the objects and subobjects to scale, constrain the object scaling by clicking the 3D gizmo axis, or plane (axes square).&#x20;

To constrain object scaling to a specified axis, move the cursor over an axis handle on the 3D Scale gizmo, specify an axis by clicking the axis when it turns yellow. When you drag the cursor using the LMB, the selected objects and subobjects are resized along the specified axis.

![](https://dl.dropboxusercontent.com/s/8fsjgnekx0il756/020.png?dl=0)

Also, you can constrain the object scaling to a specified plane. Each plane is identified by an axes square between the respective axis handles. Specify the plane of scale by moving the cursor over one of the axes square. When the axes square turns yellow, click it. Similarly to moving the object, as you drag the cursor, the selected objects and subobjects are scaled only along the highlighted plane for XY, YZ, or XZ axes.&#x20;

![](https://dl.dropboxusercontent.com/s/4hzm56ou342fsaz/021.png?dl=0)

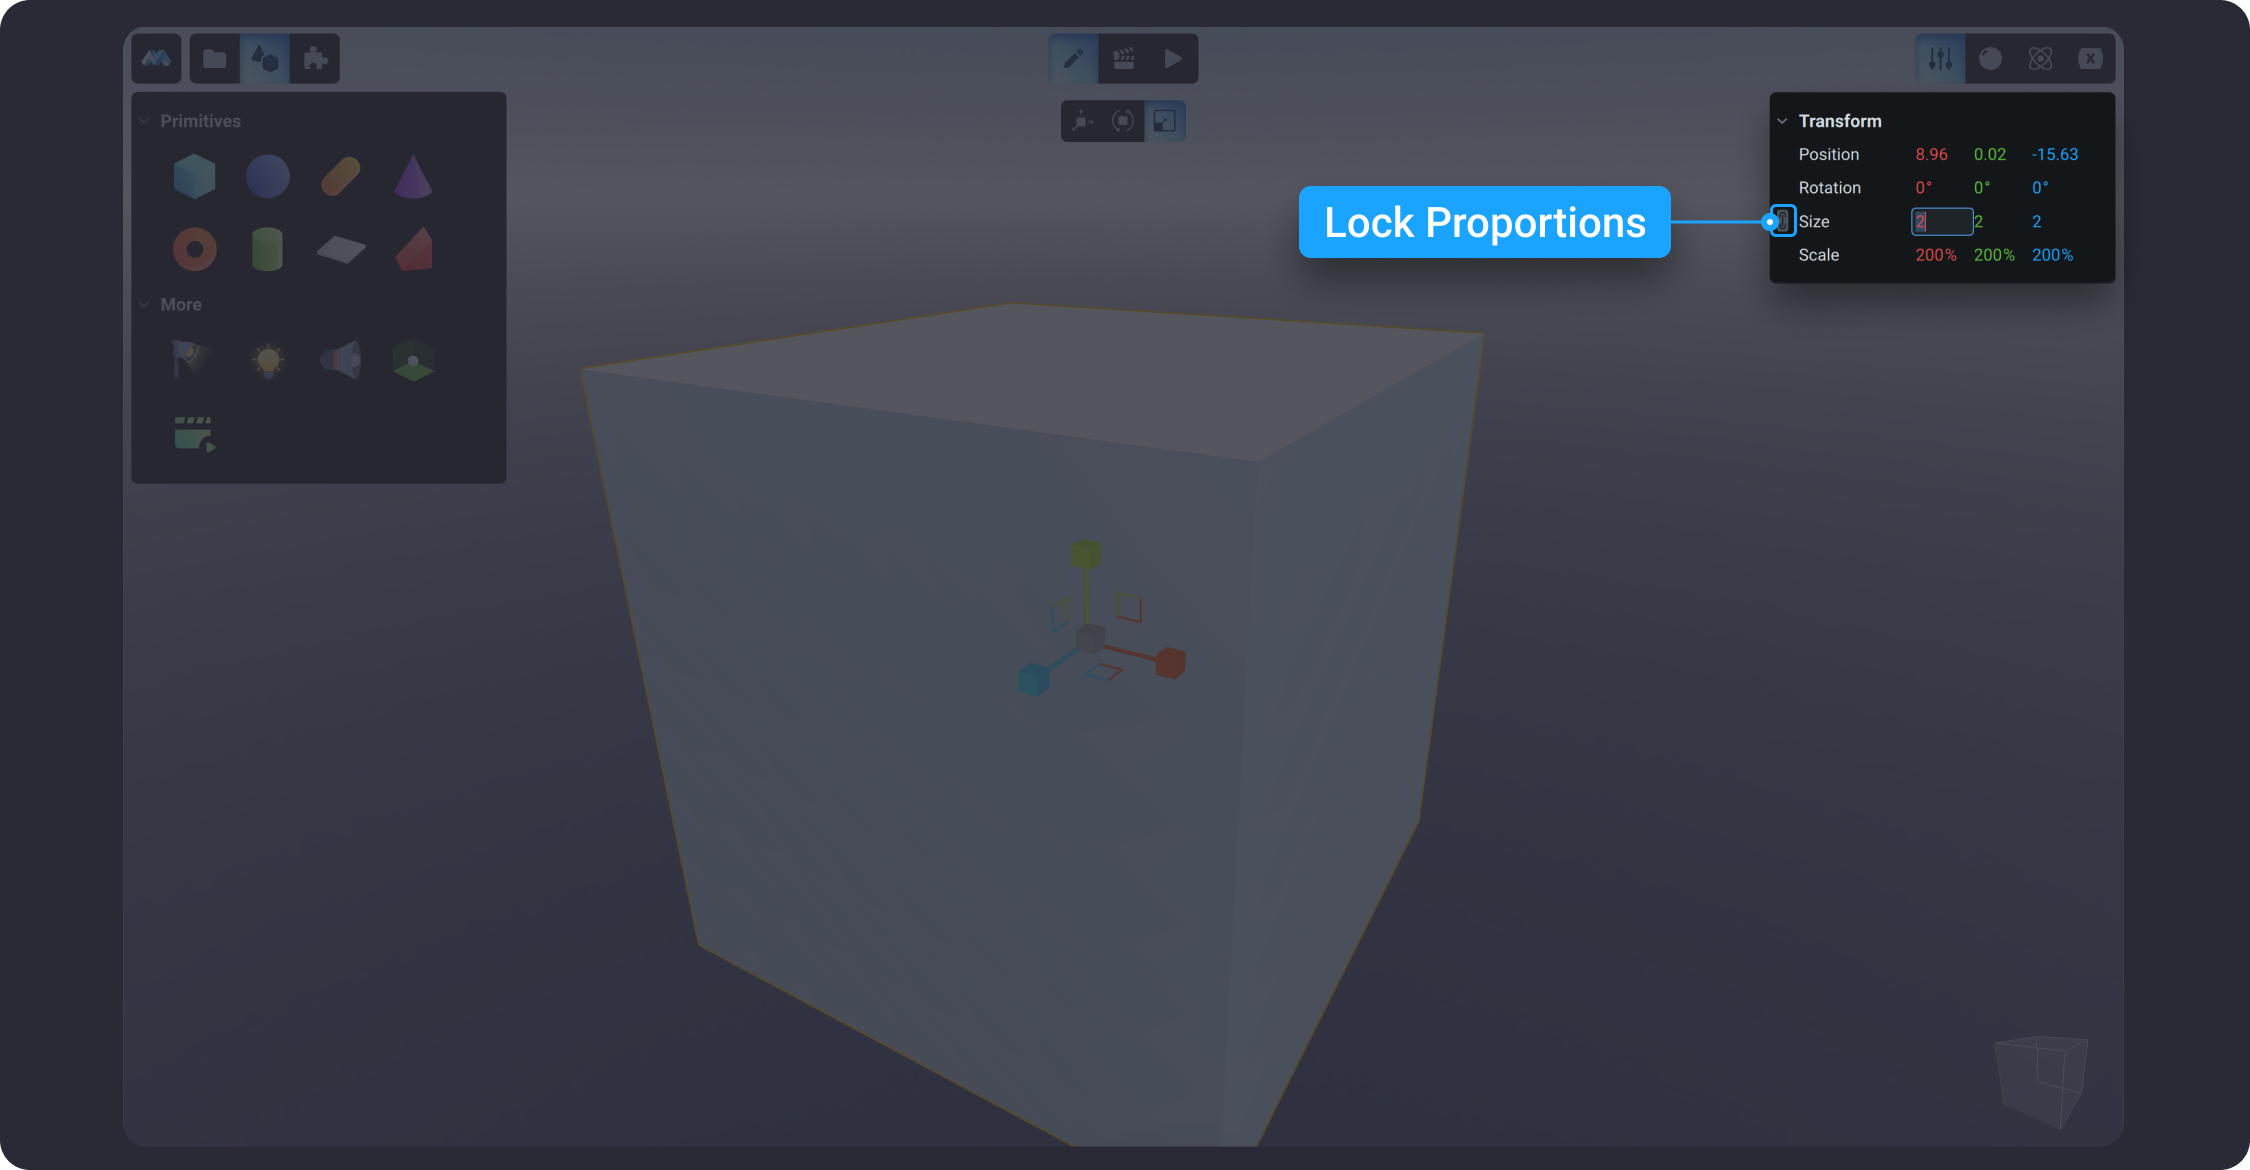
Additionally, you can also lock the object's size proportions in the Inspector tab to scale all values proportionally at the same time.

![](https://dl.dropboxusercontent.com/s/7fp5l600q8u848p/022.png?dl=0)

### Collider Gizmo&#x20;

Collider Gizmo is displayed when the selected object is physical. To add physics to the selected object, go to the Physics tab in the Inspector panel and click YES for Physical. Collider gizmo relocates the selected object’s collider along an axis or plane. When the collider gizmo is selected, the collider is highlighted in blue about the selected object. As the cursor hovers over an axis handle on the gizmo, the specified axis turns yellow. Click the axis handle. As you drag the cursor using the LMB, the movement of the selected collider is constrained to the highlighted axis.
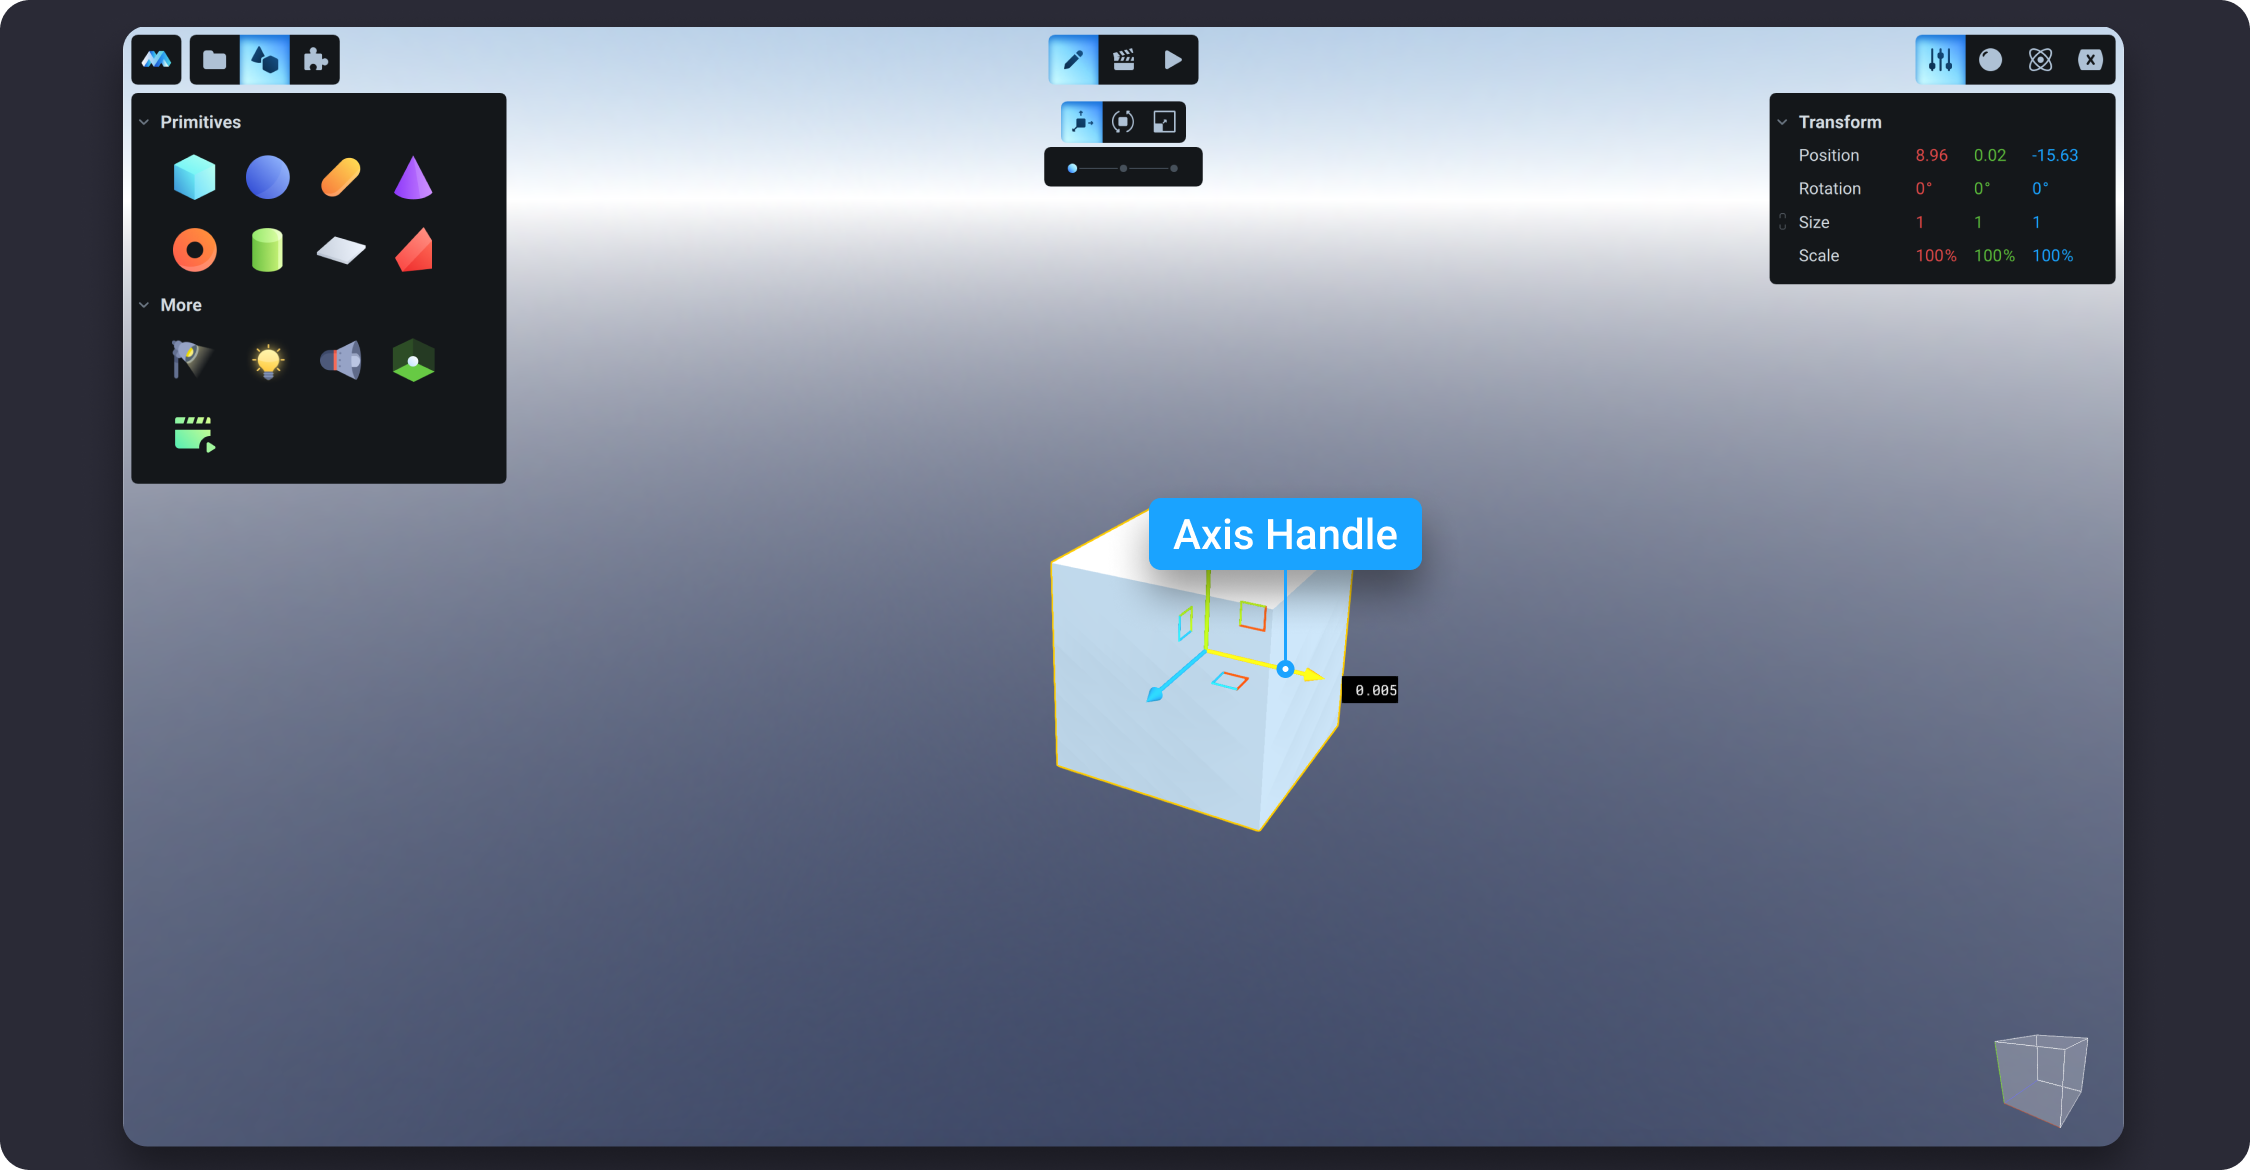
![](https://dl.dropboxusercontent.com/s/dthel8o4tlmu3z9/023.png?dl=0)

Similar to the Move gizmo, you can use the 3D Collider gizmo to constrain the collider movement to a plane. Each plane is identified by an axes square between the respective axis handles. You can specify the plane of movement by moving the cursor over the axes square. When the square turns yellow, click it. As you drag the cursor, the selected objects and subobjects move only along the highlighted plane for XY, YZ, or XZ axes.&#x20;

![](https://dl.dropboxusercontent.com/s/2js3hisiwgnjyct/024.png?dl=0)

There are a number of additional collider settings, available in the Inspector tab. To learn more about these settings, go to Physics / Collider (link).


# Animation Mode

Animation mode is a workspace designed to animate the existing objects in the scene and set up triggers to launch these animations.

In the animation mode, the left panel displays a Scene tab that contains all available animations you created in the project. The bottom panel of the animation mode has two tabs: Timeline and Triggers - both are related to a particular animation selected from the Scene tree.&#x20;

![](https://dl.dropboxusercontent.com/s/iyr4jquye1mae4n/025.png?dl=0)

## Timeline

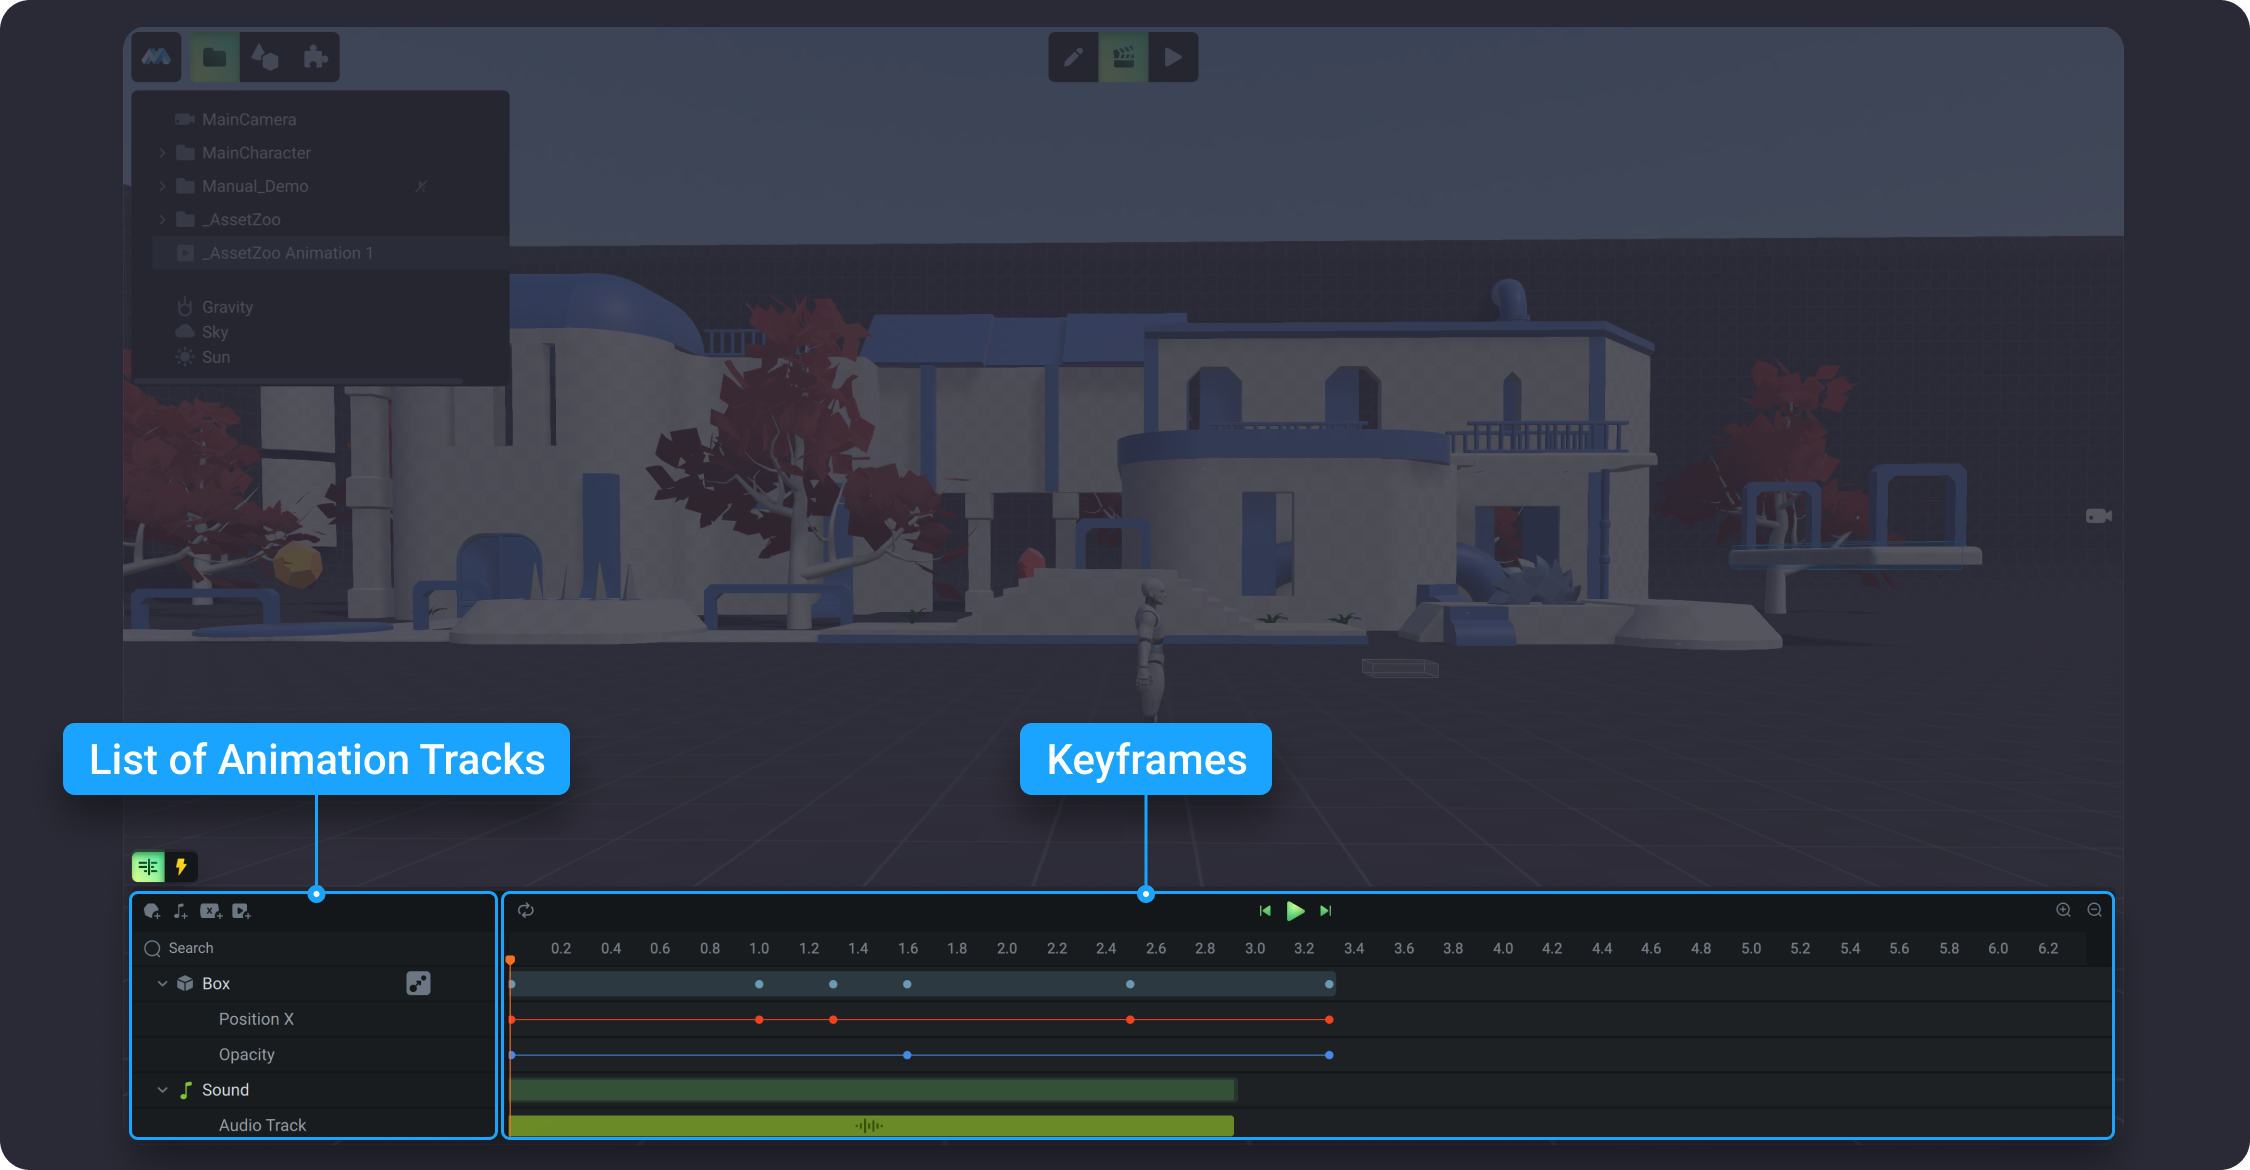
Timeline allows you to create animations for objects, including game-play sequences, and audio sequences. It represents a list of animation tracks and related keyframes.&#x20;

![](https://dl.dropboxusercontent.com/s/ptaakuowzcpmj45/026.png?dl=0)

## Triggers

A Trigger is an object that causes an animation to occur. The Triggers panel is designed to define particular conditions used to launch animations.
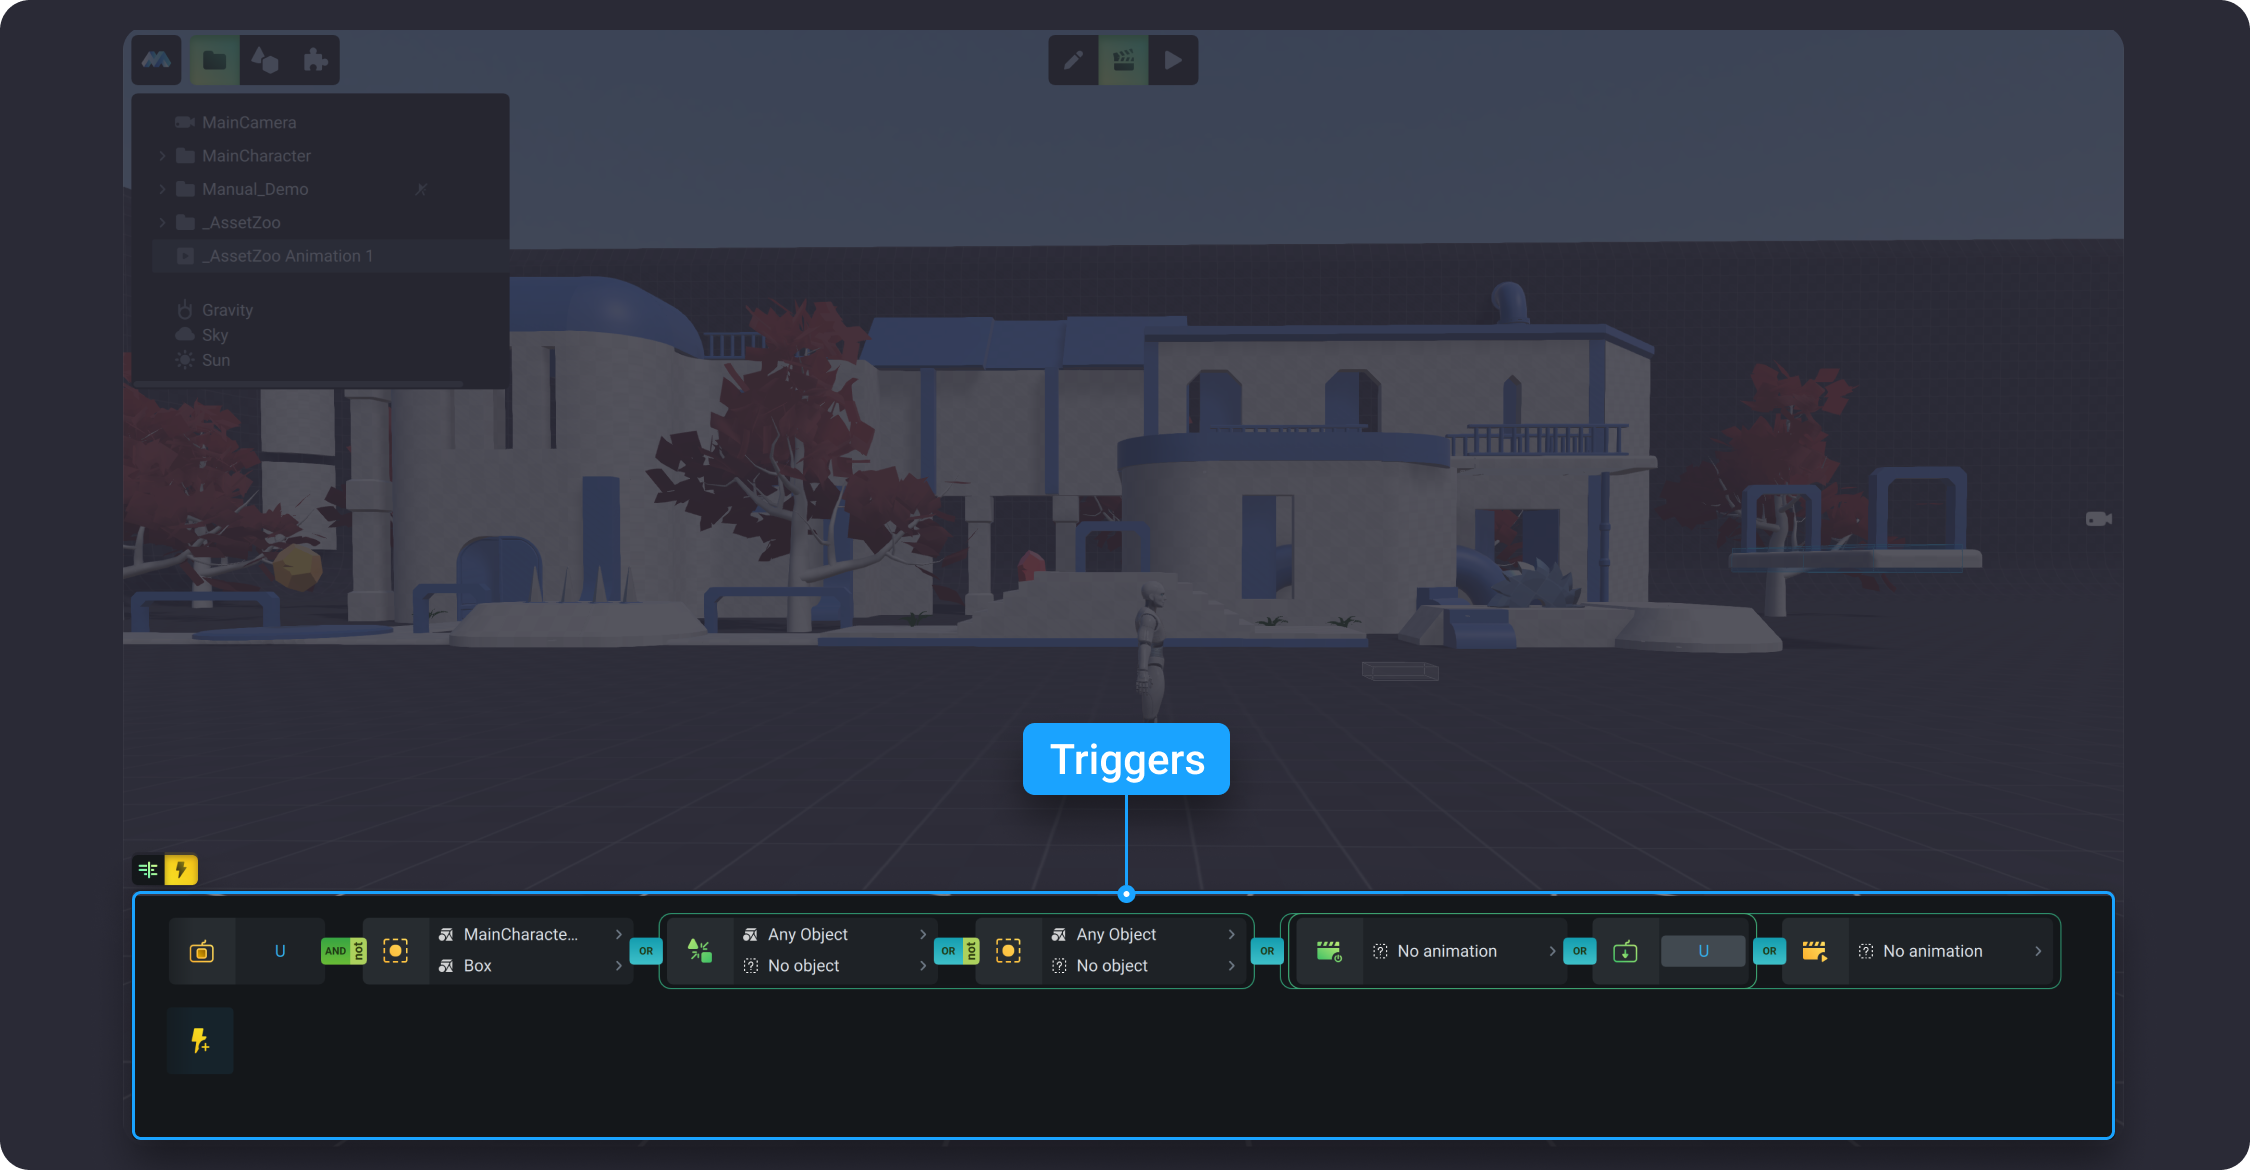
![](https://dl.dropboxusercontent.com/s/xuxbc2vu609g8dd/027.png?dl=0)


# Game Mode

The game mode allows you to play and test the game.

By default, all panels in game mode are hidden to ensure the focus on the gameplay. In the game mode, you cannot move and/or delete objects, nor edit animations.&#x20;

For show left and right panels  hit `CMD + /`  for macOS or `CTRL + /` for Windows. Also you can go to `Main Menu` > `View` > uncheck `Hide UI`. Note, that some changes you make in the Inspector will be automatically saved when switching to a different mode. It work for Main Character Properties; Main Camera; Gravity.
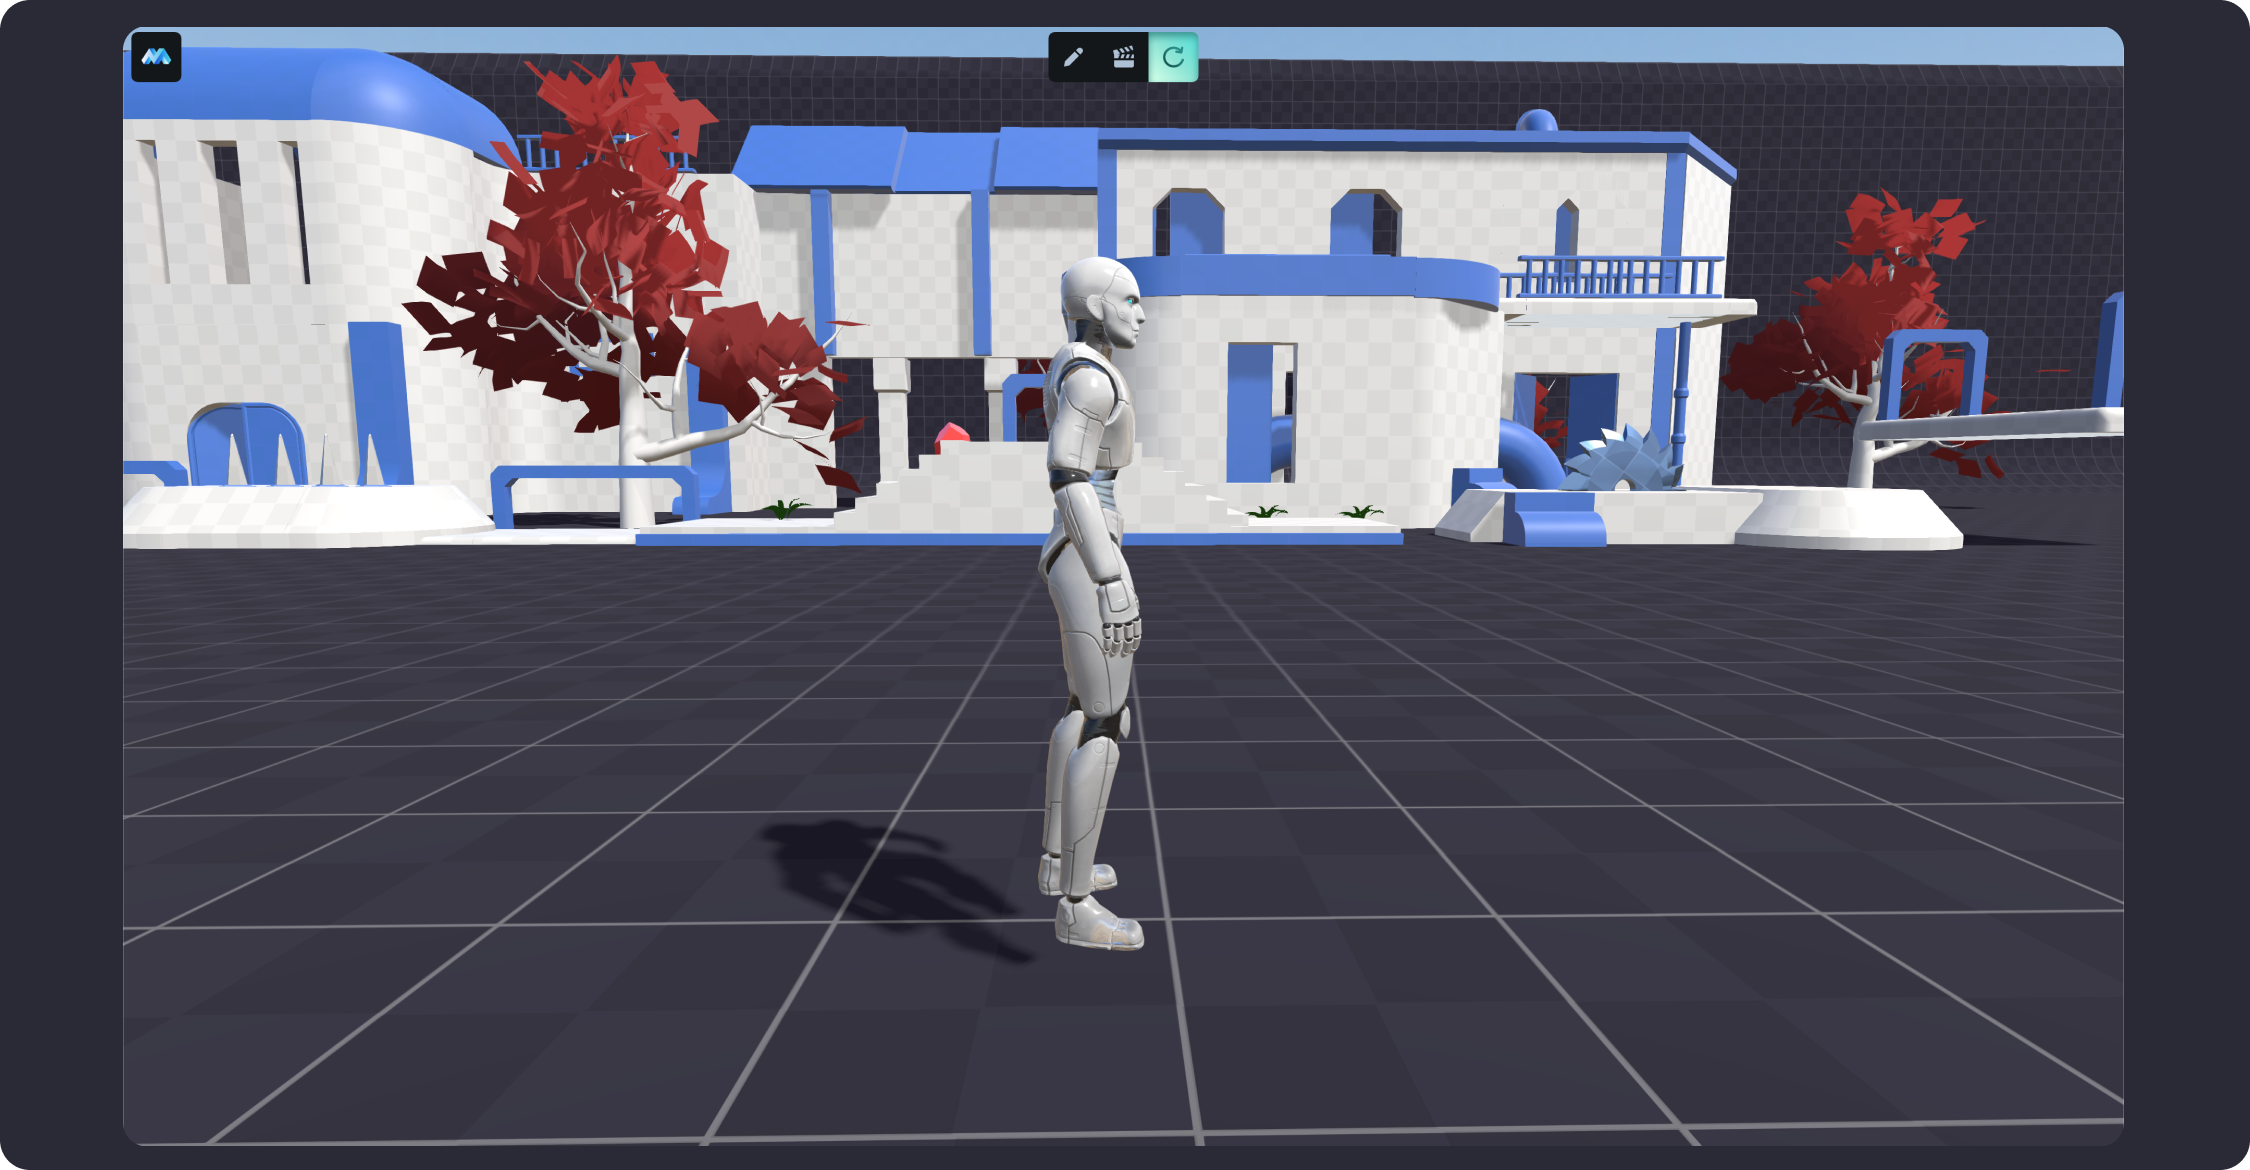
![](https://dl.dropboxusercontent.com/s/k5bpdv8ai8af229/028.png?dl=0)


# Scene Panel

Scenes include the environments and menus of your game. This article describes operations you can make using the Scene Panel.

Each Scene represents a unique level, where you can select objects, add decorations, design and build your game in pieces. *Scene tree* is available in all three modes - *Edit*, *Animation*, and *Game* modes (see [*Workspaces Modes*](/learn/manual/workspace-modes)).
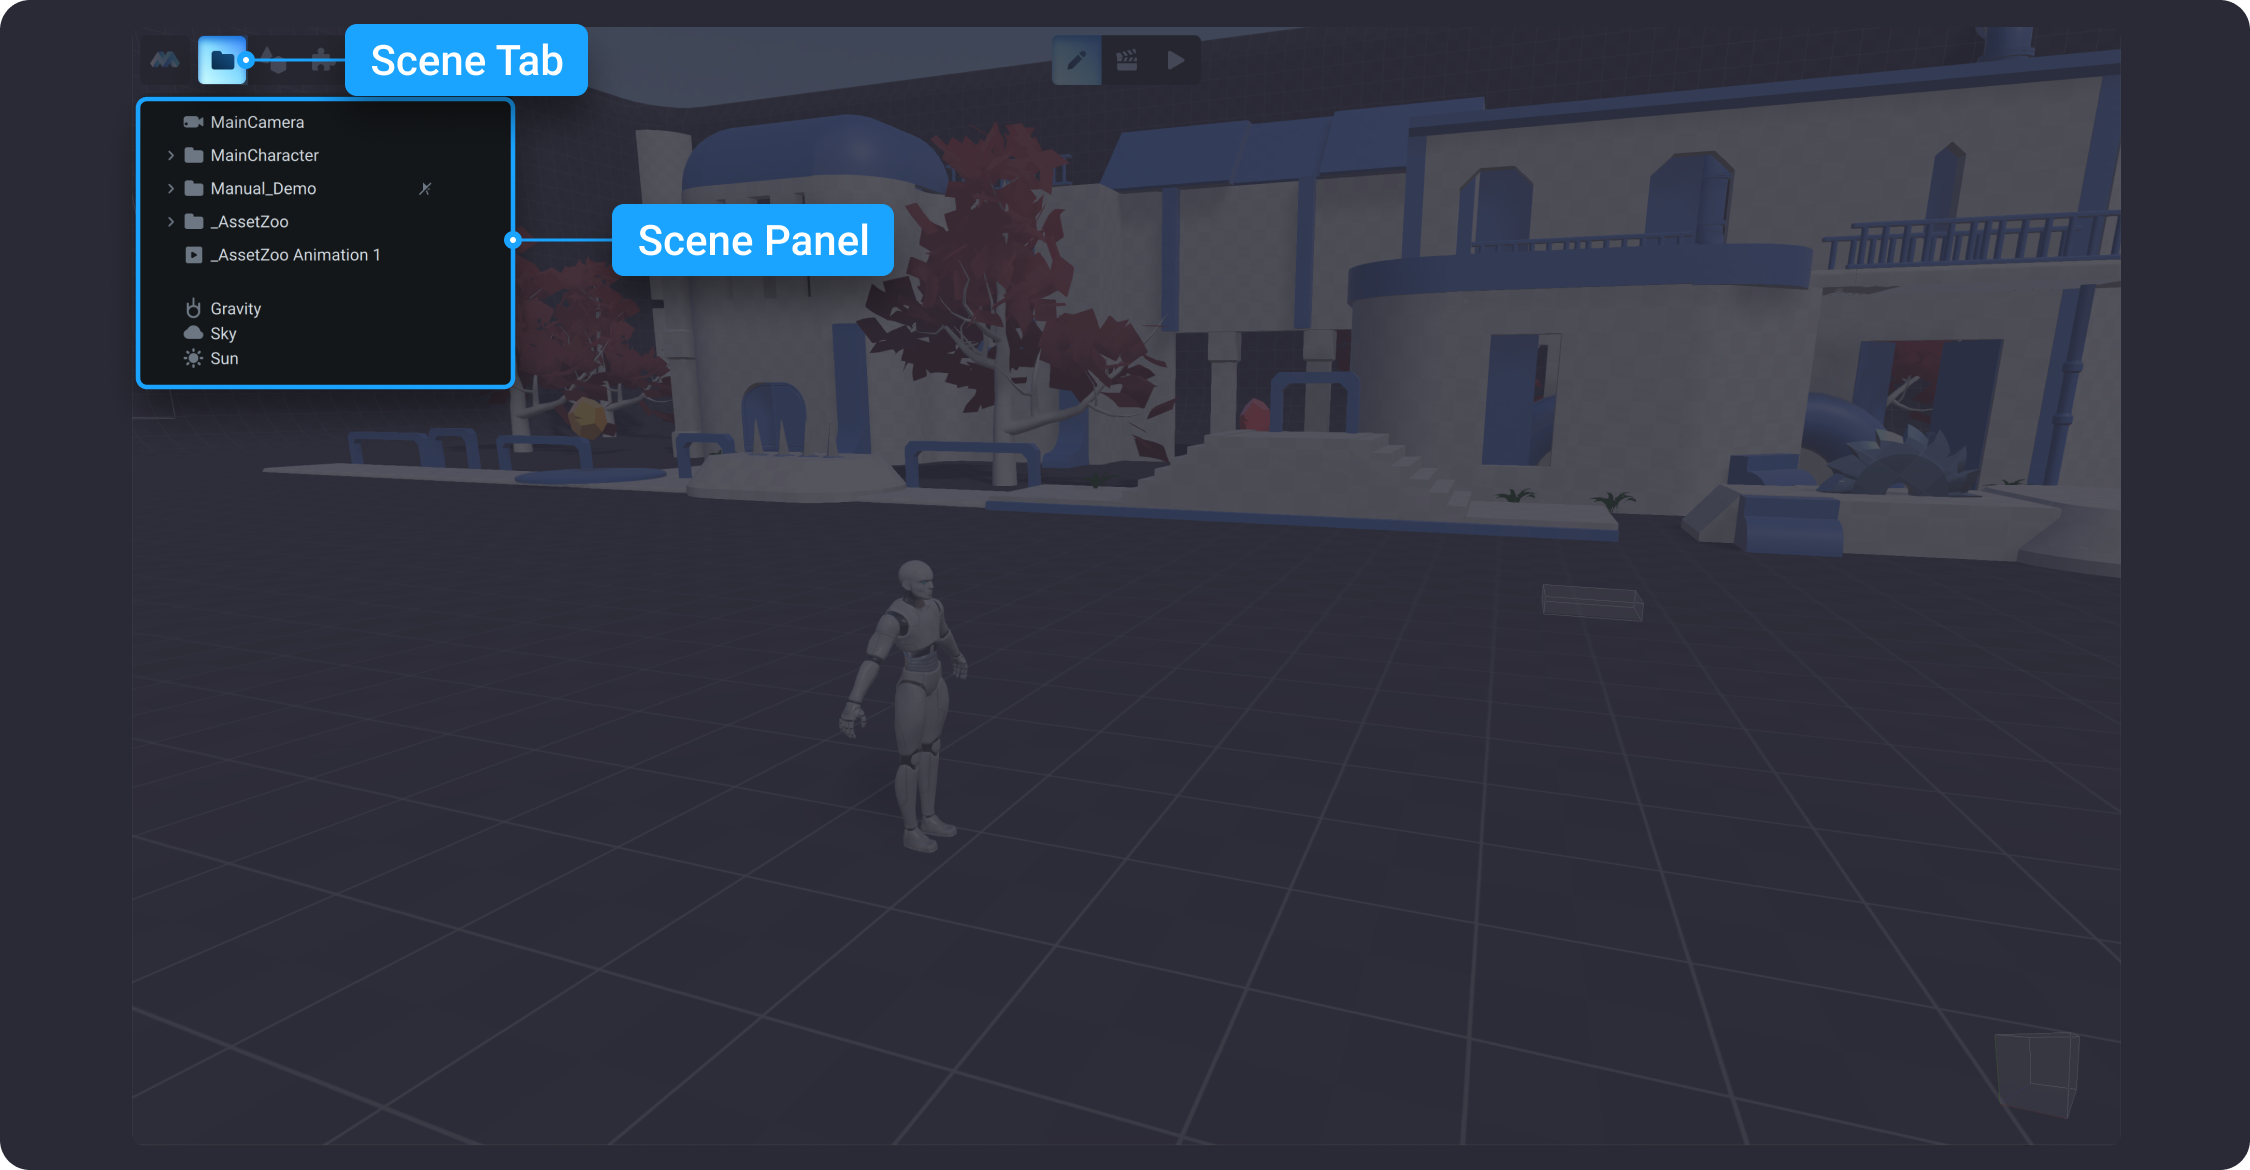
![](https://dl.dropboxusercontent.com/s/h59mwa64206wsf2/001.png?dl=0)

This section introduces a general overview of the mechanics you can complete in the Scene. These mechanics include selecting objects, organizing your objects in the scene tree, performing basic operations with objects (*cut, paste, delete, duplicate*), and modify the default units of every scene (*main camera, main camera, plane, sun, sky, gravity*).

## Select Objects

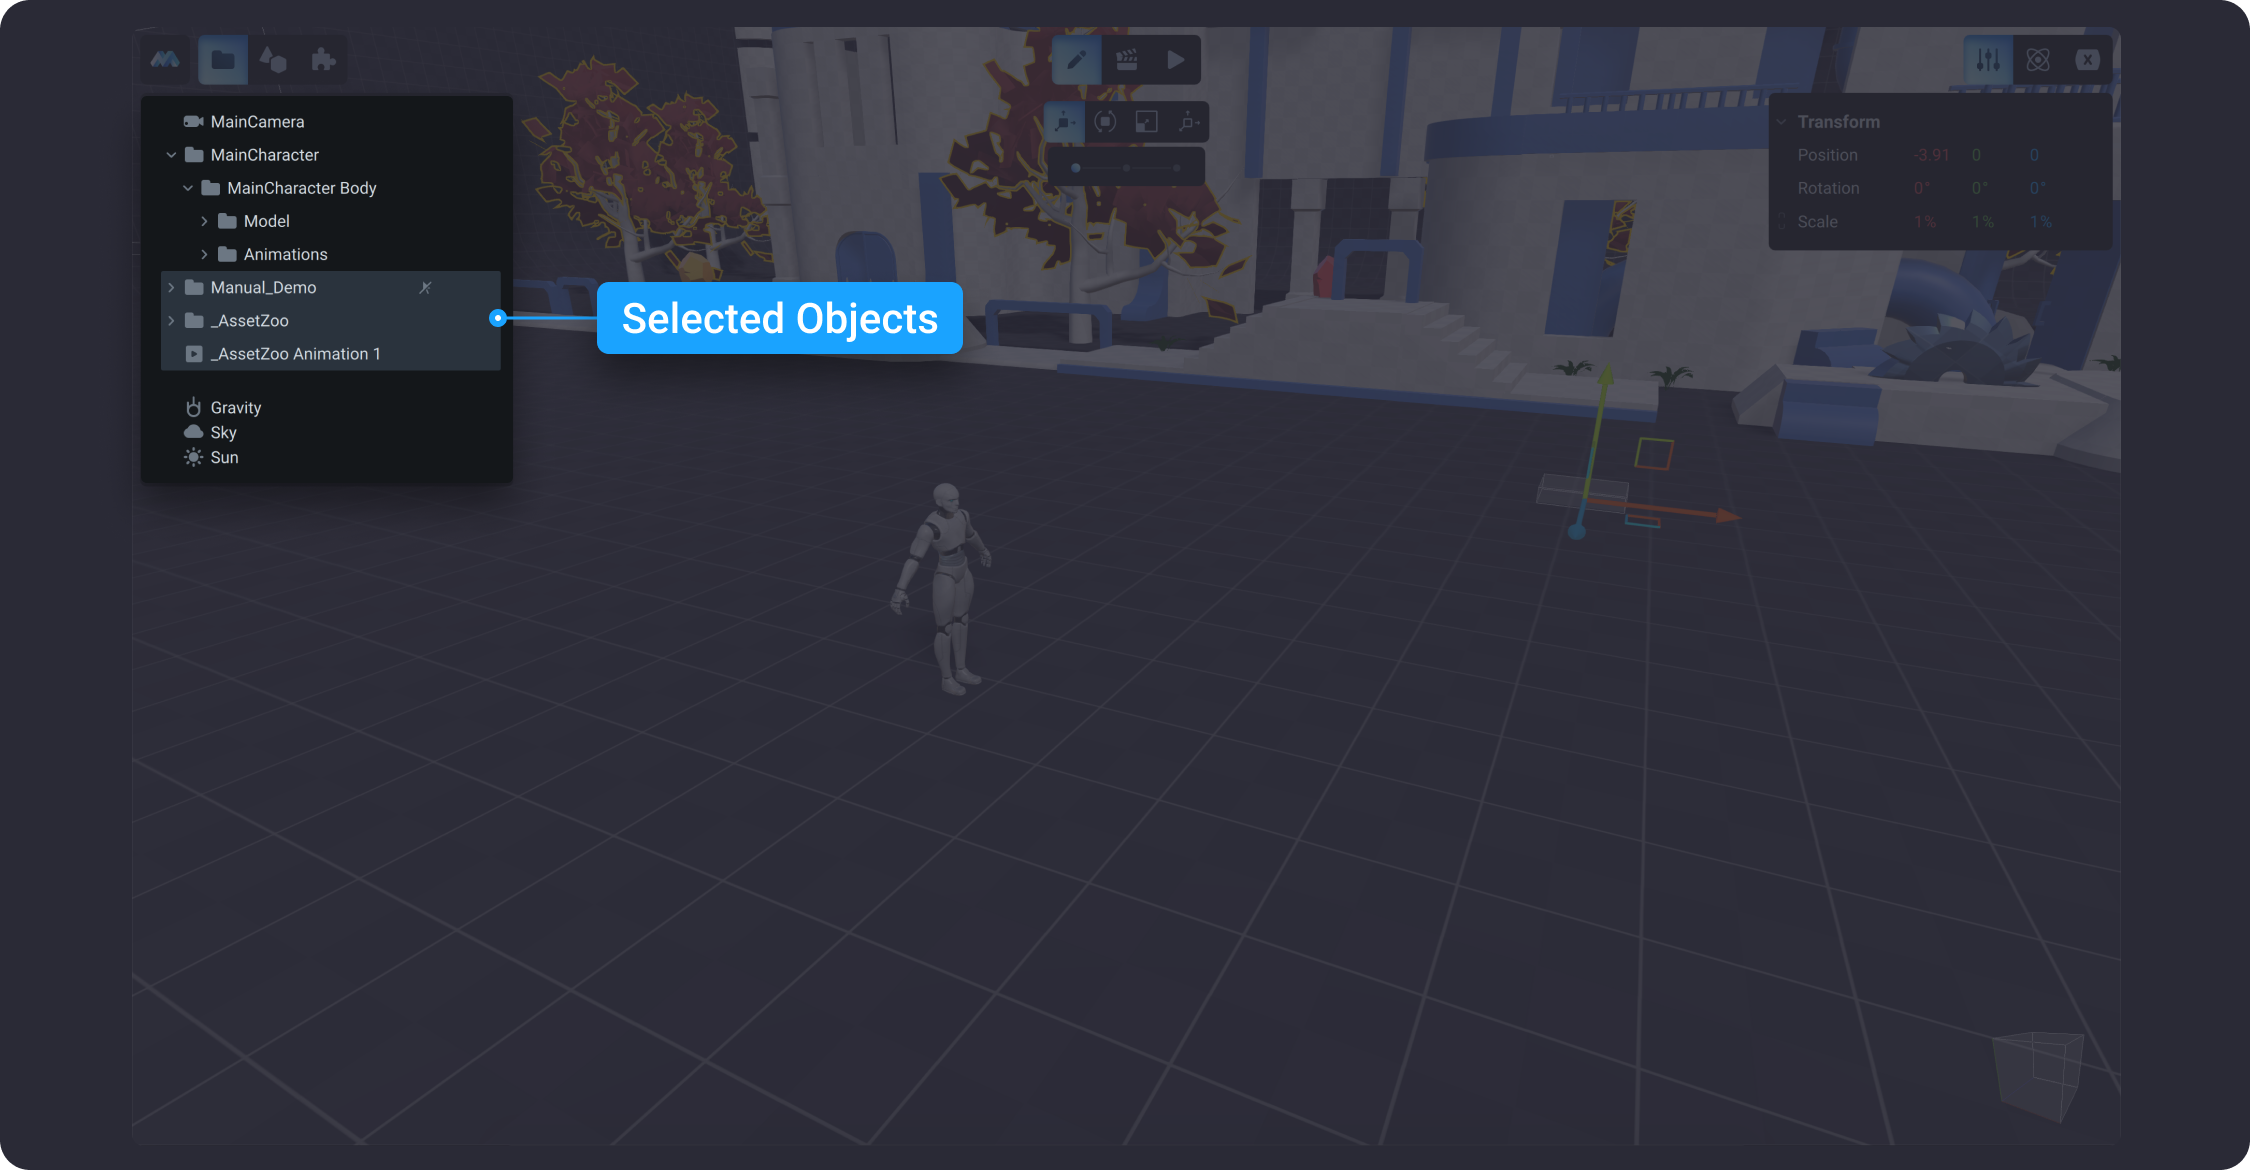
The left panel contains the *Scene Tree* that includes a list of all objects in the scene. To select an object in the scene tree, simply left click on it.
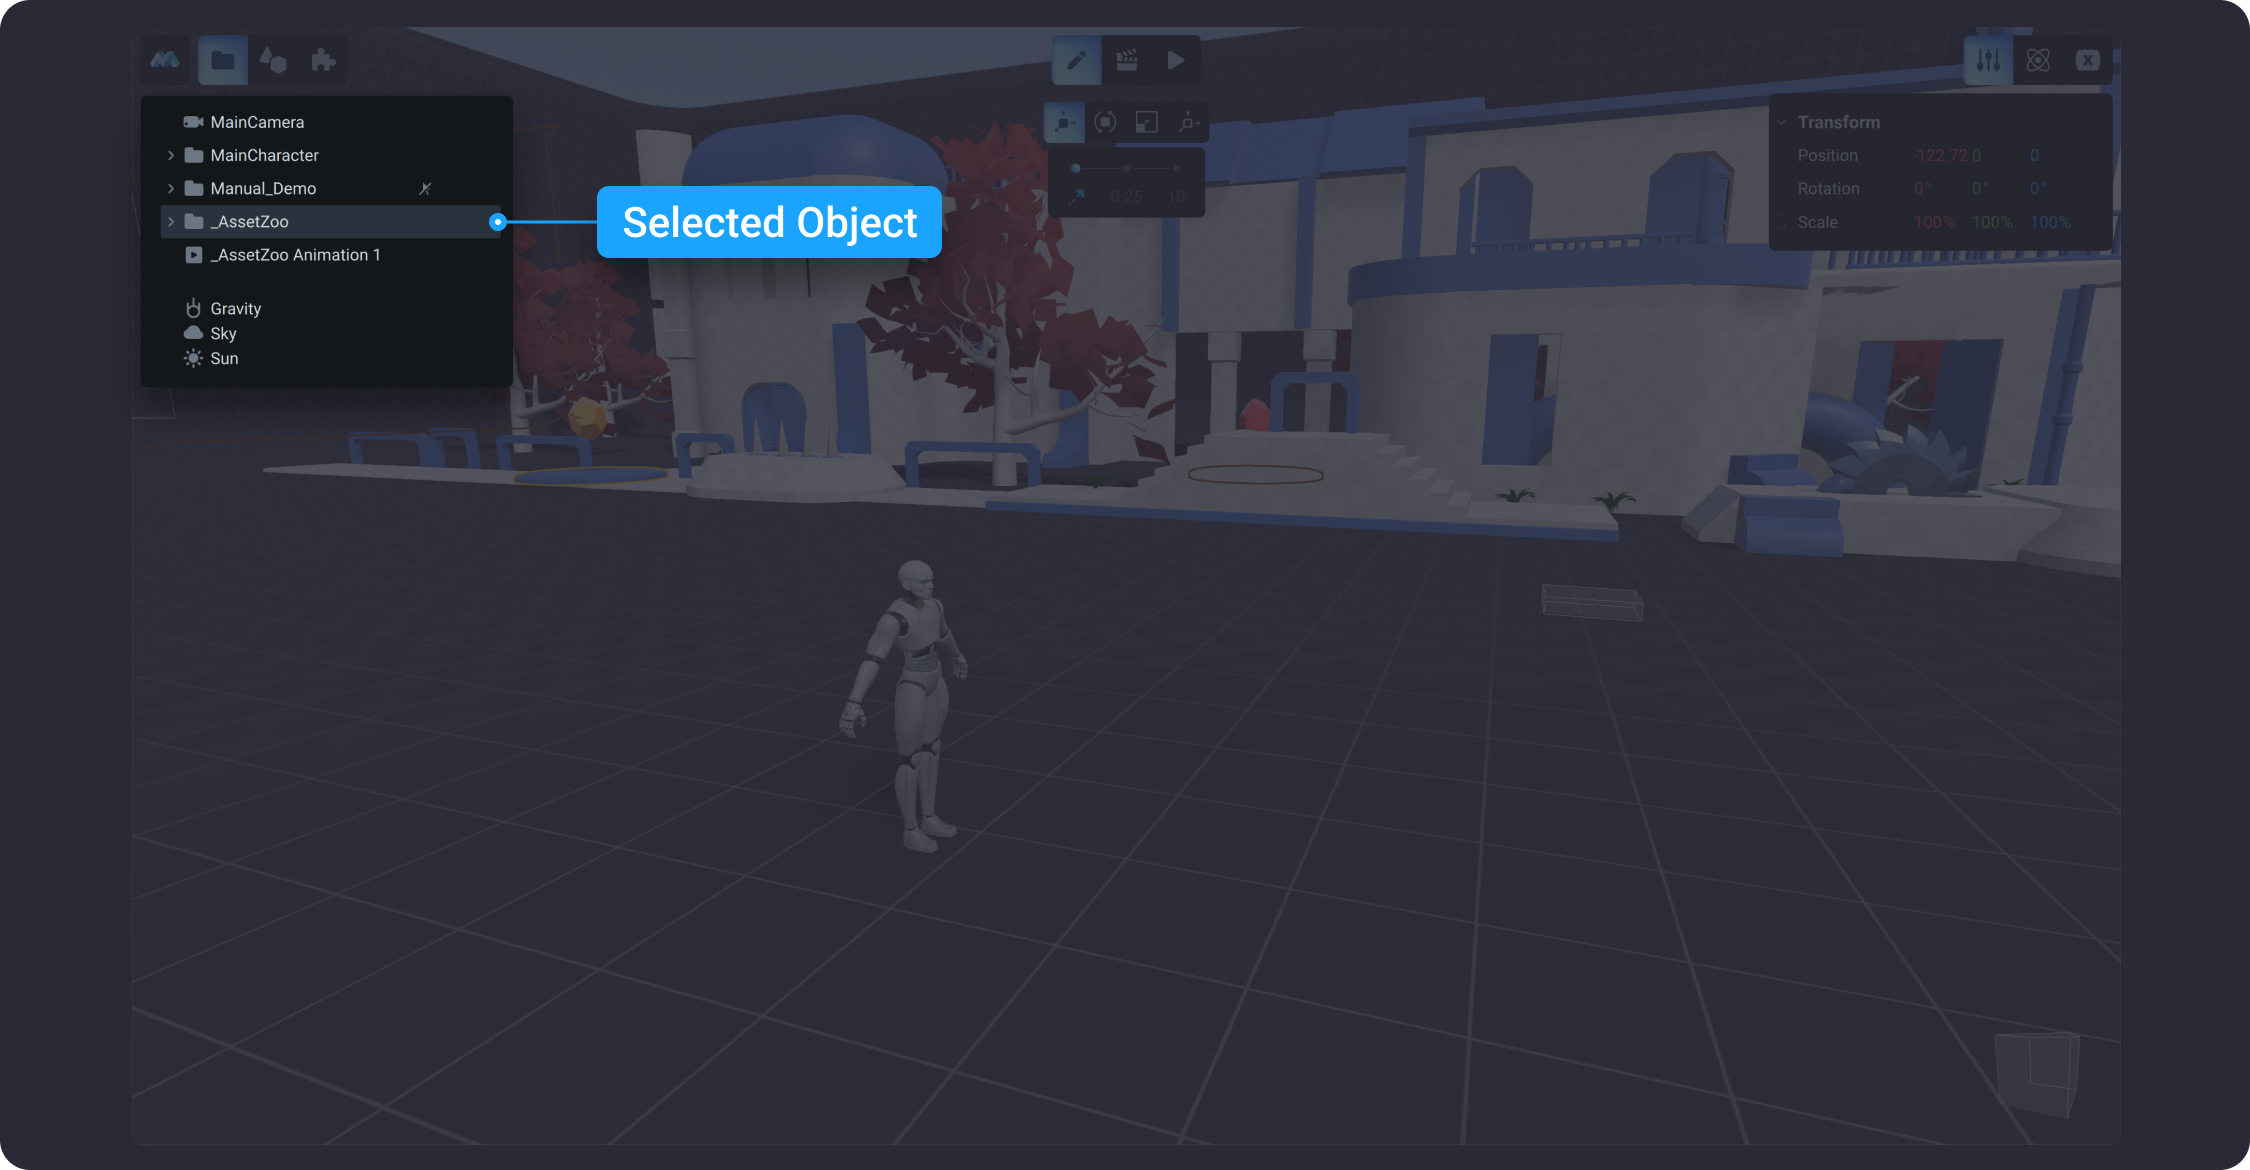
![](https://dl.dropboxusercontent.com/s/hqj5qcrxsxuprks/002.png?dl=0)

To select multiple objects in the Scene Tree, use `CMD+LMB` for MacOS and `CTRL+LMB` for Windows.&#x20;

![](https://dl.dropboxusercontent.com/s/ug670sxqwm499k6/002-1.png?dl=0)

## Organize Objects

To keep your project organized, you can *rename*, *sort objects*, *mark objects with color*, *create hierarchies*, and *group* them in the *Scene tree*.&#x20;

### Rename

To rename objects, select one in the *Scene tree*, right click and select `Rename` from the context menu.&#x20;

![](https://dl.dropboxusercontent.com/s/kff8qvcfdlptruy/003.png?dl=0)

### Sort

To sort or rearrange the order of objects in the scene tree, drag and drop them.
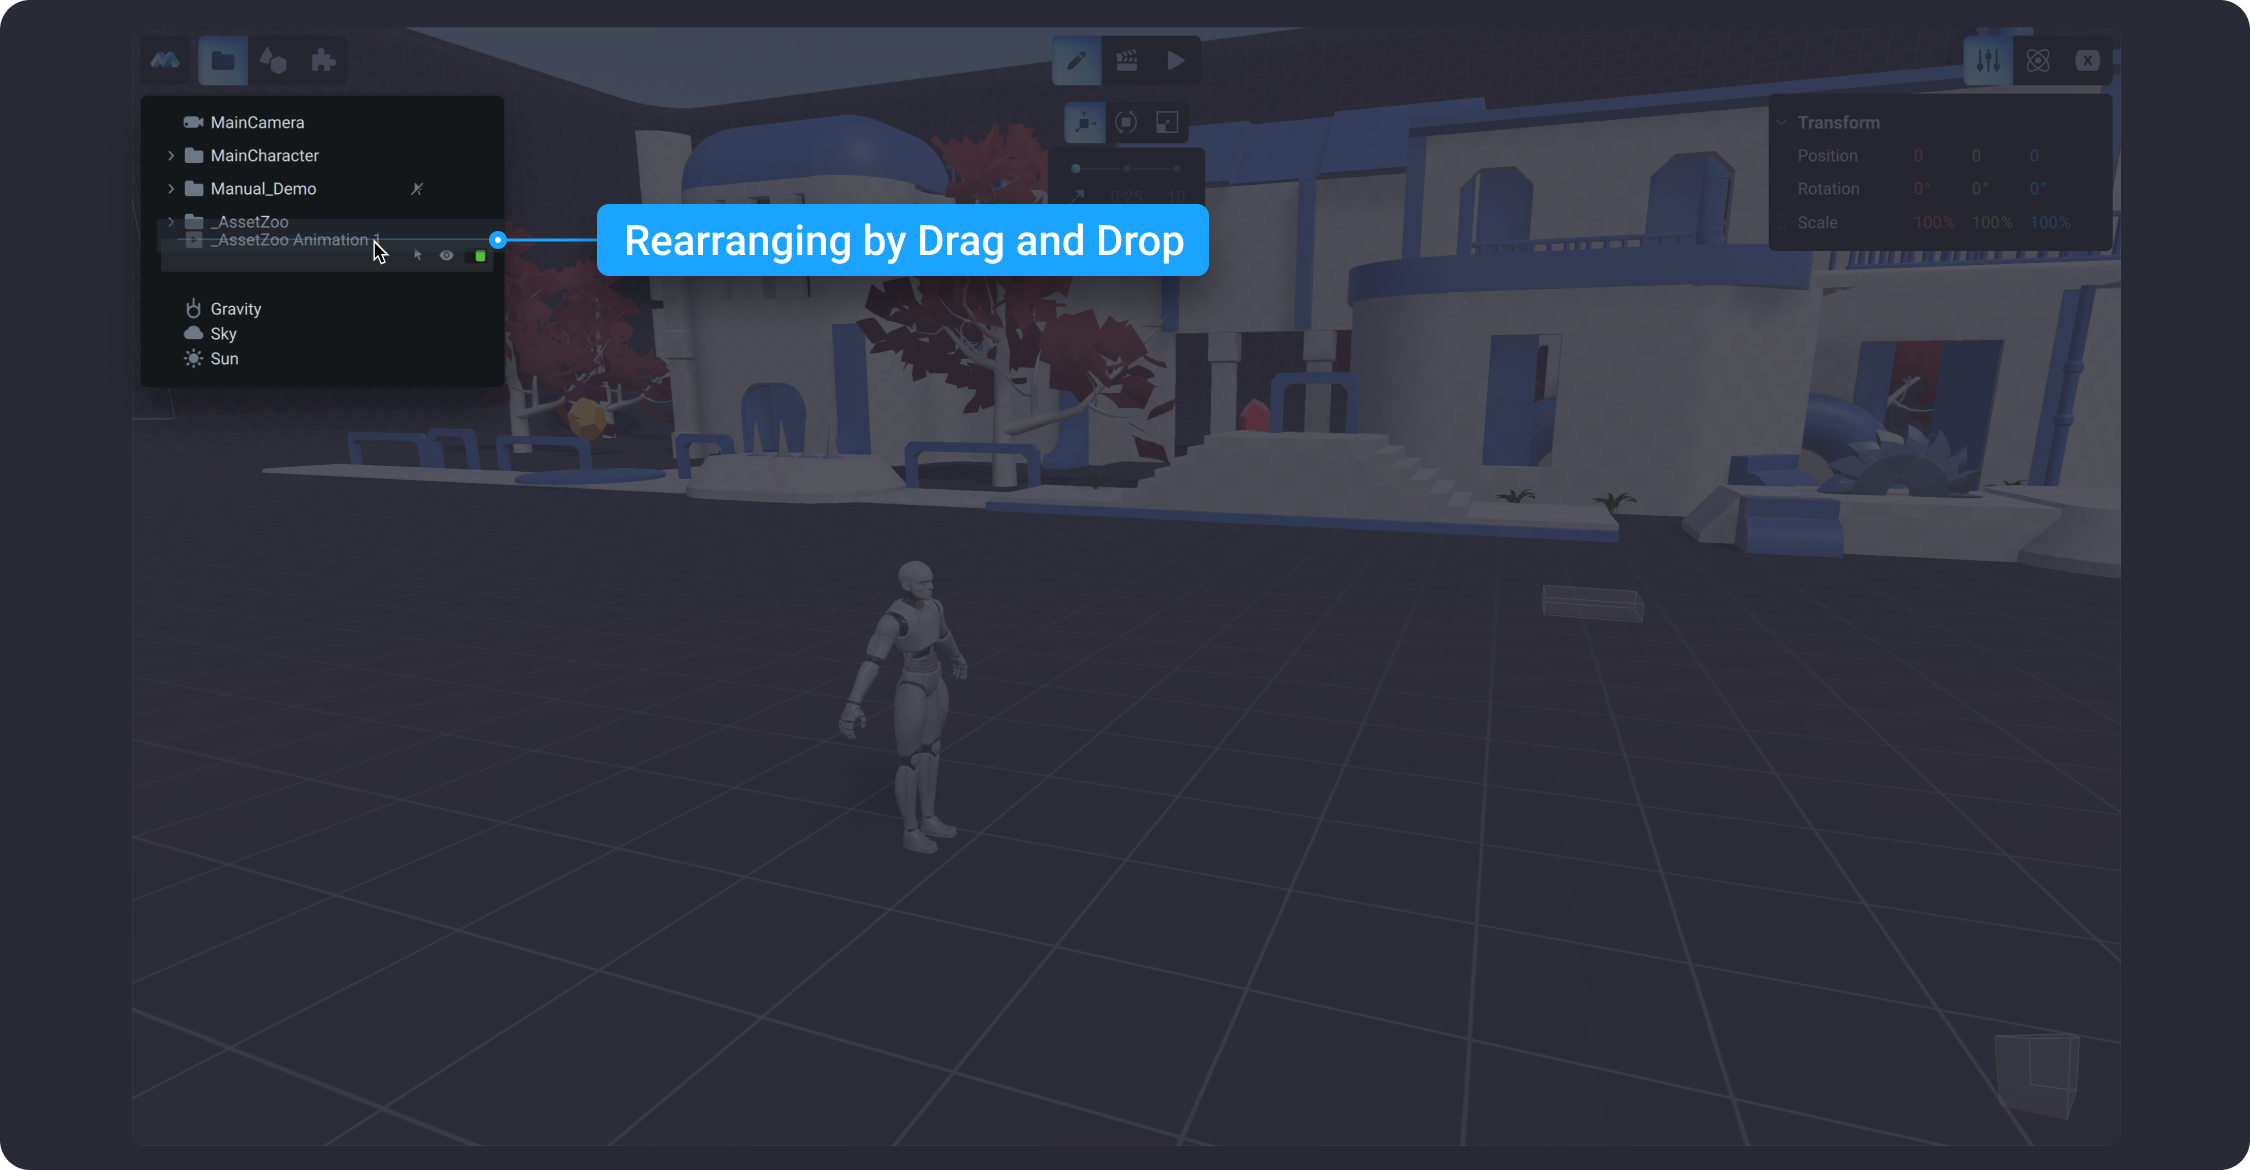
![](https://dl.dropboxusercontent.com/s/pel1jp9yi7lfa8o/004.png?dl=0)

### Mark Objects with Color

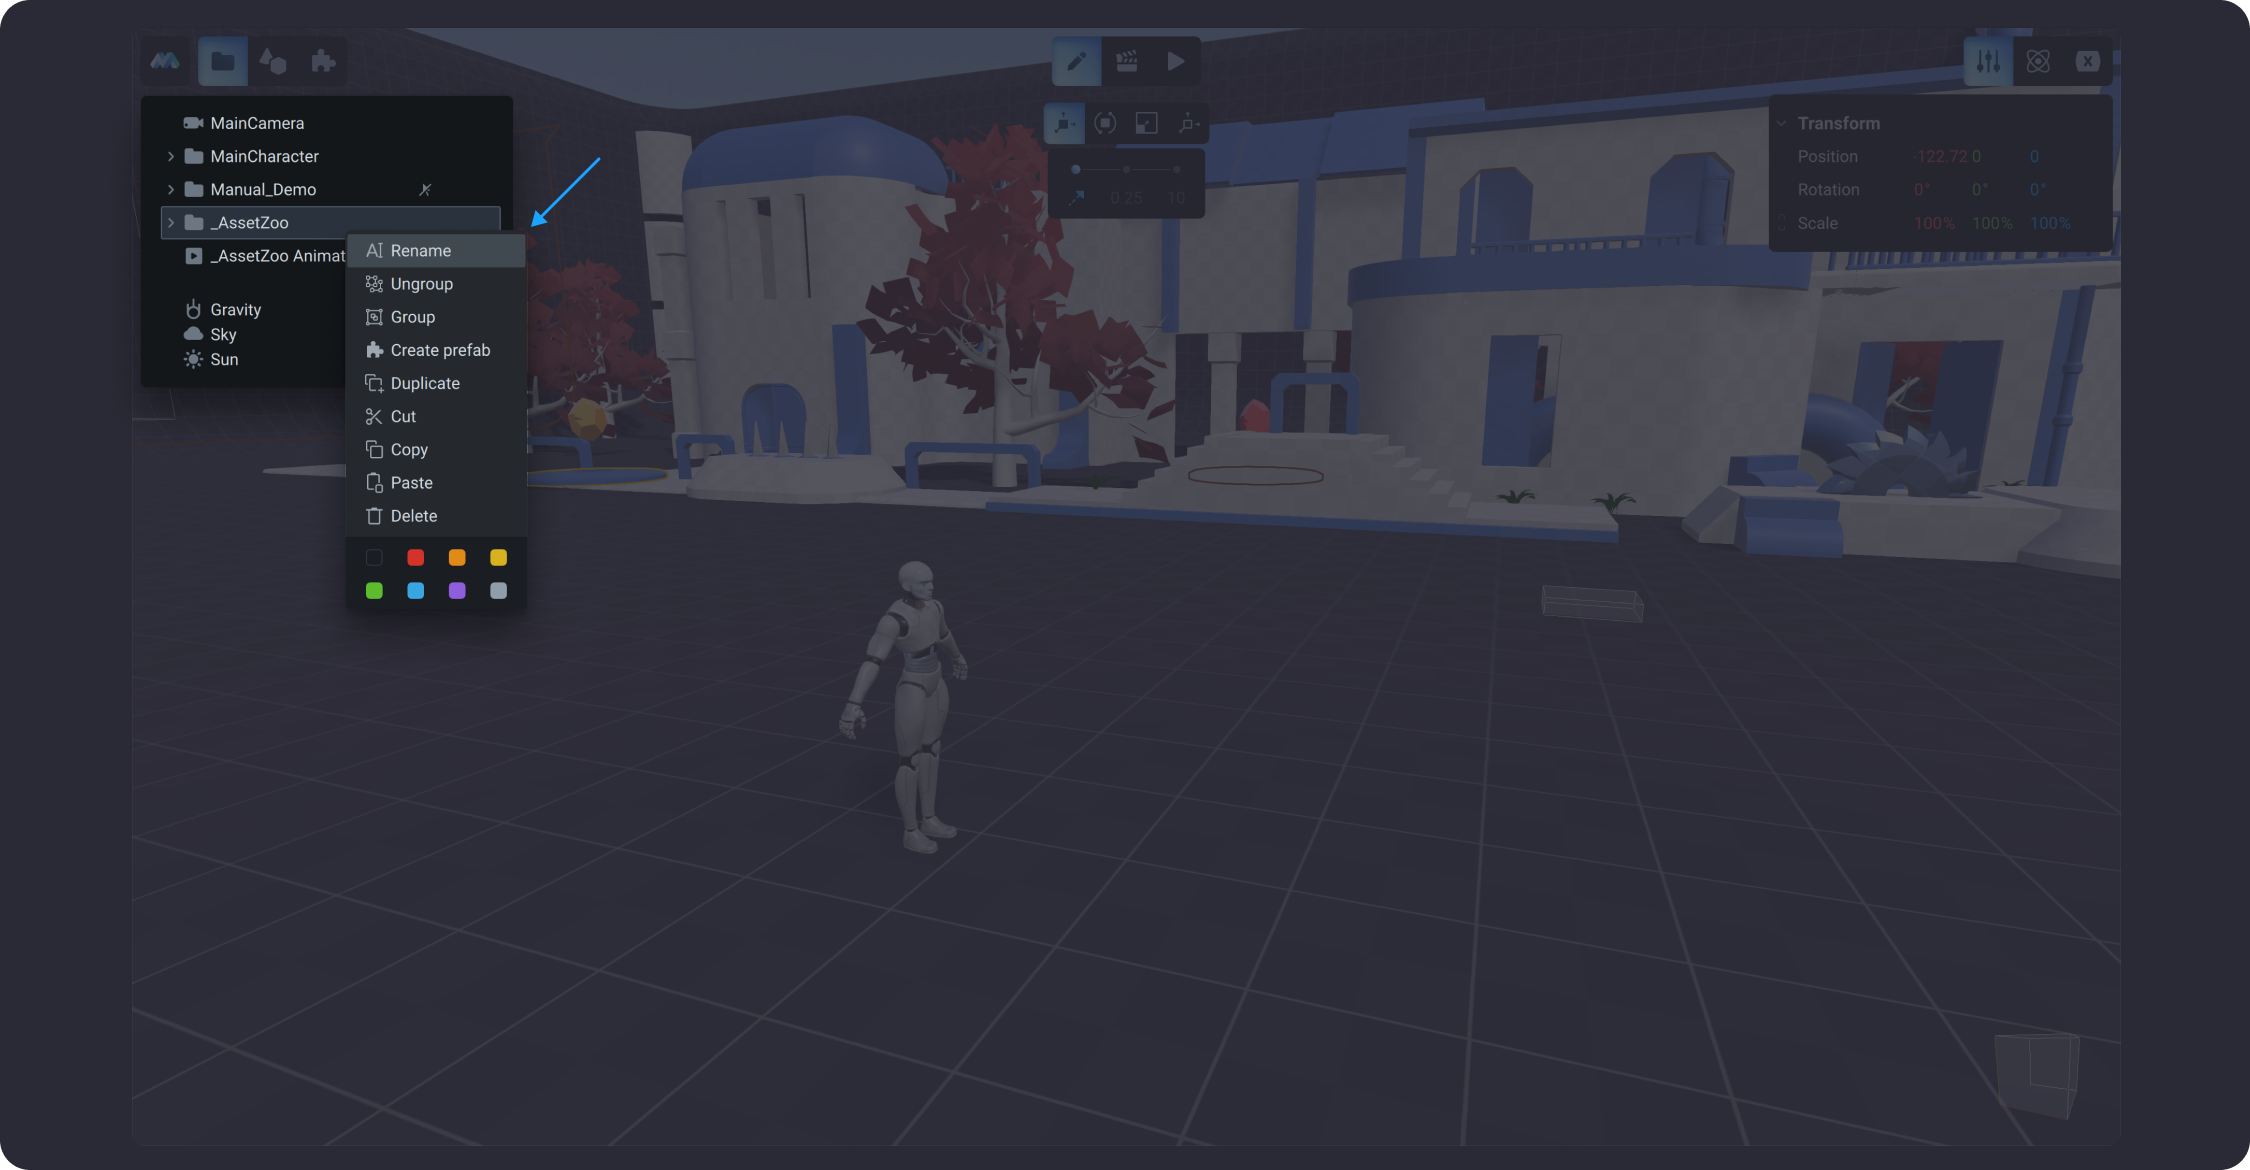
In MANU, you can highlight often used objects in the *Scene tree* by setting a custom color to them. To do that, right click on the object from the scene tree and select a custom color from the bottom section of a contextual menu.
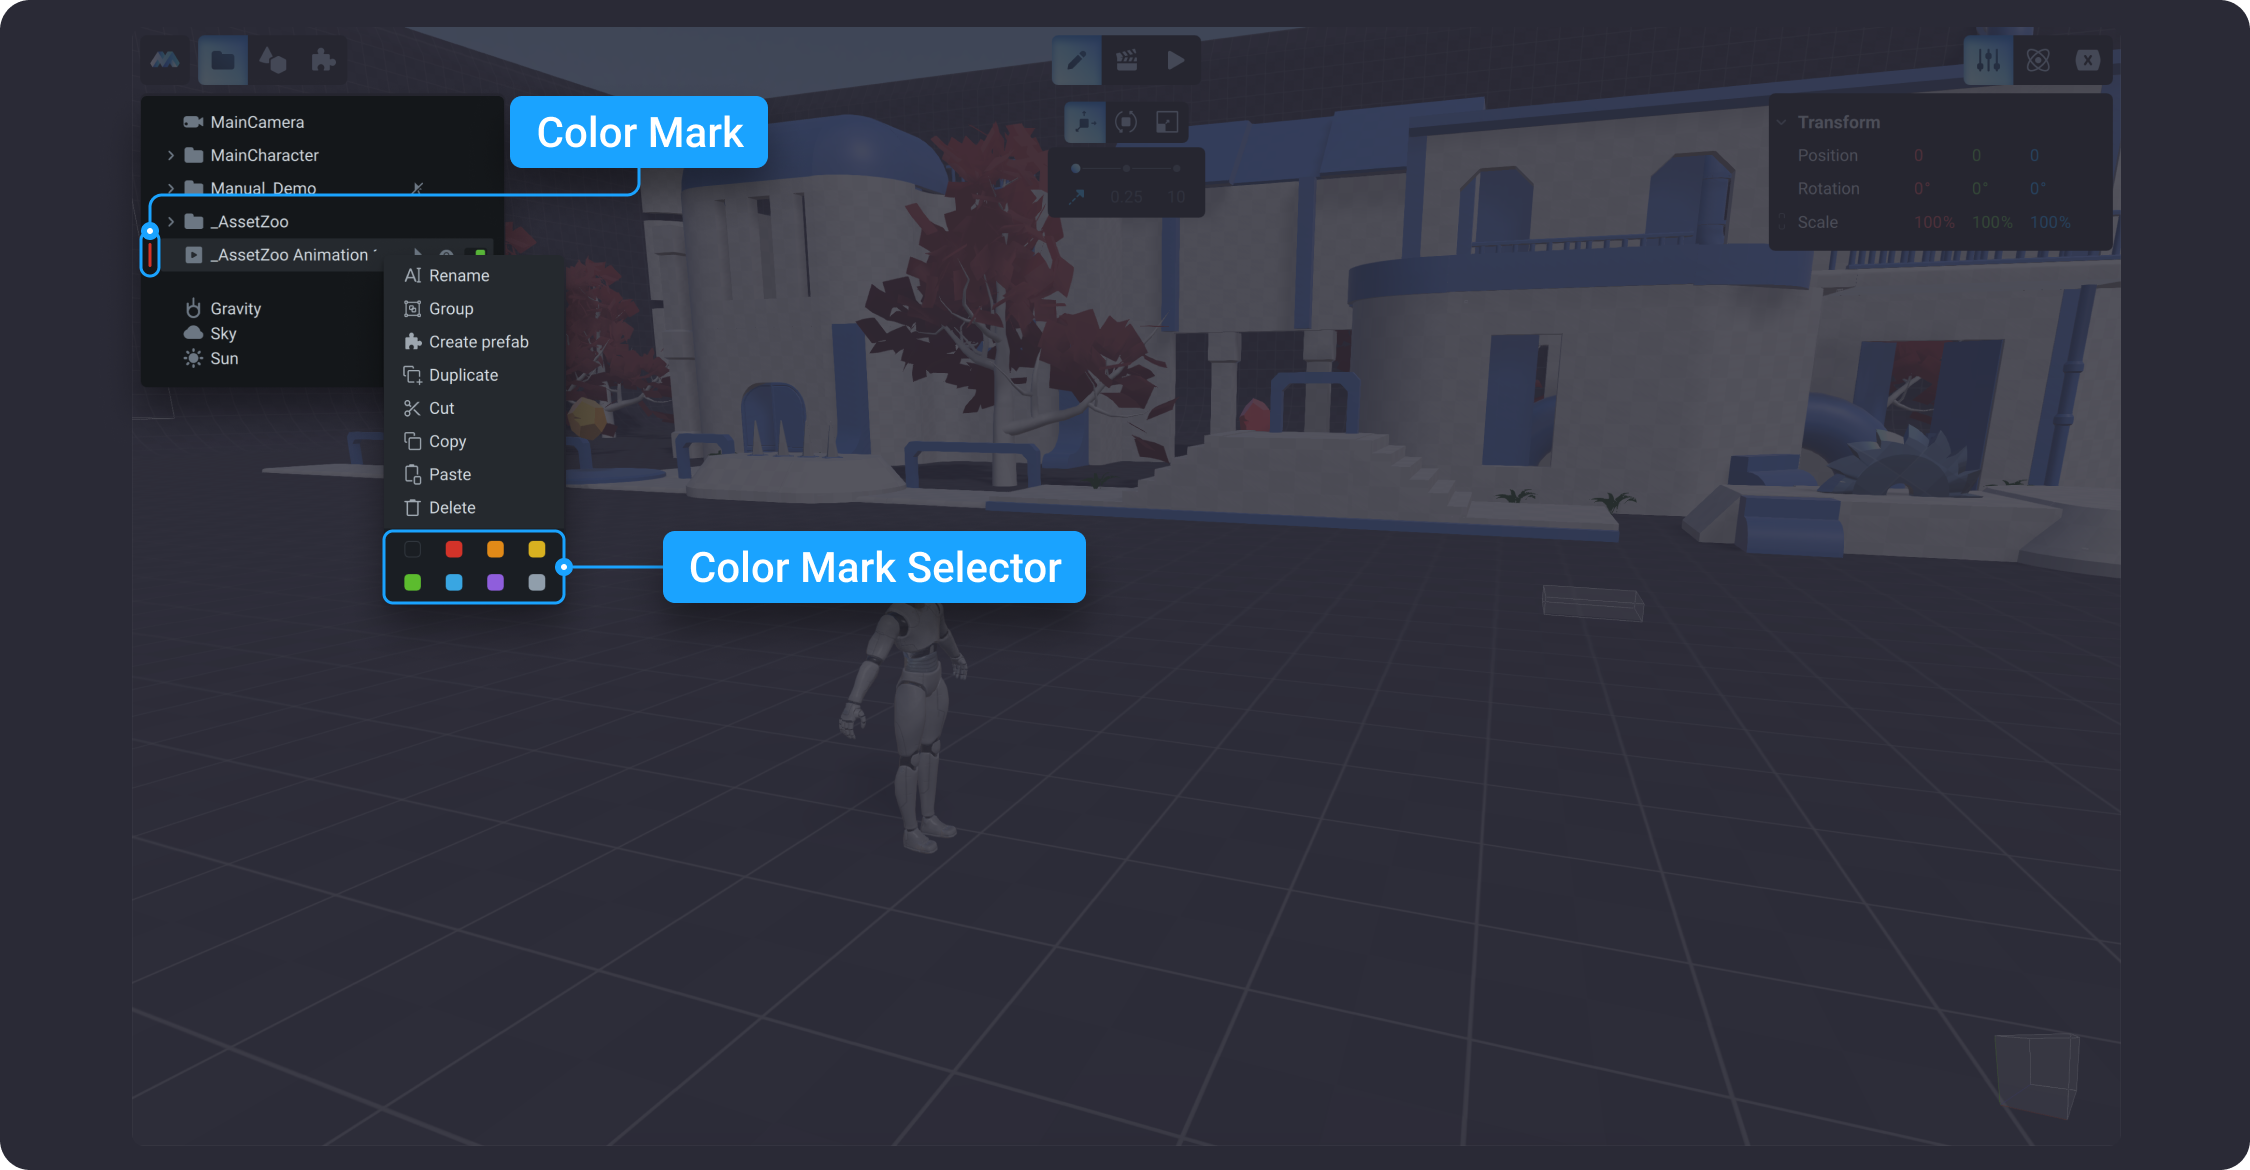
![](https://dl.dropboxusercontent.com/s/9qsy2fwe7vq6501/006.png?dl=0)

### Create Hierarchy

In MANU, you can create hierarchies by dragging one object in the scene tree into another one. The object you dragged turns into a child object
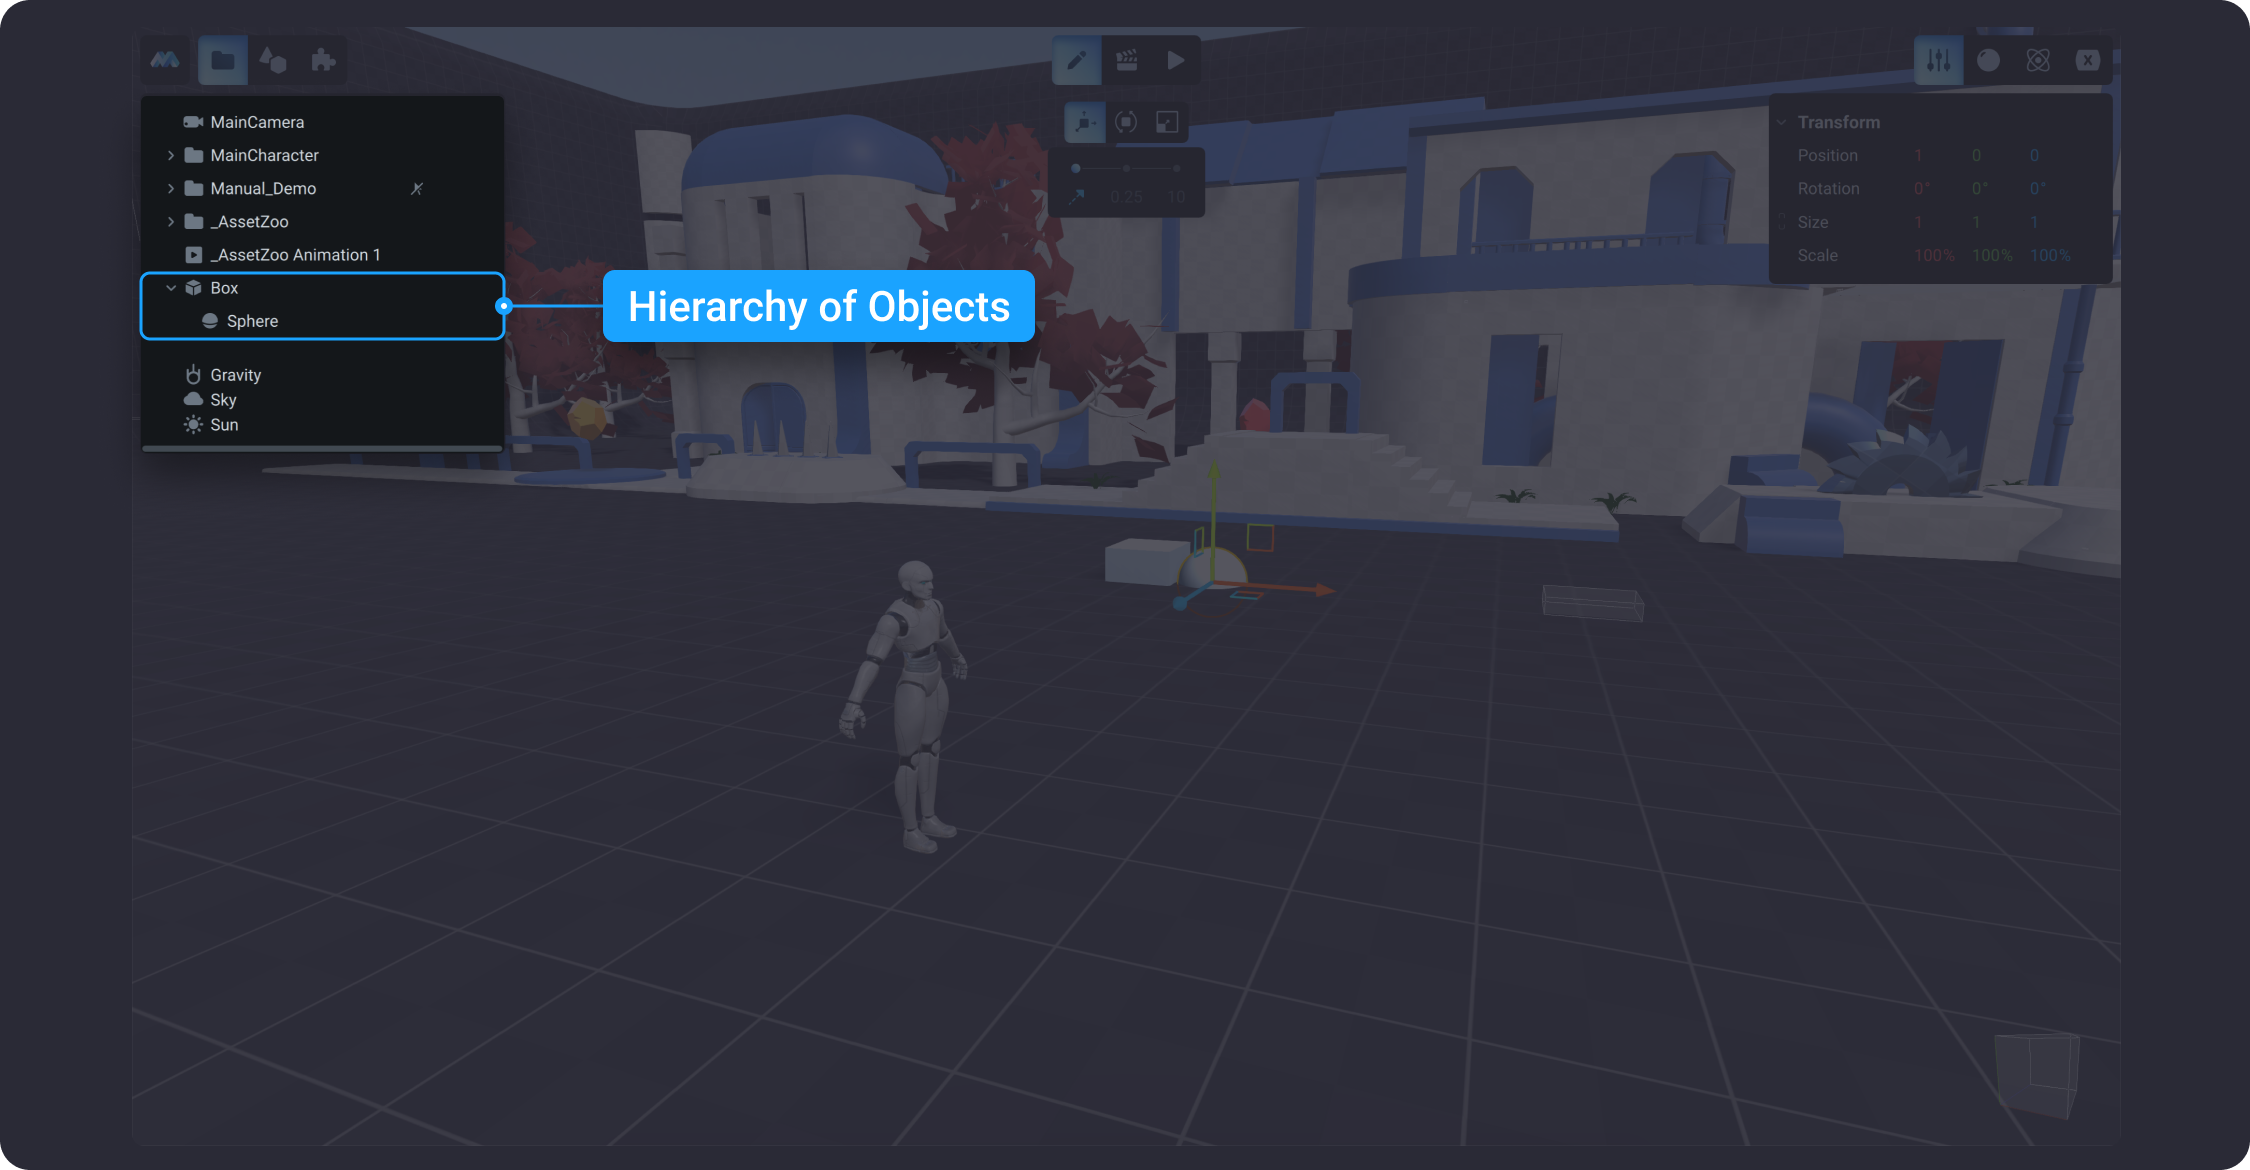
![](https://dl.dropboxusercontent.com/s/lhzjvggfogihyf7/007.png?dl=0)

If you move the object’s parent, the child will follow it. Also, if you change the rotation of the parent’s object, the same settings will be added to its child.

Similarly to the rotation, a child object will follow the size and the scale of the parent if related changes are applied to the parent.

### Group

To create a group of objects, select an object from the scene tree you want to serve as a central pivot point for your new group. Use the right click to select the `Group` option from the contextual menu.
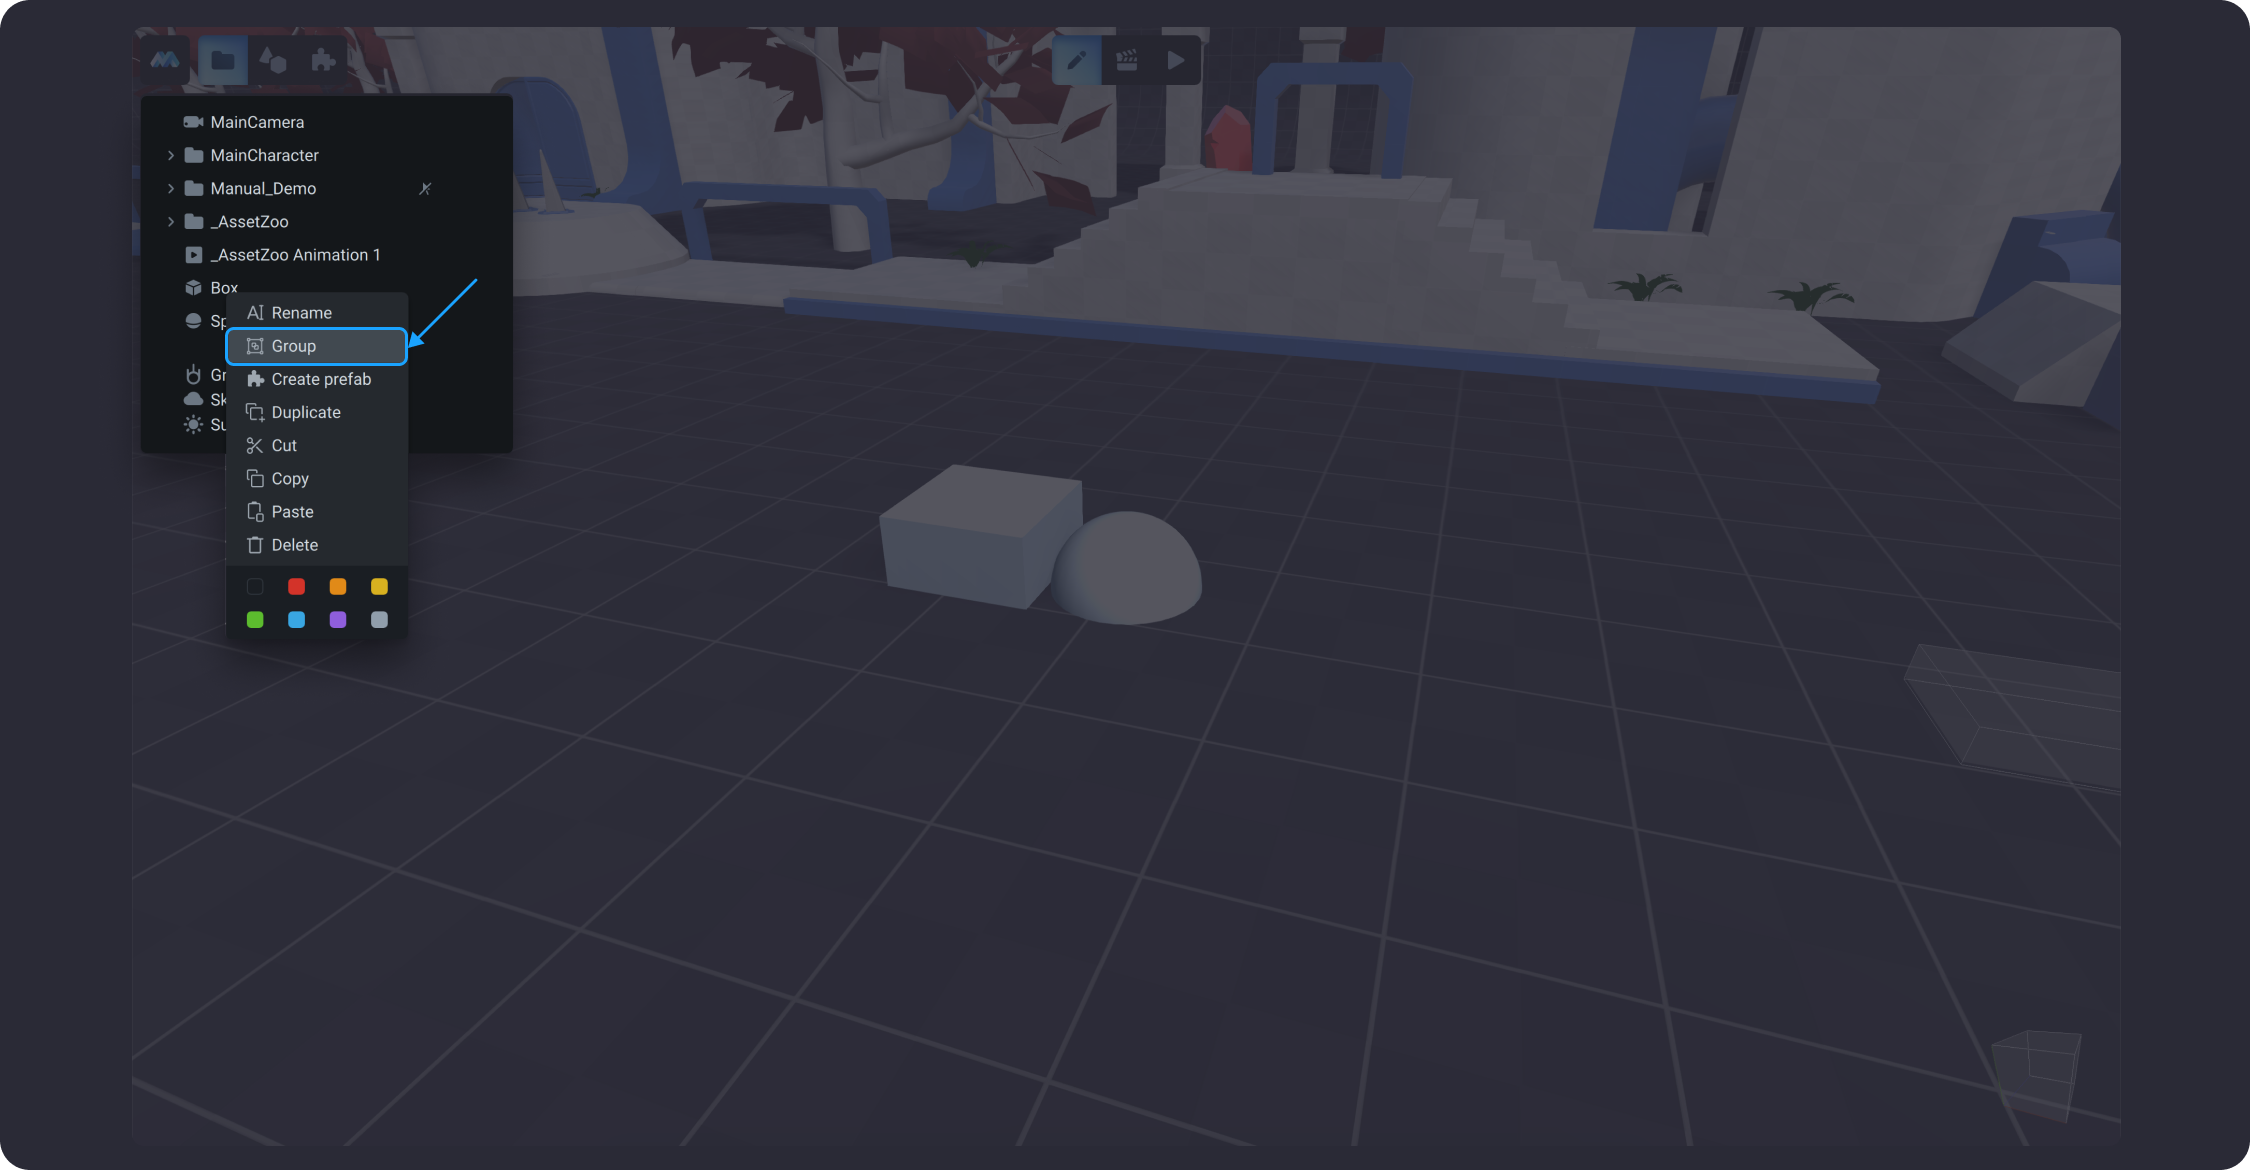
![](https://dl.dropboxusercontent.com/s/ppjgrdfiovyps53/008.png?dl=0)

By default, the name of the group is "*Group*". Rename a new group using the `Rename` option from the contextual menu.

To add other objects into this group use drag & drop into the group, one by one.
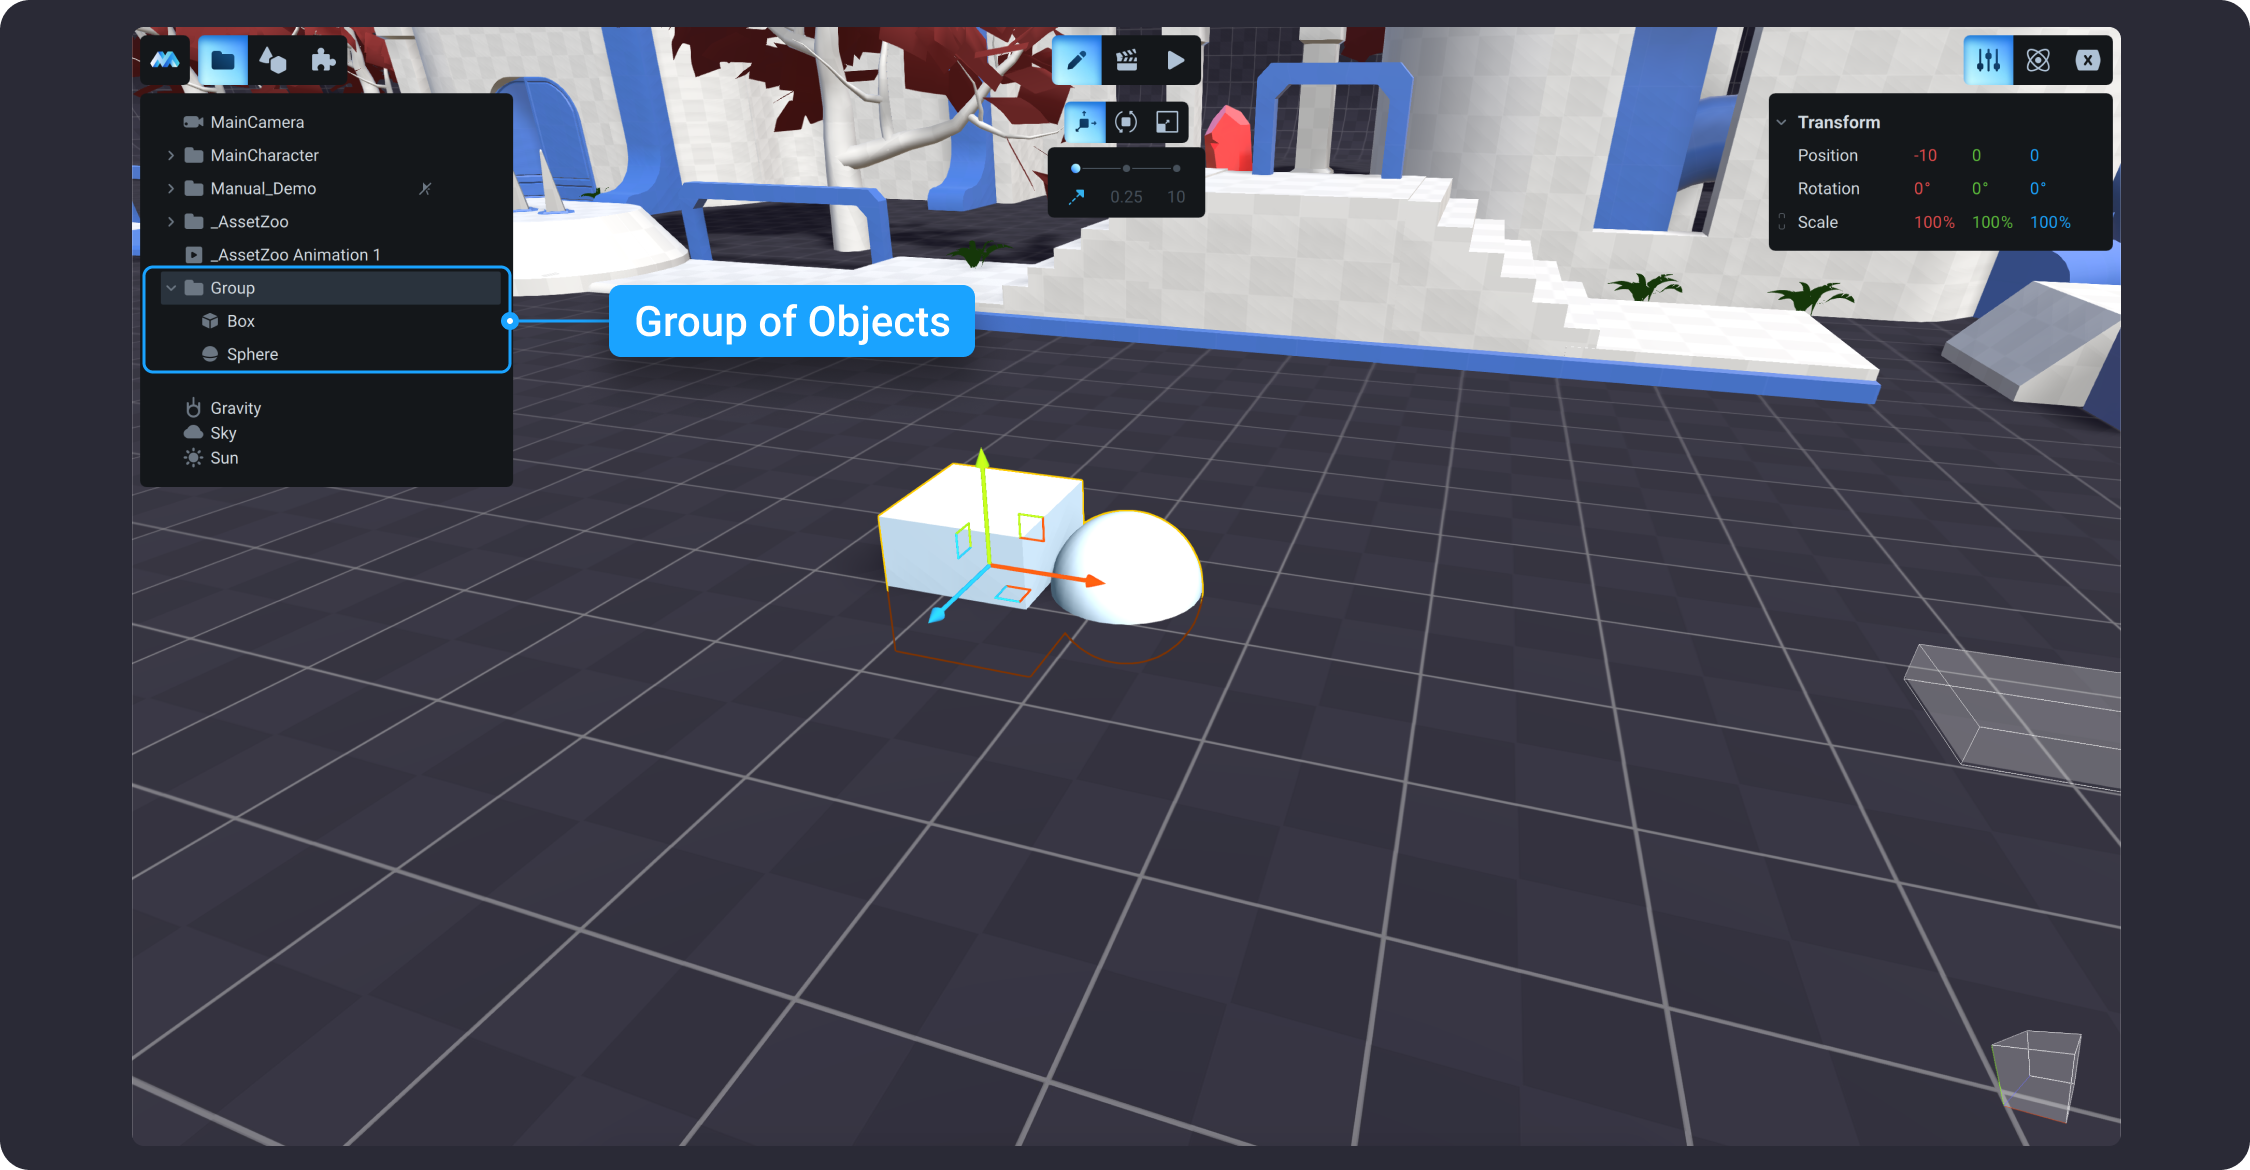
![](https://dl.dropboxusercontent.com/s/dpn2u0qesl5ec5x/008%E2%80%931.png?dl=0)

Please note that in MANU you can only create a group in regard to a particular object in your scene tree. By default, the object you select to create a group off of is set up as the pivot point for the entire group. The pivot point for the group will remain the same even if you remove the pivot object from the group. Unfortunately, you won't be able to change the pivot point for the group once it's created. If you want to change the pivot point, we recommend creating a new group in regard to the object you want to serve as a pivot point.
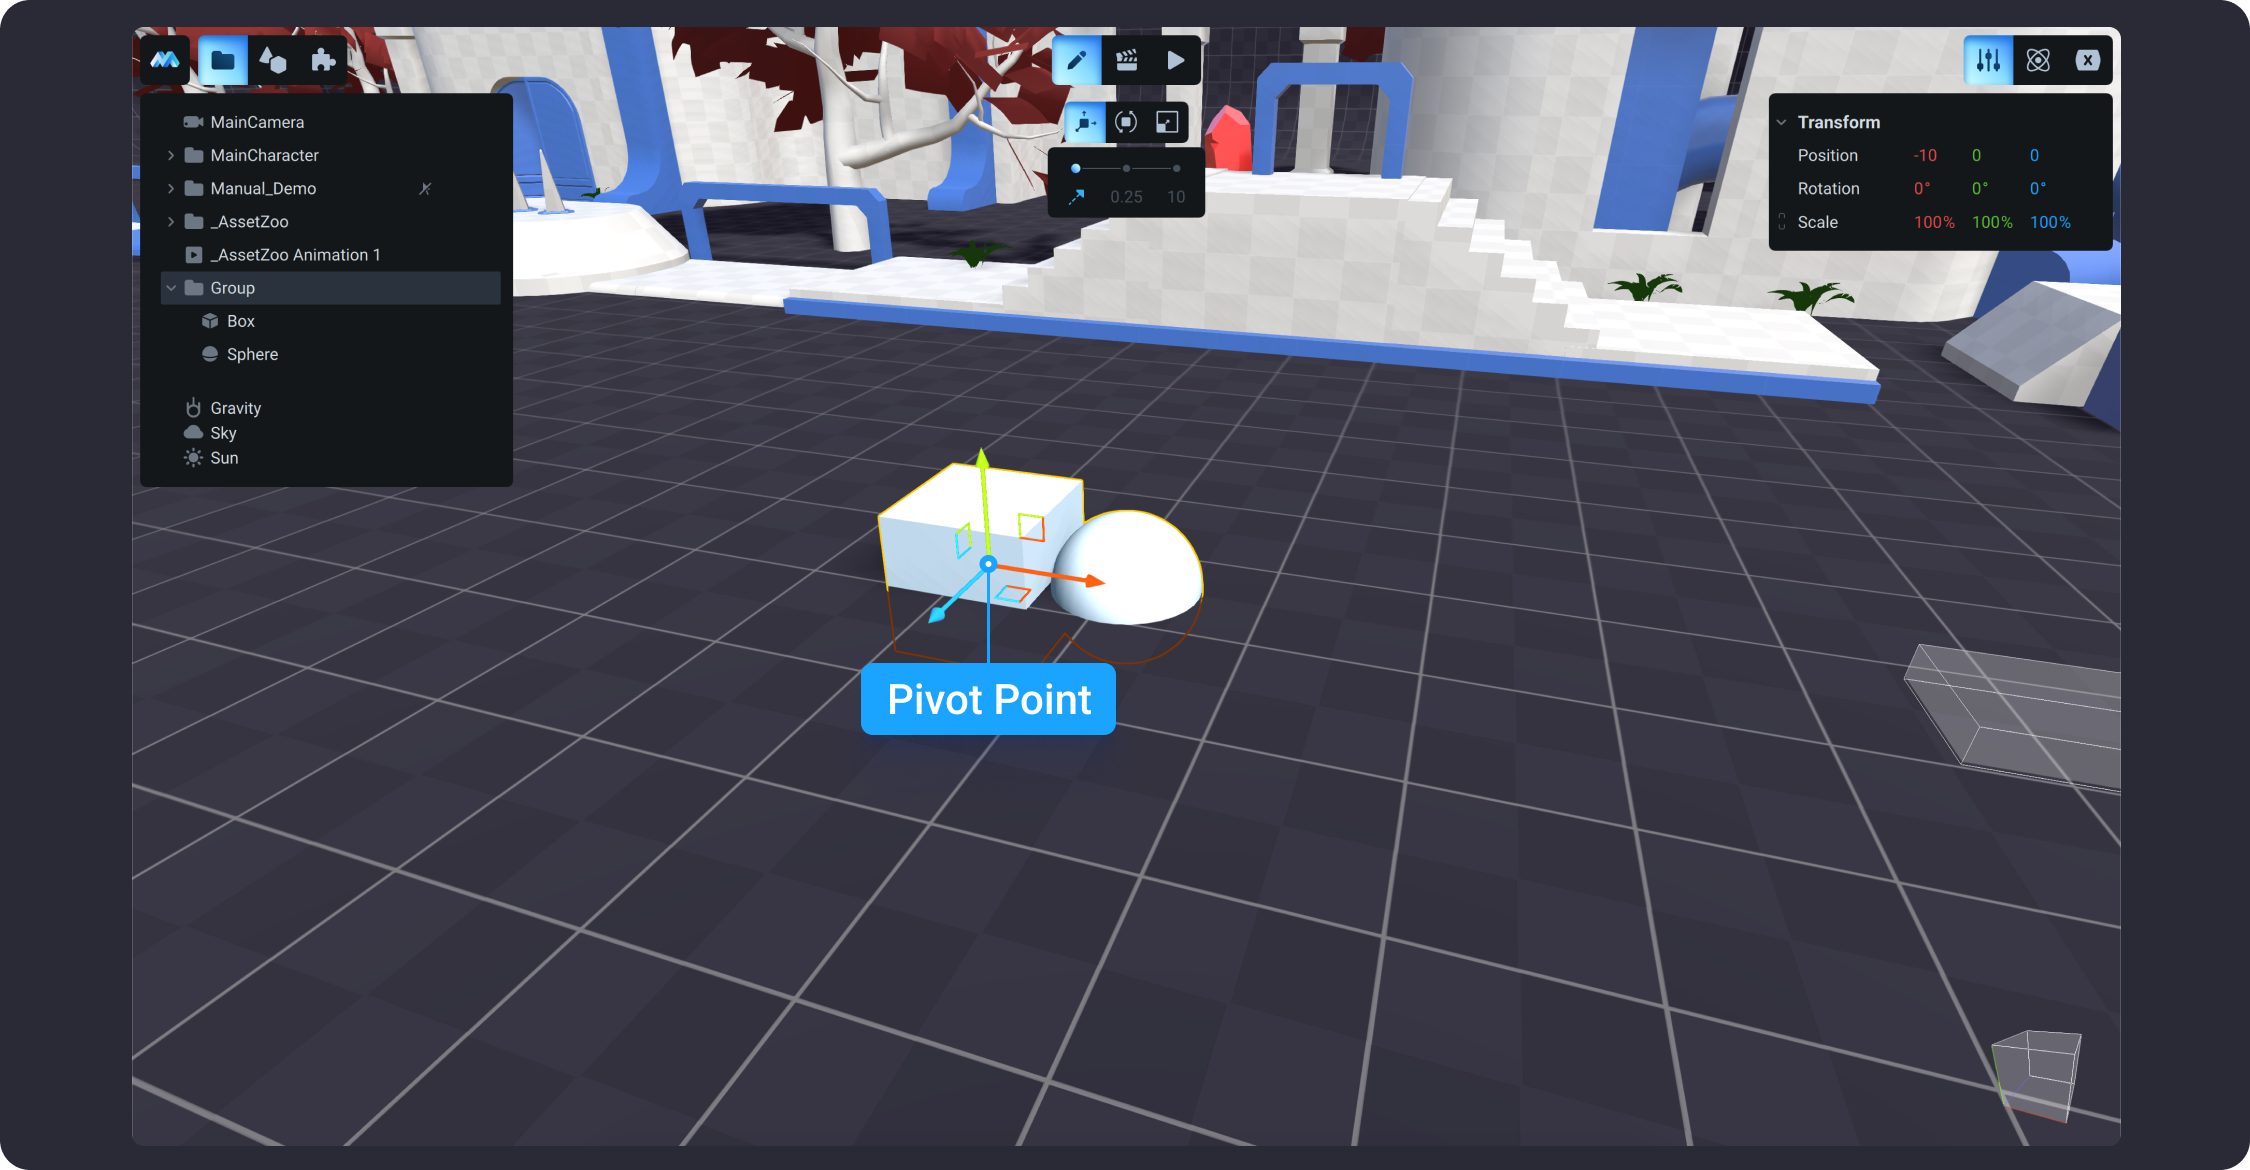
![](https://dl.dropboxusercontent.com/s/7v3rnnxt8ofg72q/009.png?dl=0)

### Static objects

In MANU, you can create static and dynamic objects in the Scene. Static objects are objects that do not transform in the game. Dynamic objects, on the contrary, are objects that can move, be rotated and scaled at runtime. We recommend that you mark all objects that will not be moved, rotated and scaled as Static. This action will significantly improve your game performance.

To do this, hover over the object in the Scene Tree and you will see the available options. Among these options, choose the one that marks the object as Static. After that, MANU systems will recognize this object as a Static Object.

{% embed url="<https://dl.dropboxusercontent.com/s/lo0i76rff27i96e/011.png?dl=0>" %}

You can mark objects as Static right away after creating them if you do not plan to transform them in any way. Or you can do it before exporting your game, when you already know exactly which objects will remain still in the game. This feature will help you to optimize your game: it will work more stable and faster and more GPU resources will be available for other functions.

## Operations with Objects

Use a *Scene tree* to perform basic operations with objects and create prefabs. These operations include *Duplicate*, *Cut*, *Copy*, *Paste* and *Delete*. To call a menu with these operations, use right click on the object from the scene tree. To review a list of hotkeys to complete basic operations, go to [Keyboard Shortcuts](/learn/keyboard-shortcuts).
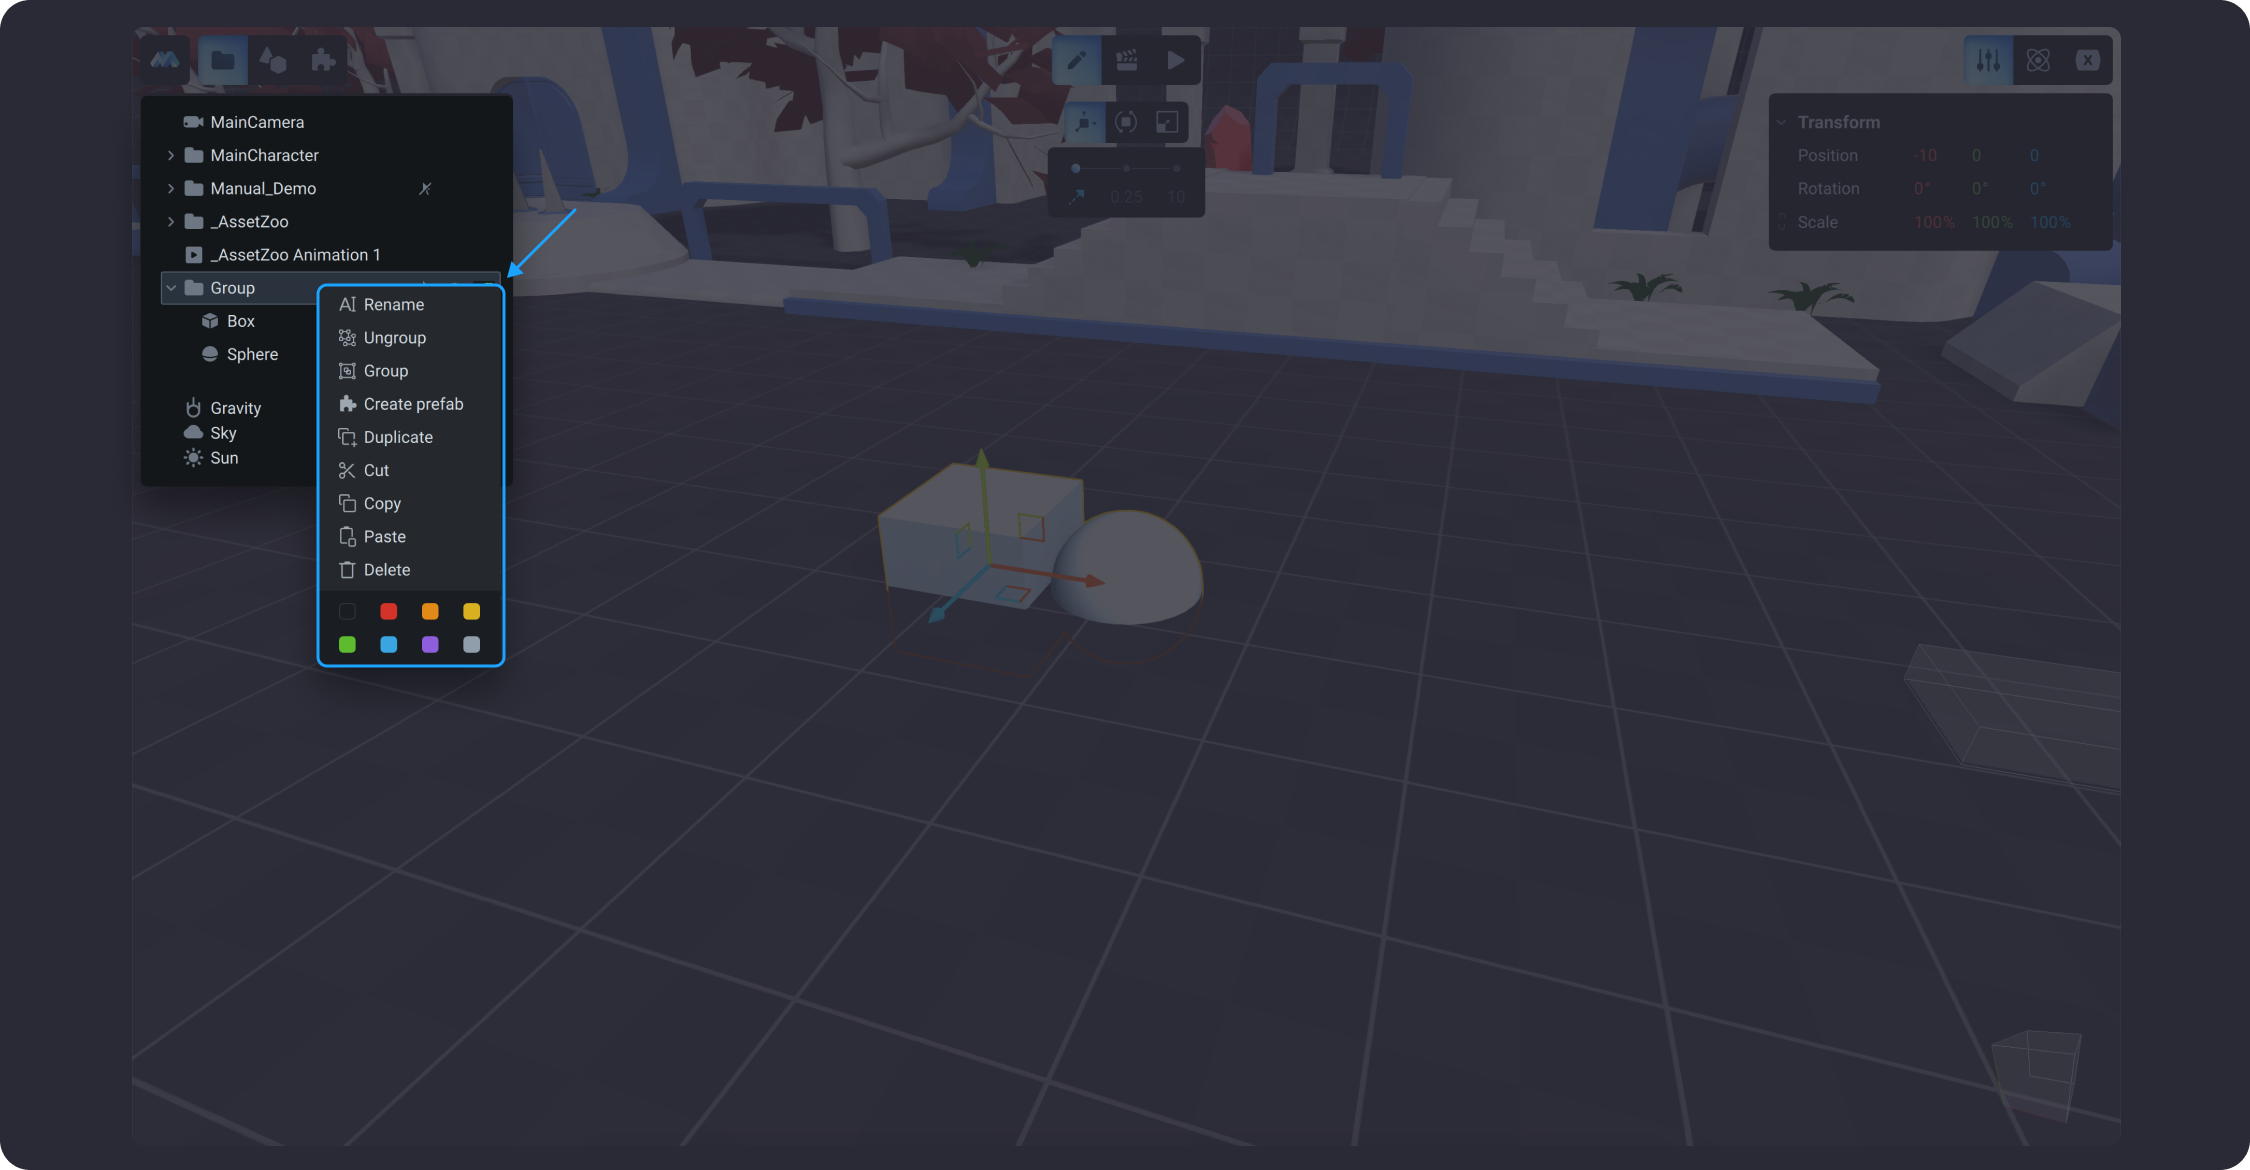
![](https://dl.dropboxusercontent.com/s/8dmfok3msd1e2zh/010.png?dl=0)

### Create Prefab

Prefab allows you to create, configure, and store an object complete with all its components, property values, and child objects as a reusable asset. To create a prefab, select `Create Prefab` from the contextual menu. To learn more about operations with Prefabs go to [Assets / Create Prefab](/learn/manual/assets#create-prefab).

## Default Units of Every Scene

Each Scene in MANU includes the following default units:&#x20;

{% content-ref url="/pages/-MVq257rYHAD7\_ojKqBr" %}
[Camera](/learn/manual/camera)
{% endcontent-ref %}

{% content-ref url="/pages/-MSZzlbDDV91opiihxOo" %}
[Main Character](/learn/manual/main-character)
{% endcontent-ref %}

{% content-ref url="/pages/-MOaY3UFvmdlxS8buErq" %}
[Gravity](/learn/manual/gravity)
{% endcontent-ref %}

{% content-ref url="/pages/-MOaYUwLz44h0pZDigQP" %}
[Sky](/learn/manual/sky)
{% endcontent-ref %}

{% content-ref url="/pages/-MOaaKOA0yf5dfEZoAa5" %}
[Lights](/learn/manual/lights)
{% endcontent-ref %}


# Main Toolbar

<figure><img src="https://4240499350-files.gitbook.io/~/files/v0/b/gitbook-x-prod.appspot.com/o/spaces%2F-Lt-sE9MYKe9pZOcHwg5%2Fuploads%2F1GsWP1GqopDJwIC2kyrp%2FGroup%2054.png?alt=media&amp;token=98153c64-441c-44ca-a5dd-3dc4cfbea006" alt=""><figcaption></figcaption></figure>

The main MANU toolbar contains all the objects used to create all the scenes and mechanics of MANU games. When you click on an object in the toolbar, it is created in the scene tree in the selected hierarchy. The toolbar contains the following tools.

**Primitives** - contains 3D objects to create primitive scenes. We recommend use them to create base of any scene and create game mechanics before importing advanced 3D models in your game.

**Game Flow** - one of MANU's main tools for connecting animations, triggers, state machines and other Game Flows together to visually build the logic of your entire game, control, customize and trigger all elements of your game.

**State Machine** - object that will allow you to create the behavior of objects in the scene and describe under what conditions the object's state should transition from one to the other.&#x20;

**Animation** - object with which you will animate your game and make all objects work the way you want them to.

**Trigger** - объект с помощью которого вы будете отслеживать события в игре и запускать с помощью него анимации, менять состояния стейт-машин и включать Game Flows.

**Collider** - through which you will receive information about each other's interactions. Colliders are of different types, look for information about them in the corresponding section.

**Light** - Light sources in your game, which you will use to light up scenes and set their mood.

**Speaker** - the sound sources in your game. Play the sounds and background music assigned to them.

**Paint group** - a tool that will help you quickly fill the scene with environment objects, plant a forest or build up a city.

**Backing volume** - a tool for baking lightmap textures into your scene. Used by advanced users to create photorealistic game scenes.

Some tools are hidden in categories, to access them, click on the triangle icon in the lower right corner of the toolbar icon to reveal the full list of that category.

<figure><img src="https://4240499350-files.gitbook.io/~/files/v0/b/gitbook-x-prod.appspot.com/o/spaces%2F-Lt-sE9MYKe9pZOcHwg5%2Fuploads%2FUHnZoaeKTLnEmMRSoDw4%2FGroup%2055.png?alt=media&amp;token=b2fc6b93-1775-4e5c-9d7f-1e315b14ee17" alt=""><figcaption></figcaption></figure>


# Primitives

In MANU, primitives are a set of 3D objects available in the [Library](broken://pages/-MRyaRYkiMDprOHxMcPQ) panel of [Edit mode](/learn/manual/workspace-modes/edit-mode). Primitives are represented by the building blocks of 3D-basic geometric forms you can use in your game as is or modify them using transform options.

Primitives in MANU include box, sphere, capsule, cone, torus, cylinder, plane, and wedge.
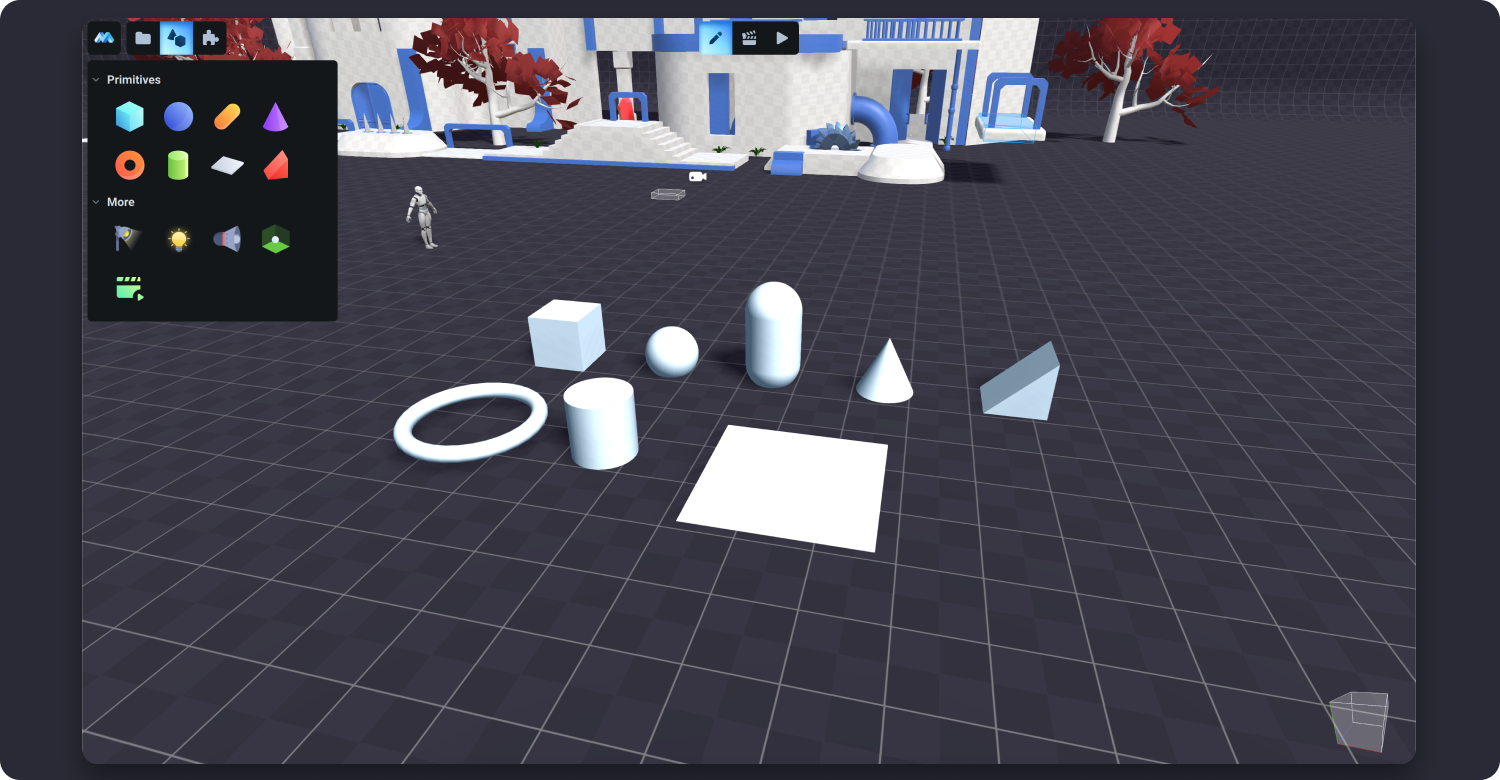
![](https://dl.dropboxusercontent.com/s/51rqqd3sw64orgd/001.png?dl=0)

You can combine some of the primitives to create more complex 3D objects, such as stairs, ladders, fences, or even bots.&#x20;


# Collider

Collider is an empty shape of the 3D object designed for purposes of physical collision detection in video games.

A collider often functions as a trigger that does not behave as a solid object and allows other colliders to pass through. When a collider enters its space, a trigger will call a certain game event or animation to occur.
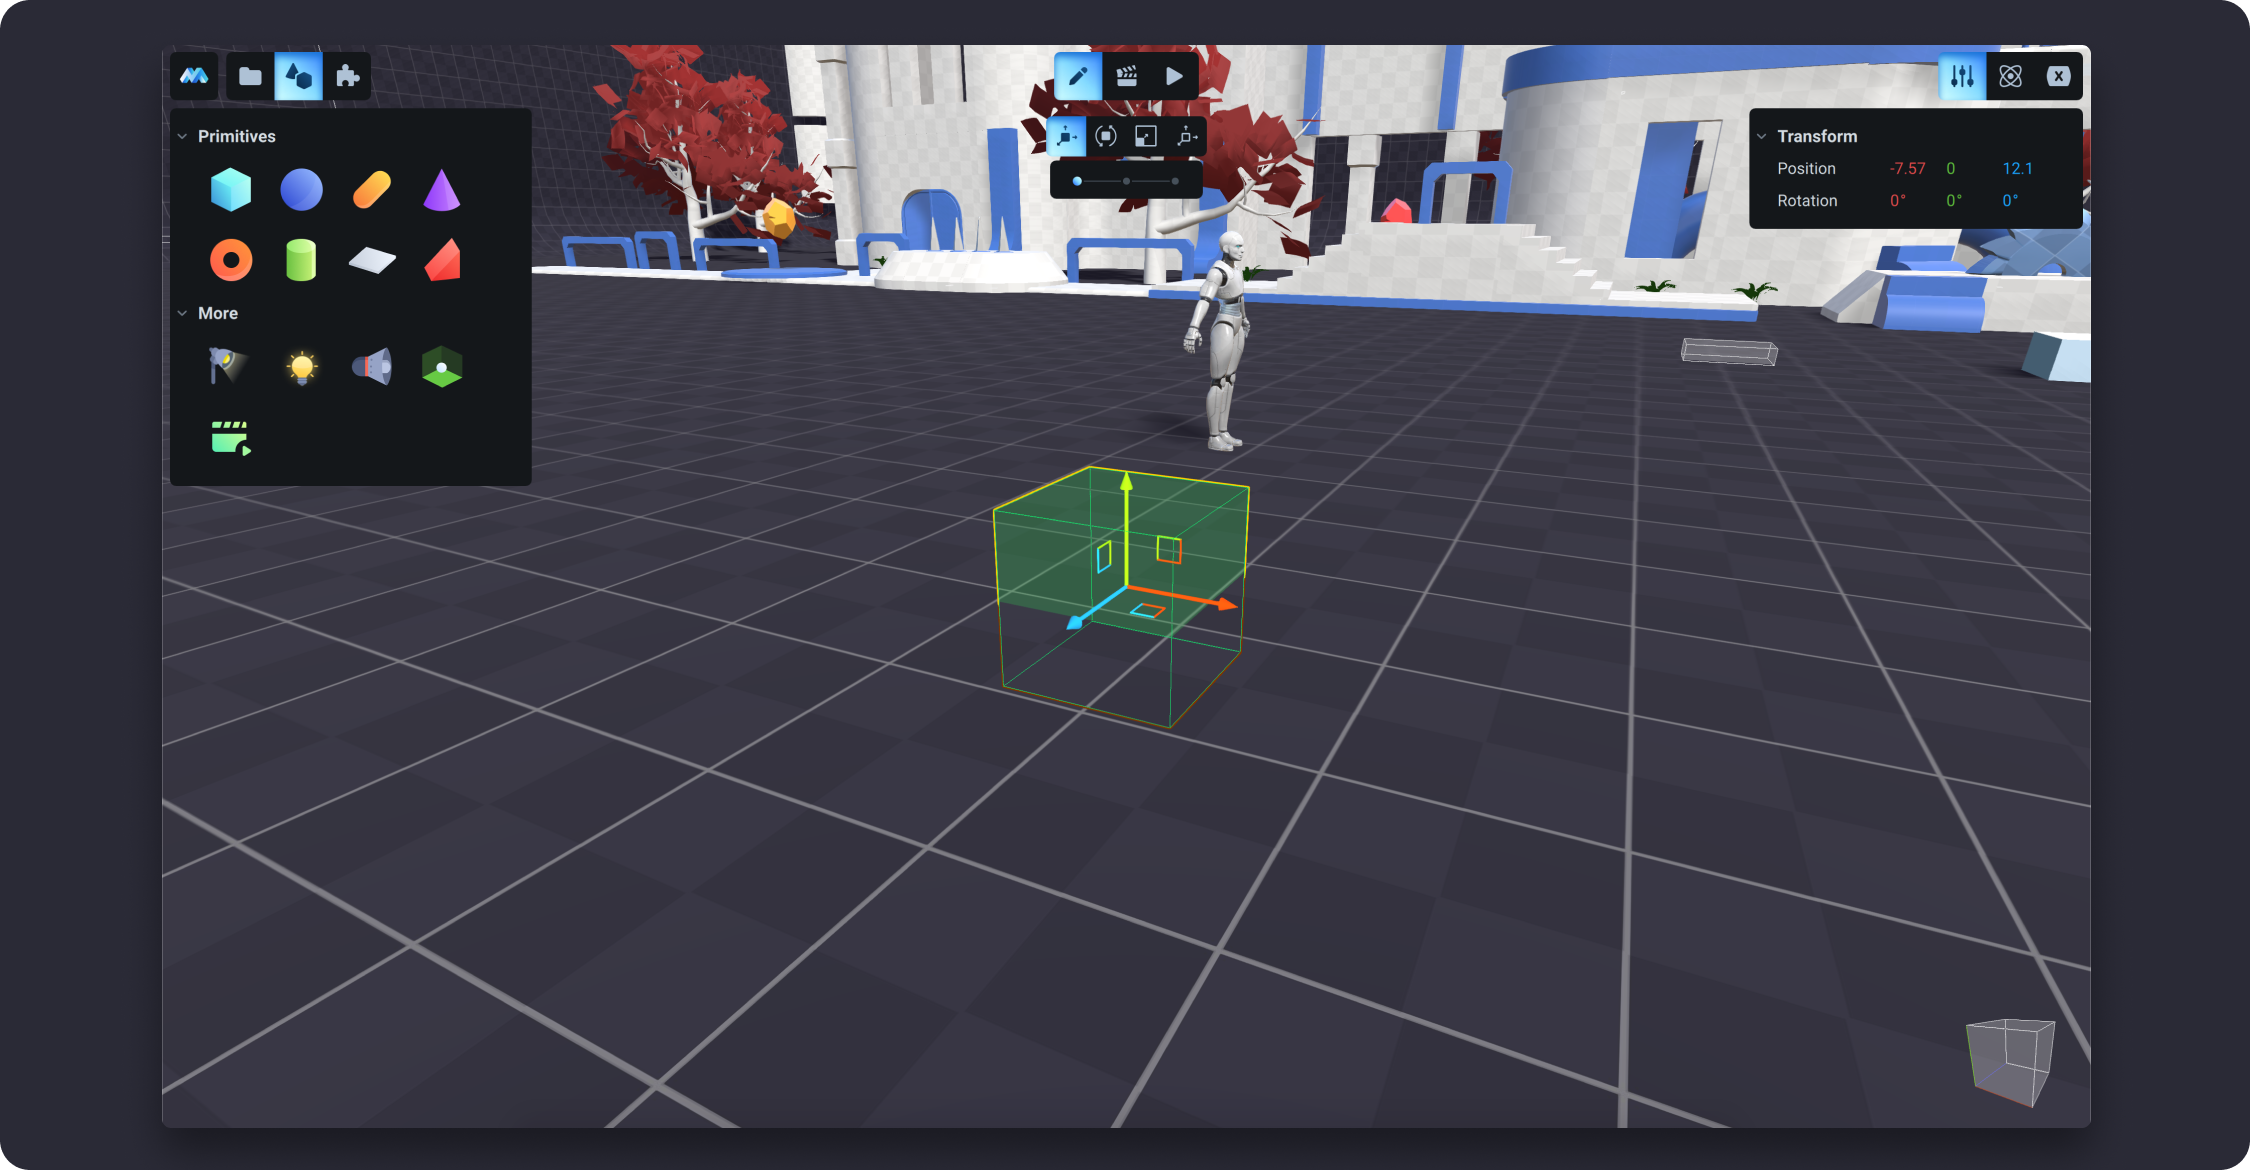
![](https://dl.dropboxusercontent.com/s/4s5gdoh1ay0vysx/002.png?dl=0)

Unlike other Primitives in MANU, a Collider functions as a trigger that does not behave a solid object and allows other colliders to pass through. When another collider enters its space, a trigger will call a certain game event or an animation to occur. To add a collider in your game, go to the Library tab and select a collider from the suggested options below.
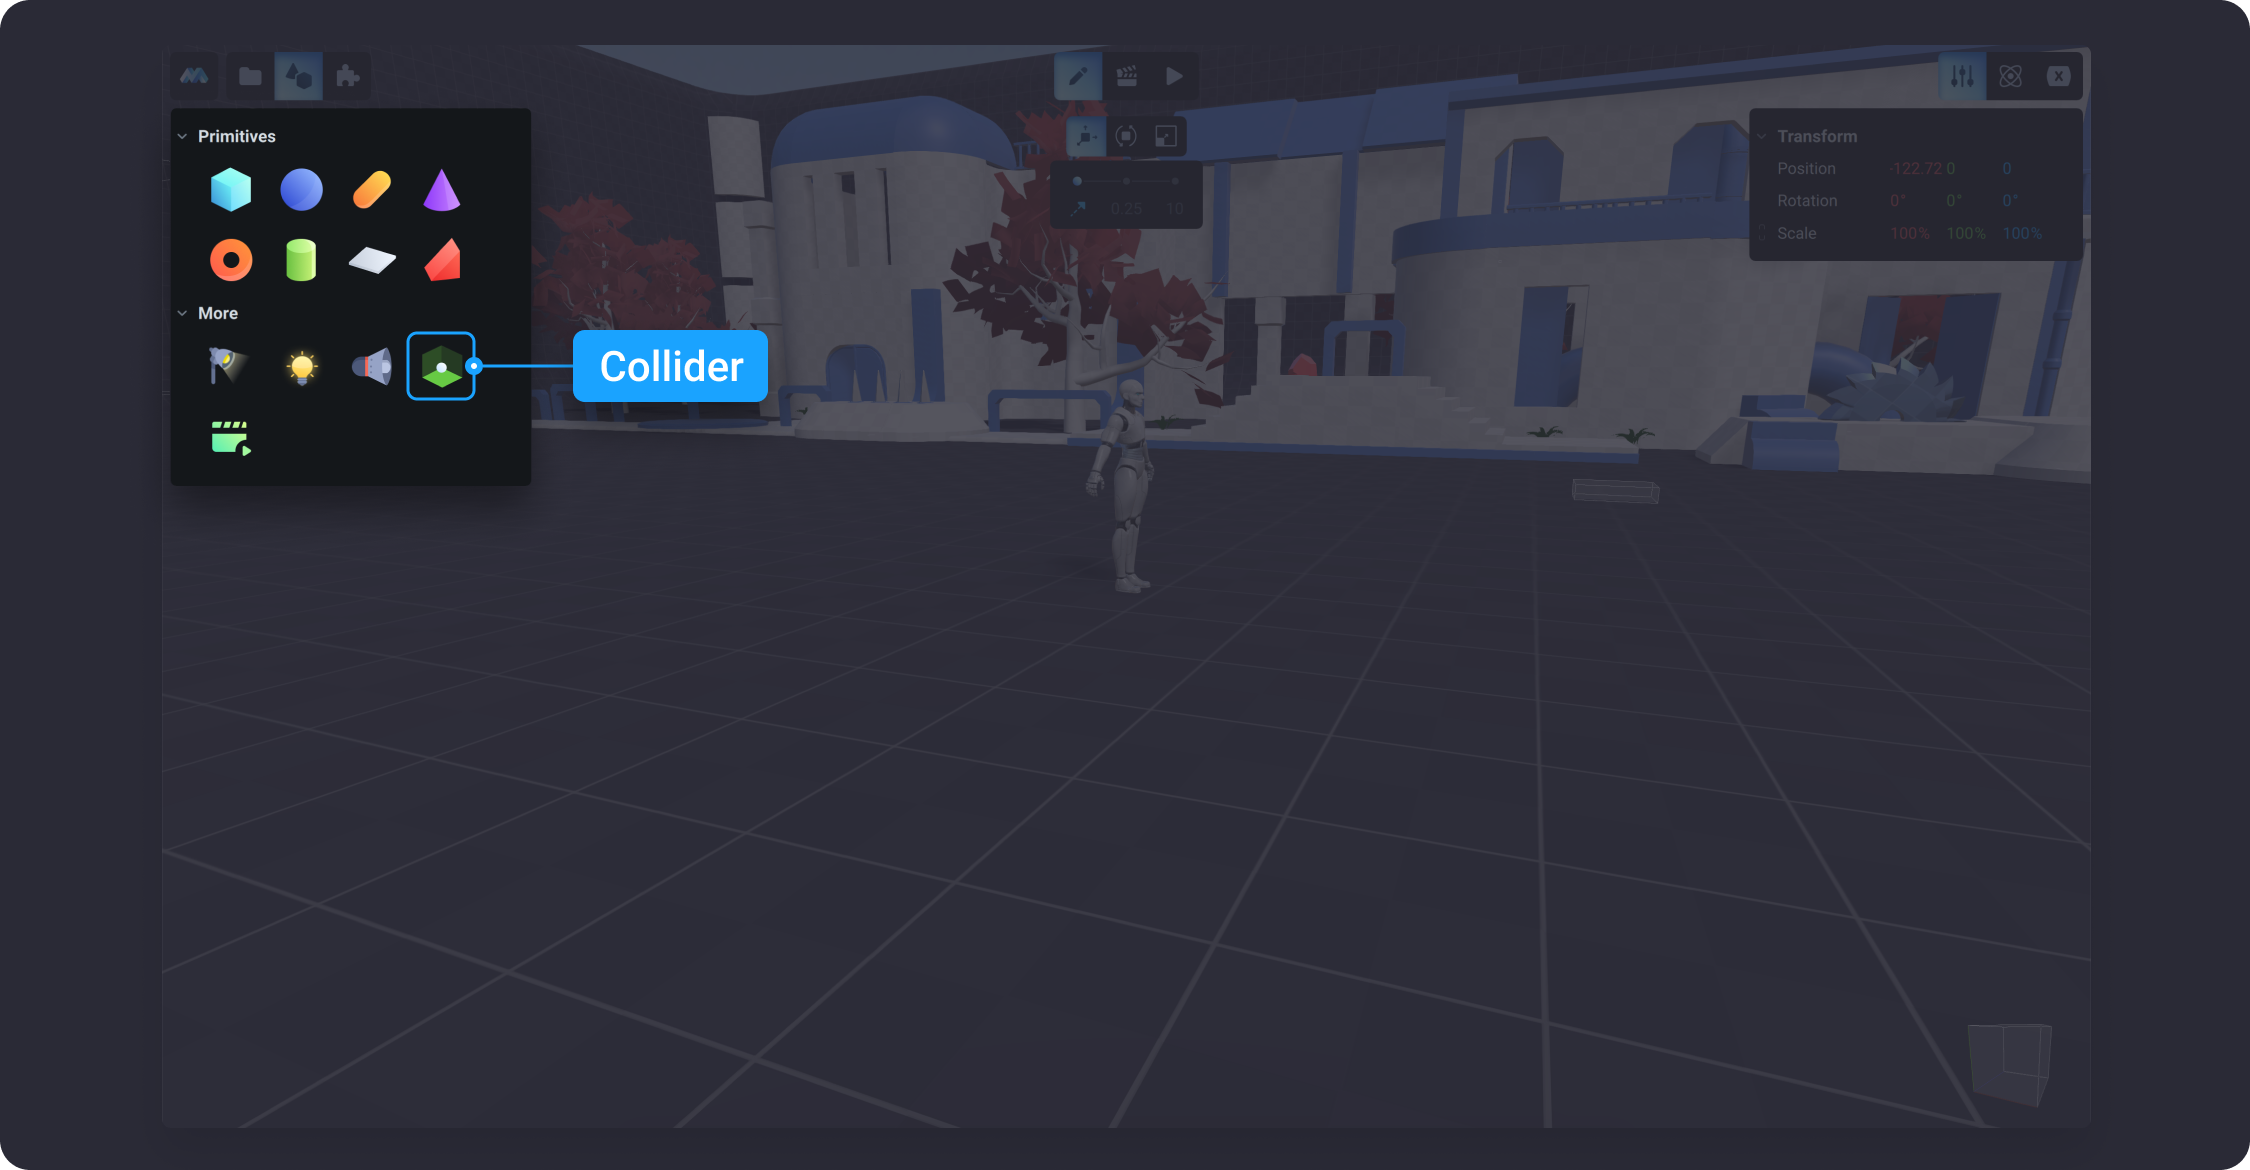
![](https://dl.dropboxusercontent.com/s/y5l2hip105xomcv/001.png?dl=0)

Collider can be used for multiple purposes in a game. Below are the examples of use cases for utilizing collider function in your games:

* With colliders you can create invisible obstacles for blocking the main character’s movements.&#x20;
* Use a collider as a pivot point for a group of objects. To learn more about how to group objects, please refer to Scene Panel / Group (link).
* Use collider to register the location of an object within the collider’s space.
* It might be helpful to create one default shape collider for an object that is made of multiple meshes.

To learn more about physical colliders and their settings, please go to [Physics](/learn/manual/physics/collider-1).


# Lights

MANU provides several different kinds of lights: **sun, spot light, and point light**. The guidelines below describe tools you could use to set up lights in your game both in Edit and Animation modes.

## Light Settings in Edit Mode

The guidelines below describe light settings available in the Edit Mode.

### Sun

*Sun* is one of the default units of every scene in MANU. It is a light with parallel rays that will illuminate the scene with an even light. Since the sun is infinitely far away, the position of it does not matter, only its direction. Use sun lighting to brightly-lit outdoor scenes (i.e. a sunny day).
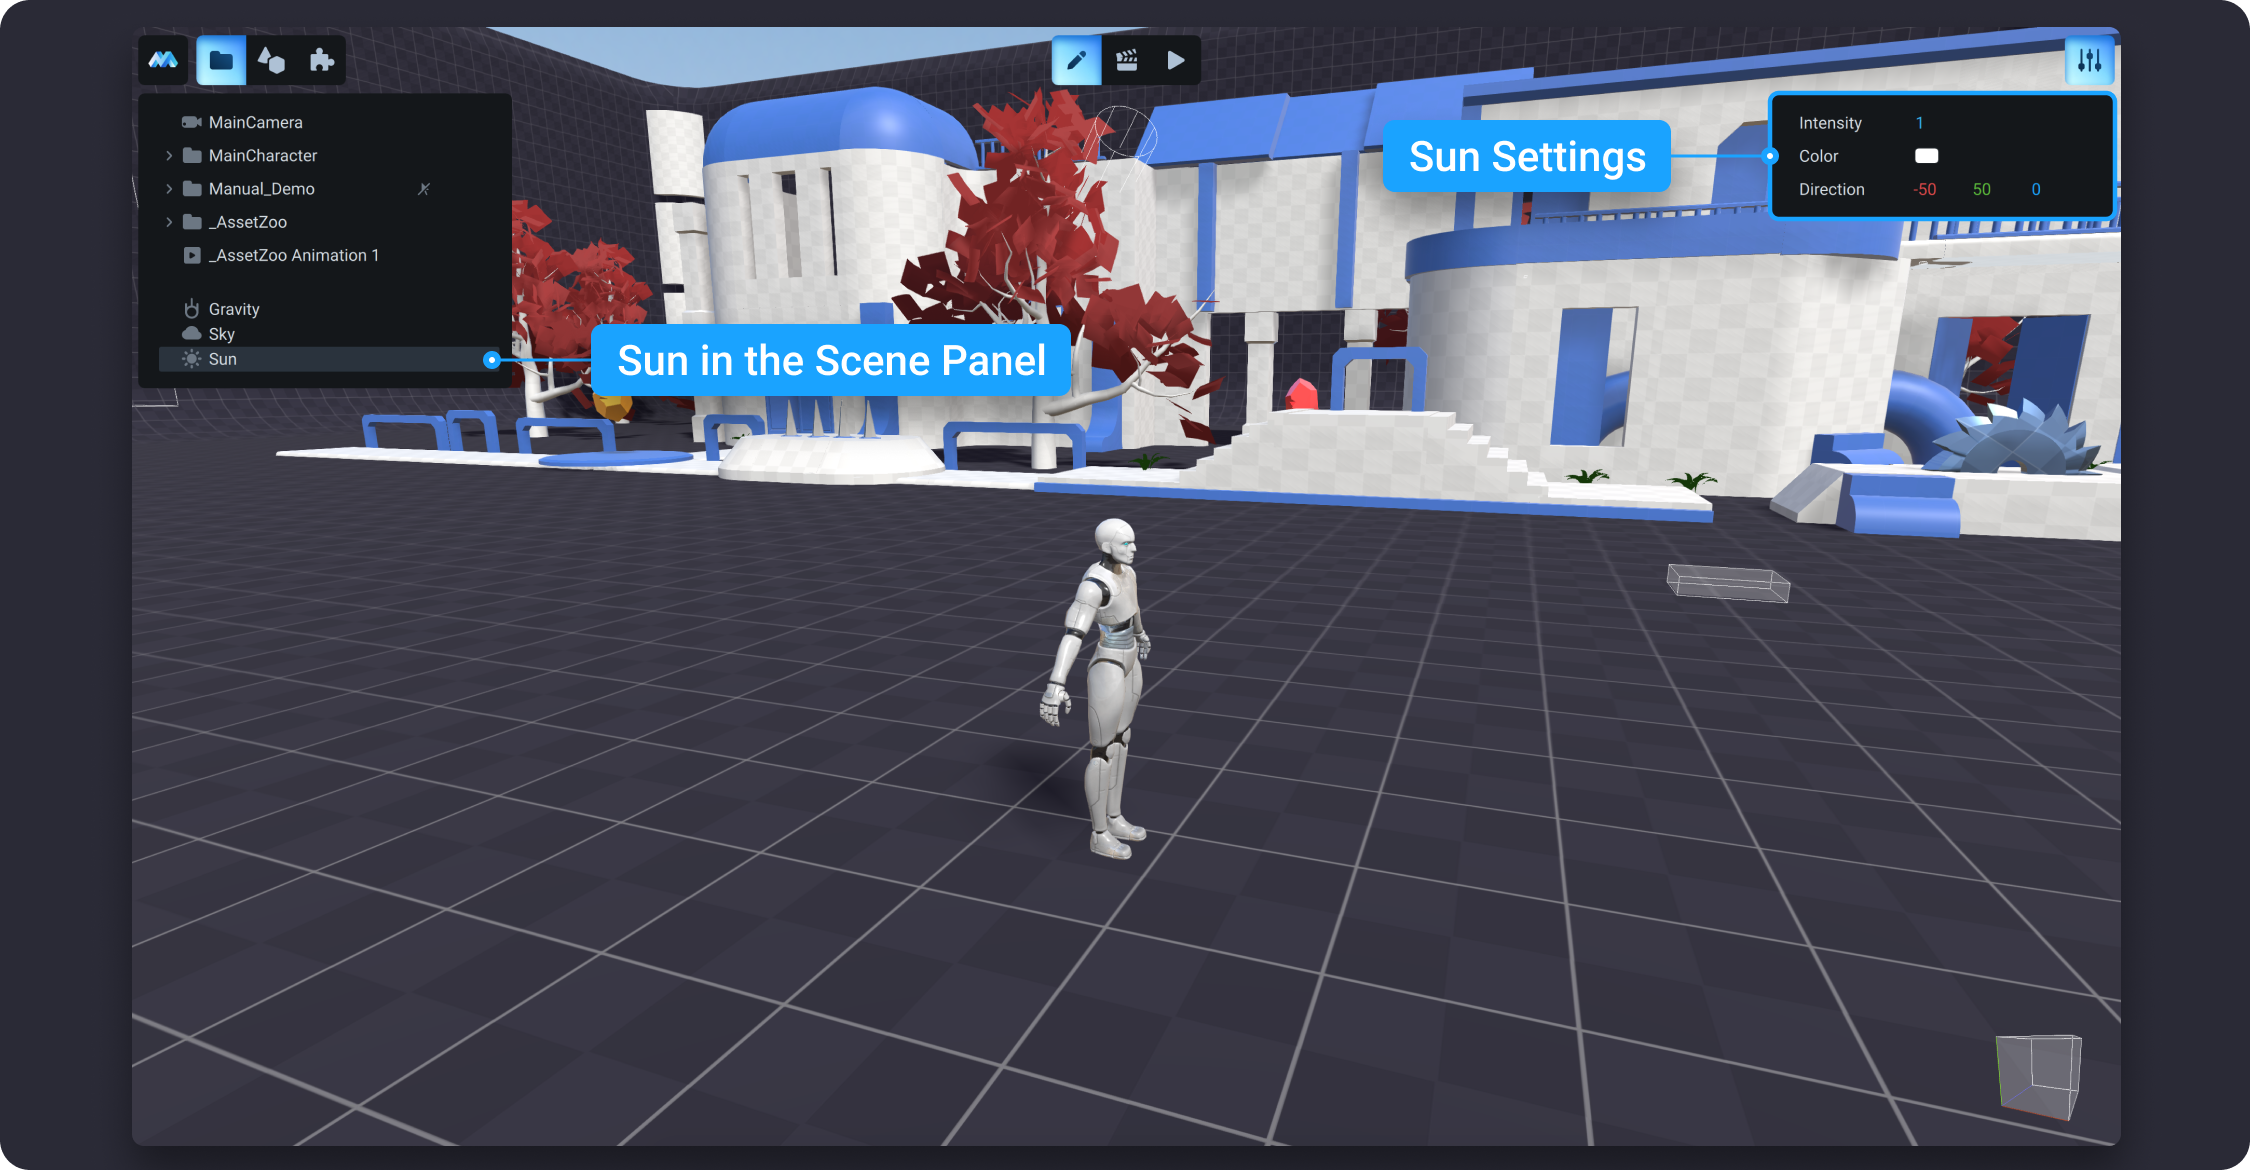
![](https://dl.dropboxusercontent.com/s/u8mwxjq862kk7j4/001.png?dl=0)

To change the parameters for a sun, select it from the Scene Panel and go to the Inspector tab. The properties to edit the sun include intensity, color, and direction for XYZ axes. The values for intensity range from 0 to 100 units, where 0 will make your scene look completely dark. The default value for intensity is 1.

### Spot Light

*Spot light* produces light constrained to a cone-shaped beam, and has some special features. It is the only light source that can be made visible with the 'halo' option, to simulate light in fog or dark environment. In addition, it is also the only light source that can cast buffer shadows.

In MANU, the settings for spot light include **color, intensity, range, angle, penumbra,** and **cast shadows** toggle.

Similar to the sun lighting, there is an option to select the color for the spot lighting using the color picker.&#x20;

The **intensity** values for spot lighting range from 0 to 9999. The higher the value for intensity, the brighter the color of the spot lighting.&#x20;

The **range** defines the length of the beam. In MANU, its values can be set within 0 to 9999 units.&#x20;

Spot light’s **angle** determines the area of the halo effect. It can be set to values that range from 0 to 180 degrees.

The **penumbra** is the region in which only a portion of the light source is obscured by the occluding object. In other words, the penumbra is the region where some or all of the light source is obscured. The higher the value of penumbra, the more obscured the lighting source is. In MANU, the values for this setting range from 0 to 9999.&#x20;

Lastly, there is an option in the Inspector panel to toggle On or Off for the spot light to **cast shadows**.
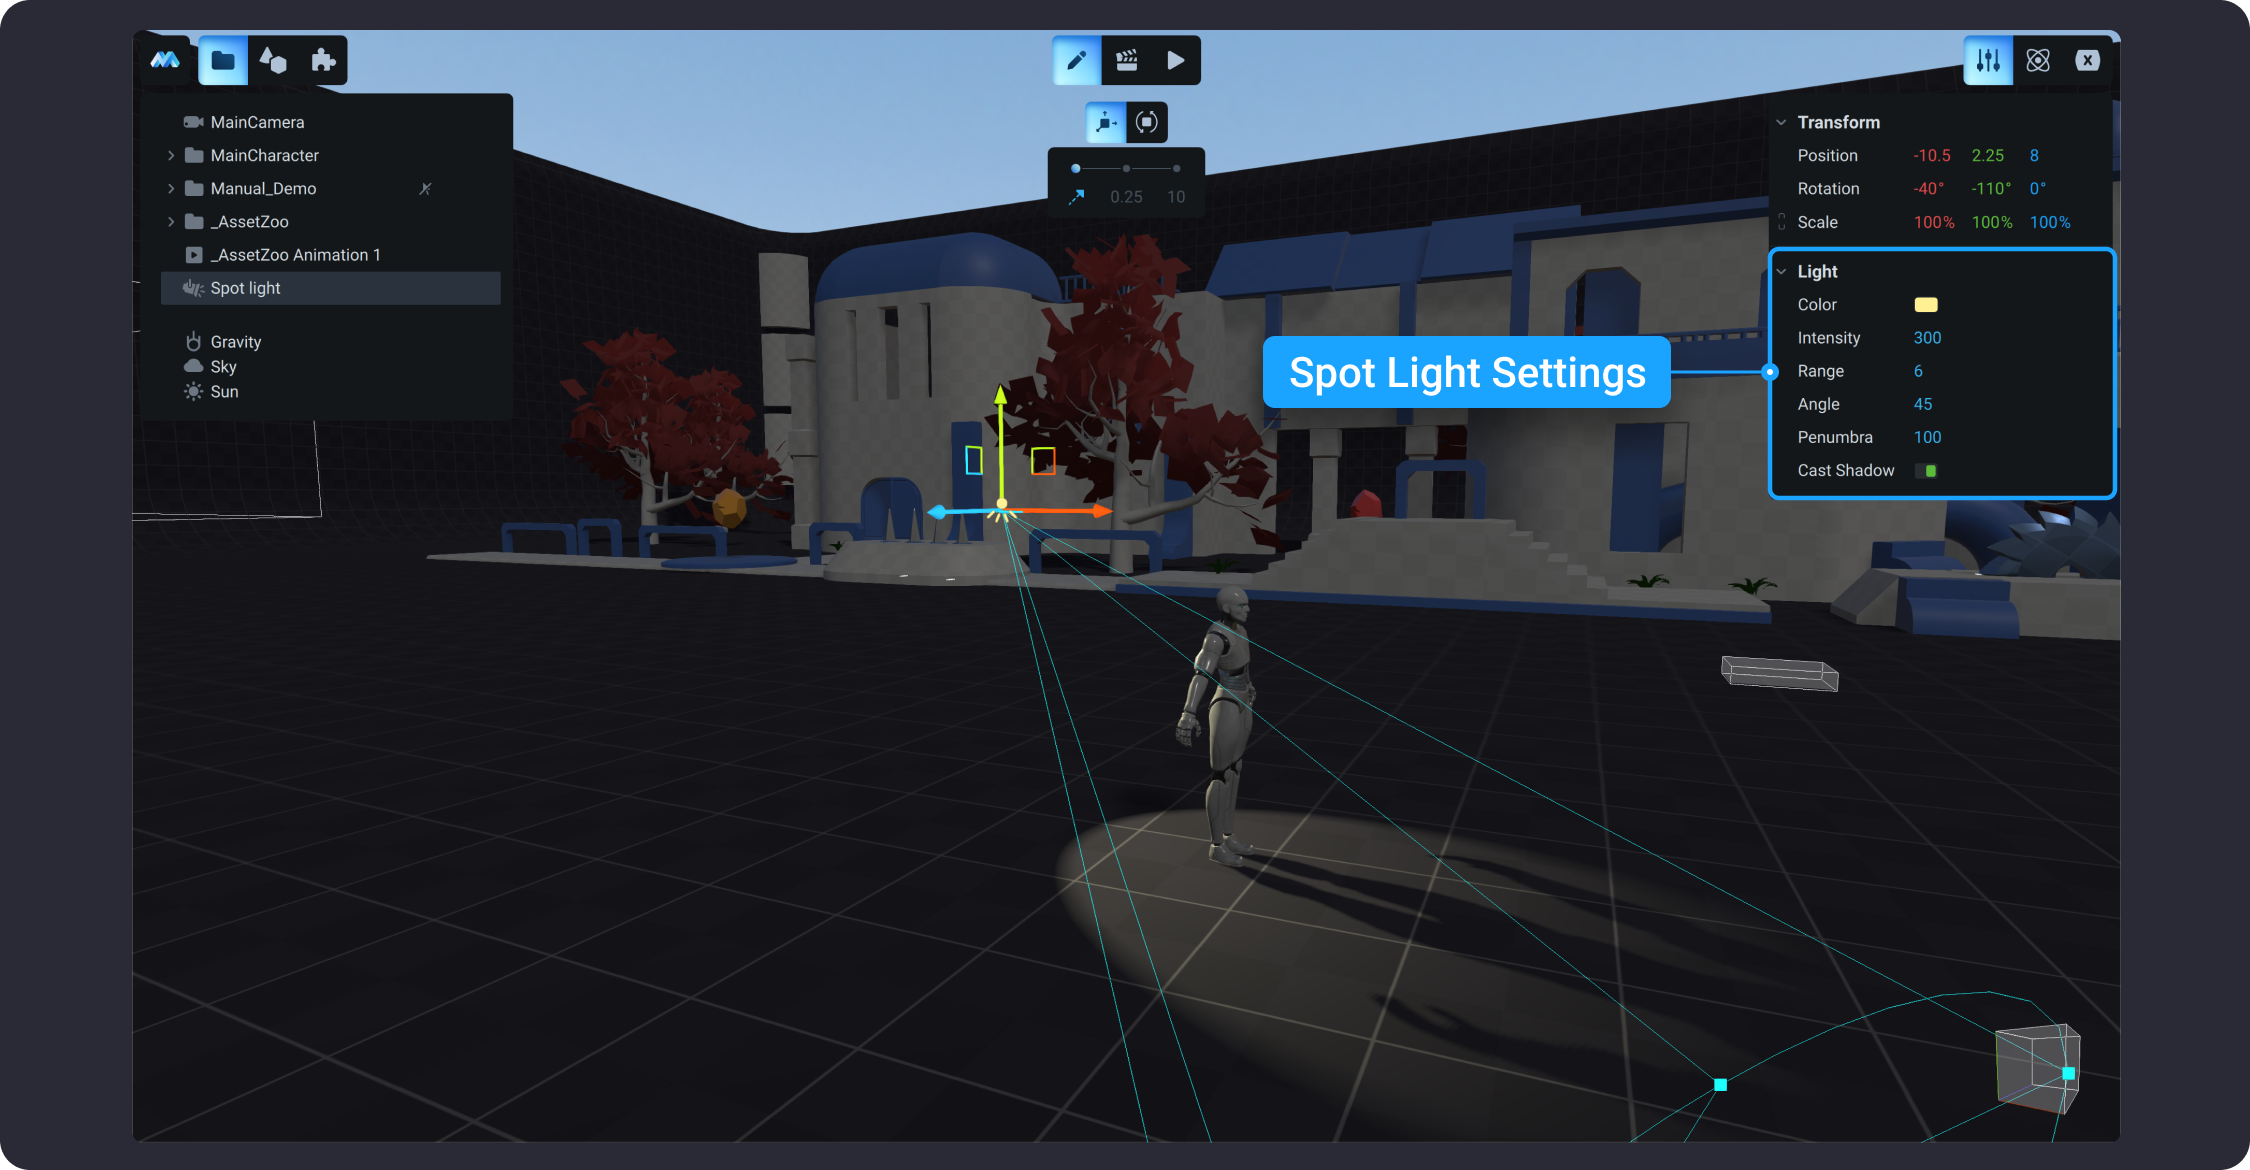
![](https://dl.dropboxusercontent.com/s/tros0ny8q3kkvfo/002.png?dl=0)

### Point Light

*Point light i*s a single point light source. Useful to provide very localized light. The shadows can be sharp, or you can set its size to something nonzero to make the shadows fuzzy. Can represent light sources within the scene; e.g. if there is a lightbulb or candle or something in the scene, position one of these within it to give the impression of light coming from that object.&#x20;

In MANU, the following settings are available for the point light - **color, intensity, range**, and **cast shadow** toggle.

Similar to the sun and spot lighting, there is an option to select the color for the spot lighting using the color picker pop-up.&#x20;

The **intensity** values range from 0 to 9999. The higher the value for intensity, the brighter the color of the point light.&#x20;

The **range** defines the area of the localized light. In MANU, its values can be set within 0 to 9999 units.&#x20;

To turn ON or OFF for the point light to **cast shadows**, use the toggle in the Inspector panel.
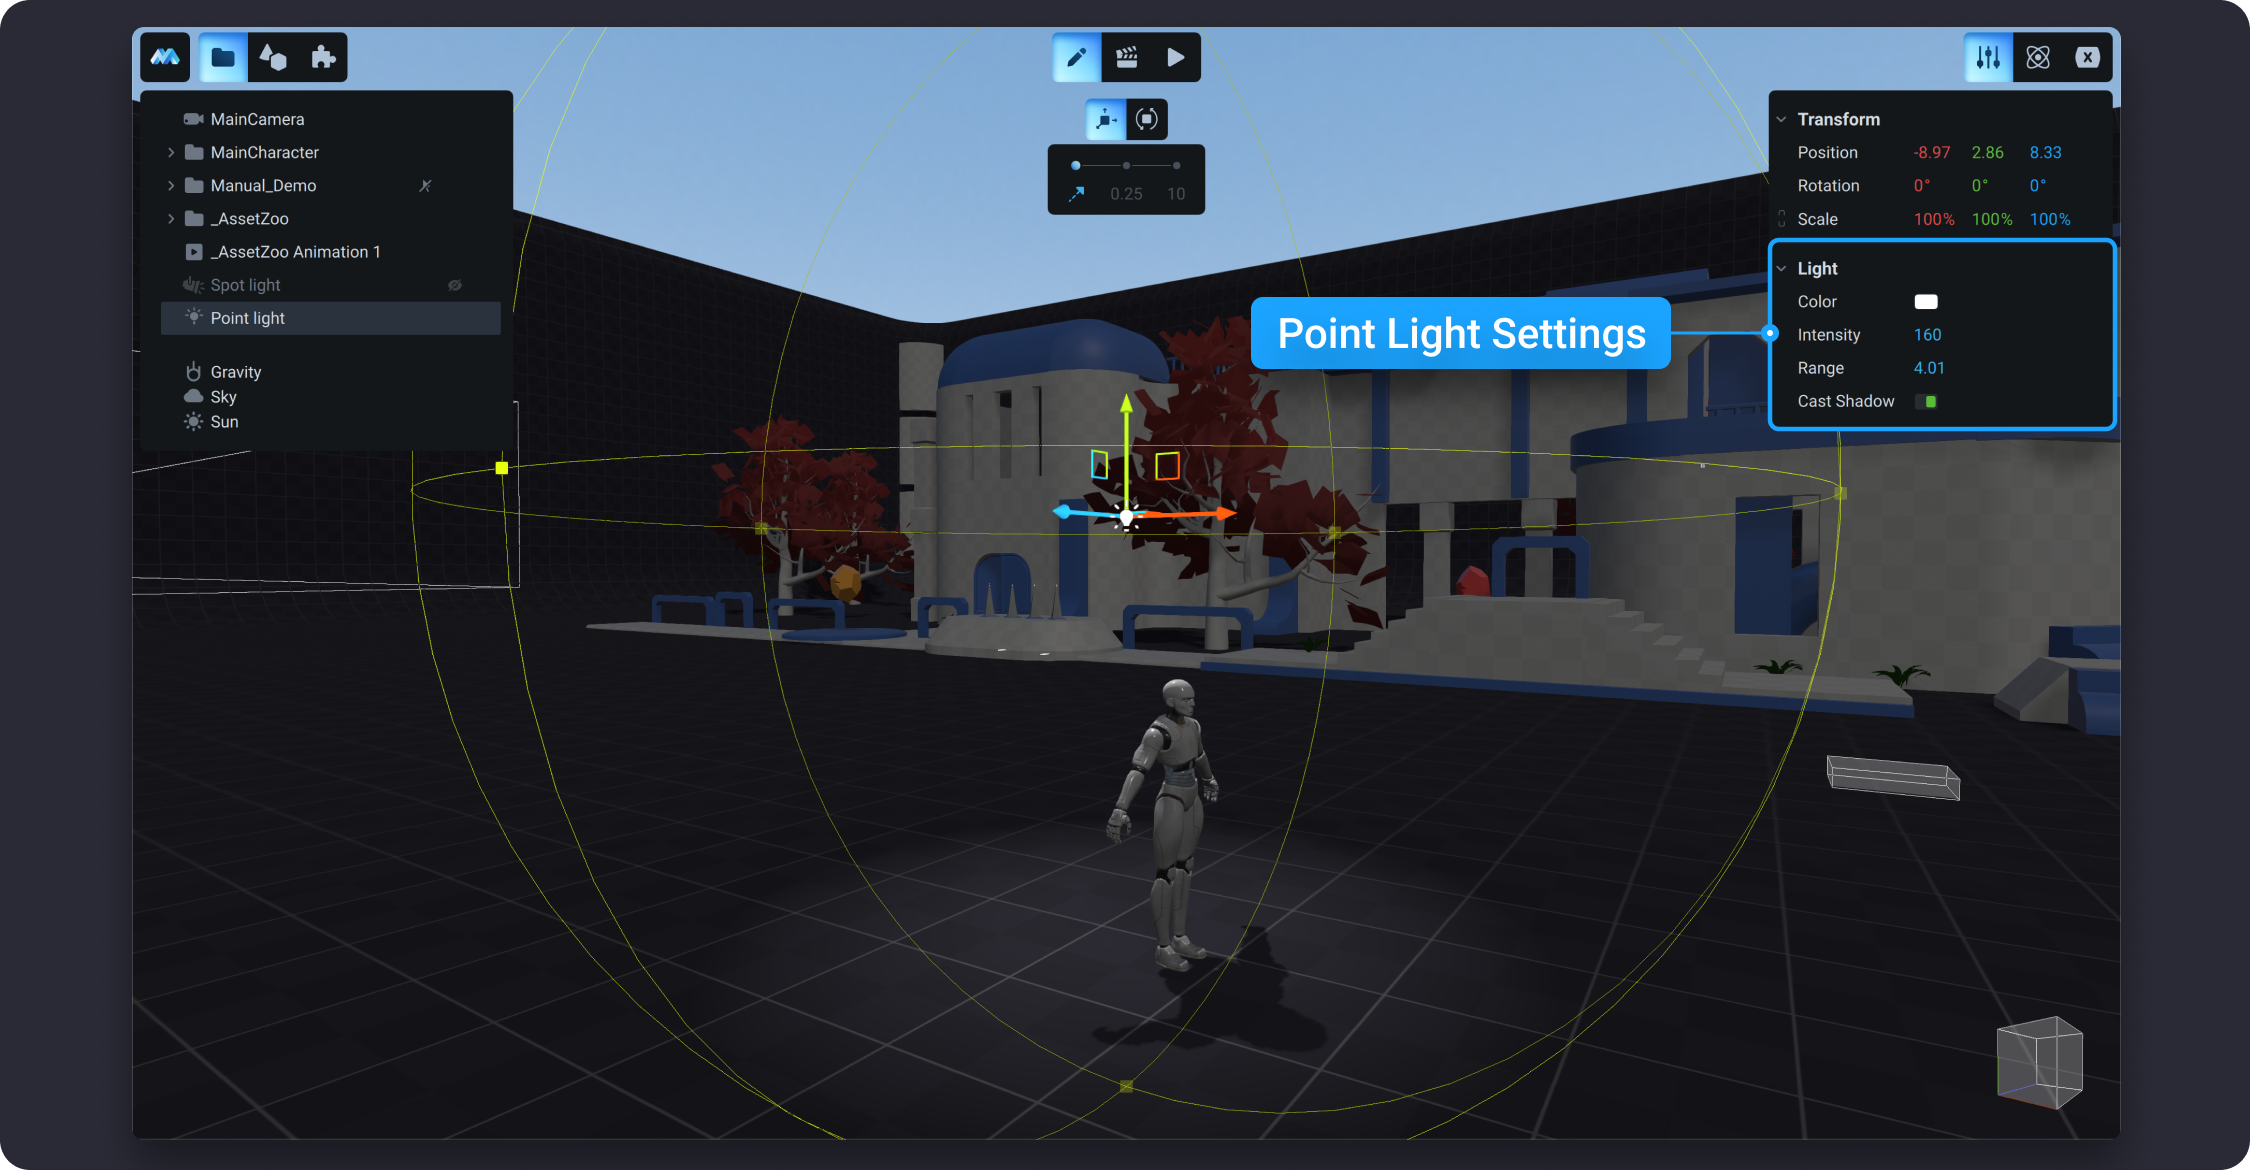
![](https://dl.dropboxusercontent.com/s/6e1kuy9ap8soue4/003.png?dl=0)

## Light Settings In Animation Mode

In MANU, you can animate the appearance of sun, point and spot lighting. The following properties are available to animate for both types of lighting - **position, enabling, color**, and **intensity.** In this section, we will focus on animating color and intensity.&#x20;

### Color

You can animate the color of any spot or point lighting in MANU using the animation timeline. It is useful for creating “blinking” or color effects for your lights in a game.&#x20;

### Intensity

The intensity for any spot or point lighting can be animated in the animation timeline. It may be useful for creating additional lighting effects for your game scene.&#x20;


# Speaker

Speakers are audio sources or components that playback audio in the game. The speaker allows you to arrange the sound that will be heard only in a certain place of the scene. Moreover, you can make your character hear the sound from a particular distance and make the sound get louder the closer you get to its source. The closer the Main Character is to the speaker, the louder the sound will be.
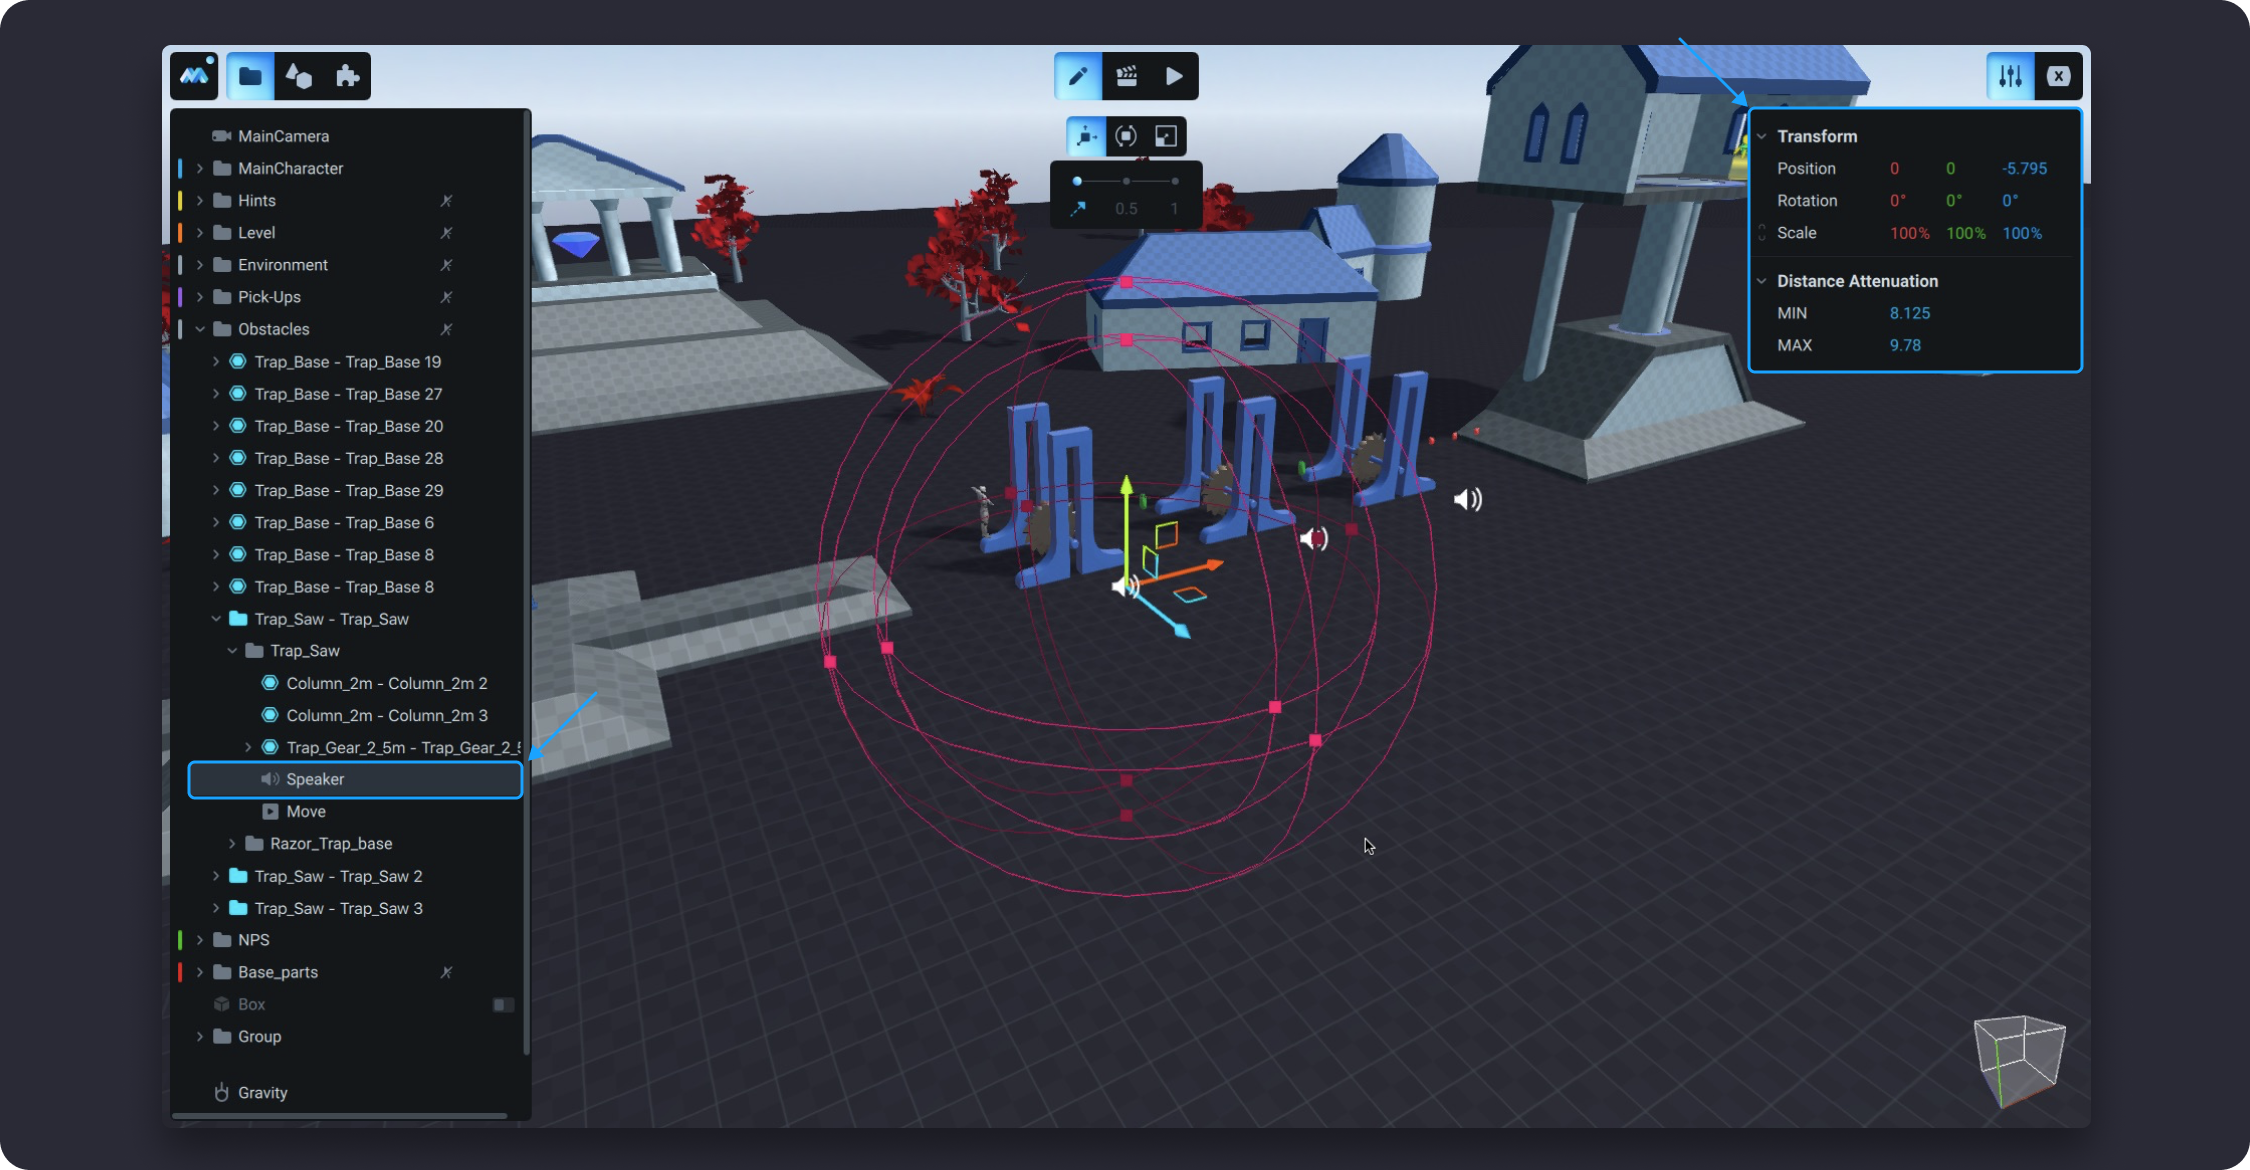
![](https://dl.dropboxusercontent.com/s/95ejjyucrn9qr1y/001.png)

### **How to add speaker in the Scene**

Go to the Left Panel and choose the [Library](broken://pages/-MRyaRYkiMDprOHxMcPQ) tab. Then, click on the Speaker icon on the Library Panel.&#x20;

After that, the speaker will appear in the Scene. Next, set the parameters of this speaker on the Inspector Panel and place the speaker in the Scene, where you need it. You can move the speaker in the Scene using Gizmo arrows.

On the Inspector Panel, you will see the Distance Attention settings, which you can use to adjust the speaker's playback volume. After adding the speaker to the Scene, you will see that it is placed in 2 spheres, the inner and outer. The sizes of the spheres can be different, you can set them according to your preferences. MAX and MIN display the dimensions of the spheres, respectively. However, the inner sphere should be smaller than the outer one. MIN relates to the minimum distance which defines how close to play the sound of full volume. MAX or maximum distance setting determines the distance after which the sounds fade. You can use the spherical gizmo to set Distance Attenuation in the Scene.&#x20;

The Audio Listener receives input from any audio source in the game; it is attached to the Main Character in MANU. When the Listener is in the area between the inner and outer spheres, the volume will increase as he approaches the inner sphere. The closer the Listener is to the inner sphere, the louder the sound. When the Listener is inside the inner sphere, the volume will be maximum.

In MANU, stereo sound allows you to convey the listener's position relative to the speaker. You will know from which side the Listener approaches the speaker. If the Listener is located on the left side of the speaker, then the left channel will sound louder than the right one. The right channel may not even sound at all. Conversely, if the Listener is located on the right side of the speaker, then the right channel will sound louder.

{% embed url="<https://dl.dropboxusercontent.com/s/avrgarlkd3fn04y/v001.mp4>" %}


# Importing 3D Objects

In MANU, you can import 3D objects of three kinds of format: dae, obj and fbx. The steps described below will talk you through that process.

## Import model and apply textures

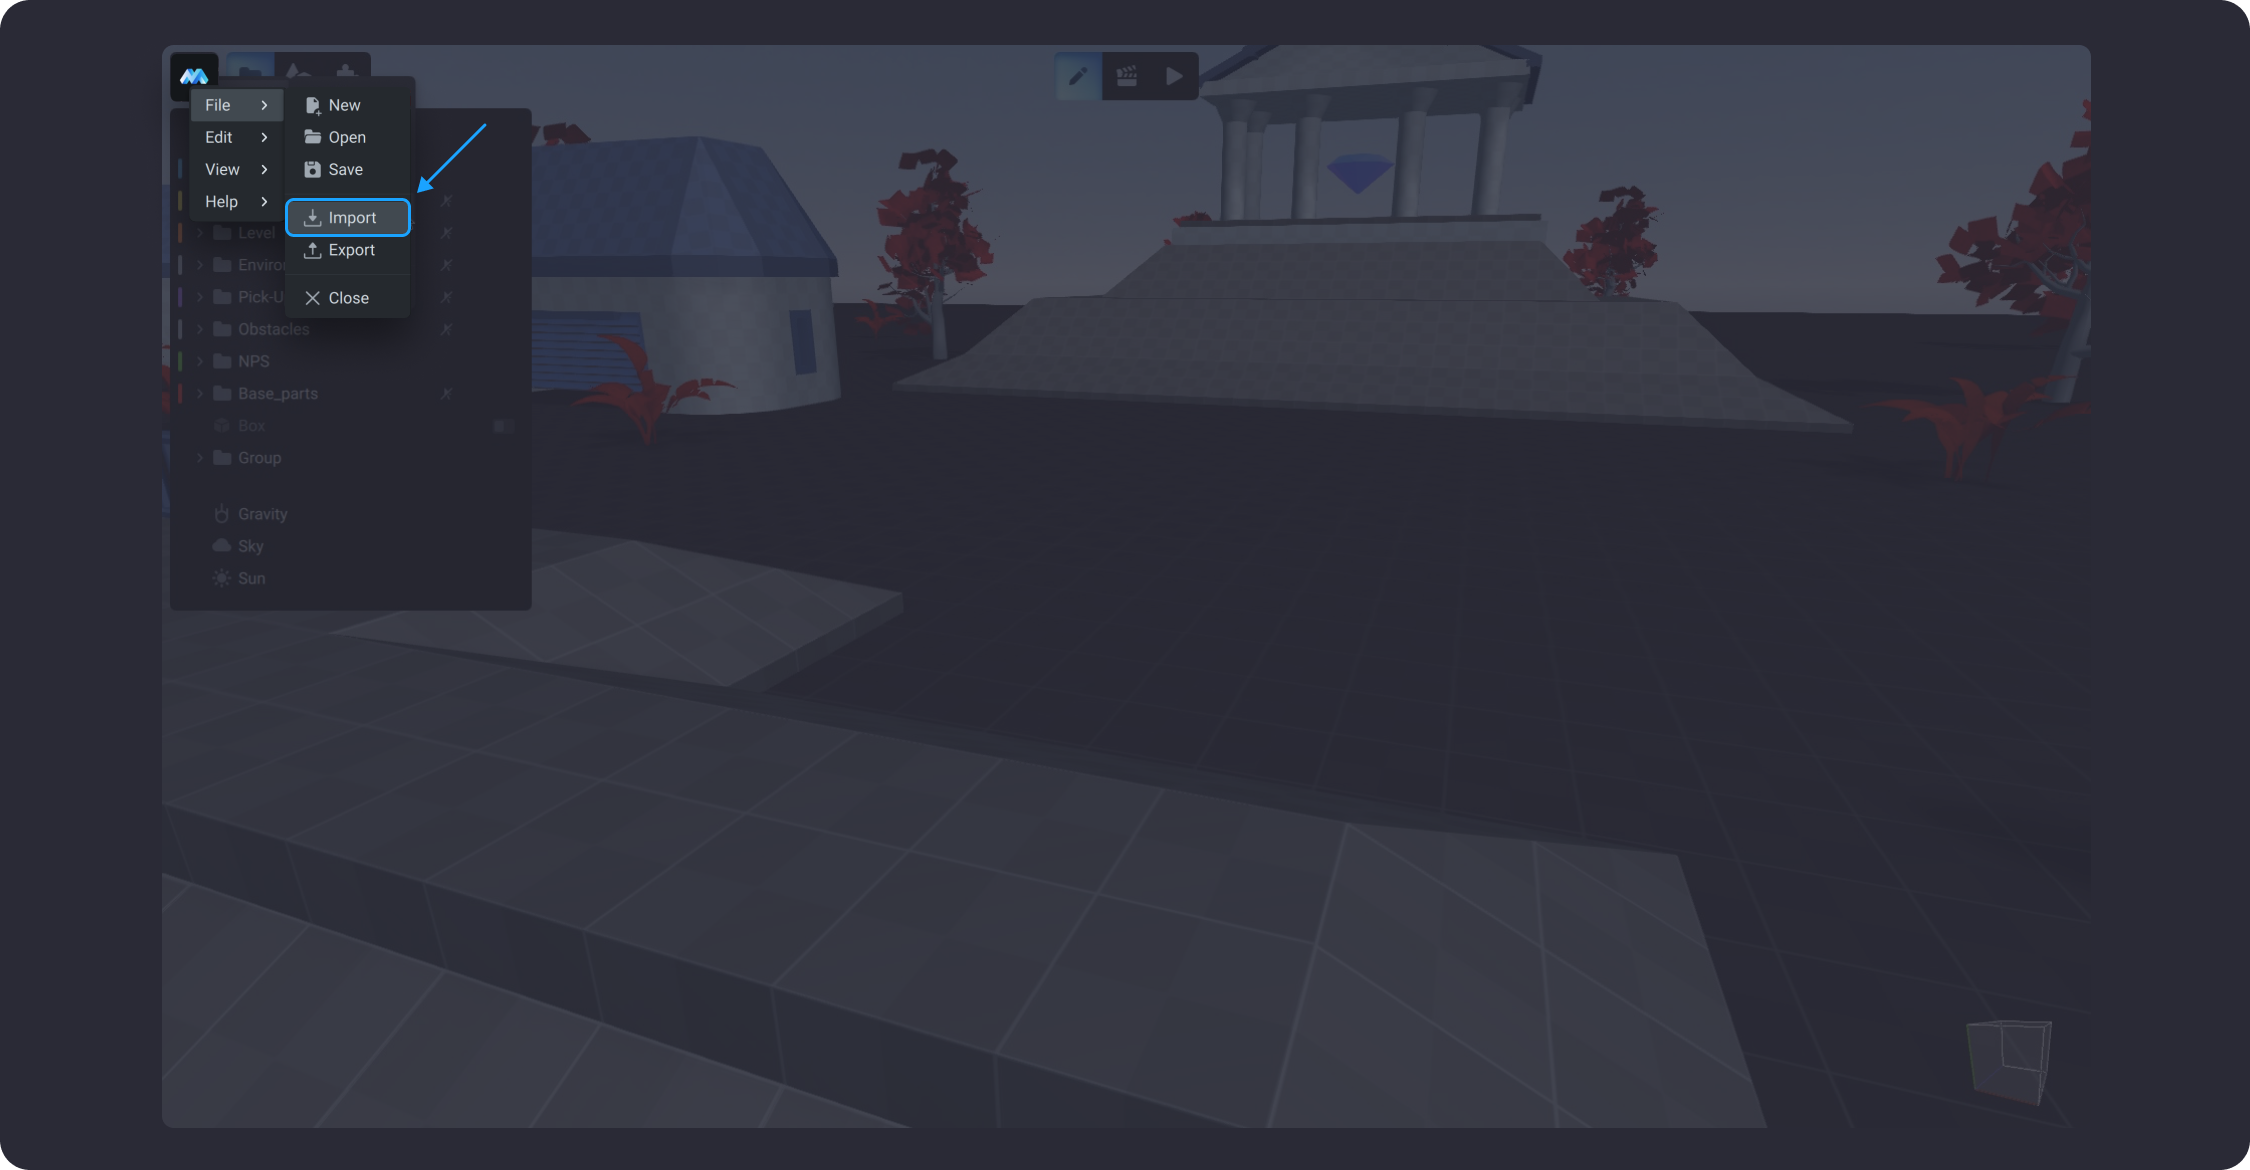
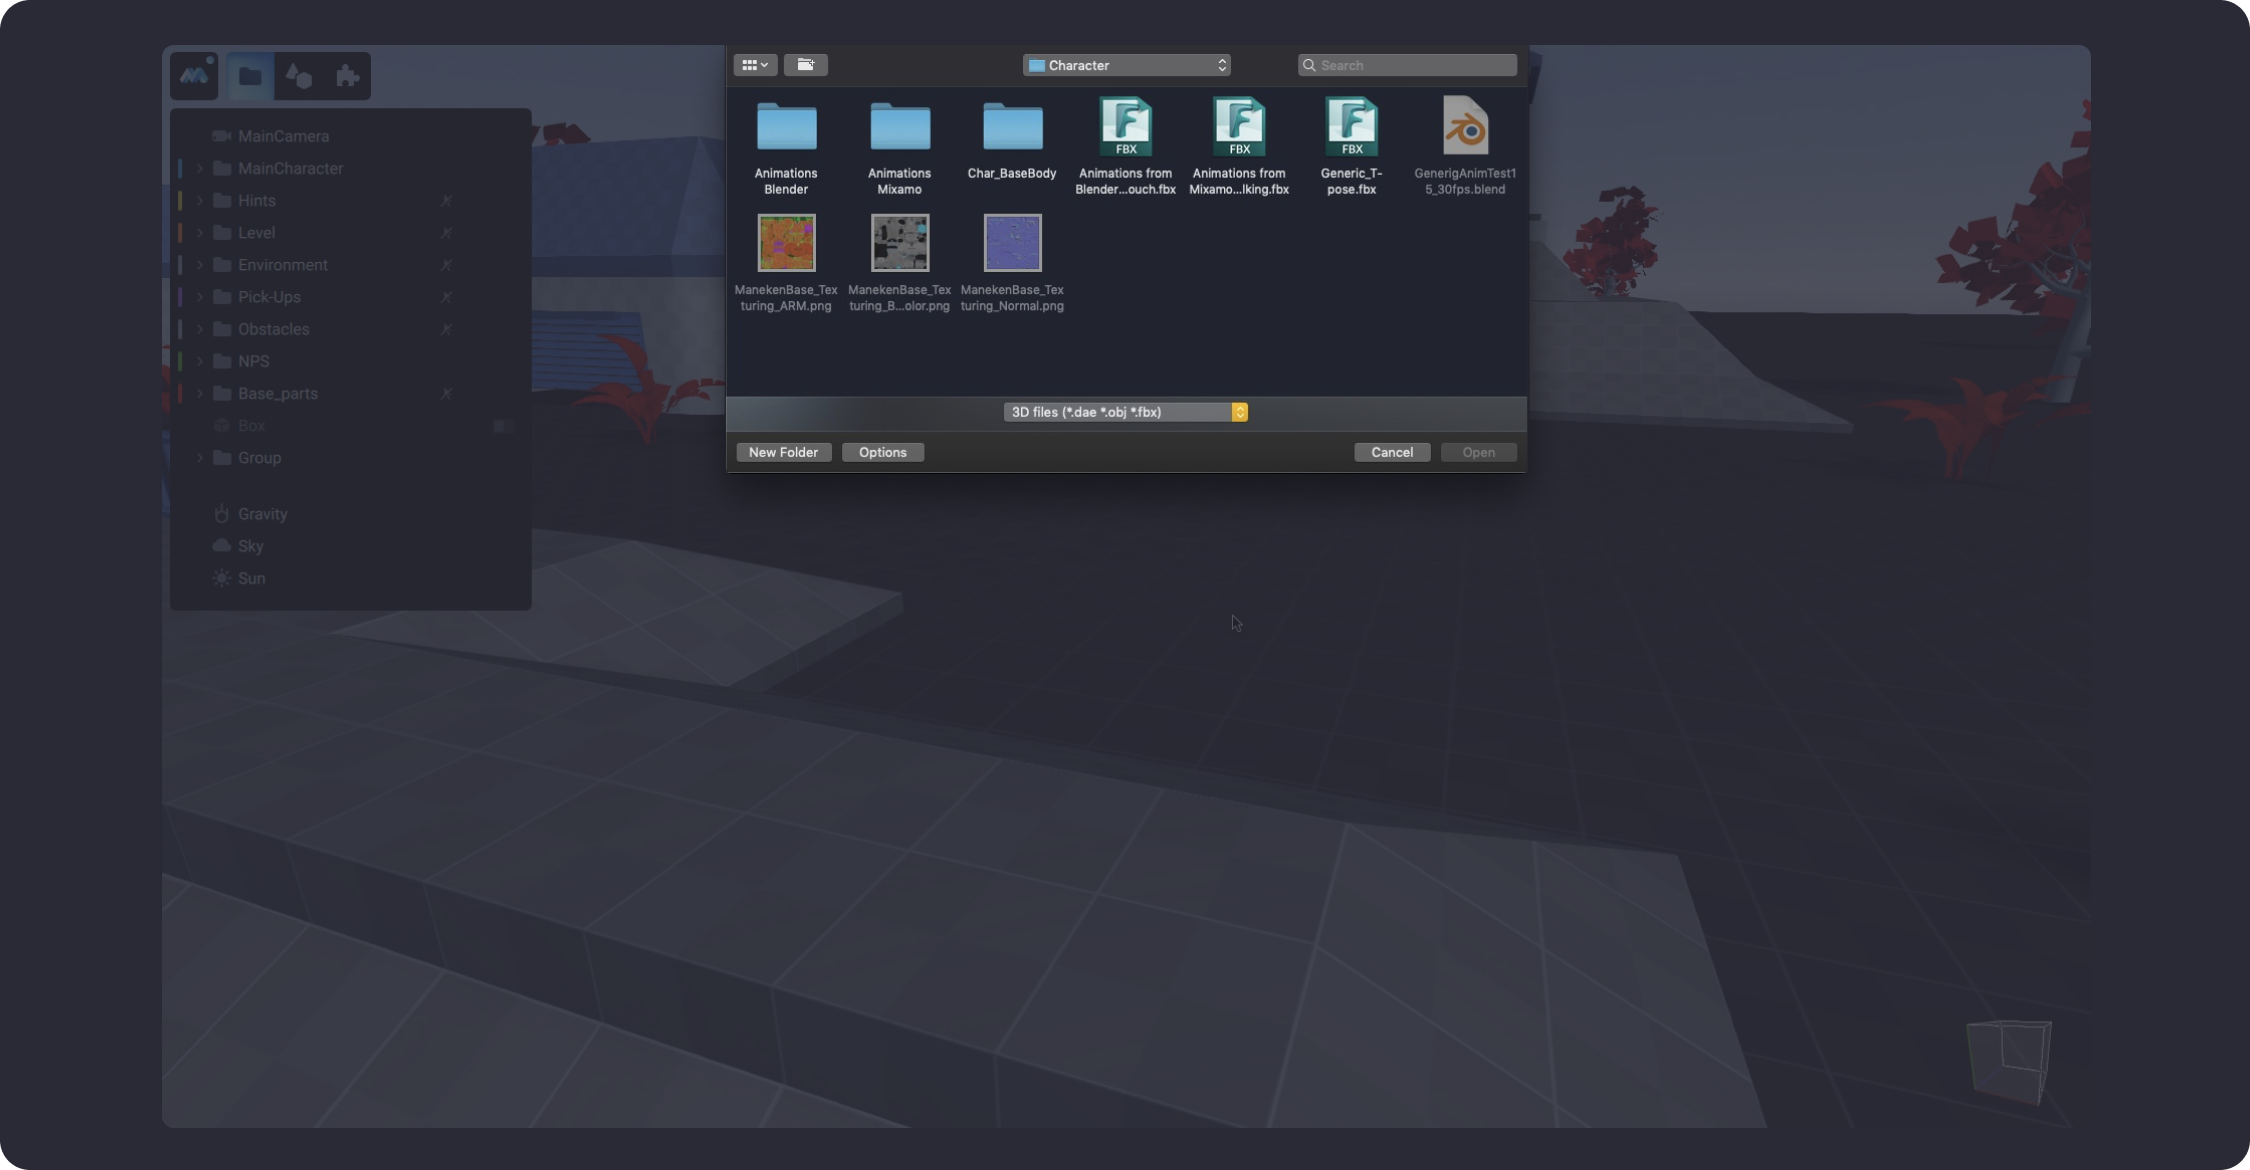
Go to `Main Menu` > `File` > `Import`. Select a 3D model you want to import and click `Open`.&#x20;

![](https://dl.dropboxusercontent.com/s/xs70bwxnynh96yg/001.png?dl=0)

![](https://dl.dropboxusercontent.com/s/yi3b15hf8vao3u1/002.png?dl=0)

If the textures of the imported 3D object are included in the file that you uploaded, they will be automatically applied to the object in MANU. The same is applied to the related animation of the object, mesh, and rig.
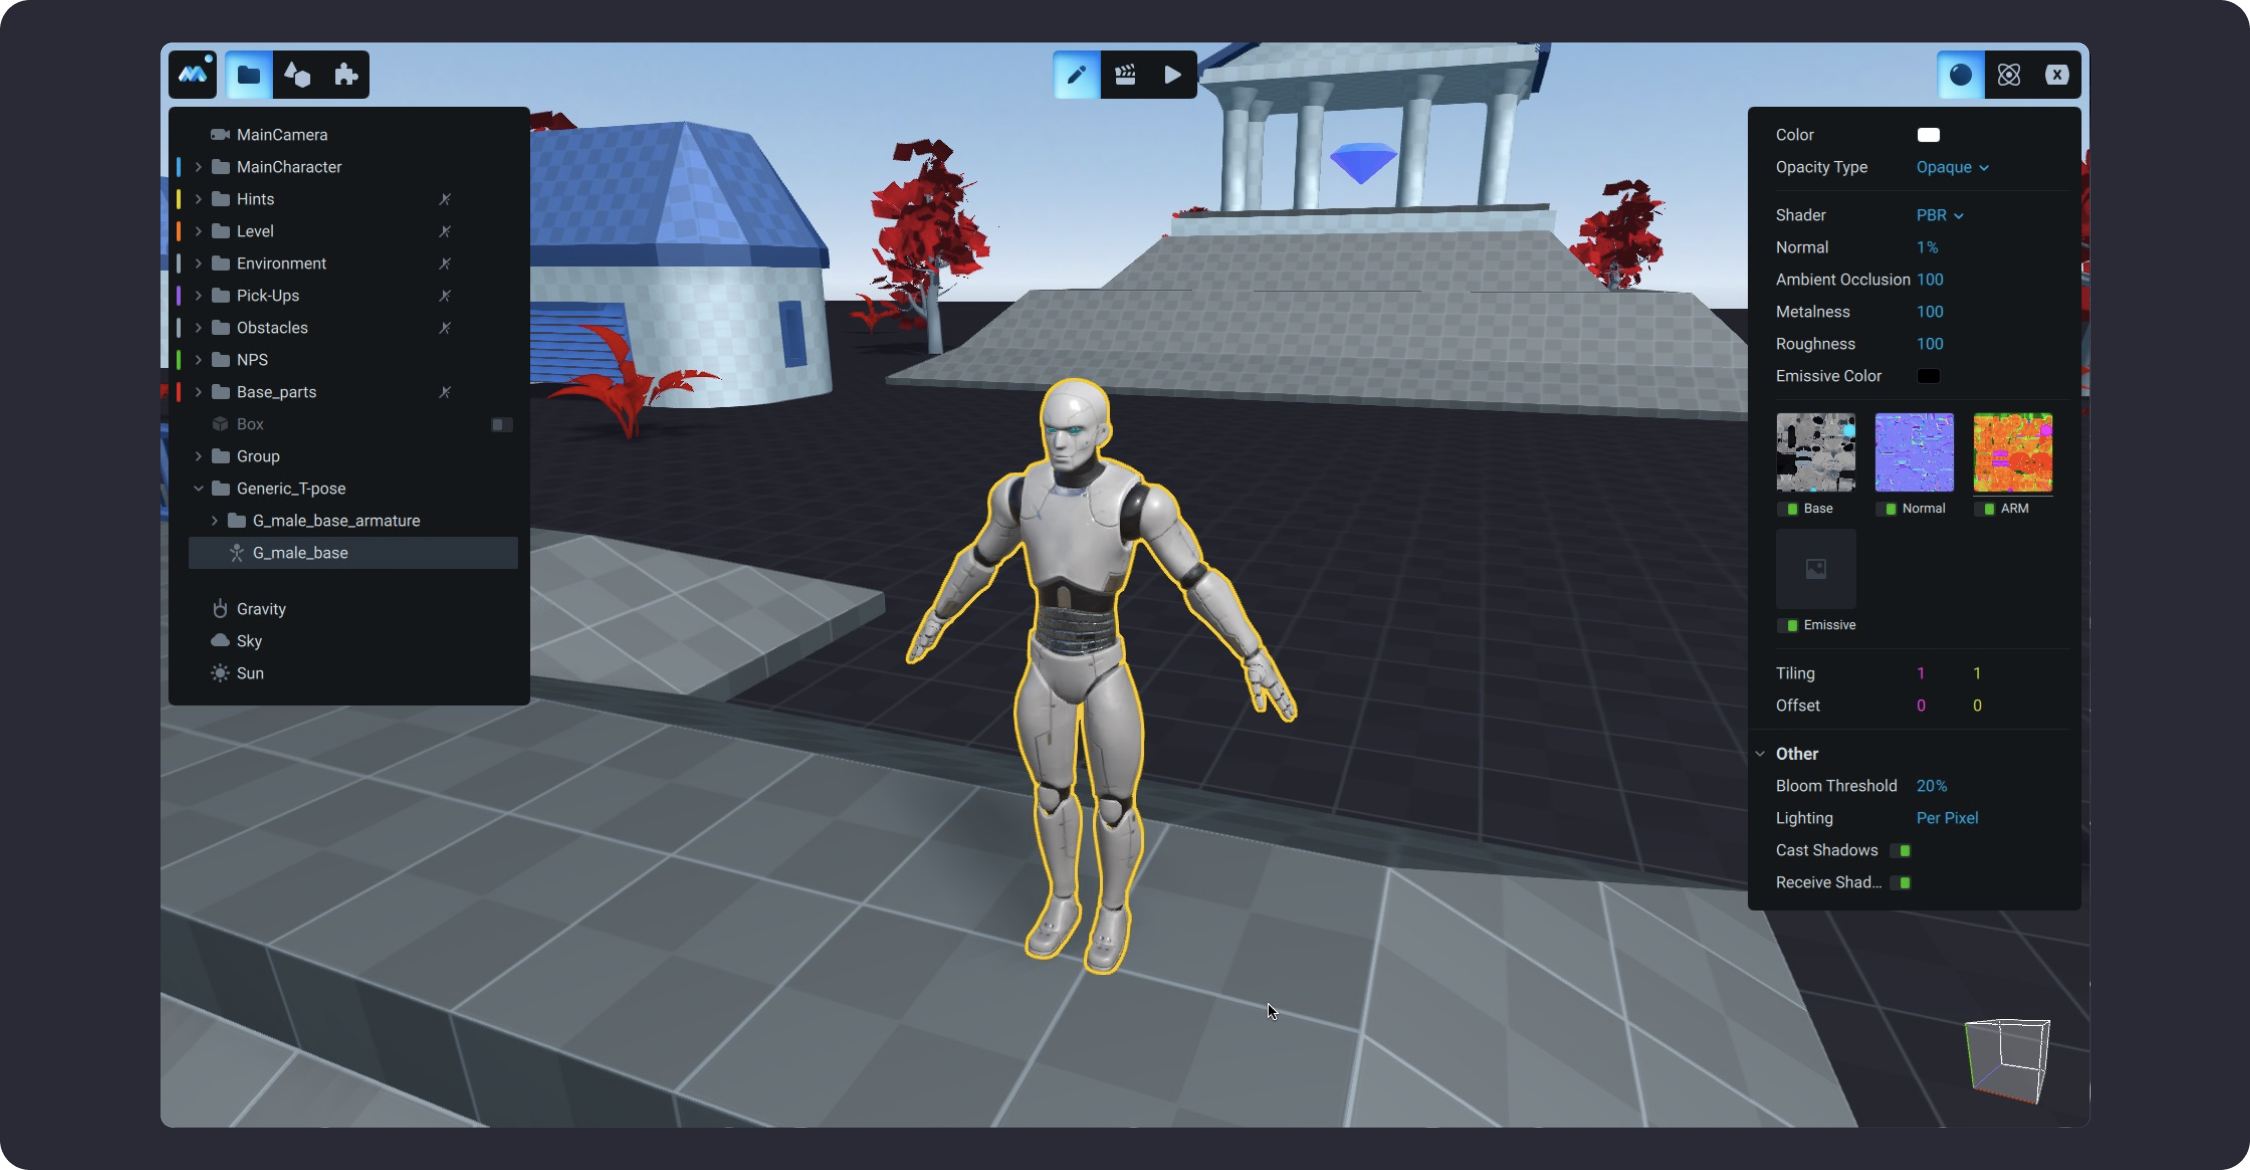
![](https://dl.dropboxusercontent.com/s/a5u2qnek4htfj96/003.png?dl=0)

## Import animations **and apply them to your model**

When you import a model into MANU that involves playing an animation, you also need to import the animation, since it is not imported with the model. The animation to be imported must be prepared in advance. It will be more convenient for you if the animation, imported model and everything related to it will be located in the same folder on your computer. You can prepare the animation yourself or download it from the [Mixamo](https://www.mixamo.com/) website. For example, the model in the screenshot above has animations from Mixamo.

{% hint style="info" %}
You can apply several animations to the one model, for example, the animation made in Blender and the animation downloaded from Mixamo.
{% endhint %}

To import an animation, switch to [Animation Mode](/learn/manual/workspace-modes/animation-mode) and right-click on the folder with the imported model in the [Scene Tree](/learn/manual/scene-panel). It is important to select the main folder of the imported model (parent folder). Then select `Import Animation`.&#x20;

![](https://dl.dropboxusercontent.com/s/6kvhj0xum7s8xsu/006.png)

Next, select the desired animation from the folder that appears. Then click `Open`. The animation is now applied to the imported model.
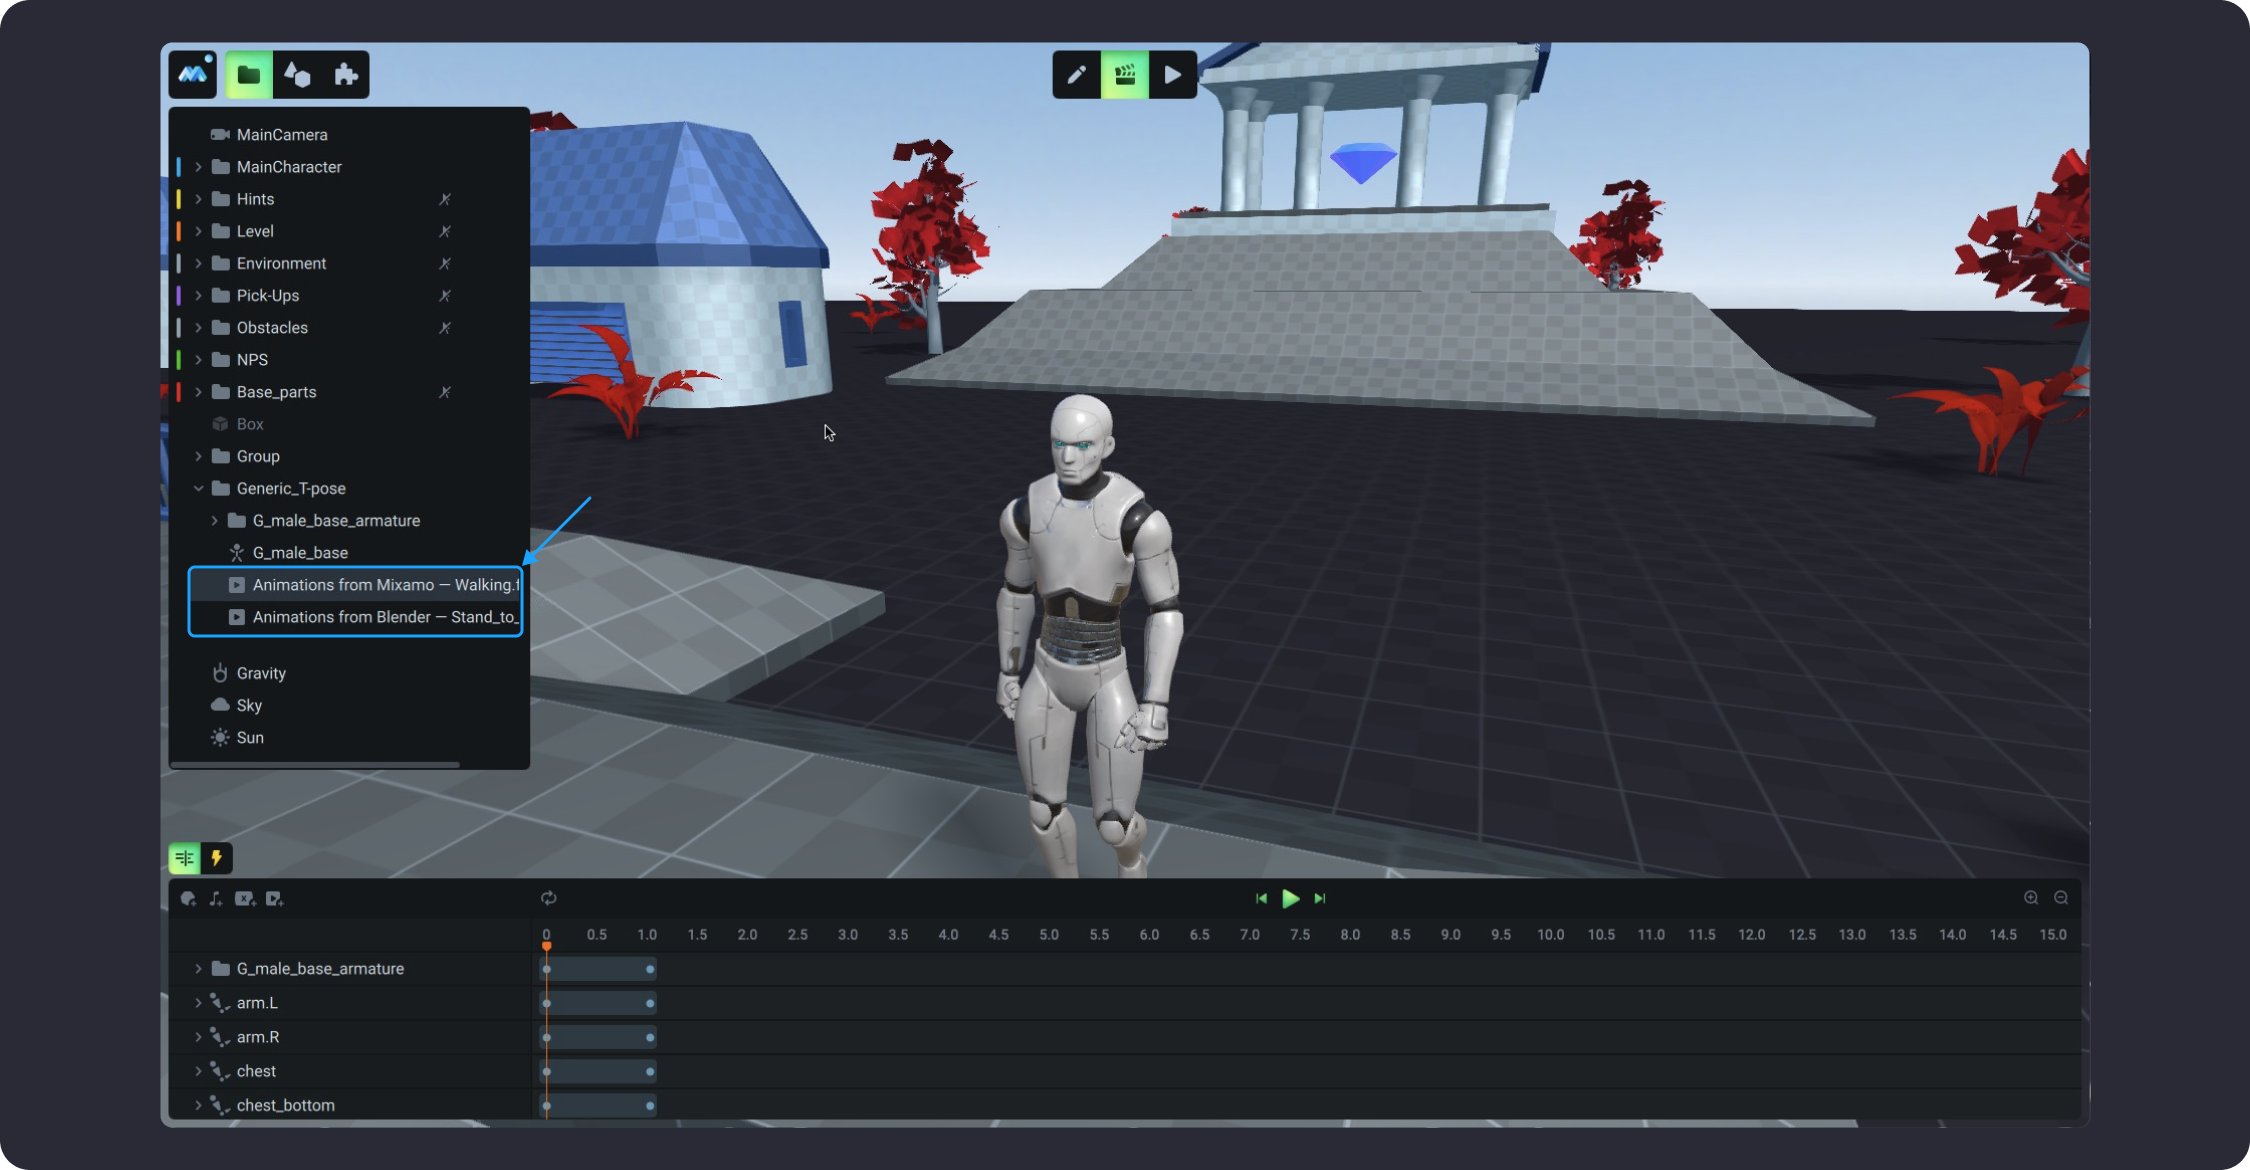
![](https://dl.dropboxusercontent.com/s/vw5cov3rf3x319m/007.png)

{% hint style="warning" %}
You will only be able to import animations prepared for this particular model. Animation from another model will not be imported. For example, let's look at the animations of the character above, which has a certain skeleton. The animation will only work for a specific skeleton, and if the skeleton changes, the animation will look clumsy or will not be imported at all.
{% endhint %}

{% embed url="<https://dl.dropboxusercontent.com/s/m08664yyu1rcrqv/v001.mp4>" %}

## Reimport

If you edited the mesh of the object and want to substitute the old mesh with a new one, select the old mesh of the imported object from the scene tree, use right click to select `Reimport`. Then select the new file with the updated mesh and click `Open`.
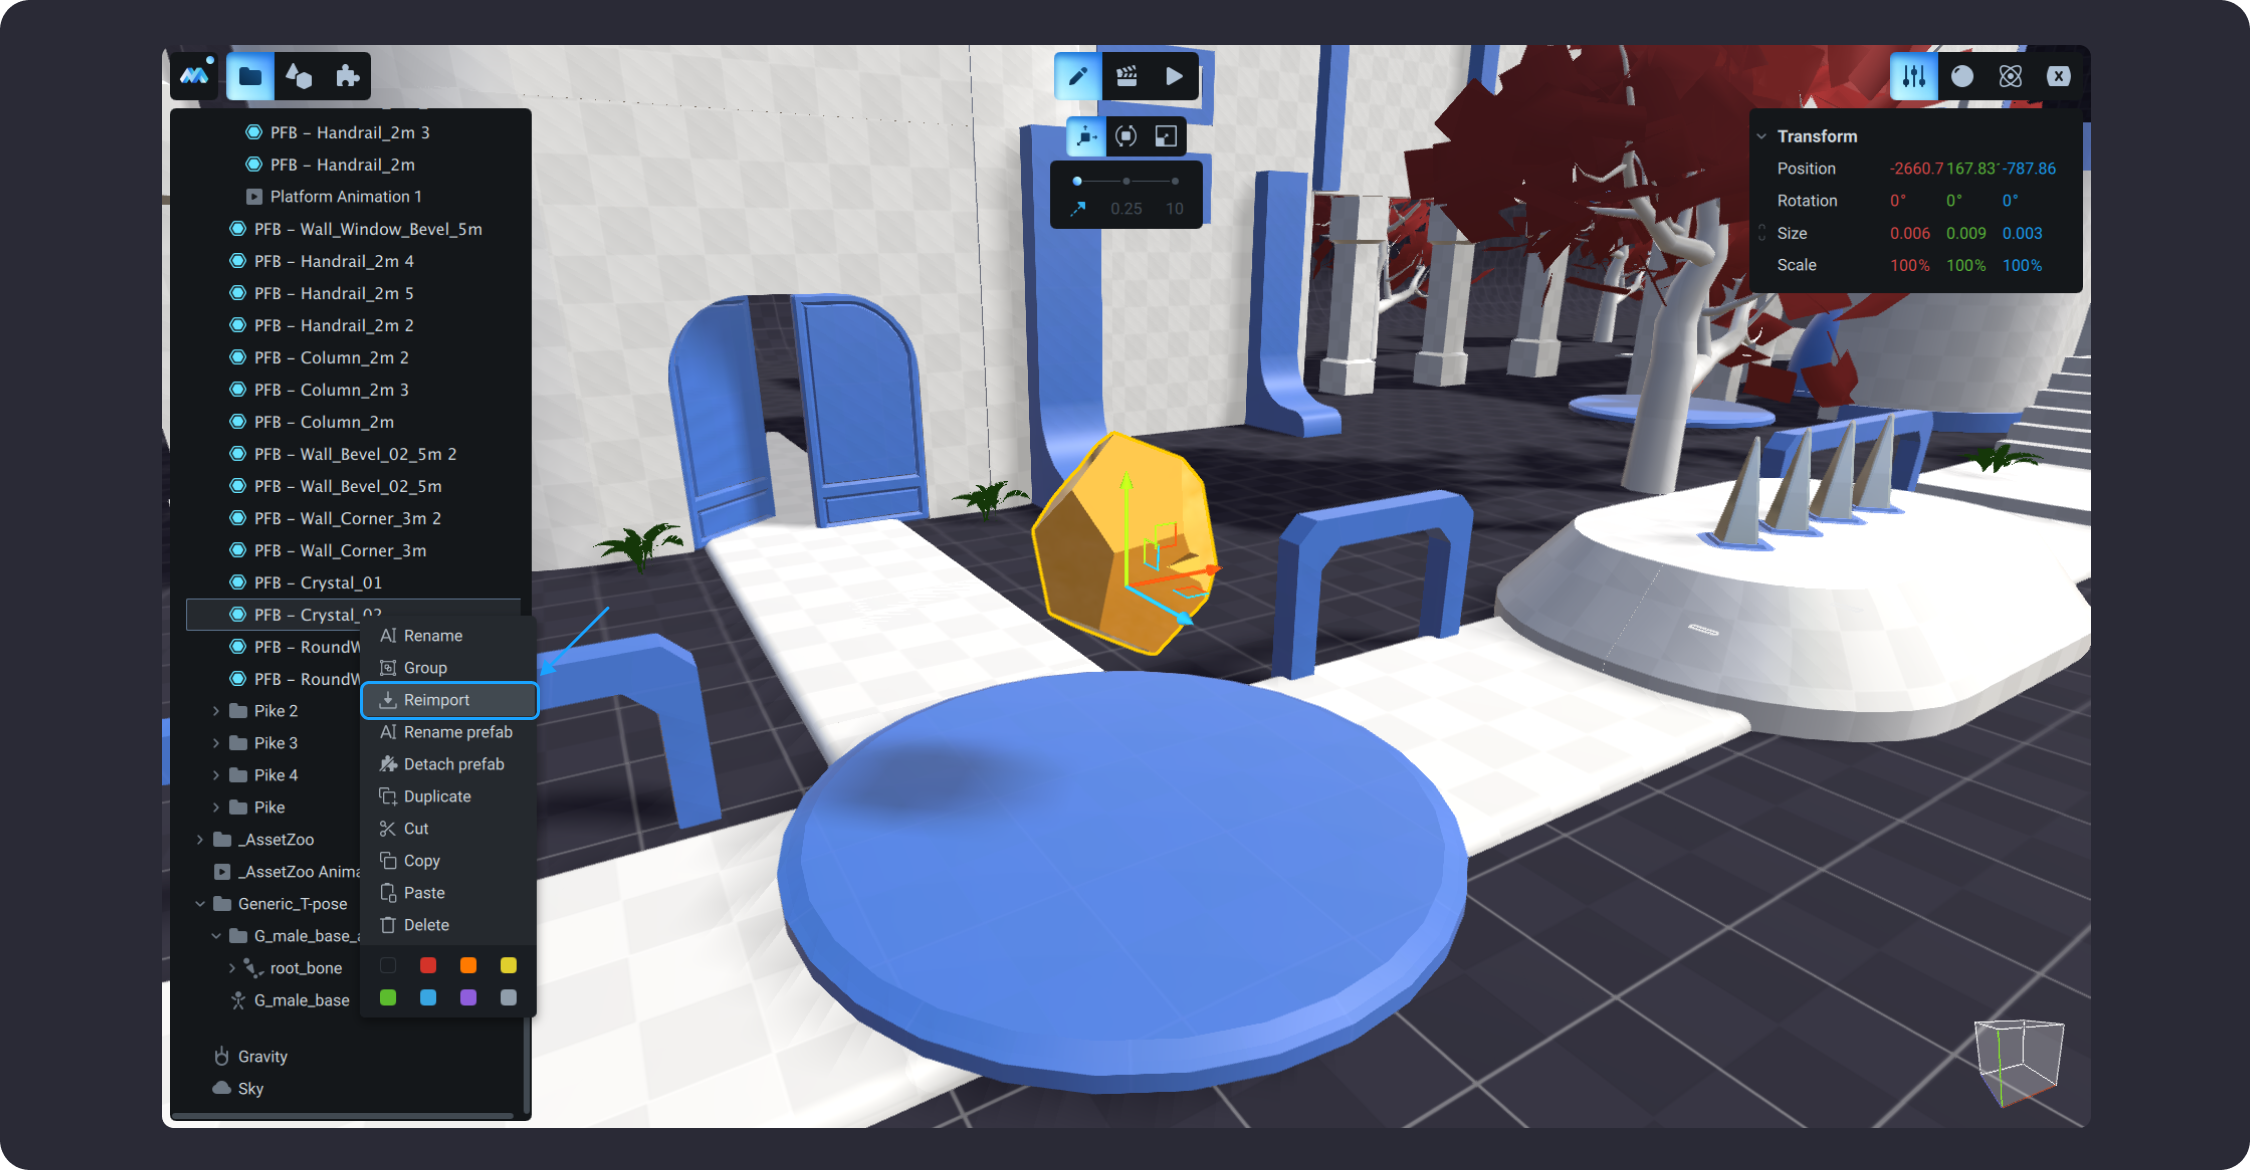
![](https://dl.dropboxusercontent.com/s/qfwo3ptkydqu6yk/004.png?dl=0)

Below is an example of the imported 3D object with updated mesh.
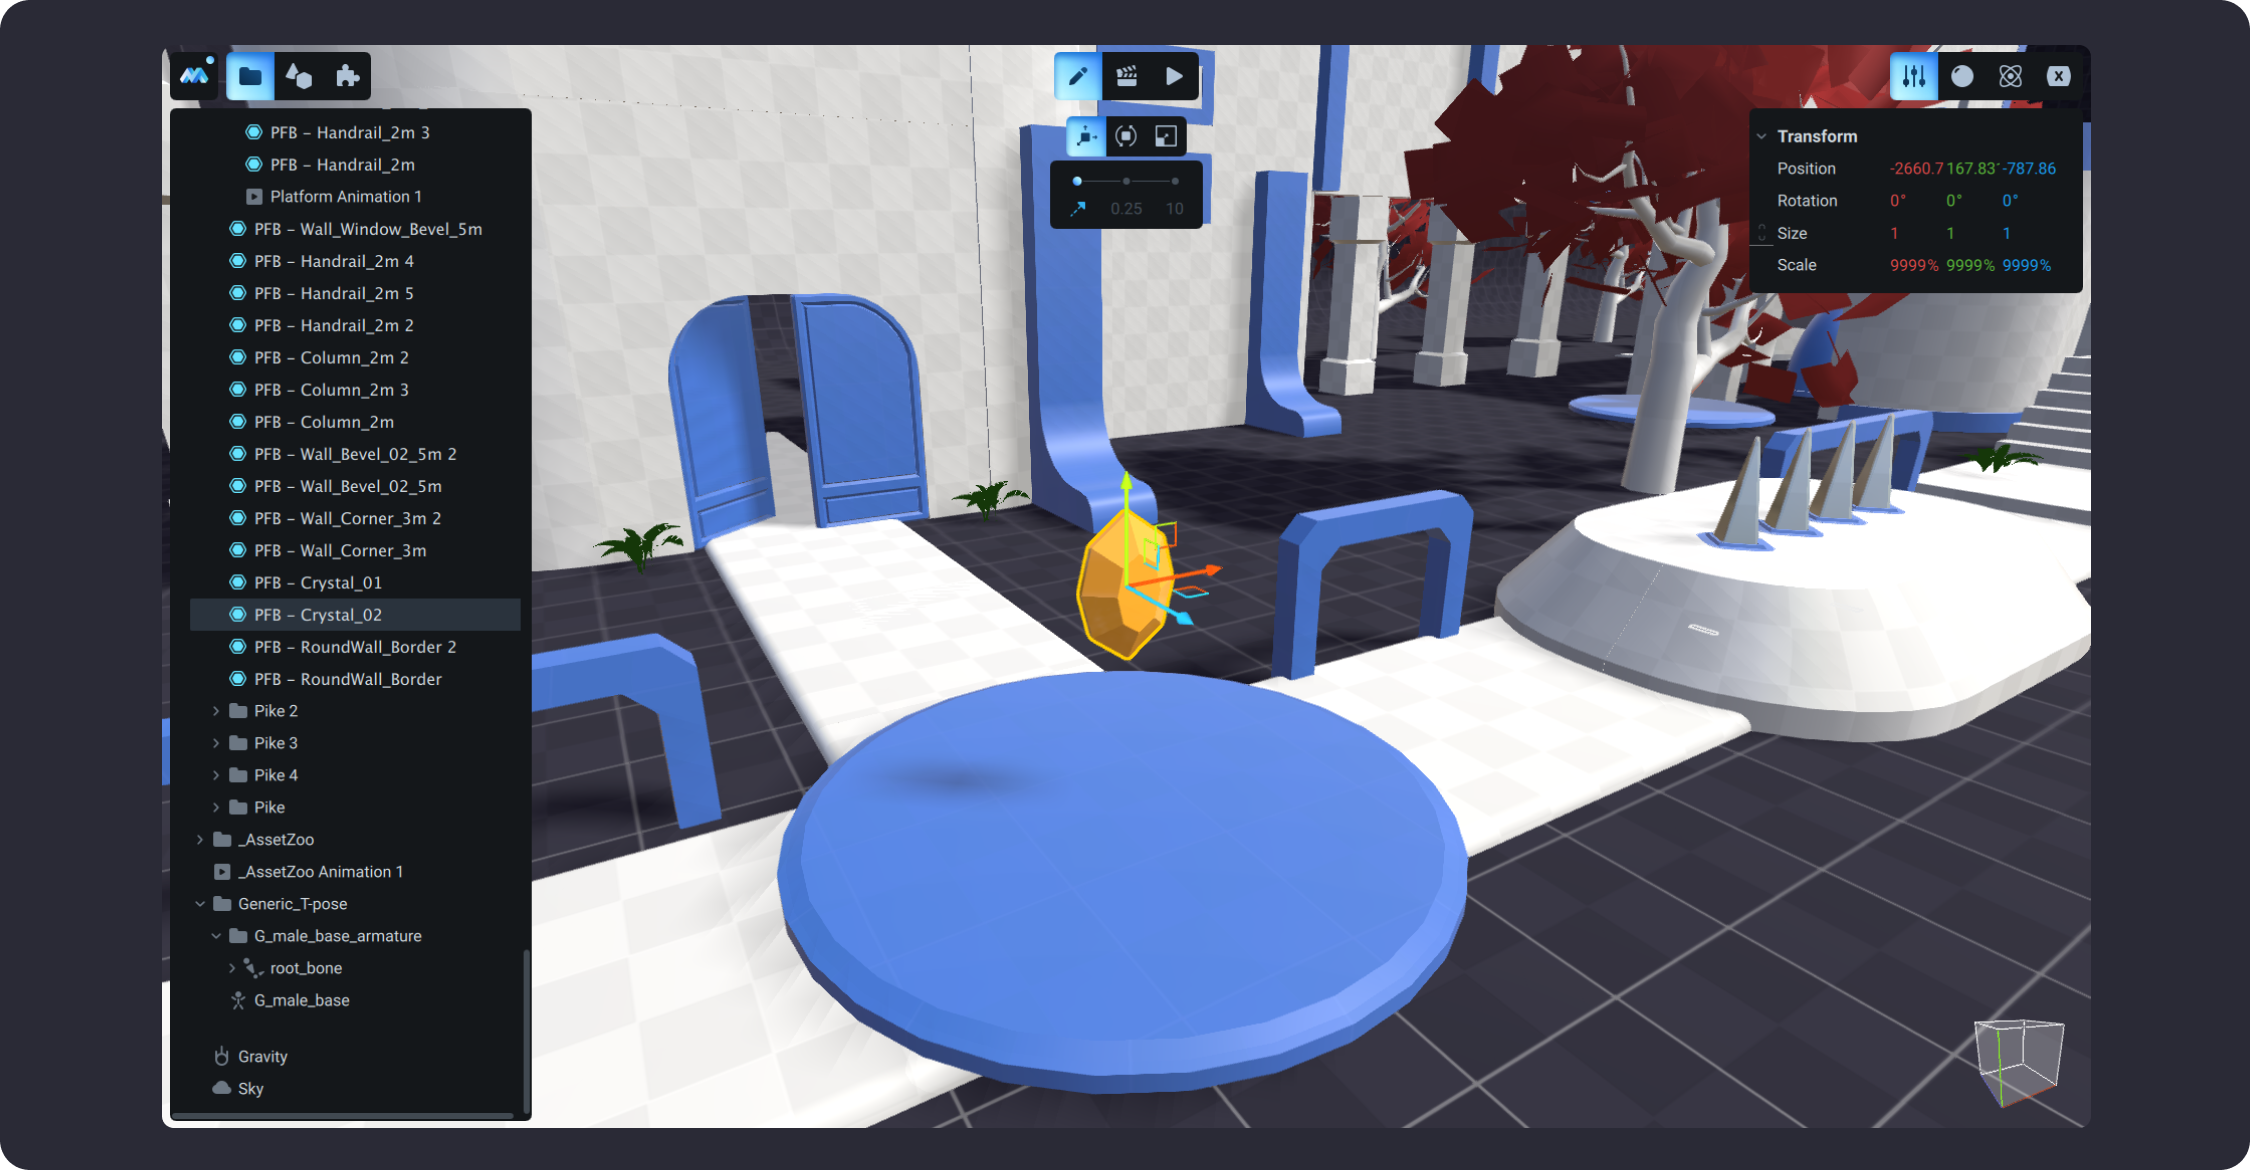
![](https://dl.dropboxusercontent.com/s/a861xmm6tnt7dhq/005.png?dl=0)


# Main Character

In MANU, Main Character is one of the default units of every scene. It is represented by a humanoid avatar commonly used in most side-scroller platformer games. This article introduces an overview of the character settings that you can tune to meet your game design goals. You may change the default mechanic settings of the character and also import your own character model. The details for performing these actions are below.
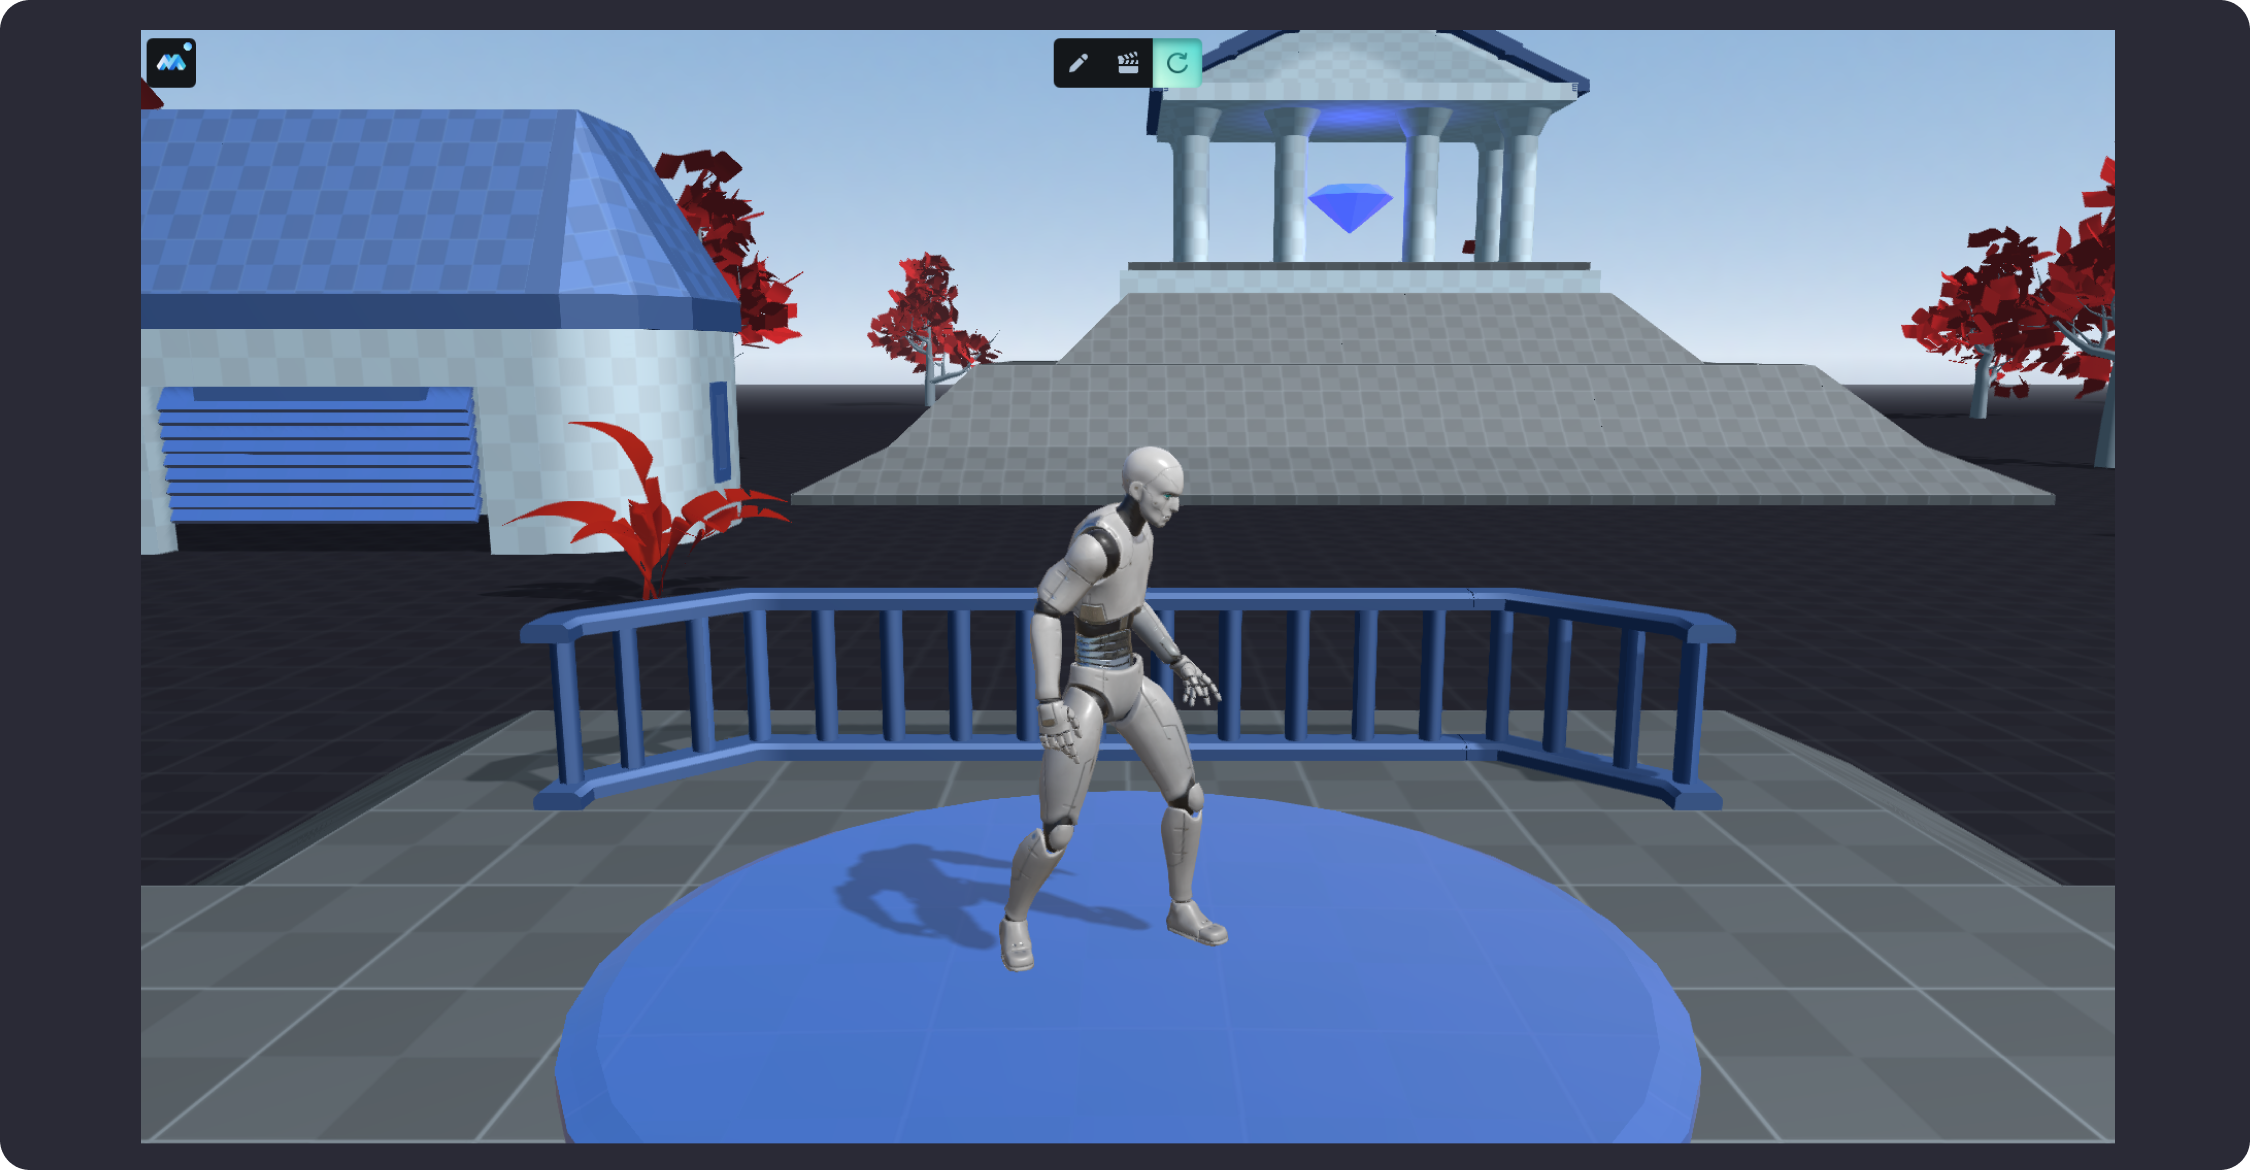
![](https://dl.dropboxusercontent.com/s/b6fq4frc2p24qod/001.png?dl=0)

By default, the Main Character is a group of objects displayed in the Scene tree that includes subgroups of Model and Animations assets within the MainCharacter Body group.The MainCharacter Body includes a component that consists of a character and a capsule with state machine.&#x20;

The "Model" subgroup contains 3D models of the main character, including its mesh, rigs, bones and related animations. "The Animation for states" subgroup includes a list of state machine animations that are triggered by a certain state of the main character.
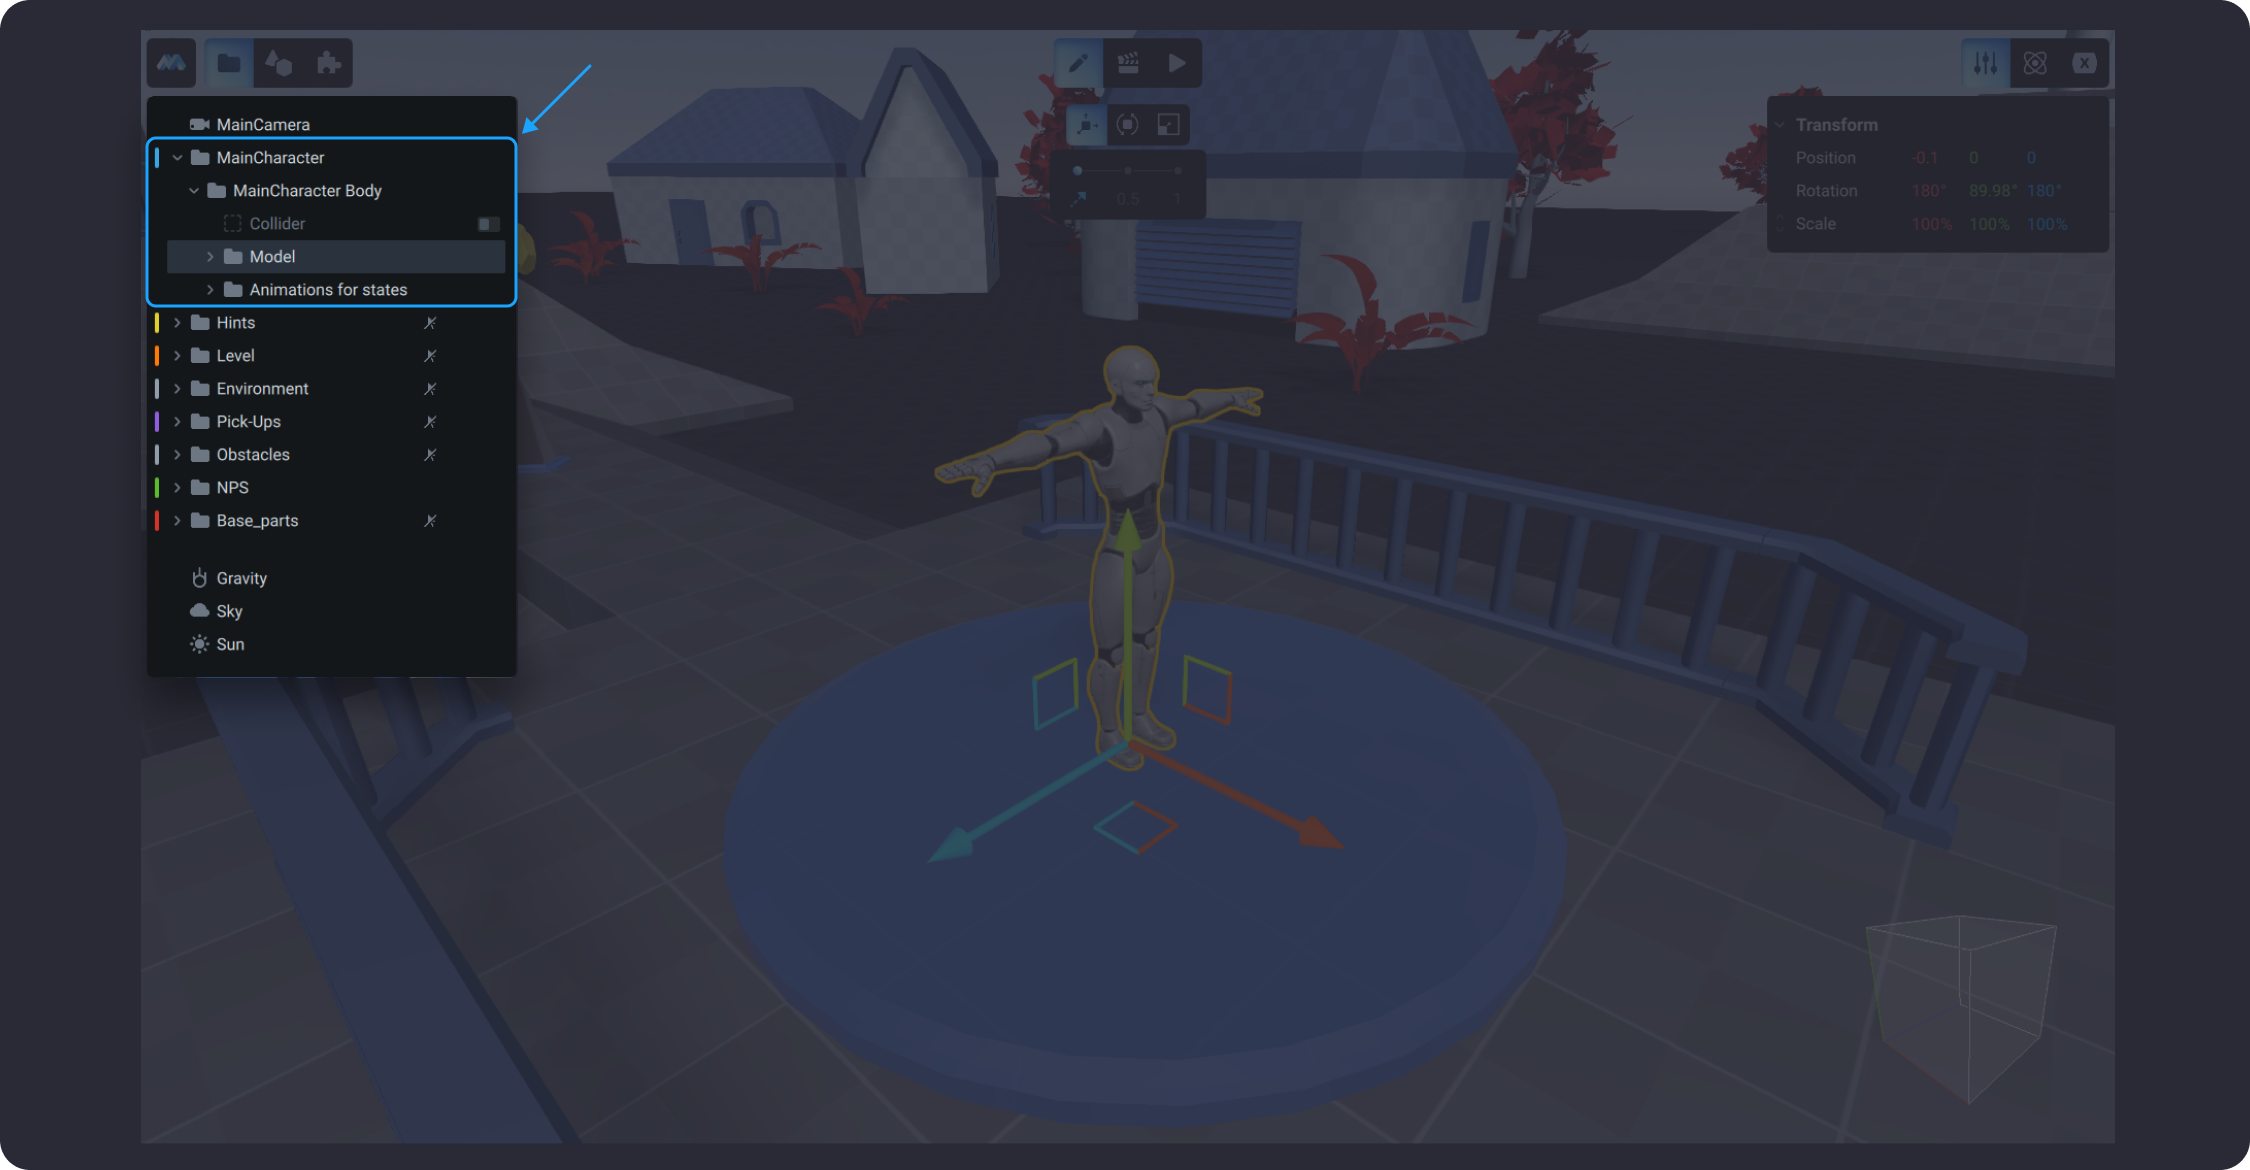
![](https://dl.dropboxusercontent.com/s/bjv4zltihaufc1y/002.png?dl=0)

## Properties

If the MainCharacter is selected in the Scene panel in Edit Mode, the following settings become available in the Inspector: walk, jump, wall, crouch, and slide. One of the powerful features of MANU is that you can tune Main Character settings right in the Game Mode, these changes will be applied immediately.
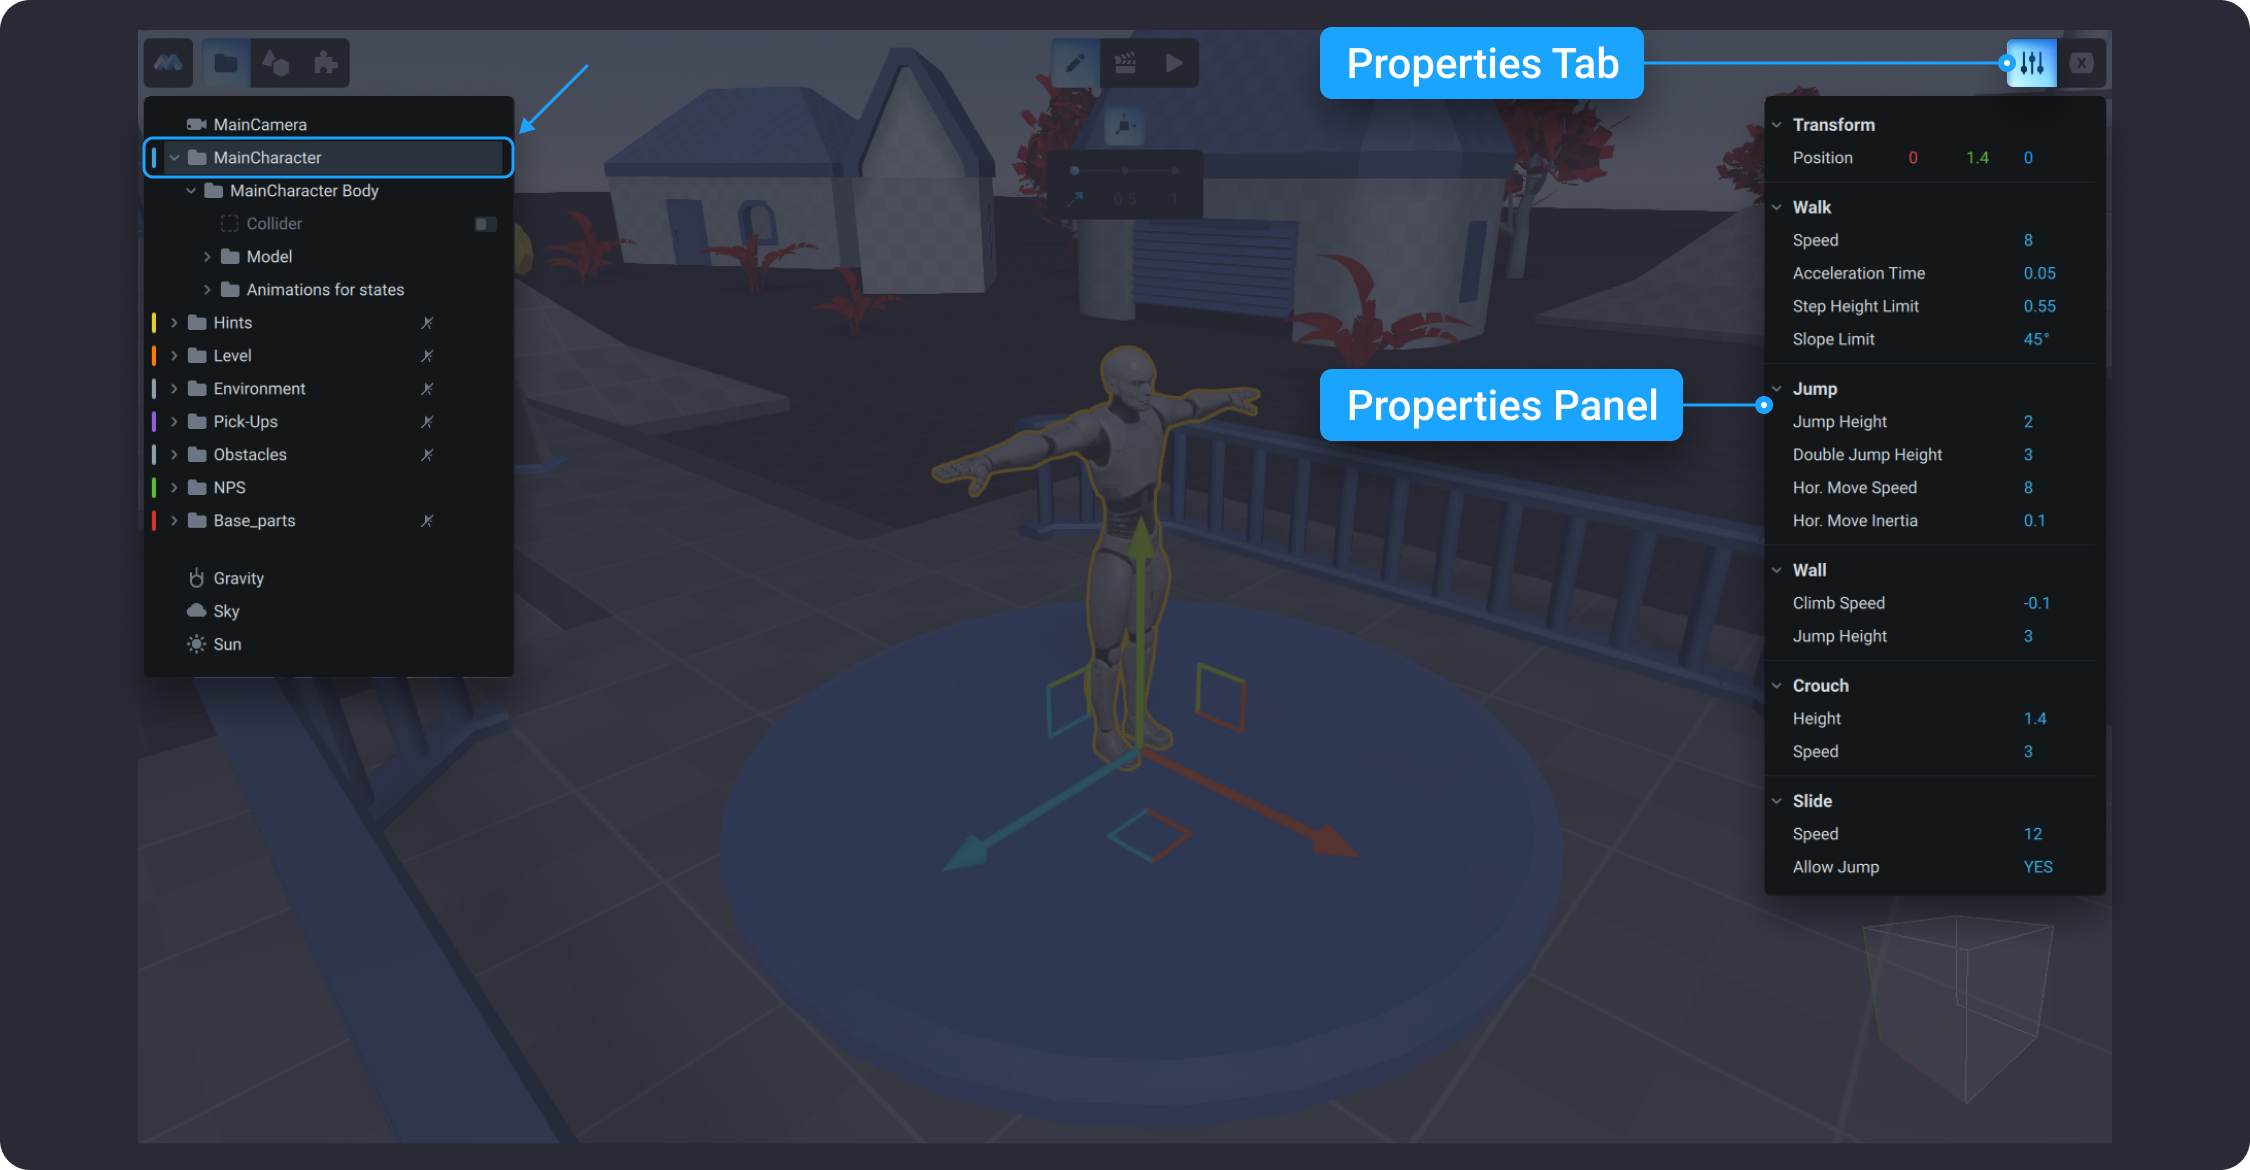
![](https://dl.dropboxusercontent.com/s/c4wxmexynvj920s/003.png?dl=0)

{% embed url="<https://dl.dropboxusercontent.com/s/mw3ns1y8warzq44/v001.webm>" %}

### Walk

Walking mechanic is controlled by right and left arrow keys in the Game Mode. The speed for walking can vary from 0 to 100 m/s. Acceleration Time defines the rate of change of the main character’s velocity with time and is displayed as a coefficient number that ranges from 0 to 1. If you want your game character to walk faster, the value for acceleration time needs to be close to “0”.
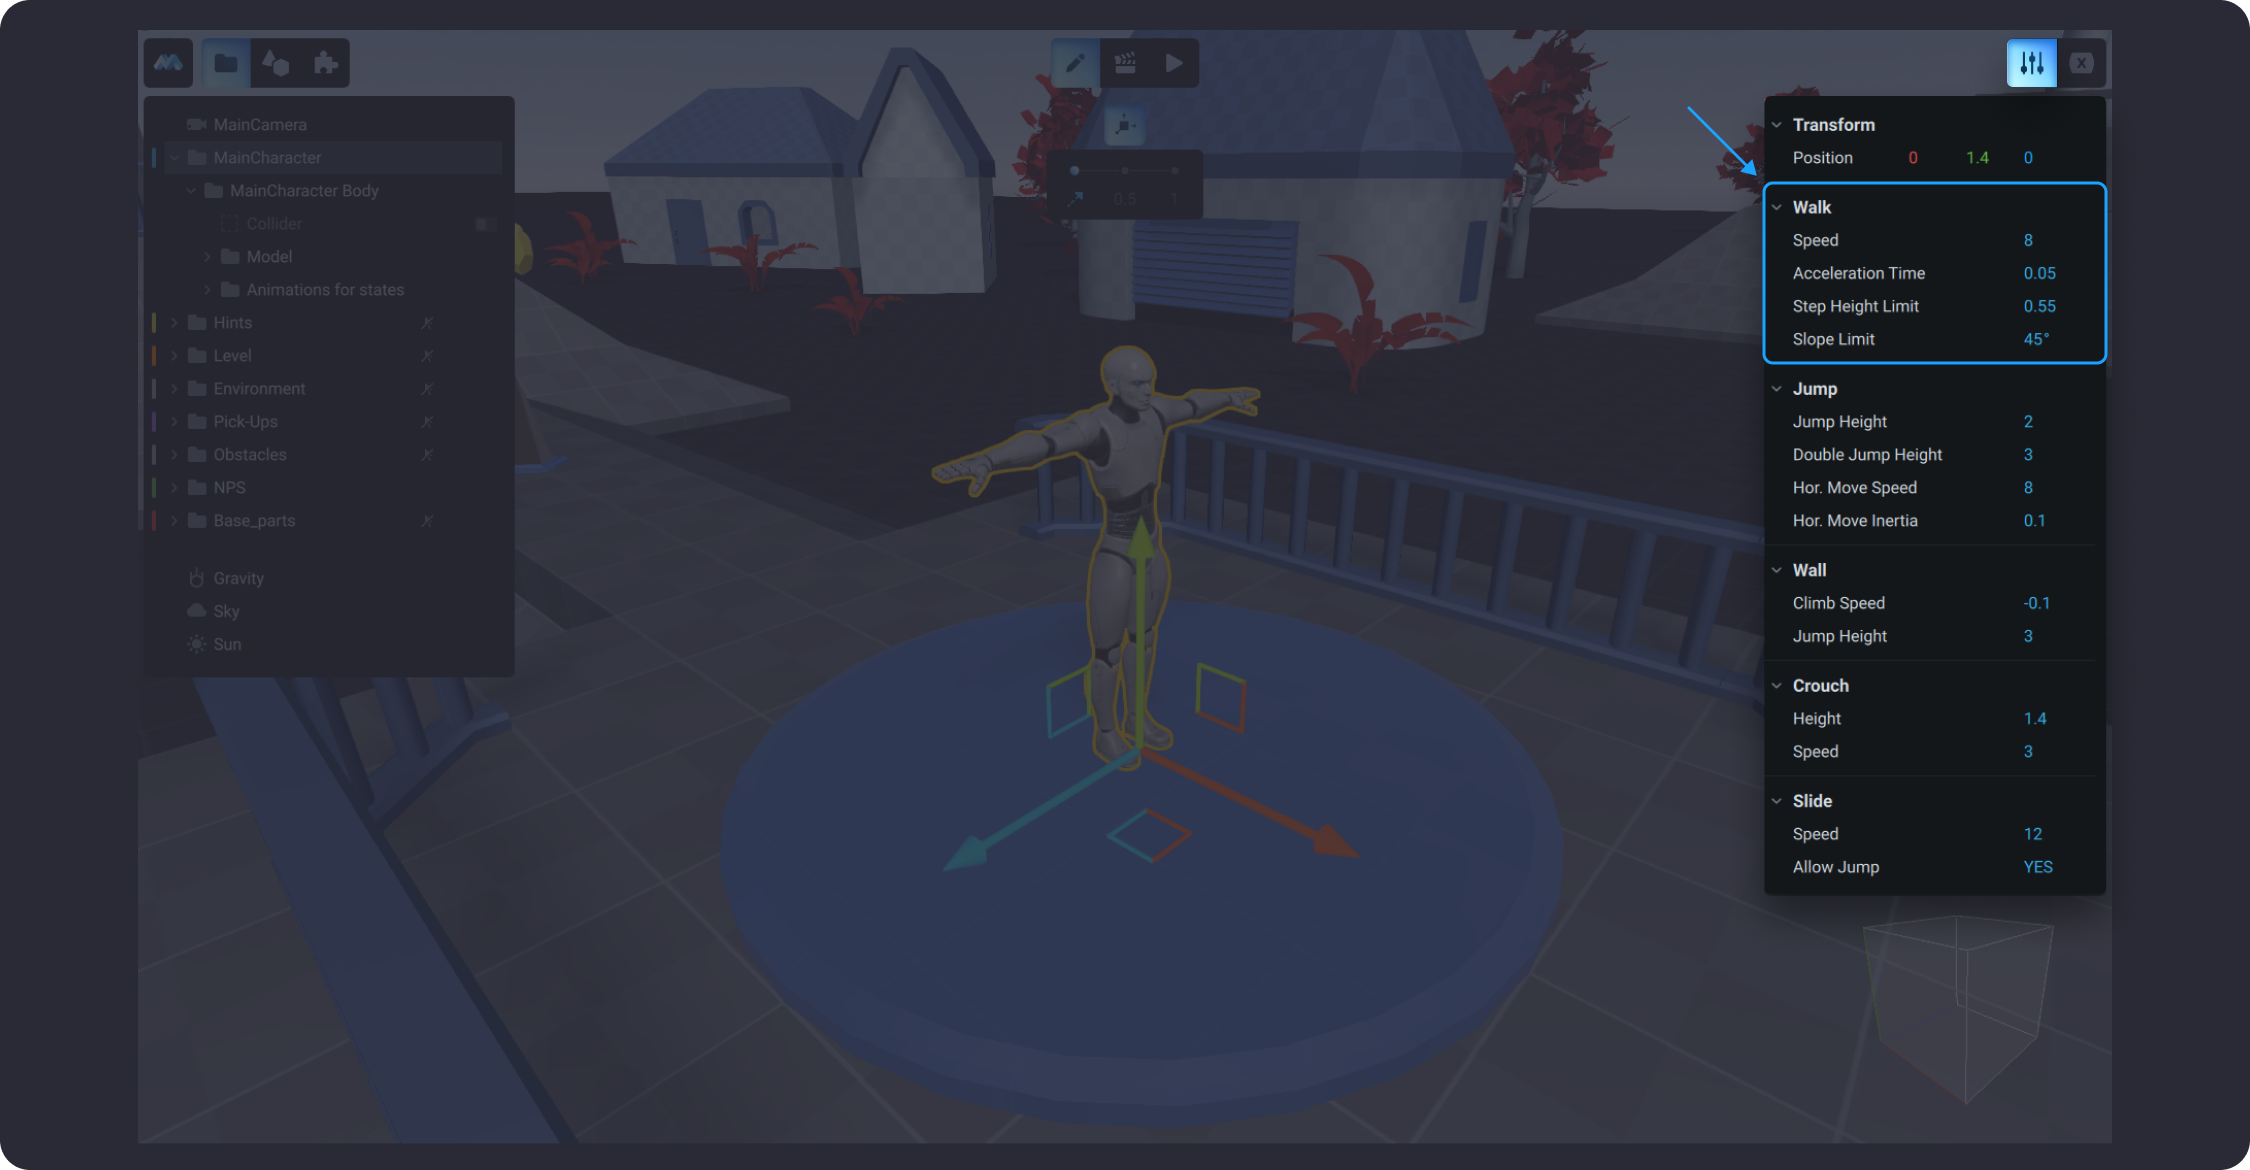
![](https://dl.dropboxusercontent.com/s/dwj6g583hqi6mw5/004.png?dl=0)

The Step Height Limit allows you to set up the limit for walking up the stairs or other objects, such as a pile of stones, depending on how tall they appear in the scene. It ranges from 0 to 9999 meters.

### Jump

Jumping mechanic is controlled by a  key. To Double Jump, hit  twice. To control the direction for jumping, use +Left arrow key or +Right arrow key. The value for Jump Height equals to meters in the game world. The default value for Double Jump Height is the same and can range from 0 to 9999.
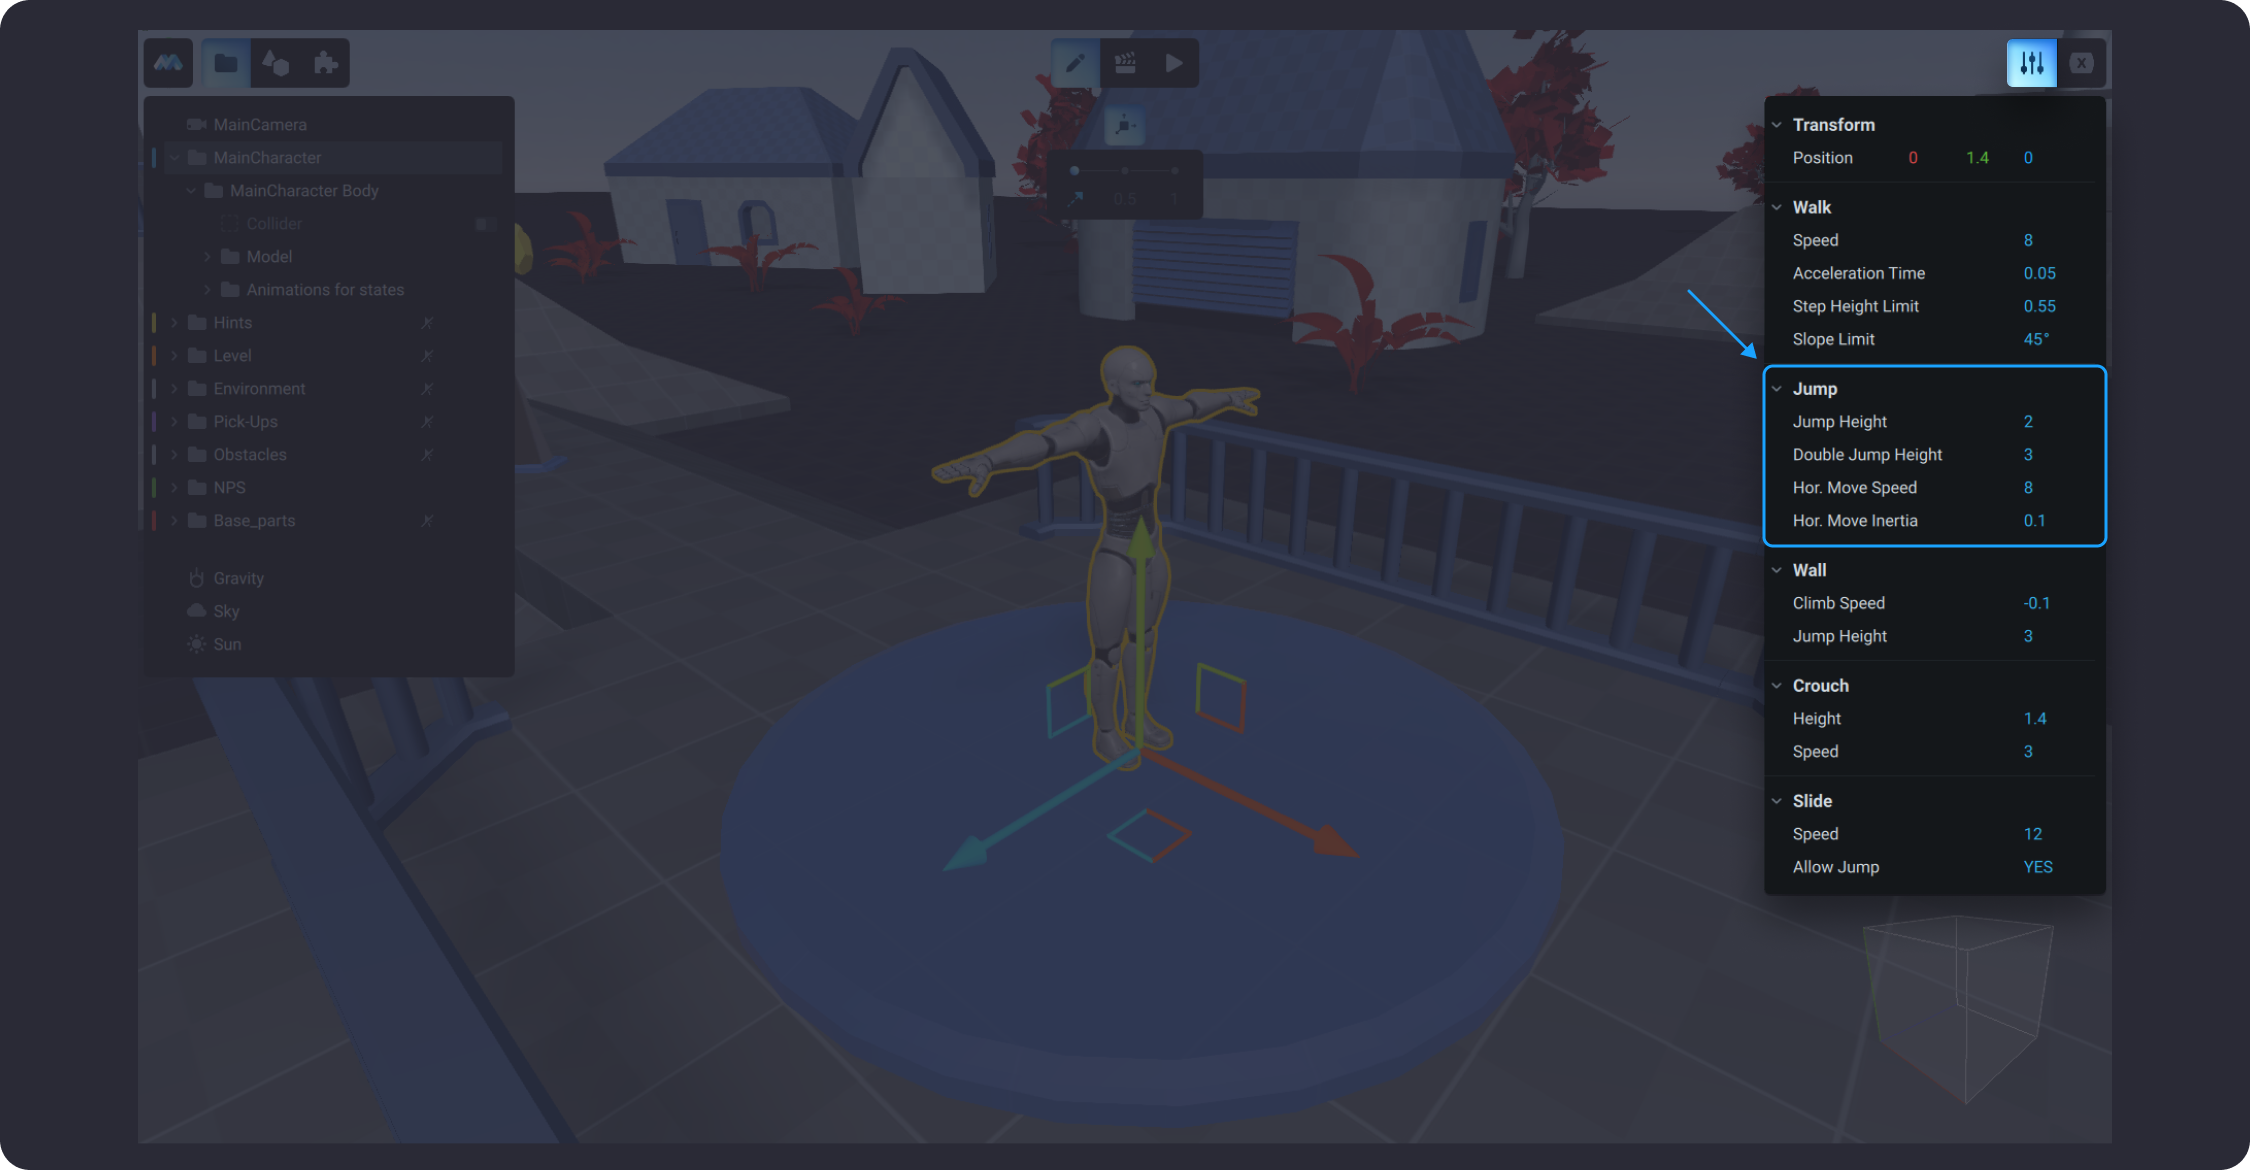
![](https://dl.dropboxusercontent.com/s/wy155xkg5uj3c0l/005.png?dl=0)

Hor. Move Speed stands for Horizontal Move Speed that defines the speed value for the main character’s movement forward and backward. The value can be set within the range from 0 to 9999.

The Hor. Move Inertia setting stands for Horizontal Move Inertia that determines the tendency of the main character to keep moving forward in a straight line at a constant speed, when no forces act upon it. This setting is represented by a coefficient value that varies from 0 to 1.

### **Wall**

Wall mechanics includes settings for Climb Speed and Jump Height. Essentially, Climb Speed stands for the ability of the main character to get a hold of the wall or other static objects in the scene and temporarily “stick” to it. The lower the Climb Speed, the faster the character will fall down from the wall. The higher the Climb Speed value, the faster it can climb up if holding the right or left arrow keys, depending on the direction the character is facing. If the Climb Speed is a negative number, then the Main Character is being dragged down.
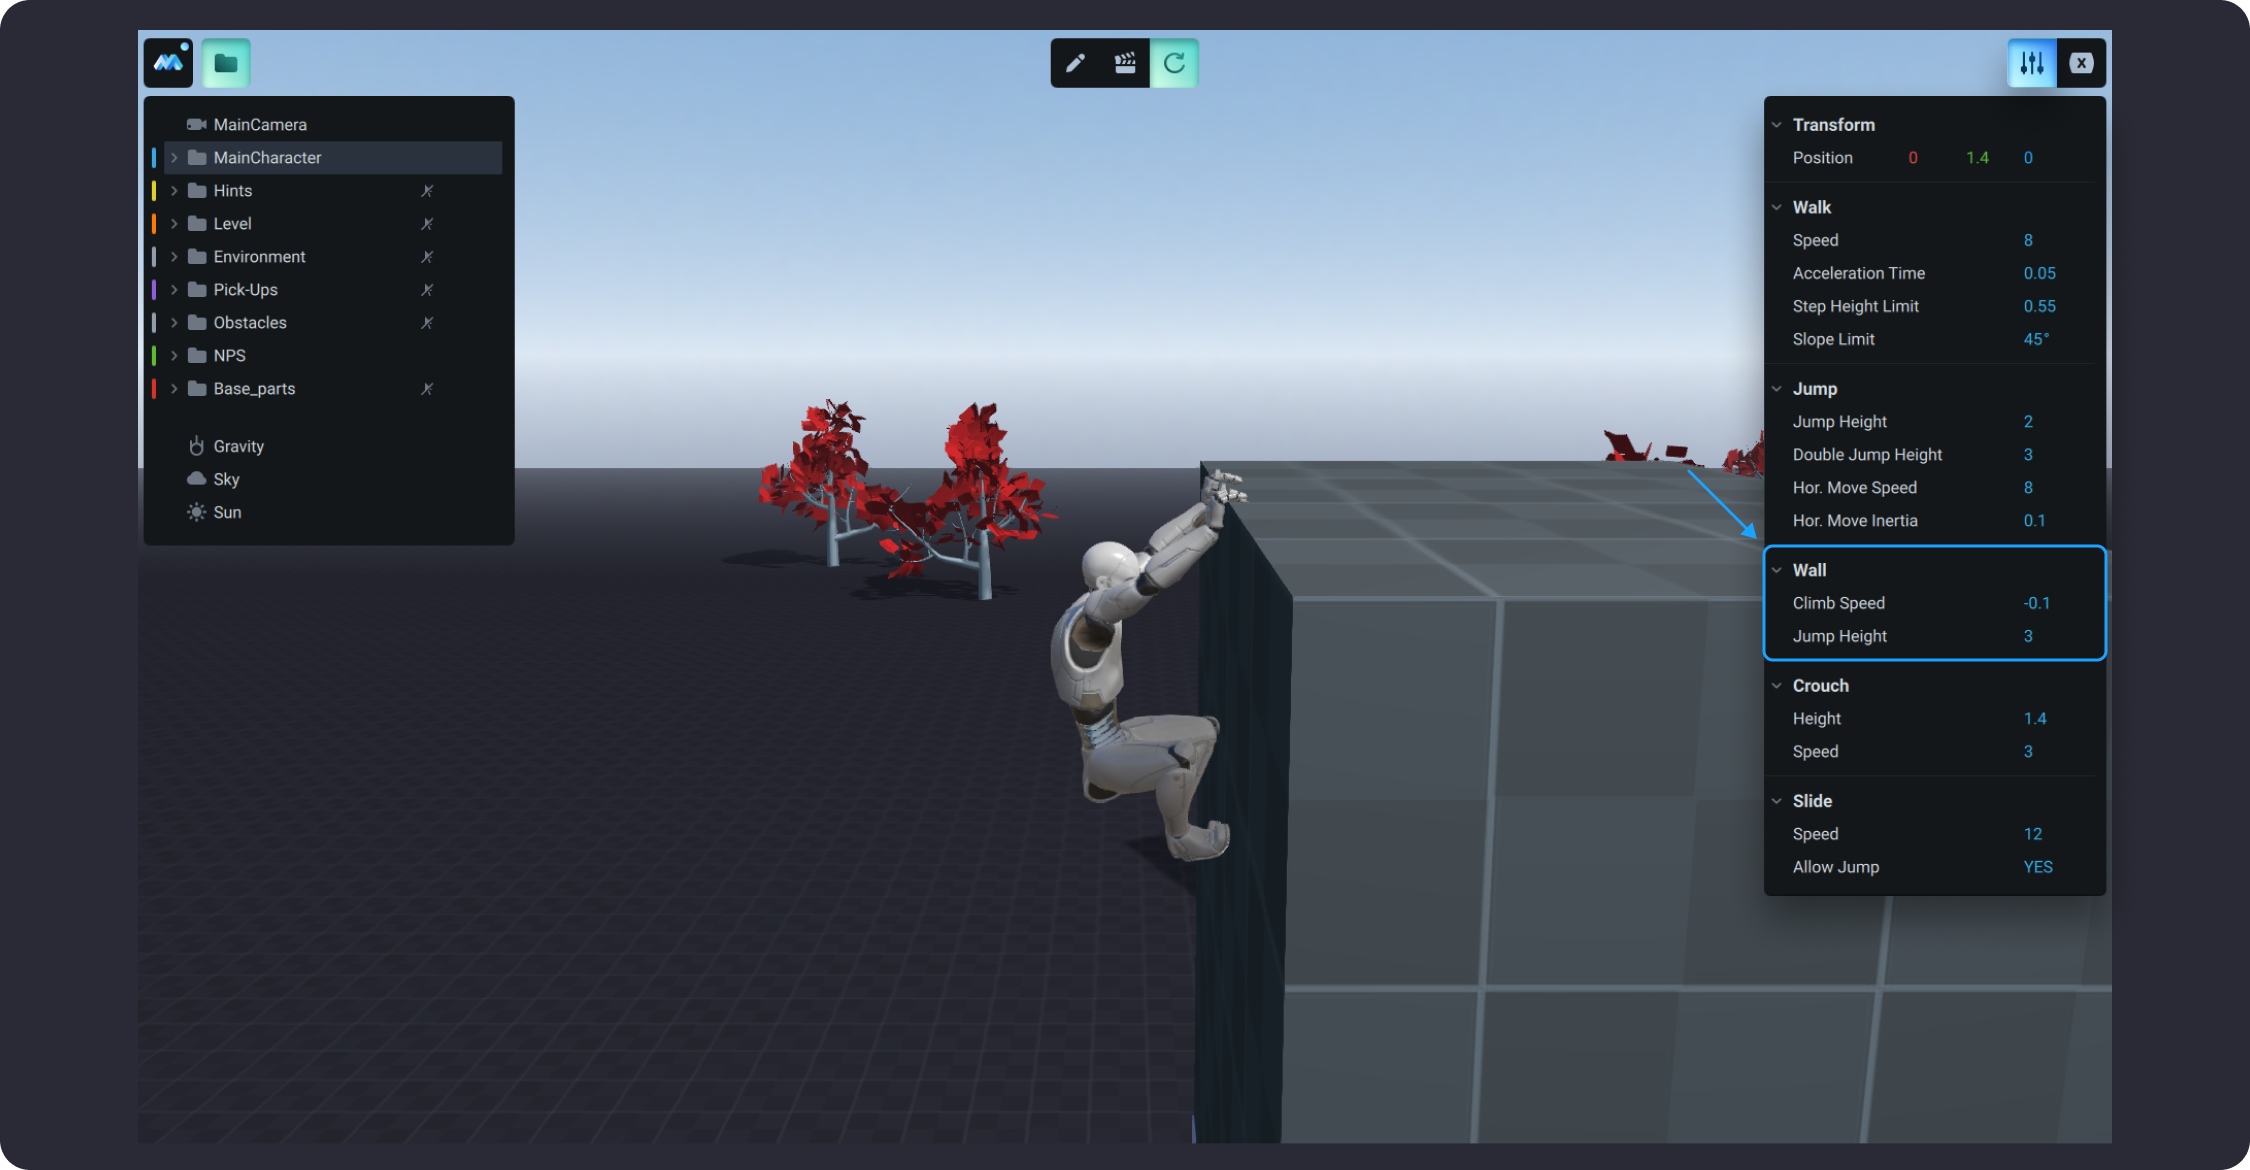
![](https://dl.dropboxusercontent.com/s/91p2tun7zbg5tnx/006.png?dl=0)

Jump Height determines how high the main character can jump off from the wall after hanging on it. To complete the Wall Jump, hold the left or right arrow key and hit SPACE.

### **Crouch**

To use the Crouch mechanic, hit \<C+Left/Right Arrow> keys. This will trigger an animation, where the main character moves forward in a position where its knees are bent and the upper body is down lower to the ground. If you want to change the height of the physics collider of the main character, use the Height settings to decrease it. The height value is in meters and is set for the entire capsule, it cannot be less than the capsule’s diameter.
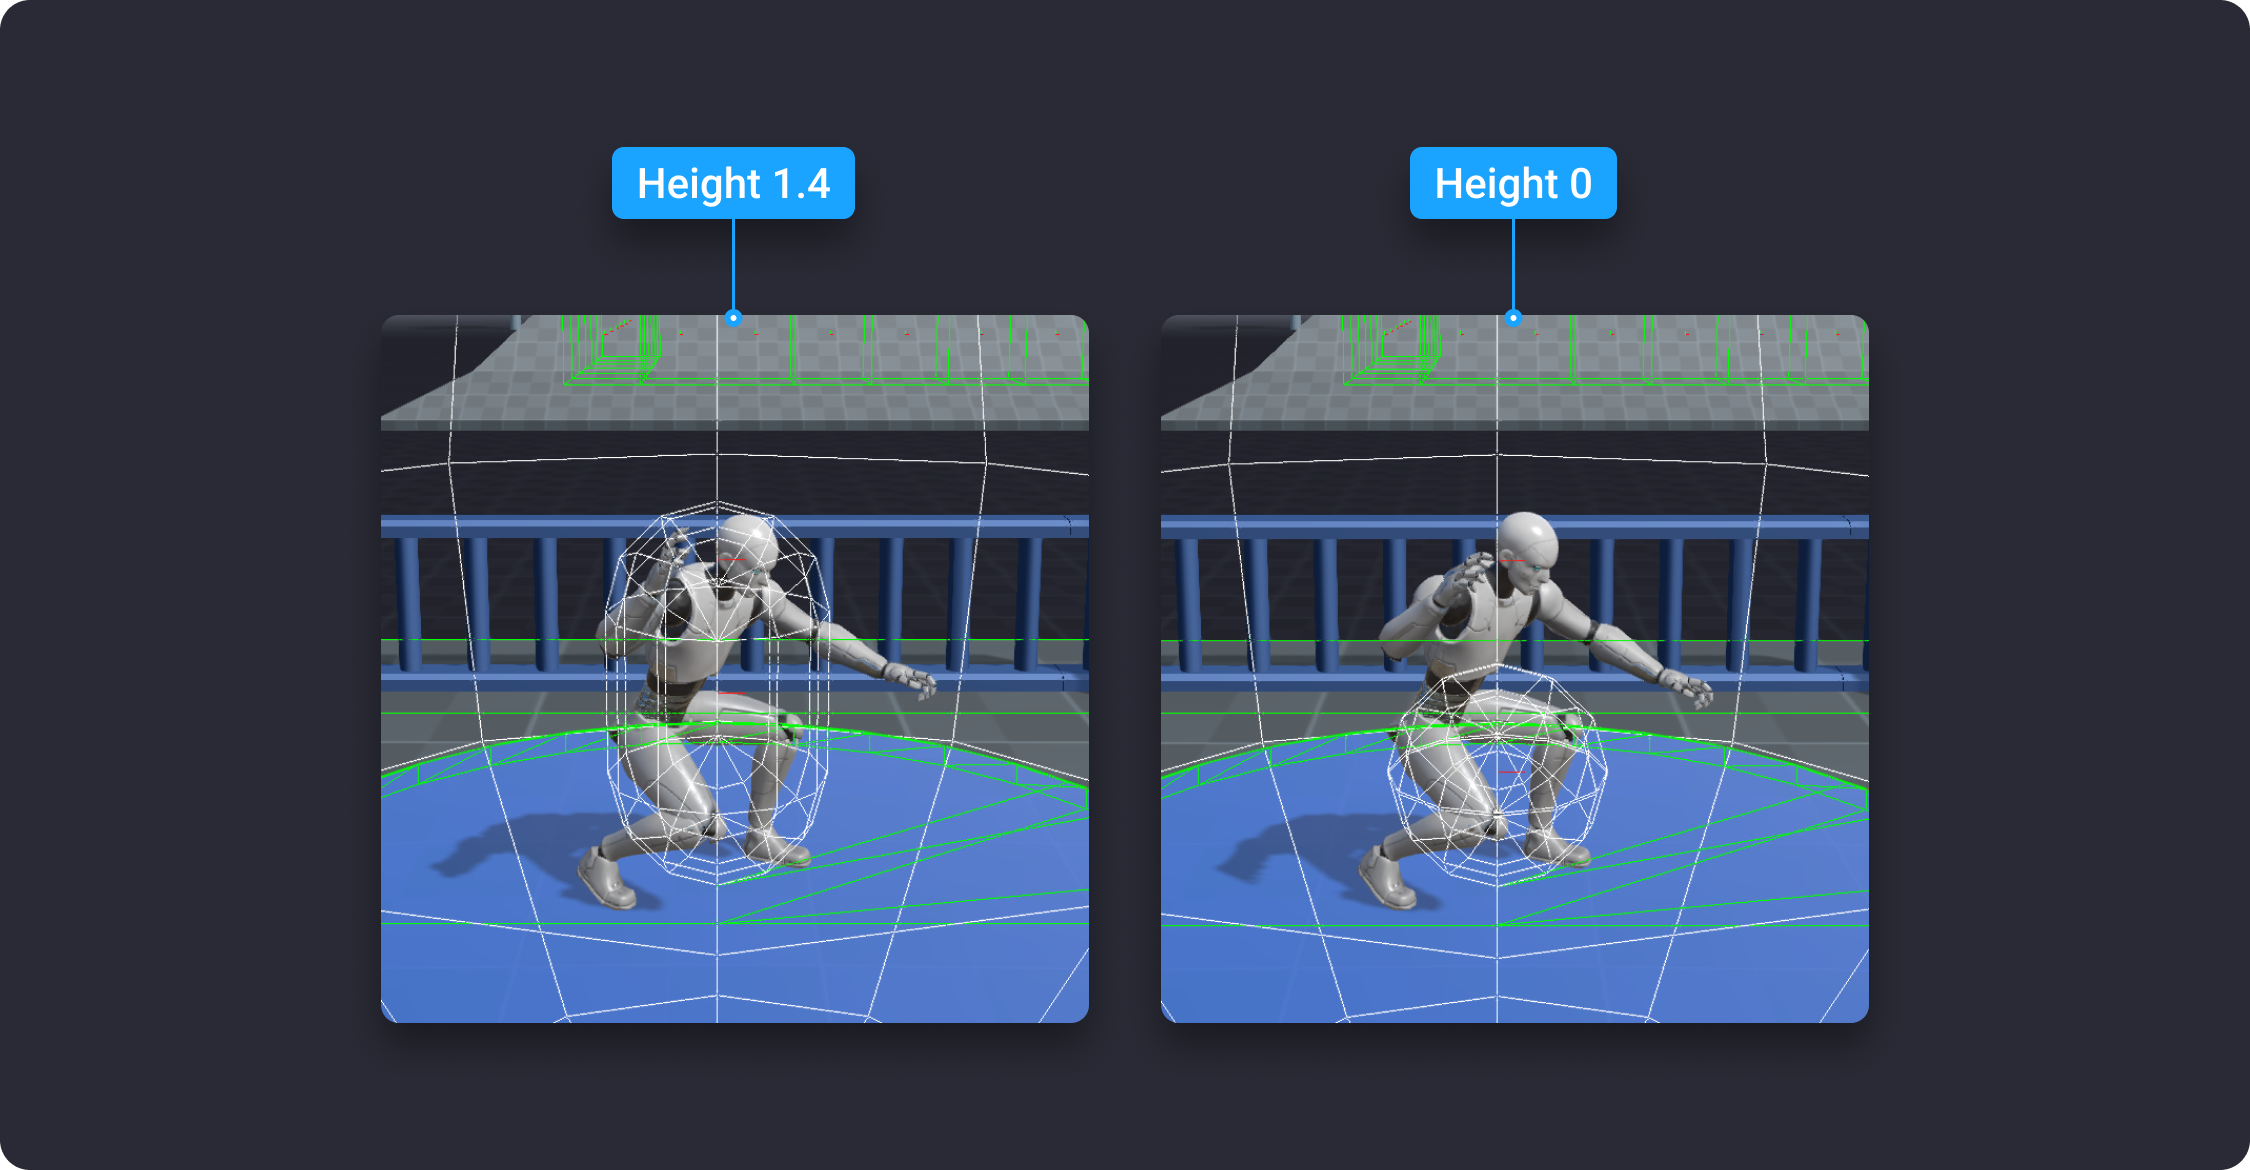
![](https://dl.dropboxusercontent.com/s/0h4knijbmkxvj9y/007.png?dl=0)

To view the changes of the сrouch Height, go to the Game mode, click on the Main Menu > View > Physics Colliders. Then, to view the Inspector panel, click on the Main Menu again > select View > Hide Right Panel. Please note that the changes made in the Inspector panel in the Game Mode will be saved when you switch back to the Edit Mode. Be sure to save the project before closing MANU, otherwise you may lose the settings you made in the Game mode.
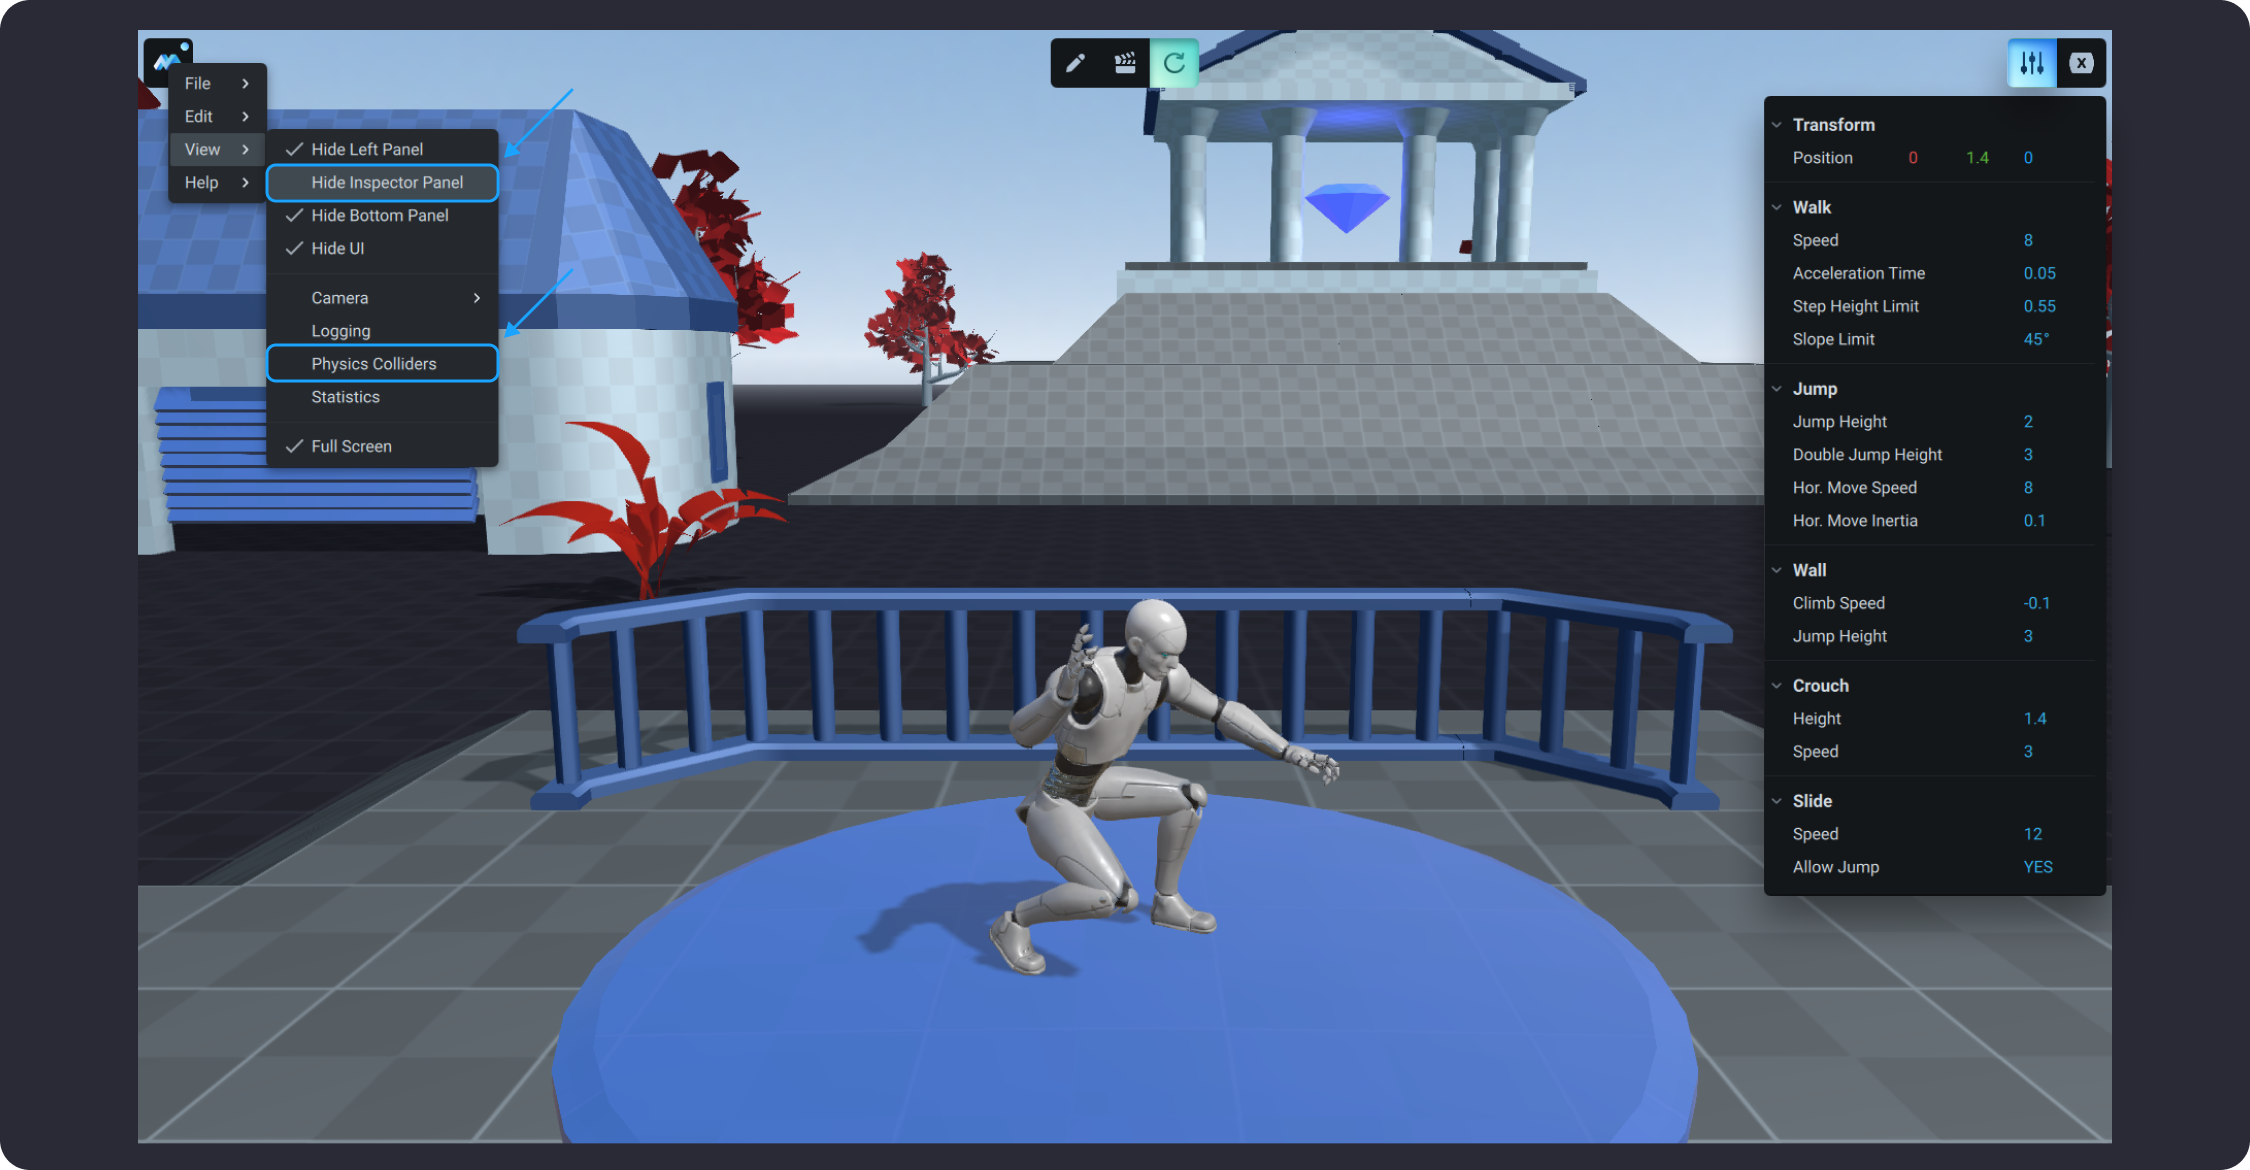
![](https://dl.dropboxusercontent.com/s/83whhxtw65d7qwb/008.png?dl=0)

When crouching, the main character would normally move slower as it’s default walk speed. Crouching and walking are independent mechanics, so if you change the default settings for crouching, the settings for walking will remain the same. You can adjust the crouch speed by changing its value using the Speed setting. If there is a physical obstacle above the character, it will remain in the crouching state even if no key is pressed. When the obstacle disappears, the character will stand up.

### **Slide**

If a main character reaches a surface rotated to a certain degree (slope limit), such as a downhill, it would trigger a Sliding mechanic.
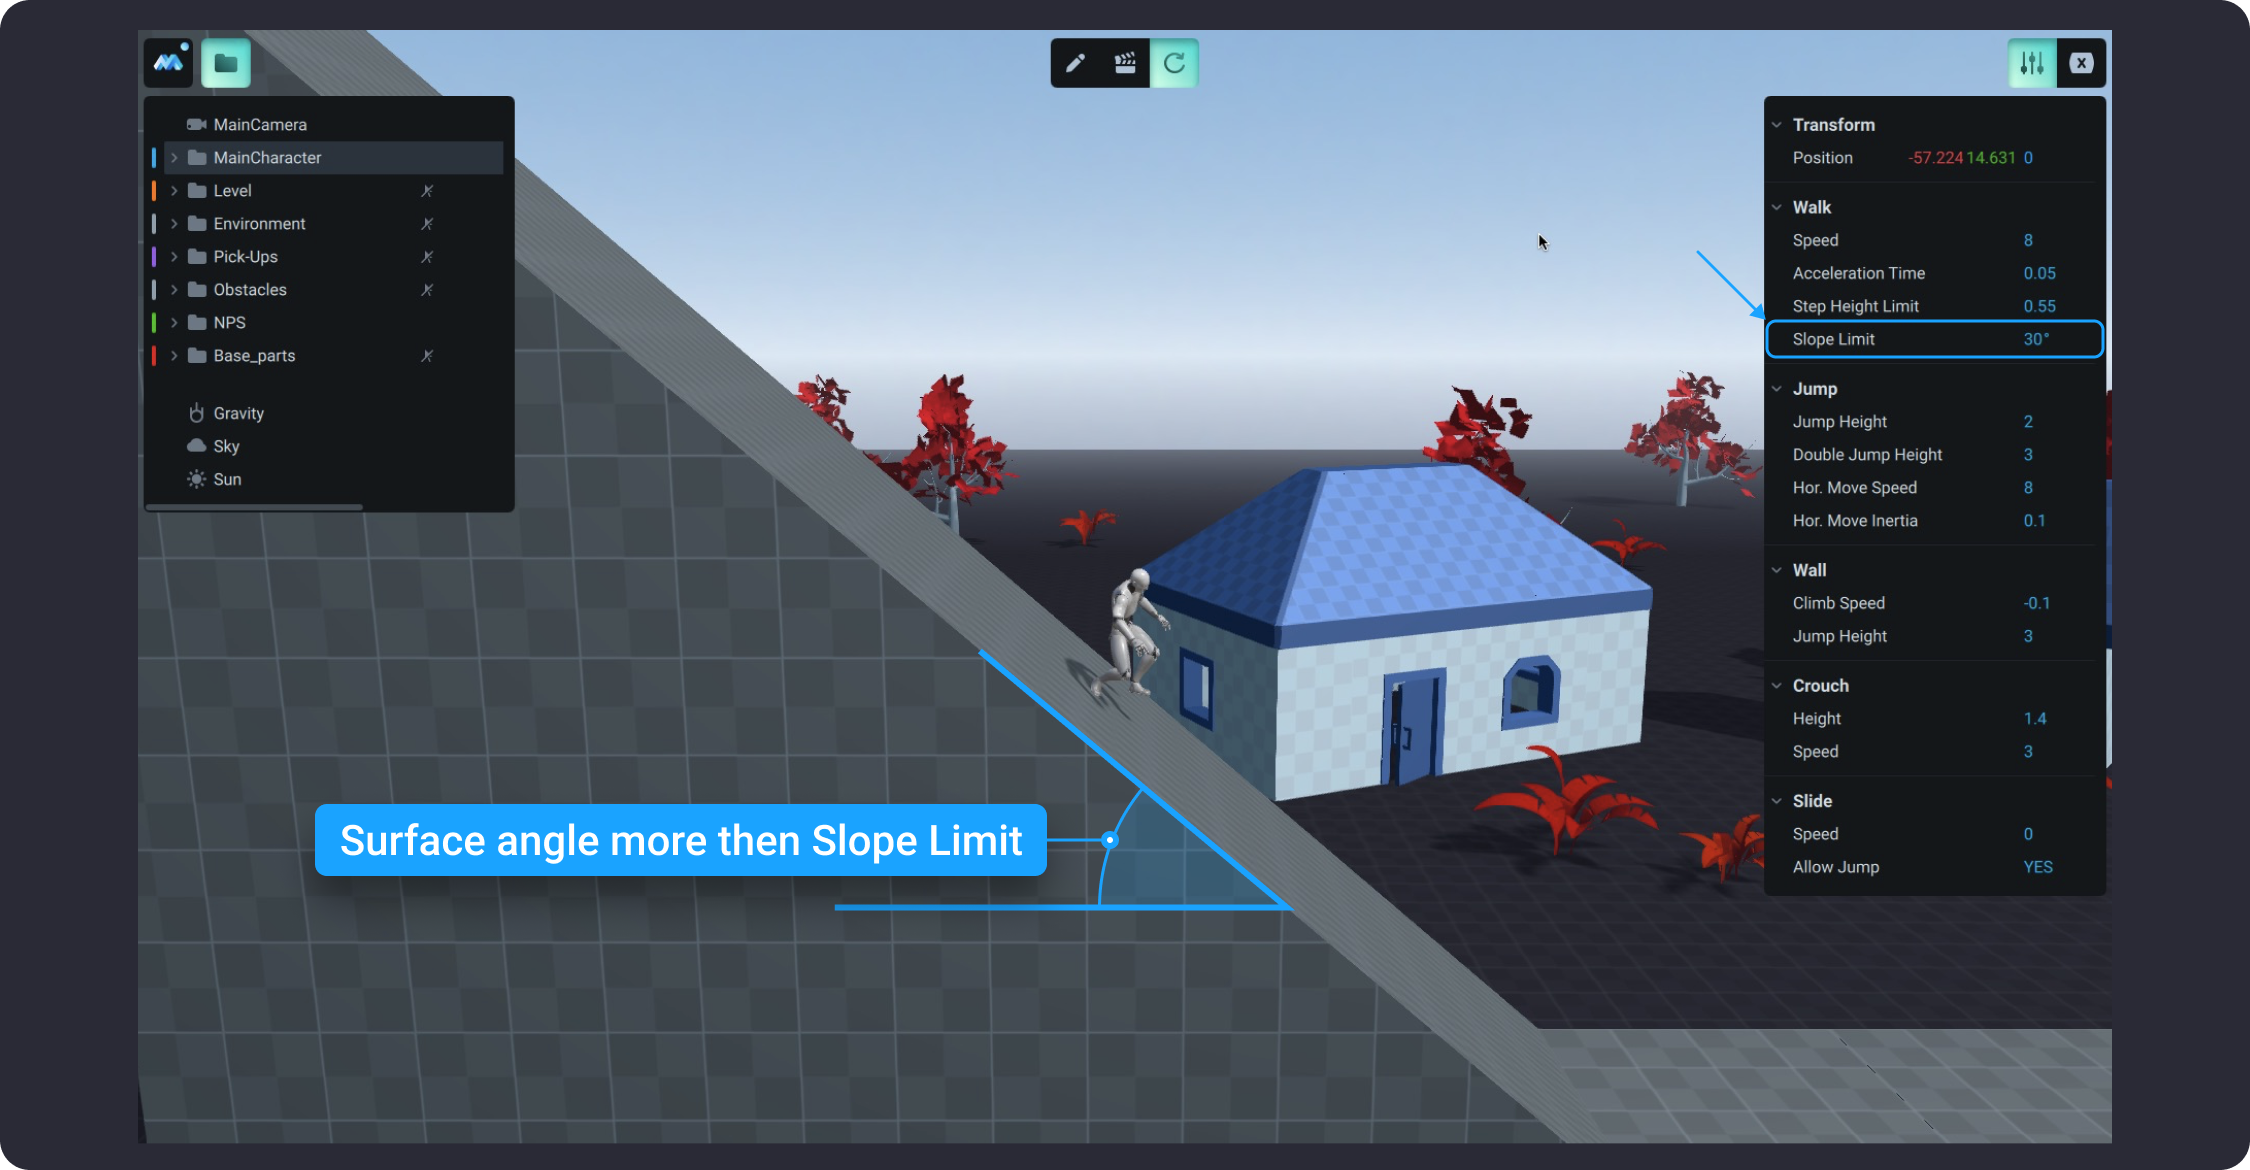
![](https://dl.dropboxusercontent.com/s/xbuapupwhs83aoj/009.png?dl=0)

By default, the Speed of the sliding mechanic is generally twice as fast as the walking speed. You can adjust this setting by setting a custom value within 0 to 9999.

Lastly, you can disable the jumping mechanic as the main character slides by using YES/NO toggle for Allow Jump.

The Slope Limit sets the boundaries (in degrees) for the main character to slope. The surfaces in the scene that are rotated to a degree that exceeds that limit will trigger the slope movement. All surfaces that are below this limit will have the main character to stand and walk on it.

## Physics

This section describes some of the default physics settings pertaining to the main character in MANU. They are available in the Physics tab of the Inspector panel and are represented by rigidbody and collider propertie&#x73;**.**

![](https://dl.dropboxusercontent.com/s/rqdr24v3ukarok4/010.png?dl=0)

### Gravity and Mass

The main character has its own Gravity and Mass.
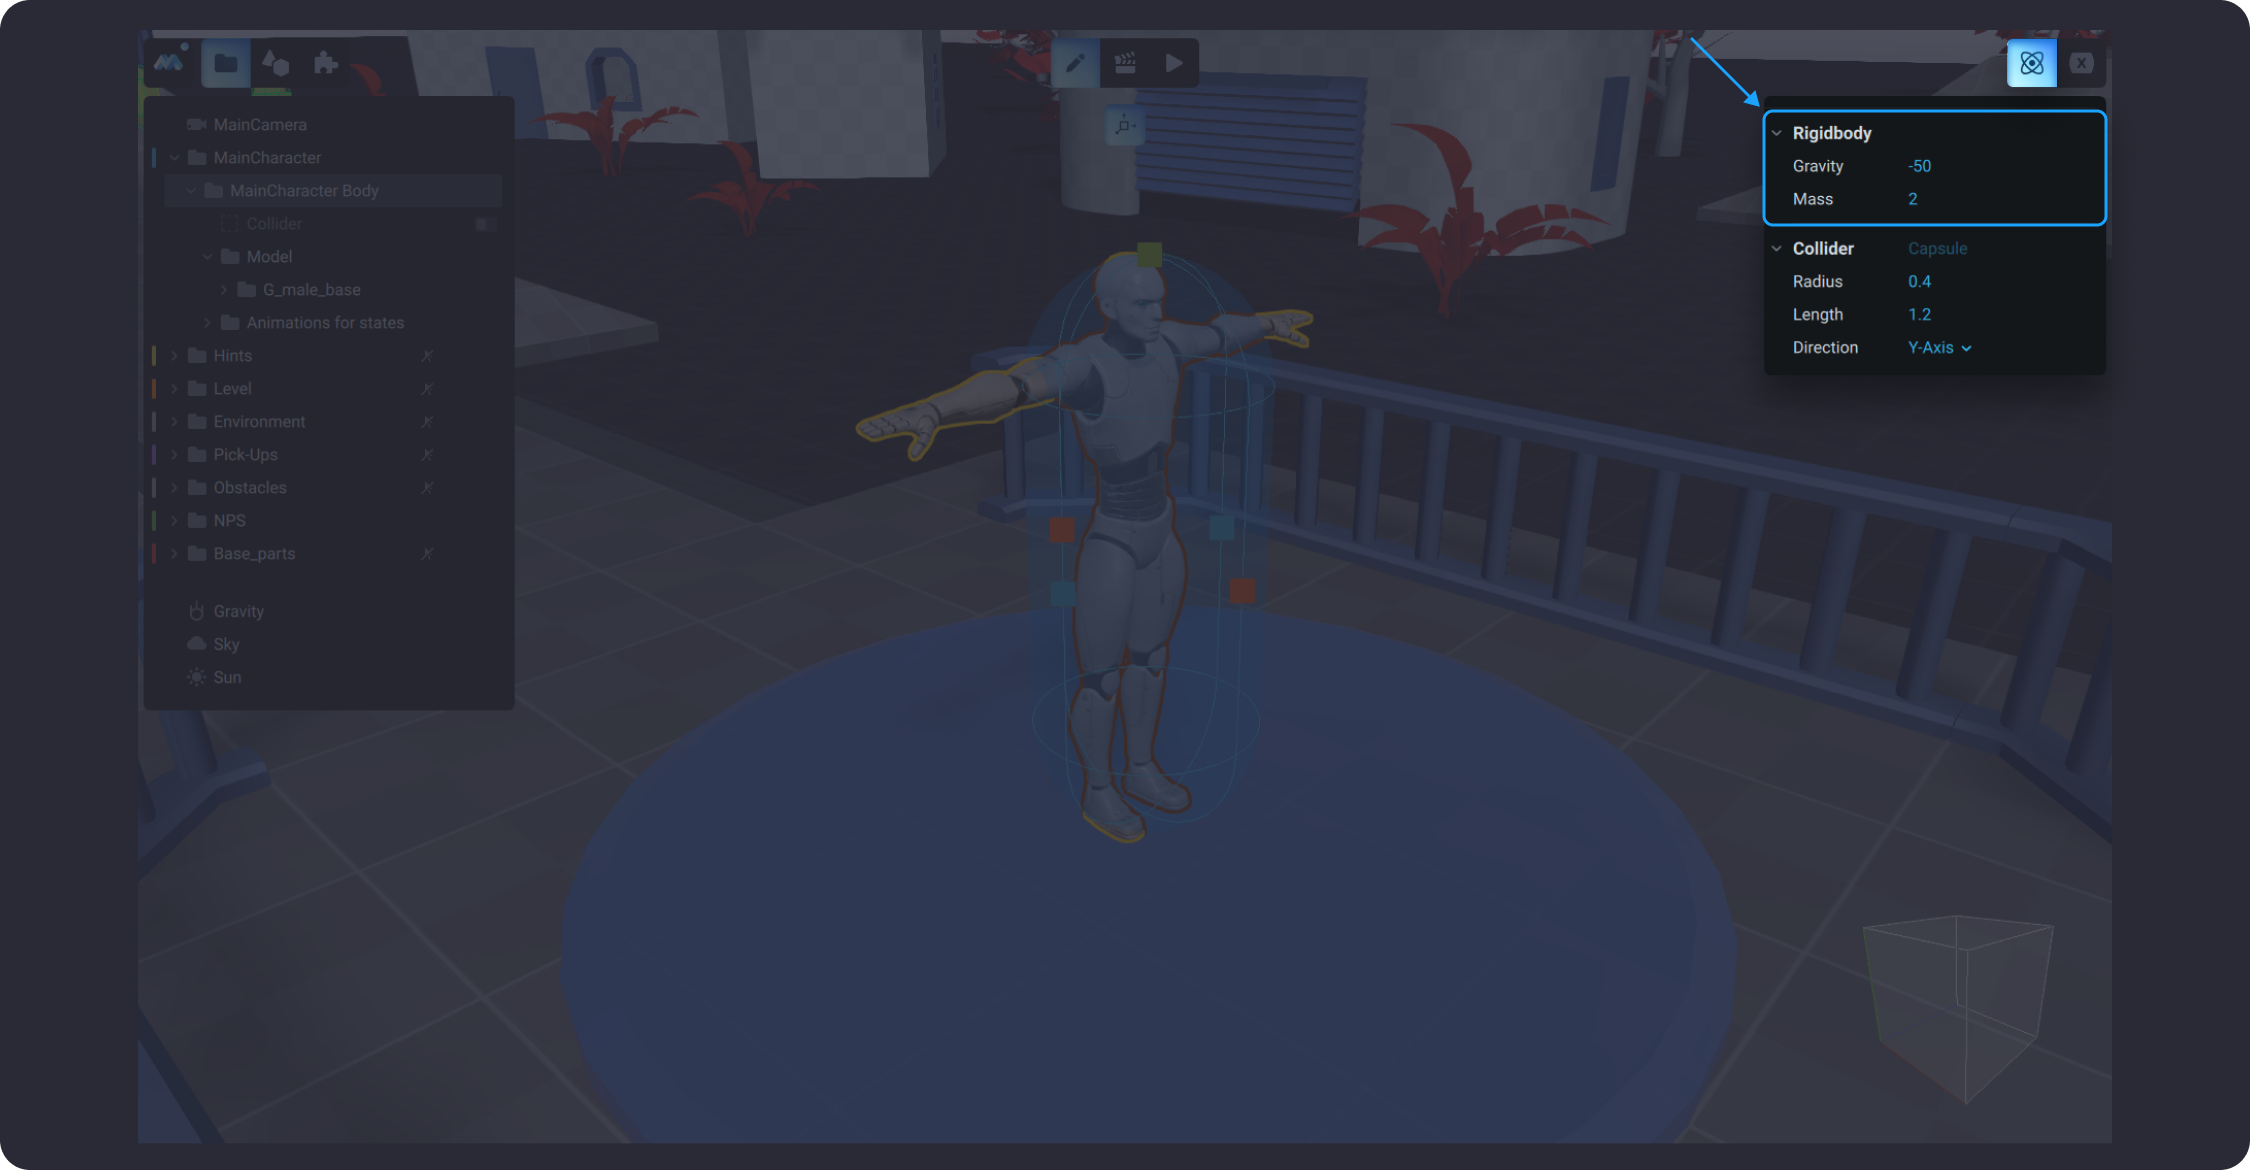
![](https://dl.dropboxusercontent.com/s/x7qb55bd24iz2qo/011.png?dl=0)

The Mass setting impacts on interactions with dynamic objects in the game, including the dynamic of reaching the main character’s maximum speed when moving in the 3D world. For example, if you want to create a massive-looking effect for a character, you would want to adjust its mass to make it appear heavy and stronger so that it interacts with other dynamic objects accordingly. In other words, it would take longer for a heavy character to accelerate, however, it’s going to apply a stronger force when interacting with dynamic objects along the way.

Main Character has its own Gravity setting to support the creation of an interesting gameplay or game level. It can be used for creating levels where you want your character to appear heavy in the game while the traditional gravity law is applied to other objects in the game, or vice versa.

### Collider

The main character’s default type of collider is Capsule. Changing the collider type for the main character is not available, although other collider settings are available for tuning, such as, Radius, Height, and Direction.
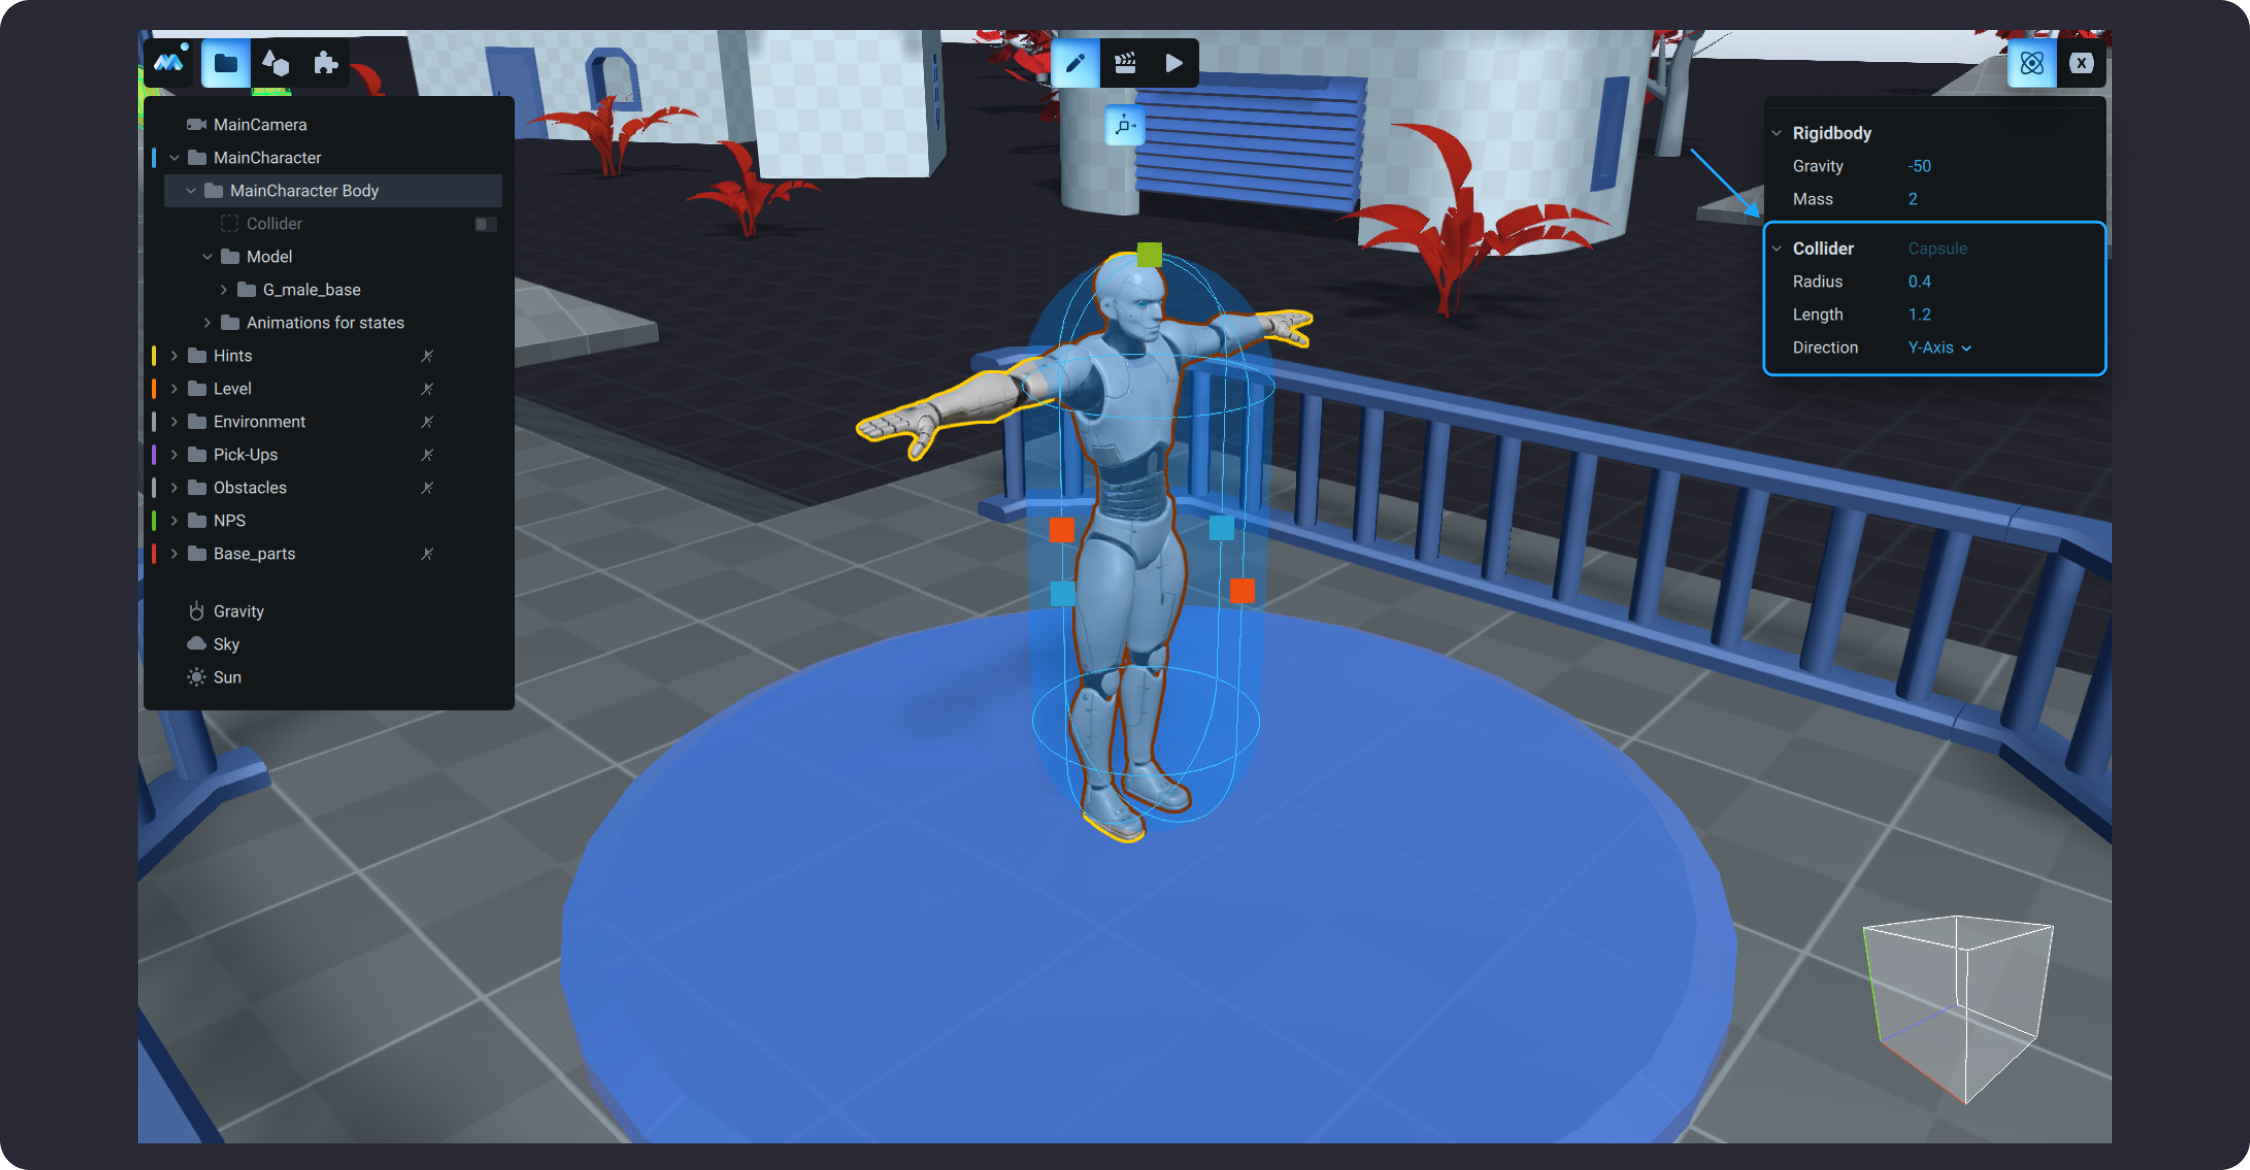
![](https://dl.dropboxusercontent.com/s/60q4by1d7kfg9a5/012.png?dl=0)

Radius value represents a straight line from the centre to the circumference of the main character’s collider that ranges from 0 to 4999.5 units.

The default Height for the collider is set to 2 meters, it equals the sum of cylinder height and 2 \*radius. The Direction determines an axis you want the collider Length to be adjusted to. To learn more about the collider settings, please go to [Physics](/learn/manual/physics).

## Importing Custom Character

In MANU, you can import any 3D model to create your custom character. As noted earlier, the default Main Character is represented by a group of objects displayed in the Scene tree. It includes subgroups of Model and Animations assets within the MainCharacter Body group. The Animation subgroup includes a list of state machine animations that are triggered by a certain state of the main character. This includes the following animations: crouchIdle, crouchWalk, fallingIdle, floating, frontFlip, idle, jump, slide, toCrouch, toCrouchForward, toStand, toStandForward, walk, wallHangIdle, and wallJumpUp.
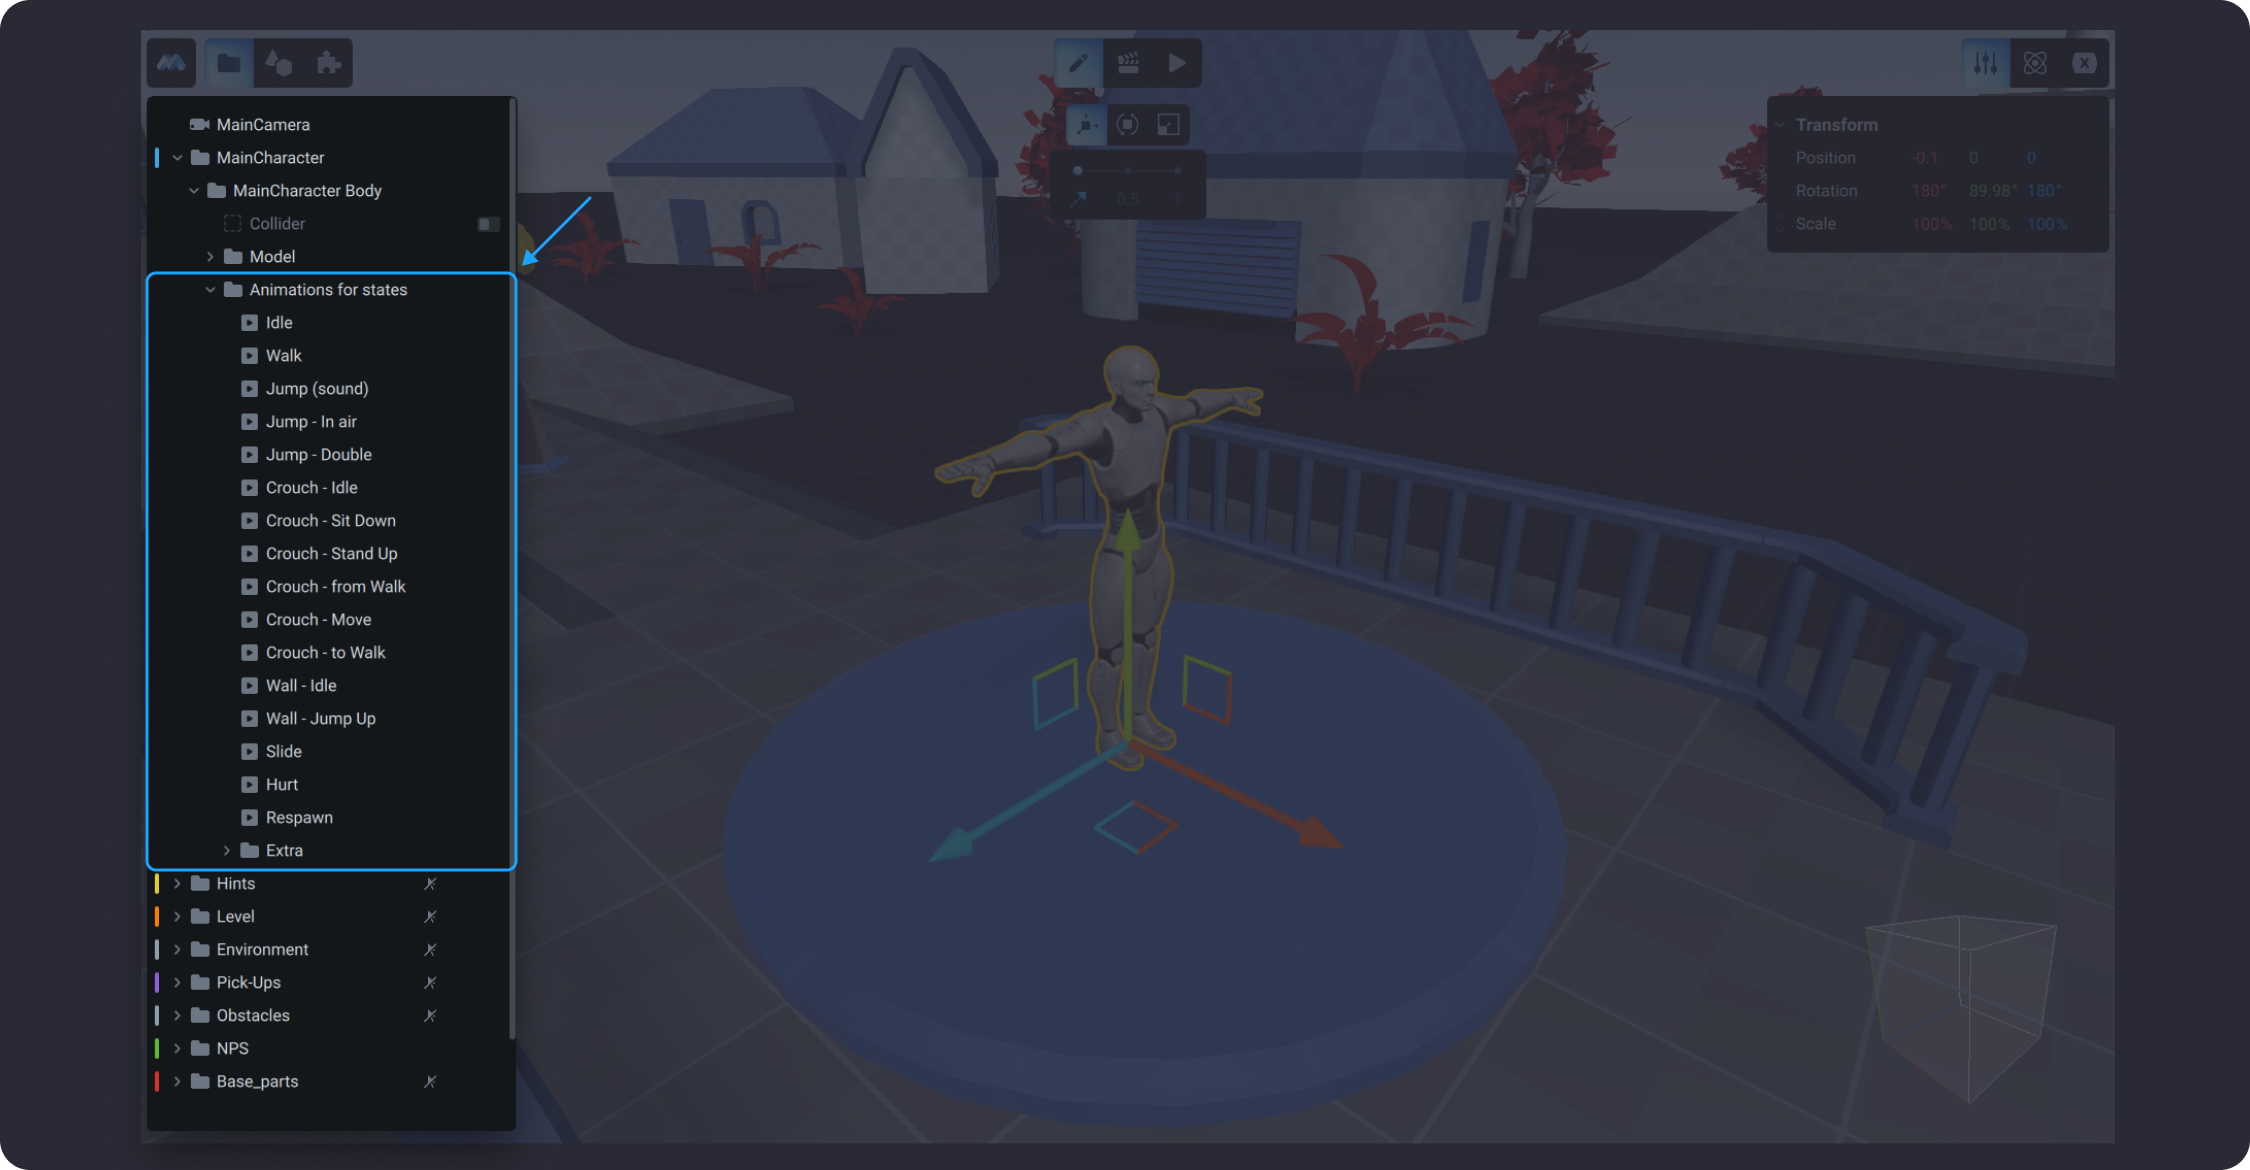
![](https://dl.dropboxusercontent.com/s/fimw61963gxk59e/013.png?dl=0)

Each of this animation has its own embedded animation, so instead of deleting these default animations, you can simply swap the embedded animations with the custom ones you have on your computer. The example below introduces step-by-step instructions on how to import a new custom character.

To import a new main character to MANU, go to Main Menu > File > Import > Select a folder with new character assets to upload. For this article we use this model.

{% file src="/files/-MYoP8y7T9EuHT9yNYX0" %}
Patrick
{% endfile %}

First let's import new model with animations and rename parent folder to "Patrick". Please see article [Import models](/learn/manual/importing-3d-objects) for more information.

{% hint style="warning" %}
Folder with new character's model should be in MainCharacter > MainCharacter Body > Model
{% endhint %}
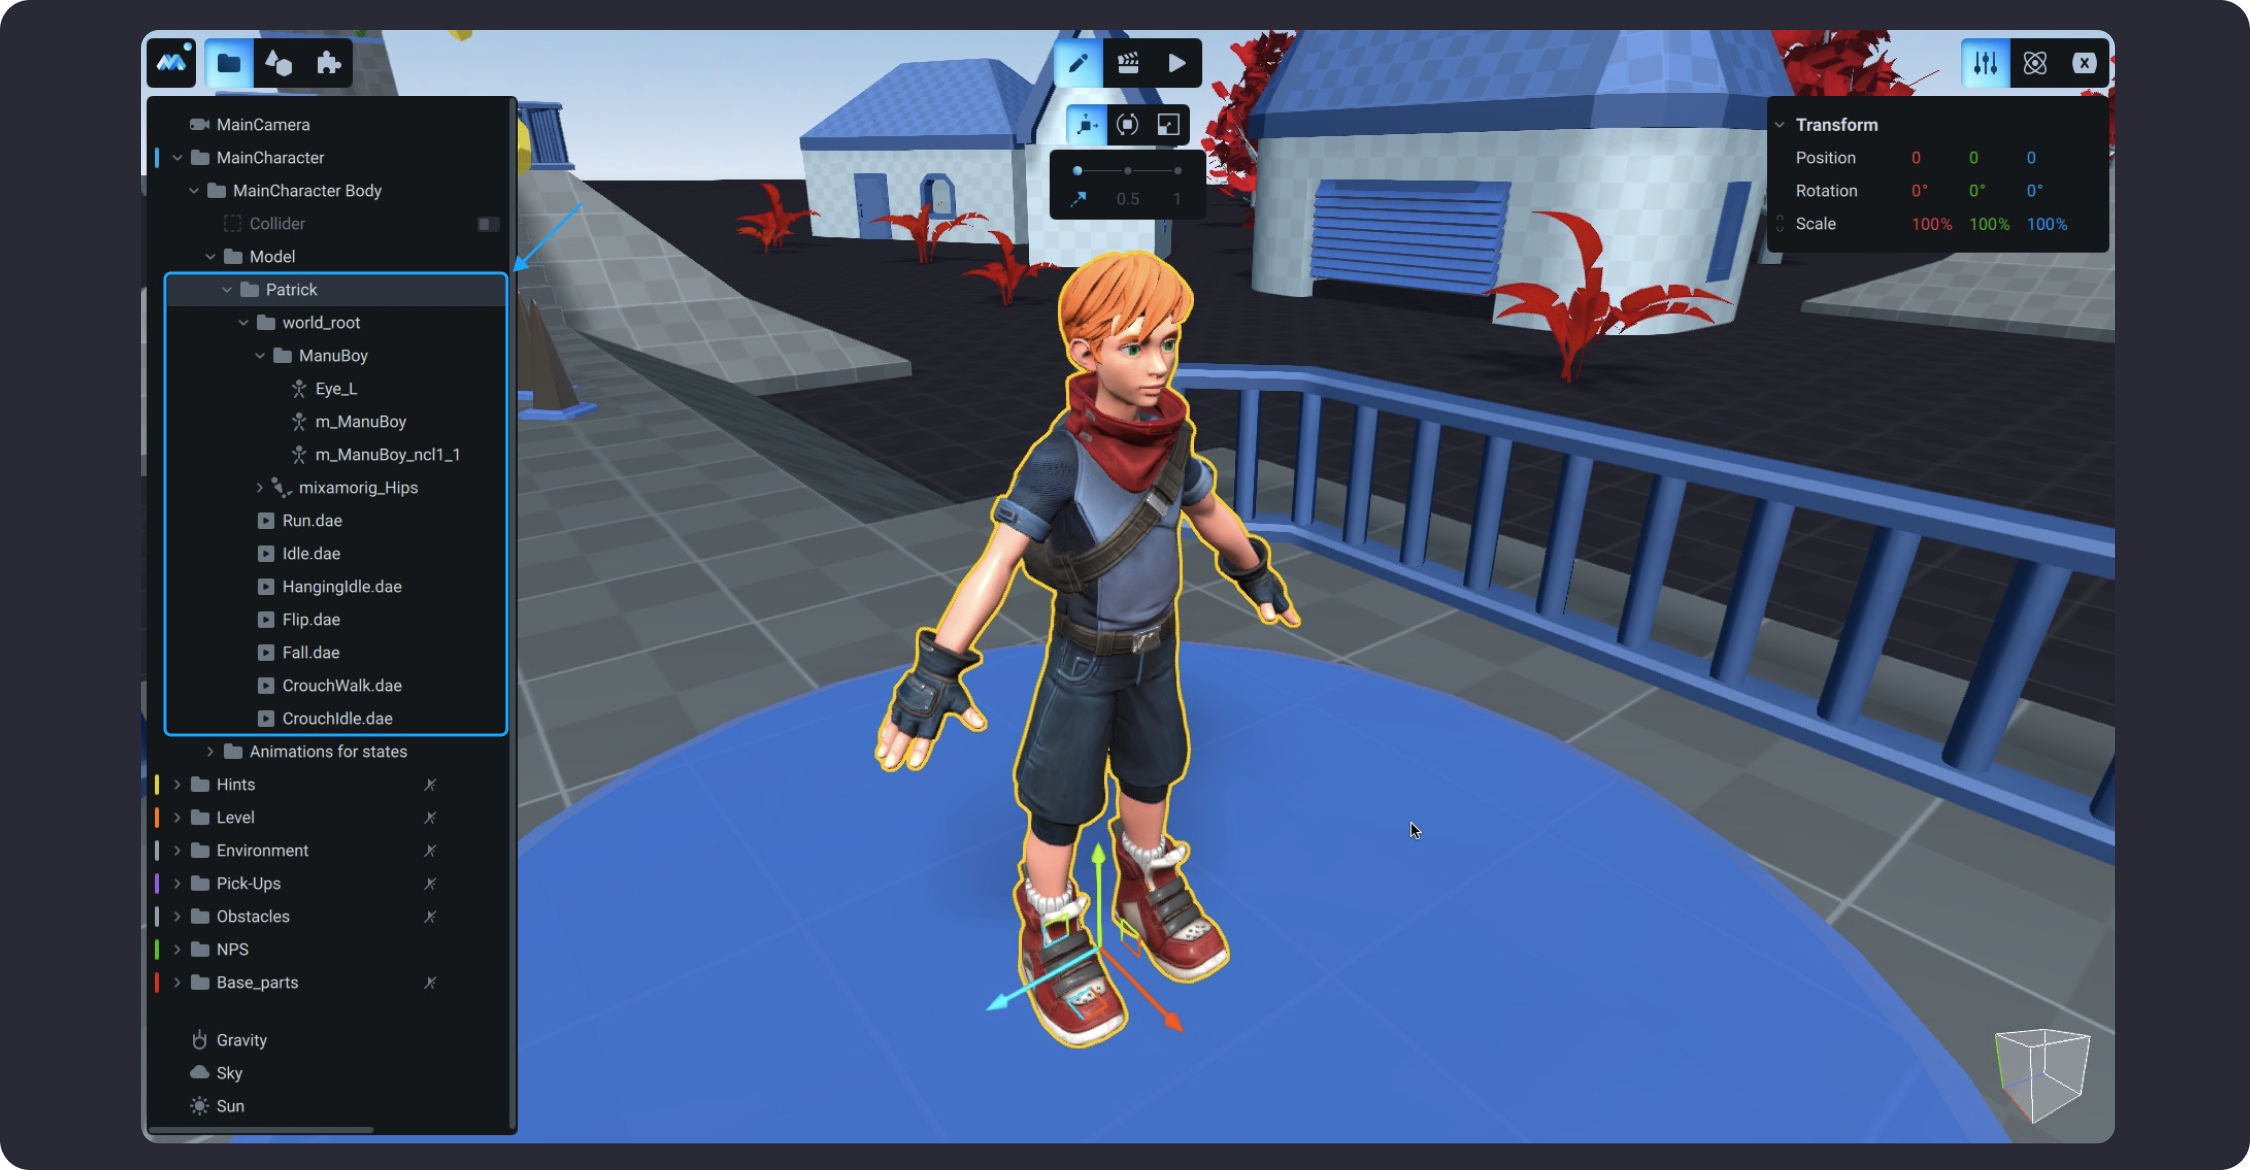
![](https://dl.dropboxusercontent.com/s/f67fcnhijp3fp1b/015.png?dl=0)

{% embed url="<https://dl.dropboxusercontent.com/s/m047twn46v2mlet/v002.webm>" %}

Also we need to check and tune physical collider for new model. Please see article [Physics](/learn/manual/physics) for more information about colliders.

![](https://dl.dropboxusercontent.com/s/ue72uqm737bwv9g/018.png)

![](https://dl.dropboxusercontent.com/s/g0pxvuswf2rg6kv/019.png)

Let's add new animations for main character. For that we need to insert new animations to specific timelines in folder "Animations for states". You can read article about inserted animations [here](/learn/manual/timeline#insert-an-animation).

![](https://dl.dropboxusercontent.com/s/ea51re4hsntnubv/016.png)

![](https://dl.dropboxusercontent.com/s/ic2e10tevgsycvs/017.png)

After all animations are inserted correctly your main character must be ready to use in the game. You may now check the work of mechanics in the Game Mode.
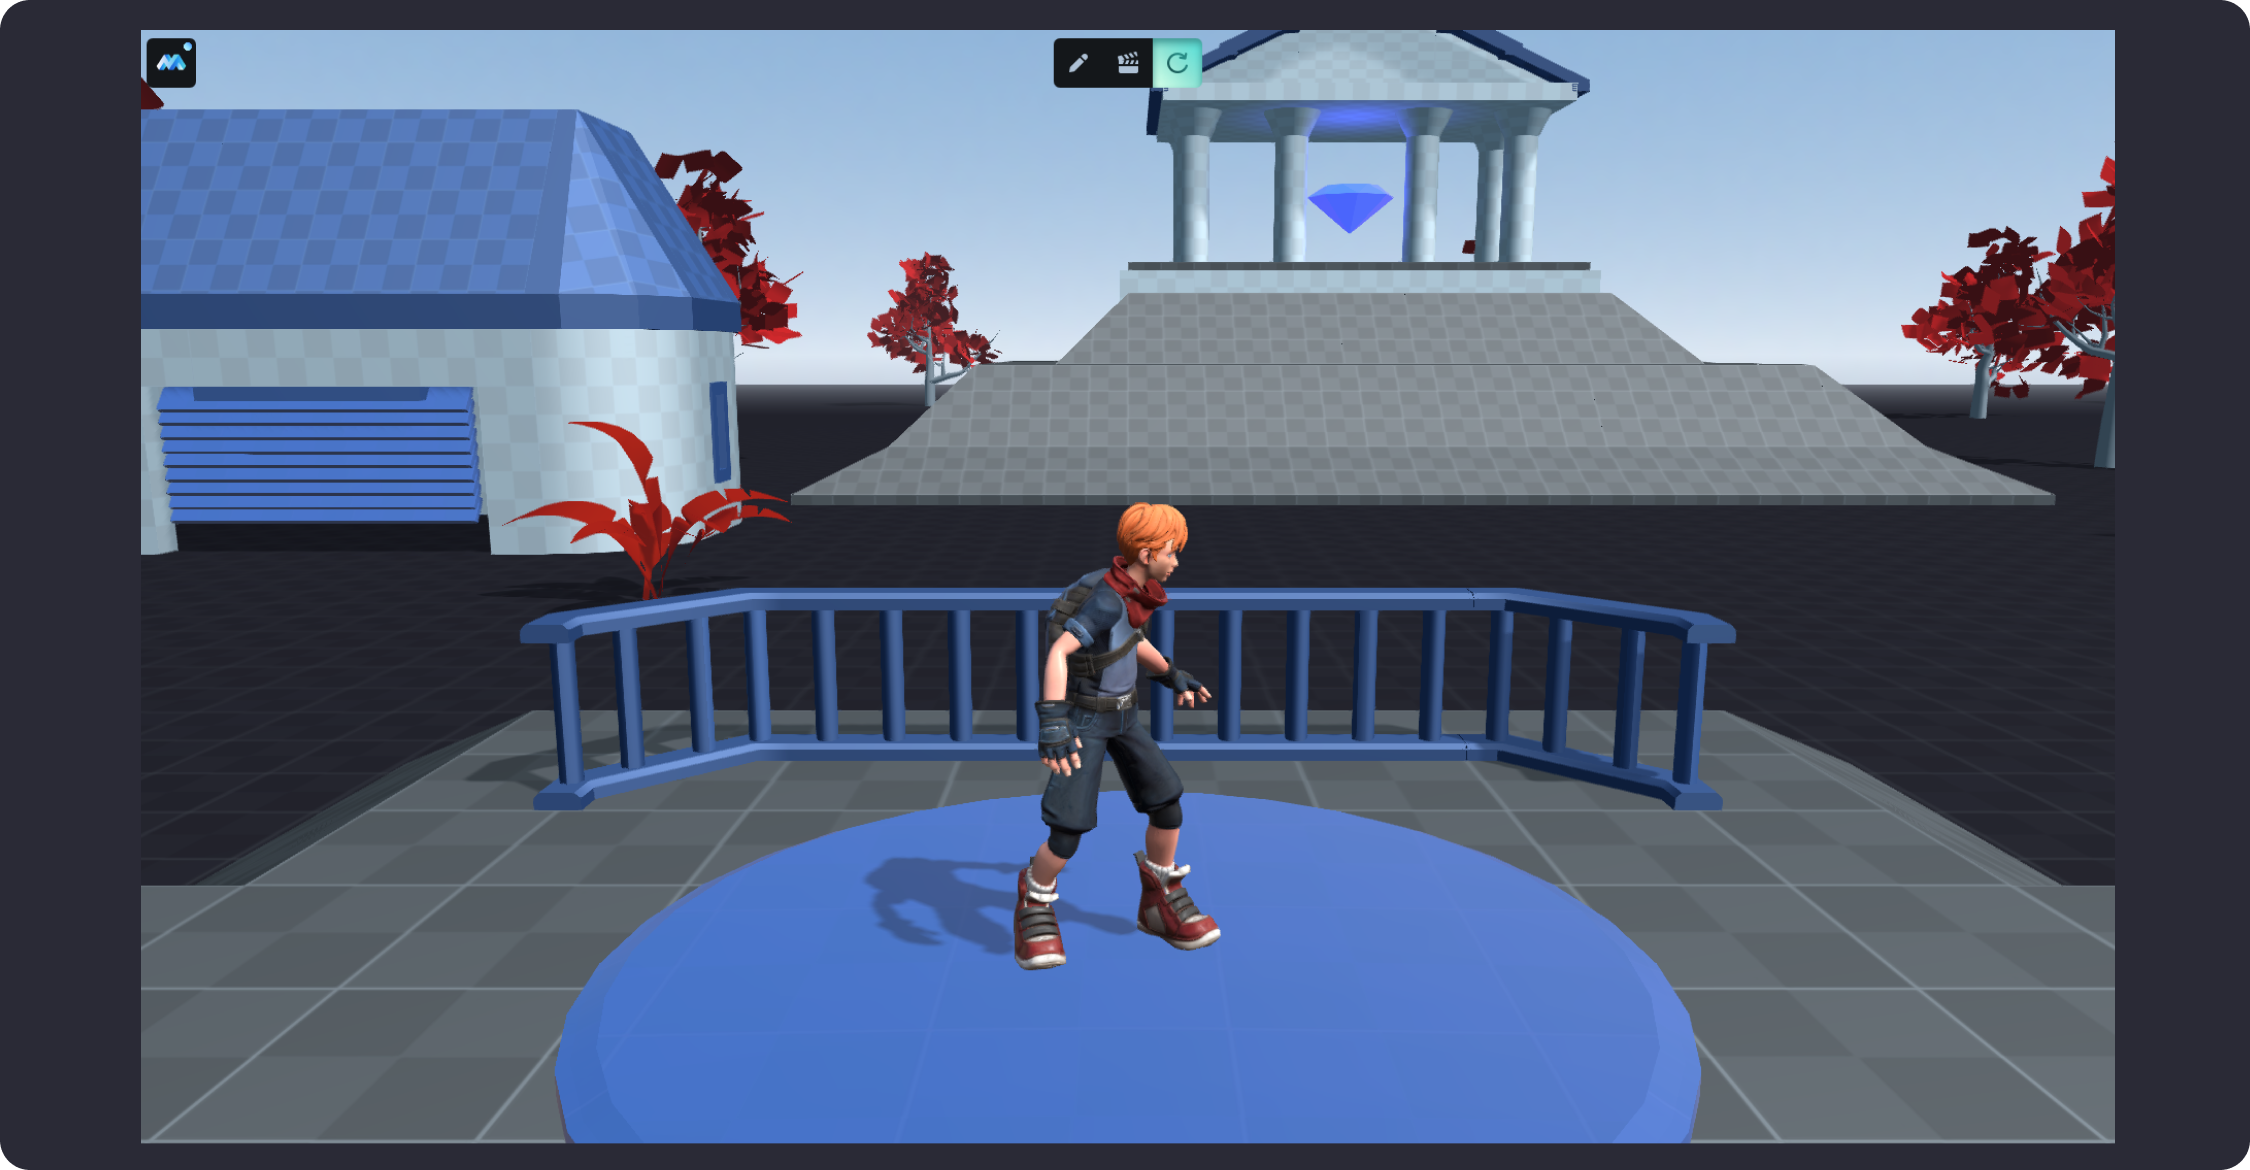
![](https://dl.dropboxusercontent.com/s/peii9n6s7xh26t5/023.png?dl=0)

## **Tips for using animations from Mixamo** &#x20;

You can use animations created on the [Mixamo](https://www.mixamo.com/) website for your model/character. When downloading the animation from the website, do not forget to check the "in place" box if there is one.&#x20;

![](https://dl.dropboxusercontent.com/s/39ijqlue065fho7/022.png)

In this case, you will be able to download the animation, which will be played correctly in MANU (the character will not move anywhere and will be in the position you need). However, if Mixamo does not offer you to download the correct animation and there is no "in place" box option to click, you still can download and use this animation. But this animation will move the position of the model (the model will exit the capsule/StateMachine). You can see it in the image below.

![](https://dl.dropboxusercontent.com/s/fi653ailpn803x3/024.png)

To solve this issue, we recommend that you add an extra track to the Timeline and animate the main folder of the imported character (parent folder). After that, on this track, set the correct values for Positions, so that the model/character does not move in the Scene. See details in the image below.

![](https://dl.dropboxusercontent.com/s/opsx1lmgc3y64io/025.png)

As you can see on the screenshot below, there is a MainCharacterBody folder added to the Timeline. Keep it as it is. Due to the presence of this folder in the Timeline, the character works correctly.


# Camera

Main Camera, also called the Game Camera, is one of the default units of every scene in MANU. Each project in MANU includes the Main Camera that is available in the Scene tree. The Main Camera represents the player's point of view and how the player sees the world in the Game mode. This section introduces an overview of the main camera properties, postprocessing and its variables.
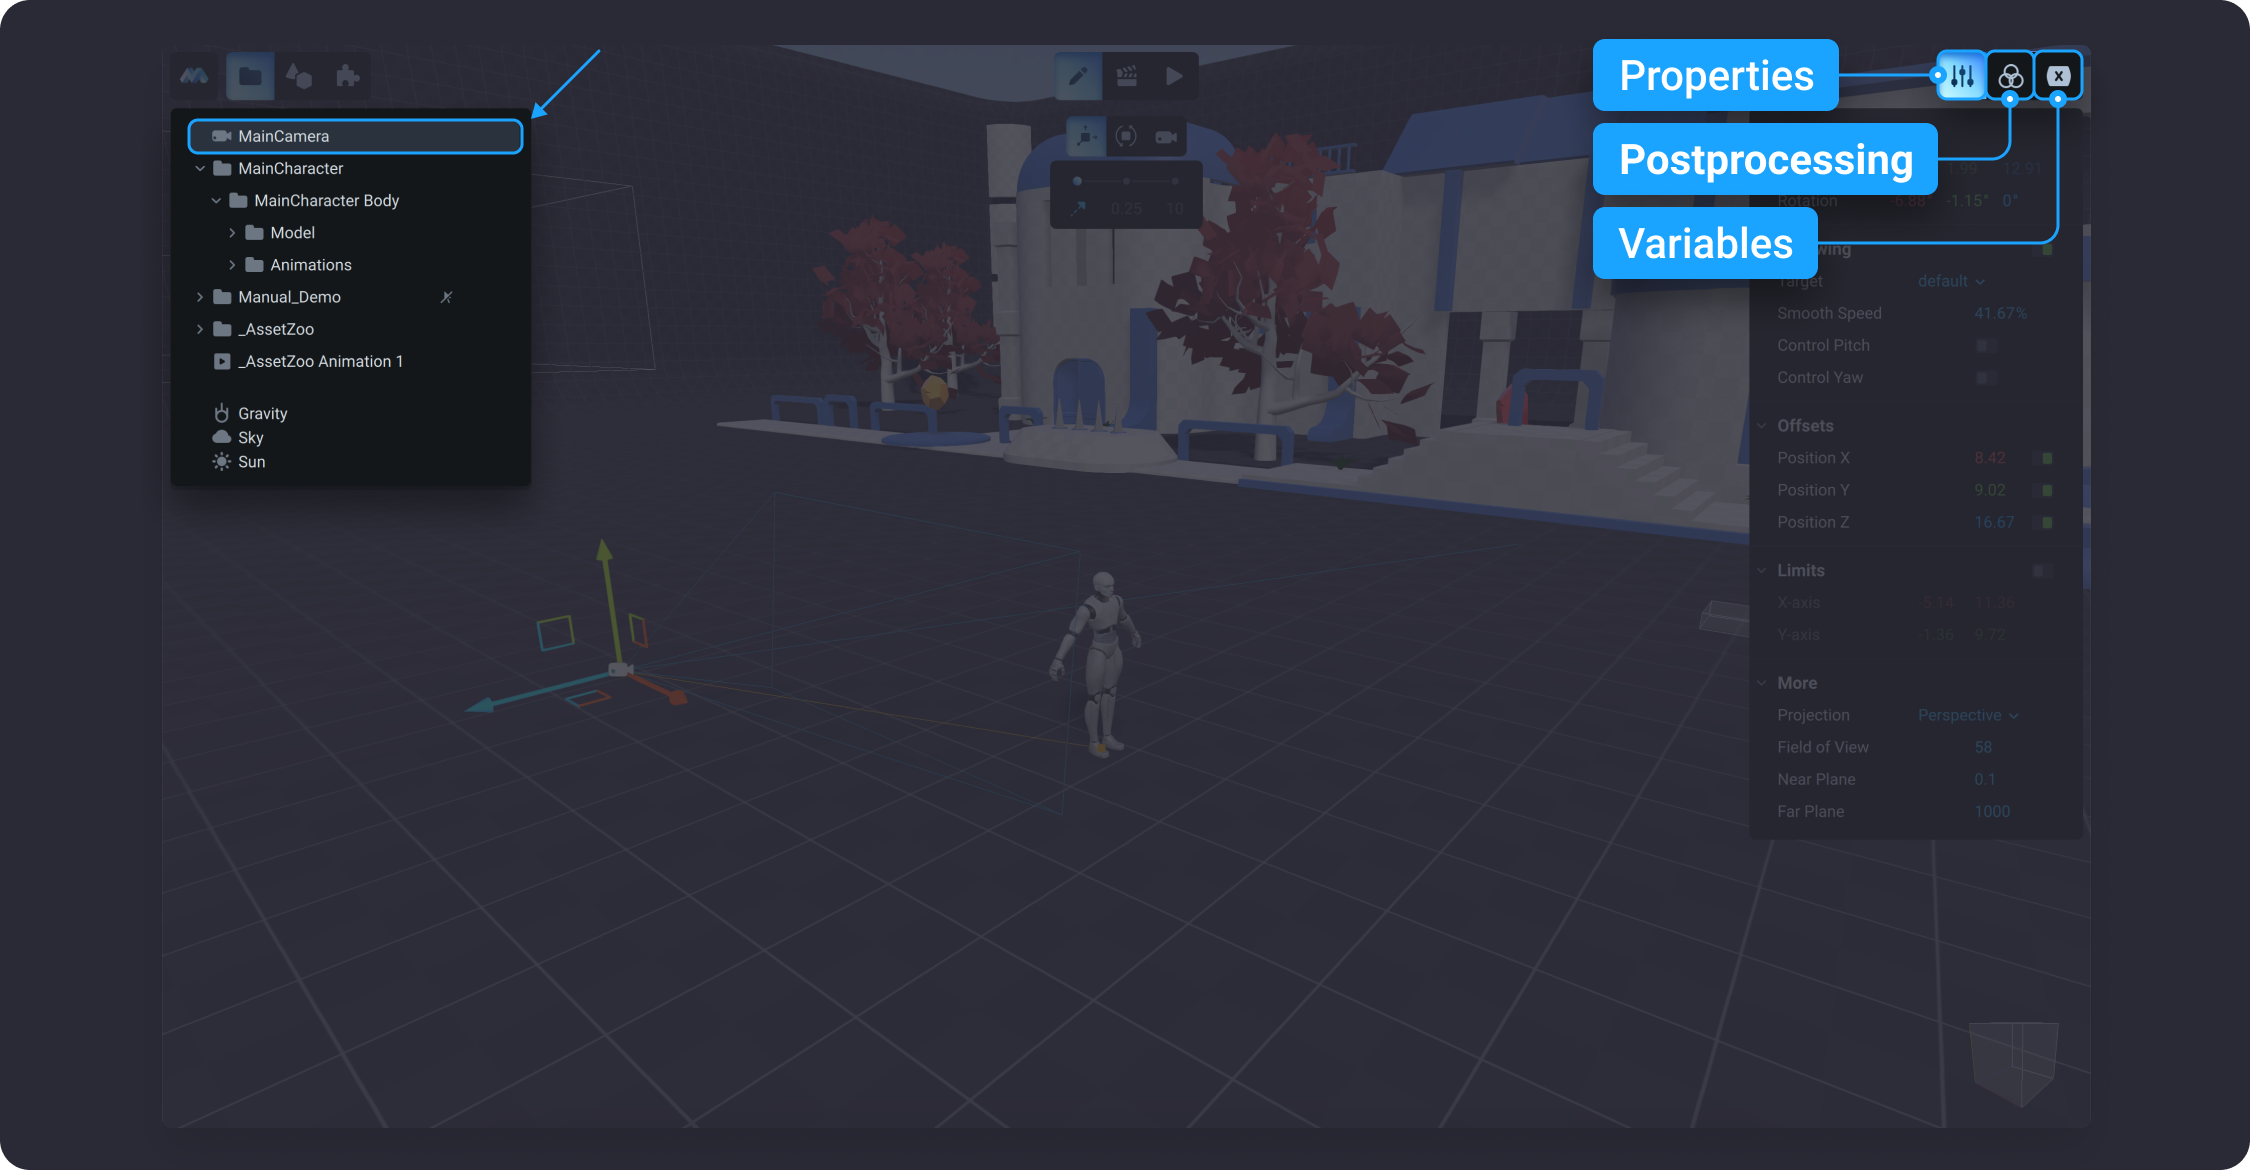
![](https://dl.dropboxusercontent.com/s/36ld00ispwxc18c/001.png?dl=0)

## Properties

With a Main Camera selected in the Edit mode, you will notice that the Properties panel on the right hand side of the screen becomes populated with settings that pertain to the Main Camera. Below is an overview of each section in the Properties panel for a Main Camera.

### Transform

In MANU, the modification of parameters for the position of Main Camera is unavailable because the Camera Follow option (see below) is ON by default. However, you can modify the settings for rotation by entering the appropriate numeric values for each axis to define the angle of the camera.
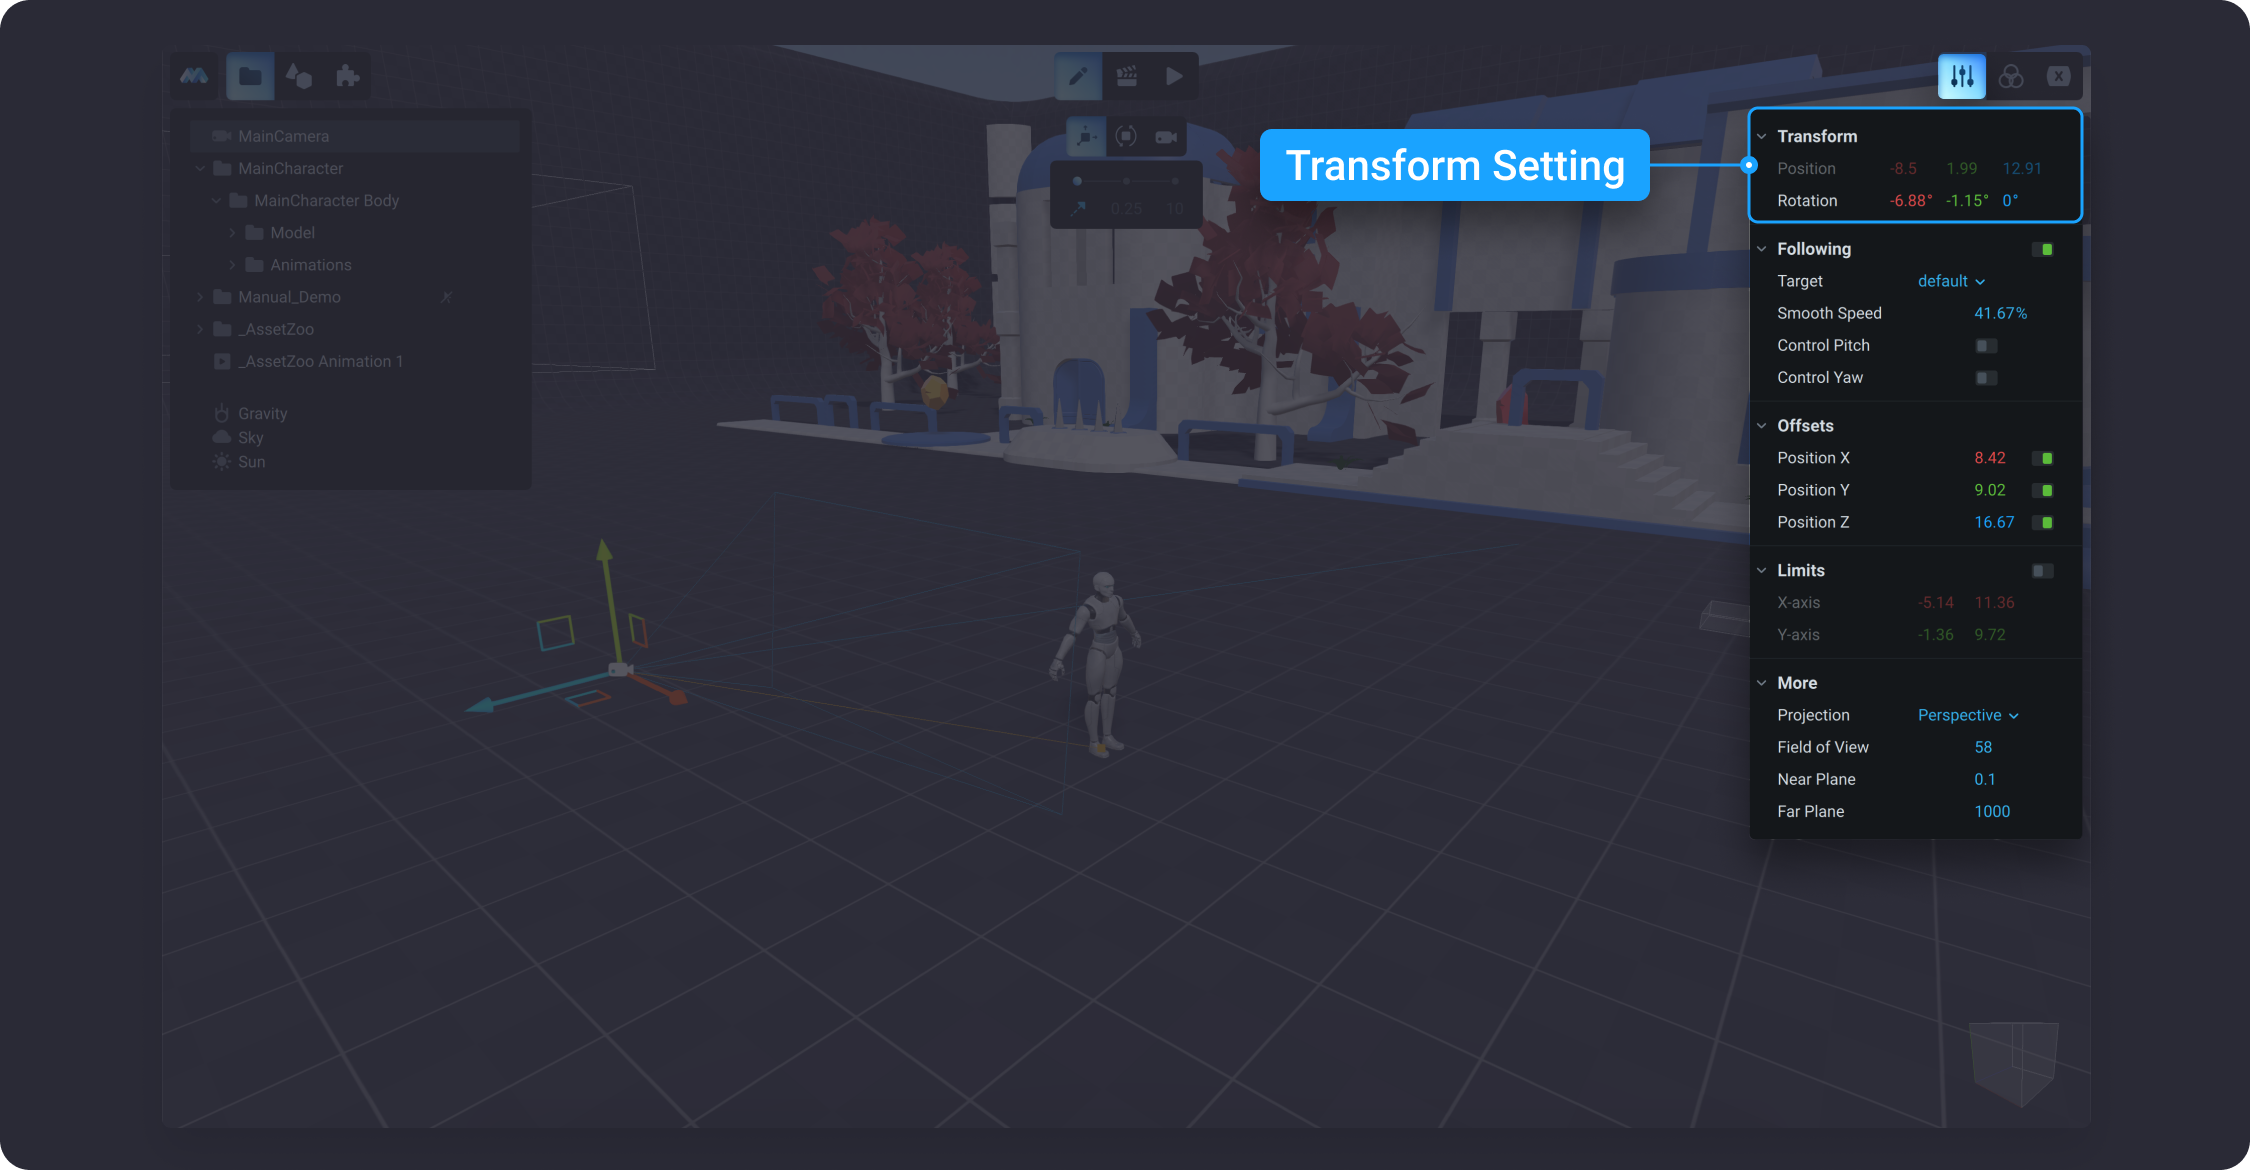
![](https://dl.dropboxusercontent.com/s/6gw3cfnw972psai/002.png?dl=0)

### Camera Follow

This subsection represents general properties for the main camera follow, as well as offsets and camera limits settings.

By default, the main camera follow is enabled. When it’s enabled, you can animate the Main Camera Follow in the animation timeline by adding Follow Enabled into the camera animation track. To learn more about how to animate the position and rotation of the main camera, go to **Animating Main Camera.**
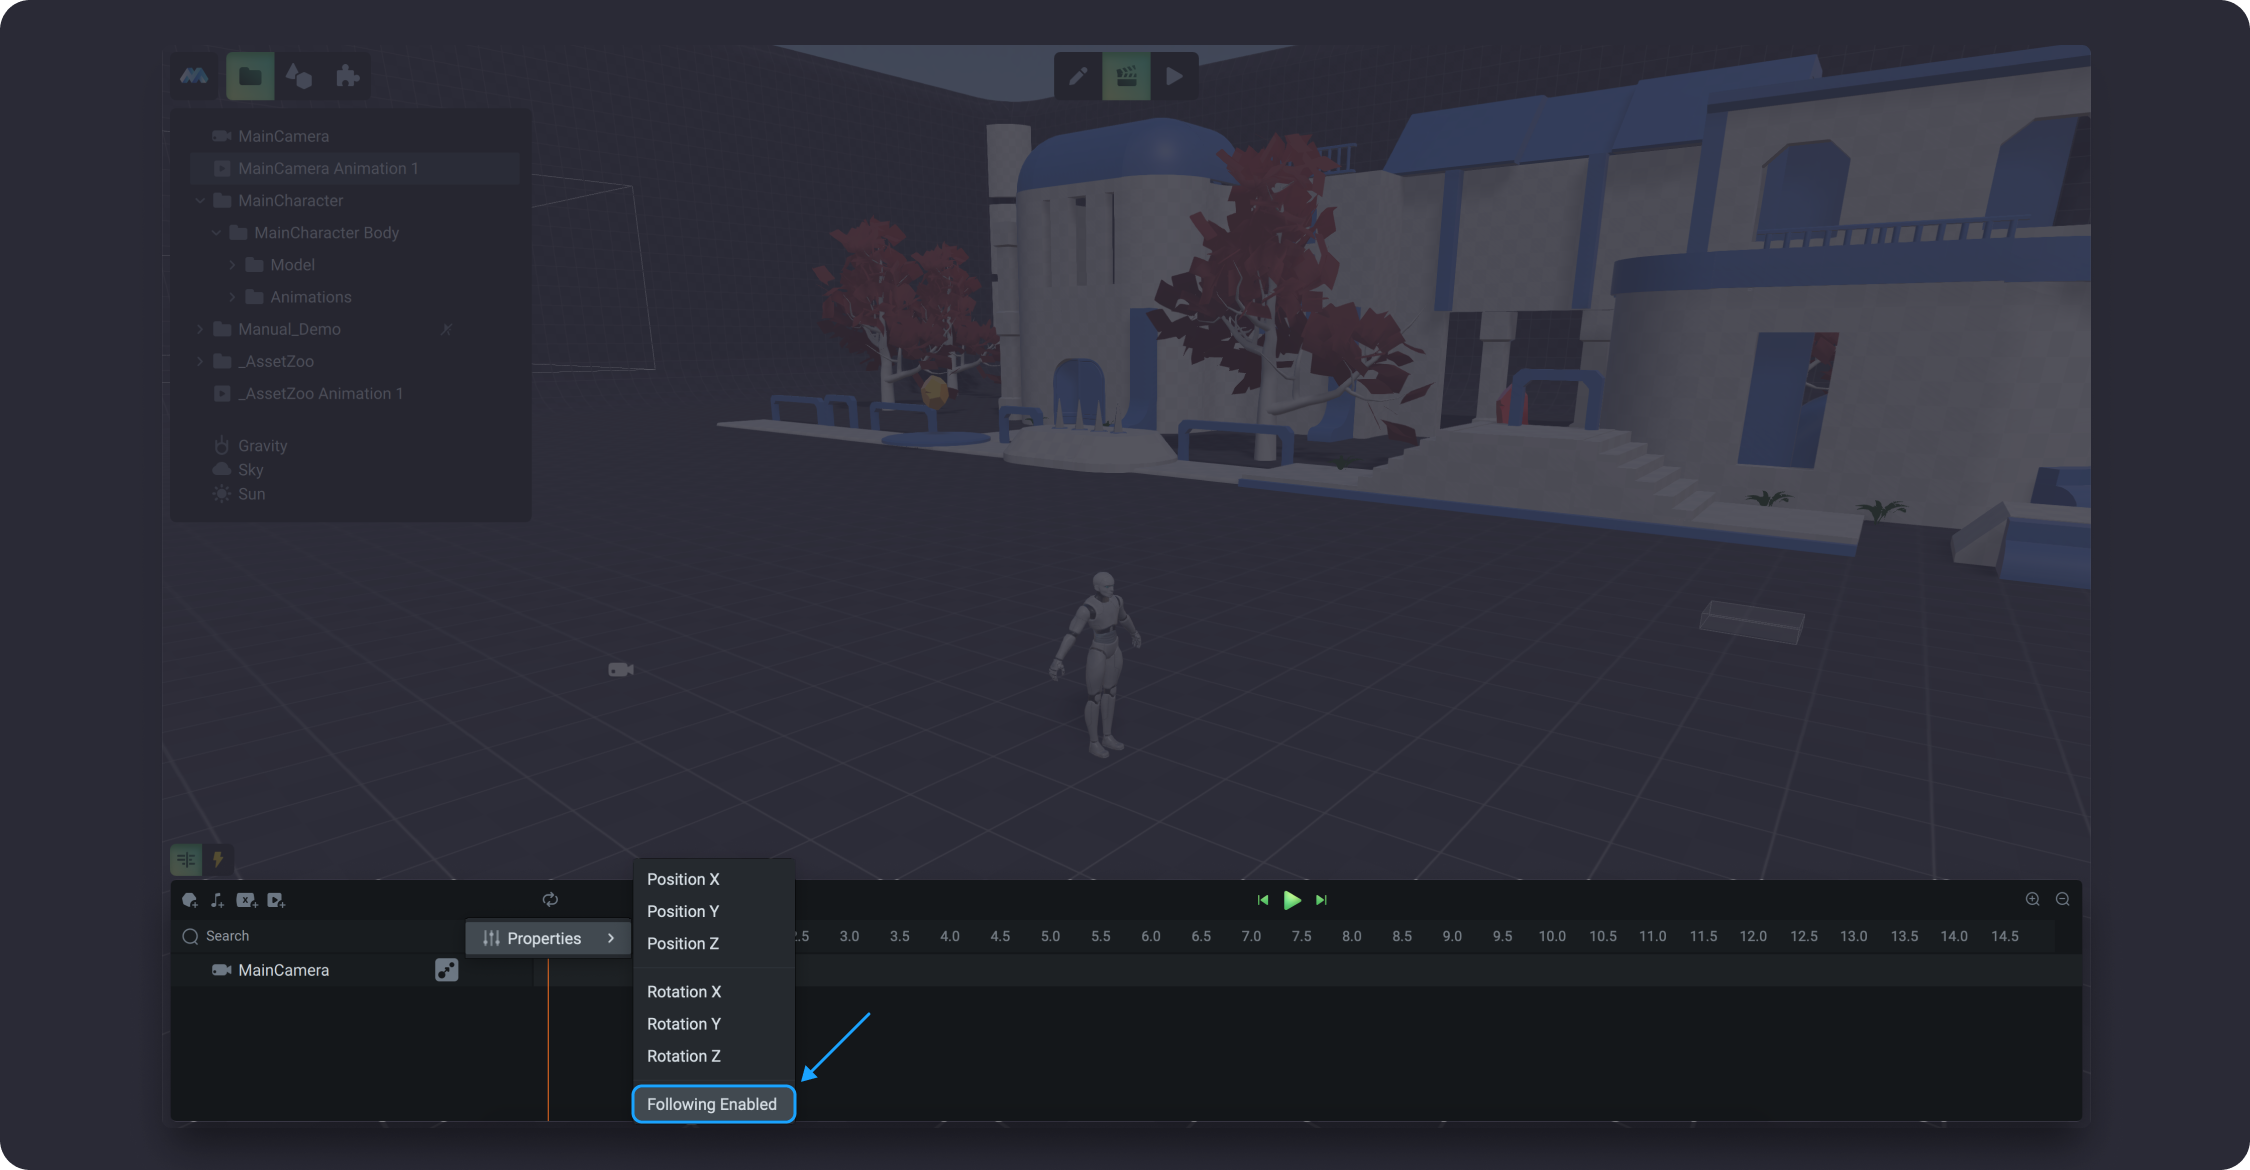
![](https://dl.dropboxusercontent.com/s/28goawl7ur5d86c/003.png?dl=0)

To disable the Camera Follow setting, turn the toggle OFF in the properties tab to unapply all settings for camera follow, including settings for offsets. When the Follow is disabled, the Transform settings for Main Camera position become available along with rotation. Please note, that there is an interdependence between the availability of settings for Camera Follow and Transform properties, where the settings for Transform work only when Follow is disabled, and vice versa.
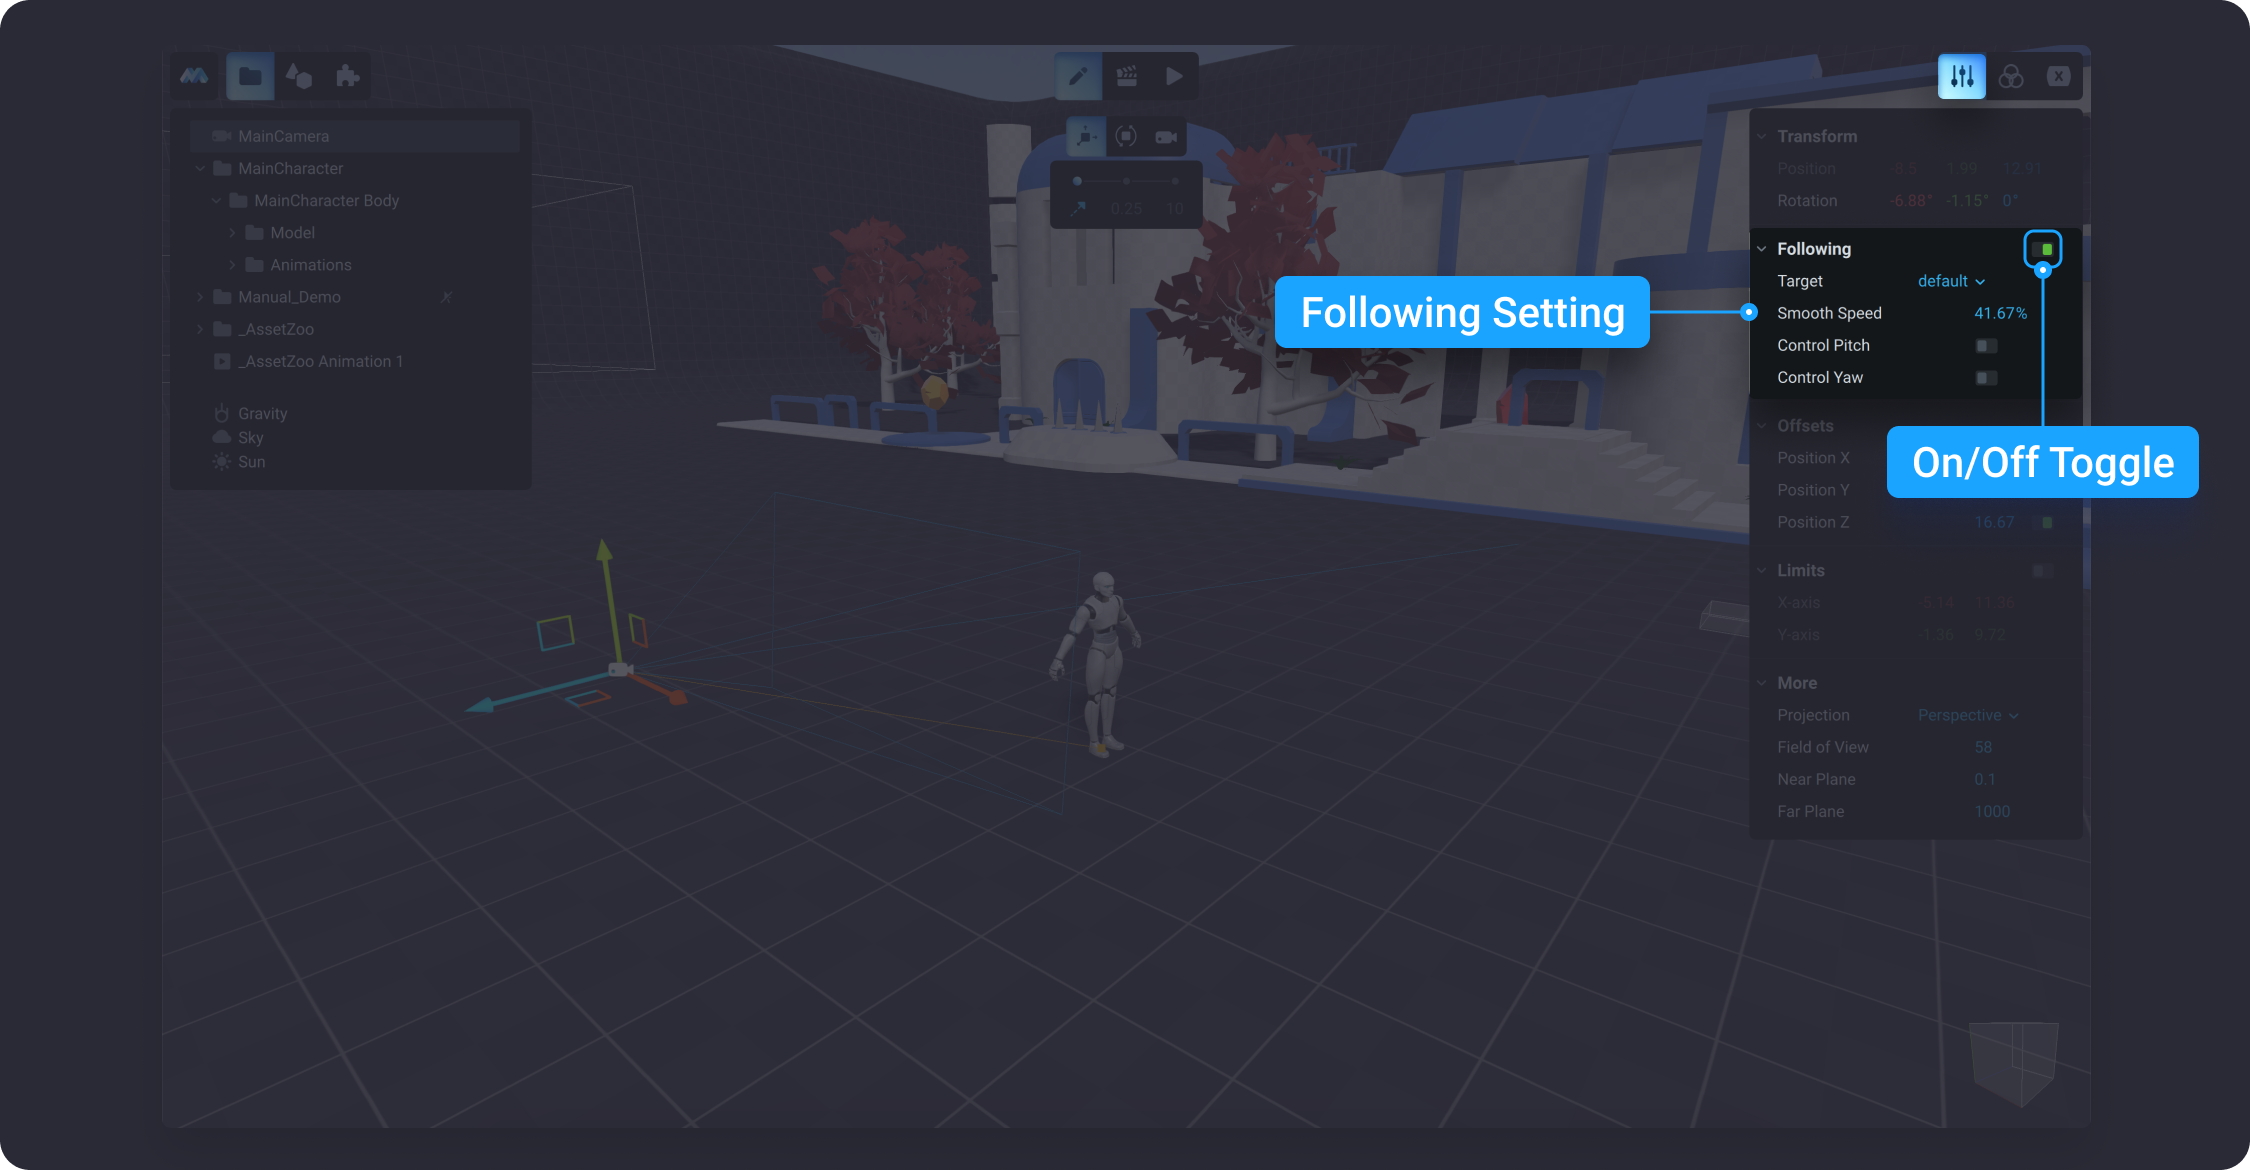
![](https://dl.dropboxusercontent.com/s/exvbpgnje1om94e/004.png?dl=0)

The properties for camera follow include settings for target, smooth speed, control pitch, and control yaw. The description of each is introduced below.

#### Target

The target represents the object in the scene the main camera is set up to follow in the Game mode. By default, it is set up to follow the Main Character. You can modify the default target object by selecting the one you want the camera to follow in the game. There is a drop-down list of objects in your scene you can assign as a target object.
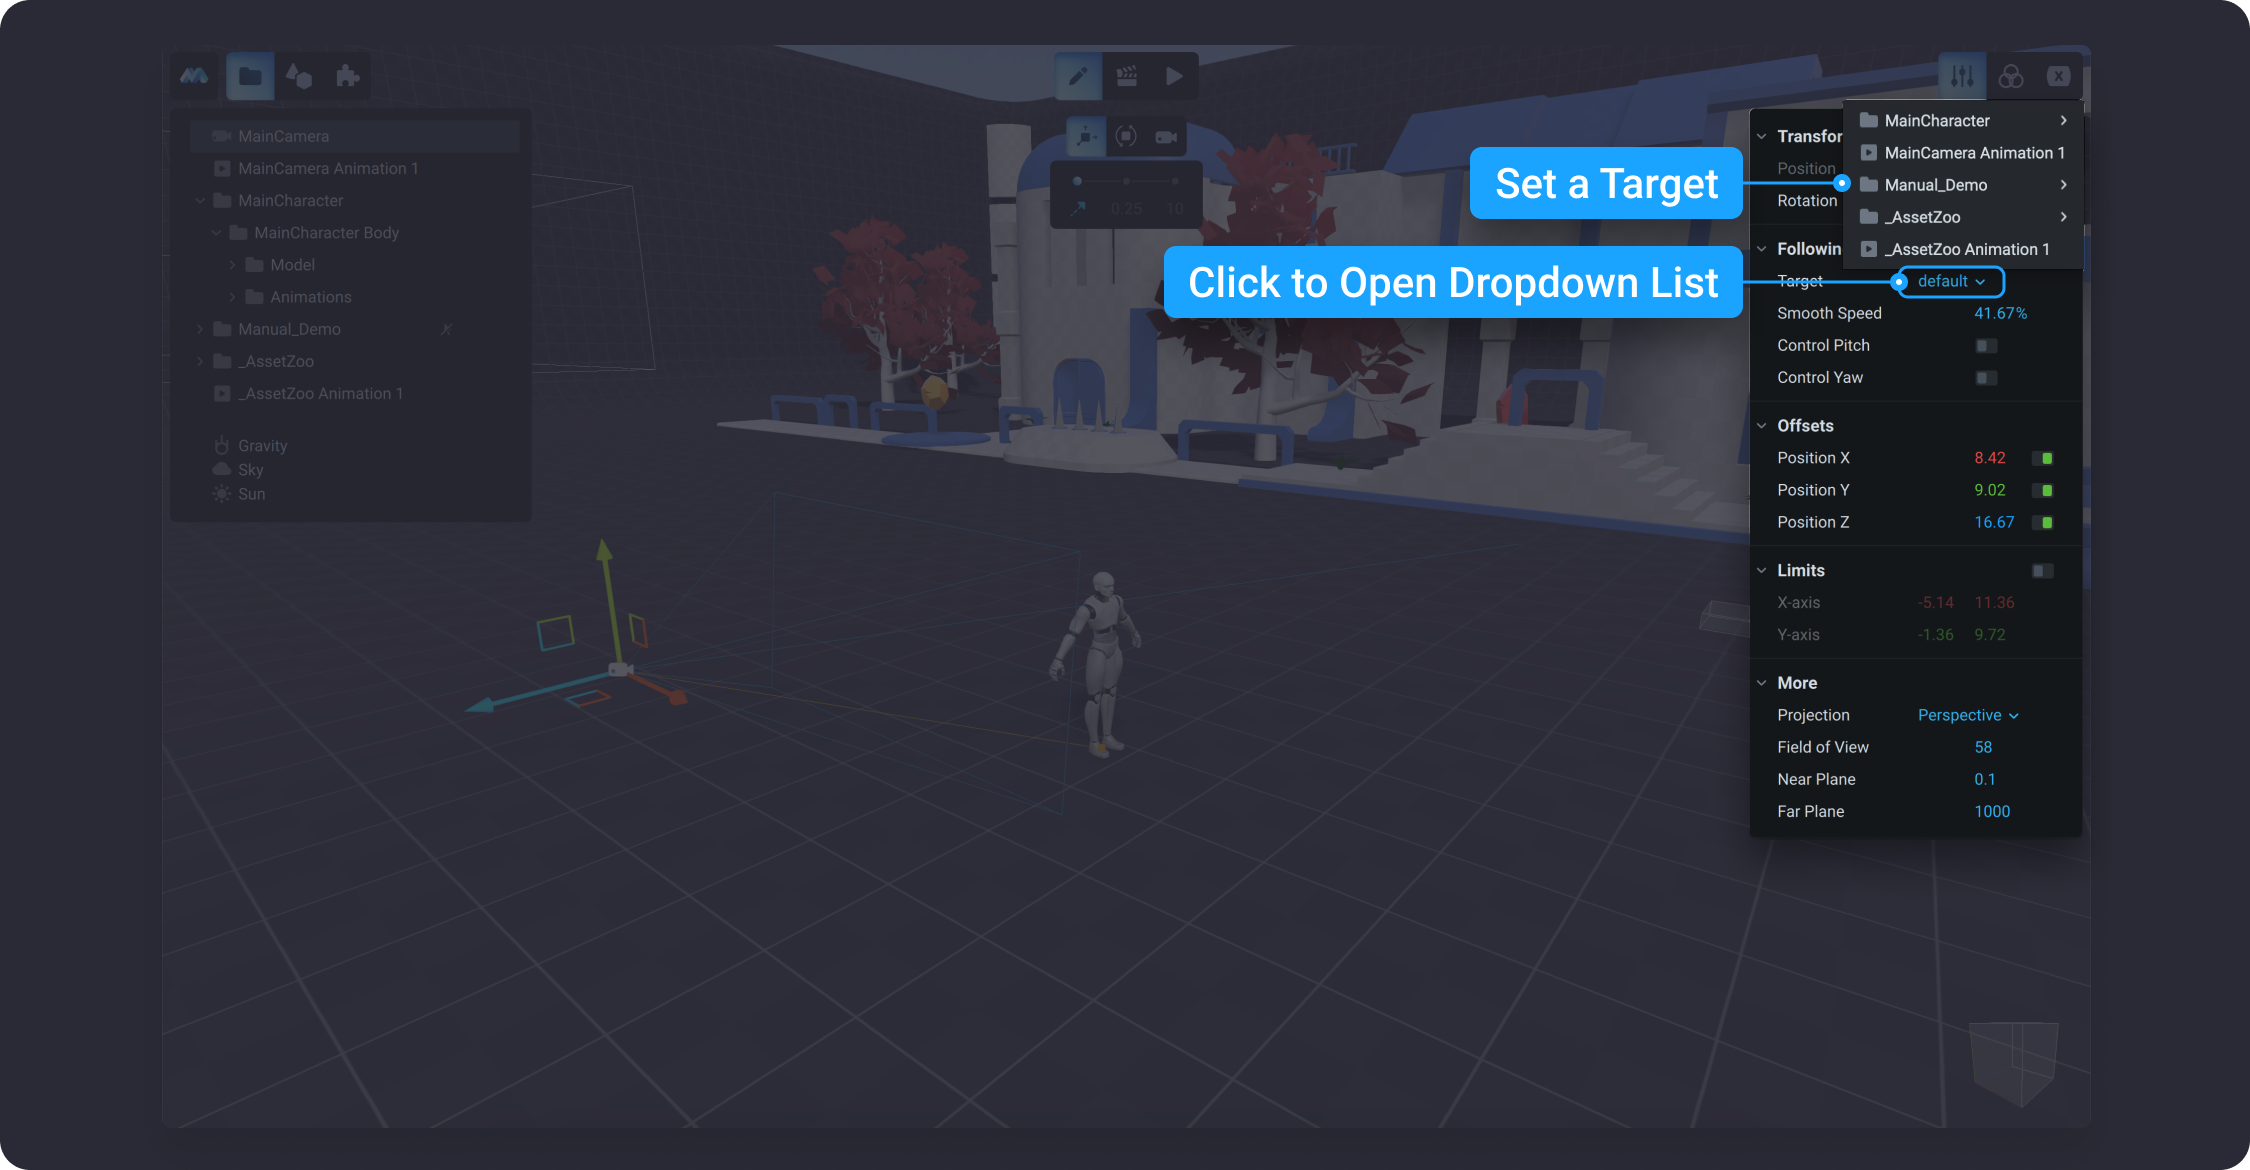
![](https://dl.dropboxusercontent.com/s/07li6m2nz8918x6/005.png?dl=0)

#### Smooth Speed

The smooth speed allows you to tune the smoothness of the main camera's follow speed. The value for this setting is represented in percentages and varies from 0 to 100%. If you set 0% for smooth speed, it would stop the camera's follow movement, and at 100% there would be no delay in it’s movement at all.

**Control Pitch and Yaw**

Control Yaw and Control Pitch describe the rotation of the camera in the 3D space around one of the axes. Think of yourself as the camera and look around. Control Yaw is the angle when moving the head left ↔ right (rotation around Y-axis). Control Pitch is up and down (rotation around X-axis).
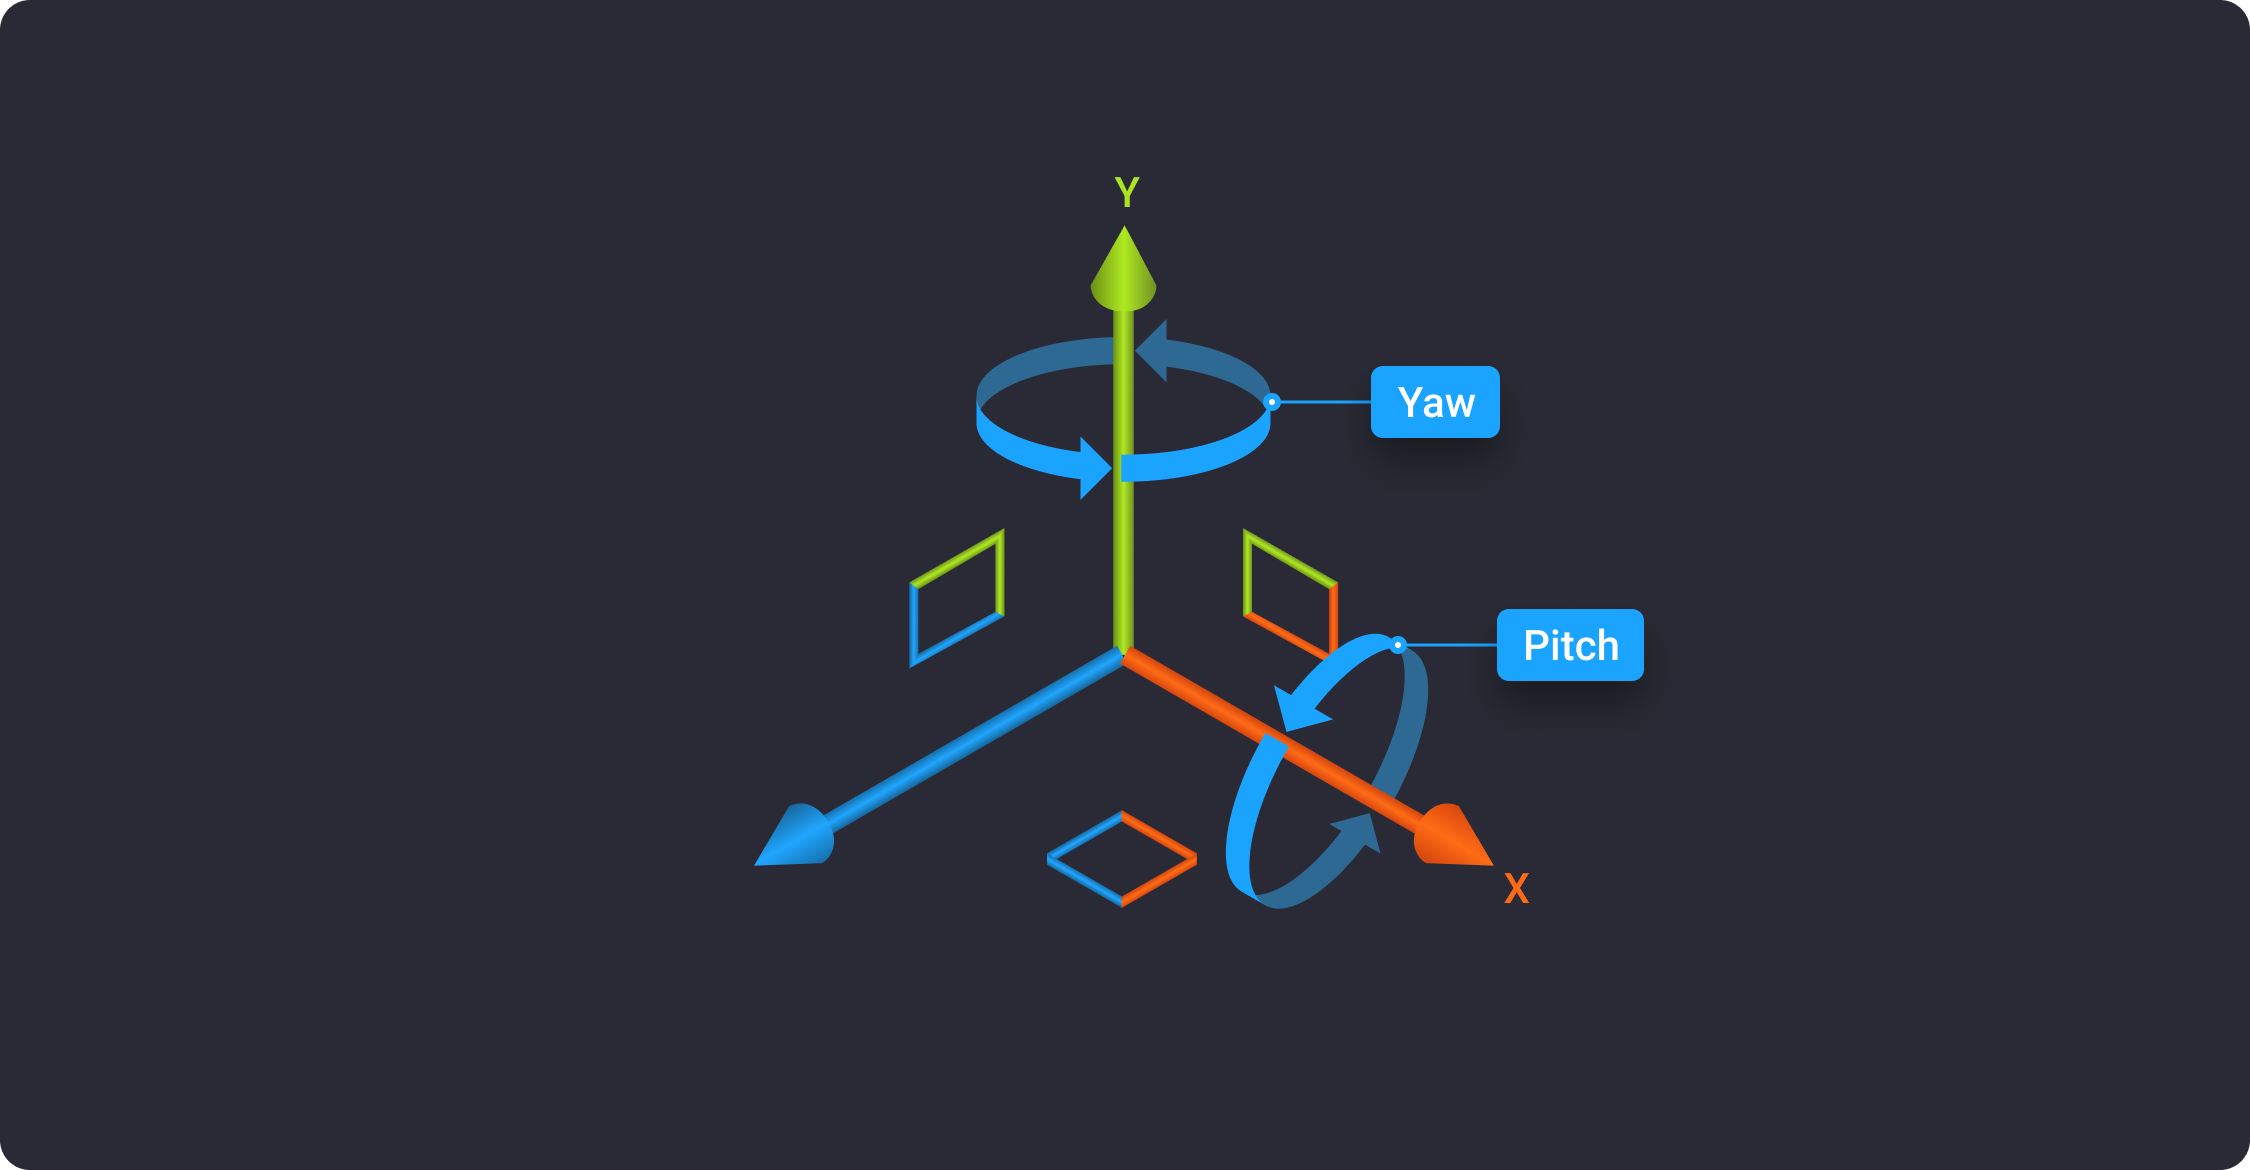
![](https://dl.dropboxusercontent.com/s/r7pznlnt7edhgi7/006.png?dl=0)

These settings are disabled by default, you can enable them by turning the toggle ON in the properties tab.
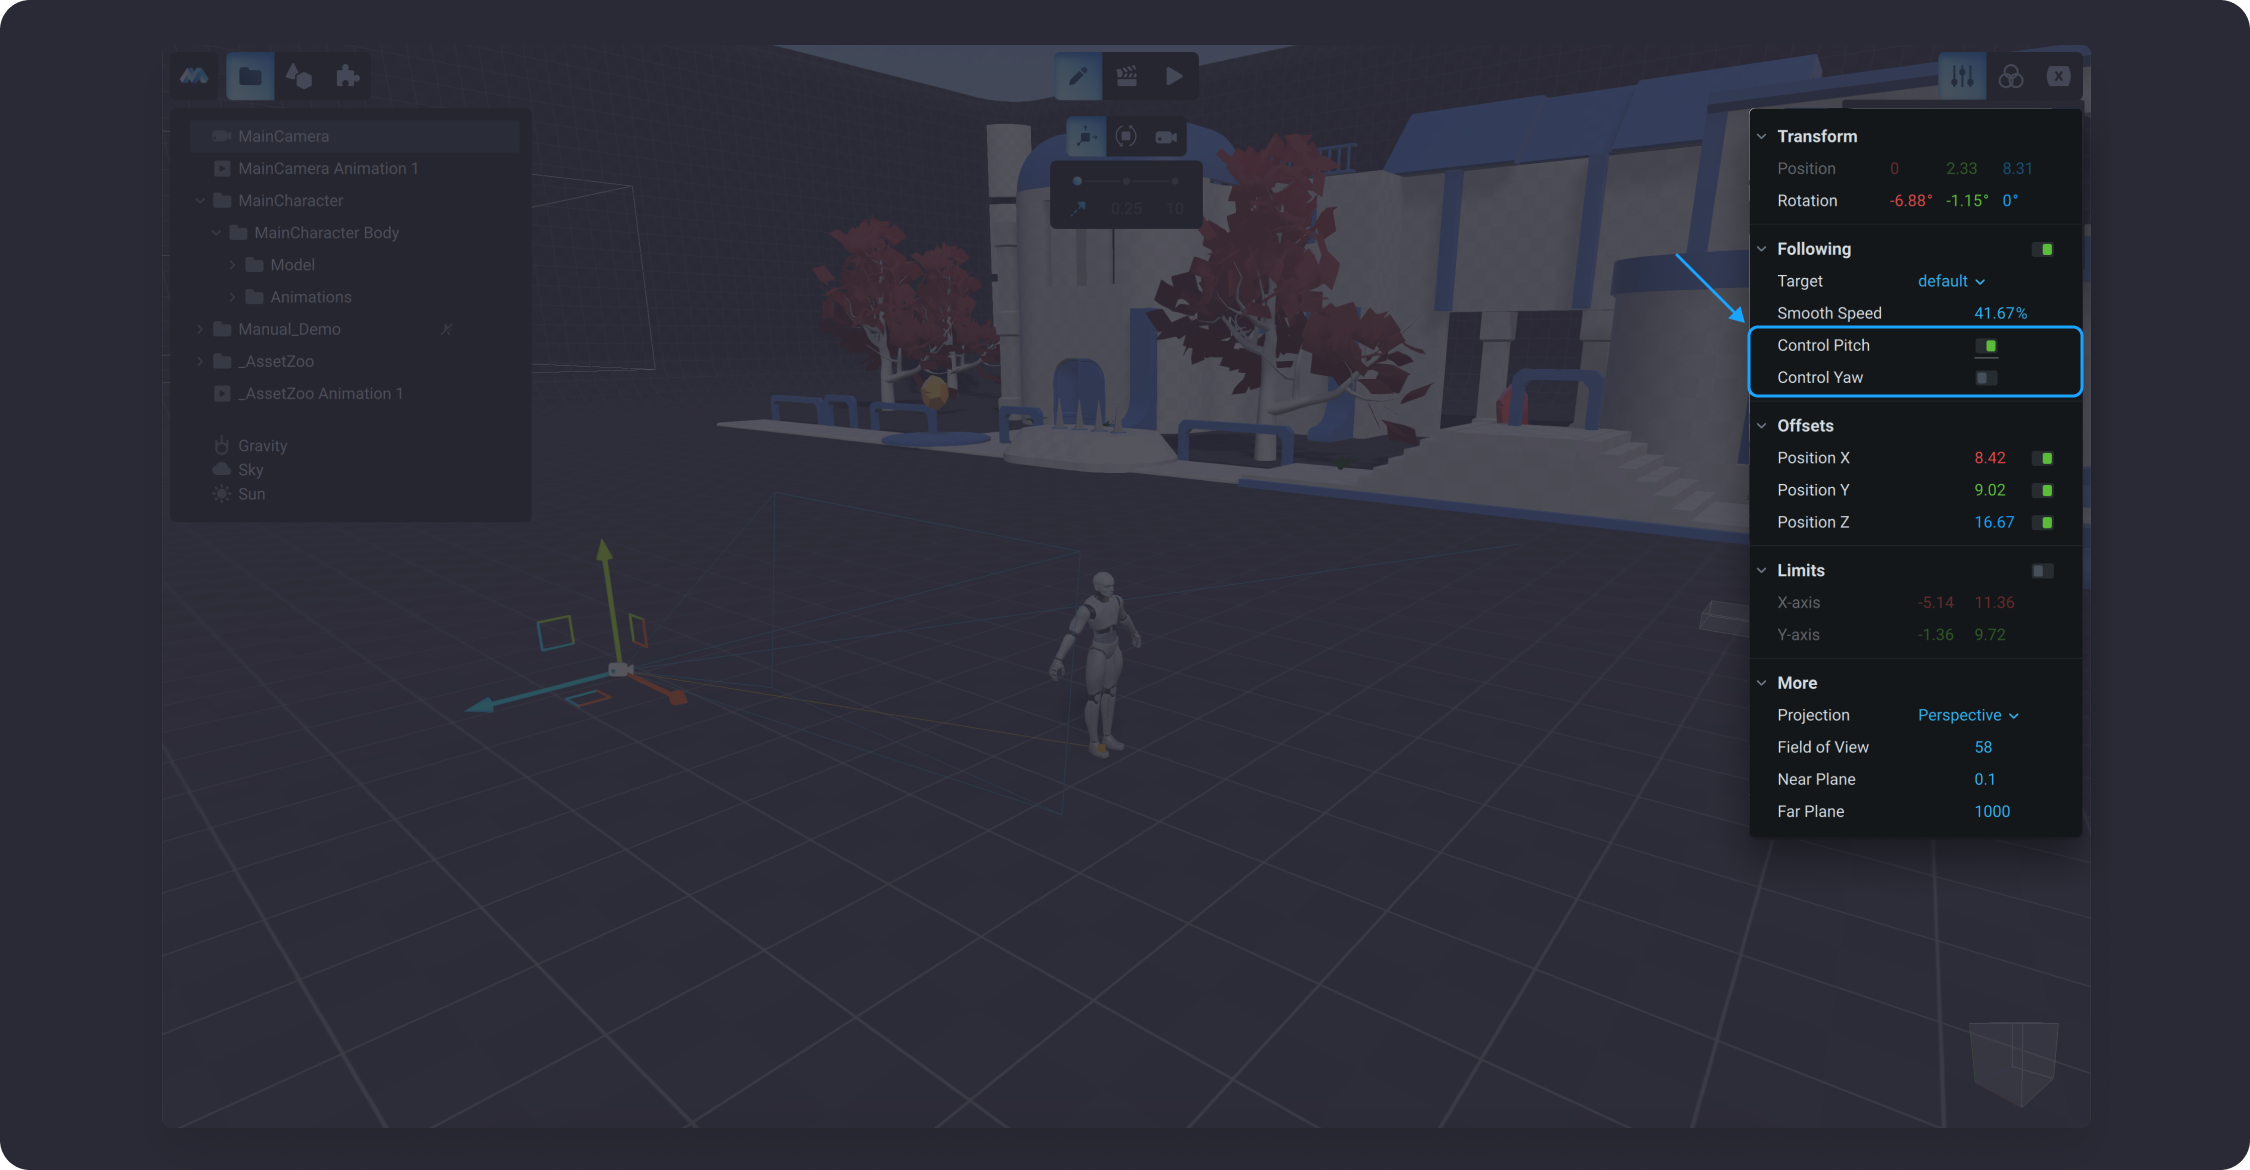
![](https://dl.dropboxusercontent.com/s/s588h30vyk9wg81/007.png?dl=0)

Control Pitch

{% embed url="<https://dl.dropboxusercontent.com/s/2yvqlb749edigyb/v001.mp4>" %}

Control Yaw

{% embed url="<https://dl.dropboxusercontent.com/s/3fkel9whnd9vgkg/v002.mp4>" %}

Control Pitch + Control Yaw

{% embed url="<https://dl.dropboxusercontent.com/s/vh02ygku8rrrwkr/v003.mp4>" %}

#### Offsets

Offset is the distance between the main camera and its target object. Enter a numeric value for each axis to specify the offsets that should be kept during the game. Also, you can toggle On and OFF the offset for each axis.

{% hint style="info" %}
When the Offsets are ON, the Main Camera’s position is calculated based on the offset values of Position X, Y, and Z. The parameters in the Transform section will NOT be taken into account.
{% endhint %}
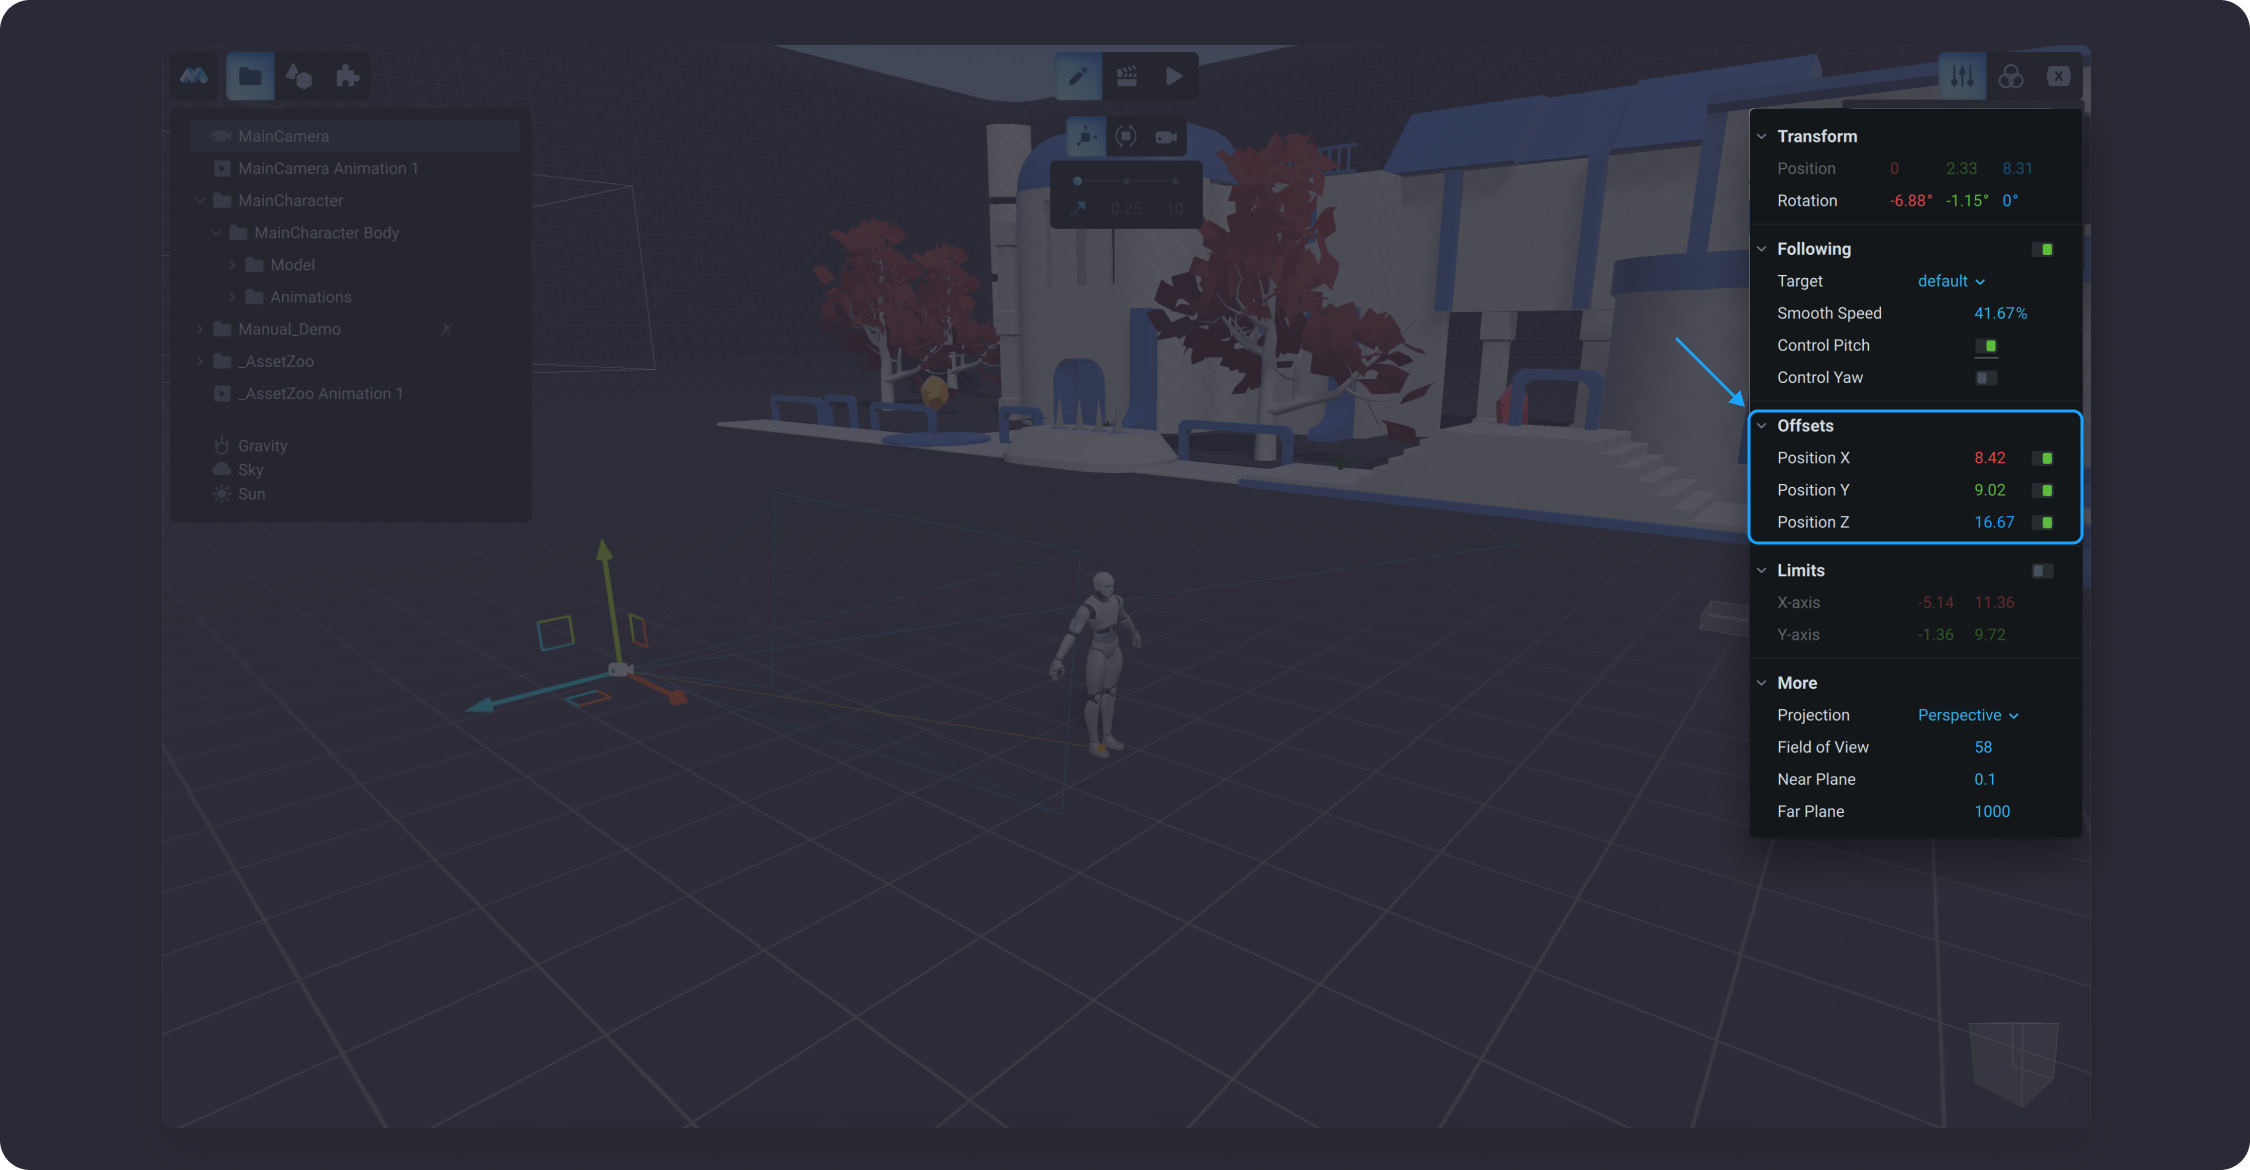
![](https://dl.dropboxusercontent.com/s/3f3q0e0ml63bjci/008.png?dl=0)

#### Limits

The Main Camera Limit represents the boundaries for camera movements. With these parameters set up, the main camera displays what it presently “sees” on the screen. As the target object moves, the displayed view will also move accordingly. Settings for camera limits can be modified in the Limits section of the Properties tab in the Edit mode.

By default, the main camera limits are enabled. You can disable it by turning the toggle OFF. Disabling the camera limits option will have the camera follow the target object while keeping it in the center of the screen in the Game mode.
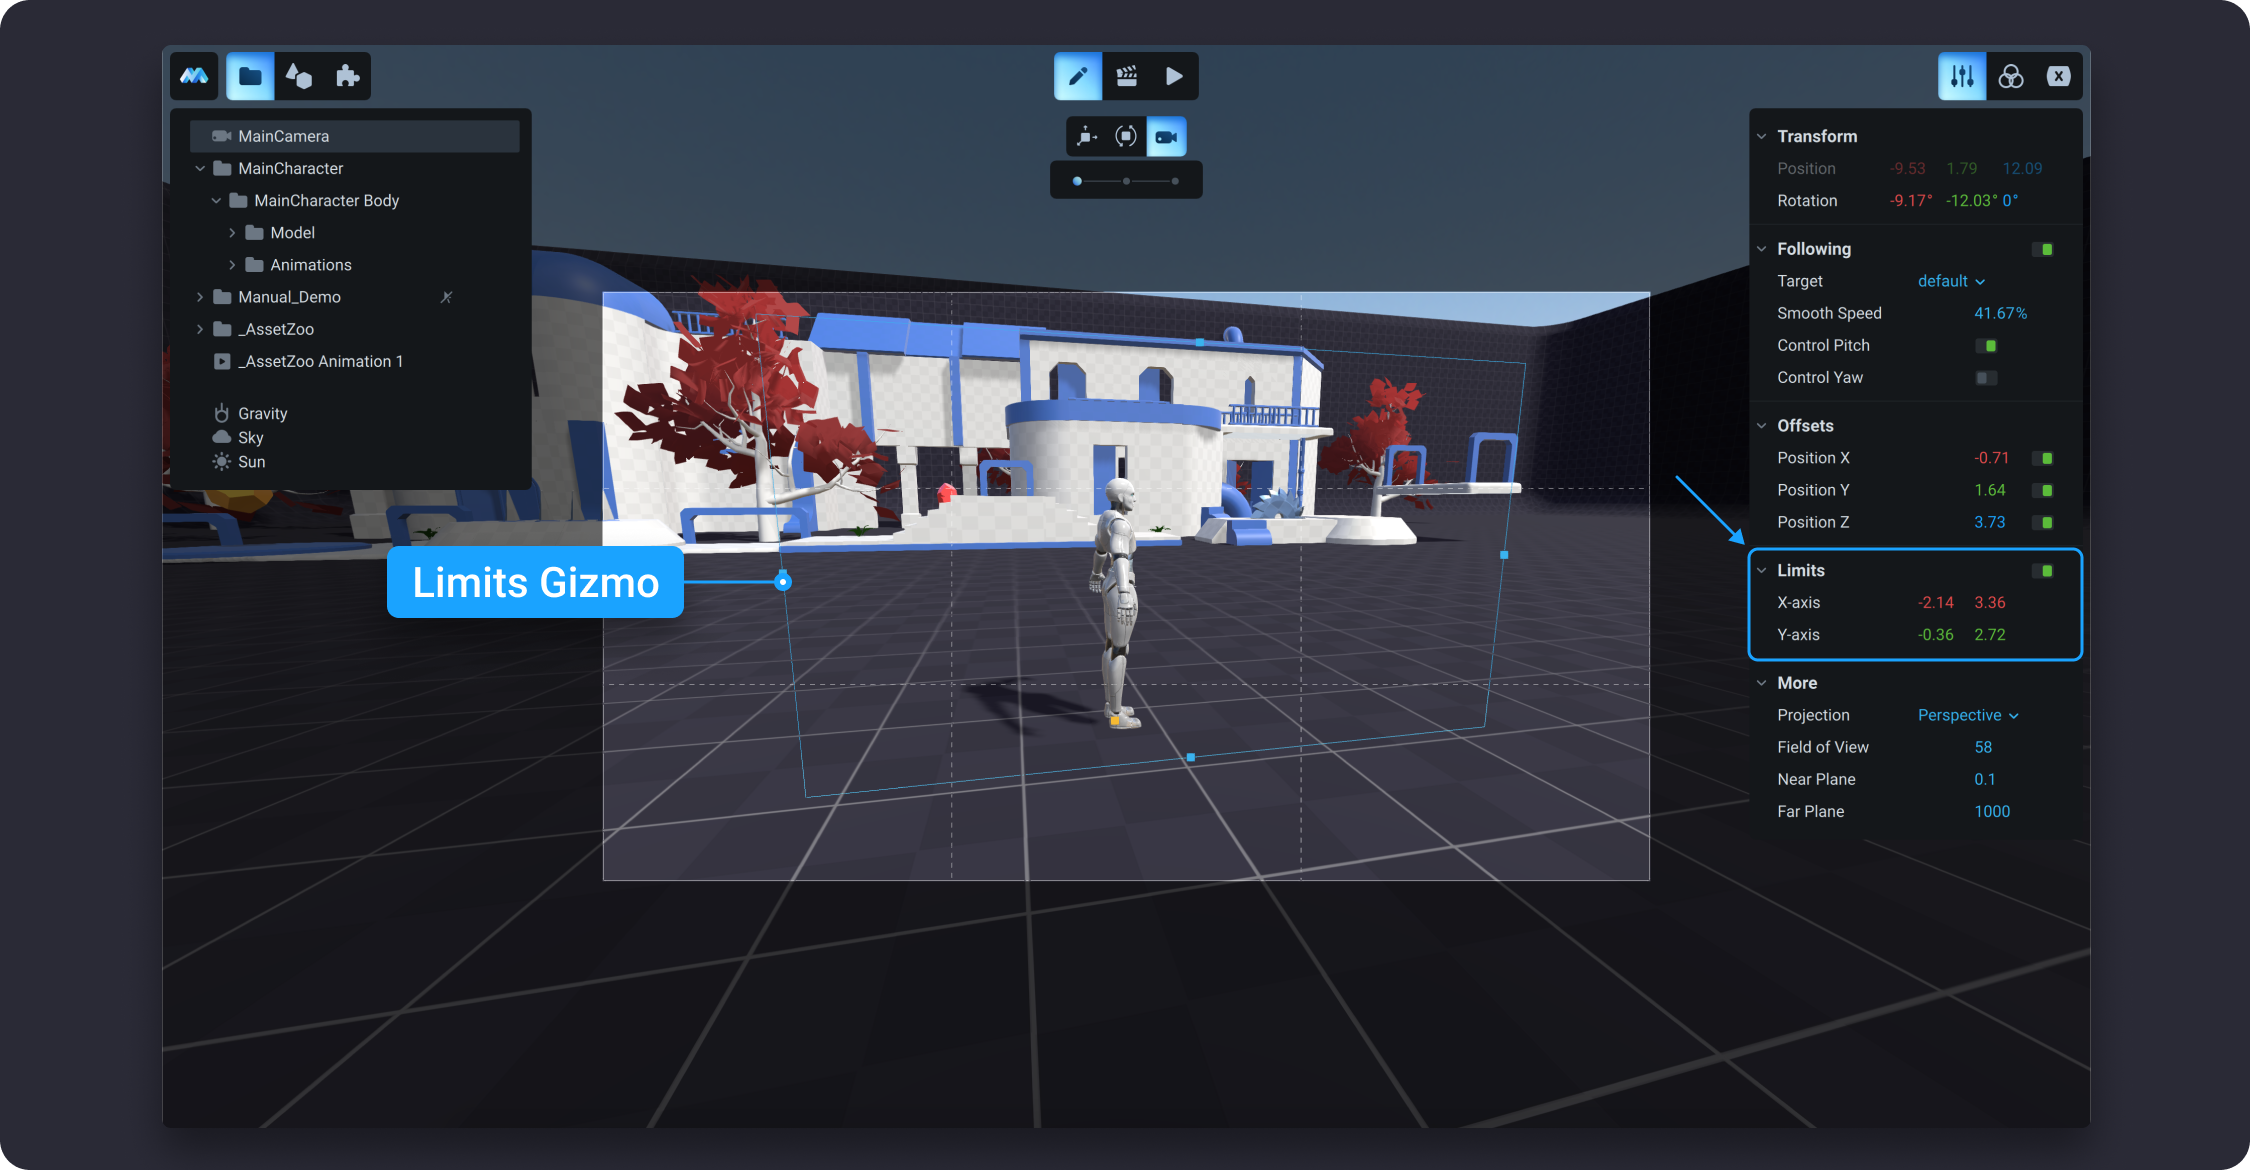
![](https://dl.dropboxusercontent.com/s/7hjnn1joxvv9fd7/009.png?dl=0)

In MANU, Main Camera limits can be set up for X and Y axes. Enter the numeric value for X-axis to limit the horizontal movement around the target follow object, and for Y-axis - to limit the vertical movement.

{% embed url="<https://dl.dropboxusercontent.com/s/1en1f9zc4txhpad/v004.mp4>" %}

### Other Settings

This section allows you to select the camera type Projection and set up the related settings, including Field of View, Near Plane, and Far Plane. Note that these settings may change depending on what type of projection is selected.

#### Projection

There are two main types of projections in MANU: Perspective and Orthographic. The perspective projection is a 3D window into the game world. The Orthographic projection - are 2D window that represent one of the main axes (XY, YZ, or XZ).
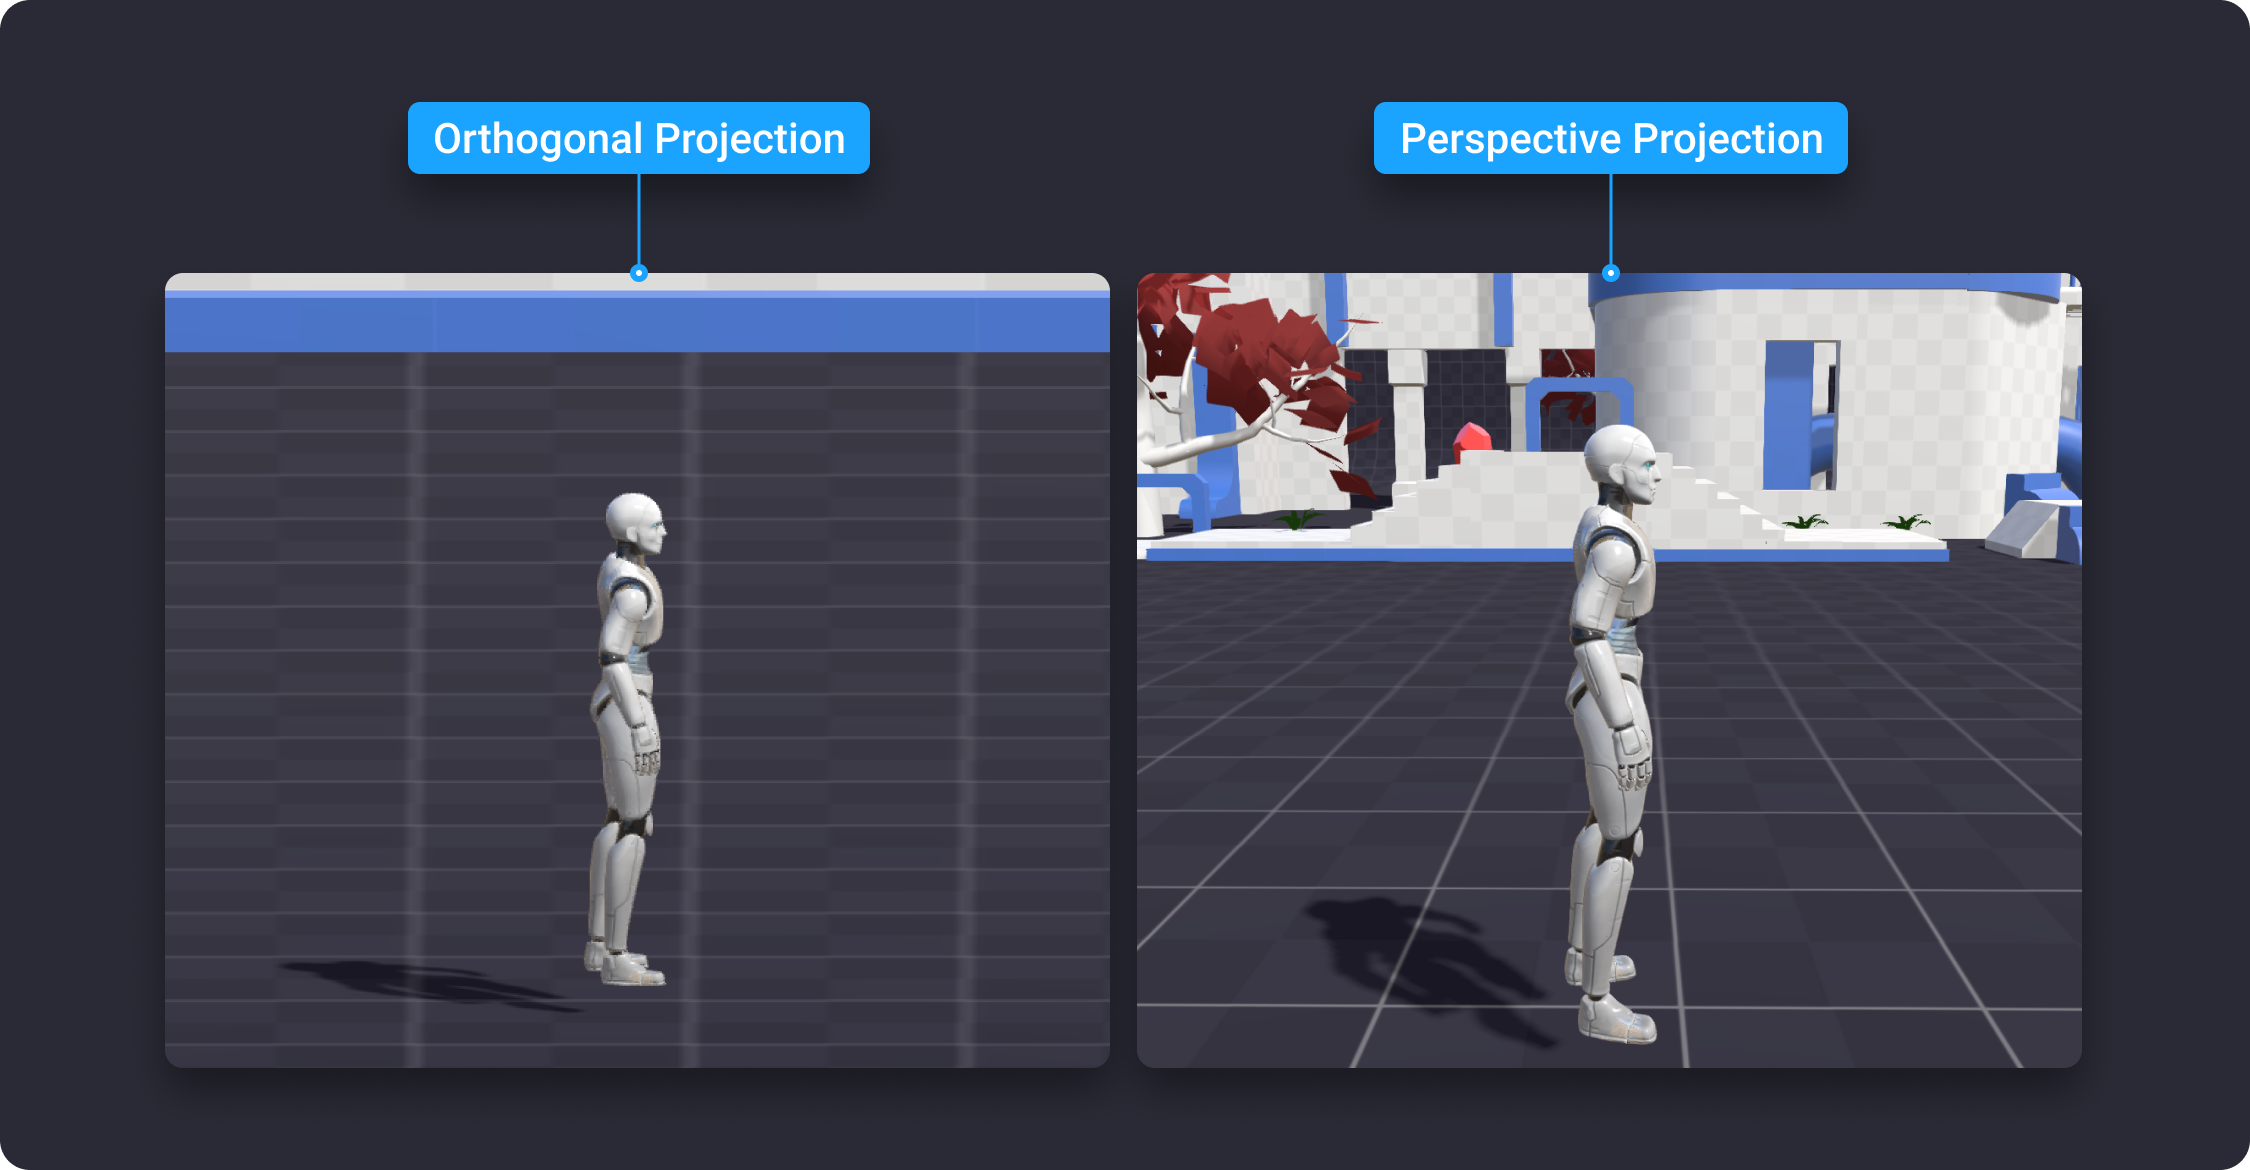
![](https://dl.dropboxusercontent.com/s/49xnhgs4o7xxy36/010.png?dl=0)

#### Field of View

The field of view (FoV) is the extent of the observable game world that is seen at any given moment in the Game mode. This setting is only available if the perspective type of camera projection is selected. The higher the number, the farther away the camera is, so the larger the field of view becomes.

In other words, when the perspective projection is used, objects appear to diminish in size as the distance from the camera increases. It means that the width and height of the viewable part of the scene grows with increasing distance.
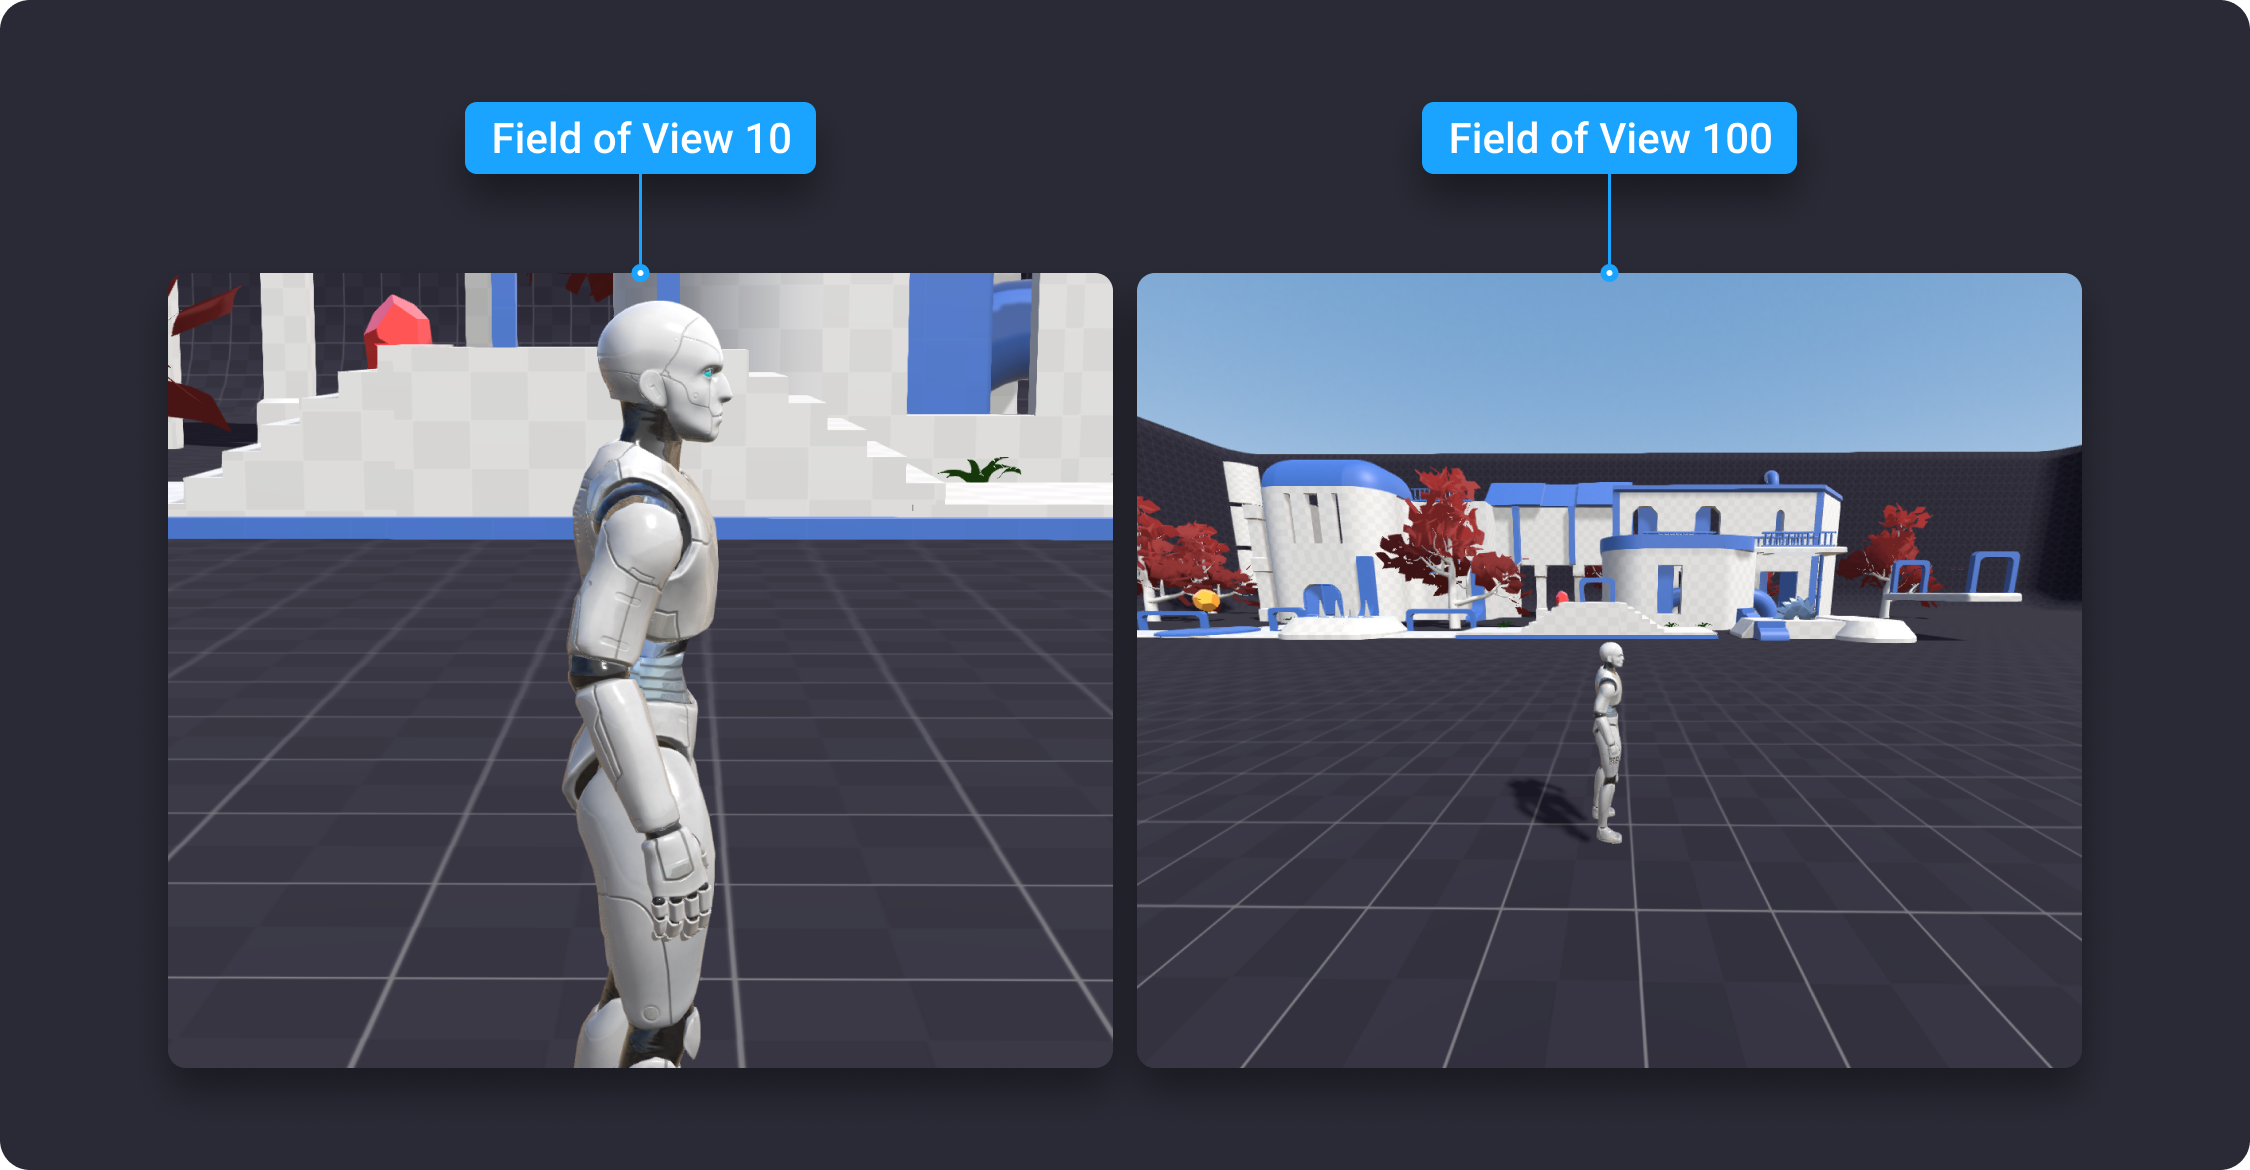
![](https://dl.dropboxusercontent.com/s/jambap8zg846kfh/012.png?dl=0)

#### Near and Far Plane

Near Plane is the closest point relative to the camera. Far Plane is the furthest point relative to the camera that drawing will occur. In MANU, you can specify the maximum and minimum distance of objects in a 3D scene that are drawn by the rendering engine to balance performance and visuals. In general, to get better precision you should move the Near plane as close as possible.
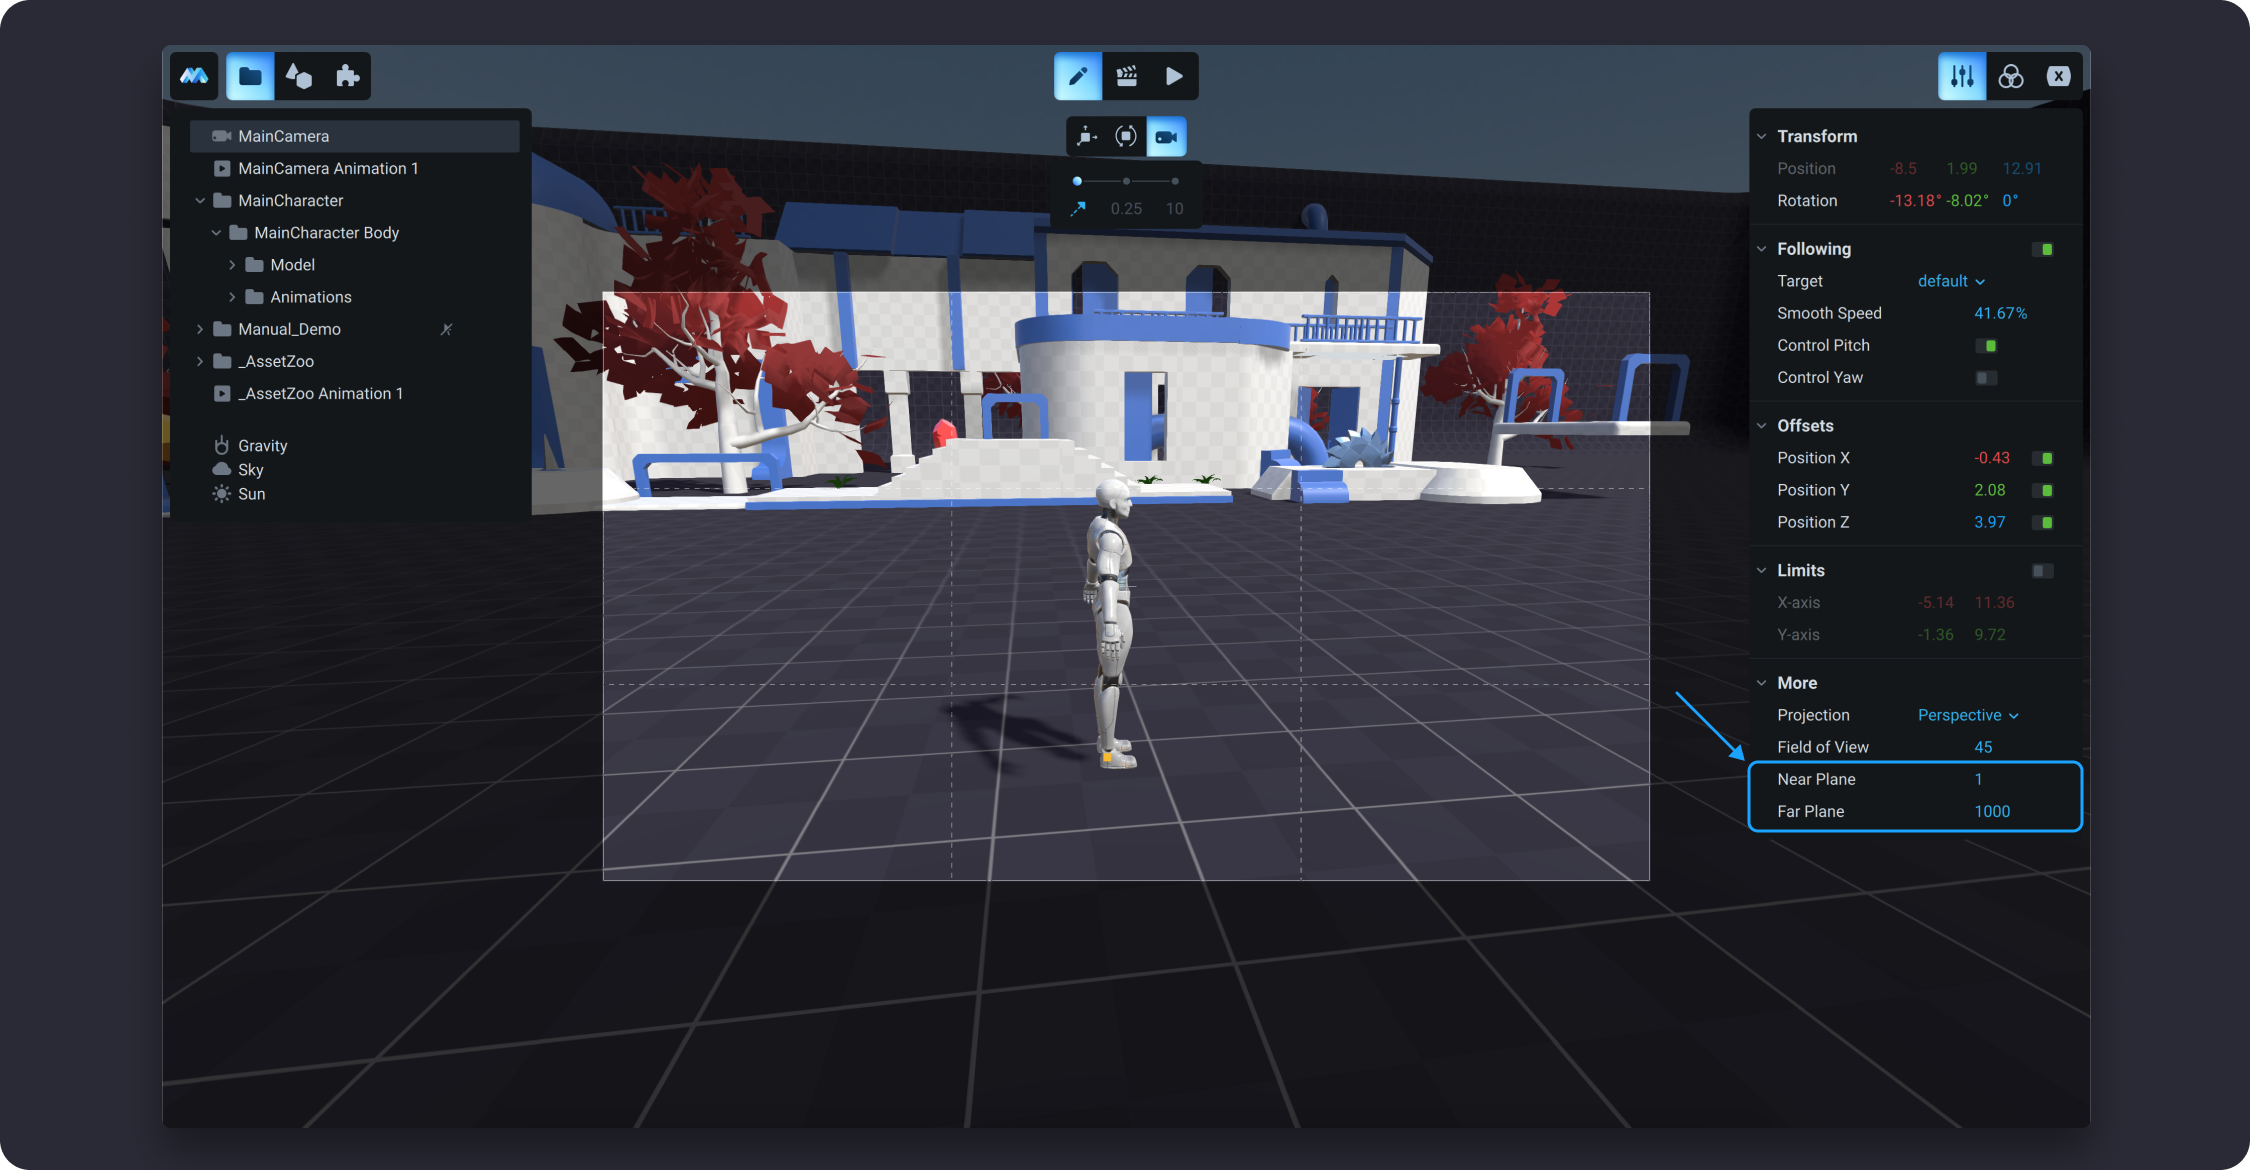
![](https://dl.dropboxusercontent.com/s/955dxo33mf346ox/013.png?dl=0)

## Postprocessing

The term Postprocessing is commonly used in real-time 3D rendering to add additional effects. Postprocessing options can greatly improve the appearance of your game with little set-up time. Use these effects to simulate a physical camera and create stylised visuals. In MANU, postprocessing effects include depth of field, chromatic aberration, and bloom. The description of each parameter is introduced below.
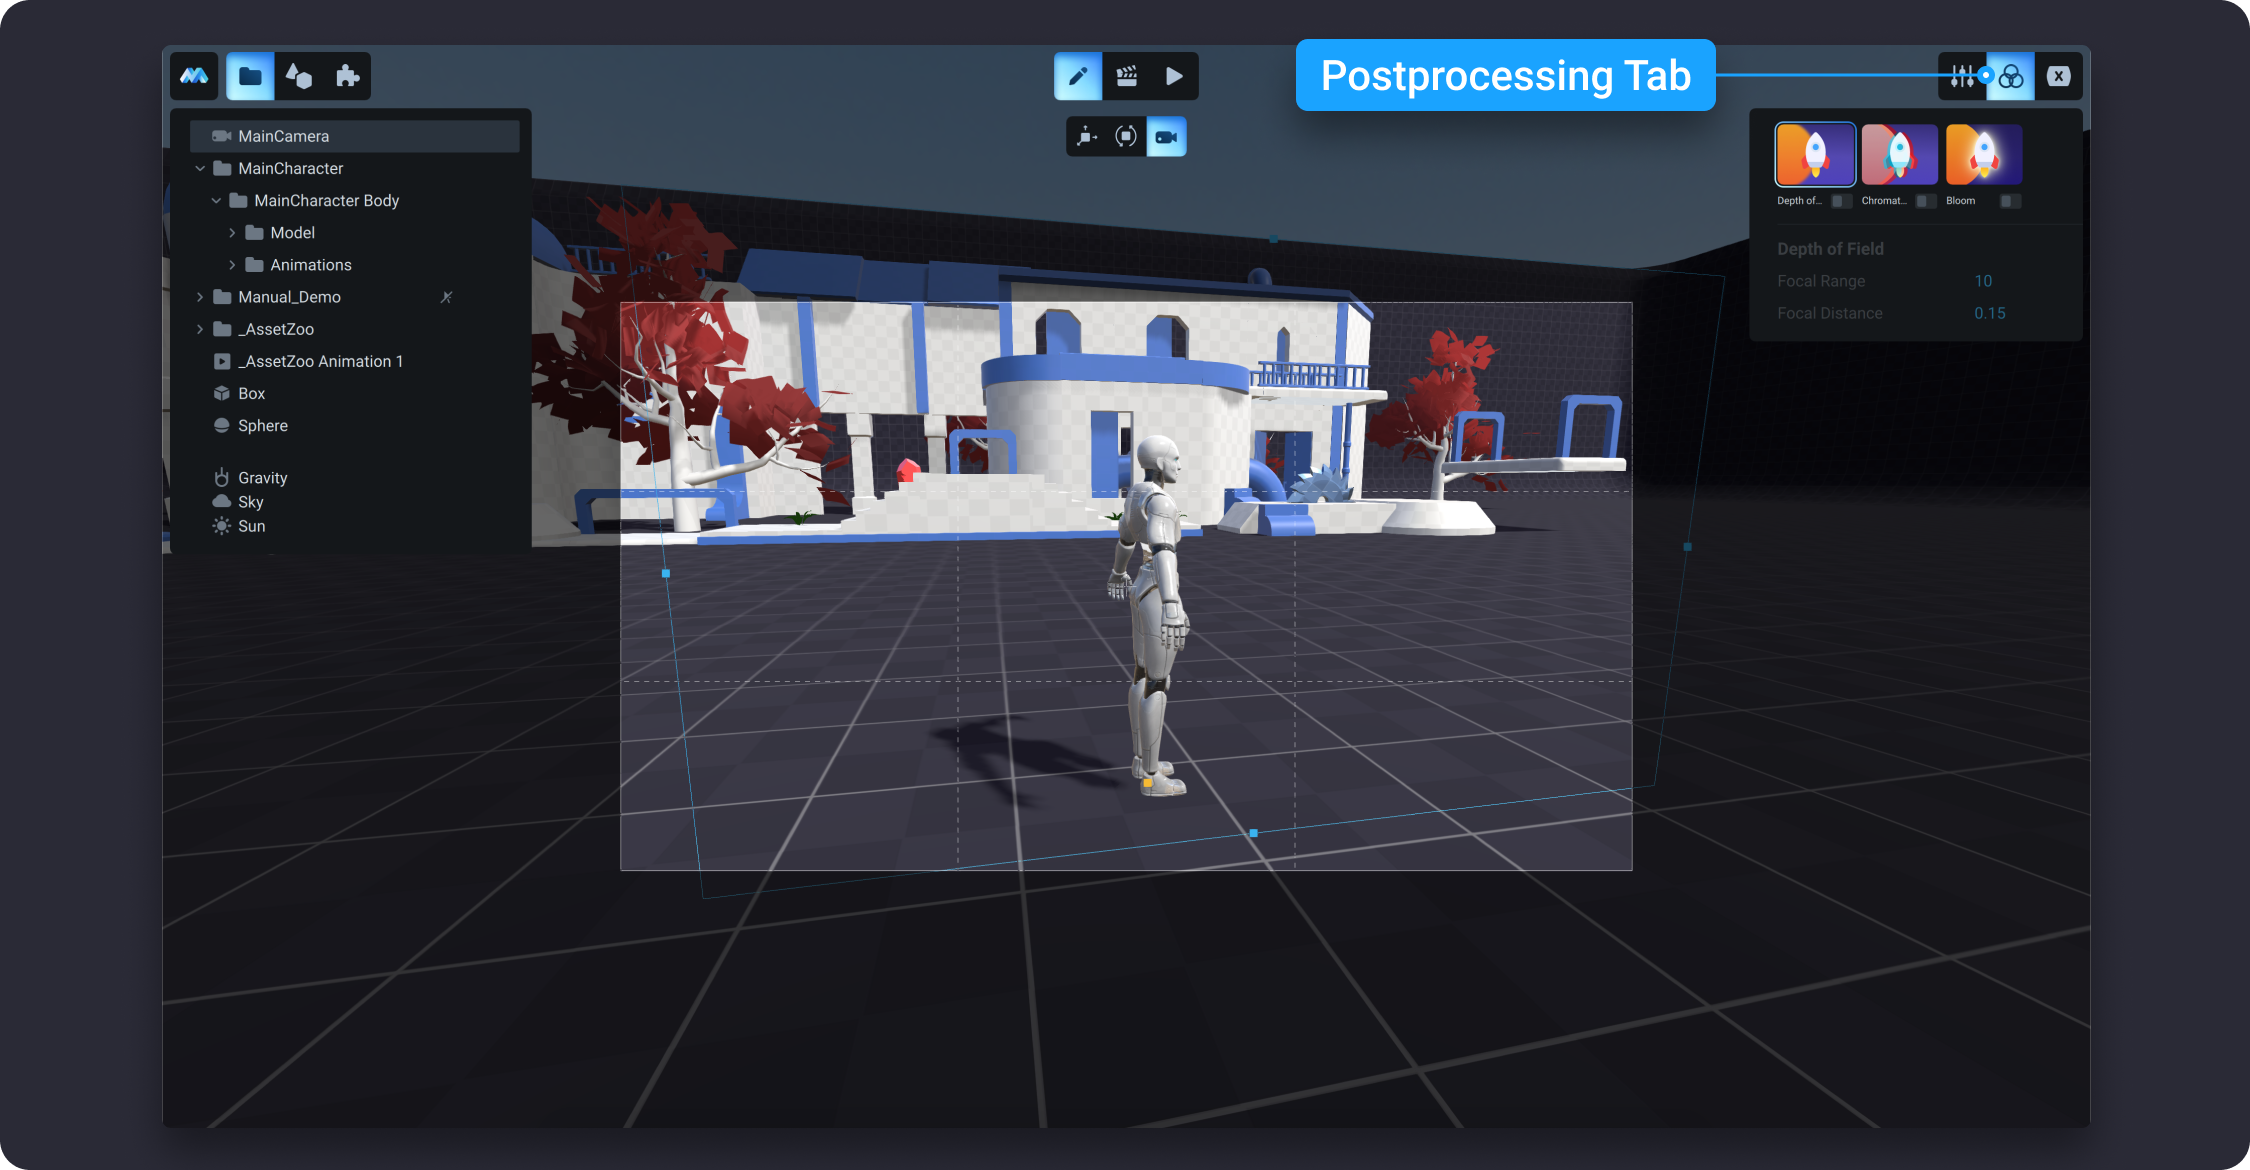
![](https://dl.dropboxusercontent.com/s/j1mmbr13cd5demc/014.png?dl=0)

### Depth of Field

The Depth of Field (DoF) effect blurs the background of your game scene while the objects in the foreground stay in focus. Essentially, it applies a blur to a scene based on the distance in front of, or behind, a focal point. This effect can be used to draw the player's attention to a specific subject of the shot based on depth and adds an aesthetic to make the rendering appear more like a photograph, or film. In MANU, the DoF effect is determined by the settings of Focal Range and Focal Distance.
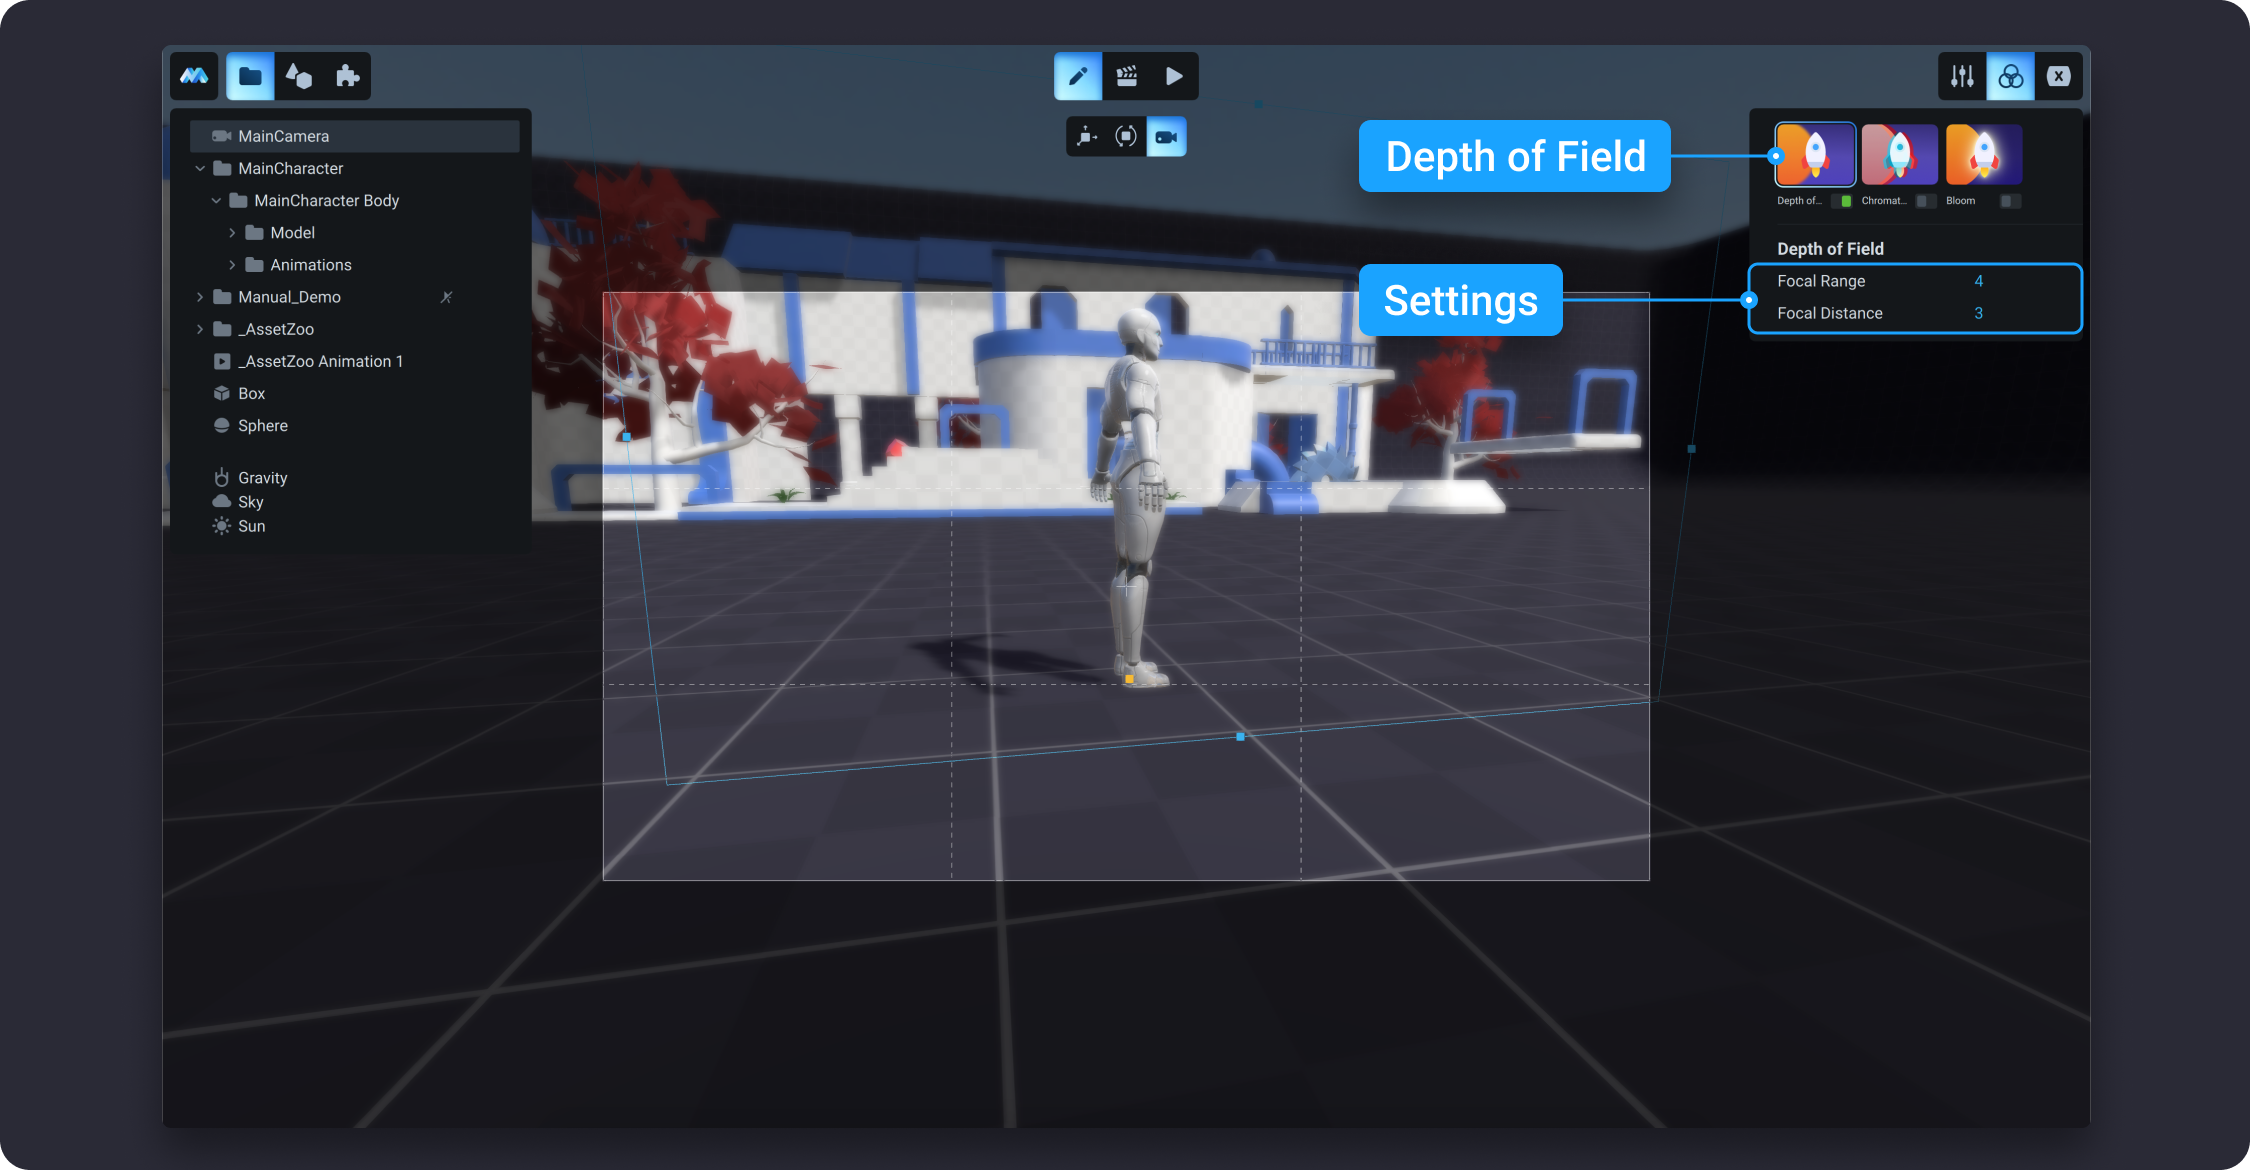
![](https://dl.dropboxusercontent.com/s/j04onvsx11acvcr/015.png?dl=0)

#### Focal Range

Focal range is the area of the sensor that captures the focus area image of the game scene. The larger the value is, the more objects appear in focus, and vice versa.

#### Focal Distance

Focal Distance is the distance from the Main Camera to the focus point. It determines the vertical field of view. Smaller focal lengths result in a larger Field of View, and vice versa. Lower values of focal distance result in a wider Field of View, and vice versa.

## Chromatic Aberration

The Chromatic Aberration effect disperses colors along the boundaries between dark and light areas of the image. The scale determines the degree of dark and light areas of color dispersion.
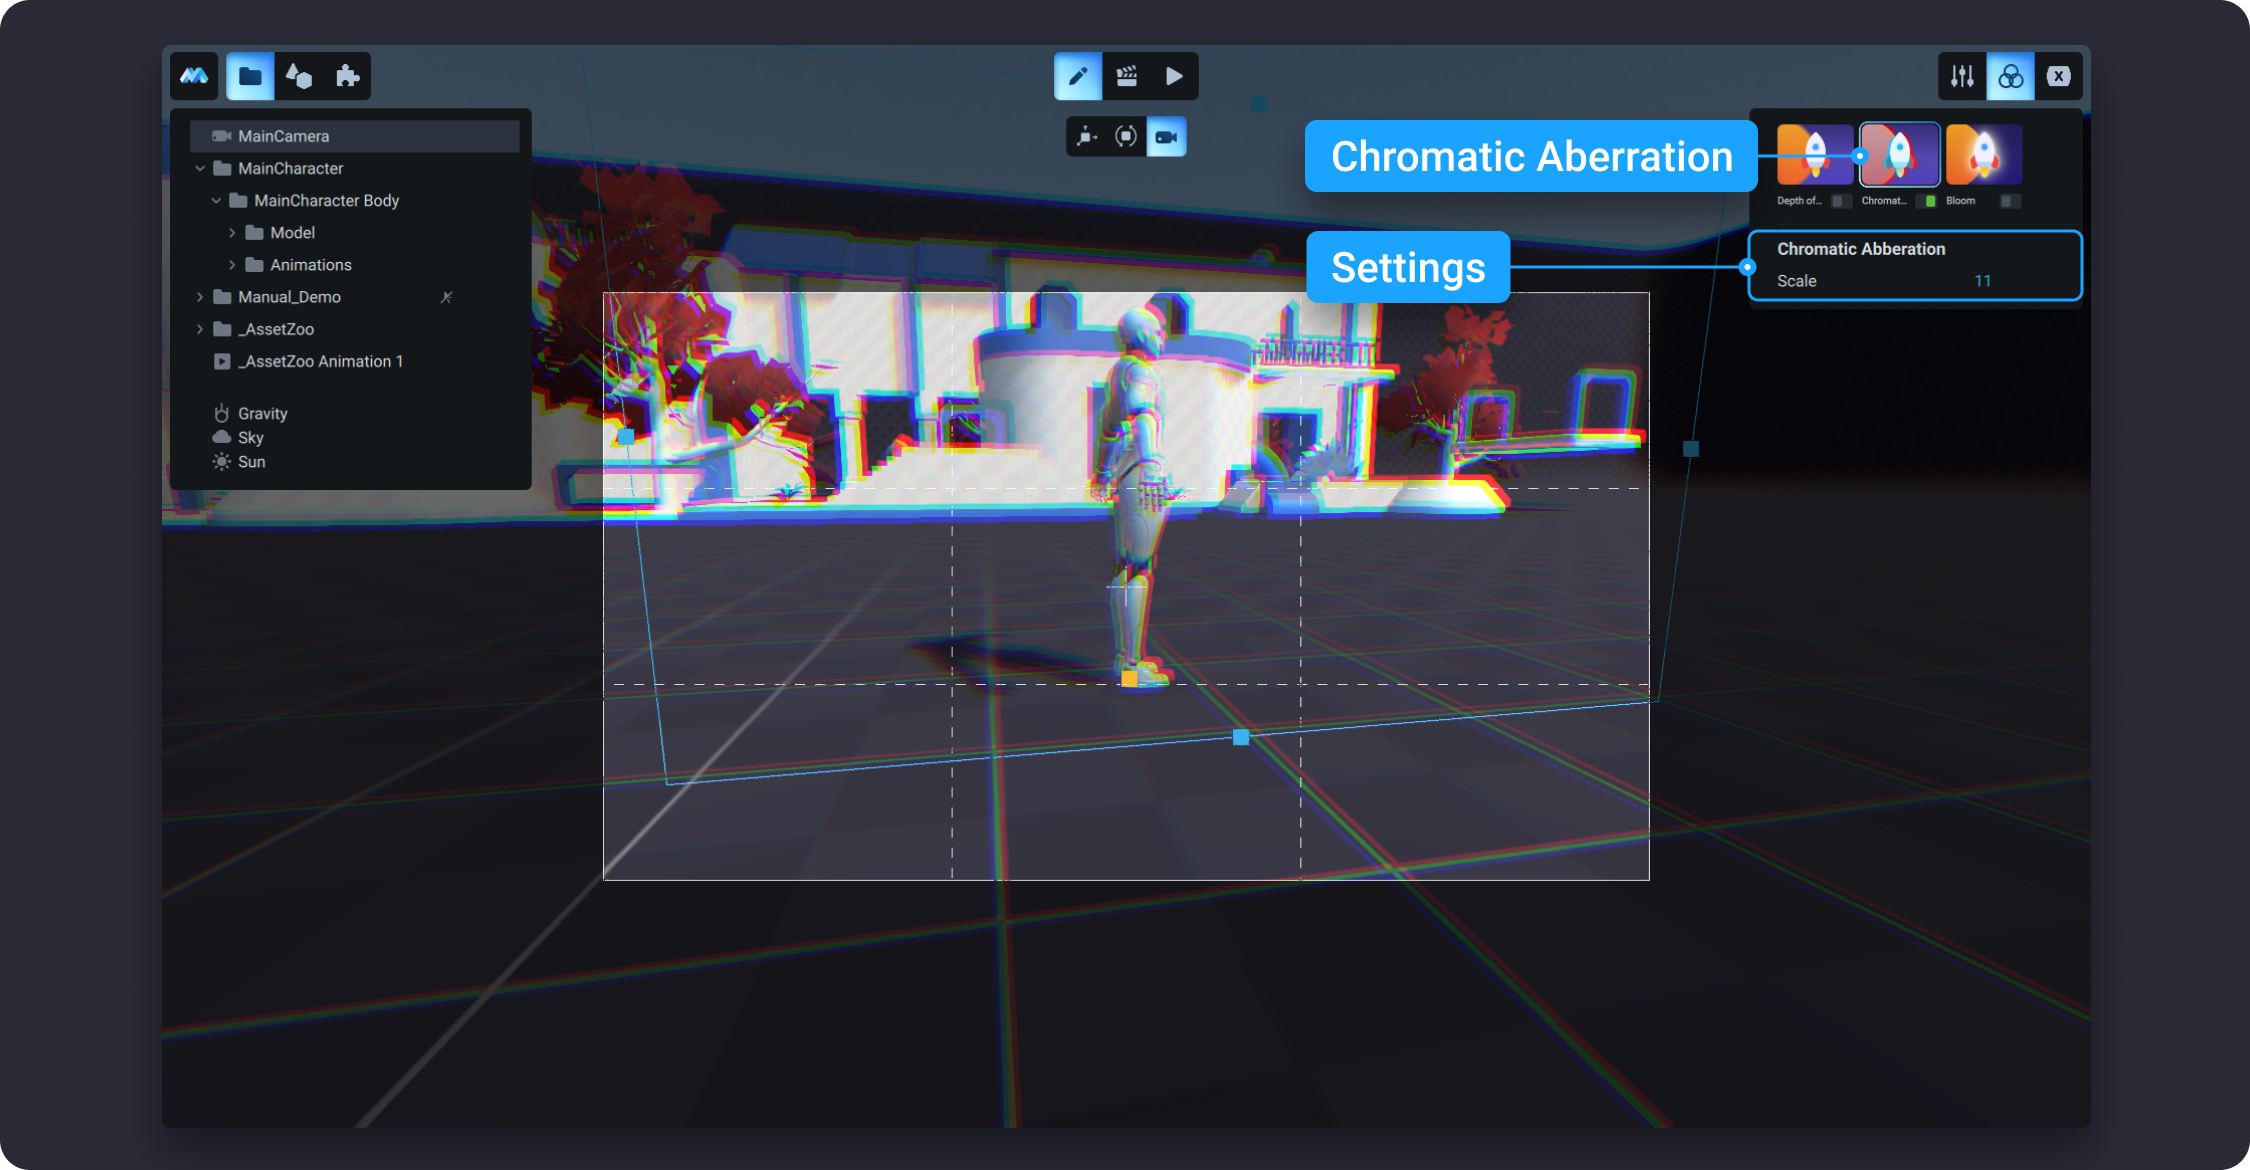
![](https://dl.dropboxusercontent.com/s/q52i3jl9ksdomso/017.png?dl=0)

## Bloom

The Bloom effect makes bright areas in your image glow. Set the strength of the Bloom filter, in a range from 0 to 1. The default is 0, which means that the Bloom effect is disabled. If you enable the Bloom effect, you would be able to adjust it’s Cascade settings and Mixer.
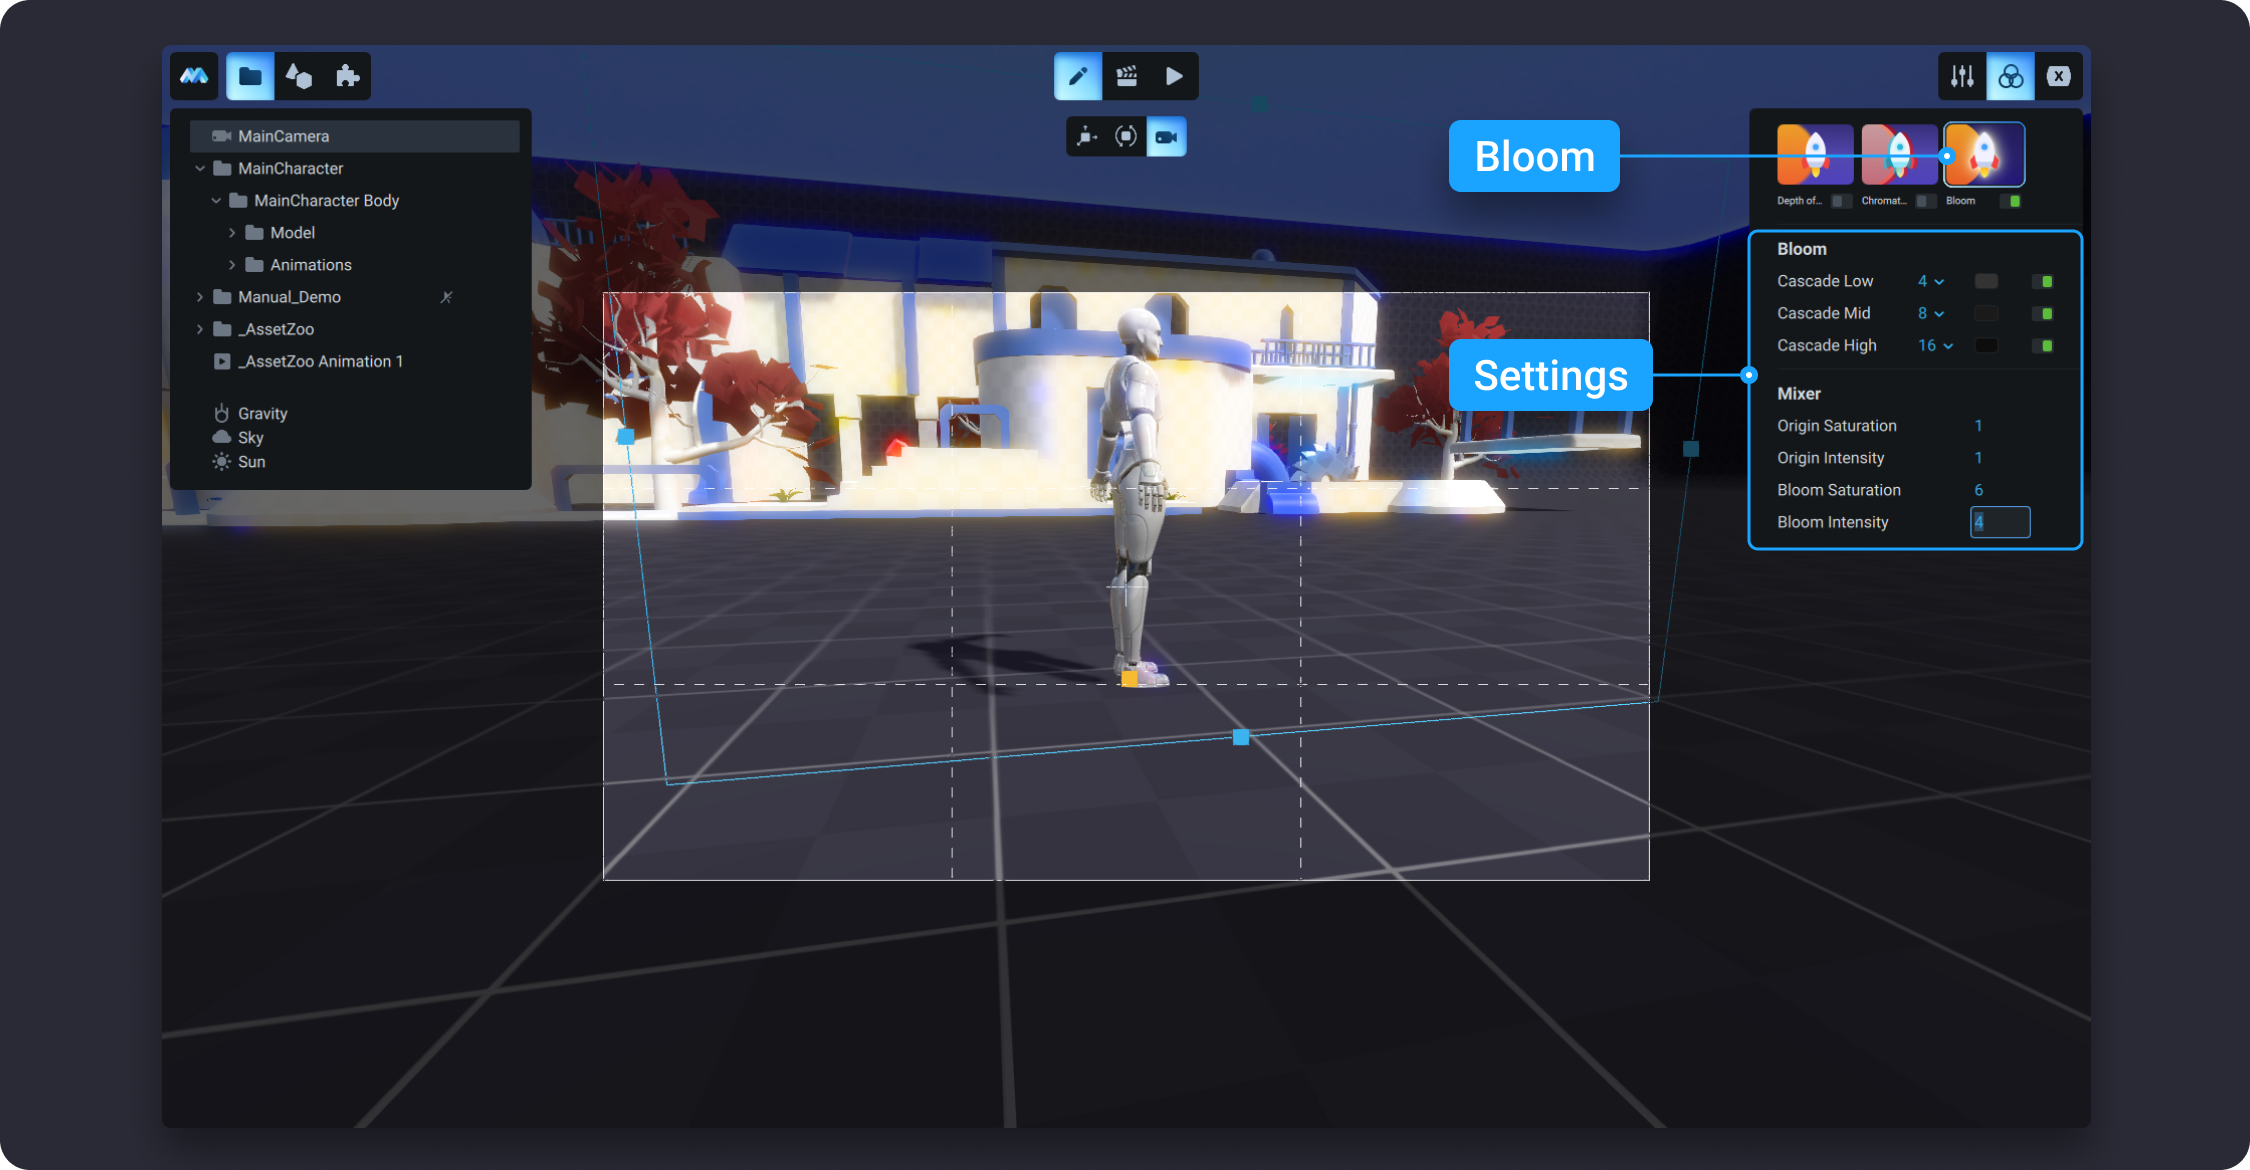
![](https://dl.dropboxusercontent.com/s/pbpoebe25u9lxhe/018.png?dl=0)

#### Cascade Low/Mid/High

The Cascade settings control the tint and brightness of the shadows (Low), midtones (Mid), and highlights (High) in your image.

#### Mixer

The Mixer allows you to tweek the balance of each input color. The Mixer effect modifies the influence of each input color on the overall mix of the output. For example, if you increase the influence of green on the overall mix of red, all areas of the final image that are green (including neutral/monochrome) tint to a more reddish hue. The Mixer includes Origin Saturation, Origin Intensity, Bloom Saturation and Bloom Intensity.

#### Origin Saturation

Origin Saturation is the strength or purity of the color and represents the amount of gray in proportion to the hue. The larger the value, the higher portion of the hue you will see in the original image.

#### Origin Intensity

Origin Intensity refers to the degree of color brightness. A highly intense color is bright and a low-intensity color is more neutral or muted. The larger the value of intensity, the lighter your origin image will be.

#### Bloom Saturation

Bloom Intensity refers to the magnitude of bloom effect applied to highlights in the rendered scene. The larger the value of intensity, the lighter the bloomed image effect will appear.

## Variables

To learn about Variables, go to the [Object Variables](broken://pages/-MYt-8N4Gr6AUpV3SwVF) article.

## Animatable parameters

* Position
* Rotation
* Follow Enabled

{% embed url="<https://dl.dropboxusercontent.com/s/ljr0wuta30fkkxa/v005.mp4>" %}


# Transforms

This article covers the Transform characteristics represented in the Properties panel in the Inspector.

In MANU, the Transform tab allows you to view and control the position, rotation, and other properties of an object, in Edit Mode.&#x20;

![](https://dl.dropboxusercontent.com/s/ihpmr8l0dd42xsu/001.png?dl=0)

Each object in Transform stores its position, rotation, size, and scale values. These may need to be manipulated numerically. In Edit Mode it mainly allows you to enter precise coordinates for an axis.&#x20;

Use this panel to either edit or display the object’s transform properties such as position, rotation, and scaling. These fields change the object’s origin coordinates.

## Position

The position is the object’s origin location in  XYZ axis coordinates. The default position of a new object is either at 0-0-0 on XYZ axis in the scene or at 0-0-0 coordinates from a parent object if a new object is a child object.&#x20;

![](https://dl.dropboxusercontent.com/s/8coyo20lpu8p0gu/002.png?dl=0)

## Rotation

Rotation is the object’s orientation, relative to the global axes and its own origin. The default rotation of an object is at 0-0-0 degrees on XYZ axes.&#x20;

![](https://dl.dropboxusercontent.com/s/zmcihso80kqrblm/003.png?dl=0)

## Size

The Size is the dimensions of the object’s bounding box aligned with the global XYZ axes. The default dimension of an object is 1-1-1 for XYZ axes. You can constrain size proportions by selecting the respective icon next to Size.
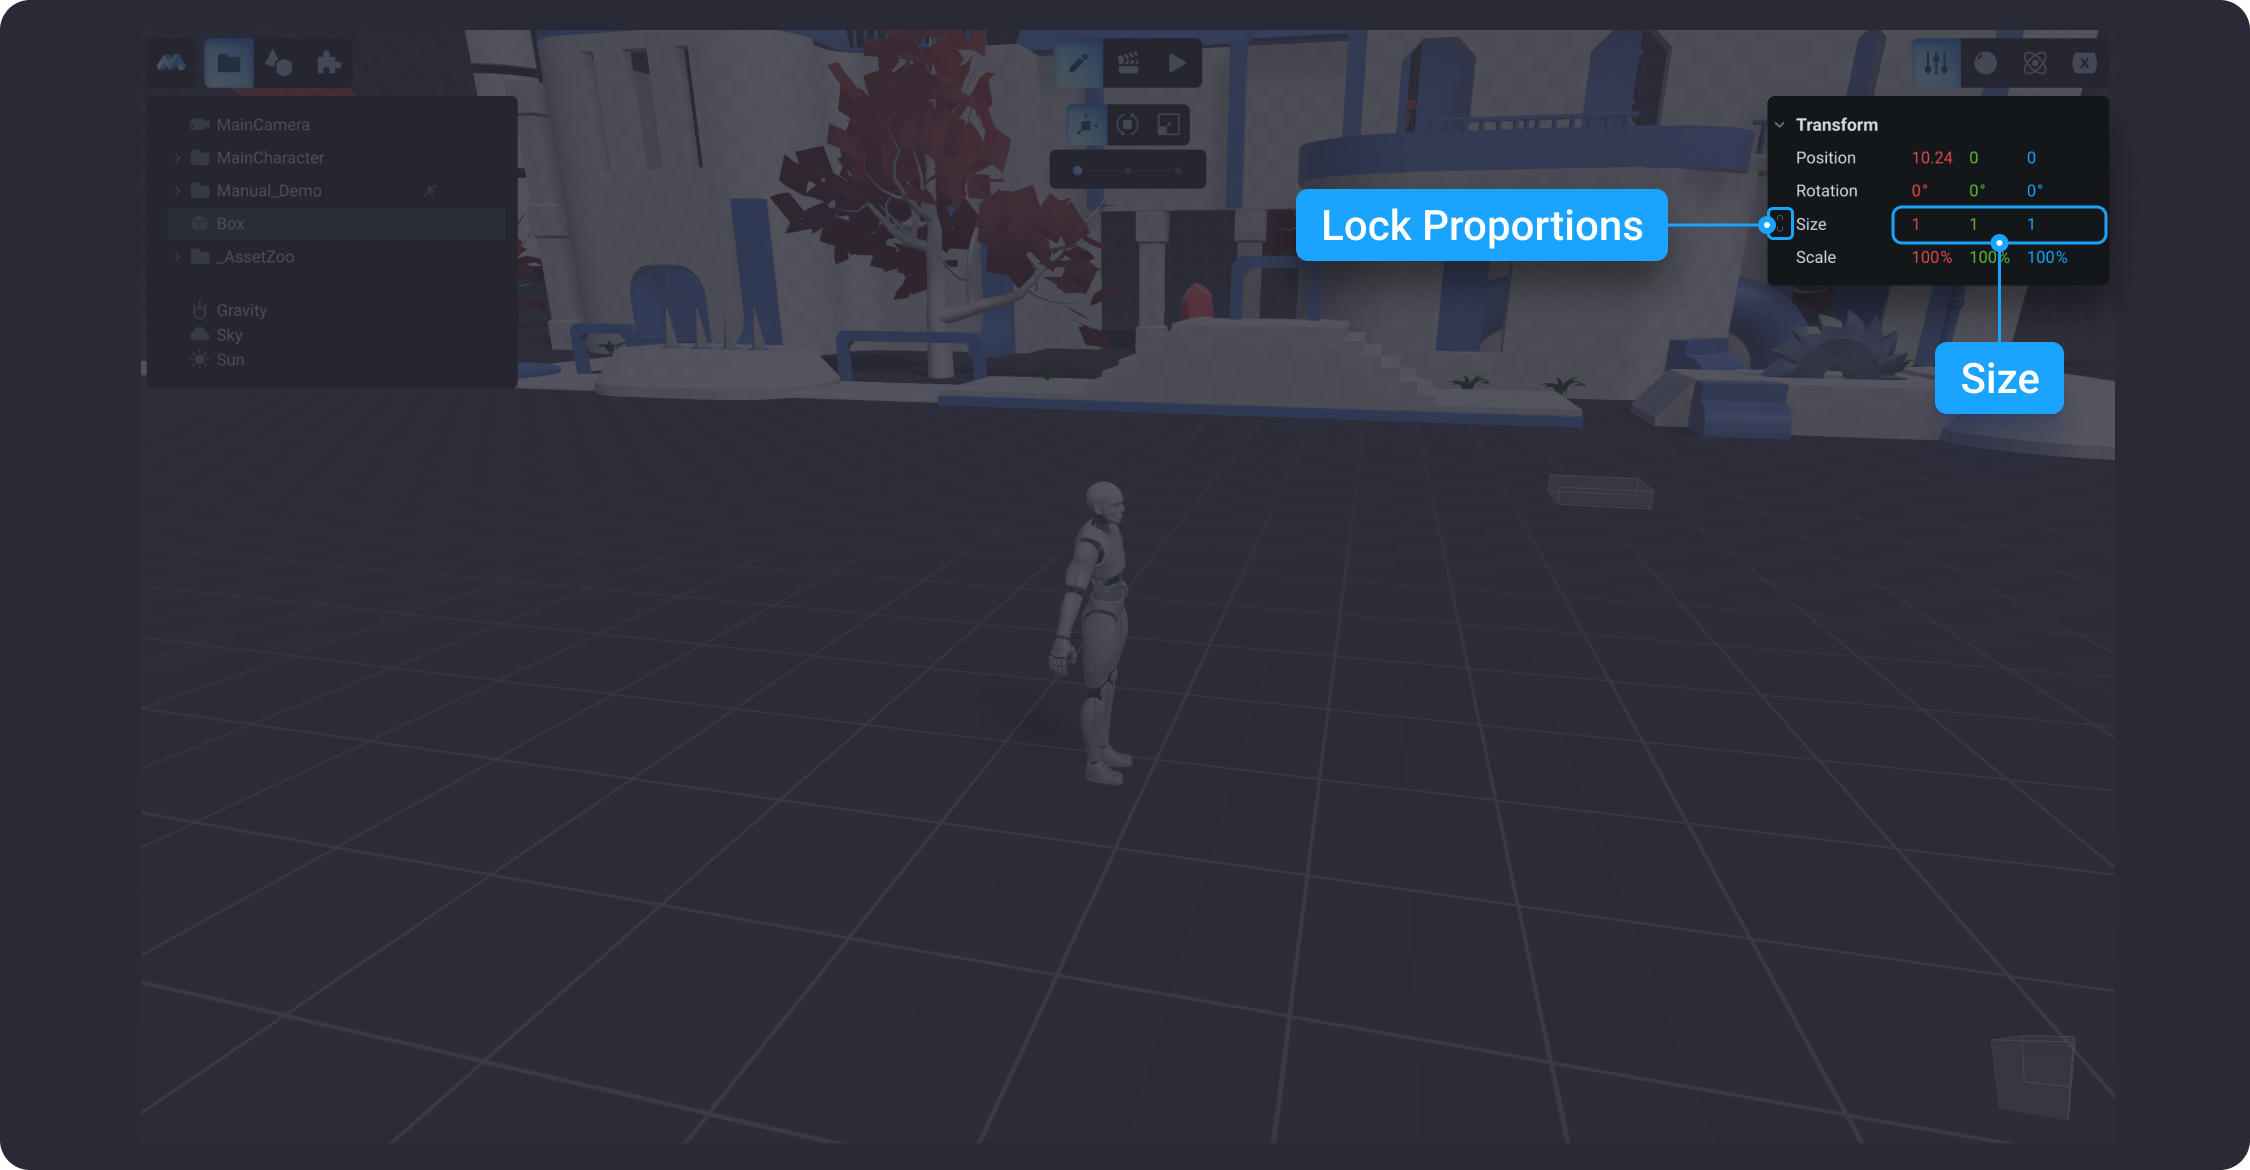
![](https://dl.dropboxusercontent.com/s/kpf9dsnlnh0jnxx/004.png?dl=0)

## Scale

Scale is the object’s relative scale along the local axis. For example,  the Scale X value represents the scale along the local X axis. Each primitive object available in MANU’s [Library](broken://pages/-MIO0PWrhxuQ4WC1hCM6) (cube, sphere, etc.), when created, includes a scale of 100% in each global direction. To make the object bigger or smaller, you scale it in the desired axis.
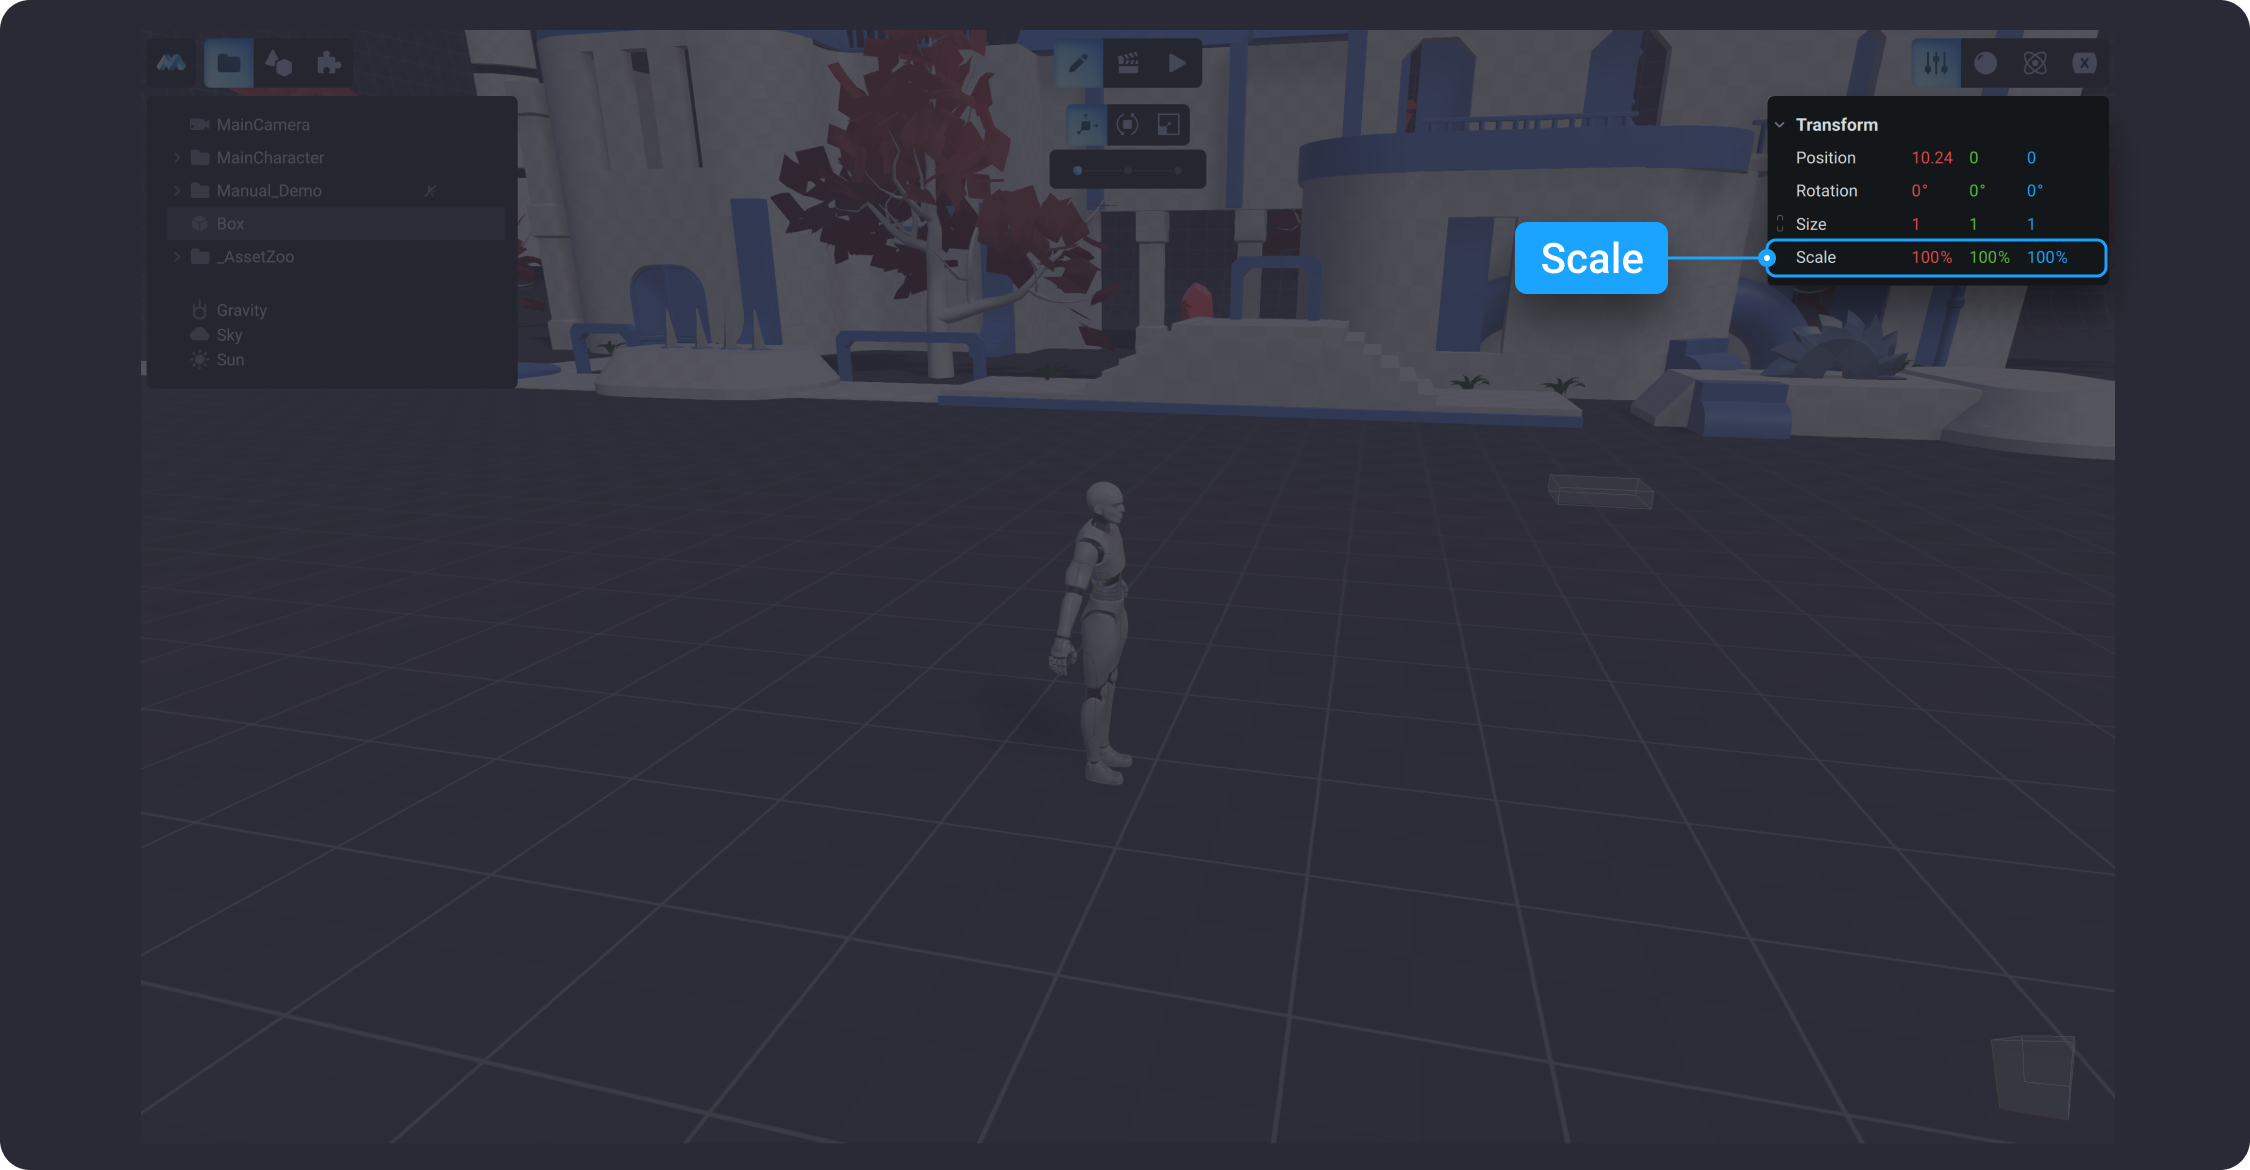
![](https://dl.dropboxusercontent.com/s/5r0leyok6mvhhyt/005.png?dl=0)

Go to [Using 3D Gizmo to Manipulate Objects](/learn/manual/workspace-modes/edit-mode#using-3d-gizmo-to-manipulate-objects) to learn more about object transforms that can be applied via gizmo in MANU.&#x20;


# Materials

All objects around us are made of different materials: metal, glass, plastic, rubber, etc. Materials, in their turn, have many parameters, such as color, texture, the ability to reflect, emit or refract light. They can be transparent or opaque. Materials create greater realism in the  game. In MANU, there are several different models of materials that can describe both real-world materials and various artistic stylized designs.

Materials in the MANU can only be applied to objects with visible geometry and to 3D objects that have polygon grids (mesh). For example, primitives or imported objects. It is impossible to assign materials for other types of objects (animation, trigger, collider or light) and it does not make sense.

Note: when you want to play around with materials choosing different textures and their settings, always remember that it will affect the performance of your game and its size on the hard drive.

## How to apply a material to the object? <a href="#y199njojm67k" id="y199njojm67k"></a>

In Manu, by default, the Default material is applied to all objects that will be created in the scene. It will also be applied to the imported objects/models.

To apply  a material, select an object from your scene, then switch to the Material tab in the Inspector panel. The Material Panel includes texture and material properties that you can manage to make your object more realistic.

&#x20;

You can choose a material from those already existing in MANU. Click on the 3-dots menu and just select the material you need from the drop-down list. After that, the material will be immediately applied to the object.

<figure><img src="https://4240499350-files.gitbook.io/~/files/v0/b/gitbook-x-prod.appspot.com/o/spaces%2F-Lt-sE9MYKe9pZOcHwg5%2Fuploads%2FIln5x8Mq6QPVT1C6mllq%2Fimage.png?alt=media&amp;token=f68fe14e-c941-4d2a-86d5-270bab4ed0d6" alt=""><figcaption></figcaption></figure>

## Material library in MANU

All materials that we create and use are stored in the  Material library. We can delete materials, duplicate them, and make new materials out of existing ones.&#x20;

We can also search for materials using the search option. This option appears together with the list of materials when we press the 3-dots menu.

All the materials that we create are placed in the list of materials. The list is sorted based on creation date.

<figure><img src="https://4240499350-files.gitbook.io/~/files/v0/b/gitbook-x-prod.appspot.com/o/spaces%2F-Lt-sE9MYKe9pZOcHwg5%2Fuploads%2FKXFtnCrOAzHbxi5rz1ue%2Fimage.png?alt=media&amp;token=13eb3926-1136-4f3a-8717-1c182b4e4544" alt=""><figcaption></figcaption></figure>

<figure><img src="https://4240499350-files.gitbook.io/~/files/v0/b/gitbook-x-prod.appspot.com/o/spaces%2F-Lt-sE9MYKe9pZOcHwg5%2Fuploads%2FqmvjH6pHTHcOngscNP1h%2Fimage.png?alt=media&amp;token=defdc5e9-c4ef-4727-9913-d305bfe3924d" alt=""><figcaption></figcaption></figure>

## How to manage materials in Manu?

### Rename materials <a href="#bpo6ydrzxc69" id="bpo6ydrzxc69"></a>

After applying the material to the object, you may rename it. To do it:

●        click on the object and go to the Material Tab in the Inspector Panel

●        next,  click on the Material name and start typing

●        when you are done, just press Enter or click anywhere in the scene.

<figure><img src="https://4240499350-files.gitbook.io/~/files/v0/b/gitbook-x-prod.appspot.com/o/spaces%2F-Lt-sE9MYKe9pZOcHwg5%2Fuploads%2FxKMFzt1aSAL0gXL3vlUx%2Fimage.png?alt=media&amp;token=cd68105d-e649-4525-9627-243d83578835" alt=""><figcaption></figcaption></figure>

### Duplicate materials <a href="#r7zd2b6o1hi7" id="r7zd2b6o1hi7"></a>

In some cases, the Duplicate Material option will be useful in creating the game objects. For example, in order to change only some settings for the material already existing in the game and apply it to a new object.

To duplicate the material:

●        press the 3-dot menu, which is next to the Material name in the Material Panel;

●        then, go to the list of materials and  hover the pointer over the material you need;

●        click on the first icon (double squares with plus), that you will see.

<figure><img src="https://4240499350-files.gitbook.io/~/files/v0/b/gitbook-x-prod.appspot.com/o/spaces%2F-Lt-sE9MYKe9pZOcHwg5%2Fuploads%2FxETgiMj79QlThq73Ttqz%2Fimage.png?alt=media&amp;token=d083f576-4691-4d7c-bbc1-4f1000696ce4" alt=""><figcaption></figcaption></figure>

The duplicated material will have the same name, but with number 2 or with the following number (if this name is already taken). Now you may apply changes to the duplicated material.

<figure><img src="https://4240499350-files.gitbook.io/~/files/v0/b/gitbook-x-prod.appspot.com/o/spaces%2F-Lt-sE9MYKe9pZOcHwg5%2Fuploads%2FoePiG71sN13ovBUKzciL%2Fimage.png?alt=media&amp;token=3c8d189e-fbbf-4f53-9867-9ee5381dbff0" alt=""><figcaption></figcaption></figure>

### Delete materials

If for some reason you need to delete materials, simply go to the Material library. The list of created and existing materials will appear after clicking on the 3-dot menu which is on the right top of the Material Panel.  To delete the material:

●        go to the Inspector Panel and click on the Material Tab

●        click on the 3-dot Menu (which is to the right of the material name). After that, the list of materials will open

●        hover over the material that needs to be deleted

●        click on the "Delete" icon (trash can) next to the material

The deleted material will be removed from the Material library.

<figure><img src="https://4240499350-files.gitbook.io/~/files/v0/b/gitbook-x-prod.appspot.com/o/spaces%2F-Lt-sE9MYKe9pZOcHwg5%2Fuploads%2Fl3JMn63ZrBdNOkNUXElH%2Fimage.png?alt=media&amp;token=4b219d42-c092-4890-9e39-8df4cda15b74" alt=""><figcaption></figcaption></figure>

When you try to delete the material that has already been applied to some objects in the scene, you will receive a notification (a popup window) that this operation is irreversible. The notification  shows how many objects have this material. Therefore, the removal of the tag must be authorized.

<figure><img src="https://4240499350-files.gitbook.io/~/files/v0/b/gitbook-x-prod.appspot.com/o/spaces%2F-Lt-sE9MYKe9pZOcHwg5%2Fuploads%2FfW0Zj8sdB0vOjVJiEyV1%2Fimage.png?alt=media&amp;token=f9c2ca7b-9e8e-477a-ba64-f0d06aee7a7f" alt=""><figcaption></figcaption></figure>

## How to create a new material in MANU? <a href="#id-9ftuxzk7eilw" id="id-9ftuxzk7eilw"></a>

To create a new material in Manu, click on the Create Material button ![](https://4240499350-files.gitbook.io/~/files/v0/b/gitbook-x-prod.appspot.com/o/spaces%2F-Lt-sE9MYKe9pZOcHwg5%2Fuploads%2FhbE88ZCvPd30EuAxQmYw%2Fimage.png?alt=media\&token=562aa2e9-cc37-4682-9c22-937e650006e4). After that, in  the Inspector Panel, you will see multiple options and parameters that you can customize and combine to create the material you need.

<figure><img src="https://4240499350-files.gitbook.io/~/files/v0/b/gitbook-x-prod.appspot.com/o/spaces%2F-Lt-sE9MYKe9pZOcHwg5%2Fuploads%2Fz2SxHl9fs5TWt92DCazP%2Fimage.png?alt=media&amp;token=39993b1e-d151-4b75-883d-4a35ef18ffeb" alt=""><figcaption></figcaption></figure>

We can create a material and assign it to other objects. In MANU, we don't have to create materials for each object every time. We can reuse materials.

If we change the material settings on one object, then these changes are applied to other objects to which this particular material is applied.

If we want to change the texture for only one object, we will need to duplicate the material and then change the settings for the duplicated material.

### Types of shaders (materials) in MANU

There are several types of shaders in MANU:

Basic

Glass

PBR

MatCap

Glow

#### How to assign a shader to a material? <a href="#ws4z8gv8gw1j" id="ws4z8gv8gw1j"></a>

To assign a shader to the material, use the Shader drop-down menu in the Material Panel. Just click on the shader you need, and  it will be applied immediately.

<figure><img src="https://4240499350-files.gitbook.io/~/files/v0/b/gitbook-x-prod.appspot.com/o/spaces%2F-Lt-sE9MYKe9pZOcHwg5%2Fuploads%2FzdLLwLi5WwiOciMeur1P%2Fimage.png?alt=media&amp;token=90826fac-3bca-49bf-acae-21cc0845d508" alt=""><figcaption></figcaption></figure>


# Texture Maps

The texture map contains a texture image that defines how the object will look. The texture map is loaded as it is and wraps the selected object with this texture to give color or relief illusion to the object. By combining texture maps, we can change the settings of different materials.


# Difuse/Albedo

The Diffuse/Albedo map indicates what colors are in this texture. It takes the color of the objects.

<figure><img src="https://4240499350-files.gitbook.io/~/files/v0/b/gitbook-x-prod.appspot.com/o/spaces%2F-Lt-sE9MYKe9pZOcHwg5%2Fuploads%2FyHWv5SG8DB0V38TkeHij%2Fimage.png?alt=media&amp;token=9edfc3fd-a211-45b0-a690-bf1b601a7aae" alt=""><figcaption></figcaption></figure>

**How to apply a texture map (on the example of a Diffuse map)?**

To apply a texture to the material, click on the diffuse map, after that it will be possible to import or select a diffuse map.

To download a texture from your computer, simply click on the Import texture option. You also can select a texture map from the texture picker.

<figure><img src="https://4240499350-files.gitbook.io/~/files/v0/b/gitbook-x-prod.appspot.com/o/spaces%2F-Lt-sE9MYKe9pZOcHwg5%2Fuploads%2FbXDV1CEil5ucEQN9dwNi%2Fimage.png?alt=media&amp;token=243a9109-aa84-4c41-94fe-1722387788ff" alt=""><figcaption></figcaption></figure>

The diffuse map can also be disabled by moving the slider under it to the left.

![](https://4240499350-files.gitbook.io/~/files/v0/b/gitbook-x-prod.appspot.com/o/spaces%2F-Lt-sE9MYKe9pZOcHwg5%2Fuploads%2F0LY0VvAswWDCVnR5d0Vq%2Fimage.png?alt=media\&token=7c4aa166-e505-41ee-9100-298ab74771aa)

If for some reason you need to delete the diffuse map, just hover over it and you will see a trash can icon. Right-click on it and the diffuse map will disappear.

![](https://4240499350-files.gitbook.io/~/files/v0/b/gitbook-x-prod.appspot.com/o/spaces%2F-Lt-sE9MYKe9pZOcHwg5%2Fuploads%2FoAAiWcSa4kxnHVnYKqxT%2Fimage.png?alt=media\&token=017a0241-778e-4ff0-899f-e4a55a2ac9e5)

### Color/Albedo Tint

Each material has a Color property; and it behaves differently for each material. For example, for Basic materials, it behaves quite straightforwardly. We can choose any color and apply it to the object. And the object will simply get this color, there will be no reliefs, shadings or refraction of light on the object.

If we apply texture and change its color, the color value is multiplied by the selected texture.

<figure><img src="https://4240499350-files.gitbook.io/~/files/v0/b/gitbook-x-prod.appspot.com/o/spaces%2F-Lt-sE9MYKe9pZOcHwg5%2Fuploads%2FKJrdClIMFkBtO0VGEmrN%2Fimage.png?alt=media&amp;token=e3e8f830-40a8-44ff-9909-c6bd1d43f5cb" alt=""><figcaption></figcaption></figure>

And if the texture is not selected or disabled, it just shows the color.

<figure><img src="https://4240499350-files.gitbook.io/~/files/v0/b/gitbook-x-prod.appspot.com/o/spaces%2F-Lt-sE9MYKe9pZOcHwg5%2Fuploads%2FQ8IUZ7L0b8eYR3iRBSMl%2Fimage.png?alt=media&amp;token=c20bf00a-4e78-4da4-8da0-11ac3de90d9d" alt=""><figcaption></figcaption></figure>

Application: the combination of texture and color can be used in animation. For example, we have some object and we need it to flash red without changing anything else. Create an animation, set the color change from white to red and loop the animation.


# Alpha

Alpha texture is responsible for transparency/translucency, as well as for irregularities on the object. This texture will designate which areas of the object will be transparent or irregular (this is done using gradation). Alpha texture will be useful if you need to show materials damaged by corrosion or rust . This texture also might be helpful to show paint residues on the material.

<figure><img src="https://4240499350-files.gitbook.io/~/files/v0/b/gitbook-x-prod.appspot.com/o/spaces%2F-Lt-sE9MYKe9pZOcHwg5%2Fuploads%2FxUde4rgCFj5Ufe5CaPem%2Fimage.png?alt=media&amp;token=6e9ac46d-dda4-46d6-98fb-d0ed893f600c" alt=""><figcaption></figcaption></figure>

#### &#x20;<a href="#id-63tos98q89ex" id="id-63tos98q89ex"></a>


# Normal

Normal map is a texture map that sets the relief for the object. This map is responsible for the light relief (bumps) on the material surface. Here, the relief is imitation. In fact, there are no bumps on the material; the geometry of the object does not change. However, due to the use of the normal map the material looks bumpy.

<figure><img src="https://4240499350-files.gitbook.io/~/files/v0/b/gitbook-x-prod.appspot.com/o/spaces%2F-Lt-sE9MYKe9pZOcHwg5%2Fuploads%2FQ4xuHjFVfN6cCYw5eRWz%2Fimage.png?alt=media&amp;token=bb102f93-86d6-4b19-8813-a4cb37b5f54e" alt=""><figcaption></figcaption></figure>


# Ambient Occlusion

Ambient occlusion is a self-shadowing effect that occurs at the intersection of two or more surfaces. The smaller the angle between the surfaces, the more shading occurs. Occlusion gives a more realistic look to the scene due to the self-shadowing of objects.

AOC map allows you to add realism to the image/reflection on the object by simulating the shadows on the material.

AOC map is responsible for the shading that occurs at the joints, faces and corners of the object. It defines the occlusion strength of the material.

<figure><img src="https://4240499350-files.gitbook.io/~/files/v0/b/gitbook-x-prod.appspot.com/o/spaces%2F-Lt-sE9MYKe9pZOcHwg5%2Fuploads%2FAG2VO8JRKfTJApMjYtml%2Fimage.png?alt=media&amp;token=4ac2c46c-4588-440b-8e22-77584518bc50" alt=""><figcaption></figcaption></figure>


# Roughness

Roughness is responsible for the roughness of the material (consists of gradations from black, gray to white). The Roughness map shows where the roughness should be. All objects have different roughness (for example, scuffs, shiny paint chips). It defines how light is scattered across the surface of the object.

<figure><img src="https://4240499350-files.gitbook.io/~/files/v0/b/gitbook-x-prod.appspot.com/o/spaces%2F-Lt-sE9MYKe9pZOcHwg5%2Fuploads%2FH0i89ENQVvP9mJz6UDGJ%2Fimage.png?alt=media&amp;token=a3b96b48-bdfd-4678-b808-2cef0e4ea1e2" alt=""><figcaption></figcaption></figure>


# Metalness

Metalness map defines the areas on the material that behave like a metal and non-metal. The metalness map determines which type of reflection on the material is (dielectric or metallic). Metalness affects the ability of the metal to reflect light, as well as the ability to absorb light that shines on the material.

All objects in the world are divided into dielectrics (insulators) and metals.

Dielectrics (for example, plastic) absorb light partially, and some of the light is reflected. Dielectrics always reflect the same light that is shone on them. Metals do not transmit light, but reflect it, partially or completely. We  can see a colored glare, where the light is reflected on the object. This glare has  the color of the metal (for example, copper, gold). Dielectrics also reflect light, but in much smaller quantities than metals.

<figure><img src="https://4240499350-files.gitbook.io/~/files/v0/b/gitbook-x-prod.appspot.com/o/spaces%2F-Lt-sE9MYKe9pZOcHwg5%2Fuploads%2F8PUTAyVUzjyNewClqB35%2Fimage.png?alt=media&amp;token=3c9f784b-7464-4d36-b5c4-f80eb5711be2" alt=""><figcaption></figcaption></figure>


# Emissive

Emission defines how light is emitted from the surface, allowing any surface to become a light source. The Emissive map is responsible for simulating the  light emission on the material.

This map will be useful for objects that should shine in the Scene. But the Emissive map only simulates the luminosity; and it will not affect other objects unless Lightmapping technology is used.

These may be distant light sources for which it is not necessary to calculate their illumination. This map does not load the game engine, but the object lights up. Emissive map is used for creation materials of neon and fluorescent colors.

The Emissive map shows which areas of our material should glow and which should not.

<figure><img src="https://4240499350-files.gitbook.io/~/files/v0/b/gitbook-x-prod.appspot.com/o/spaces%2F-Lt-sE9MYKe9pZOcHwg5%2Fuploads%2Fi9OIZWvt3QbMBLhwgqUm%2Fimage.png?alt=media&amp;token=16bb30a9-fe70-411c-9546-4901558ed86a" alt=""><figcaption></figcaption></figure>


# Basic

Basic materials can only show the texture that is loaded into them. Basic does not receive  shadows or emit lights. It does not receive reflections. Generally, this material does not react to the environment.

Basic materials can be used in games, where the realism of objects is not so important and the materials are not expected to change. It can be used in 2D games and in the design phase.

Using this material, you can create simple objects that do not require many resources.

The Basic material has only one texture map - a Diffuse map.

<figure><img src="https://4240499350-files.gitbook.io/~/files/v0/b/gitbook-x-prod.appspot.com/o/spaces%2F-Lt-sE9MYKe9pZOcHwg5%2Fuploads%2Fw9900wdUuWcisqNp3fNG%2Fimage.png?alt=media&amp;token=d790d7dc-4882-4e95-b477-bdcfef93734a" alt=""><figcaption></figcaption></figure>


# Matcap

MatCap (Material Capture)  is one of the simplest materials. Along with the color, it also shows lighting and reflections.

This material is often used in game development when it is needed to minimize the resources spent. For example, MatCap is widely used in mobile games.

There are special MatCap textures for MatCap materials.

<figure><img src="https://4240499350-files.gitbook.io/~/files/v0/b/gitbook-x-prod.appspot.com/o/spaces%2F-Lt-sE9MYKe9pZOcHwg5%2Fuploads%2FZVWOMjDB5gDnYiOFn0ec%2Fimage.png?alt=media&amp;token=0fddb554-dbdc-426b-bcc2-395637c17fa8" alt=""><figcaption></figcaption></figure>

&#x20;

For MatCap materials, you may set up Color and Opacity type.

<figure><img src="https://4240499350-files.gitbook.io/~/files/v0/b/gitbook-x-prod.appspot.com/o/spaces%2F-Lt-sE9MYKe9pZOcHwg5%2Fuploads%2FuAm4QIZD40GSqrg5Hw7d%2Fimage.png?alt=media&amp;token=d71138ab-24e7-4b91-a185-4af3cbaa86ab" alt=""><figcaption></figcaption></figure>


# PBR

PBR (Physically-based rendering) provides physically correct visualization taking into account the laws of physics. PBR materials help to display the real model of the materials that exist in the physical world.

PBR has more settings than other materials. For PBR materials, you can set up Ambient Occlusion, Roughness, Metalness and Emissive.

PBR has 4 texture maps: Base, Normal, ARM and Emissive. You can manage these texture maps using the settings in the Material Panel.

<figure><img src="https://4240499350-files.gitbook.io/~/files/v0/b/gitbook-x-prod.appspot.com/o/spaces%2F-Lt-sE9MYKe9pZOcHwg5%2Fuploads%2FyAnOTWhC1u9C6tTo51AR%2Fimage.png?alt=media&amp;token=a44810f9-03bb-4855-82a2-21c3359f273f" alt=""><figcaption></figcaption></figure>

### **Base texture map**

Base is  responsible for the color of the object and consists of two texture maps: Albedo and Alpha. When you hover over the Base, you will see a control ![](https://4240499350-files.gitbook.io/~/files/v0/b/gitbook-x-prod.appspot.com/o/spaces%2F-Lt-sE9MYKe9pZOcHwg5%2Fuploads%2FgGmC3CiyunzqF3iKo7VY%2Fimage.png?alt=media\&token=1f86539b-cb93-4ca0-bd23-321d97f2f69a)with which you can proceed to loading these 2 texture maps. Click on it, then upload the map you need.

<figure><img src="https://4240499350-files.gitbook.io/~/files/v0/b/gitbook-x-prod.appspot.com/o/spaces%2F-Lt-sE9MYKe9pZOcHwg5%2Fuploads%2FB3INh34WsobauWMh52TM%2Fimage.png?alt=media&amp;token=dc3a36ff-6952-48b4-8f90-476cb7e3c80d" alt=""><figcaption></figcaption></figure>

If you only need the Albedo texture map, then load it using the uploader on the Base texture map <img src="https://4240499350-files.gitbook.io/~/files/v0/b/gitbook-x-prod.appspot.com/o/spaces%2F-Lt-sE9MYKe9pZOcHwg5%2Fuploads%2FULhgsF5ERVJD9RAnn4tW%2Fimage.png?alt=media&amp;token=3335229d-dea8-4a03-9c46-052a4e3046a9" alt="" data-size="line">, which will appear when you hover over the Base texture. Just click on it and a texture picker will appear together with an option to Import texture.

![](https://4240499350-files.gitbook.io/~/files/v0/b/gitbook-x-prod.appspot.com/o/spaces%2F-Lt-sE9MYKe9pZOcHwg5%2Fuploads%2Fd8cHG0nDtF8heih3ppqx%2Fimage.png?alt=media\&token=e64f6e05-7935-4748-b197-93a51deb86c1)

Note: If several texture maps are used, they must be of the same size.

### **Normal map setting**

We can modify the Normal map using a Normal setting option in the Material Panel.

<figure><img src="https://4240499350-files.gitbook.io/~/files/v0/b/gitbook-x-prod.appspot.com/o/spaces%2F-Lt-sE9MYKe9pZOcHwg5%2Fuploads%2FkVL6mBLuryo4OlW35A7m%2Fimage.png?alt=media&amp;token=449e26c0-da6c-4df0-80c1-ba43ea29ab03" alt=""><figcaption></figcaption></figure>

The Normal setting is responsible for the strength of the impact of the Normal map. We can increase the Normal map to give a slightly different look to our material. You will see the difference if you move the slider from right to left.

Note: the intensity of the normal map can exceed 100% and reach up to 500%.

<figure><img src="https://4240499350-files.gitbook.io/~/files/v0/b/gitbook-x-prod.appspot.com/o/spaces%2F-Lt-sE9MYKe9pZOcHwg5%2Fuploads%2Ftpd8R0IjHeiviVusT4l7%2Fimage.png?alt=media&amp;token=53fb3109-f31e-45c7-a67b-b496d118913a" alt=""><figcaption></figcaption></figure>

### **ARM texture map**

The ARM Texture Map has three textures: Ambient Occlusion, Roughness and Metallic. ARM is just short for AOC, Roughness and Metallic.

MANU has such functionality that allows you to bake several texture maps into one - the ARM map. Combining maps allows you to increase the performance of the game, also reduces the load on rendering.

To upload baked ARM map:

* hover over the ARM texture map in the Material Panel, you will see an uploader icon <img src="https://4240499350-files.gitbook.io/~/files/v0/b/gitbook-x-prod.appspot.com/o/spaces%2F-Lt-sE9MYKe9pZOcHwg5%2Fuploads%2FFH5kFz6o7S0FKIXJ58Mu%2Fimage.png?alt=media&amp;token=771a7cfd-a4c5-4c56-bb3f-d89e54bd700e" alt="" data-size="line">&#x20;
* click on it, then upload the already prepared baked ARM map or Import it from your computer.

![](https://4240499350-files.gitbook.io/~/files/v0/b/gitbook-x-prod.appspot.com/o/spaces%2F-Lt-sE9MYKe9pZOcHwg5%2Fuploads%2F2hnSkbS1emIzmk3DNtig%2Fimage.png?alt=media\&token=2019aa86-0e4a-4d54-92f1-309f6e8af089)

If you need to upload all 3 texture maps (Ambient Occlusion, Roughness and Metallic) separately:

* hover over the ARM in the Material Panel, you will see a control <img src="https://4240499350-files.gitbook.io/~/files/v0/b/gitbook-x-prod.appspot.com/o/spaces%2F-Lt-sE9MYKe9pZOcHwg5%2Fuploads%2FicbxtpUpsCBVrCTNbGyI%2Fimage.png?alt=media&amp;token=c822c682-b978-4724-81e3-140a6b89d38f" alt="" data-size="line">;
* click on it, then upload or import  the maps you need.

![](https://4240499350-files.gitbook.io/~/files/v0/b/gitbook-x-prod.appspot.com/o/spaces%2F-Lt-sE9MYKe9pZOcHwg5%2Fuploads%2F8xLs00emxHF6GcG7MbPe%2Fimage.png?alt=media\&token=7e563575-45f8-4daf-831b-c1eb7a38dede)

Note: If several texture maps are used, they must be of the same size.

### **Ambient Occlusion  map setting**

AOC setting allows you to adjust the desired level of shading on the object, by moving the slider.

<figure><img src="https://4240499350-files.gitbook.io/~/files/v0/b/gitbook-x-prod.appspot.com/o/spaces%2F-Lt-sE9MYKe9pZOcHwg5%2Fuploads%2FV3lXEbNJJ3lhYY1DI59e%2Fimage.png?alt=media&amp;token=83163b78-515c-41a5-86eb-f63f81b52f91" alt=""><figcaption></figcaption></figure>

### **Roughness setting**

Depending on the level of roughness, the object will scatter as much light as possible that falls on it. If there is a light source in the scene and we set the minimal Roughness, then the reflection from this light source will resemble the light source itself (for example, like reflection from a smooth surface).

As the Roughness approaches the maximum, the light begins to scatter more and more. The maximum Roughness is a relative concept: all the light will be distributed over the surface, there will be no bright glare on the material.

<figure><img src="https://4240499350-files.gitbook.io/~/files/v0/b/gitbook-x-prod.appspot.com/o/spaces%2F-Lt-sE9MYKe9pZOcHwg5%2Fuploads%2FIaB59aaZKh5OOHOYgPa7%2Fimage.png?alt=media&amp;token=803eeac7-de3a-44ab-826e-8144768d2d84" alt=""><figcaption></figcaption></figure>

<figure><img src="https://4240499350-files.gitbook.io/~/files/v0/b/gitbook-x-prod.appspot.com/o/spaces%2F-Lt-sE9MYKe9pZOcHwg5%2Fuploads%2FdNGj12A9s6utWHTcHNMO%2Fimage.png?alt=media&amp;token=b2bf5aaf-d9fd-4ee1-886f-35bf4ed927fe" alt=""><figcaption></figcaption></figure>

### **Metalness setting**

When the Metalness increases,  we see that our material begins to reflect not only the color of the light source. The metal color appears in the glare.

The color of the metal itself will always be there on the metal, regardless of the lighting. Move the slider of Metalness to set the value you need.

<figure><img src="https://4240499350-files.gitbook.io/~/files/v0/b/gitbook-x-prod.appspot.com/o/spaces%2F-Lt-sE9MYKe9pZOcHwg5%2Fuploads%2FE3P2xX4nyWN3KxqAkmE9%2Fimage.png?alt=media&amp;token=c8adcf6f-5140-4950-bd66-293126c041d6" alt=""><figcaption></figcaption></figure>

<figure><img src="https://4240499350-files.gitbook.io/~/files/v0/b/gitbook-x-prod.appspot.com/o/spaces%2F-Lt-sE9MYKe9pZOcHwg5%2Fuploads%2FHpVpELaGbIXwRL8F9qaA%2Fimage.png?alt=media&amp;token=83b63fd1-14ef-4f08-b169-1bfbeddac659" alt=""><figcaption></figcaption></figure>

By combining only 2 parameters Metalness and Roughness, we can create materials similar to materials that exist in the physical world. Basically, all surfaces can be described using 3 maps: Base, Roughness, Metalness

### **Emissive setting**

If you move the Emissive slider to the right, the object begins to glow brighter. However, it will not illuminate other objects on the stage. Using this parameter, we can increase the saturation of light on the object.

<figure><img src="https://4240499350-files.gitbook.io/~/files/v0/b/gitbook-x-prod.appspot.com/o/spaces%2F-Lt-sE9MYKe9pZOcHwg5%2Fuploads%2FihbgLTc4r2eRYE8rZeyD%2Fimage.png?alt=media&amp;token=ba177b8e-df27-49d4-b6eb-6d30e31b5686" alt=""><figcaption></figcaption></figure>

<figure><img src="https://4240499350-files.gitbook.io/~/files/v0/b/gitbook-x-prod.appspot.com/o/spaces%2F-Lt-sE9MYKe9pZOcHwg5%2Fuploads%2FQvne6WM481Q1cxqdfyFI%2Fimage.png?alt=media&amp;token=f0cf449b-4b3f-4ba0-99ec-15af3c0311ac" alt=""><figcaption></figcaption></figure>

### **Emissive color**

Emissive Color is a color of the emitted light.


# Glass

Glass simulates all glass and transparent surfaces that use physical refraction of light. Glass materials are materials that transmit light and at the same time refract it. To create such materials, it is not enough to use the Transparency parameter. Glass materials have 3 texture maps: Albedo, Normal, Roughness.

<figure><img src="https://4240499350-files.gitbook.io/~/files/v0/b/gitbook-x-prod.appspot.com/o/spaces%2F-Lt-sE9MYKe9pZOcHwg5%2Fuploads%2FFM94PVbEK79R3rW5KvNU%2Fimage.png?alt=media&amp;token=ceb99926-e393-4386-bbae-3a9ff2945922" alt=""><figcaption></figcaption></figure>

<figure><img src="https://4240499350-files.gitbook.io/~/files/v0/b/gitbook-x-prod.appspot.com/o/spaces%2F-Lt-sE9MYKe9pZOcHwg5%2Fuploads%2Fq5frBXUFyvadNxoLm50x%2Fimage.png?alt=media&amp;token=b4603b72-9cda-4b64-89b3-6daf213dfba8" alt=""><figcaption></figcaption></figure>

To create objects that look like glass, you may need to set the additional parameters: IOR, Absorbtion, Ambient, Turbidity and Aberation.

### **IOR (Index of Refraction)**

IOR is a physical quantity. It controls the degree of light refraction, the permeability through the surface of the material, and also how well the reflections are visible on materials.  If we increase the IOR (dragging the slider to the right), then we will see that the objects that are behind the glass begin to refract.

To create a more accurate imitation of the glass-like material, take the value from the IOR list for common  materials. For example, the standard value for refraction of glass = 1.33.

<figure><img src="https://4240499350-files.gitbook.io/~/files/v0/b/gitbook-x-prod.appspot.com/o/spaces%2F-Lt-sE9MYKe9pZOcHwg5%2Fuploads%2F9ScbHpZ5ce5VlACsDuIp%2Fimage.png?alt=media&amp;token=97892587-3cce-4b0e-8598-37d157a0a2d6" alt=""><figcaption></figcaption></figure>

### **Absorbtion**

Transparent materials can absorb light into themselves, this is due to inhomogeneities and impurities that are inside transparent materials. If the value of Absorption is 100%, the object actually becomes opaque.

<figure><img src="https://4240499350-files.gitbook.io/~/files/v0/b/gitbook-x-prod.appspot.com/o/spaces%2F-Lt-sE9MYKe9pZOcHwg5%2Fuploads%2F7XREbxaMFRJhVl9BClAV%2Fimage.png?alt=media&amp;token=bcbc6577-4ed8-4818-abc5-8072a3d436d2" alt=""><figcaption></figcaption></figure>

### **Ambient**

Ambient is responsible for the intensity of the Reflection of the sun on glass materials.

<figure><img src="https://4240499350-files.gitbook.io/~/files/v0/b/gitbook-x-prod.appspot.com/o/spaces%2F-Lt-sE9MYKe9pZOcHwg5%2Fuploads%2F7QDpDJubJDY87m6EfEWC%2Fimage.png?alt=media&amp;token=54ff20c4-6631-4b64-9c7f-dd11590102bd" alt=""><figcaption></figcaption></figure>

### **Turbidity**

Turbidity is responsible for the internal heterogeneity and clarity of the material.

Let's say we need to create a glass ball from unevenly cooled glass. This ball will consist of several glass layers with an inhomogeneous structure. Light is also reflected inside each layer of glass. This reflection also follows  the laws of refraction and reflection inside this glass ball. As a result, refraction of light and turbidity begin to occur inside this object, which also affects the transparency/opacity of the object itself.

This parameter is used to create a thick piece of glass, crystal, quartz, inside which you need to show multiple re-reflections. You can also use this parameter to create ice. Ice never occurs simultaneously.  Ice looks like a monolith from the outside, but inside it is heterogeneous. Turbidity will help to create this heterogeneity.

<figure><img src="https://4240499350-files.gitbook.io/~/files/v0/b/gitbook-x-prod.appspot.com/o/spaces%2F-Lt-sE9MYKe9pZOcHwg5%2Fuploads%2FDZG1Ow5GnVcf0jdjz8O6%2Fimage.png?alt=media&amp;token=68d02046-9b63-4133-9e0f-5a15a04bc4b0" alt=""><figcaption></figcaption></figure>

### **Aberations**

To make your glass object even more realistic, you can use the Aberation parameter. By increasing this parameter, a clear rainbow effect will appear on the glass object.

In the physical world, this effect can be seen on the surface of transparent materials in the form of narrow colored stripes in the vertical direction (for example, on double-glazed windows, on a puddle with drops of gasoline, on pieces of ice).

<figure><img src="https://4240499350-files.gitbook.io/~/files/v0/b/gitbook-x-prod.appspot.com/o/spaces%2F-Lt-sE9MYKe9pZOcHwg5%2Fuploads%2FyaVxKPdZ2ZB0v9tDCt7n%2Fimage.png?alt=media&amp;token=cf25c279-ac74-45a9-b953-d559953d18db" alt=""><figcaption></figcaption></figure>

#### &#x20;<a href="#q53u7oradb1t" id="q53u7oradb1t"></a>


# Glow

Glow was designed specifically to create materials that should have a halo of glow. For example, you need to create lights or neon signs.

The material with this shader will glow with the color that you have chosen for it. The object will glow with a halo, but will not illuminate other objects. The object with Glow material will not be a light source.

<figure><img src="https://4240499350-files.gitbook.io/~/files/v0/b/gitbook-x-prod.appspot.com/o/spaces%2F-Lt-sE9MYKe9pZOcHwg5%2Fuploads%2FKTOfL2ABHi3xO3J16Ny5%2Fimage.png?alt=media&amp;token=da8902af-fc8f-4f37-9148-9592394da52f" alt=""><figcaption></figcaption></figure>

For Glow, you can set the Glow Threshold – the brightness of the glow from 0 to 100%. The maximum brightness of the glow will be reached at 100%. The object will glow almost white.

<figure><img src="https://4240499350-files.gitbook.io/~/files/v0/b/gitbook-x-prod.appspot.com/o/spaces%2F-Lt-sE9MYKe9pZOcHwg5%2Fuploads%2F3epfq50RQTIMPQkrKQCK%2Fimage.png?alt=media&amp;token=0c3c232e-912c-4a87-bd38-0013e04f49da" alt=""><figcaption></figcaption></figure>

You can assign a Diffuse map to this material. In this case, the object will glow with the colors that are on the texture map.

<figure><img src="https://4240499350-files.gitbook.io/~/files/v0/b/gitbook-x-prod.appspot.com/o/spaces%2F-Lt-sE9MYKe9pZOcHwg5%2Fuploads%2FbHem5OWCPKjbJKNPubCd%2Fimage.png?alt=media&amp;token=4bd4ffec-c2b8-41ca-944e-40c77a085894" alt=""><figcaption></figcaption></figure>

The objects with the Glow material will have a halo of glow that will be visible even in complete darkness.


# Texture Tiling

Tiling is the way of duplicating the same texture/image on the material.  This setting changes the material look.

By default, the object is wrapped in a material with a texture which scale is equal to the one that is loaded into the game engine. The images on the object will clearly match all the faces and scale of the loaded/imported texture map.

Tiling allows us to scale up and down the size of the texture that we assign to the object.

<figure><img src="https://4240499350-files.gitbook.io/~/files/v0/b/gitbook-x-prod.appspot.com/o/spaces%2F-Lt-sE9MYKe9pZOcHwg5%2Fuploads%2FBr80OsS1xcvB6Lp6Wwgh%2Fimage.png?alt=media&amp;token=a0b92db9-6f82-491c-98d6-5d6b13369c0b" alt=""><figcaption></figcaption></figure>

<figure><img src="https://4240499350-files.gitbook.io/~/files/v0/b/gitbook-x-prod.appspot.com/o/spaces%2F-Lt-sE9MYKe9pZOcHwg5%2Fuploads%2FkGe9EbxCDzvkziSC3wPm%2Fimage.png?alt=media&amp;token=5895b09c-b3ee-4ba1-a10d-a81181397db8" alt=""><figcaption></figcaption></figure>

The scale increases or decreases in proportion to the texture coordinates (UV coordinates). By setting the appropriate coordinates, you can adjust the texture image, so it will look the way you need.


# Texture Offset

Offset is the way of changing how and when the seamless connection of texture patterns occurs. This setting changes image positioning.

Let's say we are not satisfied that the texture image on our object breaks on the edge.  We take Offset and start moving our texture along  the UV coordinates, and we will see that the texture begins to slide. As a result, our texture matches along the edges.

<figure><img src="https://4240499350-files.gitbook.io/~/files/v0/b/gitbook-x-prod.appspot.com/o/spaces%2F-Lt-sE9MYKe9pZOcHwg5%2Fuploads%2Fp82ubsXQnk4WQmrYj0Bw%2Fimage.png?alt=media&amp;token=02f4c361-99f2-4151-872c-50098f892cc6" alt=""><figcaption></figcaption></figure>

<figure><img src="https://4240499350-files.gitbook.io/~/files/v0/b/gitbook-x-prod.appspot.com/o/spaces%2F-Lt-sE9MYKe9pZOcHwg5%2Fuploads%2F8fGaJjSfEYtDf3MOiiqq%2Fimage.png?alt=media&amp;token=71f83757-6696-4a99-93f5-1d3262fca976" alt=""><figcaption></figcaption></figure>


# Cast Shadow

Cast Shadows is responsible for the ability of an object to cast a shadow in the scene and on other objects.

<figure><img src="https://4240499350-files.gitbook.io/~/files/v0/b/gitbook-x-prod.appspot.com/o/spaces%2F-Lt-sE9MYKe9pZOcHwg5%2Fuploads%2FtXkHFEYxdF9b5NvANLTb%2Fimage.png?alt=media&amp;token=4c617acd-d177-4409-9b3e-d40bc78d2dad" alt=""><figcaption></figcaption></figure>

If you disable this option by moving the green slider to the left (the slider will turn gray), the object will stop giving shadow. But it will not stop receiving shadow from other objects since the Receive shadow option is enabled.

<figure><img src="https://4240499350-files.gitbook.io/~/files/v0/b/gitbook-x-prod.appspot.com/o/spaces%2F-Lt-sE9MYKe9pZOcHwg5%2Fuploads%2FRSslO1OJnV66KryclvFJ%2Fimage.png?alt=media&amp;token=5119c691-7906-4f30-a7c6-f1b7a256e4cd" alt=""><figcaption></figcaption></figure>


# Opacity type

In Manu, you may set the different types of opacity for the selected object: opaque, transparent, cutout.

<figure><img src="https://4240499350-files.gitbook.io/~/files/v0/b/gitbook-x-prod.appspot.com/o/spaces%2F-Lt-sE9MYKe9pZOcHwg5%2Fuploads%2FA2XDj3BYmBpEGrjjghuU%2Fimage.png?alt=media&amp;token=cf7dc567-5133-4974-82c4-6343c7387caa" alt=""><figcaption></figcaption></figure>


# Opaque

By default, all objects in the Scene are opaque. This means that the object does not have any transparency. But this can be changed by choosing other Opacity options.

<figure><img src="https://4240499350-files.gitbook.io/~/files/v0/b/gitbook-x-prod.appspot.com/o/spaces%2F-Lt-sE9MYKe9pZOcHwg5%2Fuploads%2Fb5jT05qe8529Y4yueLud%2Fimage.png?alt=media&amp;token=a855d22f-b67d-4ad3-b32f-e3ba8152d95a" alt=""><figcaption></figcaption></figure>


# Transparency

Transparent is responsible for the transparency of the object, but not for the transparency of the material. For example, during the game you will need to make the wall translucent for a while, behind which the Main Character will move. So, you can see him. The transparency option will help you to do it.

The intensity of the Opacity parameter (in Transparent mode) can be changed from 0 to 100%. If the parameter value is 0, the object will be completely transparent.

<figure><img src="https://4240499350-files.gitbook.io/~/files/v0/b/gitbook-x-prod.appspot.com/o/spaces%2F-Lt-sE9MYKe9pZOcHwg5%2Fuploads%2F5blIVL9K6IsaAXz7q1A4%2Fimage.png?alt=media&amp;token=a0eae2f1-0f55-43cf-8e24-8686d60be621" alt=""><figcaption></figcaption></figure>

<figure><img src="https://4240499350-files.gitbook.io/~/files/v0/b/gitbook-x-prod.appspot.com/o/spaces%2F-Lt-sE9MYKe9pZOcHwg5%2Fuploads%2Fv1WCeBH17f4yDd8INts9%2Fimage.png?alt=media&amp;token=3df318aa-4f78-42b6-800a-8477f2dceaf3" alt=""><figcaption></figcaption></figure>

<figure><img src="https://4240499350-files.gitbook.io/~/files/v0/b/gitbook-x-prod.appspot.com/o/spaces%2F-Lt-sE9MYKe9pZOcHwg5%2Fuploads%2FqyZCMJd40u6ldKlm0TZR%2Fimage.png?alt=media&amp;token=22f67796-e0c4-42d3-9993-a5ec382704be" alt=""><figcaption></figcaption></figure>

This option also considers the fact that some objects may consist of several components (objects) and some parts overlap each other.

When the opacity increases, such an object becomes opaque unevenly. And we can see where these components overlap, since in these places (areas) the transparency is less intense than in the whole object. Although all parts have the same level of transparency.

Look at the screenshot below. With the same opacity parameter of 22%, the component parts of the object in overlap areas give less transparency. It also brings the visualization of the object closer to the realities of the physical world.

<figure><img src="https://4240499350-files.gitbook.io/~/files/v0/b/gitbook-x-prod.appspot.com/o/spaces%2F-Lt-sE9MYKe9pZOcHwg5%2Fuploads%2Fg70iBohxAv4ku3jm08lu%2Fimage.png?alt=media&amp;token=313319d0-4986-4fee-8adb-cb713d92bae0" alt=""><figcaption></figcaption></figure>


# Cutout

Cutout is used to create objects that do not require large geometry. For example, leaves, fences, grids, objects with holes.

For Cutout, you need to load a texture map, but it must be with an alpha channel and contain only black and white colors.

<figure><img src="https://4240499350-files.gitbook.io/~/files/v0/b/gitbook-x-prod.appspot.com/o/spaces%2F-Lt-sE9MYKe9pZOcHwg5%2Fuploads%2FUtHwBApyj3qJw6Pi4DER%2Fimage.png?alt=media&amp;token=f236e856-cb55-4fe7-a604-ac2876fef899" alt=""><figcaption></figcaption></figure>

You may set the Intensity parameter in the cutout mode. When you increase it, the edge of the alpha channel begins to lighten, and edge artifacts are eliminated.

<figure><img src="https://4240499350-files.gitbook.io/~/files/v0/b/gitbook-x-prod.appspot.com/o/spaces%2F-Lt-sE9MYKe9pZOcHwg5%2Fuploads%2F2L3Rw7MBfD1OKeUlIuLn%2Fimage.png?alt=media&amp;token=6d4ddb2c-6f53-4fe0-861a-2de5acb2edb8" alt=""><figcaption></figcaption></figure>

&#x20;

<figure><img src="https://4240499350-files.gitbook.io/~/files/v0/b/gitbook-x-prod.appspot.com/o/spaces%2F-Lt-sE9MYKe9pZOcHwg5%2Fuploads%2FPO1OUwH9bZsh2uy3fQux%2Fimage.png?alt=media&amp;token=3e8b143f-eb49-435a-a8a9-17404230f8b7" alt=""><figcaption></figcaption></figure>

<figure><img src="https://4240499350-files.gitbook.io/~/files/v0/b/gitbook-x-prod.appspot.com/o/spaces%2F-Lt-sE9MYKe9pZOcHwg5%2Fuploads%2FvSNqFHYKibaFS0gCmyS4%2Fimage.png?alt=media&amp;token=56684378-cb64-463d-93de-71e7cfa6ff31" alt=""><figcaption></figcaption></figure>

You can play around with different materials and their settings to create objects that we can see in real life. You can do so much with them.  Just keep in mind that you are going to drain some resources using different materials and changing their parameters.&#x20;


# Physics

This article discusses how physics is used in MANU. You will learn what physics is, and how to apply its settings for objects in MANU when creating a video game.

## What Is Physics? <a href="#docs-internal-guid-be710f48-7fff-9768-8d94-ec0fc3f235ed" id="docs-internal-guid-be710f48-7fff-9768-8d94-ec0fc3f235ed"></a>

In 3D games, physics means using the laws of real world physics to make objects move and interact in a realistic way. For example, if your game character pushes a rock off a cliff, the rock will fall until it hits the ground. These laws are not hard coded, which means that you can change the values of certain physical parameters to build your own game mechanics. A common example is changing the amount of gravity present.

Depending on how you want your object to interact in your game, you can choose one of the following types of physics for it:

{% content-ref url="/pages/-MOadXVmEnPe82IY5DY-" %}
[Static Objects](/learn/manual/physics/static-objects)
{% endcontent-ref %}

{% content-ref url="/pages/-MOadx\_AepFLNyQyPofr" %}
[Dynamic Objects](/learn/manual/physics/dynamic-objects)
{% endcontent-ref %}

{% content-ref url="/pages/-MOae\_RKsX2vMJD3grW5" %}
[Kinematic Objects](/learn/manual/physics/kinematic-objects)
{% endcontent-ref %}

{% content-ref url="/pages/-MOaf-UCibpdplbZGvsT" %}
[Ghost Objects](/learn/manual/physics/ghost-objects)
{% endcontent-ref %}


# Static Objects

Static objects are objects that can neither move nor be moved in a game. They participate in collisions, but they do not visually respond to collisions.

This type of object is perfect for ground, walls, stones, and other heavy objects that serve as a physical environment where your game takes place. The simplest example is a flat plane. The one you would use to create a basketball court, for example.

To make an object static, select an object in a scene in the Edit mode, go to the Physics tab in the Inspector panel, and turn the Physics on. The object will become physical and static by default.

The screenshot below demonstrates the Physics tab settings for a static floor object.&#x20;

![](https://dl.dropboxusercontent.com/s/dovt9rwzk14zwmc/001.png?dl=0)

Static objects have the following parameters:

* **Friction.** The friction of a static object defines how easily other objects will slide over its surface. By default, the friction is set to 100. If you set the friction of a static object to 0, other objects will slide endlessly over its surface.
* **Bounciness.** The bounciness of a static object defines how far other objects will move away from its surface after they hit it. By default, the bounciness is set to 50. The higher the value, the bouncier the surface of a static object will be. If you set the bounciness of a static object to 0, other objects will not bounce on or off its surface at all.
* **Wall.** This setting is used to define whether or not a game character can climb up a given object.

{% embed url="<https://dl.dropboxusercontent.com/s/awy0354uc1ehoht/v001.webm>" %}

### Animatable parameters

* Rigidbody Enabled/Disabled
* Rigidbody Type
* Friction
* Bounciness


# Dynamic Objects

Dynamic objects are objects that can move and be affected by forces. For example, react to collisions with a game character or other moving objects, and follow the gravity.

The simplest example of a dynamic object is a ball. If a character hits a ball, the ball will move in response. Dynamic objects are perfect for balls and any other objects you expect to be movable in your game scene, such as barrels, crates, see-saw objects, etc.

To make an object dynamic, select an object in a scene in the Edit mode, go to the Physics tab in the Inspector panel, and turn the Physics on. Change the type of the Rigidbody to Dynamic.

In the example below, you can see the Physics tab with the settings for a dynamic ball object.&#x20;

![](https://dl.dropboxusercontent.com/s/cpart2s6h2wzvx1/002.png?dl=0)

Dynamic objects have the following parameters:

* **Mass.** The mass of a dynamic object defines how easily it can be moved. Objects with higher mass will affect the lighter objects more and vice versa the lighter objects will affect the heavier ones less.
* **Friction.** The friction of a dynamic object defines how easily it will slide over other surfaces. By default, the friction is set to 100. If you set the friction of a dynamic object to 0, it will slide endlessly over other objects.
* **Bounciness.** The bounciness of a dynamic object defines how far it will move away from other objects after it hits them. By default, the bounciness is set to 50. The higher the value, the bouncier the dynamic object will be. If you set the bounciness of a dynamic object to 0, it will not bounce on or off other objects at all.

Note that you can use the following Lock settings for a dynamic object. These settings help you to build more stable and predictable game mechanics:

* **Position.** This restricts the dimensions in which a dynamic object can move. For example, if you lock the Z-axis of an object, it will only move up or down and forward or backward, and it won't move sideways.
* **Rotation.** This restricts the dimensions in which a dynamic object can rotate.&#x20;

{% embed url="<https://dl.dropboxusercontent.com/s/my0nw6kwbft3zp2/v002.webm>" %}

### Animatable parameters

* Rigidbody Enabled/Disabled
* Rigidbody Type
* Friction
* Bounciness
* Mass


# Kinematic Objects

Kinematic objects are objects whose movement is defined by you as a game creator via animation.

Kinematic objects can collide with dynamic objects, but they will not be affected by collisions, forces, or any other part of the physics system. The collision response of kinematic objects is up to you. This type of object is perfect for moving platforms, doors, moving obstacles, flying arrows, etc.

To make an object kinematic select an object in a scene in the Edit mode, go to the Physics tab in the Inspector panel, and turn the Physics on. Change the type of the Rigidbody to Kinematic. In the example below, you can see the Physics tab with the settings for a kinematic box object.&#x20;

![](https://dl.dropboxusercontent.com/s/47p85alu3xss4pd/003.png?dl=0)

Kinematic objects have the following parameters:

* **Friction.** The friction of a kinematic object defines how easily other objects will slide over its surface. By default, the friction is set to 100. If you set the friction of a kinematic object to 0, dynamic objects will slide endlessly over its surface.
* **Bounciness.** The bounciness of a kinematic object defines how far other objects will move away from its surface after they hit it. By default, the bounciness is set to 50. The higher the value, the bouncier the surface of a kinematic object will be. If you set the bounciness of a kinematic object to 0, dynamic objects will not bounce on or off its surface at all.
* **Wall.** This setting is used to define whether or not a game character can climb up a given object.

{% embed url="<https://dl.dropboxusercontent.com/s/iuw4ruc70ry753e/v003.webm>" %}

### Animatable parameters

* Rigidbody Enabled/Disabled
* Rigidbody Type
* Friction
* Bounciness
* Position X/Y/Z
* Rotation X/Y/Z
* Scale X/Y/Z


# Ghost Objects

Ghost objects are objects that have no physical parameters such as mass, friction, or bounciness.

Ghost objects have nothing except a **collider** and are absolutely penetrable. They are used to detect collisions with other physical objects. When a collision is detected, it will trigger a certain event or behavior of certain objects or the environment. You can think of a ghost object as a sensor that performs a certain task when other objects collide with it. For example, you can make a door open when your character collides with a ghost object in front of it. Ghost objects can also be used on top of dynamic objects to ensure a more realistic visual interaction between objects.

To make an object a ghost object, select an object in a scene in the Edit mode, go to the Physics tab in the Inspector panel, and turn the Physics on. Change the type of the Rigidbody to Ghost. In the example below, you can see the Physics tab with the settings for a ghost box object.&#x20;

![](https://dl.dropboxusercontent.com/s/76t51gcr03vmuwi/004.png?dl=0)

You can apply the Ghost rigidbody type to any primitive available in MANU and any imported 3D model.

{% embed url="<https://dl.dropboxusercontent.com/s/ouyvsu6shm9qtyy/v004.webm>" %}

### Animatable parameters

* Rigidbody Enabled/Disabled
* Rigidbody Type
* Position X/Y/Z
* Rotation X/Y/Z
* Scale X/Y/Z


# Disabling Object's Rigidbody

To implement required game mechanics, you can switch off the physical body of an object in your game.

For example, you may need to make a static wall penetrable for your game character when a certain event occurs. For this purpose, you should **set up an animation** that will switch off the object’s rigidbody and thus make it non-physical.&#x20;

In the image below, you can see the Rigidbody toggle switch next to the Rigidbody type in the Inspector panel. When you switch the Rigidbody on and off, all the settings, like friction and bounciness, remain unchanged.
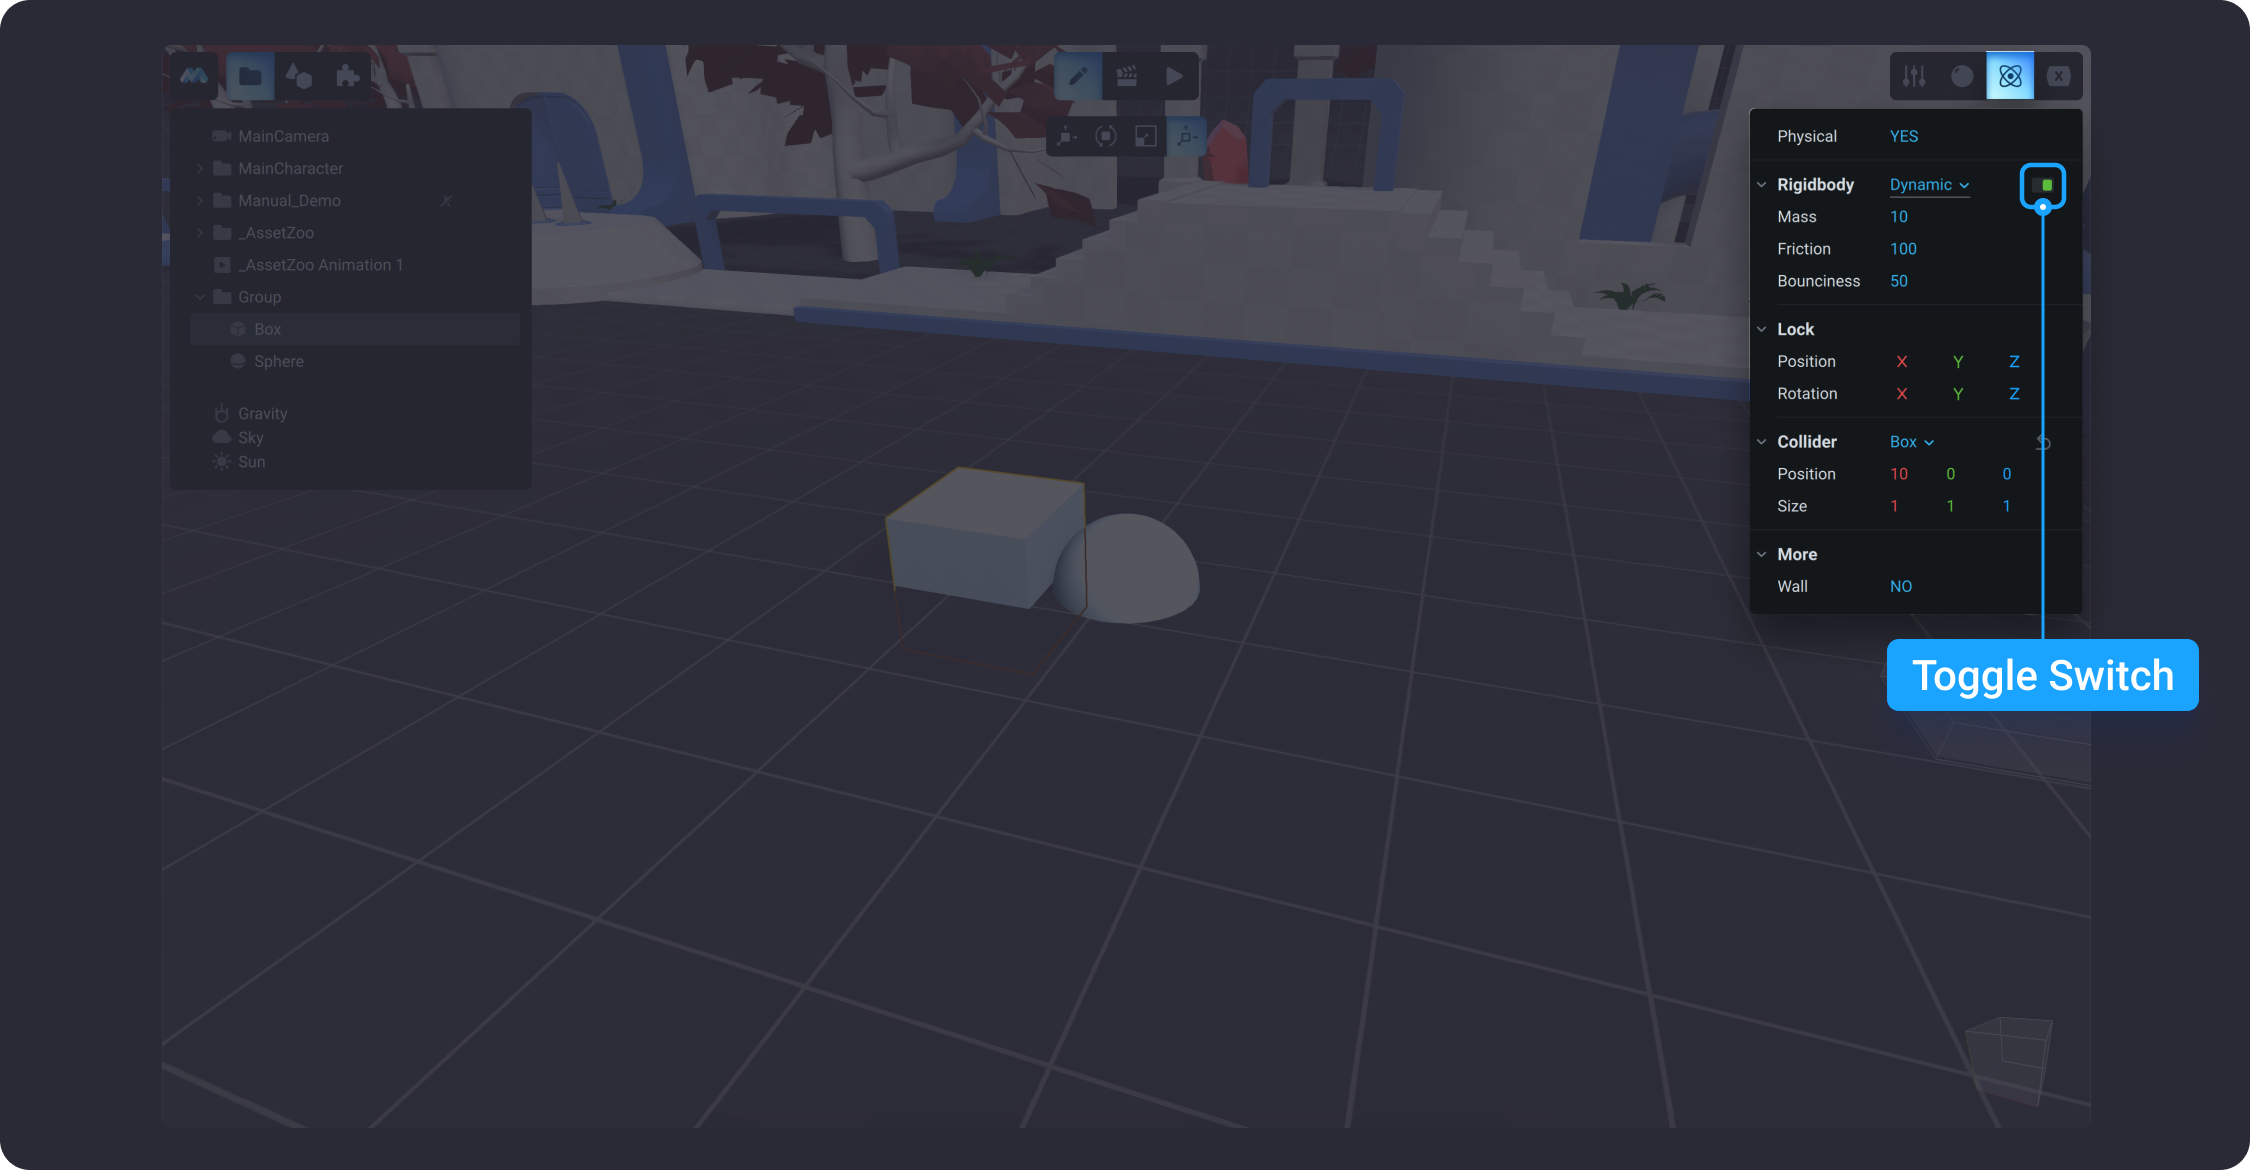
![](https://dl.dropboxusercontent.com/s/8g1k5qnz95u12sw/005.png?dl=0)

{% embed url="<https://dl.dropboxusercontent.com/s/36gnwlp20244ot8/v005.webm>" %}


# Collider

The Collider of a physical game object is used to define the object's collision bounds and to detect contact with other objects.

Collider can be thought of as an invisible physical shape of an object. For example, a physical vase in your game will be represented by two separate shapes: a shape visible to the player—probably, a complex one—and a simplified invisible physical shape, a cylinder, to approximately match the visible part of your vase. The collider types you can use in MANU are described below:

### **Box**&#x20;

This is a rectangular cuboid that is useful for items such as crates or chests. You can also use a thin box collider as a floor, wall, or a ramp.
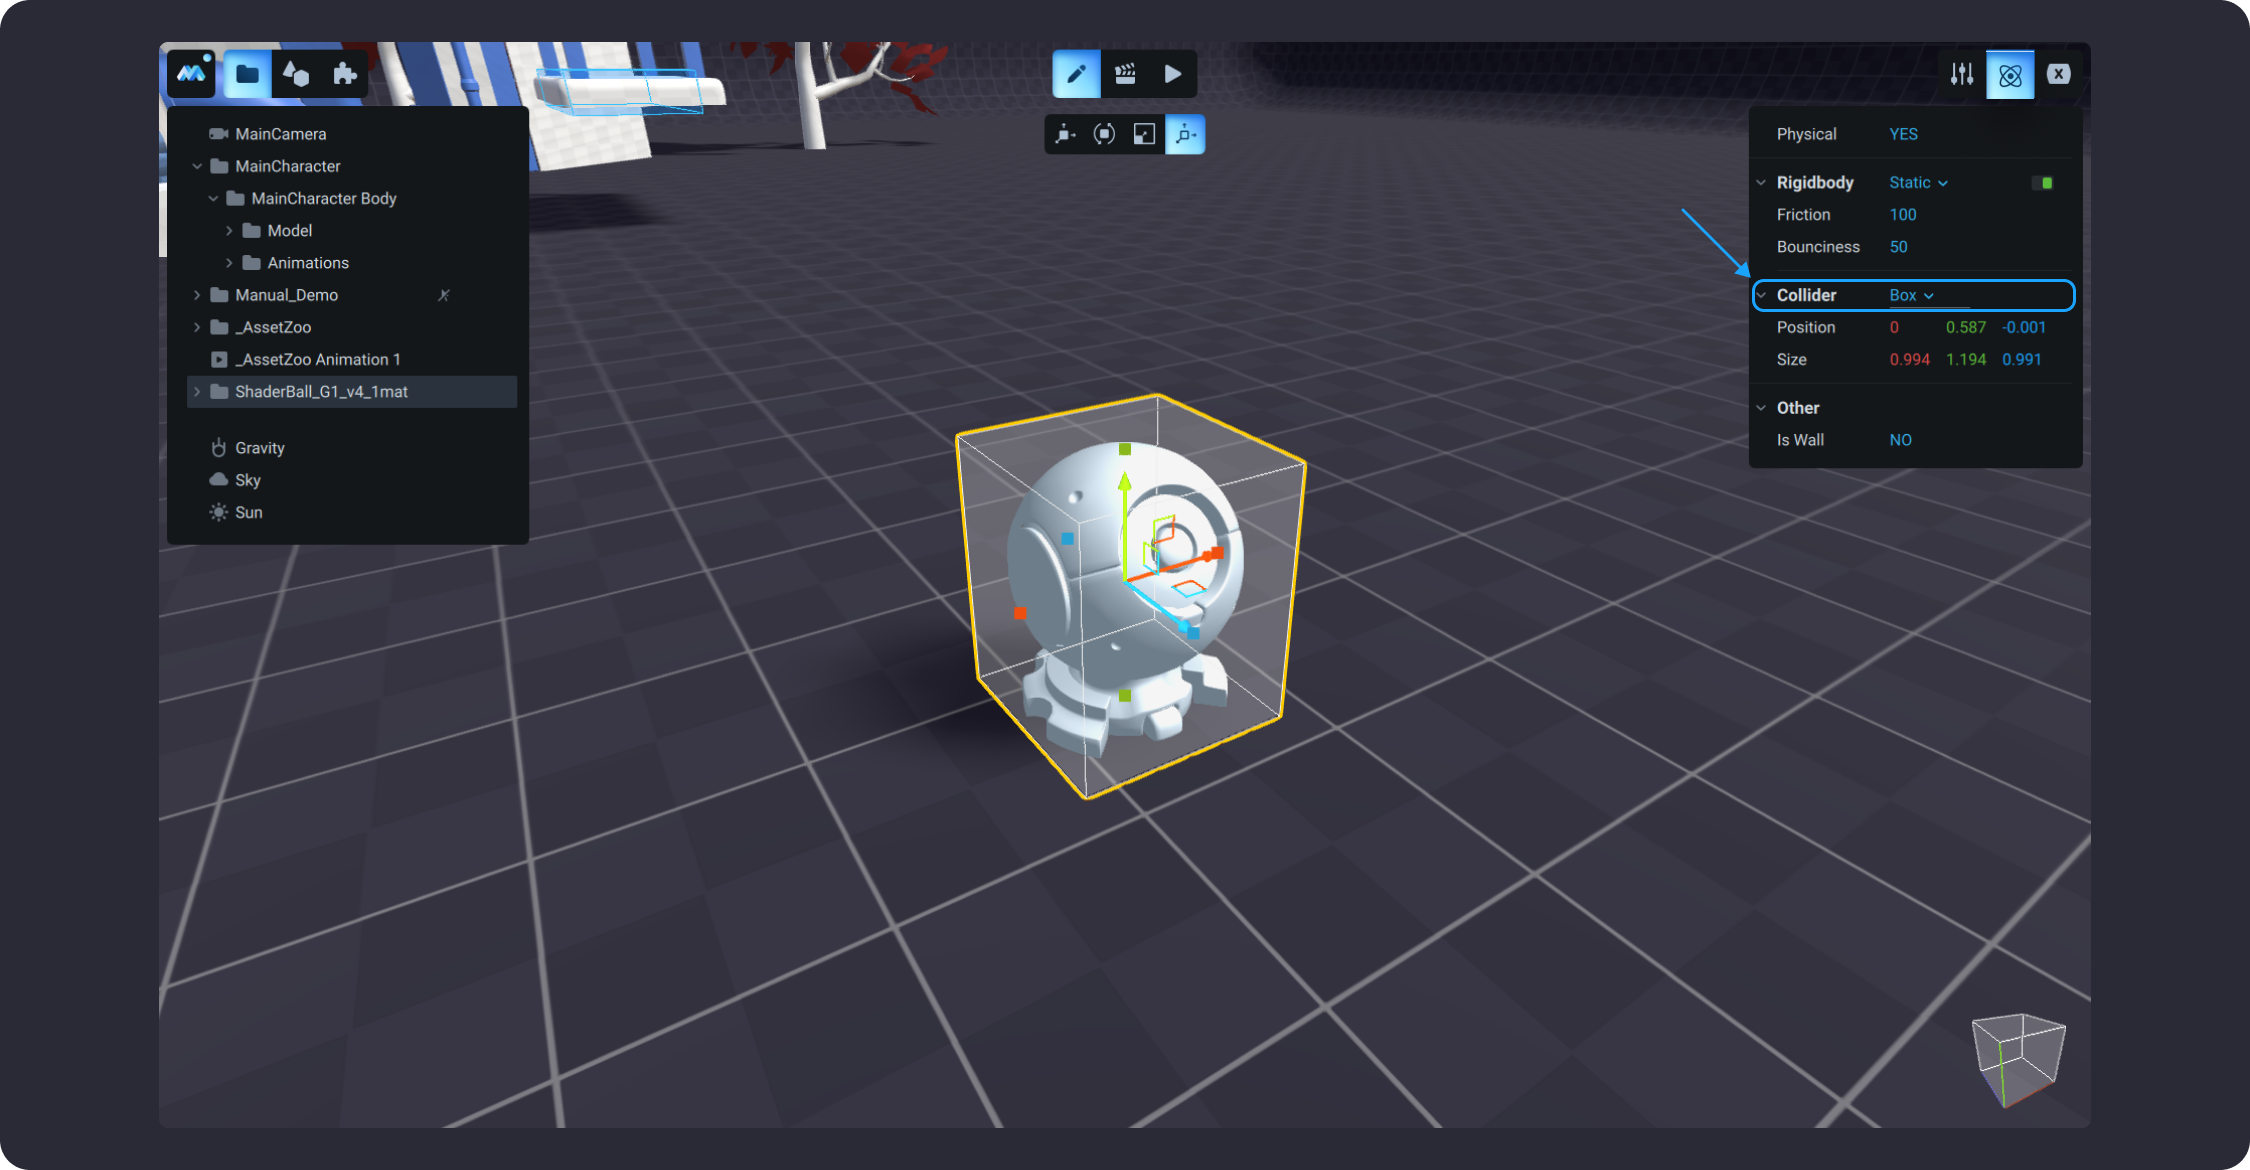
![](https://dl.dropboxusercontent.com/s/cz2jydsxtxaf78e/001.png?dl=0)

### **Sphere**&#x20;

This is a basic sphere-shaped element. It works well for balls, obviously, and other objects that need to roll and tumble, for example, falling boulders.
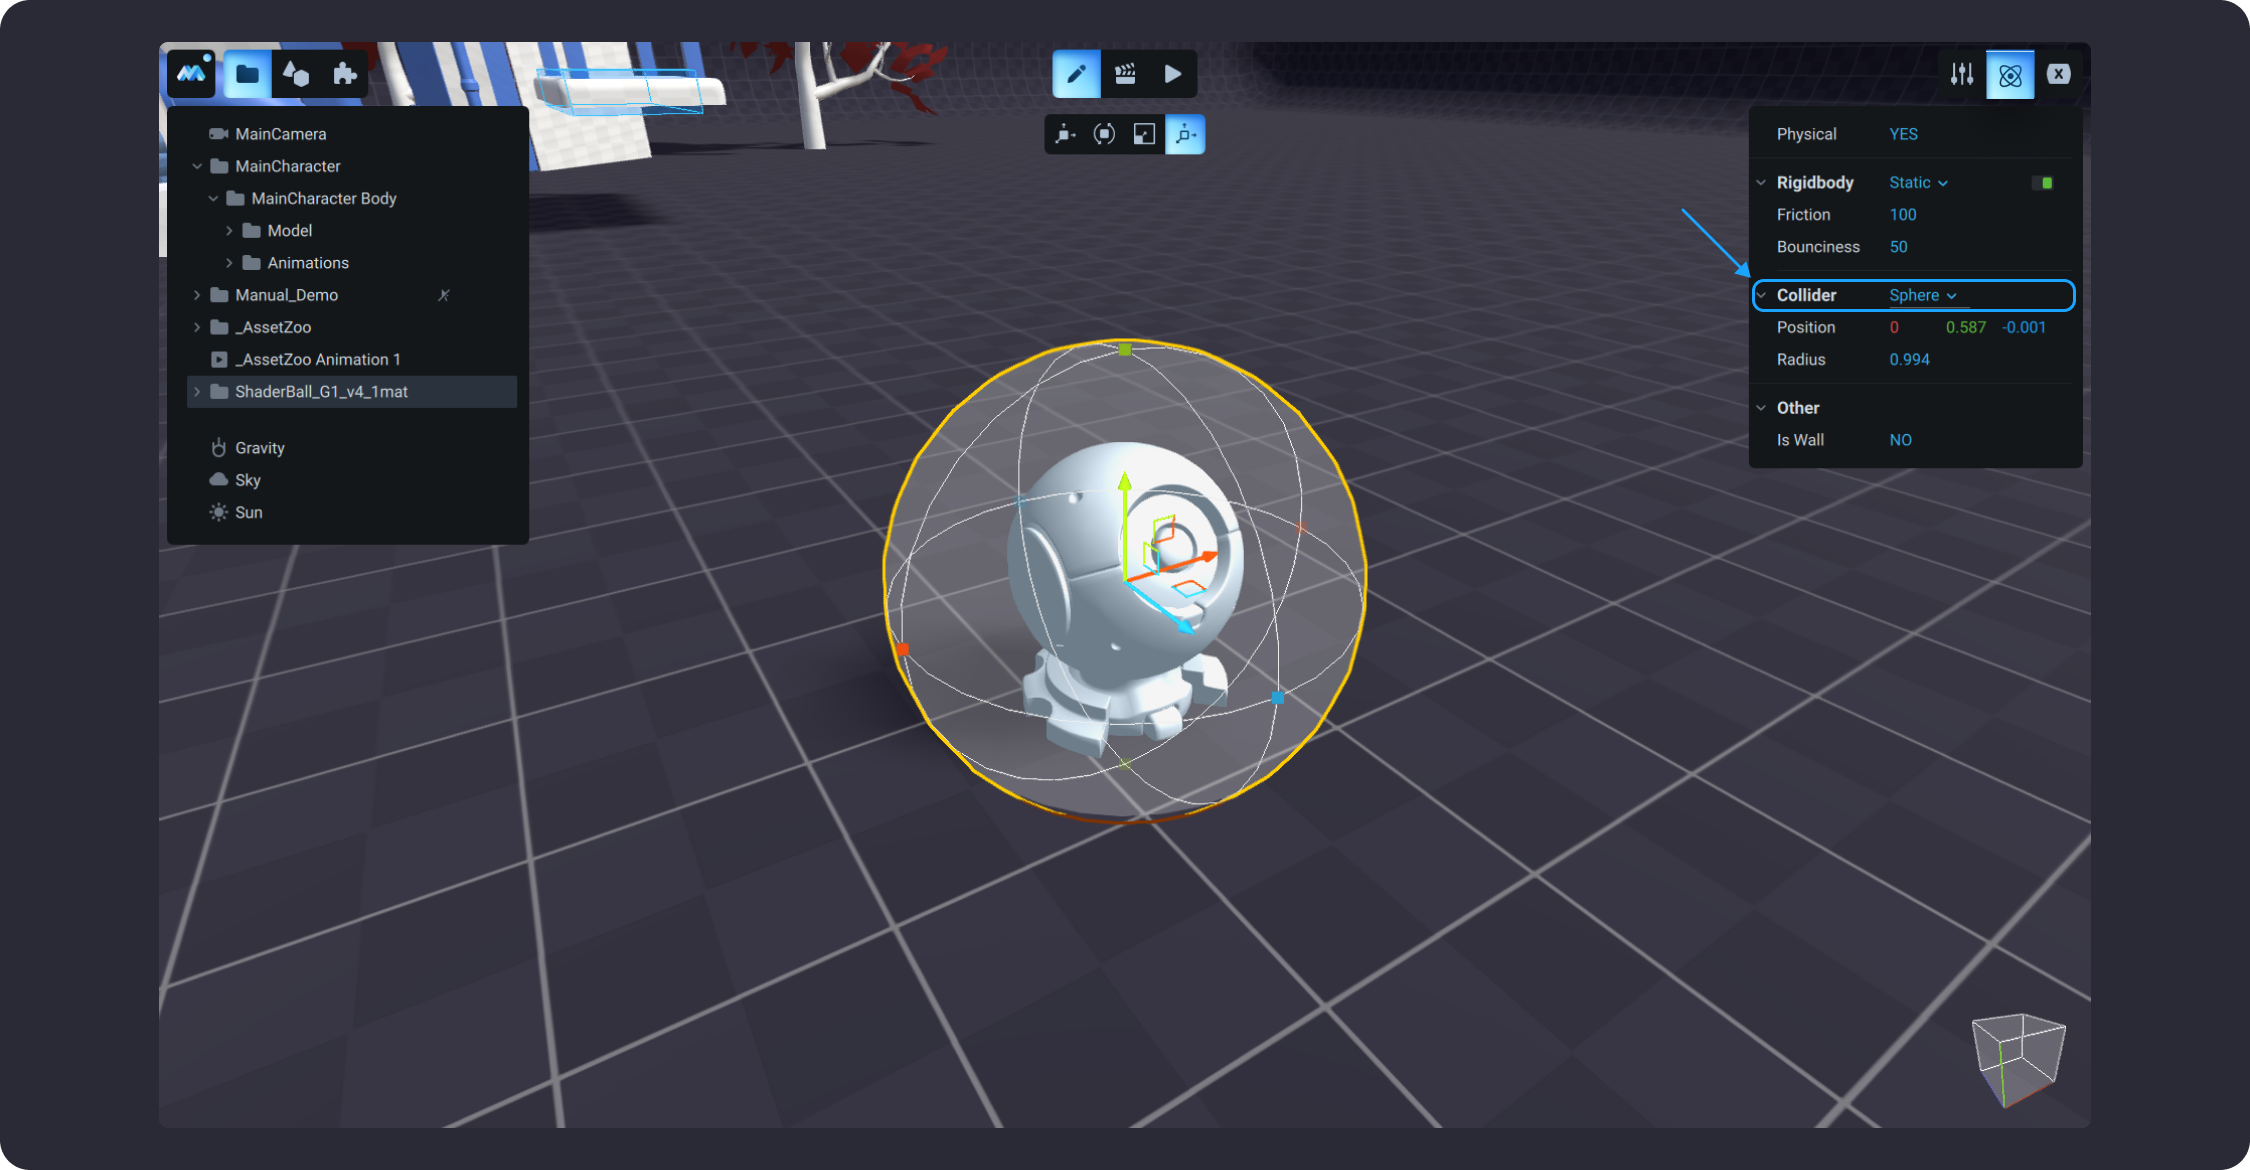
![](https://dl.dropboxusercontent.com/s/9gtdryah332r732/002.png?dl=0)

### **Capsule**&#x20;

This is an element that is made of two half-spheres joined together by a cylinder. It is suitable for pillars and can be combined with other colliders for unusual shapes.
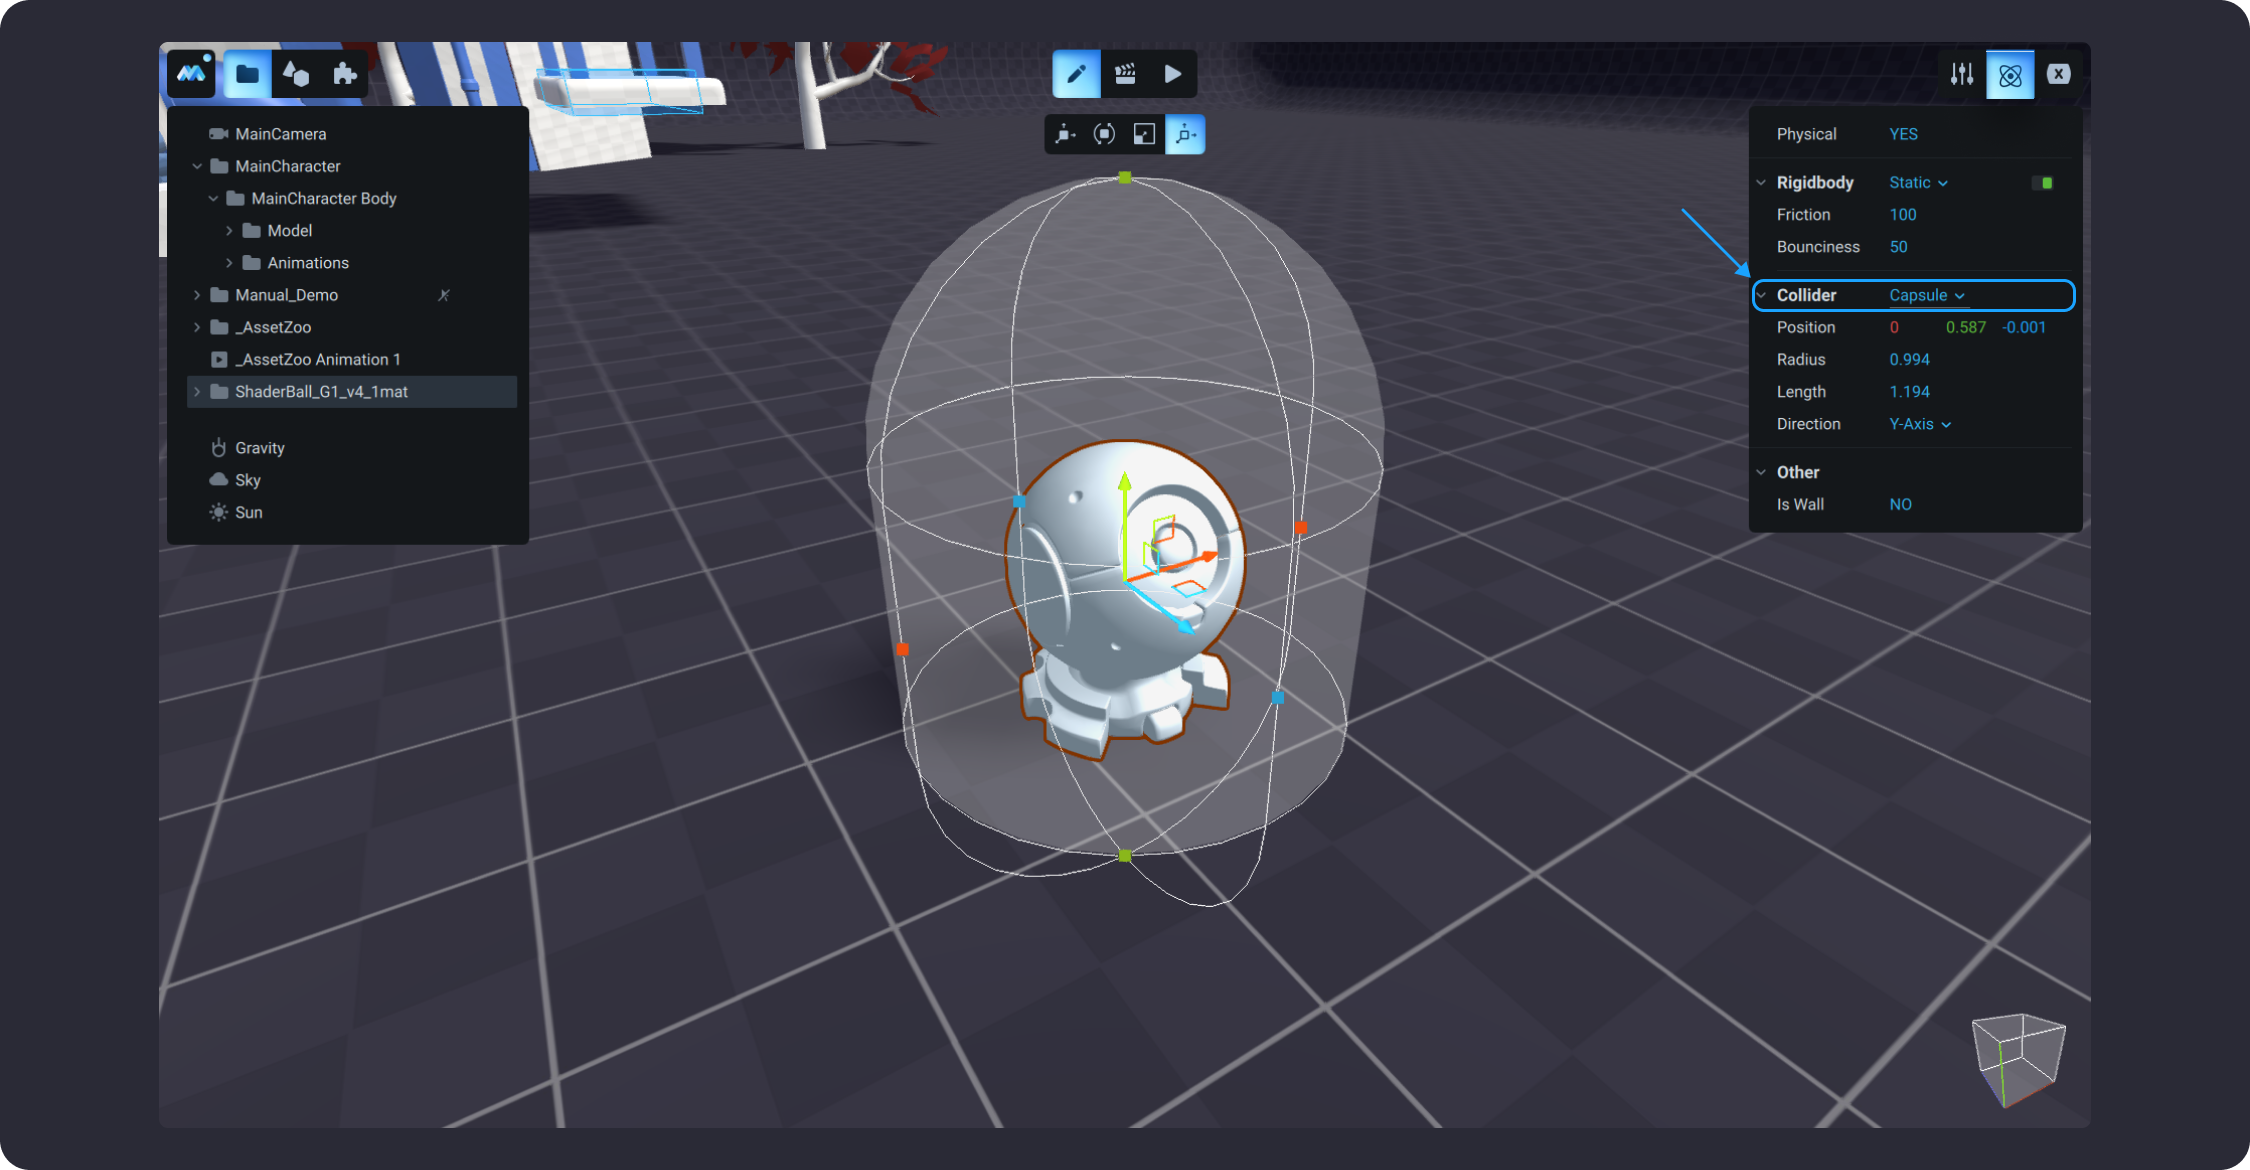
![](https://dl.dropboxusercontent.com/s/j59i9x7l2pbbc2d/003.png?dl=0)

### **Plane**&#x20;

This is an element that implements a flat collision surface. Note that the plane collider is infinite.
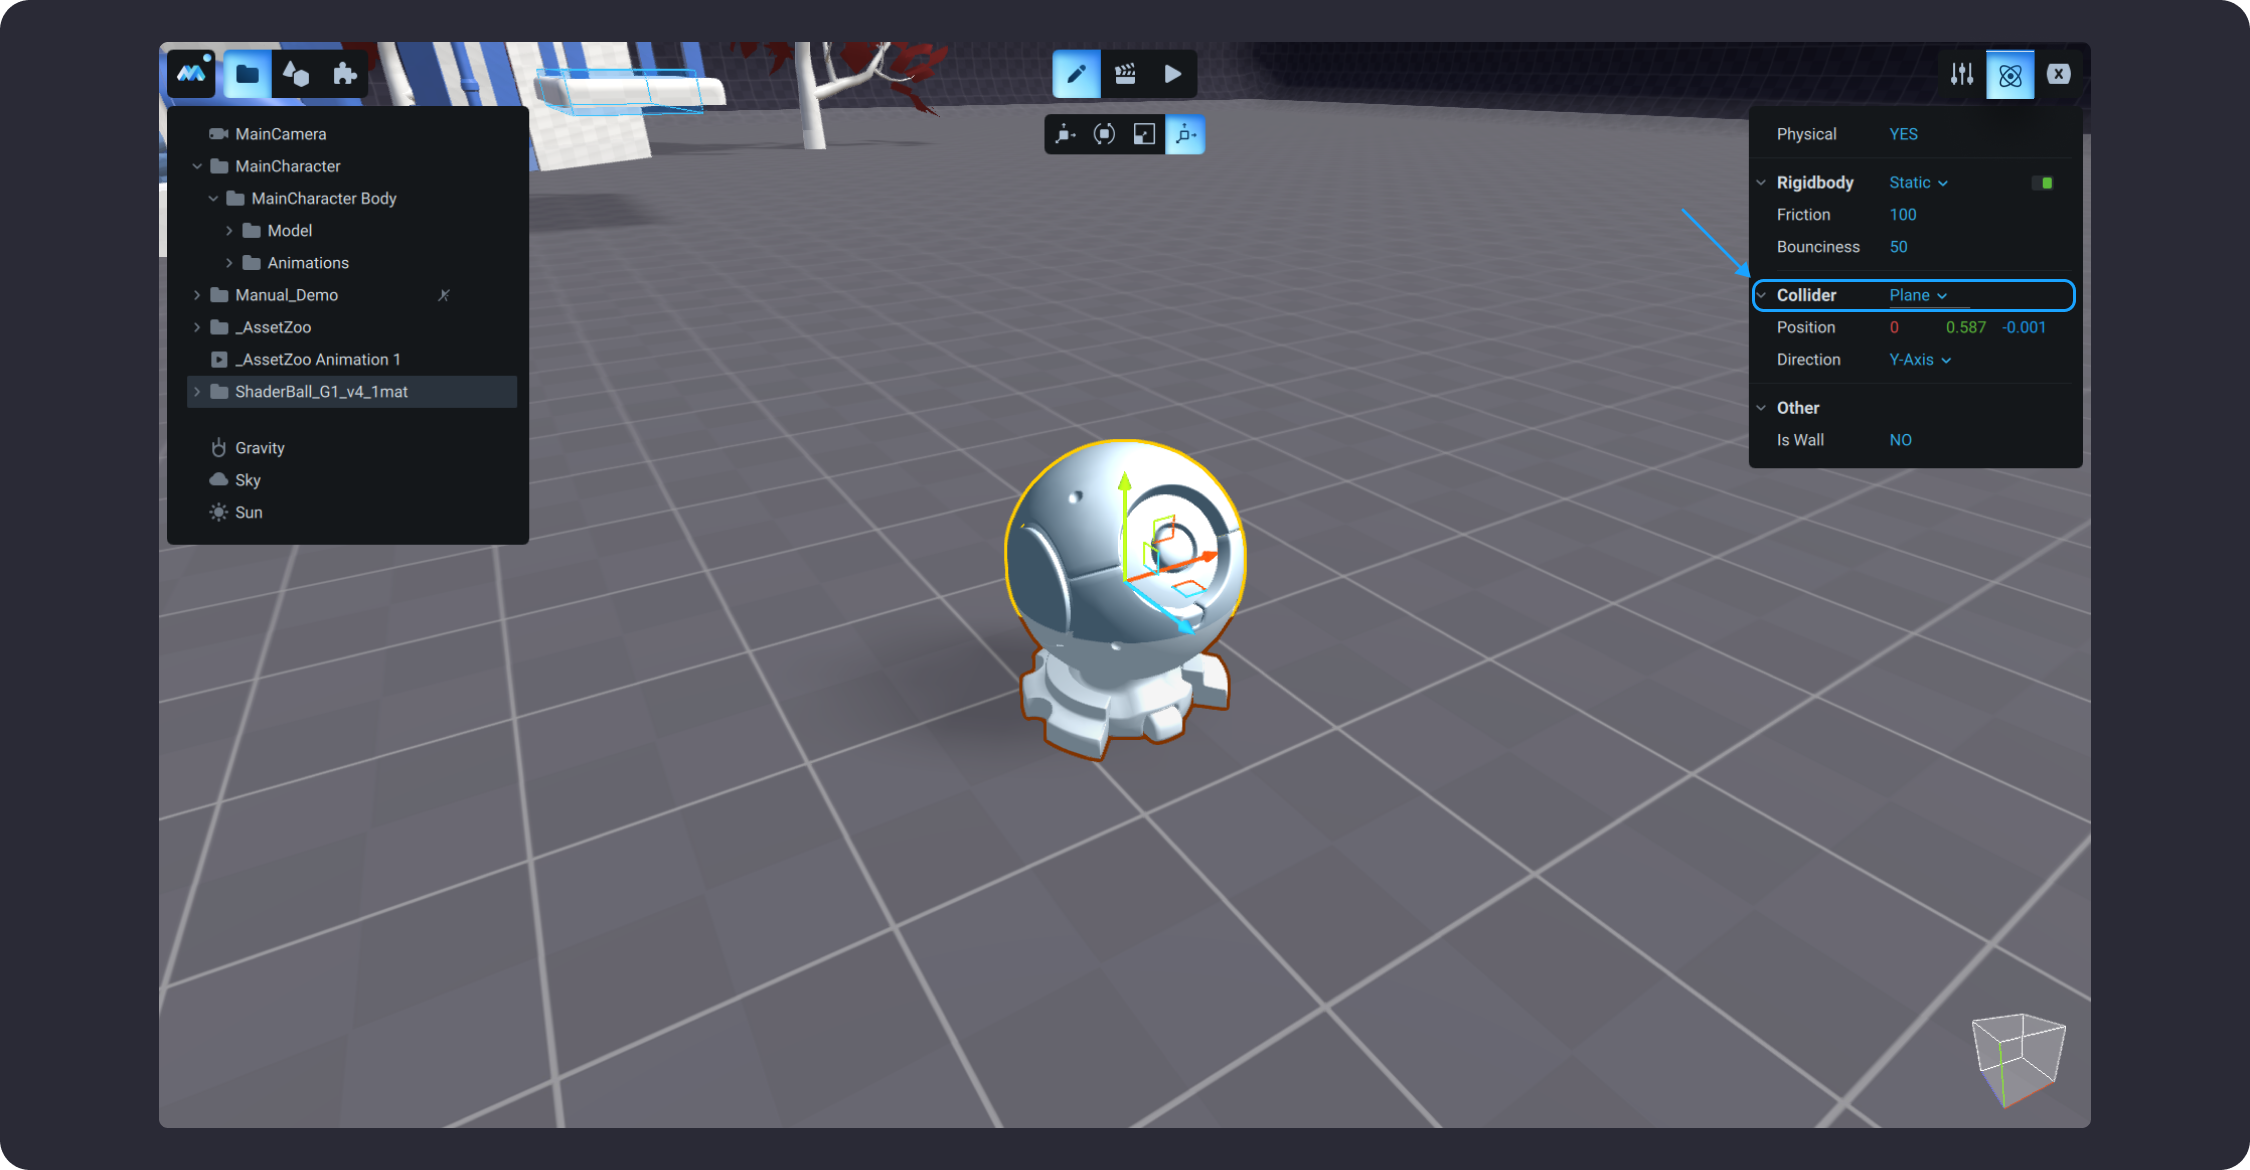
![](https://dl.dropboxusercontent.com/s/3nlrwds0xn39jyh/006.png?dl=0)

### **Cylinder**&#x20;

This is a basic cylinder-shaped element that can be handy for creating posts, rods, and wheels.
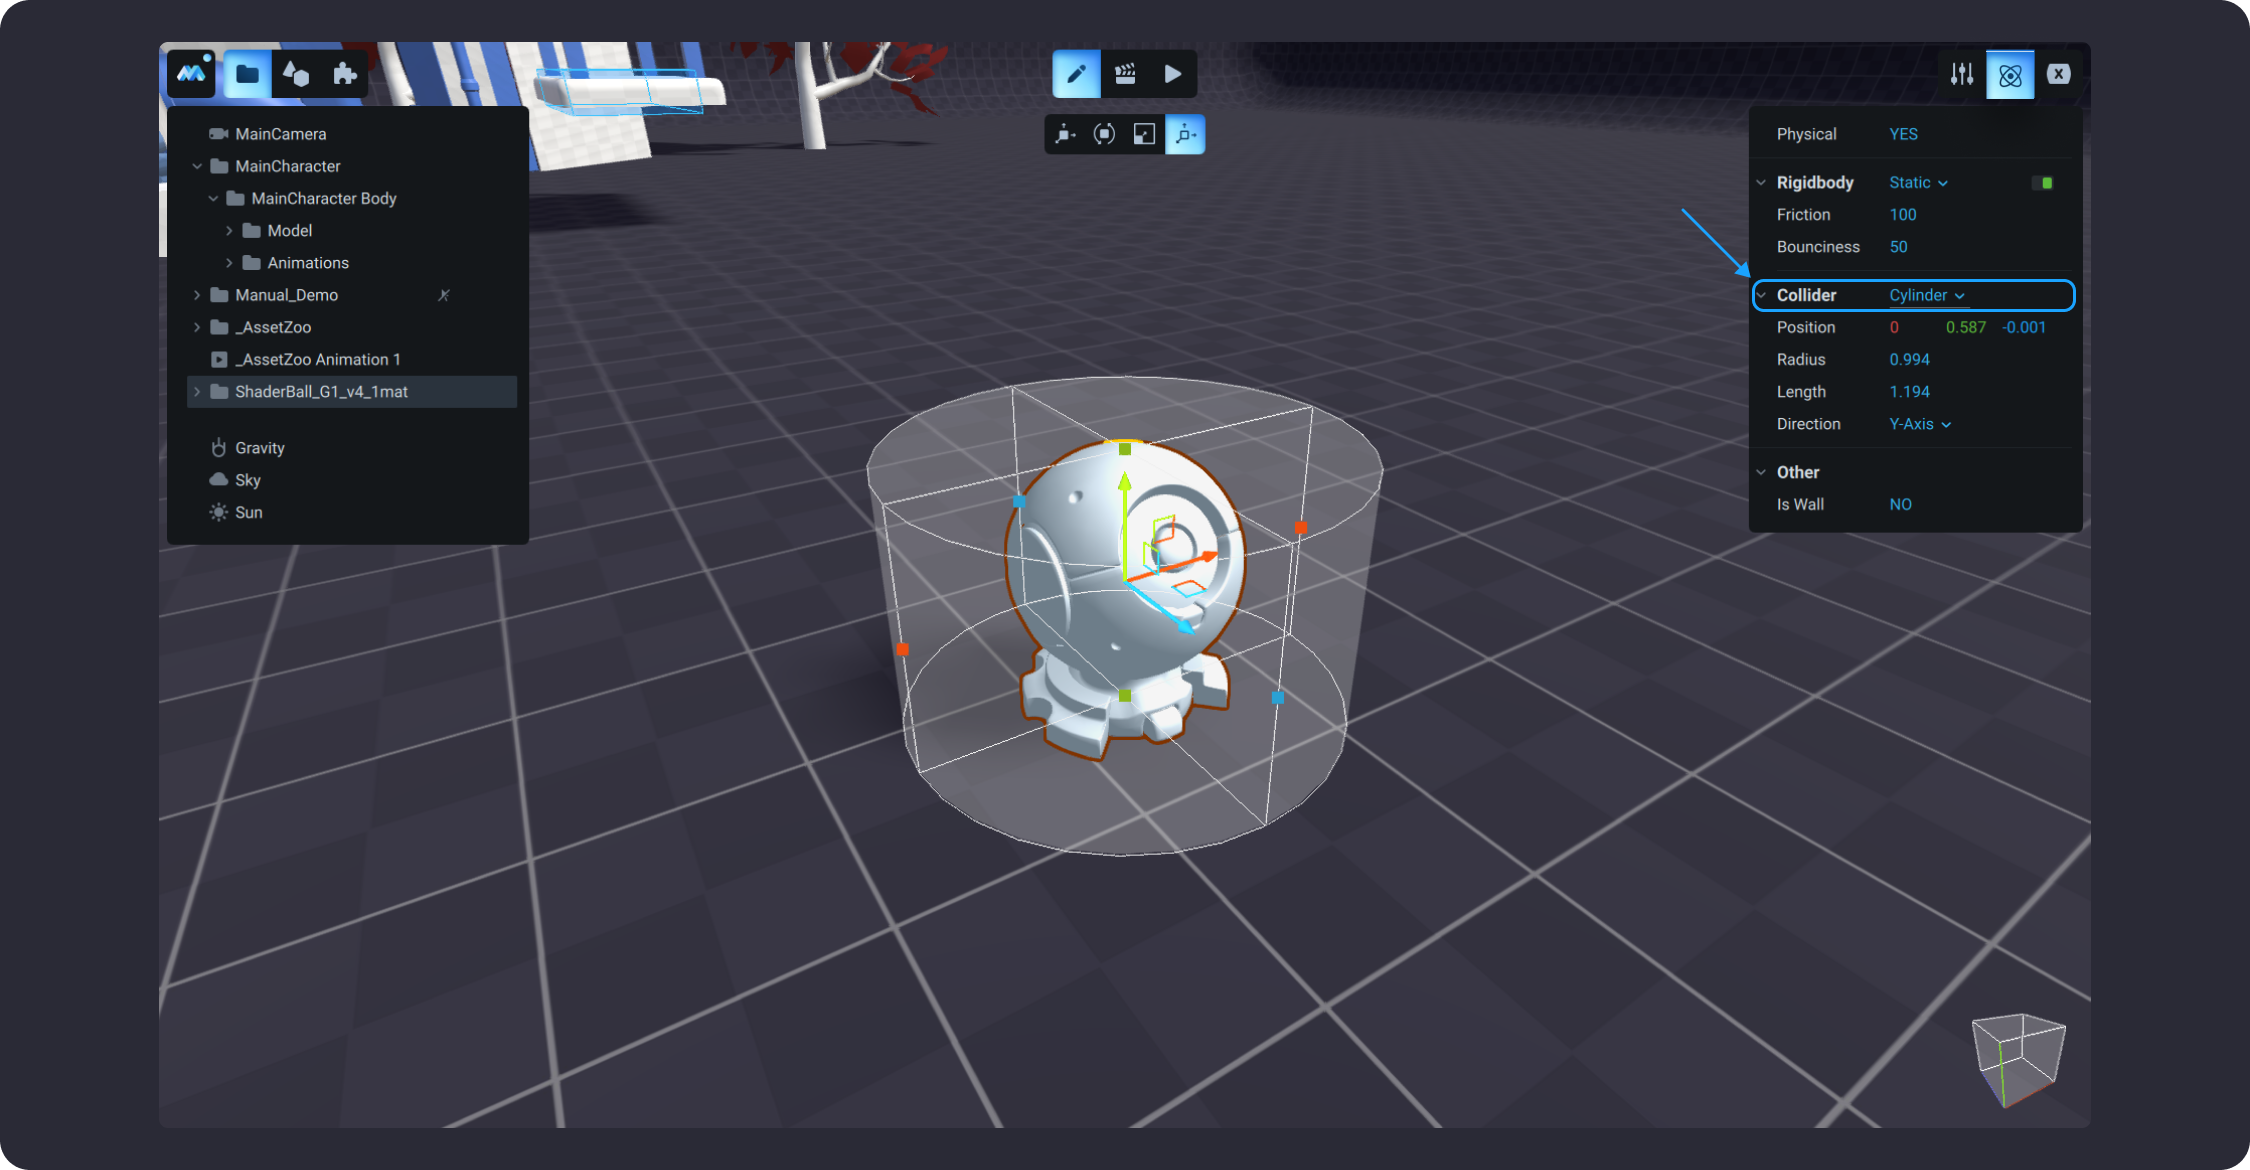
![](https://dl.dropboxusercontent.com/s/lr08pjc56rqcjqh/004.png?dl=0)

### **Cone**&#x20;

This is a basic cone-shaped element. It is perfect for tree crowns. You can also use it to create compound colliders.
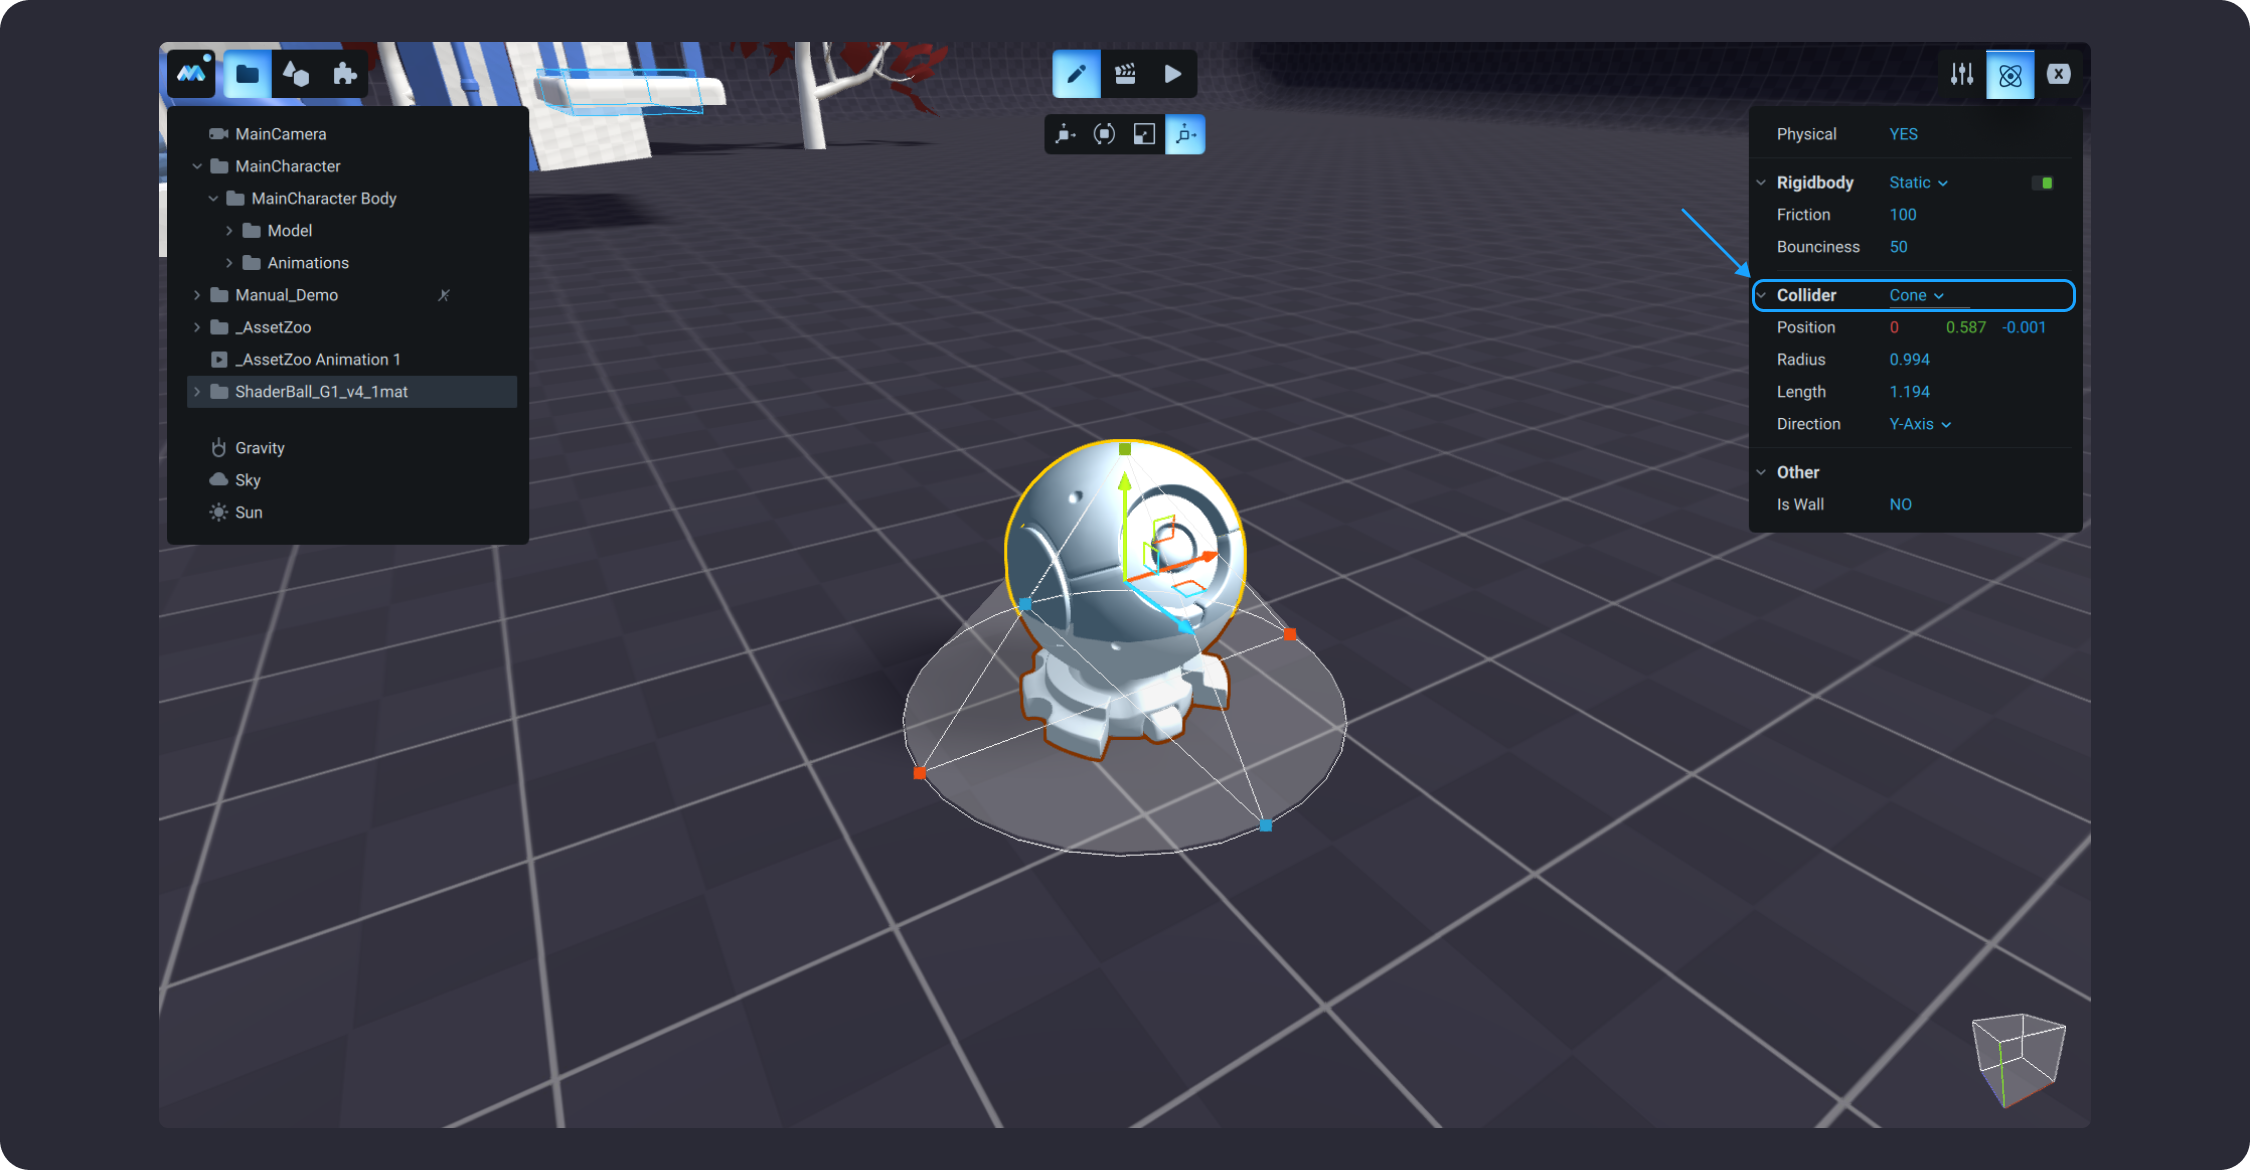
![](https://dl.dropboxusercontent.com/s/v8c7sdsakvmbdya/005.png?dl=0)

### **Convex** **hull**&#x20;

This is a shape that completely encloses a set of points. Convex hulls are usually used for imported objects of complex shapes. Note that convex hull colliders can be simplified to save computational resources.
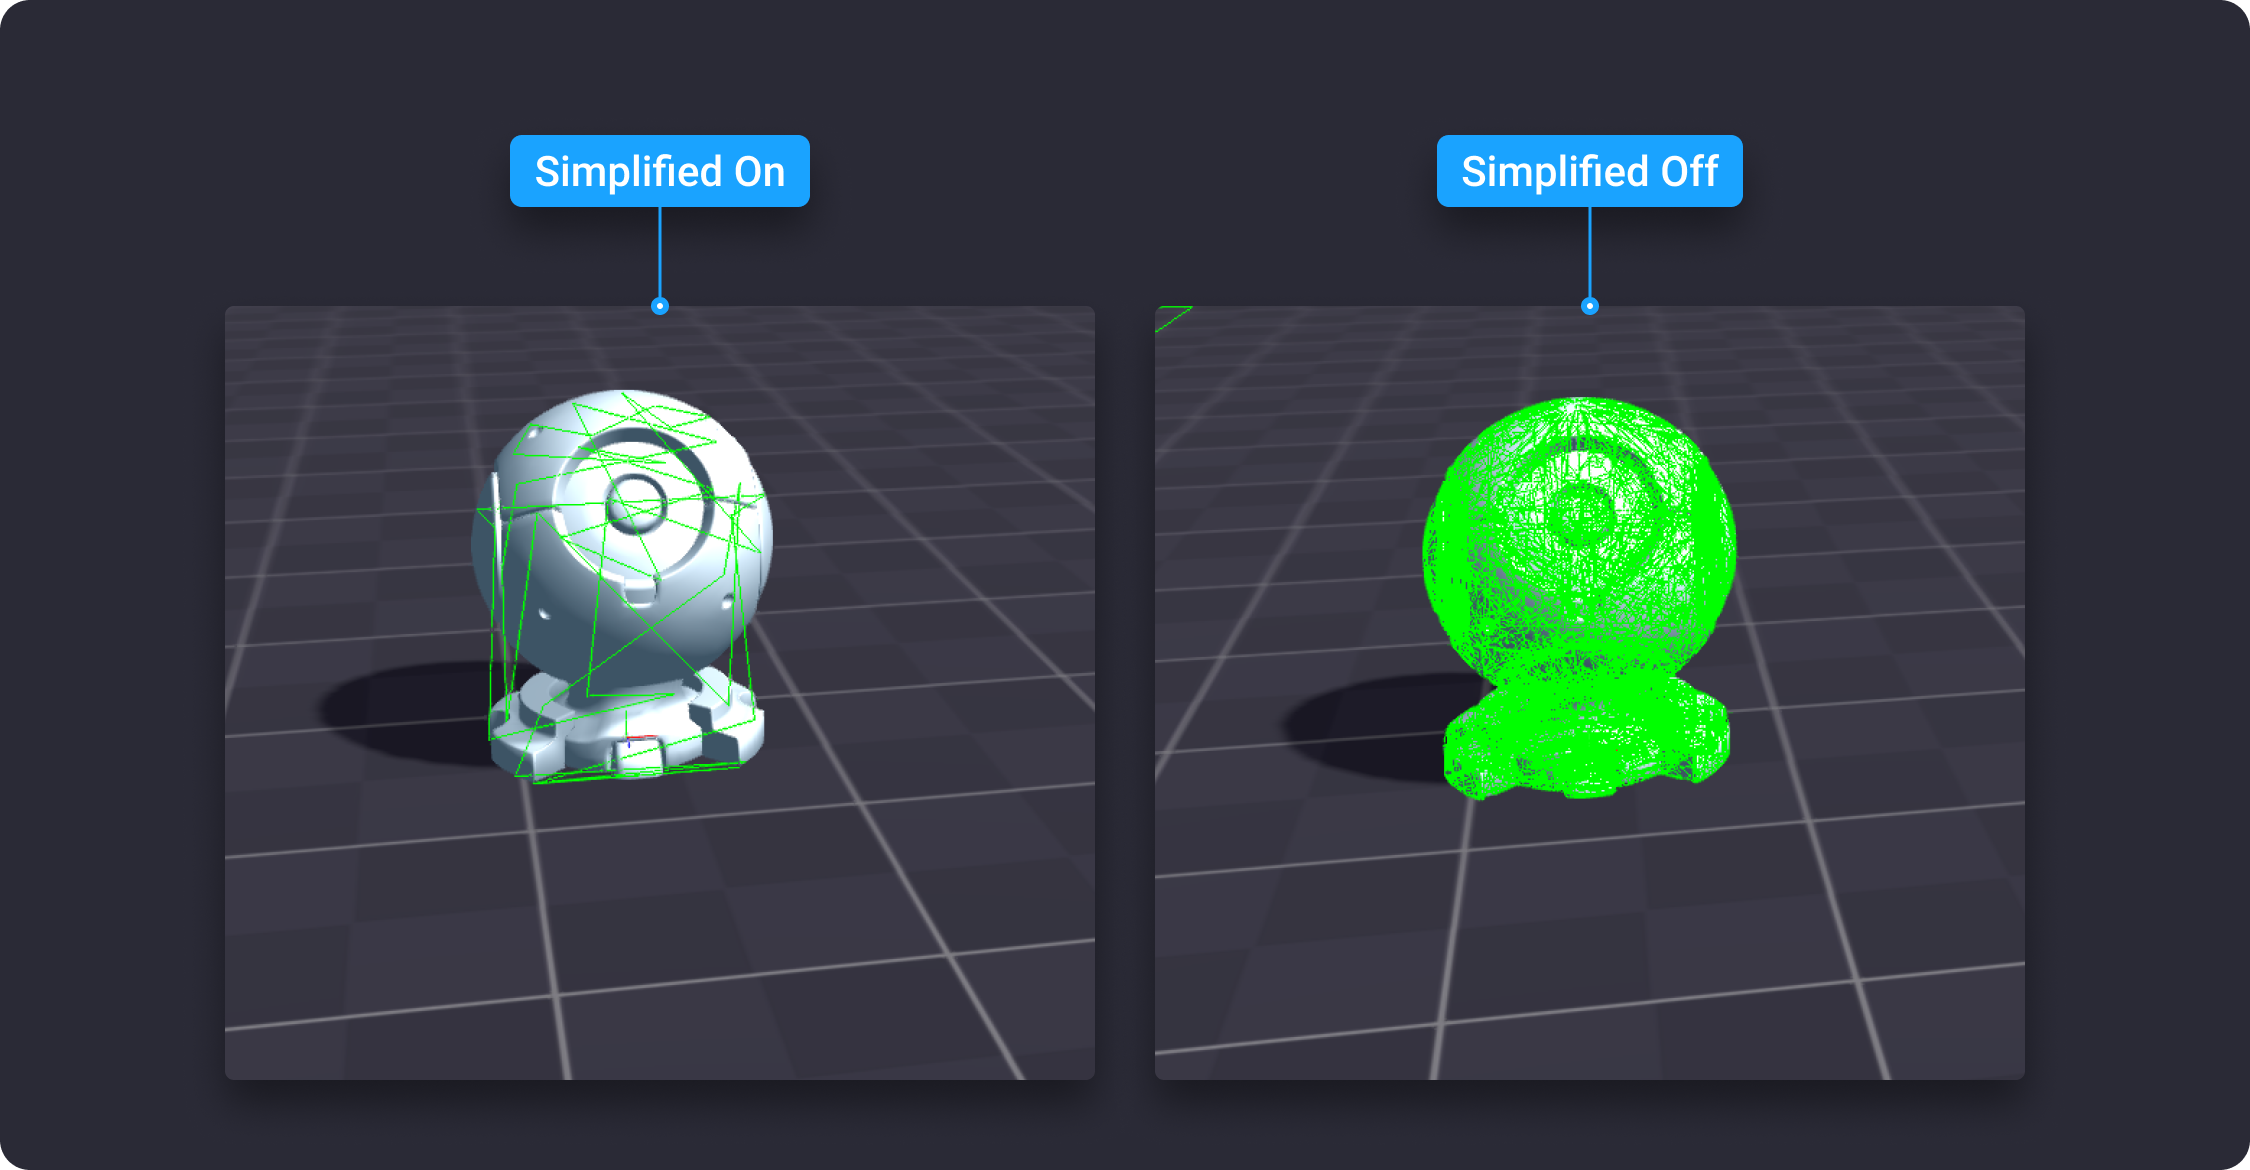
![](https://dl.dropboxusercontent.com/s/xc1eedkx21rx10f/007.png?dl=0)

{% hint style="info" %}
Note that you can change collider parameters like position and size to suit your game needs. You can do it by using the Gizmo of an object or by changing the required parameters manually in the Inspector panel. Besides, you can use the Reset button next to the collider type to reset the collider settings to the default values, if necessary. See the image below.
{% endhint %}
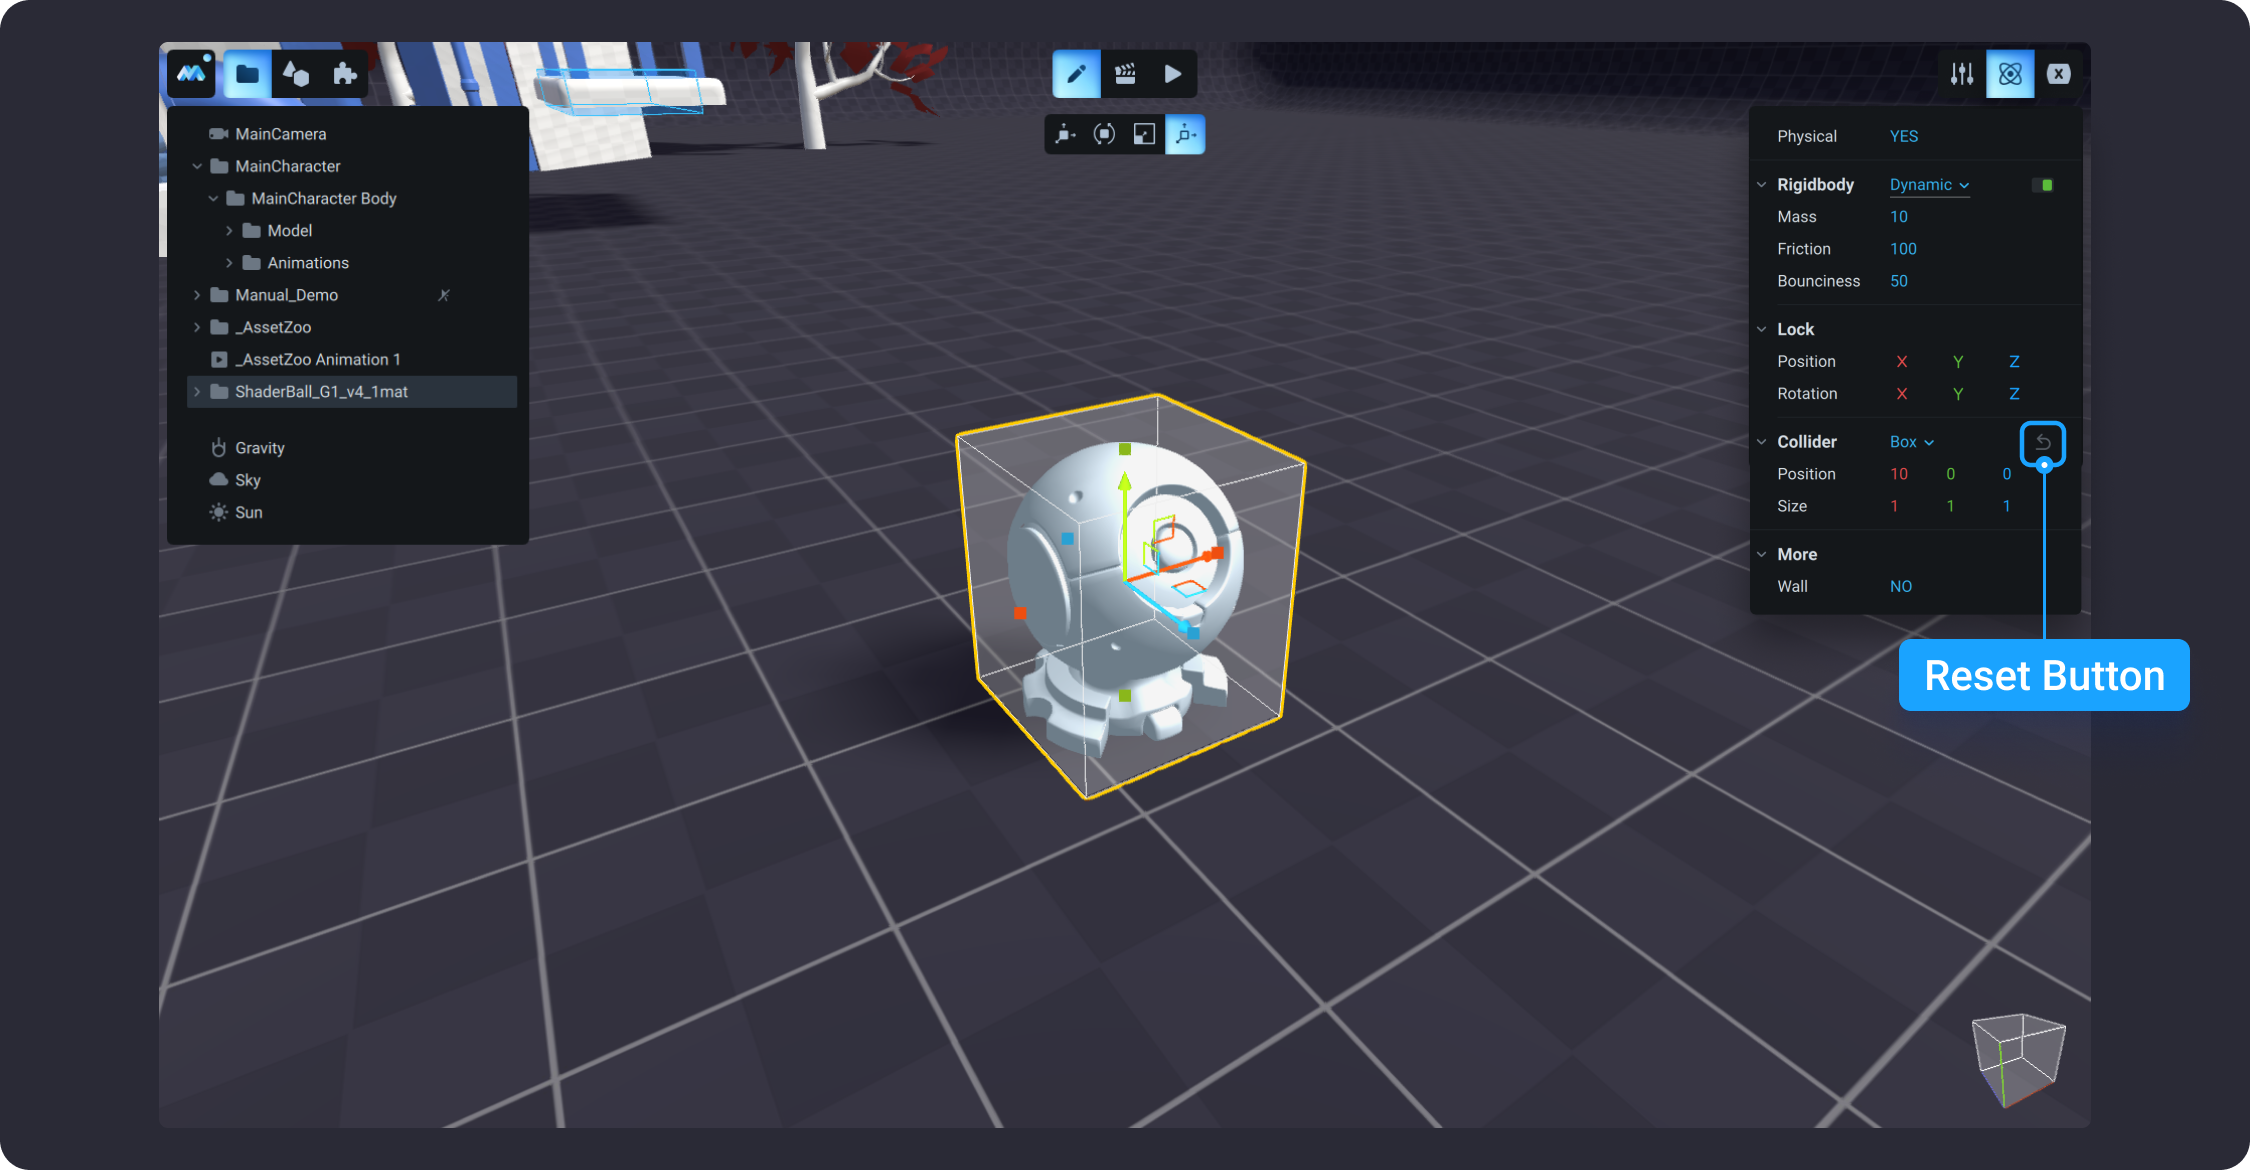
![](https://dl.dropboxusercontent.com/s/2e3756le5mmaj0z/006.png?dl=0)


# Animation Timeline

## Overview

When you select an animation from the Scene Tree in the Animation mode, you see a Timeline panel at the bottom of the window. This Timeline panel consists of the following elements:

1. Buttons for adding different types of tracks.&#x20;
2. Animation looping button.&#x20;
3. Animation playback button and the buttons for moving the playhead to the beginning or to the end of the keyframe.&#x20;
4. Zoom-in and zoom-out buttons for changing the time scale of the timeline.
5. Timeline Playhead for moving to the exact point in time being previewed in the Timeline window.
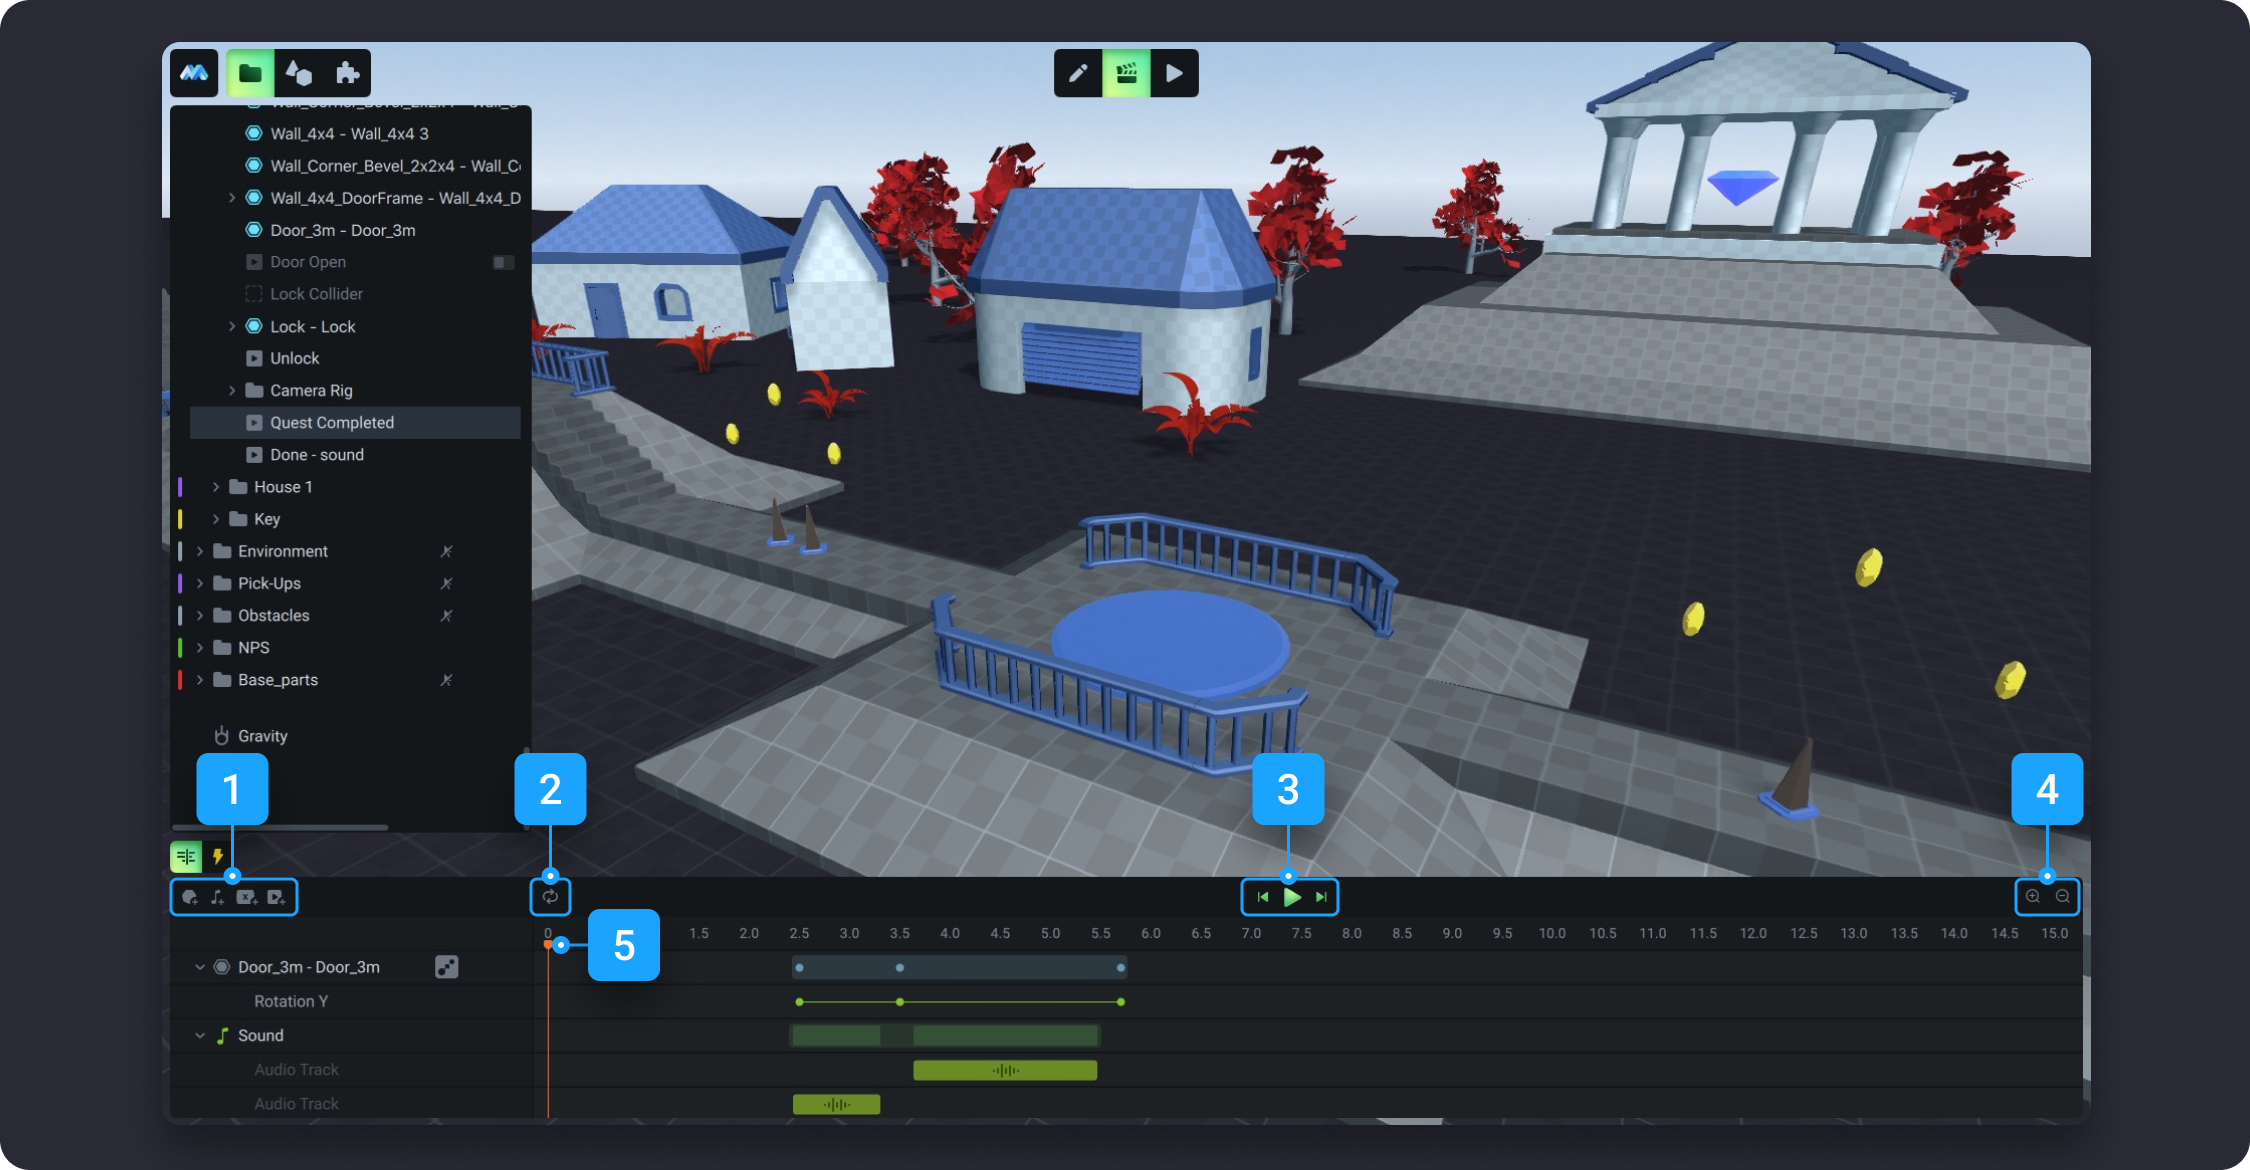
![](https://dl.dropboxusercontent.com/s/3p4db6oo1w4okdx/001.png)

## Adding an animation

You can add animations either in the Edit Mode or in the Animation Mode. To add an animation, go to the Library tab and select `Animation`.
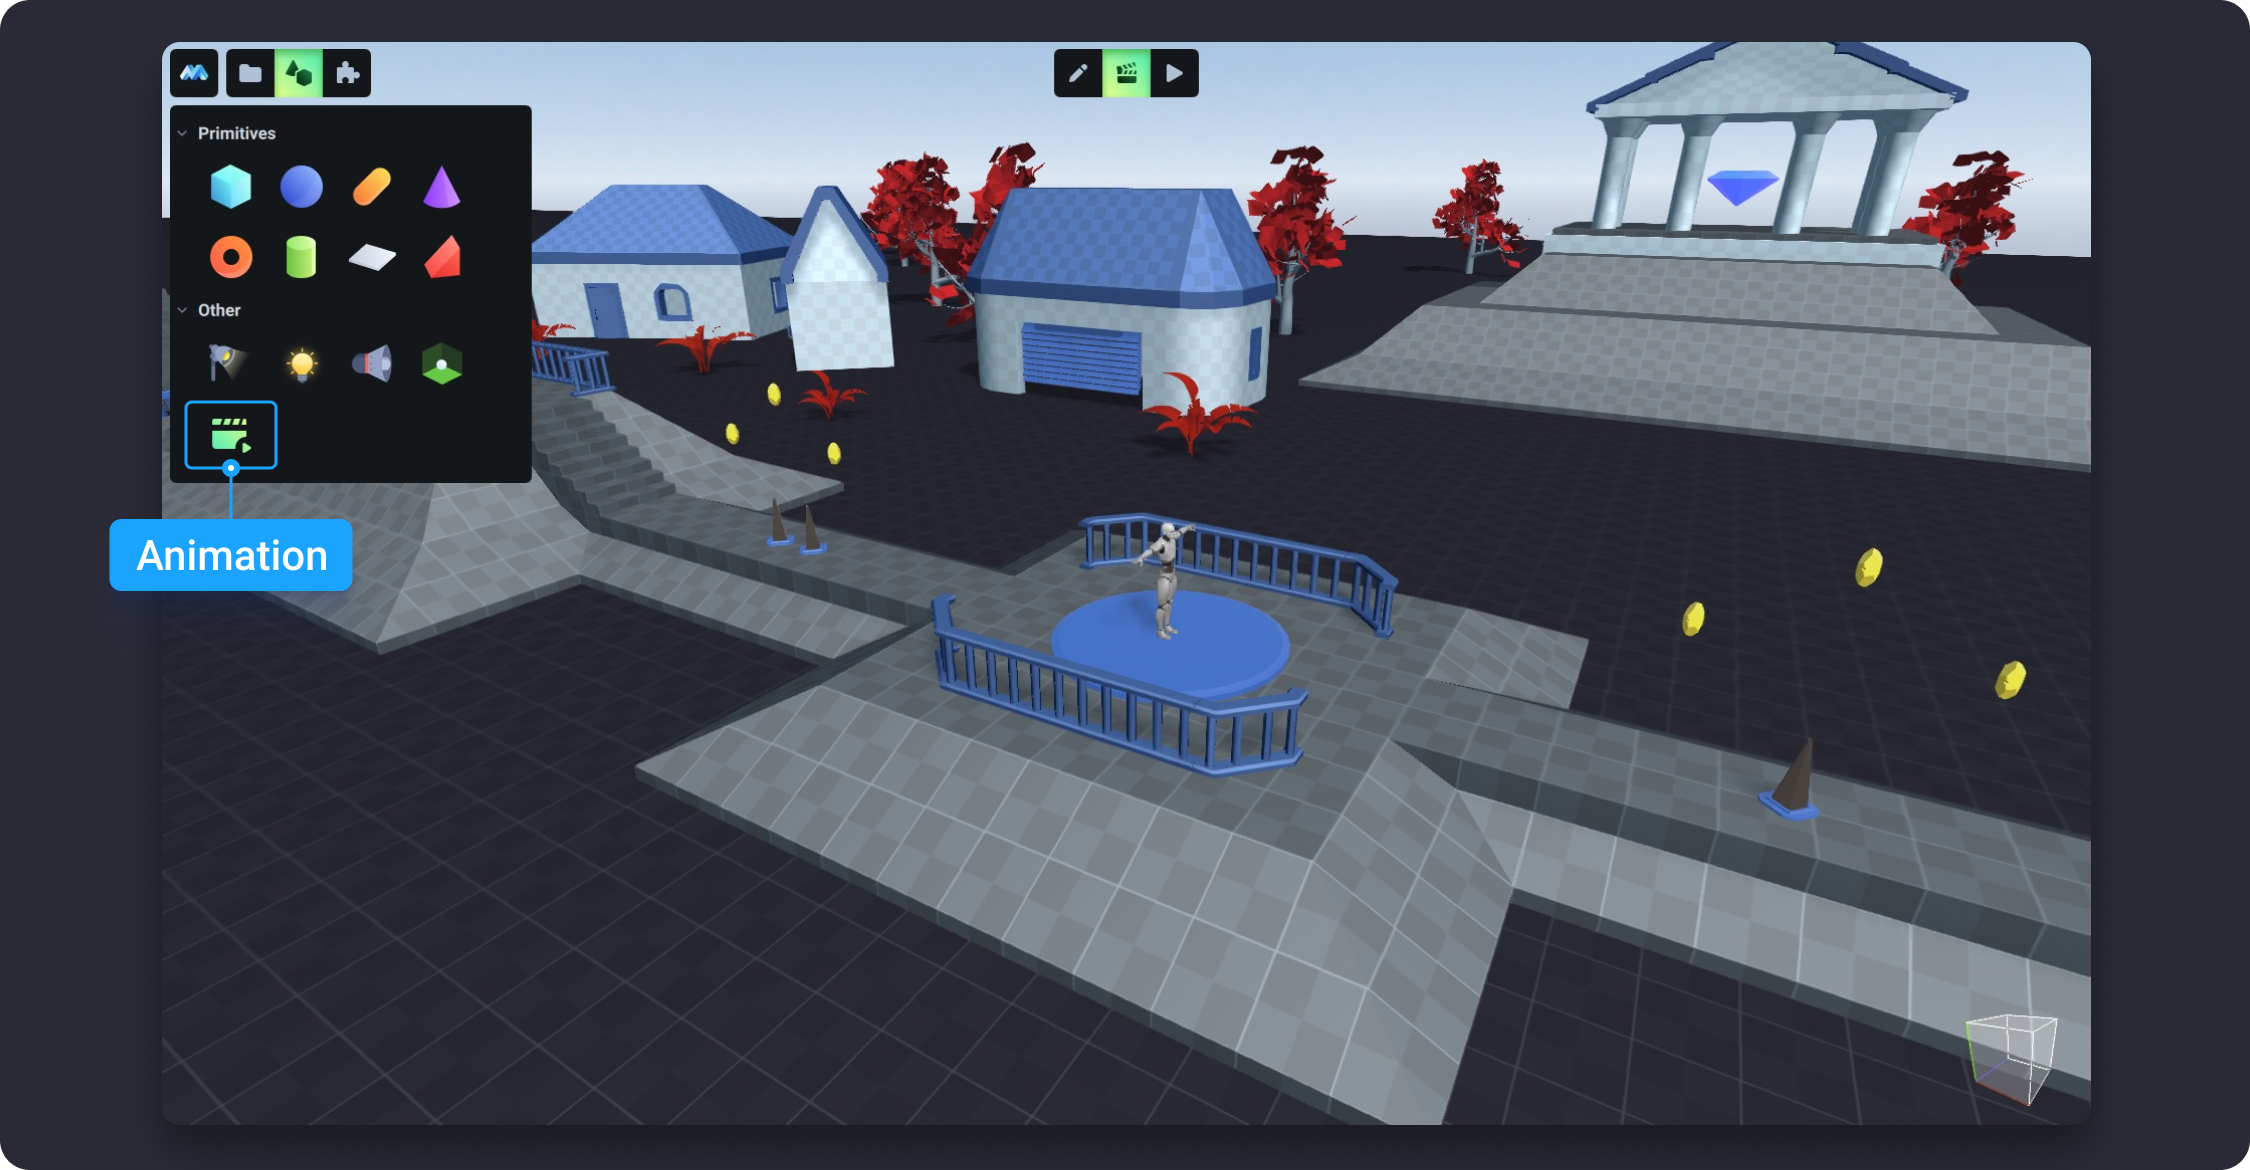
![](https://dl.dropboxusercontent.com/s/gpp9396jl00yi8o/002.png)

A new animation will appear in the Scene Tree. By default, new objects are added at the end of the list.
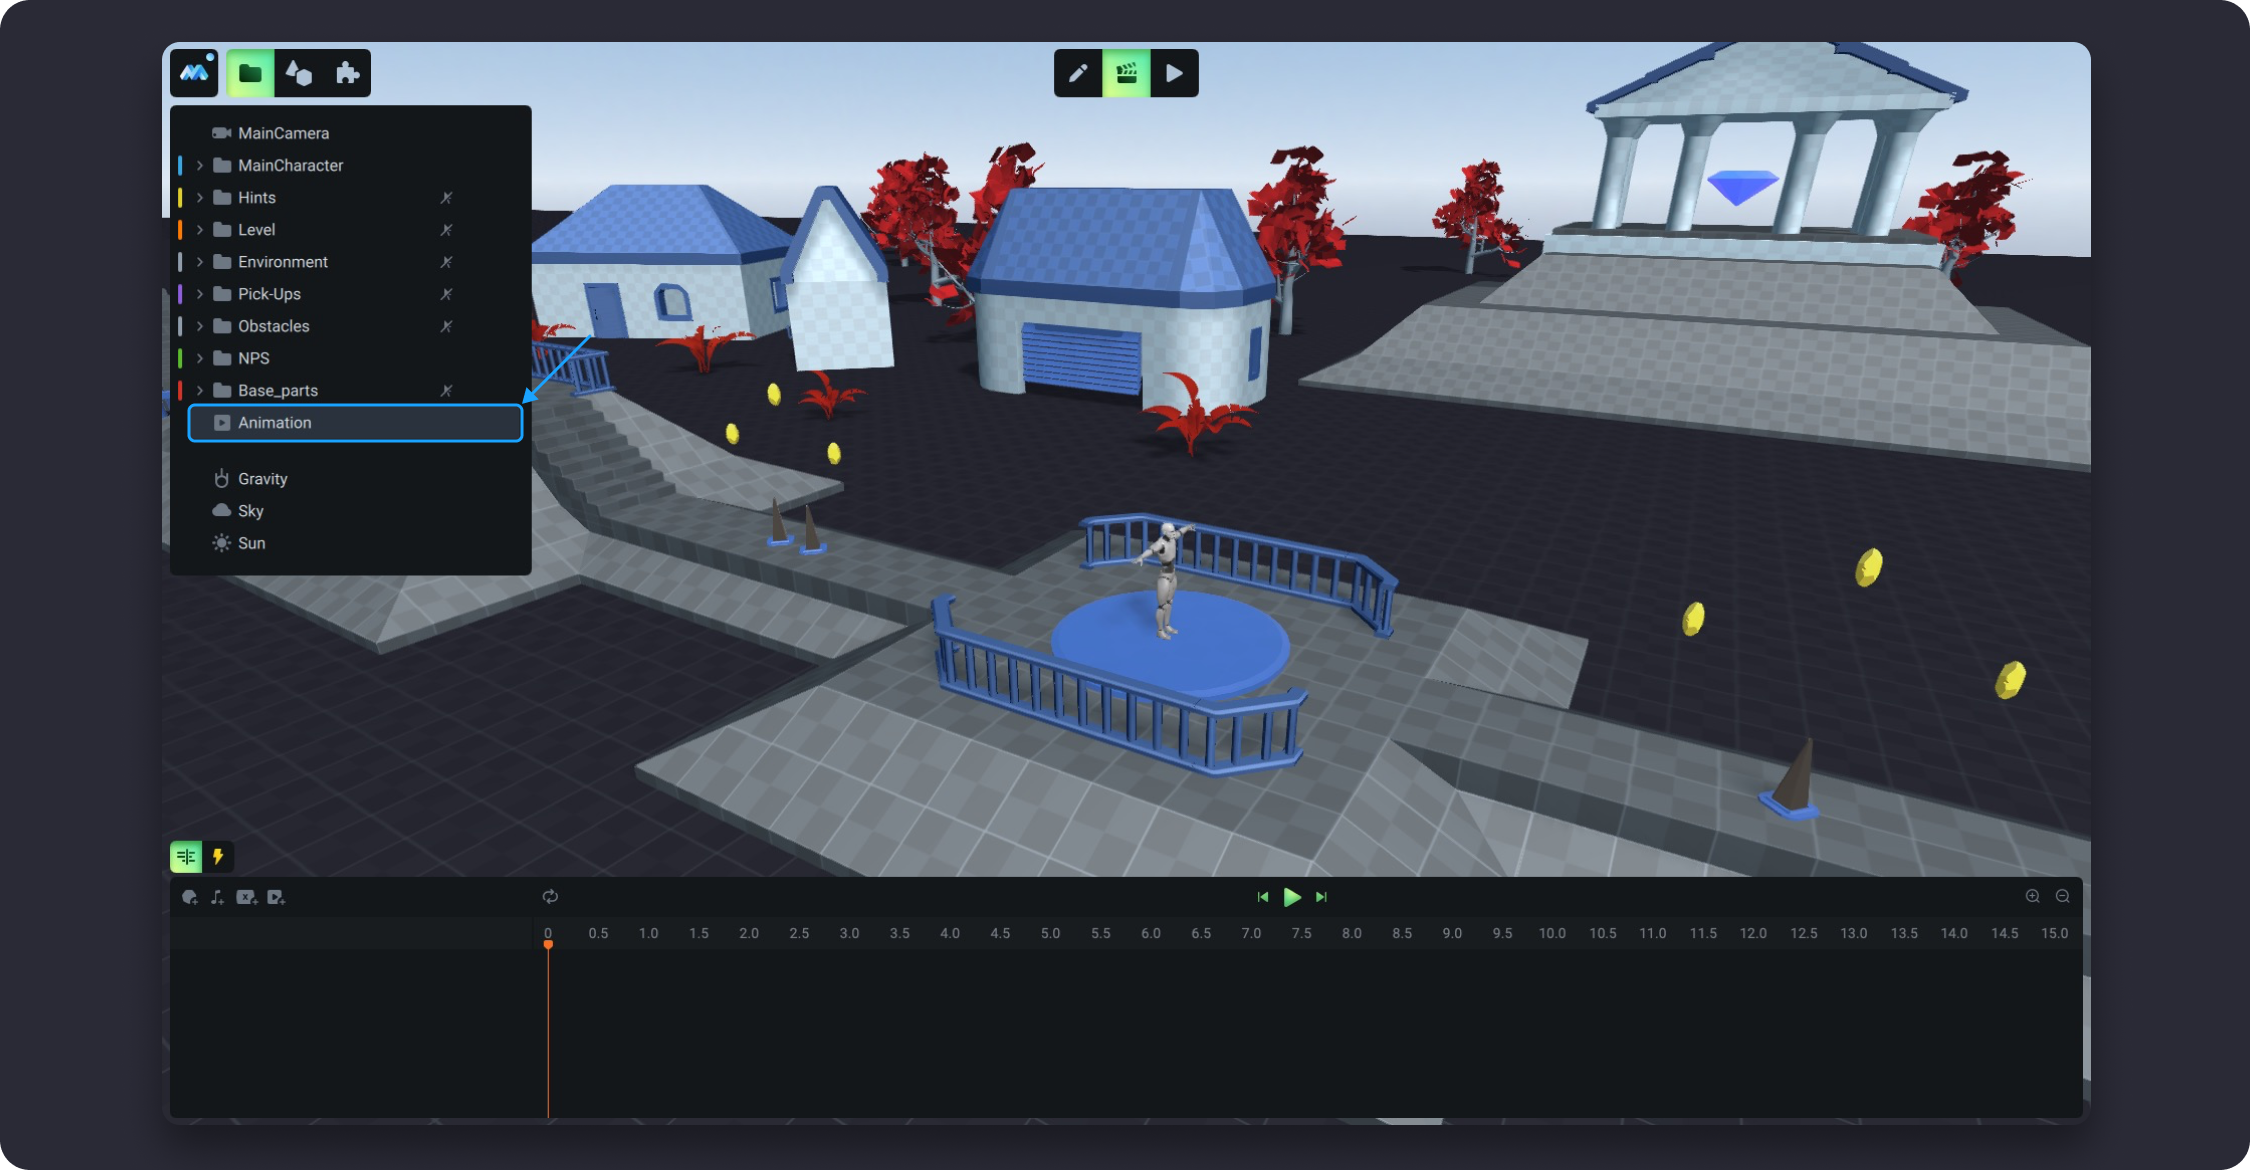
![](https://dl.dropboxusercontent.com/s/3grrtu4dw56081t/003.png)

Second way. You can add an animation in the Animation mode, select the object you want to animate in the Scene Tree, right-click on it, and then select `Create Animation`.
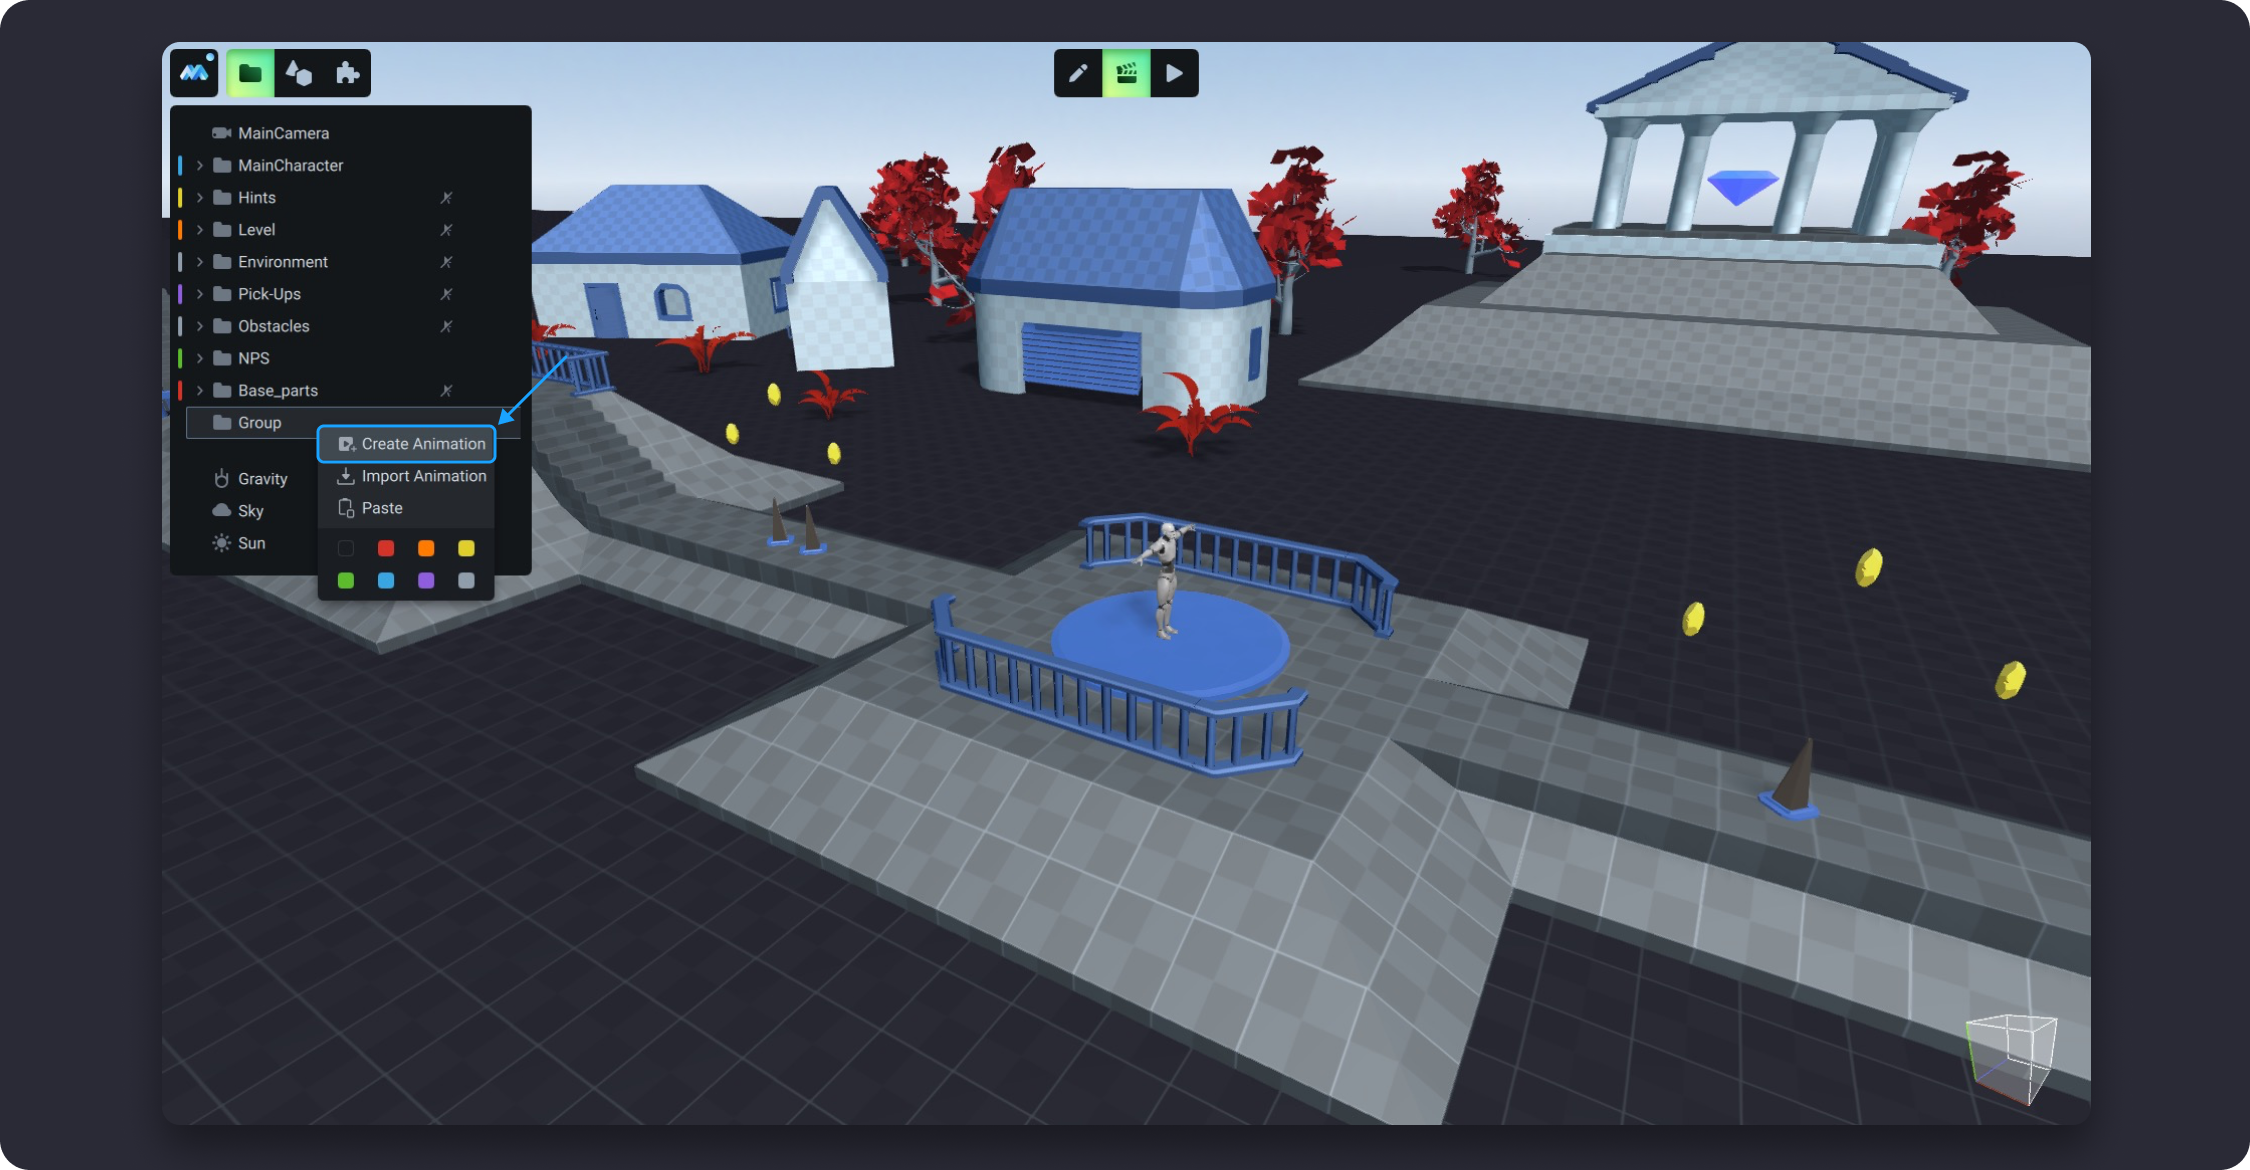
![](https://dl.dropboxusercontent.com/s/70wvqh4bd63oxuc/004.png)

A new animation will be created within the object.
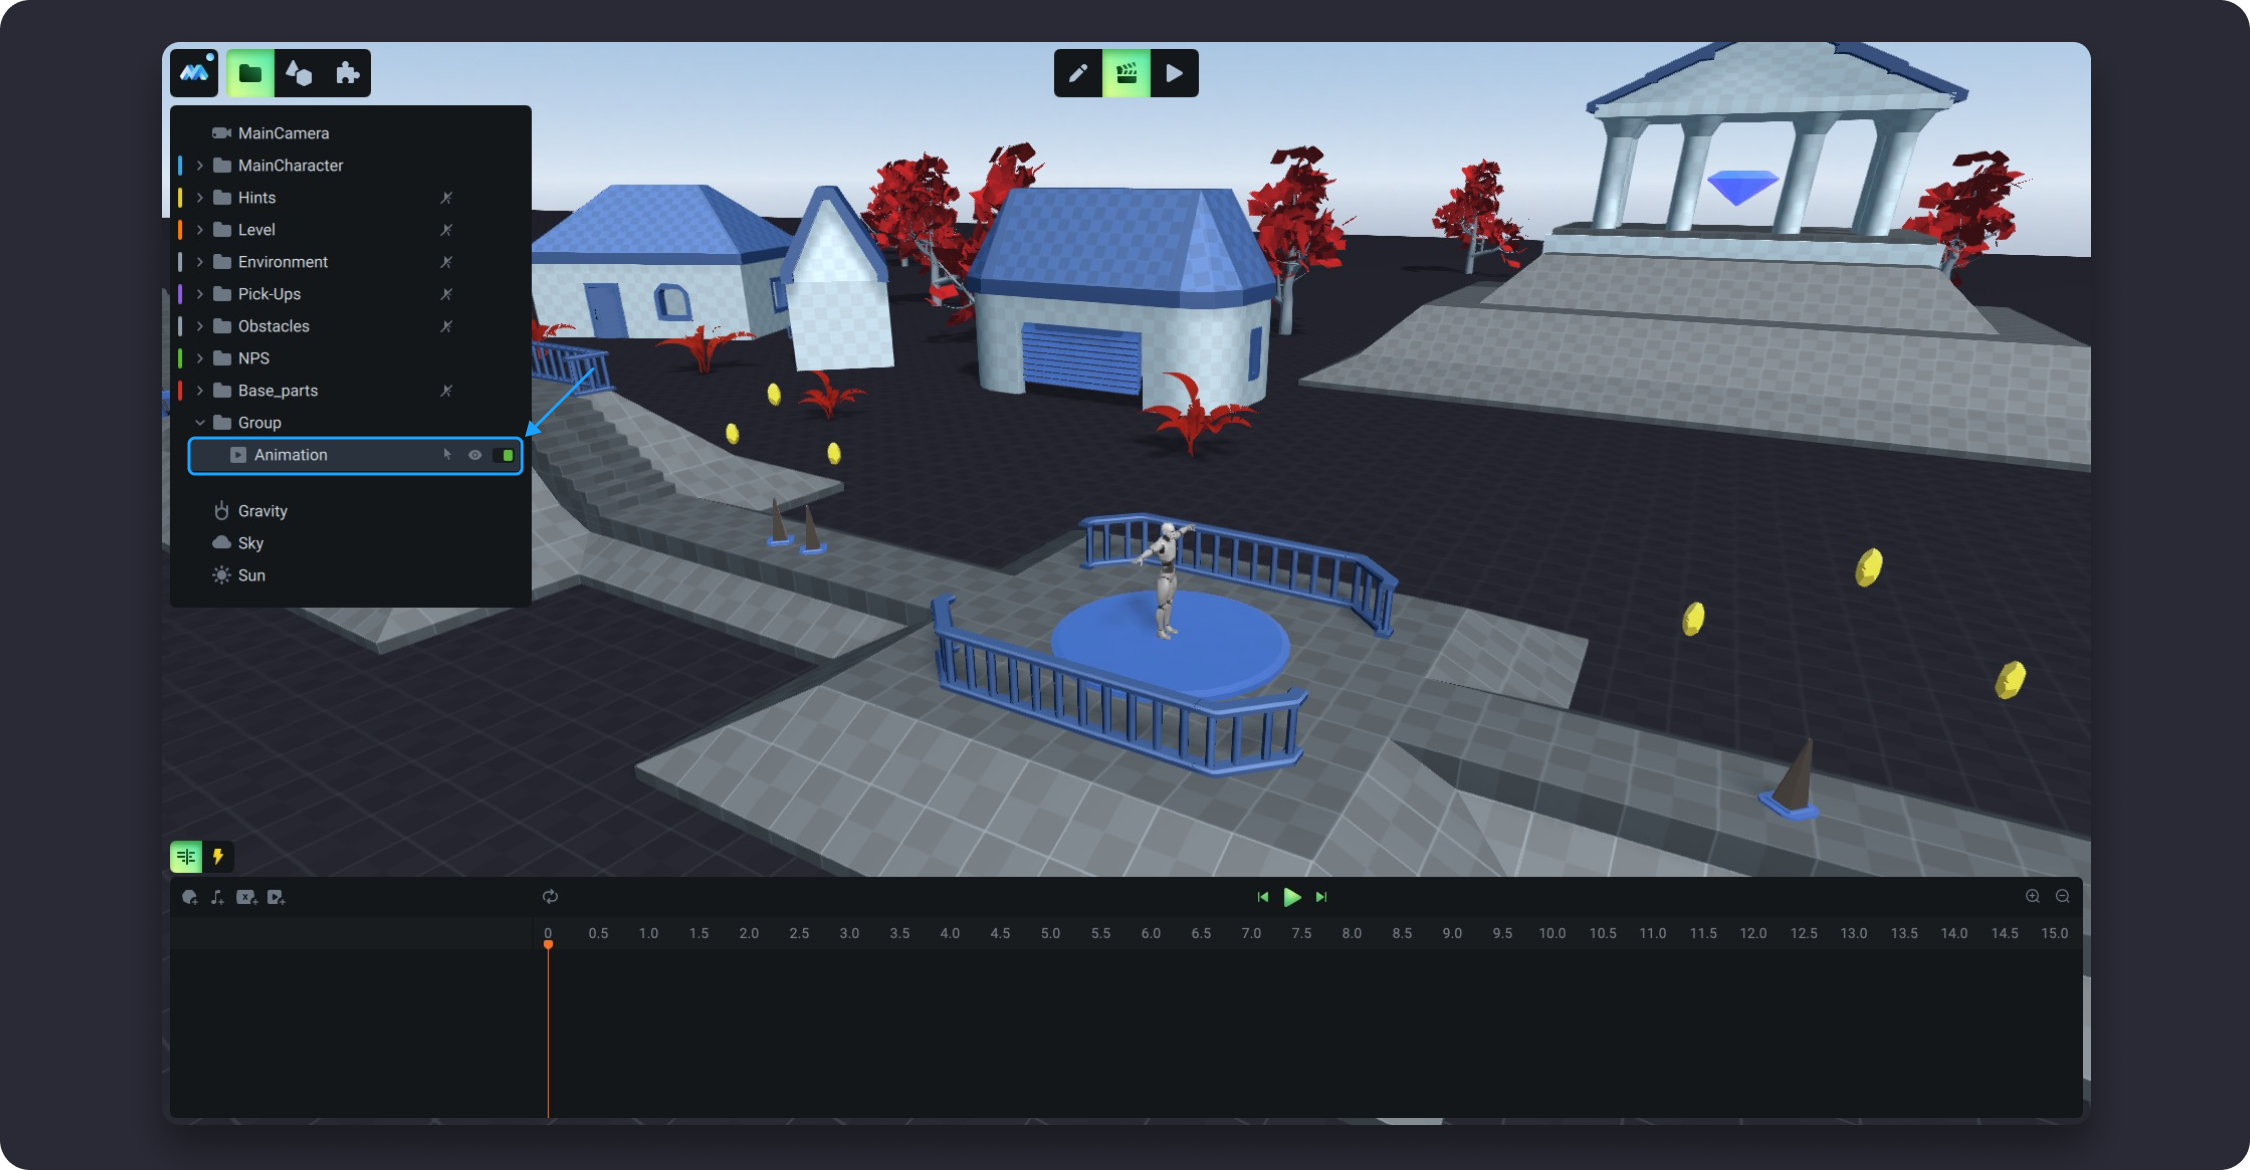
![](https://dl.dropboxusercontent.com/s/4w0k6kzh0h6z2az/005.png)

## Adding an object to the Timeline

To be able to add an object to the existing timeline, switch to the Animation mode and select the necessary timeline. You can add an object to the timeline in two ways.

First way. Click the `Add Object` button on the timeline panel and select an object from the pop-up list&#x20;

![](https://dl.dropboxusercontent.com/s/016xzsu76pn7nfh/006.png)

Second way. Right-click an object in the Scene Tree and select `Add to Timeline`
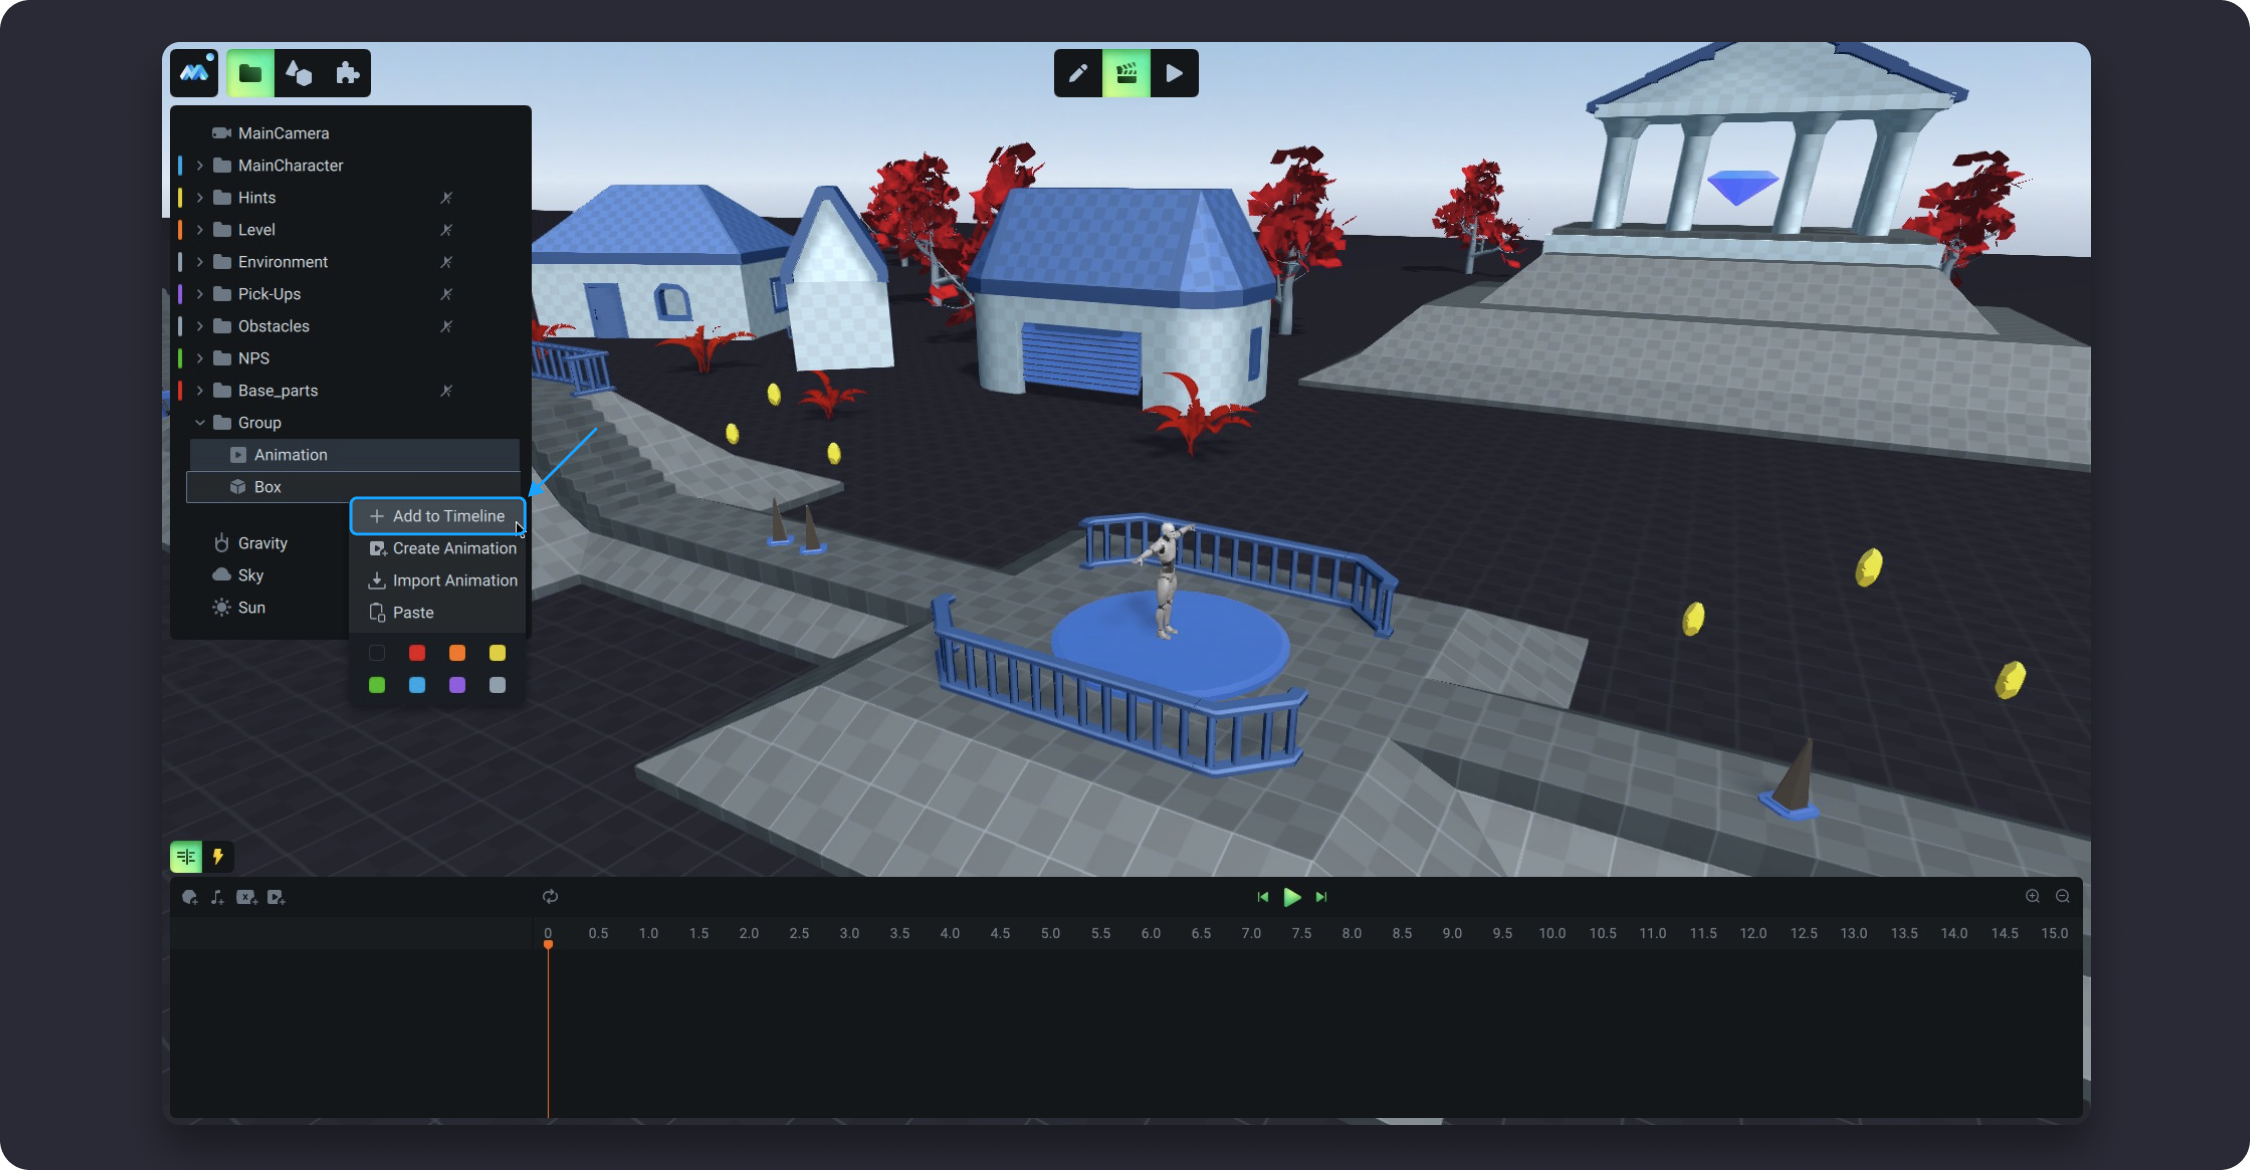
![](https://dl.dropboxusercontent.com/s/jhp8sxv9ro7cv59/007.png)

Once you add an object to the timeline, a corresponding track will appear on the timeline panel.
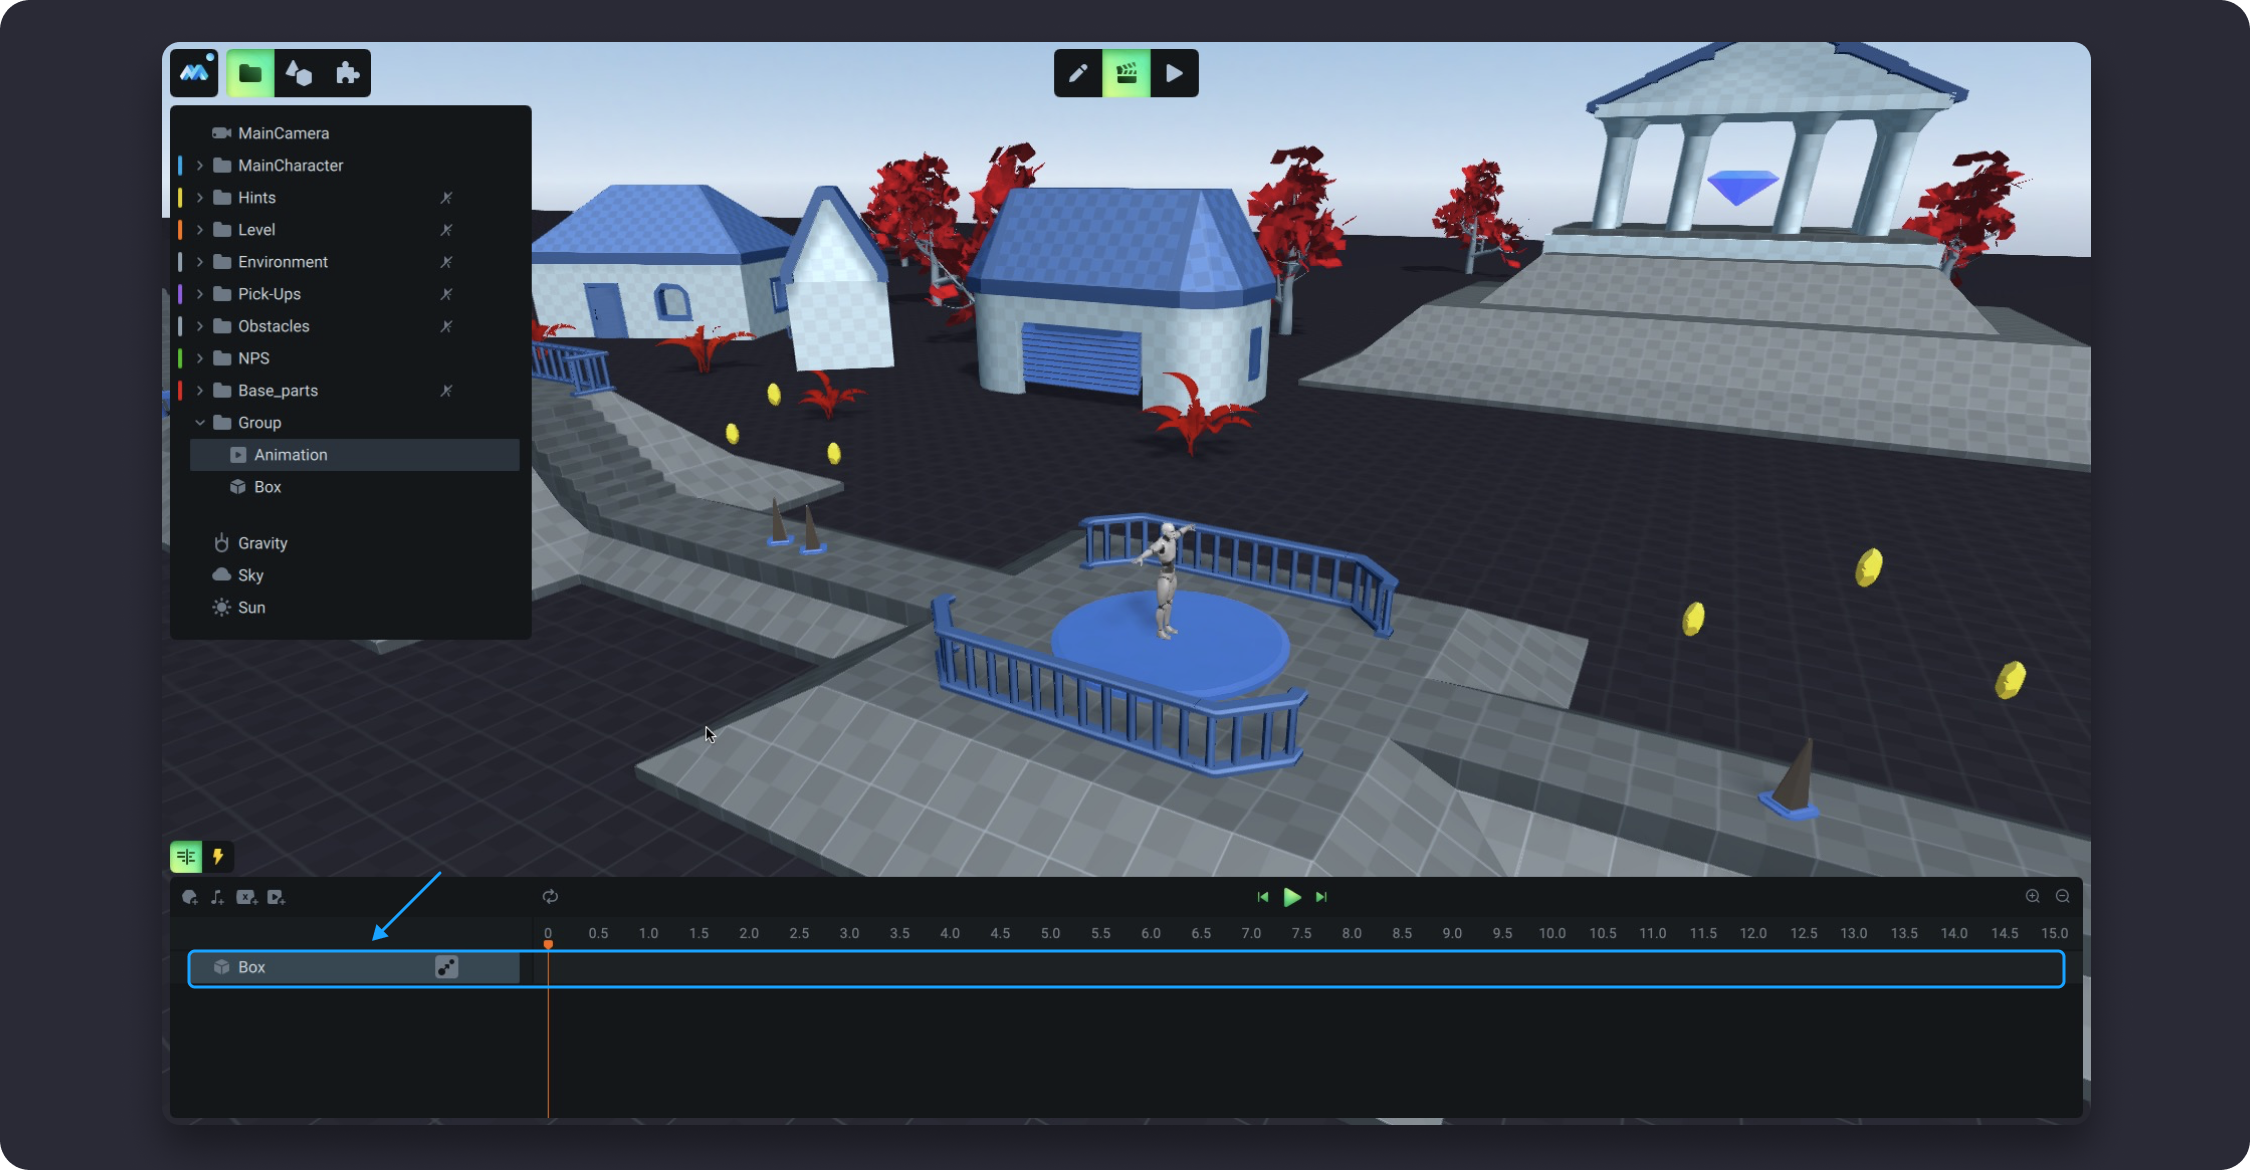
![](https://dl.dropboxusercontent.com/s/w3833hfanrsaawh/008.png)

### **Adding object’s parameters to the Timeline**

Once you add an object to the timeline, you can select the parameters of the object you want to animate. To do this, click on the `Add animated parameter` next to the object in the timeline tree and select a parameter from the pop-up list. Every parameter can be selected only once.&#x20;

![](https://dl.dropboxusercontent.com/s/zxfdodpb1wcwoq7/009.png)

Once you select a parameter, a corresponding track will appear on the timeline.
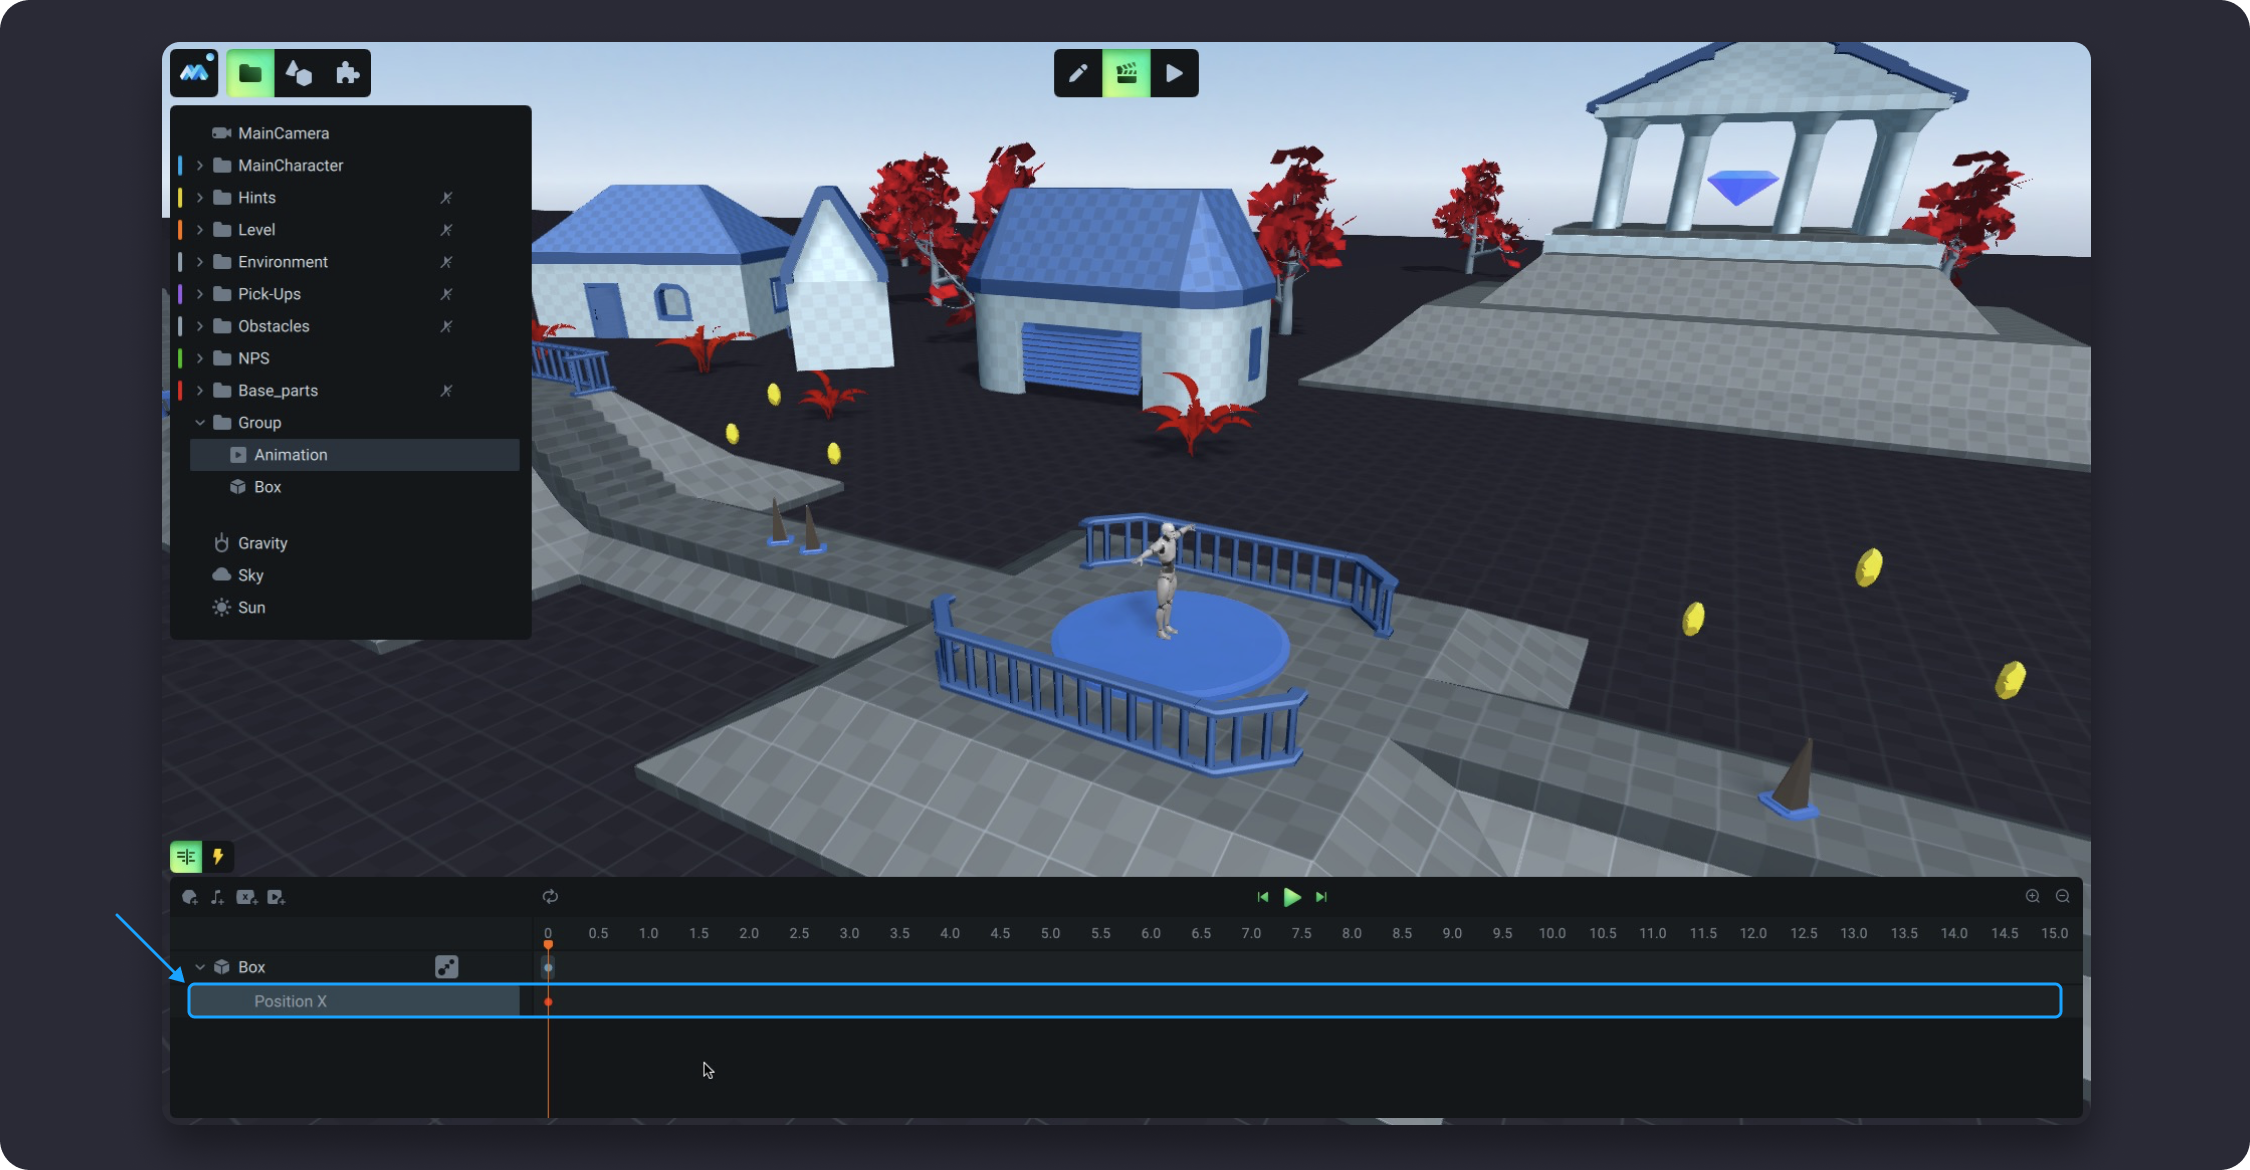
![](https://dl.dropboxusercontent.com/s/vb2voepgtk8ouze/010.png)

### Adding keyframes to the Timeline

Once you add a parameter to the timeline, you can add a keyframe to it.

Keyframes are used to assign different parameter values to an object at specific points in time to animate a certain aspect of the given object. Keyframes are what animations are made of.

To add a keyframe for parameter, follow a few steps. Hover over the parameter’s track on the timeline. Click the point on the timeline for which the keyframe should be added. A pop-up window with the parameter value input field and the Transition picker will appear.

Transition picker is used to specify how the transition between keyframes should be performed over time. Note that picking transition type is available only for digital parameters and the color parameter. More information about types of transitions described below.

Specify the value of the animated parameter at the selected point in time and pick the Transition type, if necessary. By default, Linear transition is used, which means that the value of a parameter will change evenly over time.

Once you add a keyframe, you can click on the playback button to play the animation that you have created.

{% embed url="<https://dl.dropboxusercontent.com/s/asi7ut3ld2etnl1/v001.webm>" %}

#### Types of Keyframed Parameters

Depending on their type, parameters that you keyframe take on different values. These value are as follows:

* A digital value or a formula for calculating a digital value (for example, the value of a Position X parameter)
* A boolean value (for example, YES and NO values of the Enabled parameter)
* Choice from dropdown menu (for example, the Rigidbody Type parameter)
* Color value (for example, the Base Color parameter)

### Transitions Between Keyframes

When you set up a digital value or a color for a keyframe, the pop-up window will also contain the Transition picker. You can use this Transition picker to specify how the transition between keyframes should be performed over time.

![](https://dl.dropboxusercontent.com/s/prcv72lfy3ylpf2/012.png)

If you click on the transition type in this pop-up window, you will see a choice of three graphs: No interpolation, Linear, and Ease. In these graphs, the X axis represents the time and the Y axis represents the value. There are many transition types available. To see all of the available transition types, hover over `More` in the Graphs menu and choose the graph that will suit your animation logic.
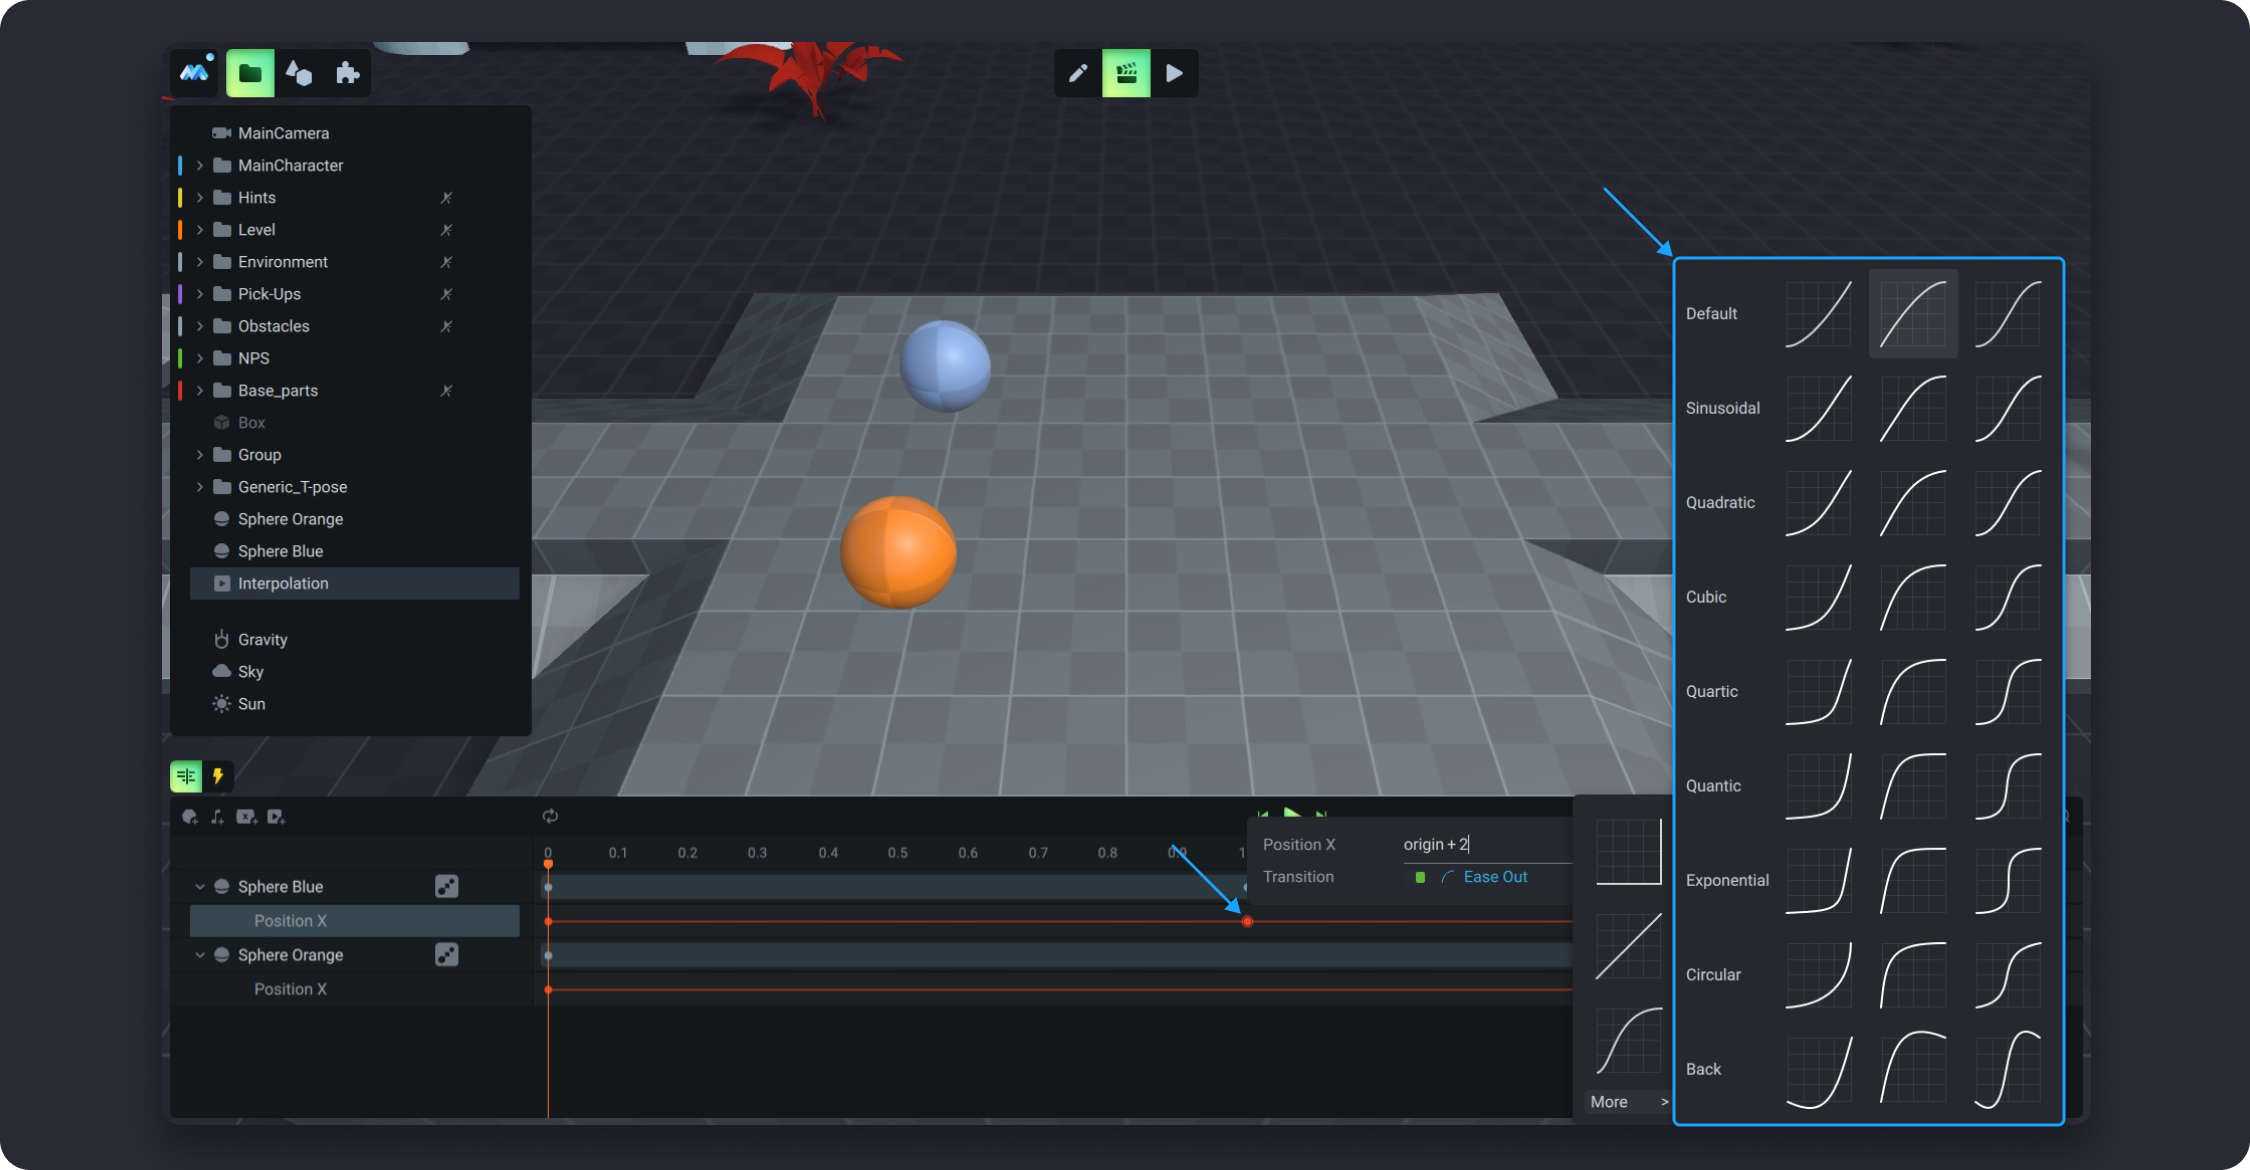
![](https://dl.dropboxusercontent.com/s/z4c9owfakkj53wi/031.png)

If you don’t need to perform any calculations between two keyframes for some reason, you can switch off transition using the toggle switch. In this case, the calculation between the two given keyframes will not be performed.

![](https://dl.dropboxusercontent.com/s/hgz8rxyvf23bcp8/013.png)

#### Transitions

{% tabs %}
{% tab title="Linear" %}

#### Linear

{% embed url="<https://dl.dropboxusercontent.com/s/xn2mb0ft5amvh8q/v005.mp4>" %}
{% endtab %}

{% tab title="Bezier Curve Interpolation" %}

#### Easy

{% embed url="<https://dl.dropboxusercontent.com/s/x8h8s9npumfxvo6/v007.mp4>" %}

####

#### Default

{% embed url="<https://dl.dropboxusercontent.com/s/2d6hg9ceukyr3n9/v008.mp4>" %}

####

#### Sinusoidal

{% embed url="<https://dl.dropboxusercontent.com/s/udrq3ll32n18w5k/v009.mp4>" %}

####

#### Quadratic

{% embed url="<https://dl.dropboxusercontent.com/s/vrk5vrje96q3d9q/v010.mp4>" %}

####

#### Cubic

{% embed url="<https://dl.dropboxusercontent.com/s/fqjywe6bihwa41h/v011.mp4>" %}

####

#### Quartic

{% embed url="<https://dl.dropboxusercontent.com/s/m8kgo7ixl19rzft/v012.mp4>" %}

####

#### Quantic

{% embed url="<https://dl.dropboxusercontent.com/s/dsjste6g5oh0s5a/v013.mp4>" %}

####

#### Exponential

{% embed url="<https://dl.dropboxusercontent.com/s/9vw2hsyhaswd5k5/v014.mp4>" %}

####

#### Circular

{% embed url="<https://dl.dropboxusercontent.com/s/duf7pum2v2bzoaq/v015.mp4>" %}

#### Back

{% embed url="<https://dl.dropboxusercontent.com/s/v89nzcbqhvskzul/v016.mp4>" %}
{% endtab %}

{% tab title="No interpolation" %}

#### No interpolation

{% embed url="<https://dl.dropboxusercontent.com/s/pkpifgub60cf9ub/v006.mp4>" %}
{% endtab %}
{% endtabs %}

### Bulk dragging of keyframes

Every keyframe that exists on the timeline is projected on the common track at the top of the timeline panel.

You can use this common track to move several keyframes forwards and backwards simultaneously. If you locate several keyframes at the same time point on the timeline, they will be combined into a single point on the common track at the top.

In this way, by moving this single point on the common track you will move several keyframes simultaneously on the timeline. Plus, you can drag this common track as a whole and move all of the existing keyframes backward and forward in the timeline.

{% embed url="<https://dl.dropboxusercontent.com/s/0zdu1zr9sn5bfqn/v002.webm>" %}

## Adding Audio

Audio clips can be added to the timeline in two ways.

#### Inside of the Sound track

In this case, the audio will be played with the same volume wherever the Main Character is.

If you add a Sound track to the Timeline, an empty audio track will be created for it by default. Hover over this track to select a time point at which your audio clip should be played. Select a clip in the window that opens.

![](https://dl.dropboxusercontent.com/s/v7zmy40k04nhbmw/014.png)

{% embed url="<https://dl.dropboxusercontent.com/s/m2pj8i9qp3n1sni/v003.webm>" %}

#### Inside of the Speaker track

In this case, an added audio clip will be played as a surround sound that will be heard only in a certain place of the scene. The closer the Main Character is to the speaker, the louder the sound will be.

To add an audio clip to the Speaker track, click the `Add animation track` next to it and select `Audio Track`. Hover over this track to select a time point at which an audio clip should be played. Select a clip in the window that opens.&#x20;

![](https://dl.dropboxusercontent.com/s/syuozt60tvwoatf/015.png)

{% embed url="<https://dl.dropboxusercontent.com/s/ltdvyuu05r66ksu/v004.webm>" %}

You can add as many audio clips as you want and move them forward and backward in the timeline one at a time or all at once using the common track on the left of the Sound track.


![](https://dl.dropboxusercontent.com/s/zgm39rmkhsrzc1f/016.png)

![](https://dl.dropboxusercontent.com/s/4jw82xhgd1fquem/017.png)

By right-clicking an audio clip, you can duplicate it inside the same audio track or copy it and paste it inside another audio track.

![](https://dl.dropboxusercontent.com/s/5ry78va2myno049/018.png)

Audio tracks also allow you to adjust their volume using the volume slider next to them.

![](https://dl.dropboxusercontent.com/s/1824uw0jlg3z6h1/019.png)

When you click an audio clip in the timeline, a pop-up window appears in which you can set up the volume and the pitch of the given audio clip. The Pitch setting is used to change the highness of the sound of the audio clip. The Pitch setting also affects the length of the audio. If you increase the Pitch value, the length of the audio will decrease. And vice versa, if you decrease the Pitch value, the length of the audio will increase.

![](https://dl.dropboxusercontent.com/s/92zkym718tqe7f6/020.png)

This window also displays the following properties of the audio clip: Name of the file; Type of the file, either mono or stereo; Frequency; Length.

## Adding a local variable

To add a local variable to the timeline, do the following: Click the corresponding icon on the top left of the timeline panel; give your local variable a name, for example "X"; select the type of value this local variable should have, either Number or Boolean; specify the value; click `Create`

A corresponding track will appear on the timeline.

![](https://dl.dropboxusercontent.com/s/a86be1hru3qwjul/021.png)

Local variables work only inside a single timeline. This means that if you create a variable with the same name in another timeline, it will be a completely different variable. Changing the value of a local variable in the timeline will not affect the value of the variable with the same name in another timeline.

{% embed url="<https://dl.dropboxusercontent.com/s/7kicwjdfpmt7w63/v006.webm>" %}

## Insert an animation

In MANU, you can play animations via other animations. To add an animation inside another animation, do the following:

Click the `Add Animation` on the top left of the Timeline panel. An Inserted Animation with an Animation Track will appear on the timeline.&#x20;

![](https://dl.dropboxusercontent.com/s/mzxvo4jirycgnm7/022.png)

![](https://dl.dropboxusercontent.com/s/1px5keerawf8sdt/023.png)

If you need more than one track inside an inserted animation, click the `Add new track` next to the Inserted Animations element. The number of animation tracks you can add is not limited.


![](https://dl.dropboxusercontent.com/s/y7q9uubjorv7uhw/024.png)

![](https://dl.dropboxusercontent.com/s/0h9mlcvlzczvdm7/025.png)

Hover over the Animation Track to select a time point at which you want to insert an animation. Select an animation you want to insert into a given animation from the pop-up list that opens.The inserted animation will appear on the timeline.

![](https://dl.dropboxusercontent.com/s/6h4j36akwkl014u/026.png)

You can use inserted animations to, for example, create a sequence of animations that will be played in a certain order at certain points in time independently of any triggers.

## Disabling animation or track

When you create an animation, it is enabled by default. However, if you need to disable an animation you can do it by hovering over the animation in the scene tree and switching off the toggle switch on the right of the animation. After that this animation will not play in Game mode.
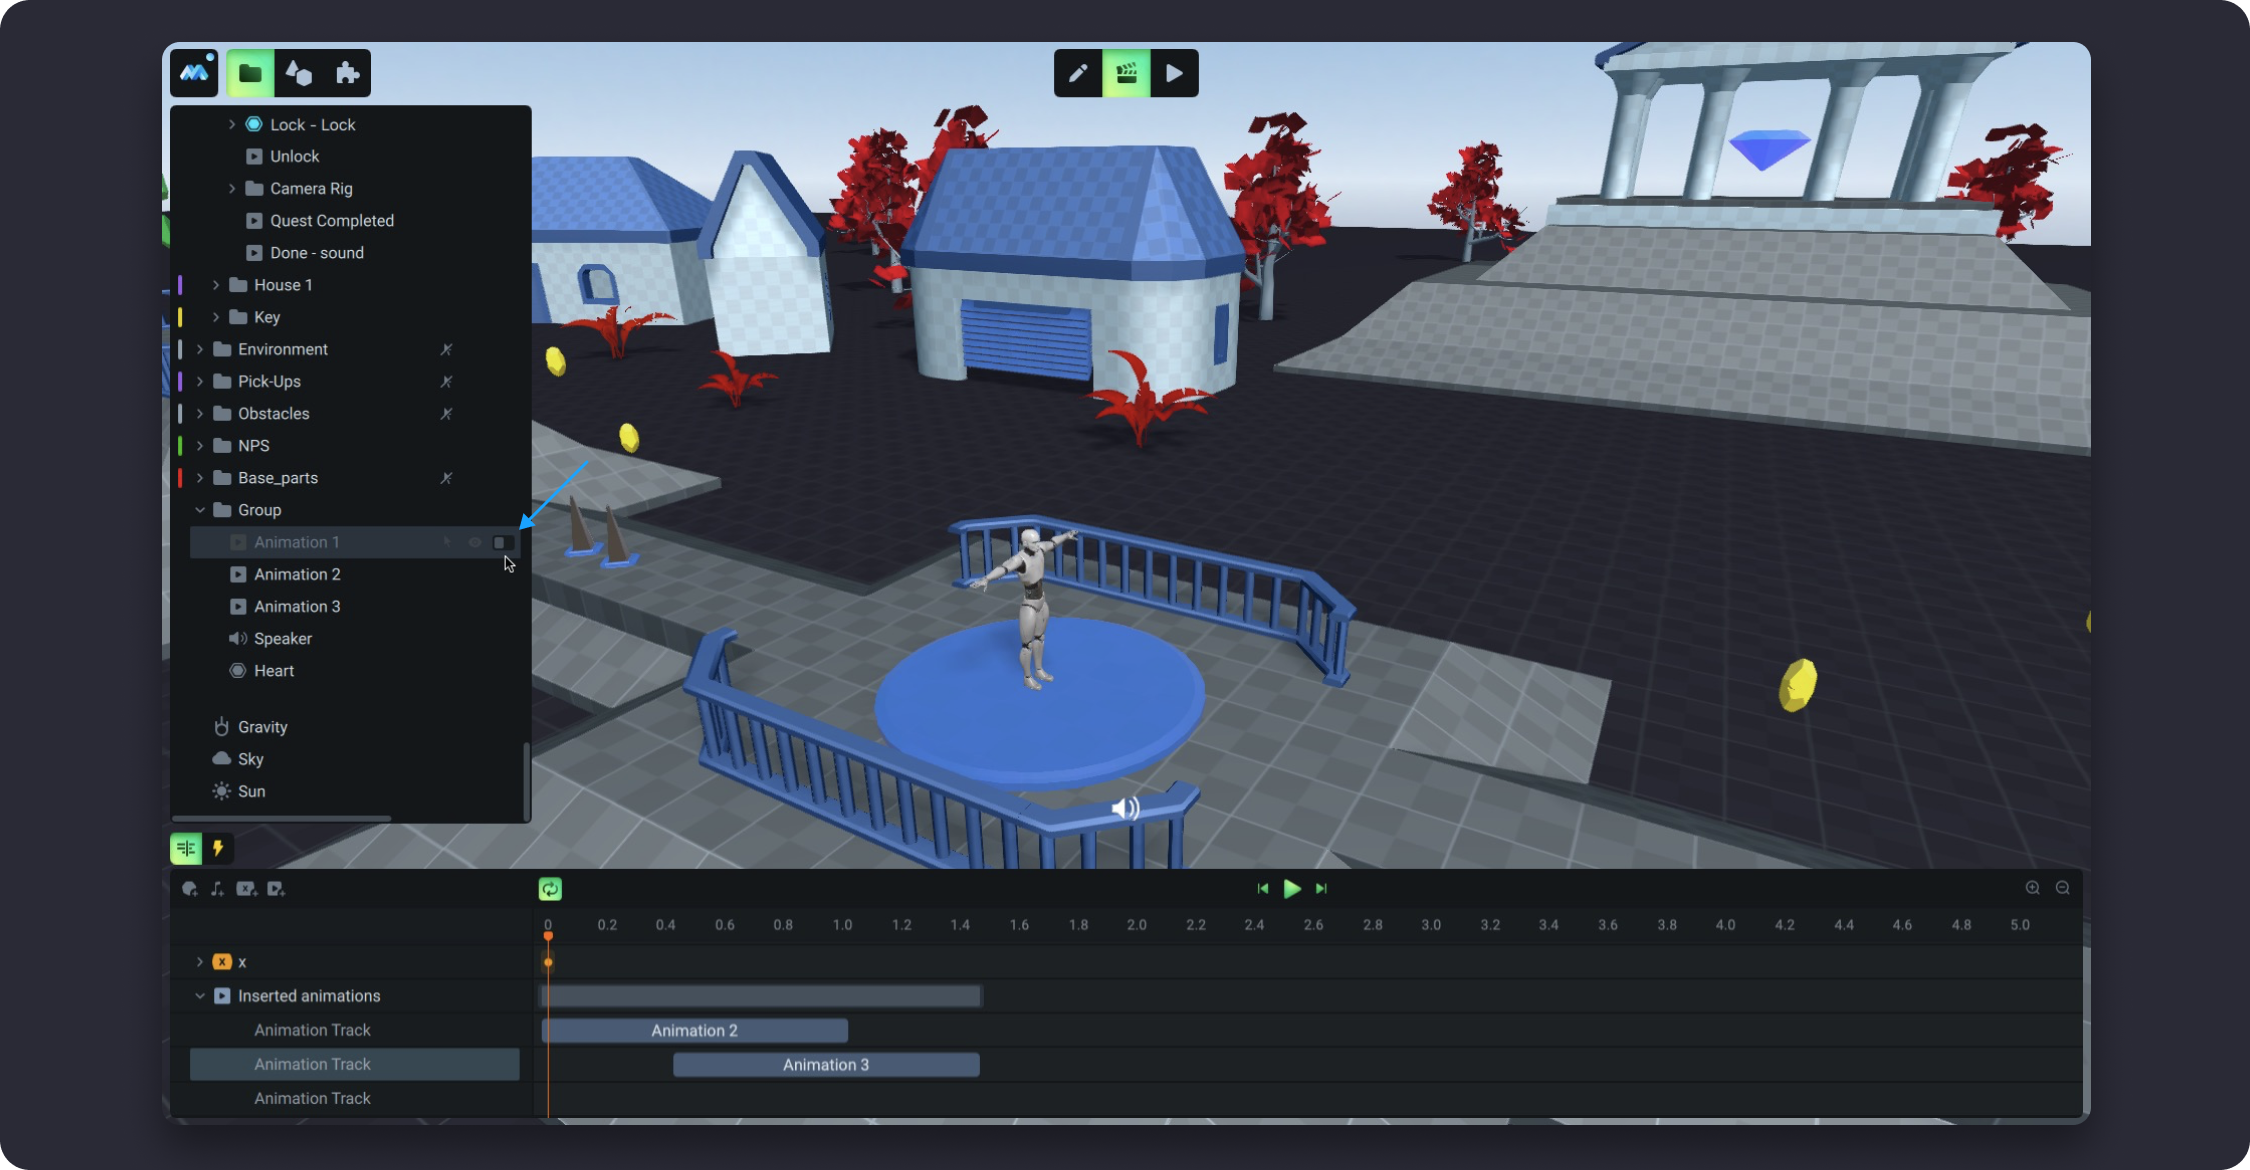
![](https://dl.dropboxusercontent.com/s/qur6ozgm1u48605/027.png)

The same works for tracks inside an animation in the timeline panel. If you need to disable a track with a certain parameter, use the toggle switch on the left of the track.


![](https://dl.dropboxusercontent.com/s/c7nqin318vq27or/028.png)

![](https://dl.dropboxusercontent.com/s/nfg02actho1hdjq/029.png)

{% hint style="info" %}
If inserted animation is disabled in the scene tree then it still play through active animation. See video below.
{% endhint %}

{% embed url="<https://dl.dropboxusercontent.com/s/edsx5ey3vfsceds/v007.webm>" %}

## How to launch animation in game

For an animation to be launched in the game, you have to set up a trigger for it. Triggers are set up in the Triggers tab, which is located next to the timeline tab.

![](https://dl.dropboxusercontent.com/s/8xk31pjx0bp0av0/030.png)

For more information about Triggers, please refer to the [Triggers](/learn/manual/triggers).


# Triggers

For animations, Game Flow and state machines to work in your game, you need to set triggering conditions for them and trigger them when those conditions are met. These conditions are tracked by objects called triggers.

Triggers consist of conditions. Such conditions can be either one or several. Several conditions can be combined with each other using Boolean logic to make more complex triggers.

### How to add a trigger?&#x20;

* Trigger as an object. It is used to create Game Flow trigger nodes and as a condition in other triggers. Such a trigger can be reused throughout the project where it is needed
* Trigger with animation. This trigger is used to start animations in which it is created.
* State machine state transition trigger. This trigger is created in the trigger panel of the state machine connectors.
* Complementary Game Flow node-to-node communication trigger

#### Trigger as an object

To add a trigger as an object:&#x20;

* Select the desired hierarchy in the scene tree Click the Trigger icon in the main toolbar

<figure><img src="https://4240499350-files.gitbook.io/~/files/v0/b/gitbook-x-prod.appspot.com/o/spaces%2F-Lt-sE9MYKe9pZOcHwg5%2Fuploads%2Fvu918prthhMP0kDQ1Woj%2FGroup%202.png?alt=media&amp;token=de74657a-0022-4f74-b9d5-70dd5e10052d" alt=""><figcaption></figcaption></figure>

* The trigger will be created in the selected hierarchy

* Open the trigger panel by selecting the trigger&#x20;

* In the trigger panel that opens, you can add conditions.

Trigger as an object can be created together with the creation of a node in Game Flow, to do this:

* Create a Game Flow by clicking in the main toolbar
* Open the Game Flow editing window Select the Trigger node creation tool in the Game Flow toolbar
* Click on the canvas and select Create New
* A Trigger node will be created on the canvas
* A new trigger is created in the scene tree as a child of this Game Flow which can be reused throughout the project&#x20;
* The trigger can also be edited by double-clicking on the trigger node
* In the trigger panel that opens, you can add conditions

#### Animation Trigger

To add a animation trigger

* Select the desired hierarchy to create an animation
* &#x20;Hold down a click on the Animation icon in the main toolbar From the drop-down submenu, select Animation with Trigger
* &#x20;An animation with trigger will be created
* &#x20;Select the animation and go to Animation mode
* &#x20;In the tab above the timeline, click the Trigger icon. In the trigger panel that opens, you can add conditions.

#### State Machine state transition trigger

To create a State Machine state transition trigger:&#x20;

* Create a State Machine by clicking in the main toolbar
* &#x20;Open the edit window of the State Machine
* &#x20;Create a states and link them
* &#x20;Click on the link between the states
* &#x20;In the trigger panel that opens, you can add conditions

#### Additional trigger in the link between Game Flow nodes

To create an additional trigger in the link between Game Flow nodes:

* Create a Game Flow by clicking in the main toolbar
* Open the Game Flow editing window
* Create the nodes and the link between them
* Click on the link In the trigger panel that opens, you can add the conditions

## Trigger condition types

There are many types of trigger conditions in MANU that follow events in the game. The list of conditions is constantly growing. In the current version of MANU there are the following types of conditions:

* [On Launch Scene](https://app.gitbook.com/s/-Lt-sE9MYKe9pZOcHwg5/~/changes/166/learn/manual/triggers/on-launch-scene)
* [Key](https://app.gitbook.com/s/-Lt-sE9MYKe9pZOcHwg5/~/changes/166/learn/manual/triggers/key)
* [Collision](https://app.gitbook.com/s/-Lt-sE9MYKe9pZOcHwg5/~/changes/166/learn/manual/triggers/collision)
* [Animation](https://app.gitbook.com/s/-Lt-sE9MYKe9pZOcHwg5/~/changes/166/learn/manual/triggers/animation)
* [State Machine](https://app.gitbook.com/s/-Lt-sE9MYKe9pZOcHwg5/~/changes/166/learn/manual/triggers/state-machine)
* [Comparsion](https://app.gitbook.com/s/-Lt-sE9MYKe9pZOcHwg5/~/changes/166/learn/manual/triggers/comparsion)
* [Game Flow](https://app.gitbook.com/s/-Lt-sE9MYKe9pZOcHwg5/~/changes/166/learn/manual/triggers/game-flow)
* [Trigger](https://app.gitbook.com/s/-Lt-sE9MYKe9pZOcHwg5/~/changes/166/learn/manual/triggers/trigger)
* [Object Enabled](https://app.gitbook.com/s/-Lt-sE9MYKe9pZOcHwg5/~/changes/166/learn/manual/triggers/object-enabled)
* [Network](https://app.gitbook.com/s/-Lt-sE9MYKe9pZOcHwg5/~/changes/166/learn/manual/triggers/network)

&#x20;You can learn about each type of trigger event in its own section.

## Trigger Logic <a href="#docs-internal-guid-12f9ce58-7fff-9bc4-0482-cc06cc92f9b7" id="docs-internal-guid-12f9ce58-7fff-9bc4-0482-cc06cc92f9b7"></a>

Triggers can have two states: TRUE and FALSE.  If the condition specified by the trigger is met, the trigger state will be TRUE. When this condition is not met, then the trigger state will be FALSE. All transitions of triggers from one state to another (from TRUE to FALSE and from FALSE to TRUE) activate the trigger logic. If, for example, the trigger is set to collide one object with another, then as long as there is no such collision, the trigger has the FALSE state. When a collision occurs, the trigger changes its state to TRUE. When the trigger state is TRUE, it sends the command “animation play”. When the trigger state is FALSE, it gives the command “animation stop”. Animation continues to play, even when the play event is sent again (state true). Animation ignores these commands until it finishes its playback. While the animation is playing, it does not accept new play commands. When the animation play period stops, the object listens to the trigger command again. Animation will stop if the stop command is sent (state false). It stops at the moment when this command appears, even before finishing its playback.

#### One-time trigger

A one-time trigger exists for an instant. For example, Collision Started is a one-time trigger, it registers the moment of objects’ collision when it has just happened. Other examples of one-time triggers: Collision Ended, Key Down, Key Up, State Machine State Start, State Machine State Stop, Animation Started, Animation Ended.

#### Long-running trigger

For example, Collision Continue is a long-running trigger, its state is long in time and exists as long as the interaction of objects continues. Other examples of long-running triggers: Animation Continue, Key Pressed, Collision Continue, State Machine State Continue.

Note: It is very important to distinguish a one-time trigger from a long-running trigger, especially if you group or combine them to launch the animation. To know more, go to the Scene (link).

### Trigger chain

In MANU, you can use as many triggers as you want to launch animations, thus creating a chain of triggers. The concept of a trigger logic chain allows you to:

* combine several triggers with the help of common logical operators (AND, OR, NOT) such that the output result of the trigger logic chain will depend on which triggers are used, as well as on the meaning of the operator.
* set the calculation sequence in the trigger chain by grouping triggers
* give a more complex condition for triggering the animation.

All these options, offered by MANU, open up more opportunities for the user compared to the usage of only one trigger to start and stop the animation. Creating trigger chains, remember that the calculations in the chain occur sequentially, from left to right. The calculation algorithm checks each trigger and operator in order. If one of the triggers changes its state, even for a fraction of a second, the mechanism for checking the trigger chain will start again. The chain checking does not always occur, but it is triggered every time an event occurs. The new event causes the trigger state to change from TRUE to FALSE. The combination of trigger states (TRUE and FALSE) defines the logic of the trigger chain. If, after all calculations, the trigger chain output is TRUE, then the animation starts. If the output is FALSE, then the animation does not play. When, during the animation playback, a new event occurs, it activates the checking of the trigger logic chain. The animation playing will stop if the output of the checking is FALSE. If the output of checking is TRUE, then the running animation continues to play. The animation does not start again, it just keeps playing, ignoring the TRUE value.

### Grouping triggers

The trigger chain allows you to create complex conditions for the activating animation. Triggers in the chain are calculated sequentially. If you want to set the order in calculation of triggers you should use the grouping of triggers. You can combine multiple triggers into groups and create multiple groups. Using the trigger groups helps to control the order of calculation.

### Logical operators

#### OR

OR returns TRUE value if any of the arguments/elements are TRUE, in the opposite situation, it will return FALSE. You need this logic operator if you want to initiate the animation by two or more triggers in condition that only one or more triggers are activated. By default, when you add a trigger, it joins the existing ones by OR.
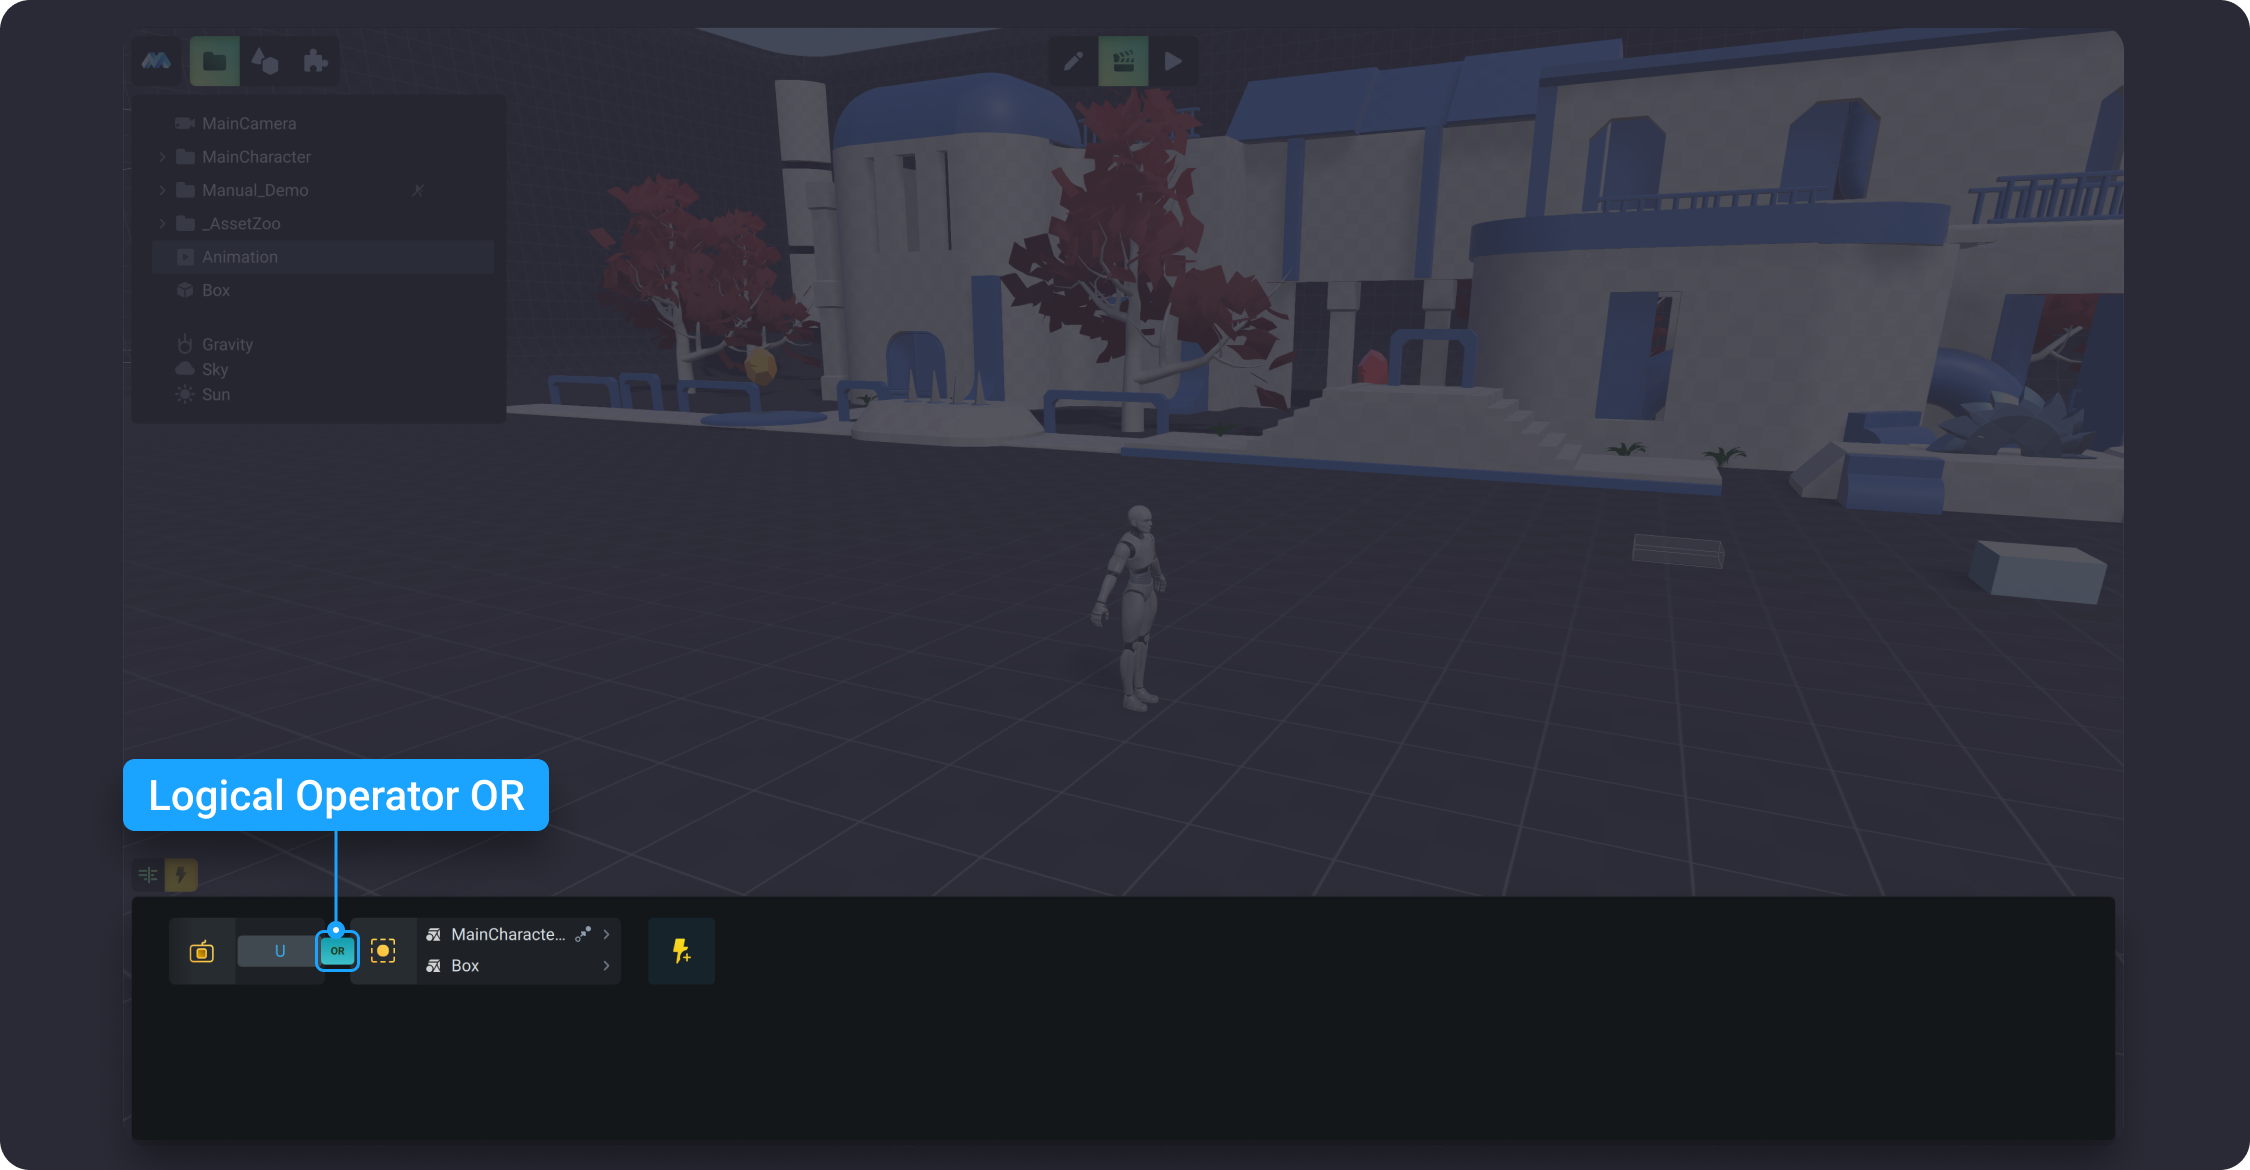
![](https://dl.dropboxusercontent.com/s/8k22zj6hcsg91vg/015.png?dl=0)

#### AND <a href="#docs-internal-guid-acb0c83f-7fff-d3a8-b1cc-2446976e8149" id="docs-internal-guid-acb0c83f-7fff-d3a8-b1cc-2446976e8149"></a>

AND returns a TRUE value if both elements are TRUE and returns FALSE otherwise. If you want that more than one trigger launches an animation, provided that both/all triggers have to be activated, then you need AND as a logical operator to create a chain of triggers. By default, when you add a trigger, it joins the existing ones by OR. You can change it simply by clicking on the AND Icon.
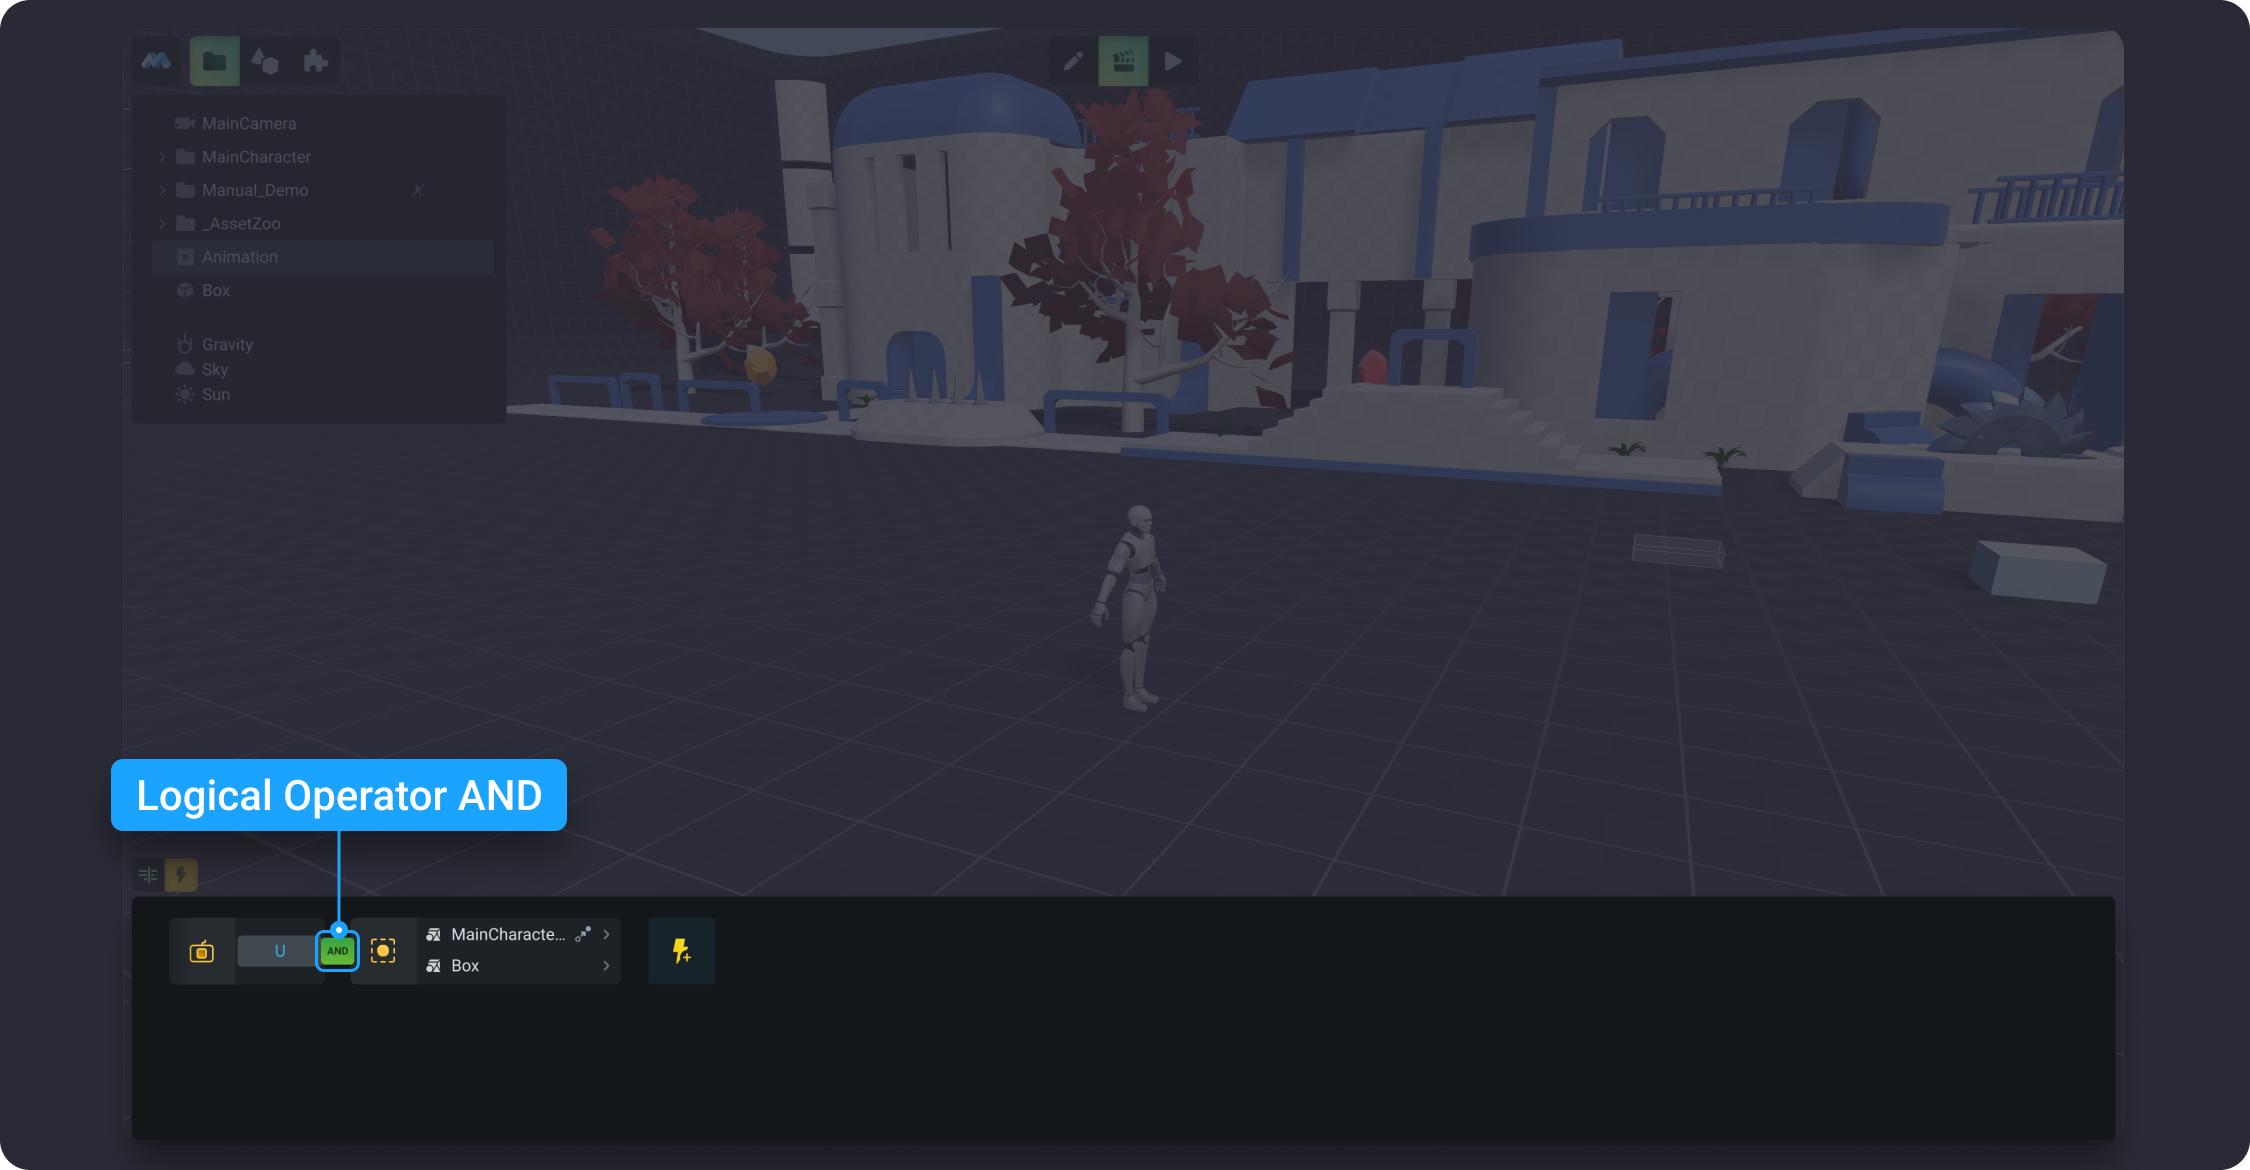
![](https://dl.dropboxusercontent.com/s/wkaq7uz16guo7e2/016.png?dl=0)

#### NOT <a href="#docs-internal-guid-26d9ed59-7fff-fbd9-2a68-be8897b52482" id="docs-internal-guid-26d9ed59-7fff-fbd9-2a68-be8897b52482"></a>

NOT performs a logic negation by inverting TRUE to FALSE and FALSE to TRUE. By hovering over the added trigger, you will notice that it is highlighted a little bit. After that click on the right mouse button and choose from the dropdown list Add NOT. If you have changed your mind, just click Remove NOT on that list. NOT can be set not only for one trigger, but also for the trigger group.
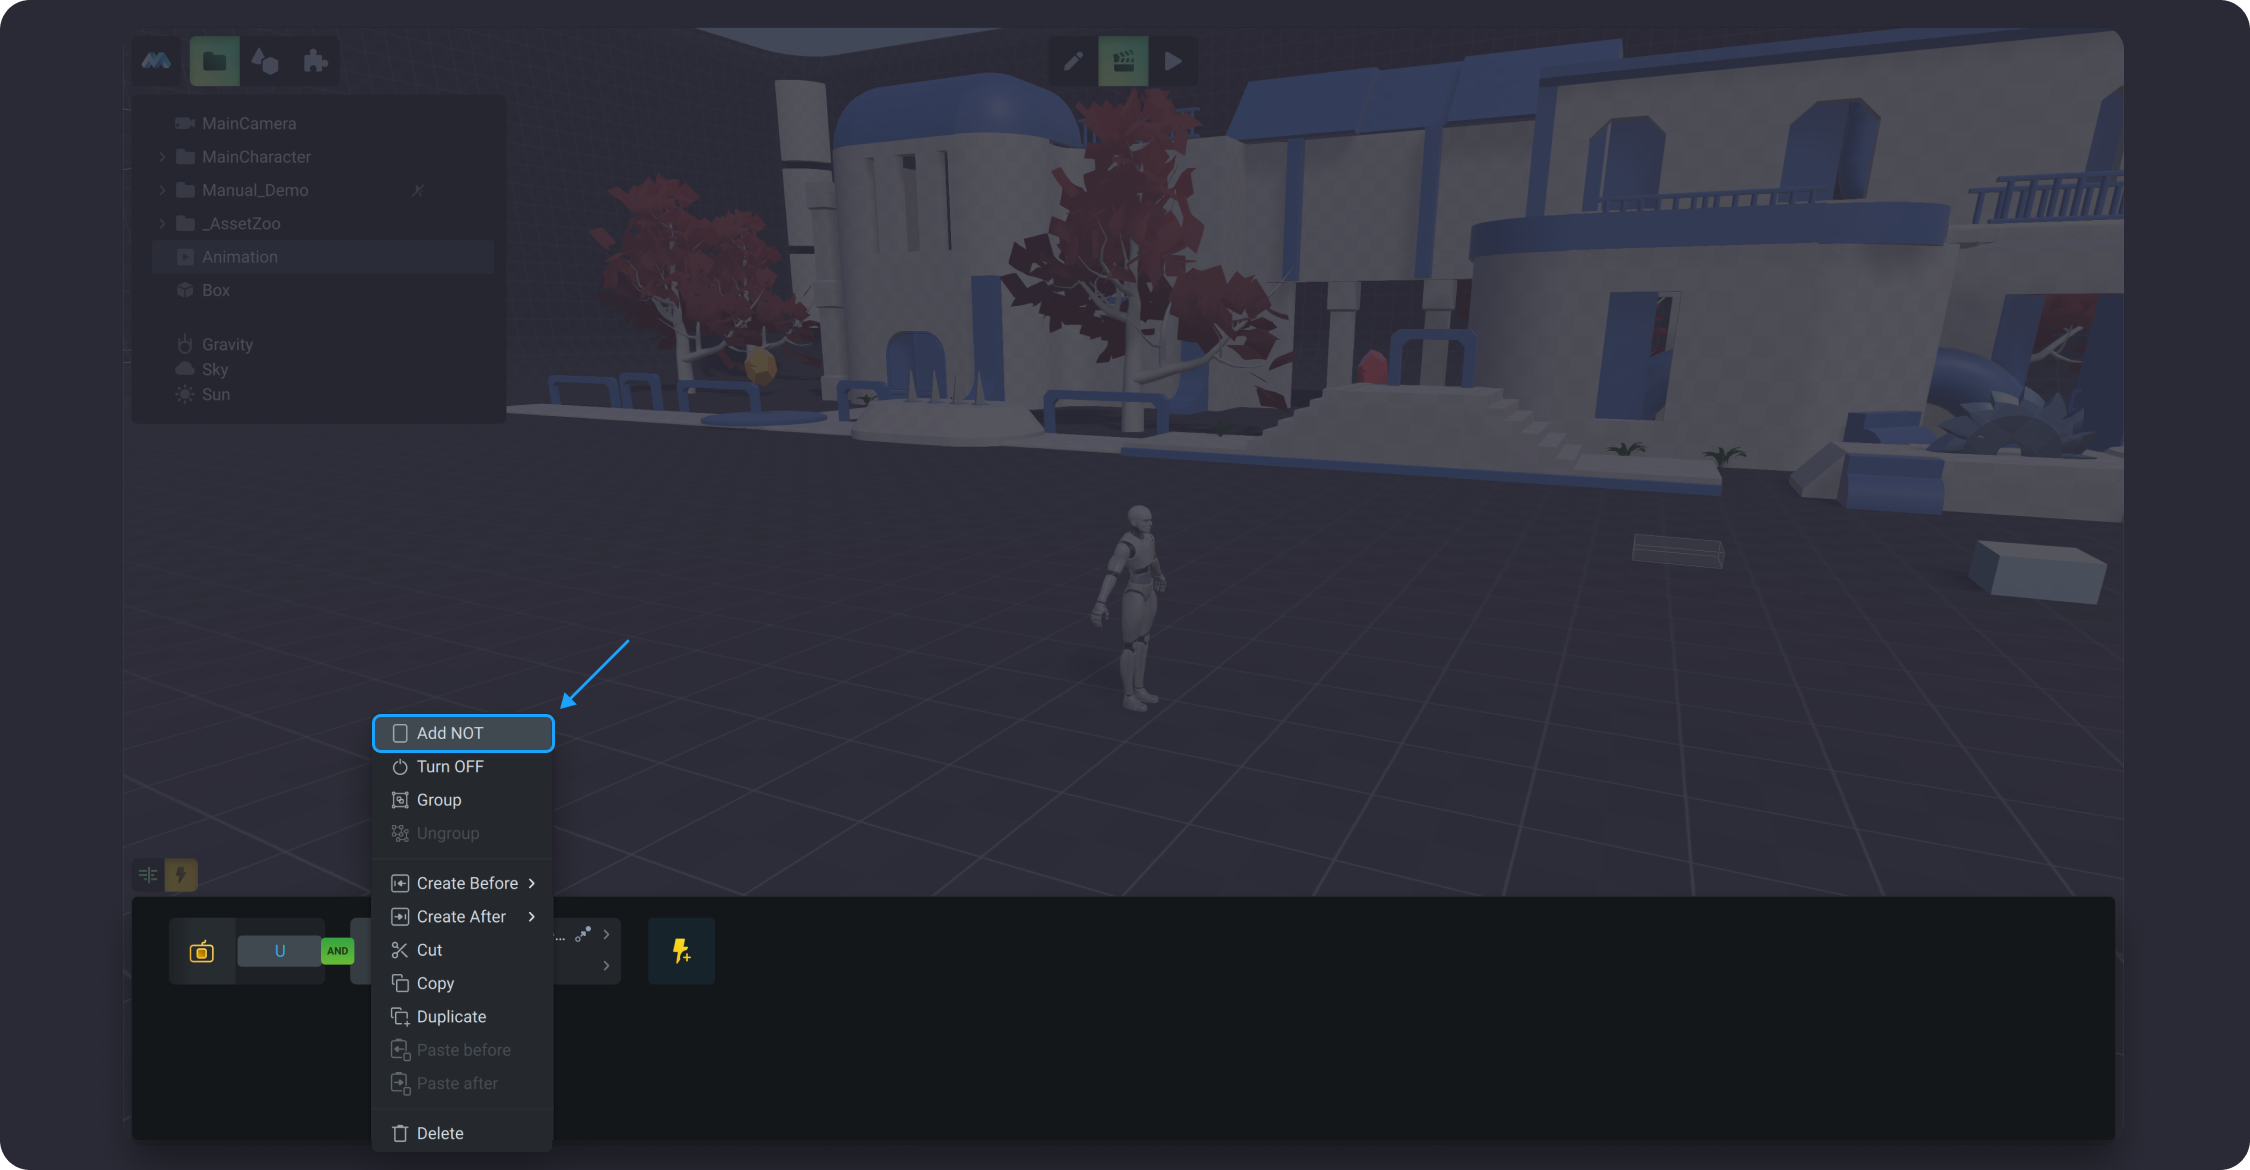
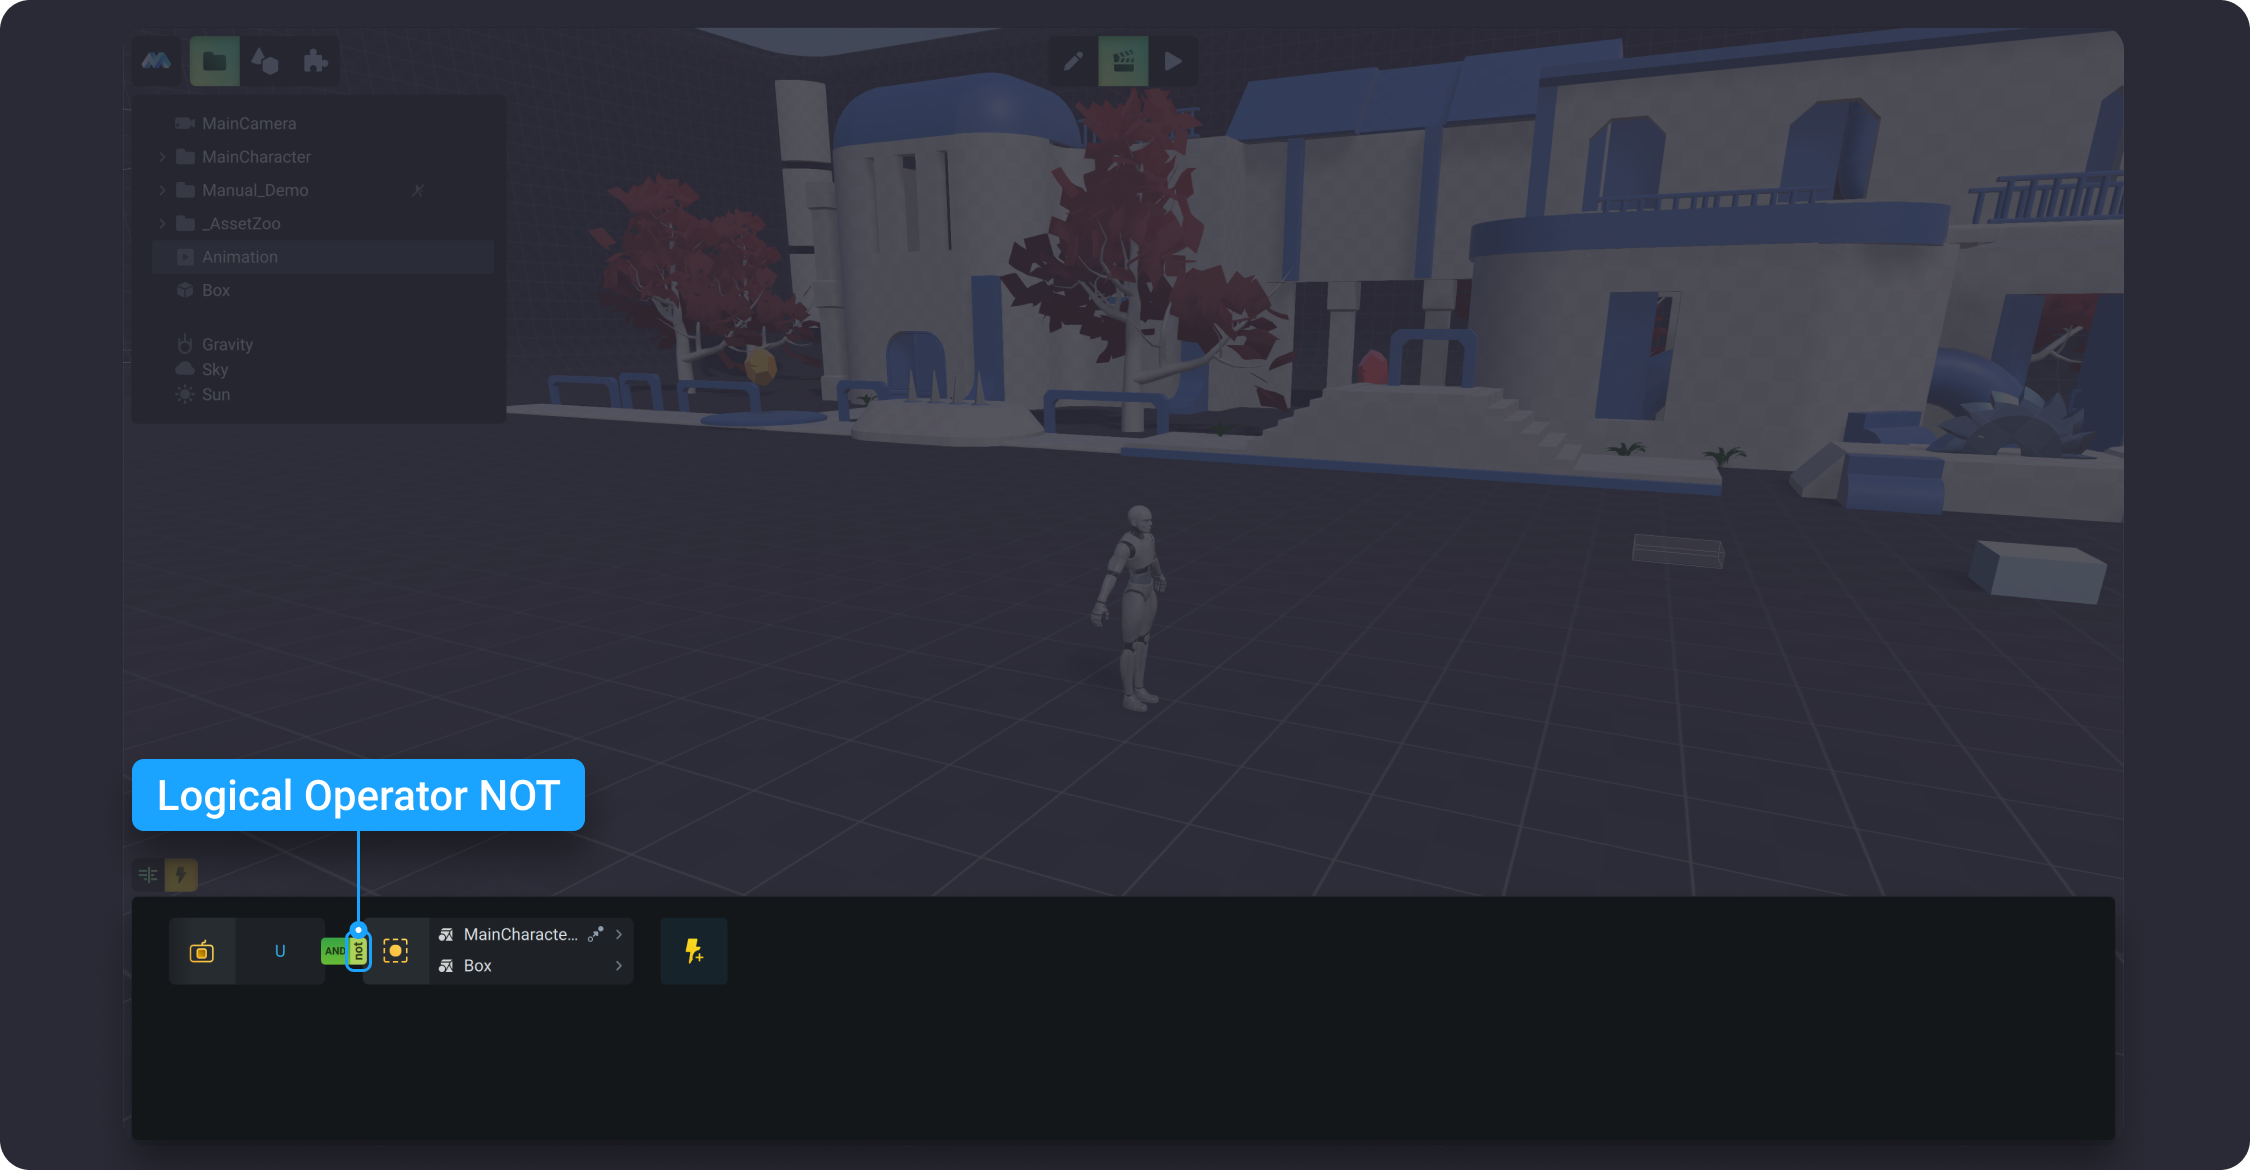
![](https://dl.dropboxusercontent.com/s/3gp7enhw3mxw3r9/017.png?dl=0)

![](https://dl.dropboxusercontent.com/s/djfrozk7urgwxlu/018.png?dl=0)

![](https://dl.dropboxusercontent.com/s/iauazobya9istst/019.png?dl=0)

### Truth table

| Trigger 1 | Operation | Trigger 2 | Result |
| --------- | --------- | --------- | ------ |
| YES       | `OR`      | YES       | YES    |
| YES       | `OR`      | NO        | YES    |
| NO        | `OR`      | YES       | YES    |
| NO        | `OR`      | NO        | NO     |
|           |           |           |        |
| YES       | `AND`     | YES       | YES    |
| YES       | `AND`     | NO        | NO     |
| NO        | `AND`     | YES       | NO     |
| NO        | `AND`     | NO        | NO     |

### Managing triggers <a href="#docs-internal-guid-2be78d94-7fff-261c-066f-ff4c6fd88971" id="docs-internal-guid-2be78d94-7fff-261c-066f-ff4c6fd88971"></a>

You can manage triggers using a dropdown list which appears when you hover over the selected trigger and click on the right mouse button.&#x20;

#### Turn Off/On <a href="#docs-internal-guid-f7626cdc-7fff-6837-77e8-0e583ae8076c" id="docs-internal-guid-f7626cdc-7fff-6837-77e8-0e583ae8076c"></a>

The Turn Off/On option is used to check the logic of trigger chains. This option is necessary for testing and finding errors in the trigger logic. For example, when a chain of 6 triggers does not work, you can turn them on and off in sequence, and then perform a check. The turned off triggers are ignored during the chain checking process. Note that along with the turned off triggers, the logical operators in front of them are also turned off and ignored.
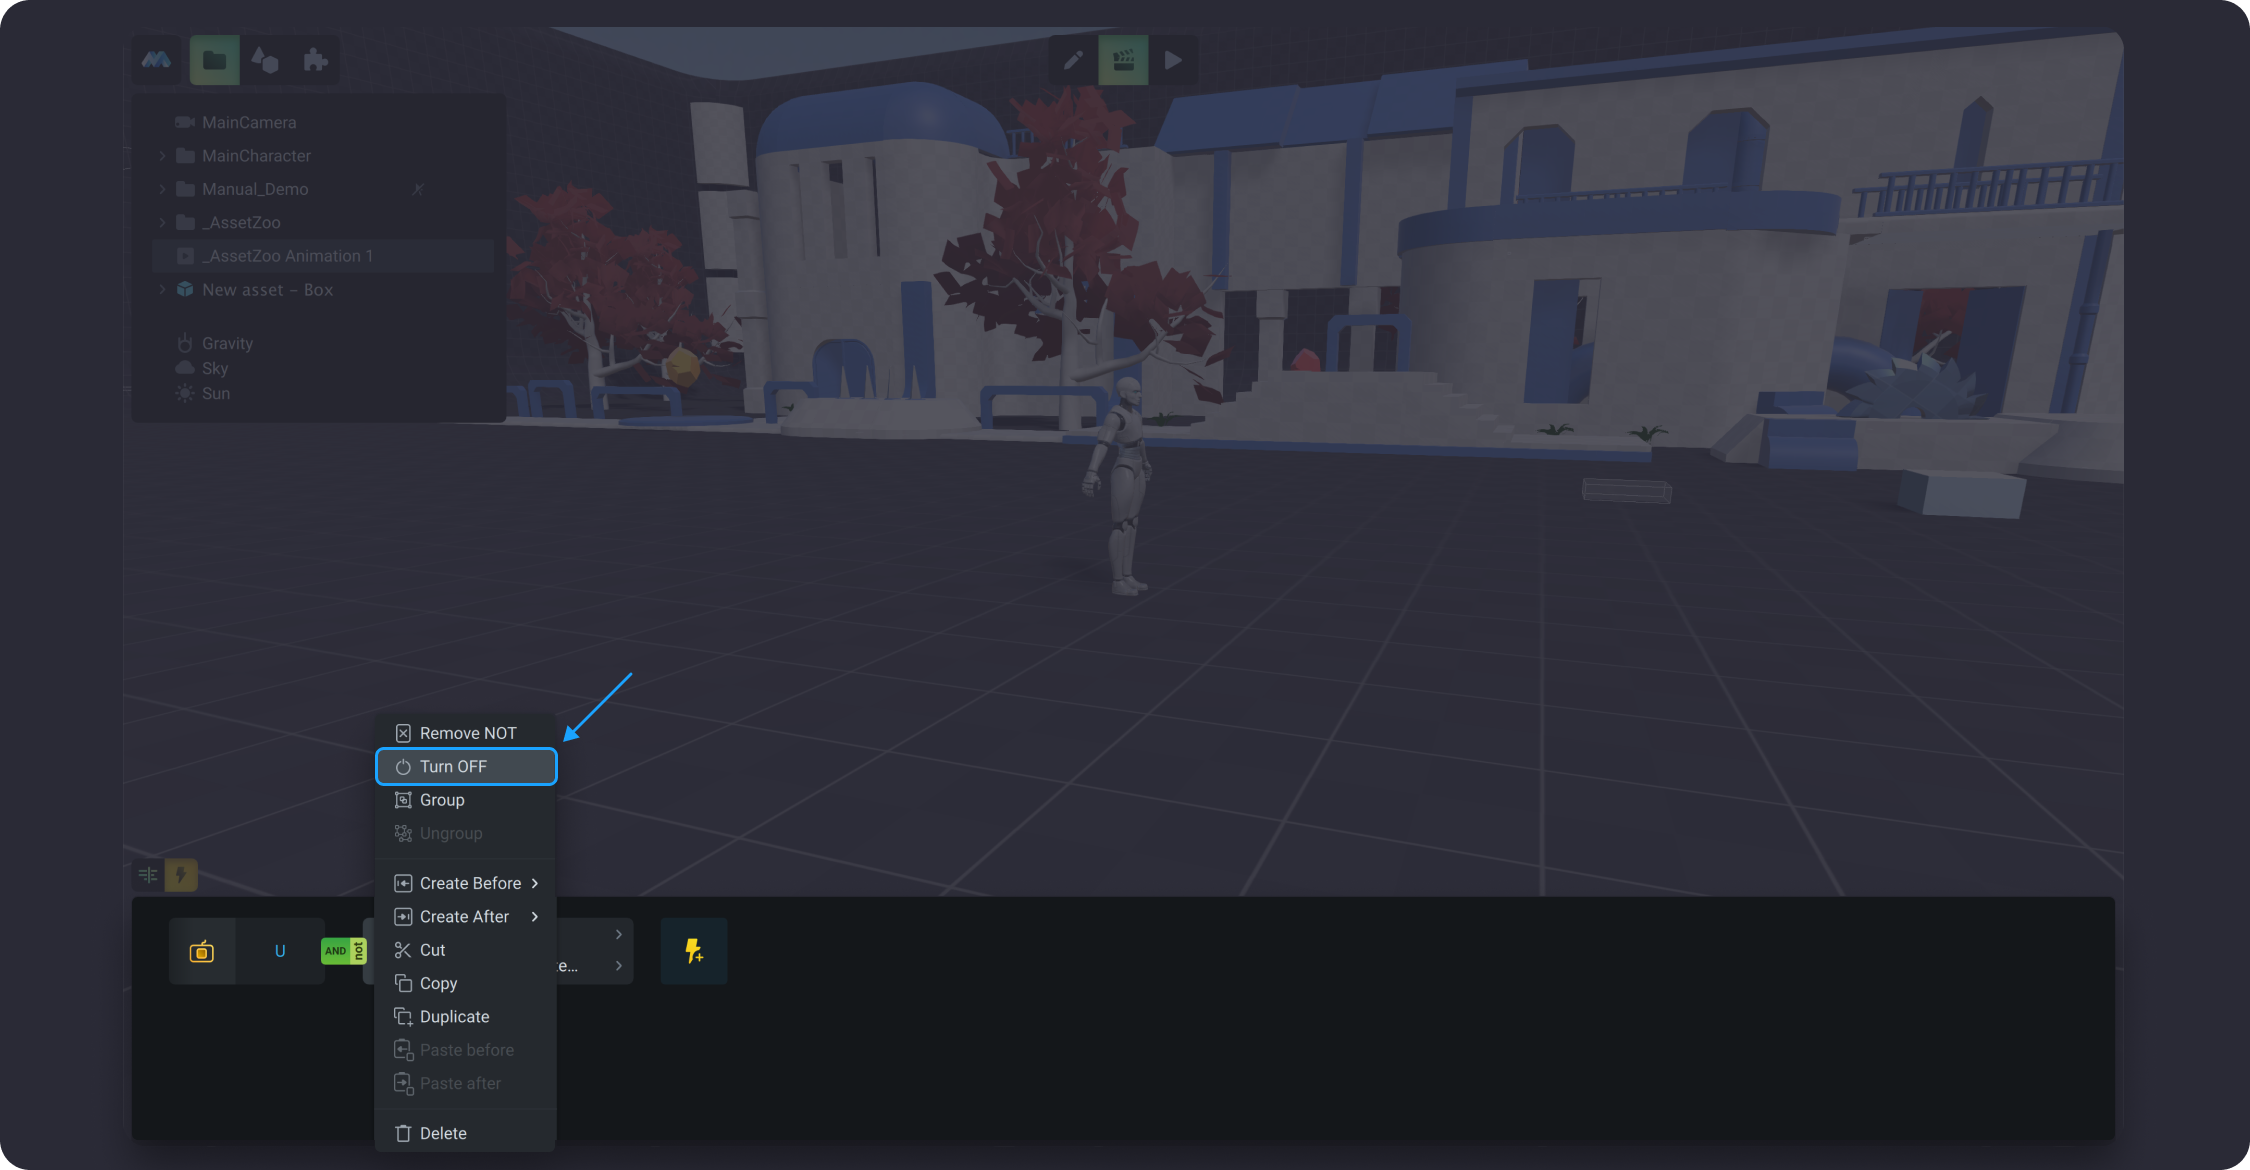
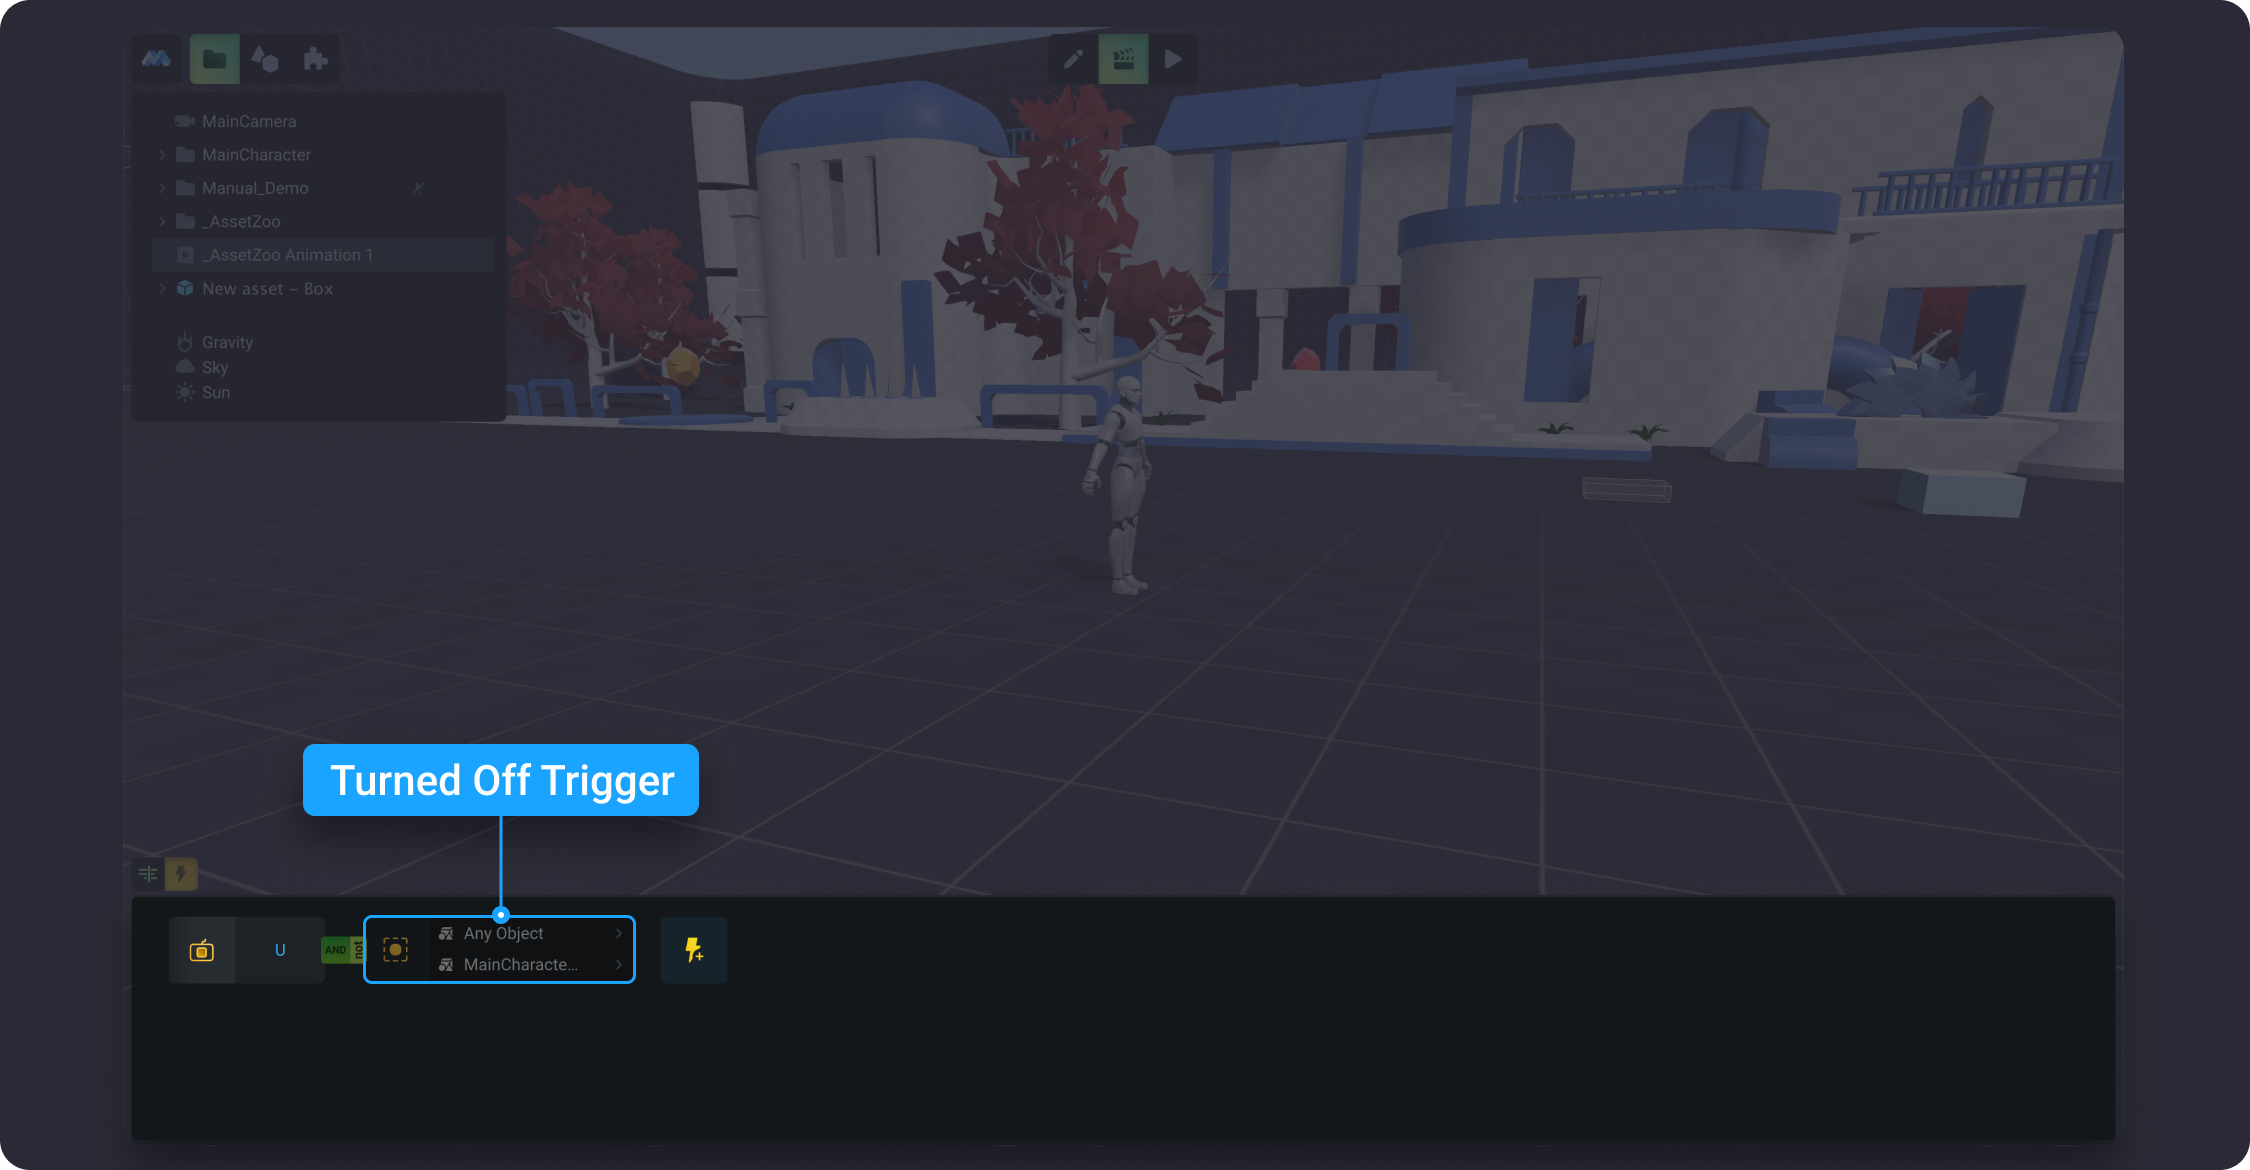
![](https://dl.dropboxusercontent.com/s/lpl5getccf2svc5/021.png?dl=0)

![](https://dl.dropboxusercontent.com/s/gmjc8z1fwgw4gup/022.png?dl=0)

#### Group <a href="#docs-internal-guid-7391aa00-7fff-c07f-5a42-e772fc3f9858" id="docs-internal-guid-7391aa00-7fff-c07f-5a42-e772fc3f9858"></a>

To create a group of triggers, move the mouse cursor over the desired trigger and select Group from the drop-down list. A green border will appear around the selected trigger, which changes its color to white if you hover the mouse cursor over it. Next, add the necessary triggers to the group using the Create *After/Before* or *Paste After/Before* options for cut or copied triggers. You also can use *Duplicate* if you need the same trigger in your chain.
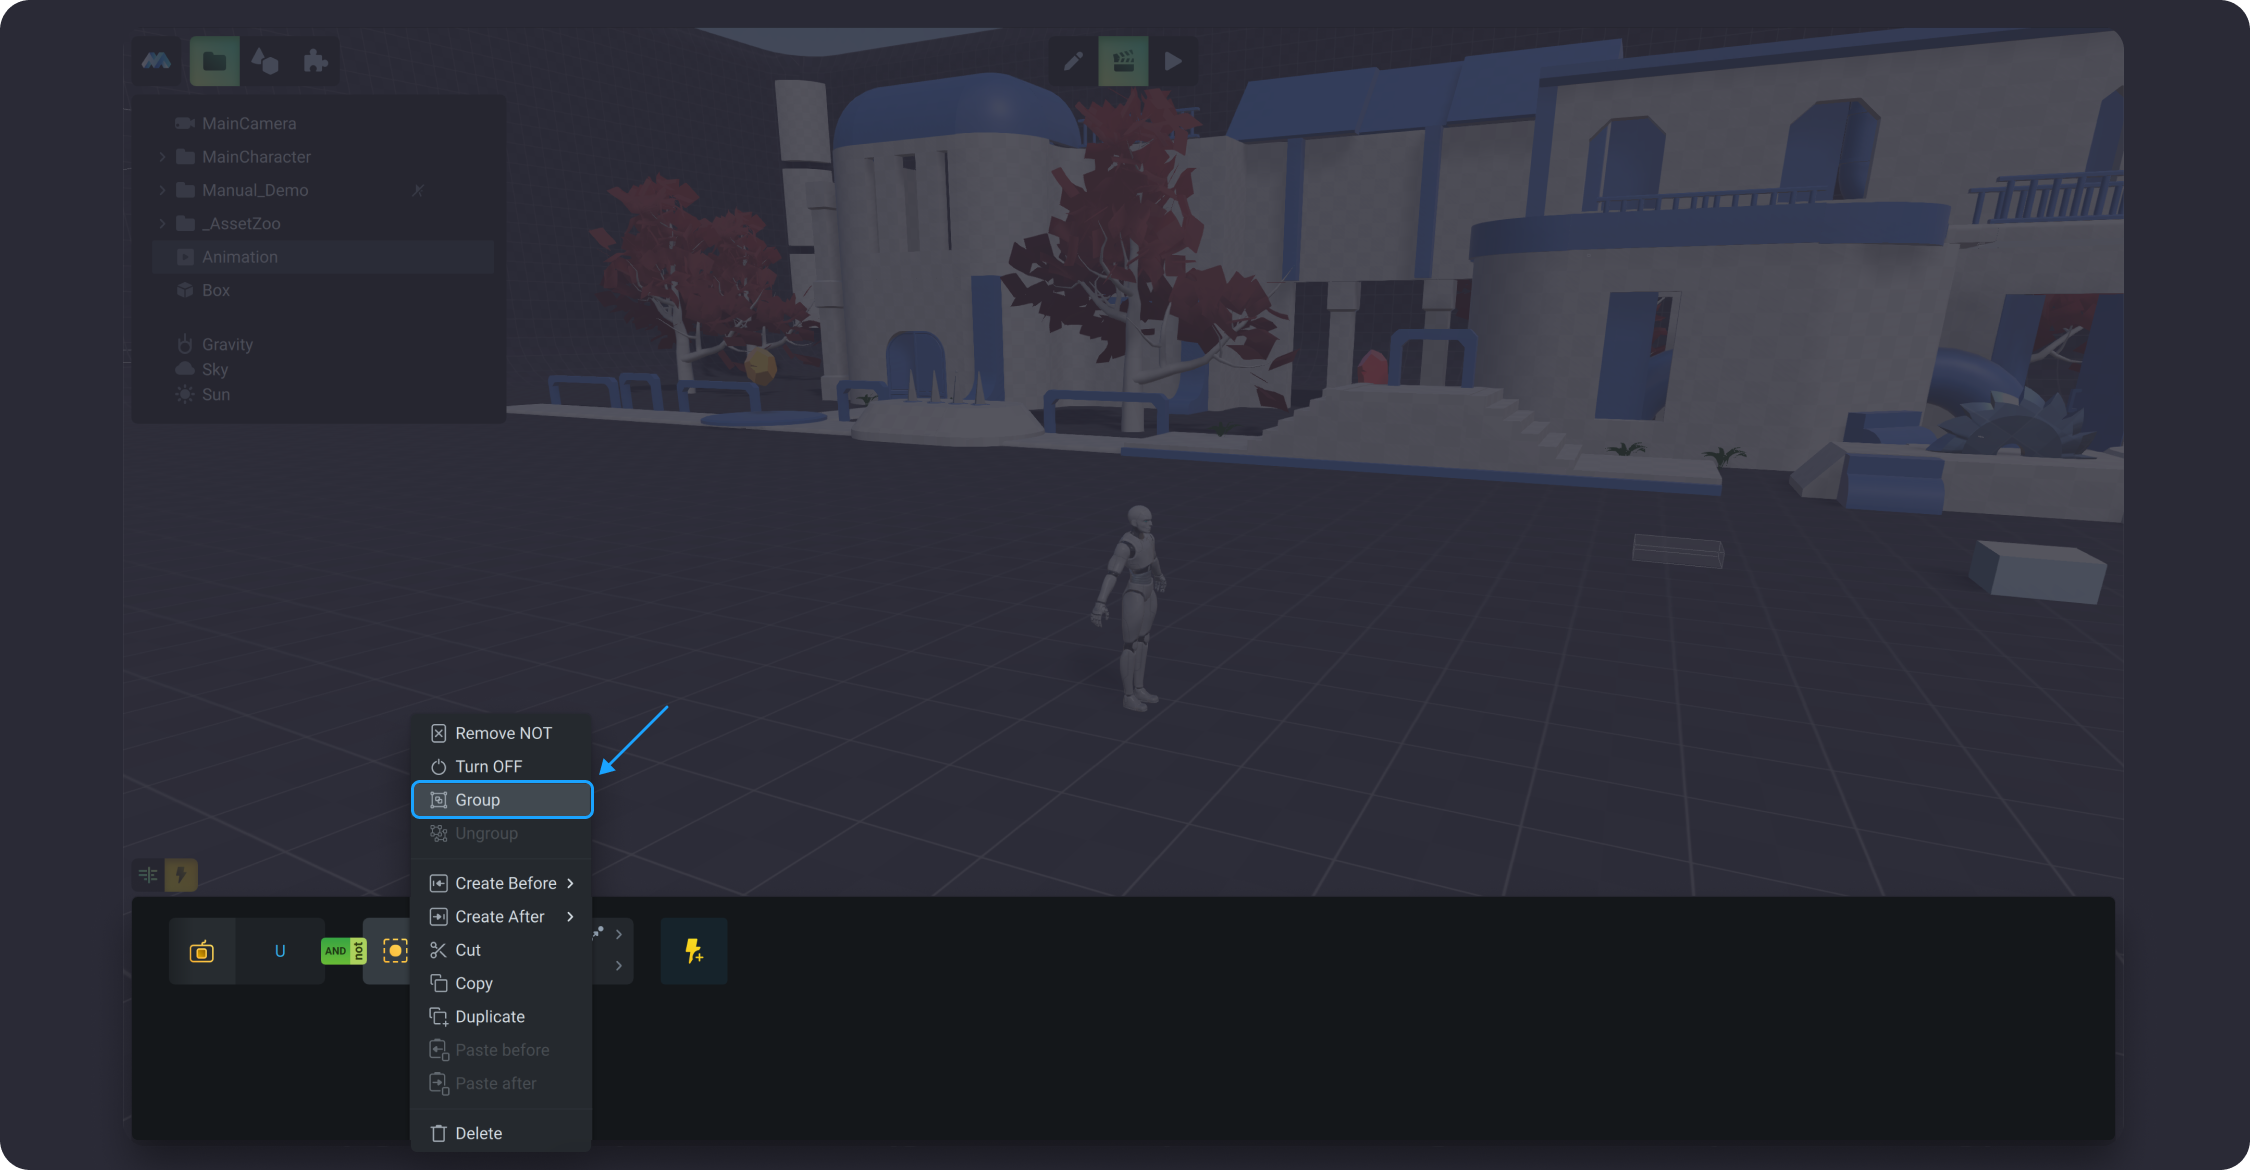
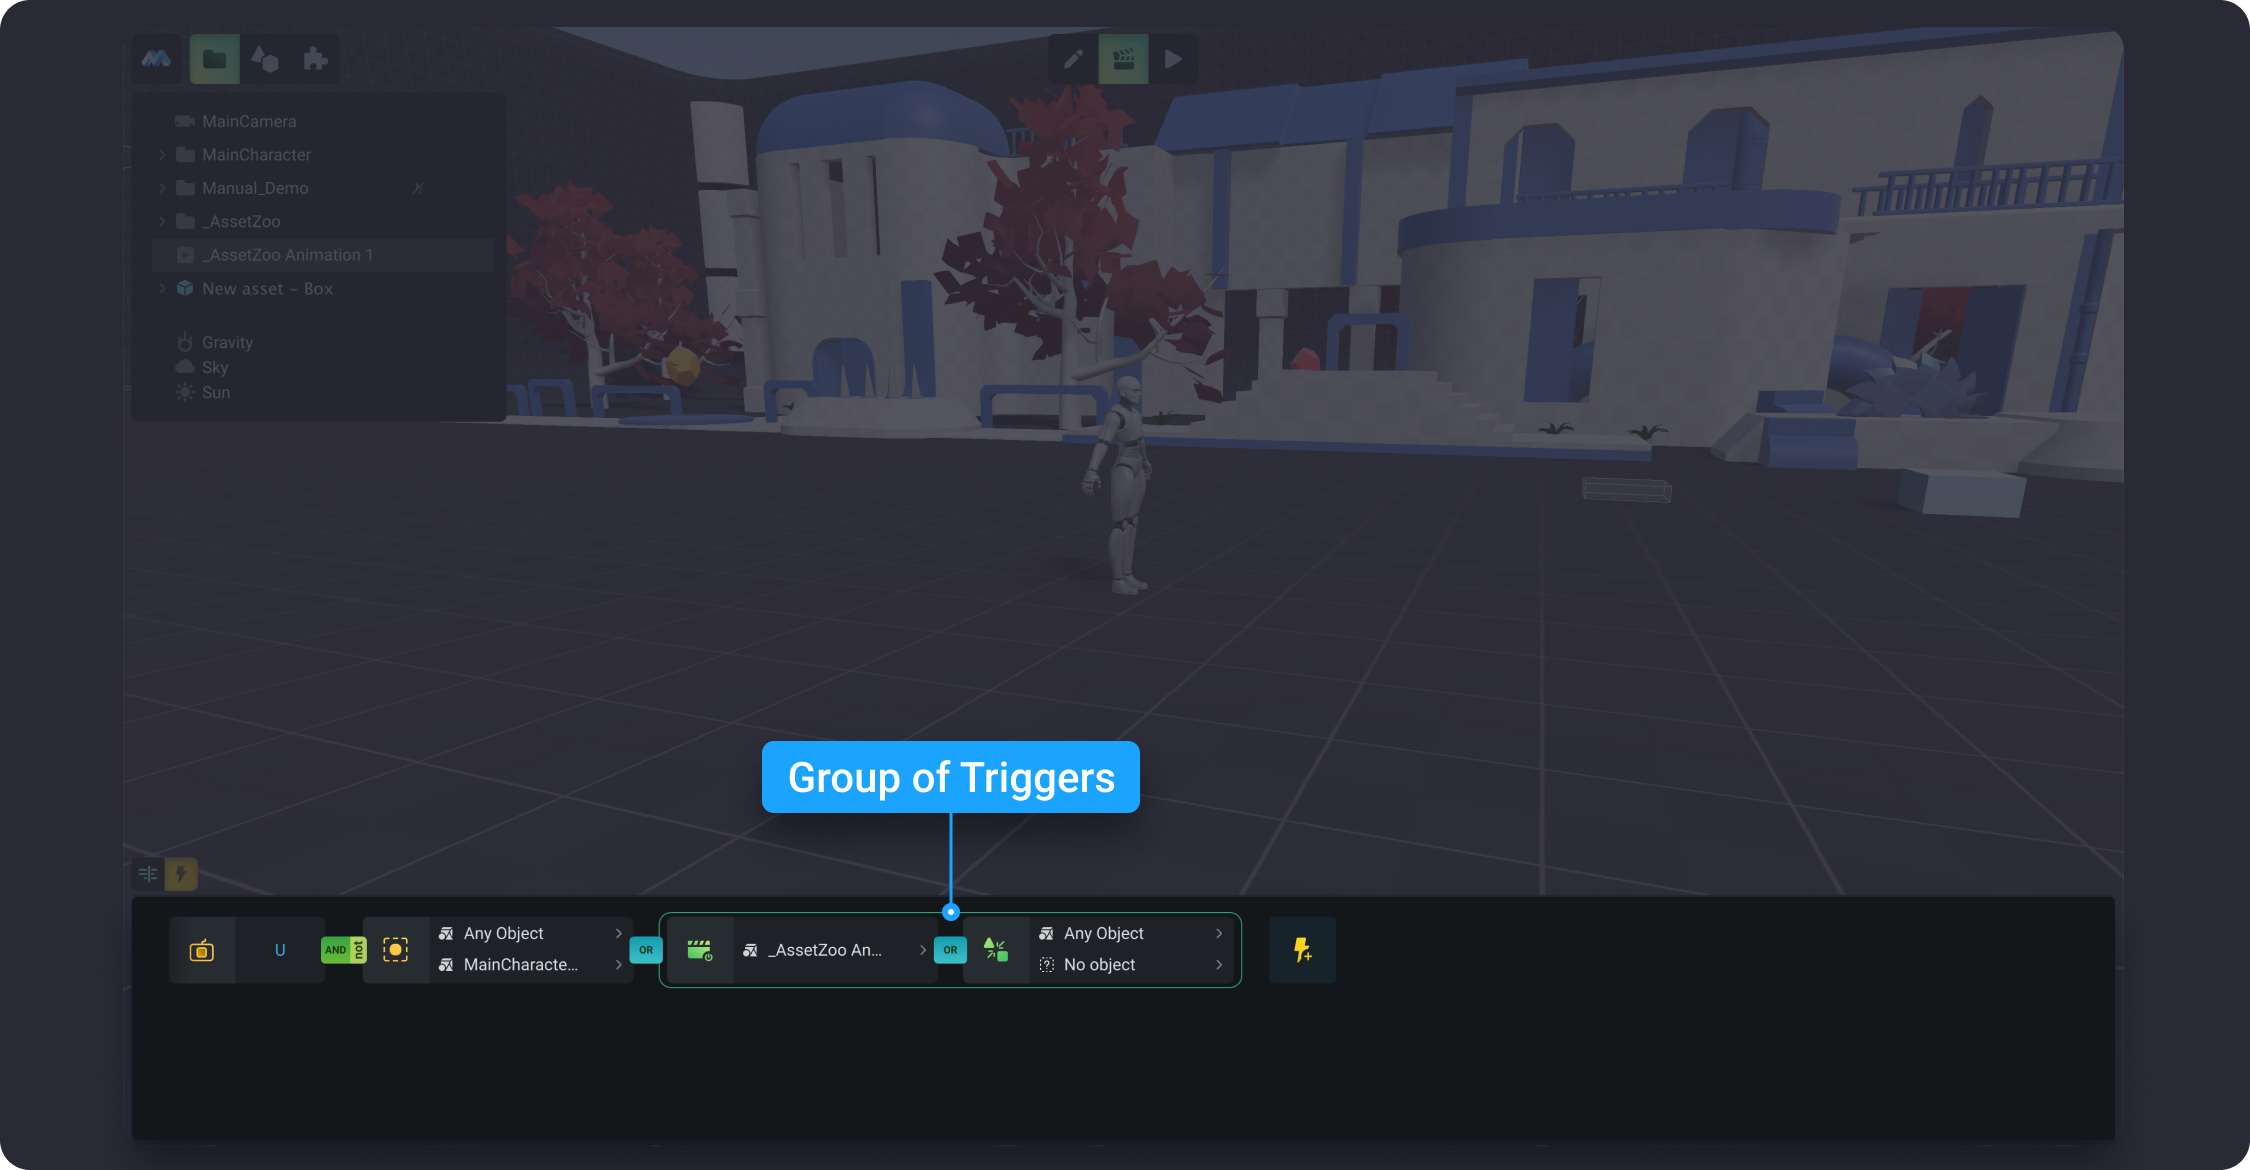
![](https://dl.dropboxusercontent.com/s/gsee9k07mtth6nr/020.png?dl=0)

![](https://dl.dropboxusercontent.com/s/oshvx94bzh2dr7z/023.png?dl=0)

#### Ungroup <a href="#docs-internal-guid-1457ab8f-7fff-4eba-efdd-9454383c448f" id="docs-internal-guid-1457ab8f-7fff-4eba-efdd-9454383c448f"></a>

Hover the mouse cursor over the green border around the trigger group, and it will immediately change color to white. Then, click the right mouse button and select *Ungroup* from the dropdown list.
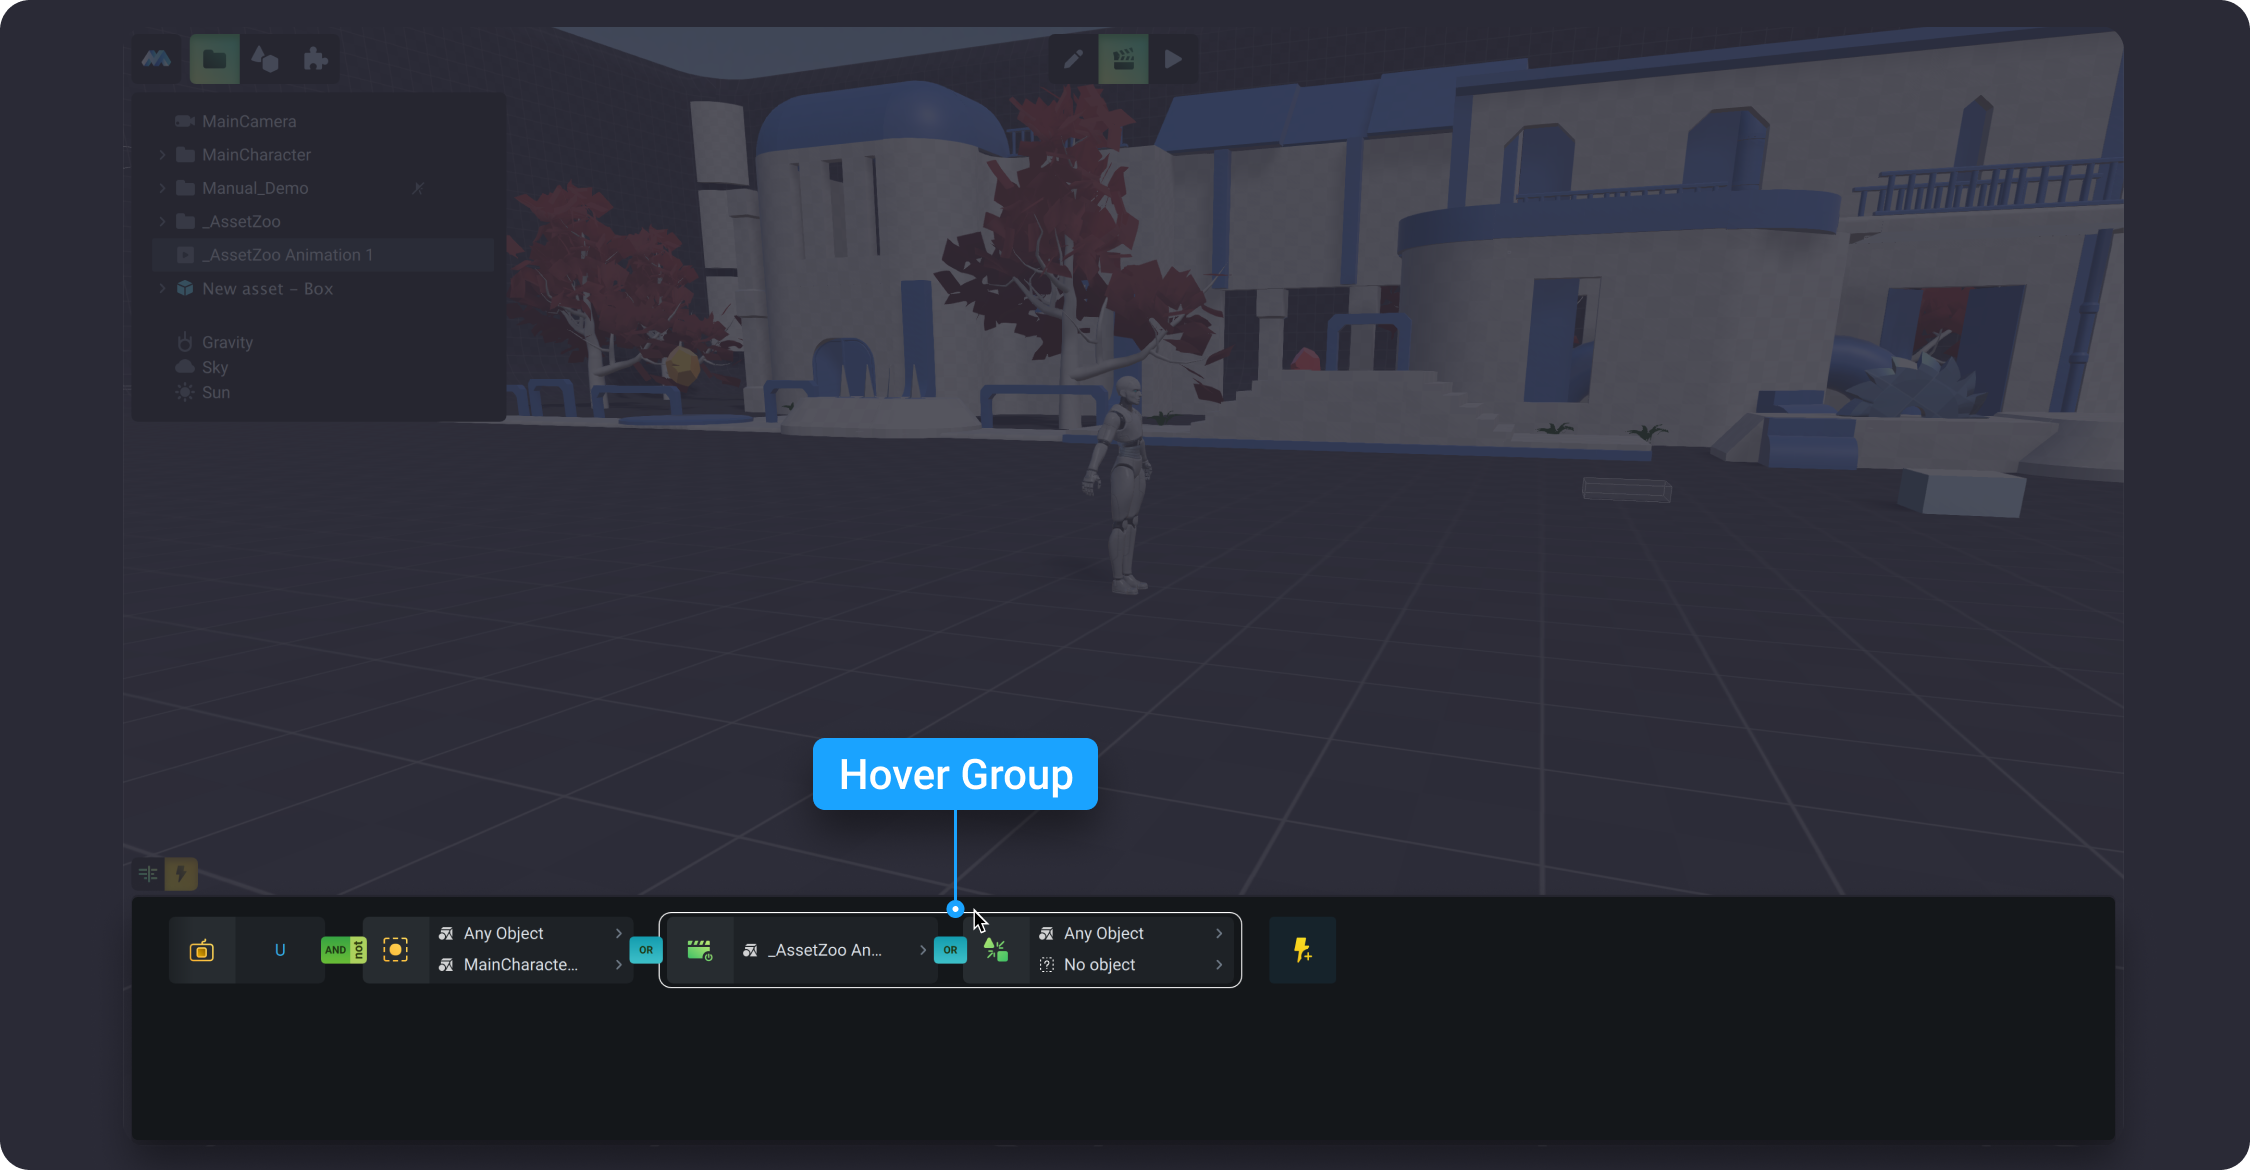
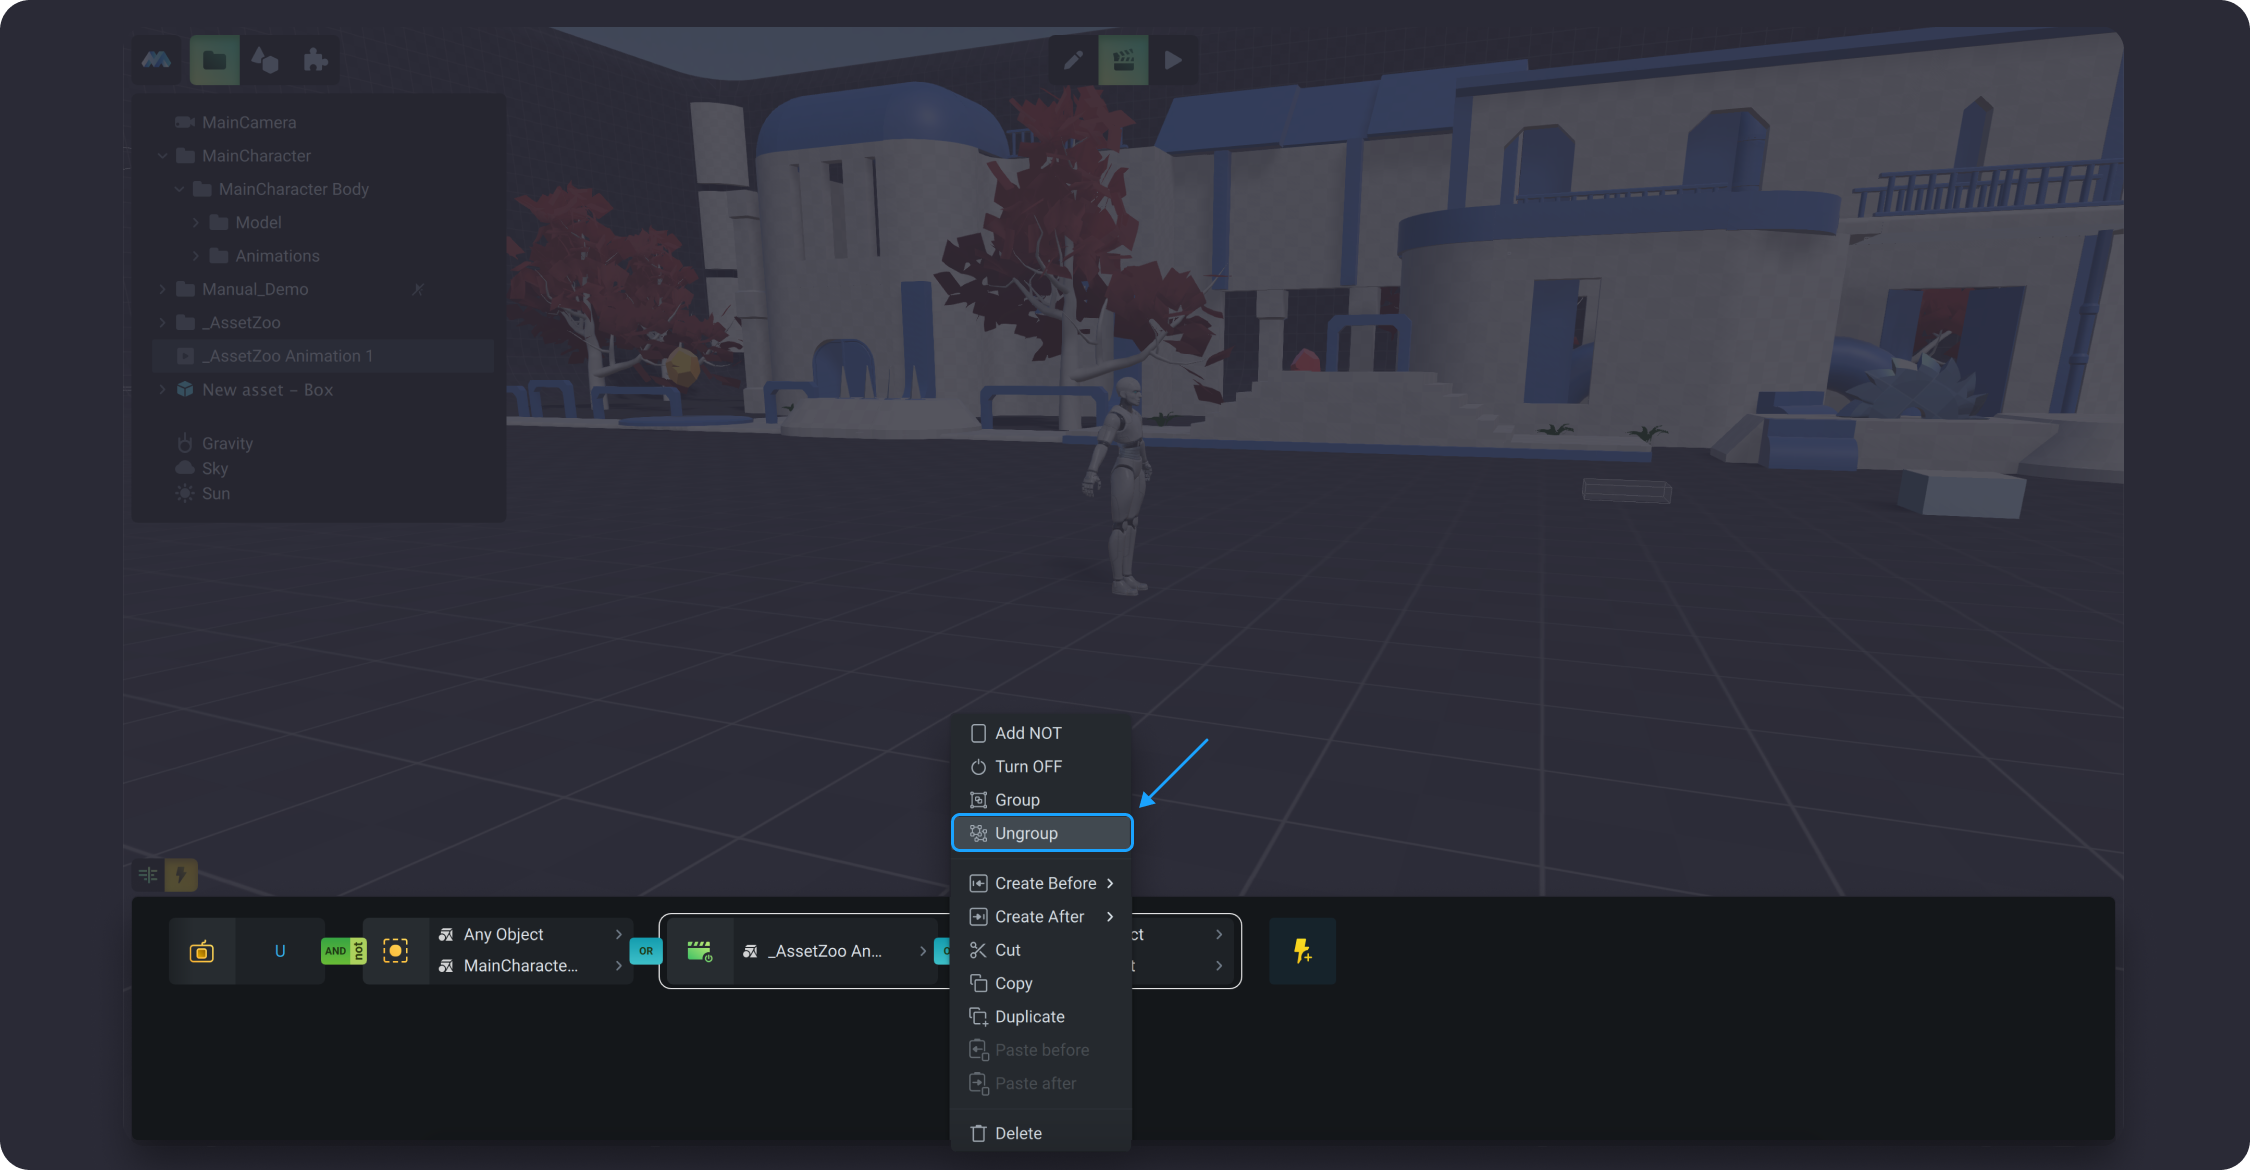
![](https://dl.dropboxusercontent.com/s/crvujjv7pzwx7vt/024.png?dl=0)

![](https://dl.dropboxusercontent.com/s/fydkdzecuc154fd/025.png?dl=0)

#### Create Before/Create After <a href="#docs-internal-guid-10d178c0-7fff-86e7-44b5-532ea1de3010" id="docs-internal-guid-10d178c0-7fff-86e7-44b5-532ea1de3010"></a>

*Create Before* and *Create After* allow you to create a trigger at a specific location in the trigger chain. Just hover over the trigger after or before which the new trigger should go, and then click on the right mouse button to invoke the dropdown list. Both options have dropdown lists where you can choose all types of triggers that MANU offer.&#x20;

![](https://dl.dropboxusercontent.com/s/p4kmp65mspmlhp9/026.png?dl=0)

#### Cut <a href="#docs-internal-guid-baeb8f7f-7fff-0533-8291-09a7c9c016d4" id="docs-internal-guid-baeb8f7f-7fff-0533-8291-09a7c9c016d4"></a>

The Cut option temporarily removes the currently selected trigger from the trigger chain. After you cut the trigger, you can place it to a different location in the current trigger chain, or to a different animation. Simply click *Paste Before/Paste After* options from the dropdown list or click on the area between triggers and you will see the Paste option, which allows you to put the trigger at the end of the trigger chain.
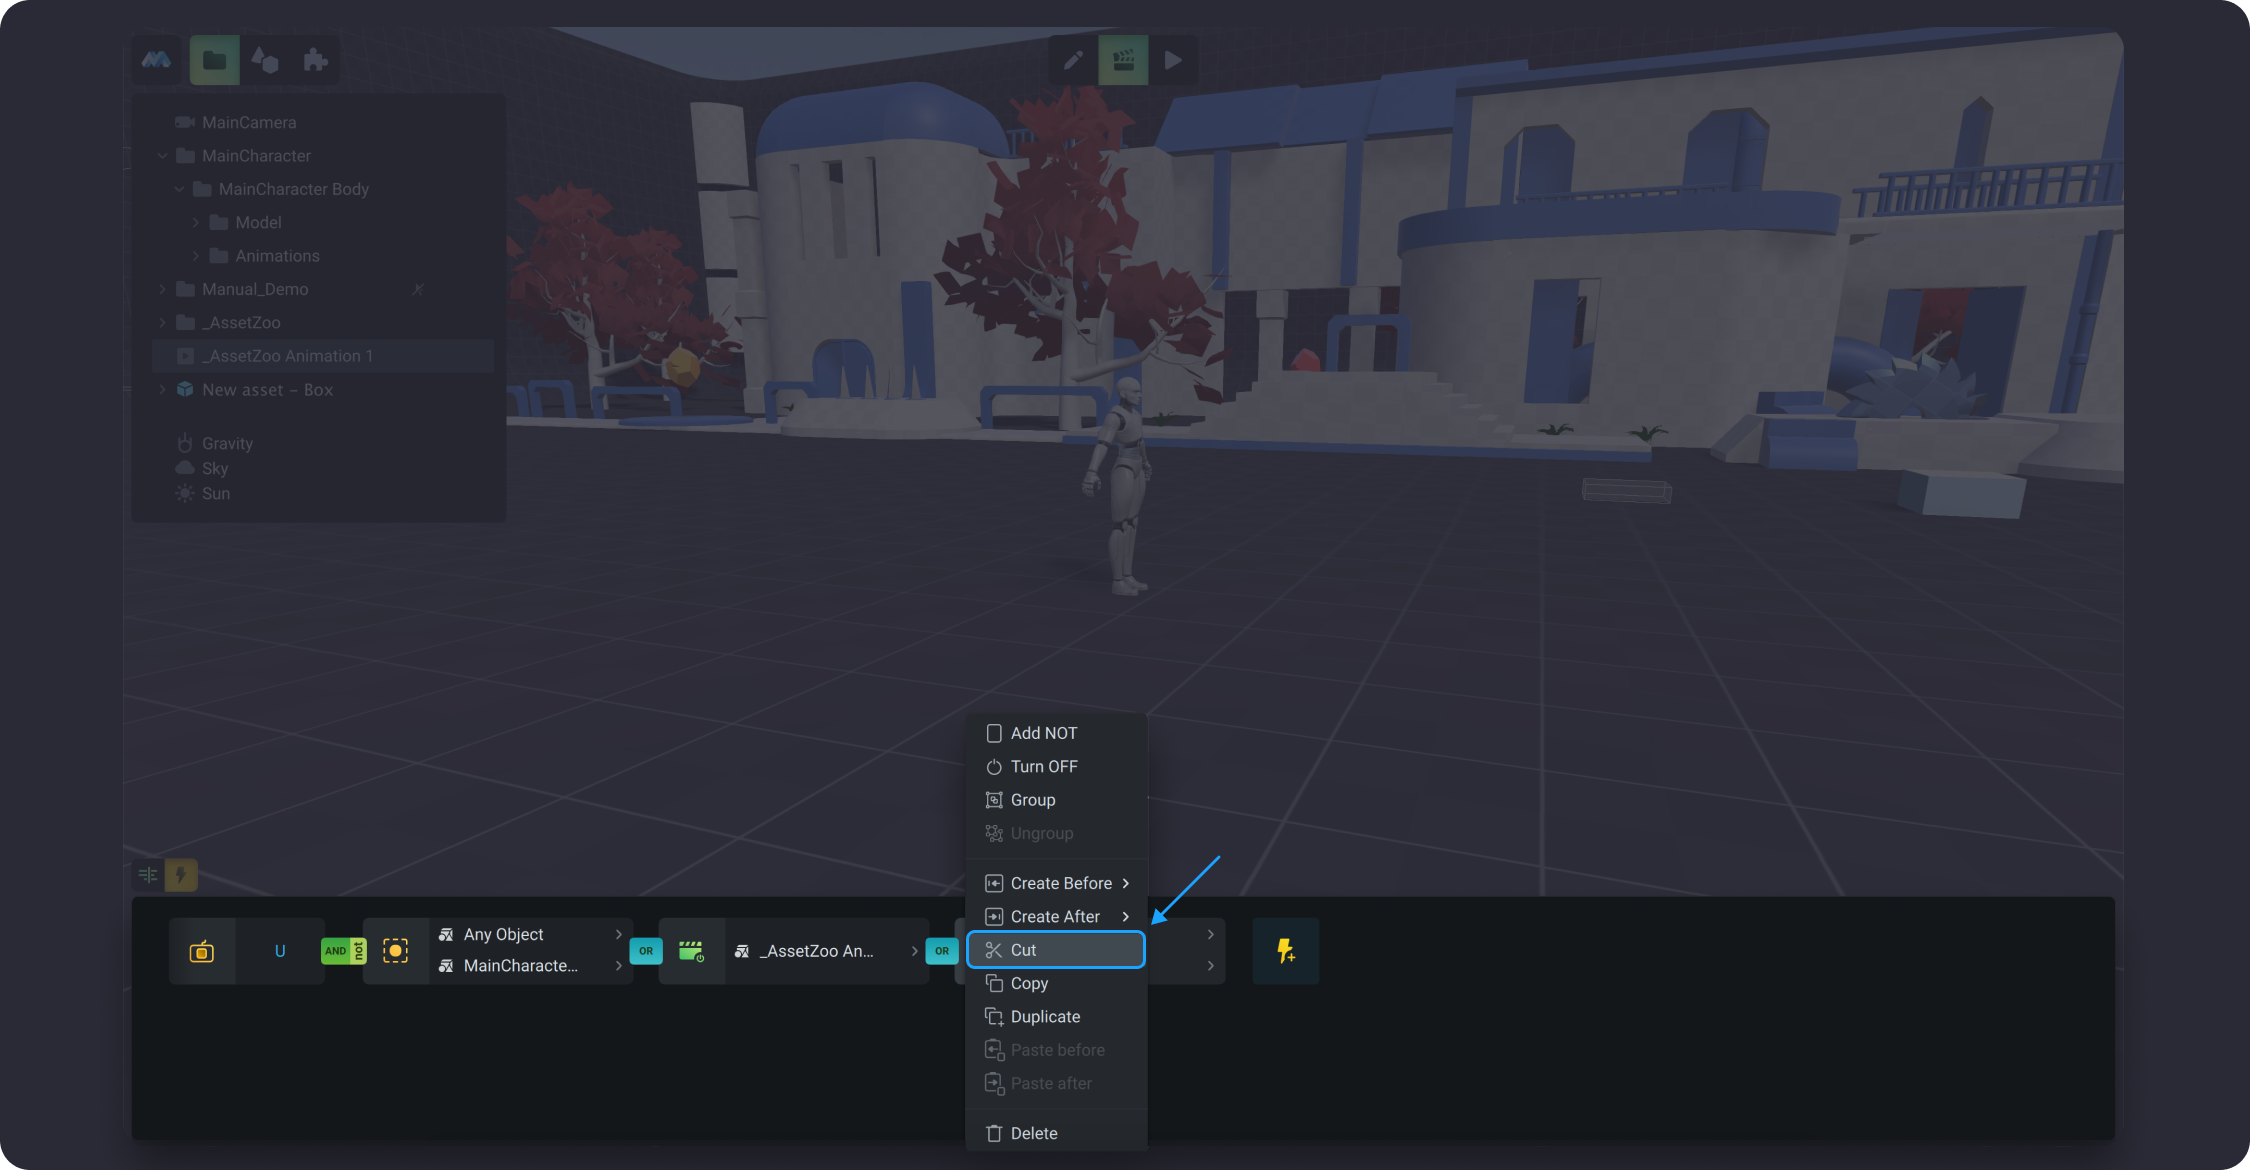
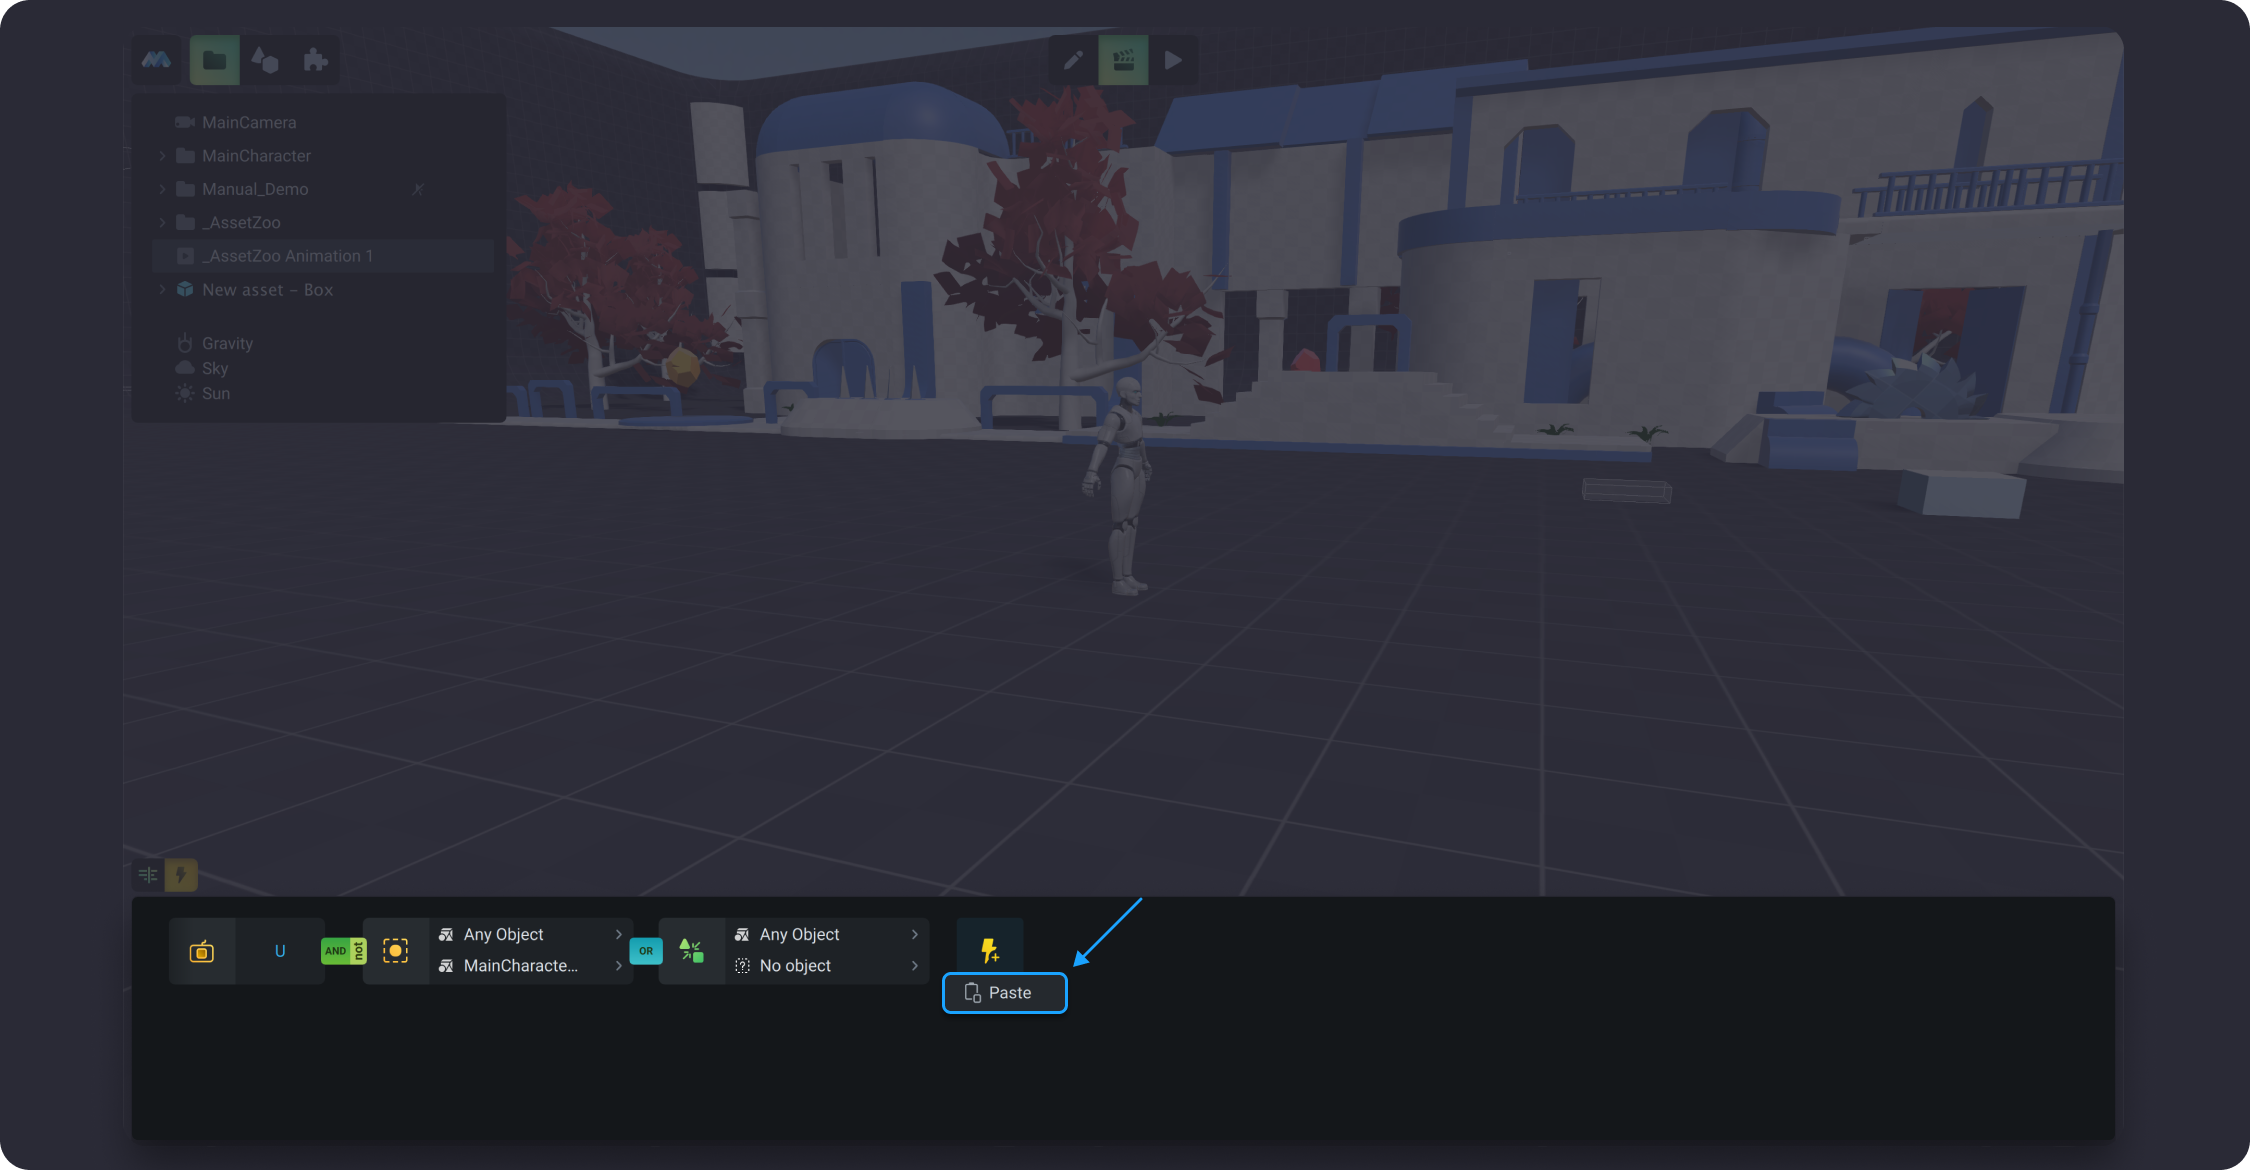
![](https://dl.dropboxusercontent.com/s/vf4h0zoso45sunw/029.png?dl=0)

![](https://dl.dropboxusercontent.com/s/edff8bbj7cqwbzh/028.png?dl=0)

#### Copy <a href="#docs-internal-guid-4191789a-7fff-7102-d6ee-c7ef376b4d40" id="docs-internal-guid-4191789a-7fff-7102-d6ee-c7ef376b4d40"></a>

When you press *Copy*, the selected trigger remains in its original location. To put the trigger on the desired place use *Paste Before/Paste After* options from the dropdown list. By pasting the copied trigger, you actually duplicate it.

#### Duplicate

With the *Duplicate* option you copy and paste the selected trigger in one click. The new trigger will follow the selected one.

#### Paste Before/Paste After

The *Paste Before/Paste After* options allow you to place the cut or copied triggers anywhere in the trigger chain.  You can paste triggers multiple times or in several places without copying it again.&#x20;

![](https://dl.dropboxusercontent.com/s/tjqoni37bgbw2ed/027.png?dl=0)

#### Delete

With *Delete* you can remove all undesired triggers from your logic trigger chain.

![](https://dl.dropboxusercontent.com/s/bn1f1kkrufkdvfg/030.png)


# On Launch Scene

### On Launch Scene

On Launch Scene is an independent trigger that activates as soon as the game starts. You can manage the trigger hovering over the Icon and using a dropdown list that appears after right clicking. Go to Managing Triggers to know more (link).

<figure><img src="https://4240499350-files.gitbook.io/~/files/v0/b/gitbook-x-prod.appspot.com/o/spaces%2F-Lt-sE9MYKe9pZOcHwg5%2Fuploads%2FgQUolRhYzHozaQE1zcfH%2Fimage.png?alt=media&amp;token=e45d3c94-c3e9-42cd-9392-e84731dd5ad9" alt=""><figcaption></figcaption></figure>


# Key

### Key <a href="#docs-internal-guid-f8985995-7fff-aa63-9a0b-8acb56b6ab85" id="docs-internal-guid-f8985995-7fff-aa63-9a0b-8acb56b6ab85"></a>

Key combines a group of triggers that use keyboard keys to trigger animations. There are 3 of them: Key Down, Key Pressed, and Key Up. All key triggers have their own color Icons.
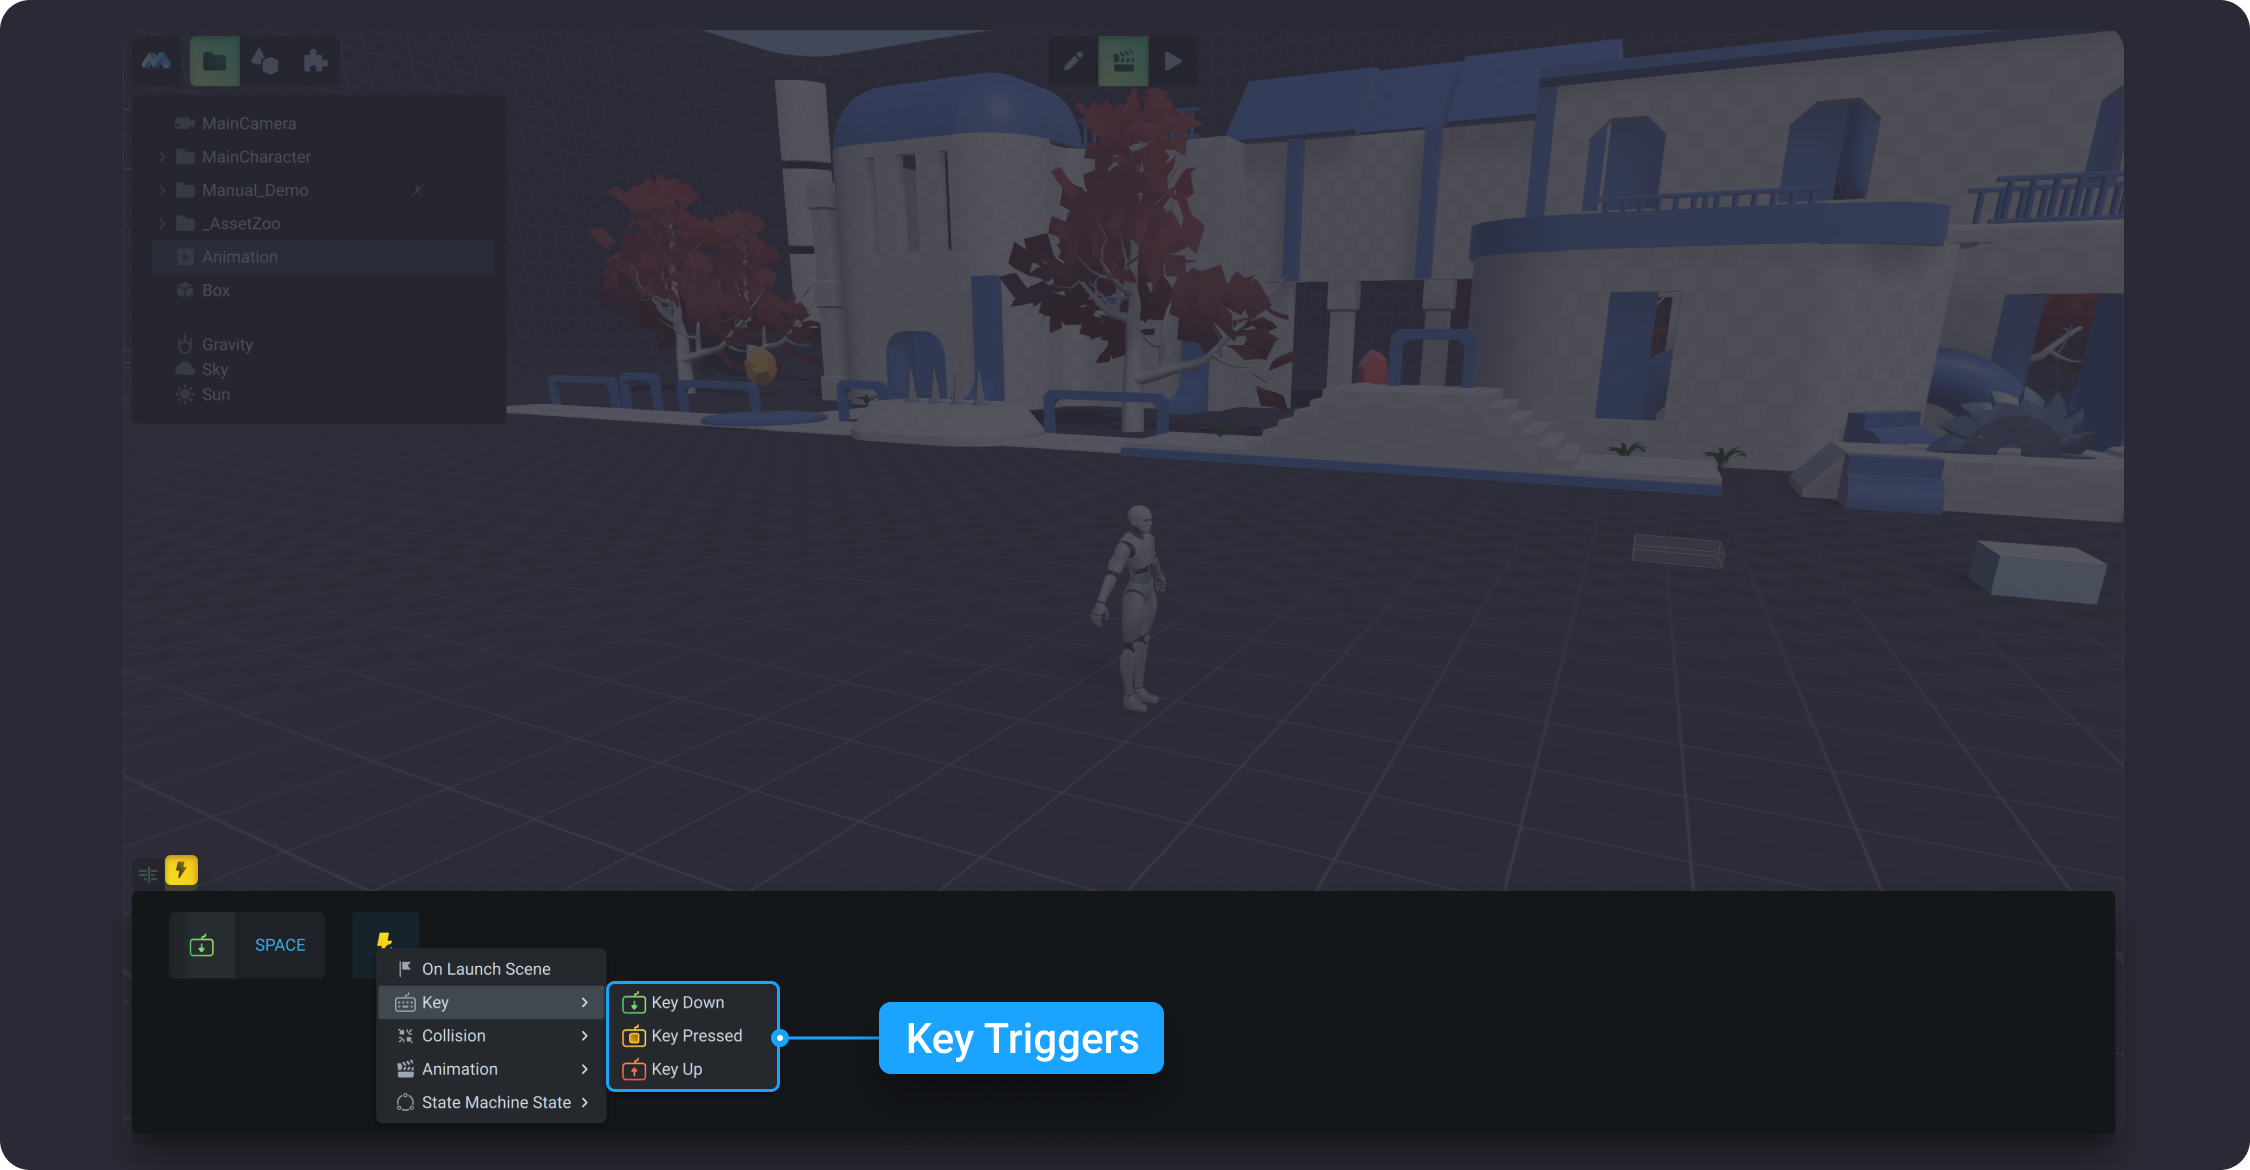
![](https://dl.dropboxusercontent.com/s/ikqjxvthk5lpl5a/005.png?dl=0)

By clicking on the Icon of the existing trigger you can change the type of key triggers using a dropdown list.
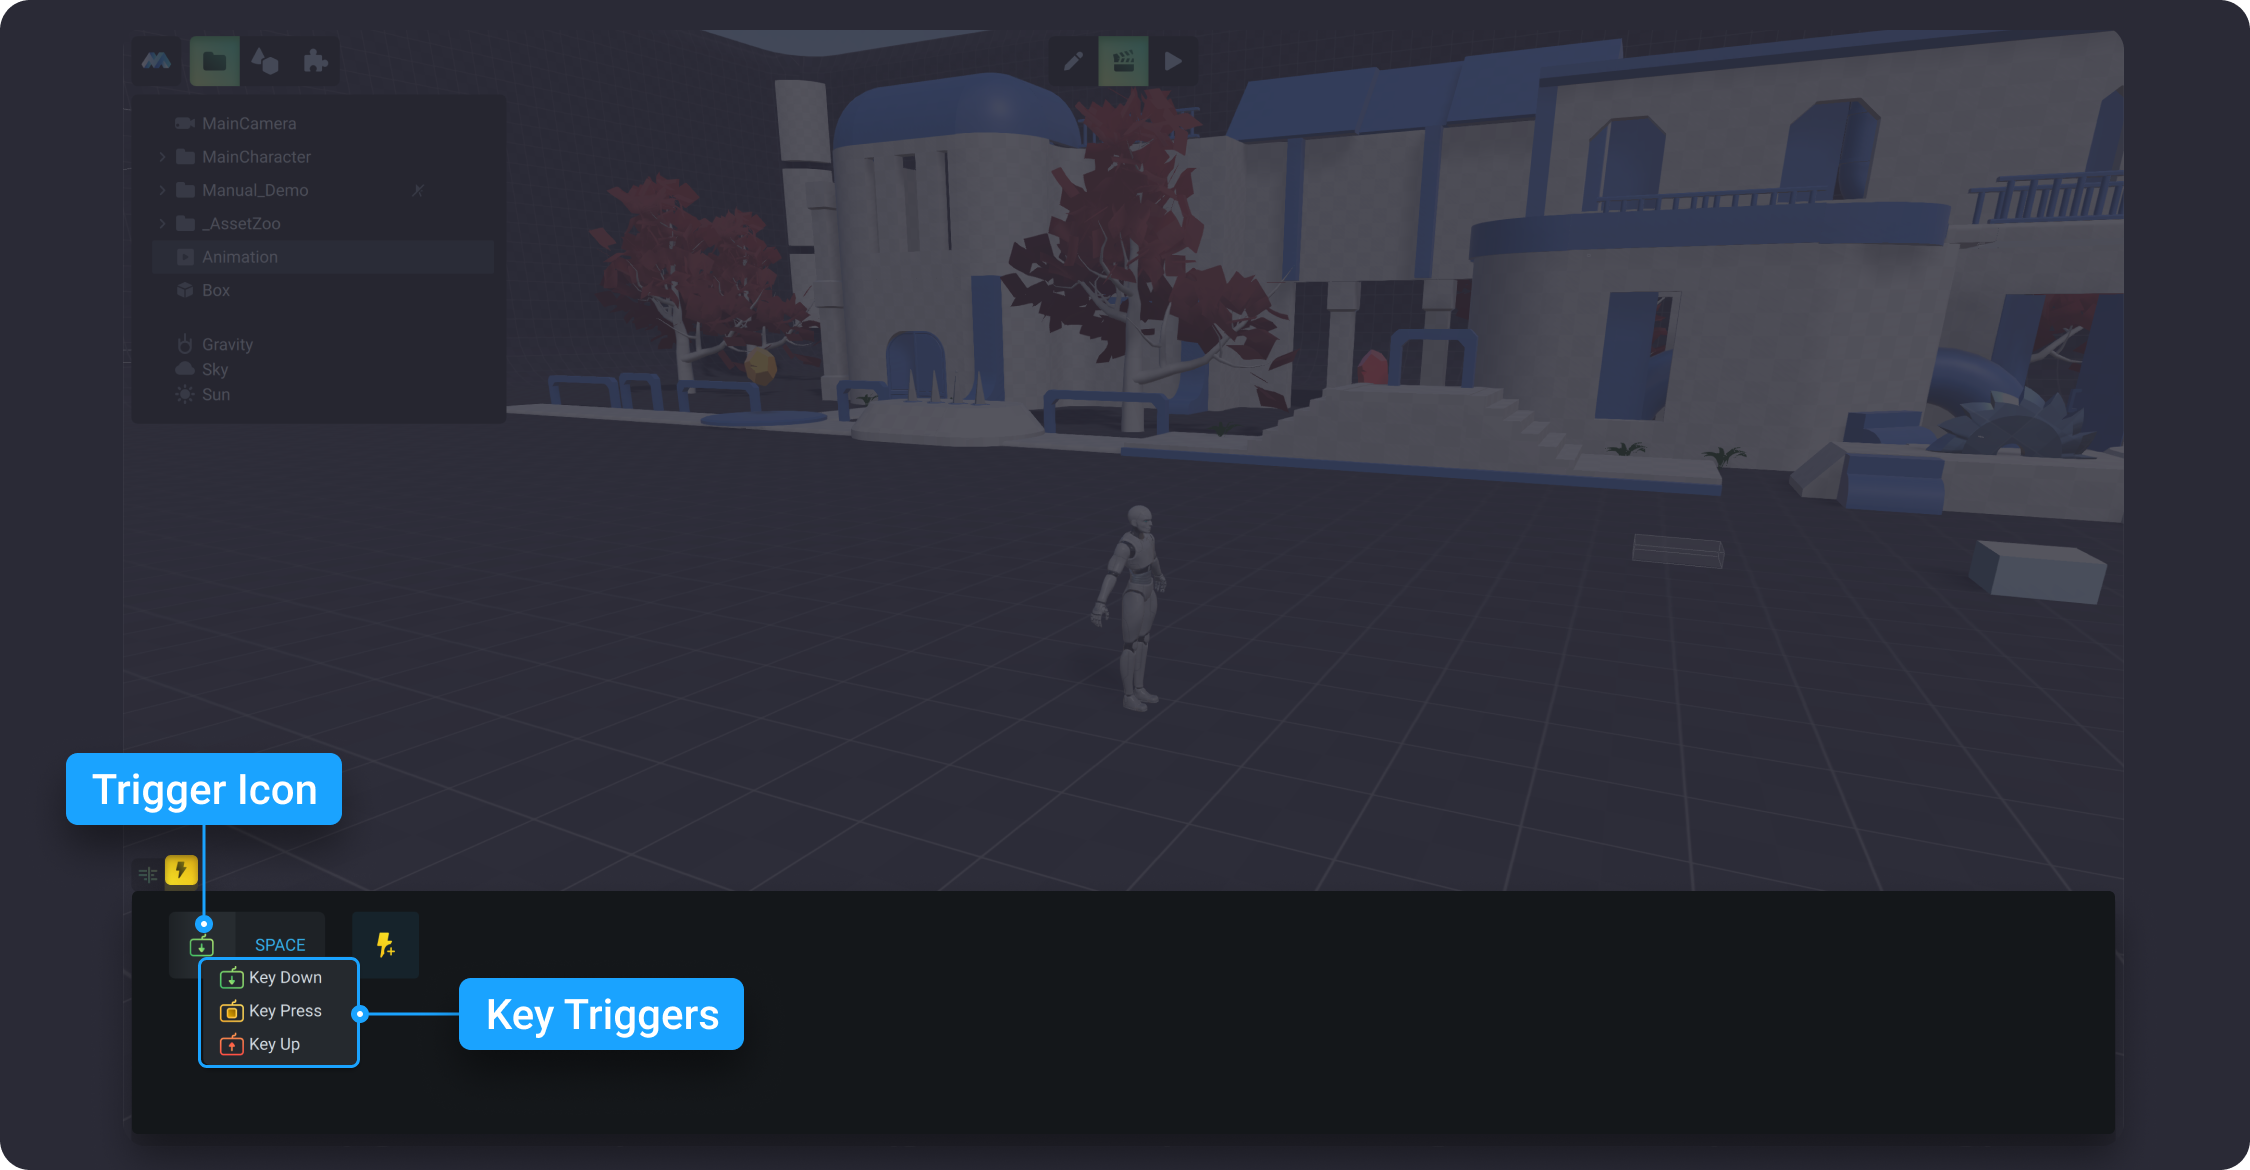
![](https://dl.dropboxusercontent.com/s/nzg5rpapm5iuybi/006.png?dl=0)

#### Key Down <a href="#docs-internal-guid-c93cbd90-7fff-06d5-a2d4-8e79a96e7d04" id="docs-internal-guid-c93cbd90-7fff-06d5-a2d4-8e79a96e7d04"></a>

Key Down trigger will start when the key is pressed.

#### Key Pressed

Key Pressed trigger will be activated while the key is held down.

#### Key Up

Key Up trigger will start when we let go of the key.&#x20;

{% hint style="warning" %}
**Note:** you can use any keys from your keyboard to launch the animation, except `Fn`.
{% endhint %}

### &#x20;<a href="#docs-internal-guid-f4aa9591-7fff-3dba-67e1-399a0bce8074" id="docs-internal-guid-f4aa9591-7fff-3dba-67e1-399a0bce8074"></a>


# Collision

**Collision** consists of a group of triggers that are activated when the interaction between the objects occurs. From a dropdown list you can choose from 4 options: *No Collision, Collision Started, Collision Continue, Collision Ended*. All collision triggers have their own color Icons.
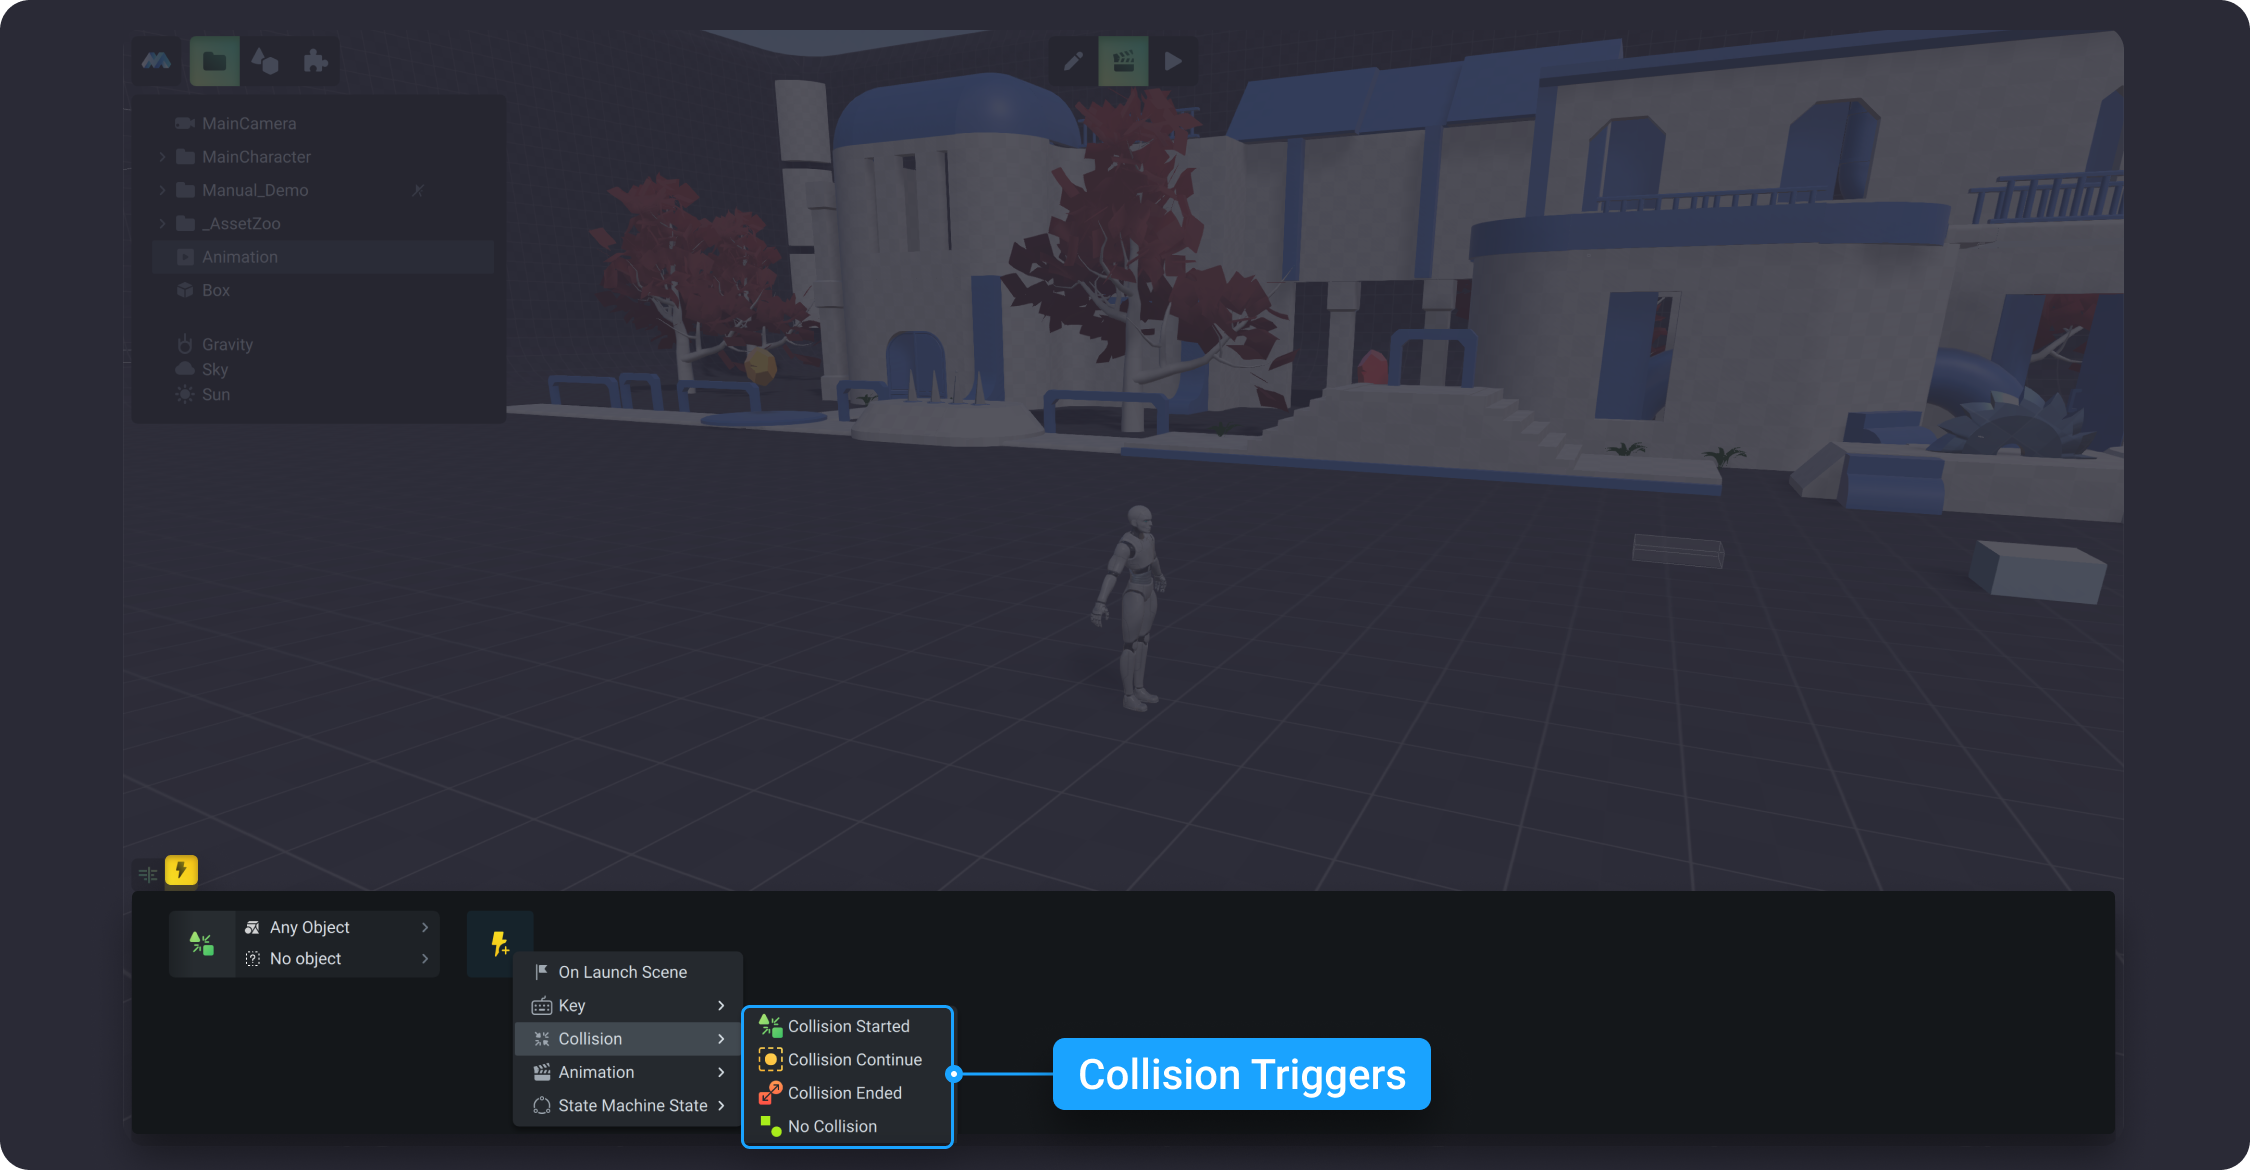
![](https://dl.dropboxusercontent.com/s/z9v0ya6wsobn1bv/007.png?dl=0)

You can change the type of collision triggers by clicking on the Icon and choosing the ones you need from a dropdown list. \
It is also possible to choose and change objects of collision by clicking on the popup menu
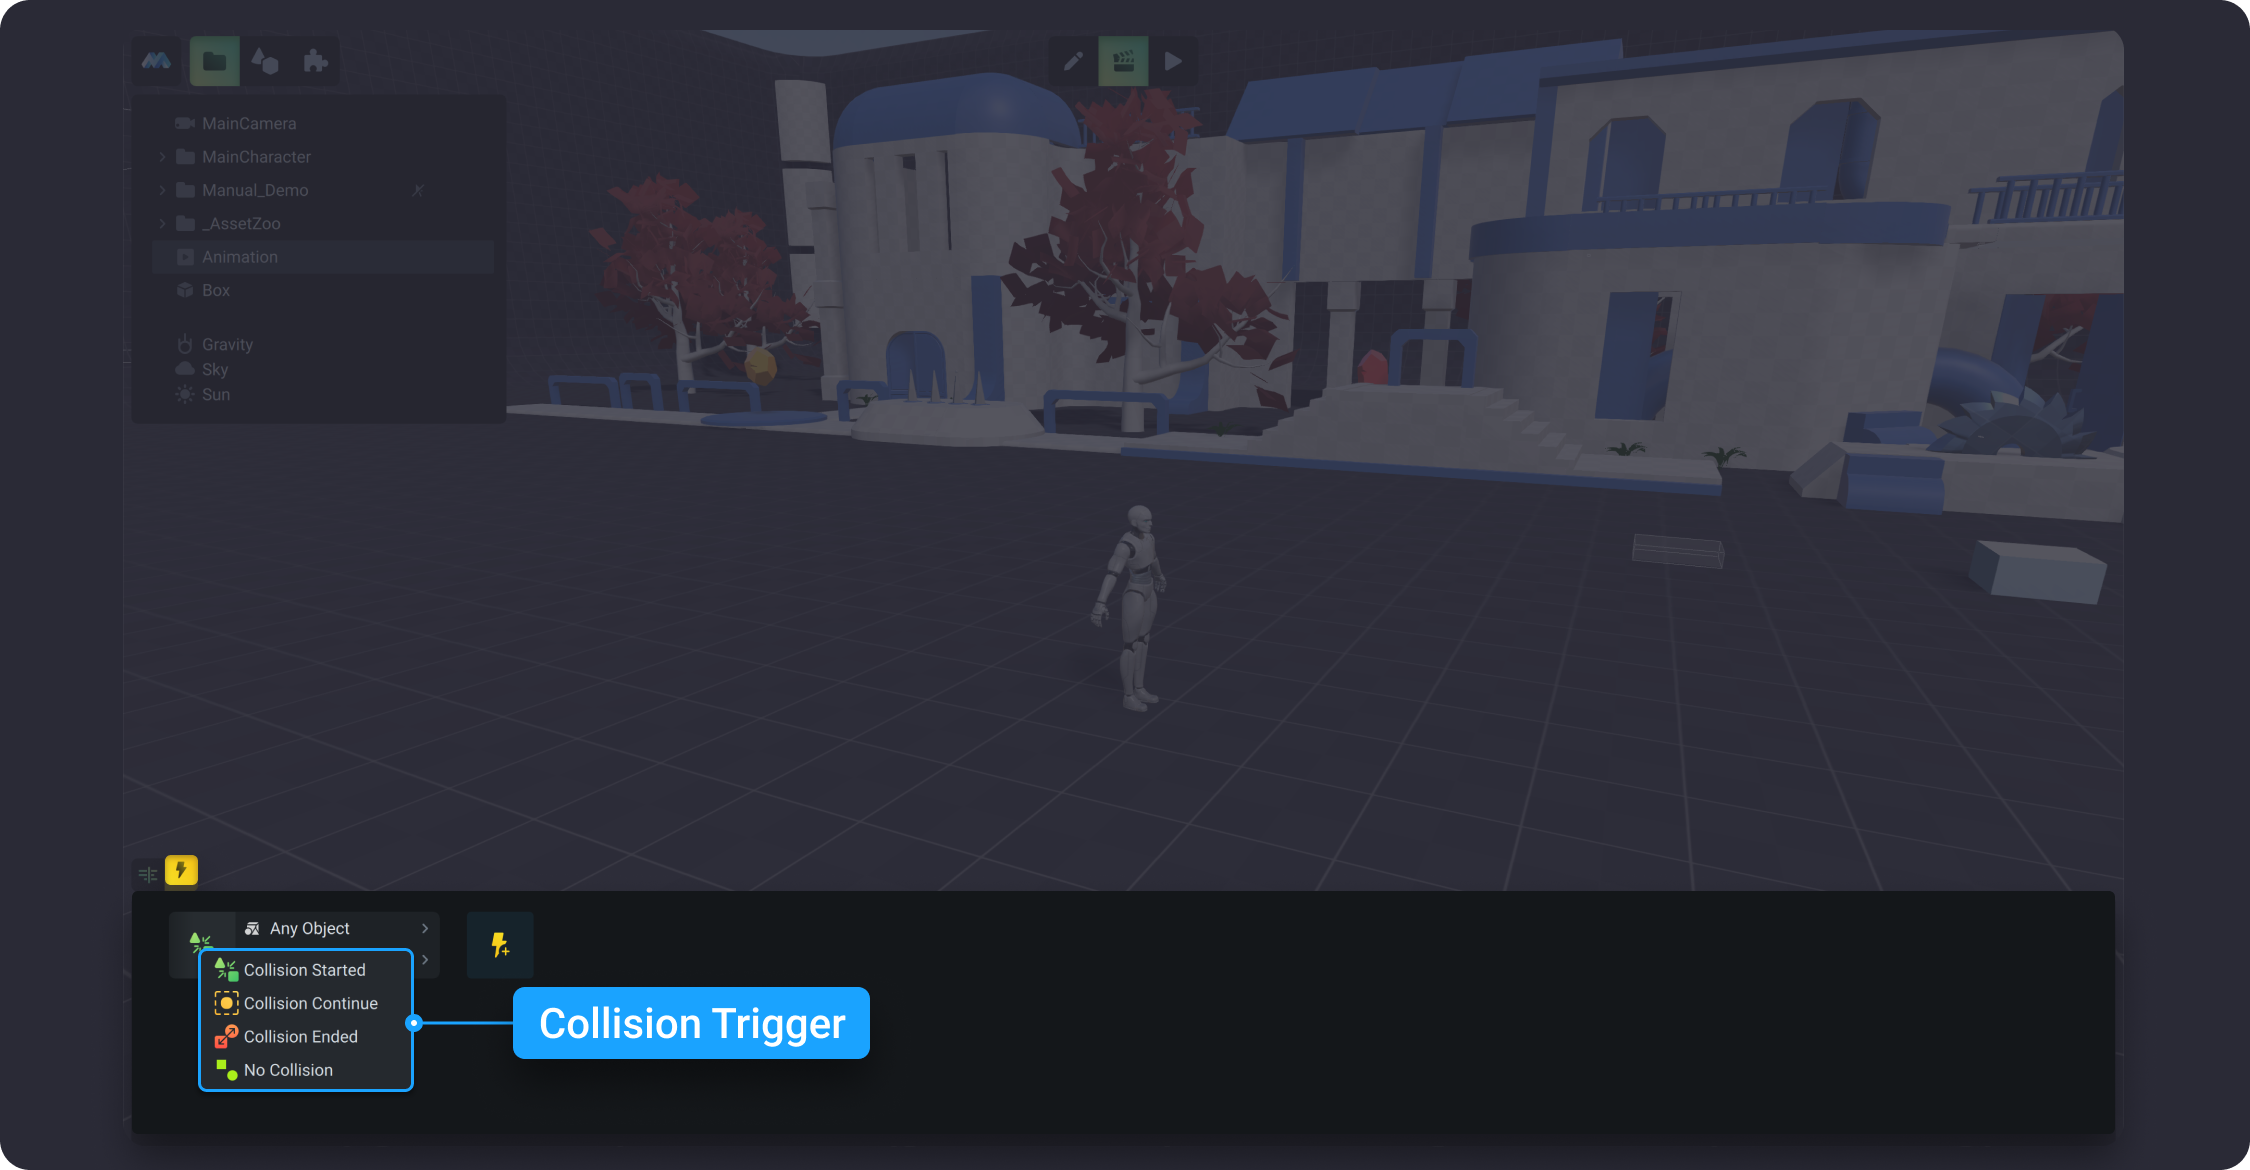
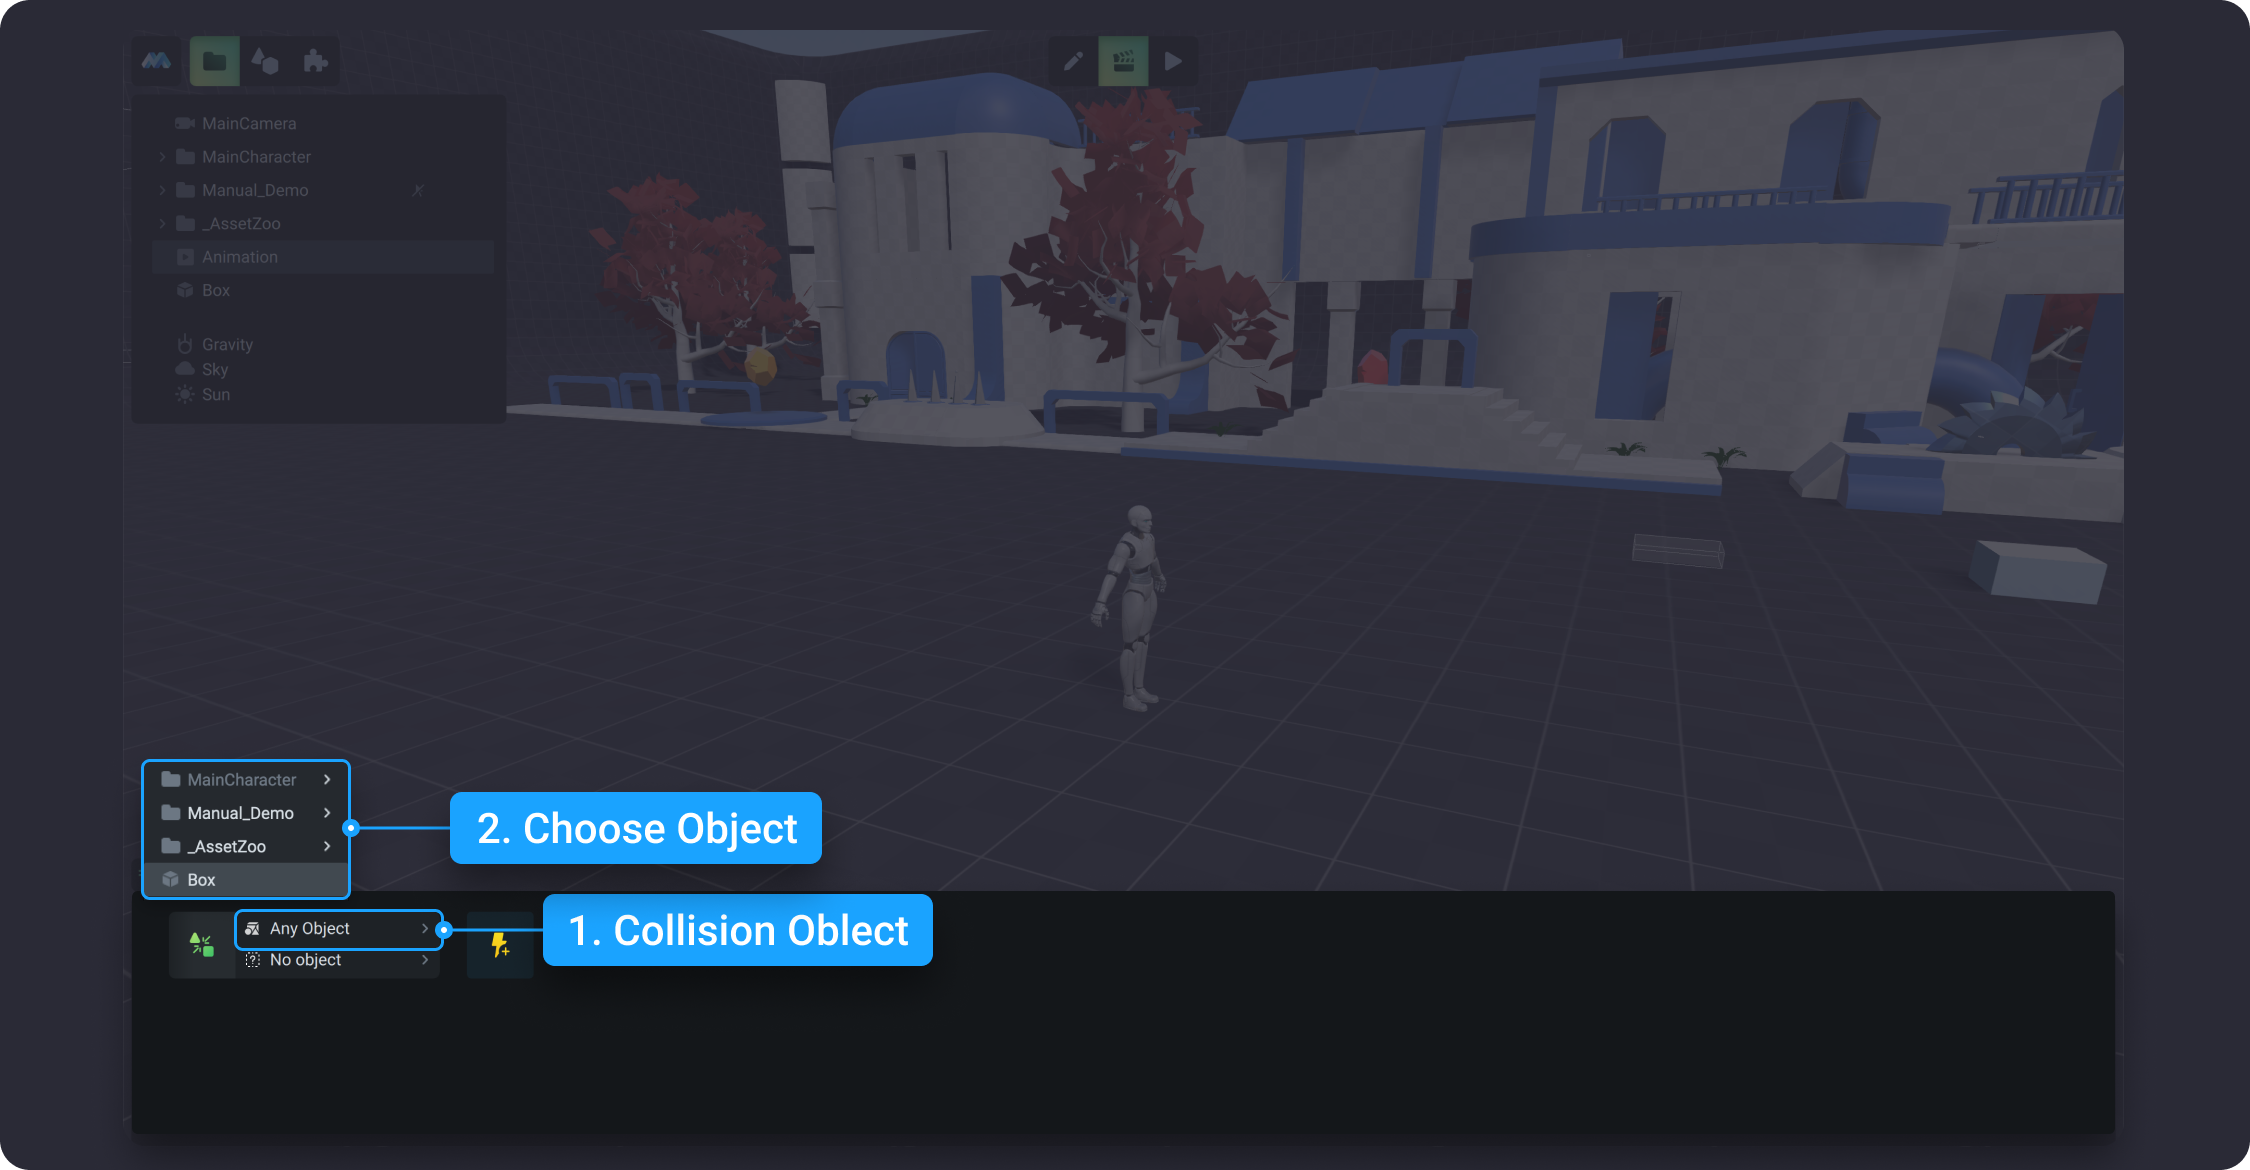
![](https://dl.dropboxusercontent.com/s/ibxuwqcu4touz7u/008.png?dl=0)

![](https://dl.dropboxusercontent.com/s/u4mad0py0y8d4pv/009.png?dl=0)

Note: not all objects created in the game appear in the dropdown list for collision triggers. Only objects with Physics can collide.

#### No Collision <a href="#docs-internal-guid-1ba7795e-7fff-f7f8-fe55-323d09f4e31c" id="docs-internal-guid-1ba7795e-7fff-f7f8-fe55-323d09f4e31c"></a>

No Collision is a trigger that keeps the animation playback when the objects are not in the process of interaction.

#### Collision Started

Collision Started is a trigger that is initiated when objects have just collided. This trigger captures the moment of collision itself.

#### Collision Continue

Collision Continue helps to keep the animation playback while the objects are in the process of interaction.

#### Collision Ended

Collision Ended is a trigger which captures the moment when the collision between the objects is over and launches the animation after that.


# Animation

**Animation** is a group of triggers that are initiated when the playback state of another animation changes. There are 3 possible options: *Animation Start, Animation Stop, Animation Continue*. Each animation trigger has its own color Icon.&#x20;

![](https://dl.dropboxusercontent.com/s/i8yi34ze3or4h2h/010.png?dl=0)

For the animation trigger, you can choose the animation, which was already created from the pop-up menu, to launch the animation you need.
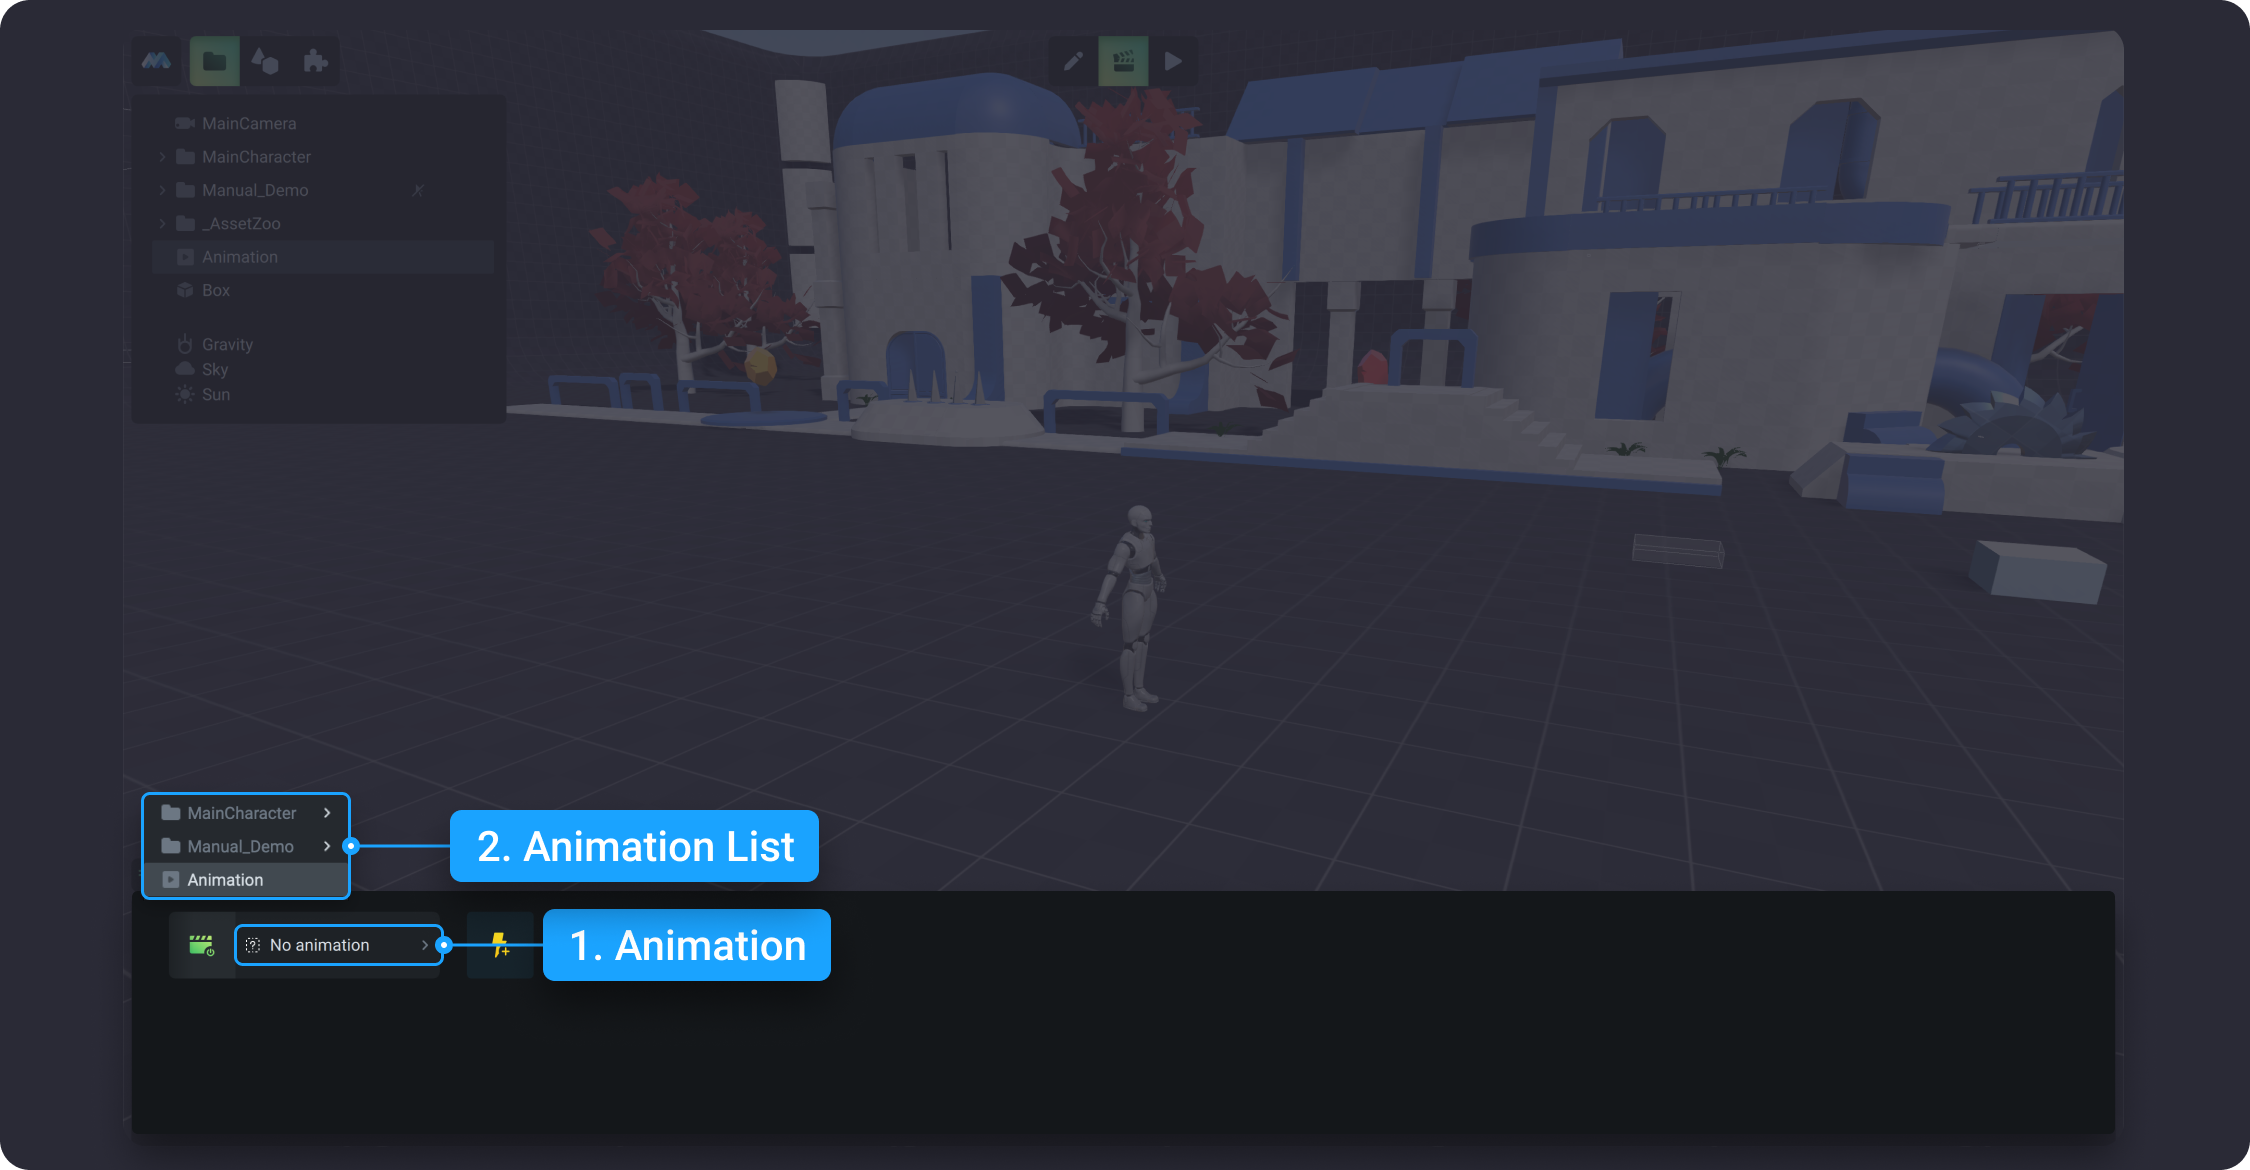
![](https://dl.dropboxusercontent.com/s/k3dqvby61xjs459/011.png?dl=0)

By clicking on the Icon of the animation trigger you can change the animation trigger type.

#### Animation Start

Animation Start is a trigger that launches the animation of one object after capturing the animation start of another object.

#### Animation Stop

Animation Stop helps to start animation of the object after the animation of another object ends.

#### Animation Continue

Animation Continue launches the animation of the object while the other object is still being animated.

###


# State Machine

The state machine trigger detects events related to the states of the specified state machine. By tracking the states of the steates we can bind animations to them.

A state-machine trigger consists of two properties: State machine name and name of the state.

<figure><img src="https://4240499350-files.gitbook.io/~/files/v0/b/gitbook-x-prod.appspot.com/o/spaces%2F-Lt-sE9MYKe9pZOcHwg5%2Fuploads%2F5oeBDHuLc88fDo7t540r%2FGroup%203.png?alt=media&amp;token=24787fe1-3422-4c48-852e-8fc2ab02cdd4" alt=""><figcaption></figcaption></figure>

Conditions are tracked by three trigger modes: Started, Continue, End.

#### State Started

![](https://4240499350-files.gitbook.io/~/files/v0/b/gitbook-x-prod.appspot.com/o/spaces%2F-Lt-sE9MYKe9pZOcHwg5%2Fuploads%2FfT2As9QevMLYJ2RuwTdC%2Fimage.png?alt=media\&token=dc672b63-40ba-4efc-ad22-4cbccfbe1151)

Trigger starts as soon as the specified state machine enters the specified state.

#### State Continue

![](https://4240499350-files.gitbook.io/~/files/v0/b/gitbook-x-prod.appspot.com/o/spaces%2F-Lt-sE9MYKe9pZOcHwg5%2Fuploads%2FdnmEgTXKiLmoVTI0hBCi%2Fimage.png?alt=media\&token=79063554-dab0-43be-b002-5deb44de8dee)

Trigger starts and continues it's working as long as the specified state machine is in the specified state. Upon exiting that state, refered objects stops immediately.

#### State Stop <a href="#docs-internal-guid-cdc9fe4f-7fff-3466-3617-00bc246e7a04" id="docs-internal-guid-cdc9fe4f-7fff-3466-3617-00bc246e7a04"></a>

![](https://4240499350-files.gitbook.io/~/files/v0/b/gitbook-x-prod.appspot.com/o/spaces%2F-Lt-sE9MYKe9pZOcHwg5%2Fuploads%2FakZuWNYOM9fLCNpEV20F%2Fimage.png?alt=media\&token=940aa378-3ad4-4ee8-951f-4f586186d131)

Trigger starts as soon as the specified state machine exits the specified state.

Trigger links from the states of the State machine in Game Flow actually represent a State machine trigger. You can choose to use this event more conveniently.

<figure><img src="https://4240499350-files.gitbook.io/~/files/v0/b/gitbook-x-prod.appspot.com/o/spaces%2F-Lt-sE9MYKe9pZOcHwg5%2Fuploads%2FGO1YAciup3YZeAJPGE41%2FGroup%204.png?alt=media&amp;token=a0bd2817-f453-4f33-9574-51c1772c964b" alt=""><figcaption></figcaption></figure>


# Comparsion

The comparison trigger monitors the conditions under which numbers or variable values meet the comparison conditions. Comparison conditions can be as follows:

<figure><img src="https://4240499350-files.gitbook.io/~/files/v0/b/gitbook-x-prod.appspot.com/o/spaces%2F-Lt-sE9MYKe9pZOcHwg5%2Fuploads%2Fit5JiDYfdBGkTgueKqXl%2FGroup%201.png?alt=media&amp;token=0c8fec80-ccdc-4add-9041-4dfaefe4c462" alt=""><figcaption></figcaption></figure>

* **(=) Equal** - variables or numbers are equal
* **(≠) Not Equal** - variables or numbers are not equal
* **(>) More** - the first variable or number is greater than the second variable or number&#x20;
* **(≥) More** - the first variable or number is greater than or equal to the second variable or number&#x20;
* **(<) Less** - first variable or number less than the second variable or number&#x20;
* **(≤) Less** - the first variable or number less than or equal to the second variable or number

You can change the comparison condition in an already created trigger by clicking the icon between the parameters being compared.

The comparison objects can be:&#x20;

* **Numbers**, you can compare to numbers or numeric variables&#x20;
* <img src="https://4240499350-files.gitbook.io/~/files/v0/b/gitbook-x-prod.appspot.com/o/spaces%2F-Lt-sE9MYKe9pZOcHwg5%2Fuploads%2FfEaoEneDhvF7owNEL1I0%2Fimage.png?alt=media&amp;token=99f67c3b-c049-4a9f-9078-48f55e14841a" alt="" data-size="line"> **Numeric variables**, can be compared to numbers and other numeric variables&#x20;
* <img src="https://4240499350-files.gitbook.io/~/files/v0/b/gitbook-x-prod.appspot.com/o/spaces%2F-Lt-sE9MYKe9pZOcHwg5%2Fuploads%2FPj6FrgVt0yJbSDnDwySX%2Fimage.png?alt=media&amp;token=2408d6de-1d82-494a-af57-9644d1d3c237" alt="" data-size="line"> **Boolean variables**, can only be compared to boolean or numeric variables. When comparing with numeric variables, the value is false=0, true=1.&#x20;
* <img src="https://4240499350-files.gitbook.io/~/files/v0/b/gitbook-x-prod.appspot.com/o/spaces%2F-Lt-sE9MYKe9pZOcHwg5%2Fuploads%2FyqU8N5PbfOWlgjLvCpr1%2Fimage.png?alt=media&amp;token=ade6343d-4f90-4725-87c8-c95e2dc0b29b" alt="" data-size="line"> **Variables of object type**, can be compared only with variables of object type. Comparison can be performed only by conditions (=) or (≠)&#x20;
* <img src="https://4240499350-files.gitbook.io/~/files/v0/b/gitbook-x-prod.appspot.com/o/spaces%2F-Lt-sE9MYKe9pZOcHwg5%2Fuploads%2FPhQxtbAFrbPlZvAc7wyD%2Fimage.png?alt=media&amp;token=e85c03b8-b907-4d48-ba96-bc62763fbfcc" alt="" data-size="line"> **Variables of the tag type**, can be compared only with variables of the tag type. Comparison can be made only by conditions (=) or (≠).

Comparison of variables of different types has no sense (except for numeric and boolean variables) and will be triggered only when comparing by (≠).

Events are tracked by 4 states Started, Continue, End,False

#### Comparsion Started

![](https://4240499350-files.gitbook.io/~/files/v0/b/gitbook-x-prod.appspot.com/o/spaces%2F-Lt-sE9MYKe9pZOcHwg5%2Fuploads%2FAD2c17FKNqzQE3YgrtvW%2Fimage.png?alt=media\&token=aa4d8680-27da-4b77-ac98-2f26d4bb327c)

The trigger is activated as soon as the specified expression becomes true. If it has been true since the game started, the trigger will not work.

#### Comparsion Continue

![](https://4240499350-files.gitbook.io/~/files/v0/b/gitbook-x-prod.appspot.com/o/spaces%2F-Lt-sE9MYKe9pZOcHwg5%2Fuploads%2FpZD7PJXgXDQzZZF1K0vd%2Fimage.png?alt=media\&token=c8c970dc-bed8-4c9c-b033-dd9b49723a1f)

The trigger activates and continues as long as the specified expression remains true.

#### Comparsion Ended

![](https://4240499350-files.gitbook.io/~/files/v0/b/gitbook-x-prod.appspot.com/o/spaces%2F-Lt-sE9MYKe9pZOcHwg5%2Fuploads%2FfcJHarcTRXhmGfq1CebO%2Fimage.png?alt=media\&token=8b765089-27db-4892-a283-5cd590b92810)

The trigger activates as soon as the specified expression is no longer true. If it has been false since the game started, the trigger will not work.

#### Comparsion False

![](https://4240499350-files.gitbook.io/~/files/v0/b/gitbook-x-prod.appspot.com/o/spaces%2F-Lt-sE9MYKe9pZOcHwg5%2Fuploads%2FkLIatowIije1rN1y1WkE%2Fimage.png?alt=media\&token=682ce18d-b679-43f8-85b8-c18ccbecee88)

The trigger activates and continues its operation as long as the specified expression remains incorrect.


# Game Flow

The Game Flow trigger detects events related to operating certain Game Flow .&#x20;

A Game Flow trigger consists of one property, Game Flow name.

Conditions are tracked by three trigger modes: Started, Continue, End.

#### How Game Flow define modes Started, Continue, End

<figure><img src="https://4240499350-files.gitbook.io/~/files/v0/b/gitbook-x-prod.appspot.com/o/spaces%2F-Lt-sE9MYKe9pZOcHwg5%2Fuploads%2FjYCrRNSDGuGXX9gkSLVu%2FGroup%201564.png?alt=media&amp;token=db575957-0739-41ef-bfbb-e88ebfb9f531" alt=""><figcaption></figcaption></figure>

If Game Flow has been enabled since the launch of the game, it will remain in Continue mode until it receives a signal on its End node.

If Game Flow has been disabled since the start of the game, it will be in an undefined mode

As soon as a disabled Game Flow receives a signal on the Start node, it will go into Started mode, then it will be in Continue mode until it receives a signal on its End node.

As soon as Game Flow receives a signal on the End node, it will switch to the Ended mode.

#### Game Flow Started

![](https://4240499350-files.gitbook.io/~/files/v0/b/gitbook-x-prod.appspot.com/o/spaces%2F-Lt-sE9MYKe9pZOcHwg5%2Fuploads%2FCVGzBJ1DZc5t7q5GDK9z%2Fimage%207.png?alt=media\&token=2c1e6faf-3503-4c46-a807-21a07849775c)

Trigger activates as soon as the Game Flow receives a signal on Start node.

#### Game Flow Continue

![](https://4240499350-files.gitbook.io/~/files/v0/b/gitbook-x-prod.appspot.com/o/spaces%2F-Lt-sE9MYKe9pZOcHwg5%2Fuploads%2FHXfjJ5r96oDYpknJ9ROw%2FGroup%201566.png?alt=media\&token=8aa1a56c-709b-4bba-986e-14d7a2d24b31)

Trigger activates as soon as the Game Flow receives a signal on Start node and didn't eceives a signal on Endnode.

#### Game Flow Stop <a href="#docs-internal-guid-cdc9fe4f-7fff-3466-3617-00bc246e7a04" id="docs-internal-guid-cdc9fe4f-7fff-3466-3617-00bc246e7a04"></a>

![](https://4240499350-files.gitbook.io/~/files/v0/b/gitbook-x-prod.appspot.com/o/spaces%2F-Lt-sE9MYKe9pZOcHwg5%2Fuploads%2FFtQHiSr4gmbGiR1NbCMD%2Fimage%209.png?alt=media\&token=b9e23dc5-7807-4692-9bec-1b43b59308f2)

Trigger activates as soon as the Game Flow receives a signal on End node.


# Trigger

You can compose triggers using already created triggers as internal conditions of other triggers. By combining in this way you can create your own events in the game. Triggers of this kind work according to the same principles as other trigger conditions:

* When all internal conditions of a trigger are met, it is considered to be working
* When at least one condition is not met - it is considered to be non-working. Triggers can be combined using the same Boolean expressions and groupings as in regular triggers

<figure><img src="https://4240499350-files.gitbook.io/~/files/v0/b/gitbook-x-prod.appspot.com/o/spaces%2F-Lt-sE9MYKe9pZOcHwg5%2Fuploads%2FDRYWAq5VCkBtBe9OtGZt%2FGroup%201567.png?alt=media&amp;token=2c2b8c71-ae02-4da3-8a76-08cad406b812" alt=""><figcaption></figcaption></figure>

As in other triggers, you can use all trigger modes.

#### Started

![](https://4240499350-files.gitbook.io/~/files/v0/b/gitbook-x-prod.appspot.com/o/spaces%2F-Lt-sE9MYKe9pZOcHwg5%2Fuploads%2FOstSp6p6GtqVY5CC35oz%2Fimage.png?alt=media\&token=2d21fc34-69d7-4513-814a-6d39cc4db92f)

Trigger activates as soon as all internal conditions of the trigger have been fulfilled and the trigger has started its work.

#### Continue

![](https://4240499350-files.gitbook.io/~/files/v0/b/gitbook-x-prod.appspot.com/o/spaces%2F-Lt-sE9MYKe9pZOcHwg5%2Fuploads%2FL73NDztCQVkTSkQcuhxA%2Fimage.png?alt=media\&token=1d9ae6ed-c90f-4e78-9465-72dc504c736b)

Trigger activates as soon as all internal conditions of the trigger operation have been met and the trigger is still operating.

#### Ended

![](https://4240499350-files.gitbook.io/~/files/v0/b/gitbook-x-prod.appspot.com/o/spaces%2F-Lt-sE9MYKe9pZOcHwg5%2Fuploads%2Fk5Xr25tsUykD1FKtuRqA%2Fimage.png?alt=media\&token=6db4c74b-68ae-44e8-bf96-7e55b113e0c1)

Trigger activates as soon as all internal conditions of the trigger have been fulfilled and the trigger has stopped executing

Trigger links from triggers in Game Flow actually use such triggers . You can choose to use this trigger in a more convenient way.

<figure><img src="https://4240499350-files.gitbook.io/~/files/v0/b/gitbook-x-prod.appspot.com/o/spaces%2F-Lt-sE9MYKe9pZOcHwg5%2Fuploads%2Fqy3GinyDM6SvMsFFPkoF%2FGroup%2015637.png?alt=media&amp;token=318a2d1d-cf3c-436a-a5cb-7513f40577d5" alt=""><figcaption></figcaption></figure>


# Object Enabled

Enabling and disabling objects through animations in a scene is a very common event in games. You can use this event in trigger conditions.

The parameters specify the object whose switching on and off is monitored by the trigger.

As in other conditions it has 3 modes

#### Started

![](https://4240499350-files.gitbook.io/~/files/v0/b/gitbook-x-prod.appspot.com/o/spaces%2F-Lt-sE9MYKe9pZOcHwg5%2Fuploads%2FMoenXbNCPvfMAv9j7H8I%2Fimage.png?alt=media\&token=015086f4-8844-482a-ad0e-977198961cfe)

The object has been disabled in the scene and is enabled

#### Continue

![](https://4240499350-files.gitbook.io/~/files/v0/b/gitbook-x-prod.appspot.com/o/spaces%2F-Lt-sE9MYKe9pZOcHwg5%2Fuploads%2FokPQjNDVEAI06zAS5VjD%2Fimage.png?alt=media\&token=e4afd2fa-7f8f-48d4-a081-f16ac7f789a9)

The object is enabled in the scene and continues to be enabled

#### Ended

![](https://4240499350-files.gitbook.io/~/files/v0/b/gitbook-x-prod.appspot.com/o/spaces%2F-Lt-sE9MYKe9pZOcHwg5%2Fuploads%2F2b3ugdvyPG48u5MaBLnq%2Fimage.png?alt=media\&token=cd2c5845-9f46-4b47-912e-e4f073dfff02)

The object has been enabled in the scene and has been disabled


# Network

Network triggers use events that occur during network game. To use network triggers, the network game mode must be enabled and objects with the network component enabled must be present.

Before learning about network triggers, we recommend that you study the Network section of this documentation

Network triggers monitor the following events:

* **Net Client Master** - monitors the event related to the transfer of functions of the main network computer in the game, which is called Master
* **Net Client Join** - monitors events related to the connection of network game clients.
* **Net Mode Enabled** - monitors events related to enabling and disabling network mode.
* **Net Object Athority** - monitors events related to obtaining the authority of game objects
* **Net Error** - monitors network errors

### Net Client Master

Net Client Master In the parameters of this trigger you can specify which client will be monitored for receiving Master:

![](https://4240499350-files.gitbook.io/~/files/v0/b/gitbook-x-prod.appspot.com/o/spaces%2F-Lt-sE9MYKe9pZOcHwg5%2Fuploads%2FR5mh7xgBycKgZZadIBwq%2Fimage.png?alt=media\&token=0c79f66d-123a-4b36-a029-a3ebcfeb2136)

* Any Client - any client of the network game
* Local Client - local client, current player
* Remote Client - remote client, game partners.

#### Net Client Master Started

#### ![](https://4240499350-files.gitbook.io/~/files/v0/b/gitbook-x-prod.appspot.com/o/spaces%2F-Lt-sE9MYKe9pZOcHwg5%2Fuploads%2FbTtj8R1bAwsR5MrPXT4d%2Fimage.png?alt=media\&token=a04e2c16-7cad-423d-aec4-e7a8720770aa)&#x20;

The joined client has become a Master

#### Net Client Master Continue&#x20;

![](https://4240499350-files.gitbook.io/~/files/v0/b/gitbook-x-prod.appspot.com/o/spaces%2F-Lt-sE9MYKe9pZOcHwg5%2Fuploads%2FIsI5tnlT1WE8wmD7lKYW%2Fimage.png?alt=media\&token=b64cc888-3758-4b8c-9671-69cf6bf5247d)

The joined client has become and continues to be a Master

#### Net Client Master Ended&#x20;

![](https://4240499350-files.gitbook.io/~/files/v0/b/gitbook-x-prod.appspot.com/o/spaces%2F-Lt-sE9MYKe9pZOcHwg5%2Fuploads%2FrNXyCzKvEoKKNnBicie9%2Fimage.png?alt=media\&token=f96e411e-0905-4572-a79f-0010fe05ddcb)

Client was and is no longer a Master

### Net Client Join

Net Client Master In the parameters of this trigger you can specify which client will be monitored for Joining:

![](https://4240499350-files.gitbook.io/~/files/v0/b/gitbook-x-prod.appspot.com/o/spaces%2F-Lt-sE9MYKe9pZOcHwg5%2Fuploads%2FfdGu7lD3MPBSytWG5Mjc%2Fimage.png?alt=media\&token=e41b7a5d-64c1-4c11-8cd7-2cfeaf03a67d)

* Any Client - any client of the network game
* Local Client - local client, current player
* Remote Client - remote client, game partners.

#### Net Client Joined

![](https://4240499350-files.gitbook.io/~/files/v0/b/gitbook-x-prod.appspot.com/o/spaces%2F-Lt-sE9MYKe9pZOcHwg5%2Fuploads%2FxTrYjWFTwiXgmBBUNKCt%2Fimage.png?alt=media\&token=d48da8e7-64d4-487a-92af-204f2c03ceab)

Client joins the game

#### Net Client Joined Continue

![](https://4240499350-files.gitbook.io/~/files/v0/b/gitbook-x-prod.appspot.com/o/spaces%2F-Lt-sE9MYKe9pZOcHwg5%2Fuploads%2F8iRncOPh8tXHLpvnJDLc%2Fimage.png?alt=media\&token=6ac7a3c4-3b5d-410e-ac9c-0f099f786556)

Client joined and remains joined to the game

#### Net Client Leave

![](https://4240499350-files.gitbook.io/~/files/v0/b/gitbook-x-prod.appspot.com/o/spaces%2F-Lt-sE9MYKe9pZOcHwg5%2Fuploads%2Fuzrf4fHX0ay0wLPmfCiy%2Fimage.png?alt=media\&token=b393e8e8-a19a-4a05-b84d-b592df7ea843)

Client has joined the game and has leave the game

### Net Mode Enabled

Net mode enabling by animating network object.

This condition have no parameters or objects.

#### Net Mode Enabled Started

![](https://4240499350-files.gitbook.io/~/files/v0/b/gitbook-x-prod.appspot.com/o/spaces%2F-Lt-sE9MYKe9pZOcHwg5%2Fuploads%2FgQKdk0KvTS4S2DbebEc0%2Fimage.png?alt=media\&token=7aba3dc8-a7f6-4636-be03-8c40fcb7f1ad)

Net Mode has been enabled&#x20;

#### &#x20;Net Mode Enabled Continue

![](https://4240499350-files.gitbook.io/~/files/v0/b/gitbook-x-prod.appspot.com/o/spaces%2F-Lt-sE9MYKe9pZOcHwg5%2Fuploads%2FhV1rQRvTeOcyu3XYtTFF%2Fimage.png?alt=media\&token=d212b8e5-f743-407c-9f0e-4bd4178d8acf)

&#x20;Net Mode has been enabled and continues to be enabled&#x20;

#### &#x20;Net Mode Enabled Ended

![](https://4240499350-files.gitbook.io/~/files/v0/b/gitbook-x-prod.appspot.com/o/spaces%2F-Lt-sE9MYKe9pZOcHwg5%2Fuploads%2F7xd4hflygEHkJFb0Ihut%2Fimage.png?alt=media\&token=767f03ac-4445-4edb-90c8-71396fb32653)

&#x20;Net Mode has been enabled and is disabled

### Net Object Athority

The monitoring parameter specifies the object to which the authority can be passed. The object must have a network component for its selection to be available.

#### Net Object Athority Started

![](https://4240499350-files.gitbook.io/~/files/v0/b/gitbook-x-prod.appspot.com/o/spaces%2F-Lt-sE9MYKe9pZOcHwg5%2Fuploads%2FbddNwgcJ3HEVCyajjHyO%2Fimage.png?alt=media\&token=f58a01d5-24e4-431a-afac-67979e11df04)

The object has obtained the authority&#x20;

#### Net Object Athority Continue&#x20;

![](https://4240499350-files.gitbook.io/~/files/v0/b/gitbook-x-prod.appspot.com/o/spaces%2F-Lt-sE9MYKe9pZOcHwg5%2Fuploads%2FqxEUYKOpAuiy8rnkpHd0%2Fimage.png?alt=media\&token=44439aaf-9f7a-4f98-801d-fa1b9b8a82bd)

The object has obtained the authority and continues to be with it&#x20;

#### Net Object Athority Ended&#x20;

![](https://4240499350-files.gitbook.io/~/files/v0/b/gitbook-x-prod.appspot.com/o/spaces%2F-Lt-sE9MYKe9pZOcHwg5%2Fuploads%2FS74K0XmIbtg90QWujIPe%2Fimage.png?alt=media\&token=ea2f11d8-549f-40c3-8132-bc02c5c2af5d)

The object had authority and has been removed or transferred to another object

### Net Error

![](https://4240499350-files.gitbook.io/~/files/v0/b/gitbook-x-prod.appspot.com/o/spaces%2F-Lt-sE9MYKe9pZOcHwg5%2Fuploads%2Fn5RelB5LBXUx5laUCK3b%2Fimage.png?alt=media\&token=87101016-442c-4c3b-b7a9-4ab15001ba58)

The trigger has no parameters and is triggered when network errors occur


# State Machine

<mark style="color:blue;">**State Machine**</mark> (from the theory of algorithms) is an abstract machine that has a finite set of states and transitions between them that occur in accordance with established rules.

The state machine can have different states, but only one state can be active at a time. There are some events that switch the transition of the state machine from one state to another. As a result, the state machine can perform different actions by changing its state.

The state machine is widely used in game development for creating game mechanics.

### How to create a State Machine in MANU?

To create a State Machine in MANU, go to the Toolbar and click on the State Machine icon. After that, the State Machine will appear in the Scene Tree.

![State Machine in Toolbar](https://4240499350-files.gitbook.io/~/files/v0/b/gitbook-x-prod.appspot.com/o/spaces%2F-Lt-sE9MYKe9pZOcHwg5%2Fuploads%2FT37m4O255zPxEuKAdp1X%2F0?alt=media)

By default, the created state machine has the name State Machine, you can rename it using the right mouse button. Just click on the State Machine in the Scene Tree and select this option from a dropdown list. If you hit the State Machine in the Scene Tree, the new window will pop-up: State Machine Window.

![State Machine window](https://4240499350-files.gitbook.io/~/files/v0/b/gitbook-x-prod.appspot.com/o/spaces%2F-Lt-sE9MYKe9pZOcHwg5%2Fuploads%2Fx67irFQnzTZNUEwUu6r7%2F1?alt=media)

### How to work with the State Machine Window?

Let's look at the elements of the pop-up window. In the center, there are 2 states: <mark style="color:blue;">**State1**</mark> and <mark style="color:blue;">**Any State**</mark>.

State 1 (with a blue icon) is the initial state of your State Machine by default.

<mark style="color:blue;">**Any State**</mark> (with a red icon) – a special state that always exists. It is suitable for situations when it is needed to switch to a certain state, regardless of the current state of the State Machine. This is a faster way than adding an outgoing transition to each state.

Sometimes it is needed to configure transitions from all states to one. For example, when the Main Character dies, he can die being in any state. Death can occur when he is sitting or running, etc. In this case, you need to set up transitions from all states of the Main Character's state machine, which is time-consuming. For such cases, MANU provides Any State, using which you need to configure only one transition.

![State connections](https://4240499350-files.gitbook.io/~/files/v0/b/gitbook-x-prod.appspot.com/o/spaces%2F-Lt-sE9MYKe9pZOcHwg5%2Fuploads%2Fxnig9hKCtKMmjE9WJdtt%2F2?alt=media)

**Note:** Any State cannot be the final point of the transition, i.e. the transition to “any state” cannot be used to select a random state.

The Minimize/Maximize and Close buttons are located at the right end of the title bar.

![Default canvas](https://4240499350-files.gitbook.io/~/files/v0/b/gitbook-x-prod.appspot.com/o/spaces%2F-Lt-sE9MYKe9pZOcHwg5%2Fuploads%2FmZYofFrSJVgeaIOUff3F%2F3?alt=media)

### Toolbar

The toolbar is located in the upper left corner:

![Pointer tool](https://4240499350-files.gitbook.io/~/files/v0/b/gitbook-x-prod.appspot.com/o/spaces%2F-Lt-sE9MYKe9pZOcHwg5%2Fuploads%2Fmp2xftB4UnUyWZzvT2uK%2F4?alt=media)

<mark style="color:blue;">**SELECT**</mark> — using this tool, you can select state objects and move them;

<mark style="color:blue;">**STATE**</mark> — you can use it to add a new state;

<mark style="color:blue;">**CONNECTOR**</mark> – you can use it to create connections between states;

<mark style="color:blue;">**PAN**</mark> — allows the user to quickly switch to panning the canvas. .

Furthermore, it is also possible to add a new state using the right mouse button if you first click on SELECT. You can also create a state by double-clicking on the canvas.

By right-clicking on the State, you can open the context menu with a set of actions which you can apply to the State. Using this menu, you can rename, duplicate, cut, copy, delete the state, as well as add color labels. Most of the commands are accessible via hotkeys. Furthermore, it is possible to rename the State by double-clicking on its name.

### Color labels

Color labels are used to visually design transitions from one state to another, which is very convenient when a state machine has many states and connections between them. To add labels, just right-click on the State and choose the color you want to mark it with.

![Color labels](https://4240499350-files.gitbook.io/~/files/v0/b/gitbook-x-prod.appspot.com/o/spaces%2F-Lt-sE9MYKe9pZOcHwg5%2Fuploads%2F0qlzMbYKKpS5VzqOzUwI%2F5?alt=media)

![Color transitions between states](https://4240499350-files.gitbook.io/~/files/v0/b/gitbook-x-prod.appspot.com/o/spaces%2F-Lt-sE9MYKe9pZOcHwg5%2Fuploads%2FZghIgqs4cuKnMNgKenbn%2F6?alt=media)

### Creating Transitions between states

To set the connection between states, you first need to select Connector on the Toolbar. Then click on the State, from which you need to make a transition, and drag the line to another State holding down the left mouse button. For example, drag the line from State 1 to State 2.

![Connection tool](https://4240499350-files.gitbook.io/~/files/v0/b/gitbook-x-prod.appspot.com/o/spaces%2F-Lt-sE9MYKe9pZOcHwg5%2Fuploads%2FFqqNID2banUNLBcVoKhc%2F7?alt=media)

A dotted line with an arrowhead will appear between these states. The dotted line means that the link between **State 1** and **State 2** has been created, but it is not configured, i.e. the rule has not been created yet. It is not described how the transition from one state to another will take place. This dotted line can be moved, its shape can be changed. All this can be done by clicking on and dragging the left mouse button. The shape of the line does not affect the transition between states. Therefore, it can be drawn in any shape.

![Connector edit](https://4240499350-files.gitbook.io/~/files/v0/b/gitbook-x-prod.appspot.com/o/spaces%2F-Lt-sE9MYKe9pZOcHwg5%2Fuploads%2FkFGP0U063zd21s6mk4f3%2F8?alt=media)

### Configuring a Transition rule

When you click on the dotted line, a Trigger Panel will appear. Using this panel, you can create a rule for the transition from one state to another. Just choose a trigger you need.

![Transition edit](https://4240499350-files.gitbook.io/~/files/v0/b/gitbook-x-prod.appspot.com/o/spaces%2F-Lt-sE9MYKe9pZOcHwg5%2Fuploads%2Fa8PPAaWxHWH2tNRZY3oL%2F9?alt=media)

![Tarnsition trigger](https://4240499350-files.gitbook.io/~/files/v0/b/gitbook-x-prod.appspot.com/o/spaces%2F-Lt-sE9MYKe9pZOcHwg5%2Fuploads%2FkKEK9pSQrkpVDmH8LXxr%2F10?alt=media)

The Trigger Panel closes when you click on any area of the State Machine Window. After creating a rule, the dotted line will turn to a solid, continuous line. It means that the connection between states has been configured; and the transition rule from one state to another is established. In addition, when you hover over the line, the transition rule will be shown in the tooltip (for example, Key Down: 0).

![Connector tooltip](https://4240499350-files.gitbook.io/~/files/v0/b/gitbook-x-prod.appspot.com/o/spaces%2F-Lt-sE9MYKe9pZOcHwg5%2Fuploads%2FBaygOwPGRWQ8JYEN7cDf%2F11?alt=media)

One state can have several connection lines with other states. Multiple transitions can be made from one state, as well as into it.

![State Machine example](https://4240499350-files.gitbook.io/~/files/v0/b/gitbook-x-prod.appspot.com/o/spaces%2F-Lt-sE9MYKe9pZOcHwg5%2Fuploads%2FbTMDLd0Dr7iwb9E4mGUA%2F12?alt=media)


# State Machine — Example

## How does the State Machine work in the game?

Let's see how the State Machine works in MANU using the example with a door.

#### Door State Machine

First, we will add a Door and a Door State Machine to the Scene Tree via Toolbar. The size, position and rigidbody of the Door can be modified with the help of the Inspector Panel and its Tabs (Properties, Physics).

Then, we need to determine how many states and transitions between them our Door State Machine can have. Number of states of the State Machine are limited to the number of states we define in the game. Let our Door State Machine have 5 states, 5 transitions between them, and the initial state - Closed. Additionally, we will bind animations to states. So, it will help us see more clearly how the State Machine works in MANU.

| **States**                                                         | **Transitions**                                                                                                    |
| ------------------------------------------------------------------ | ------------------------------------------------------------------------------------------------------------------ |
| <p>Closed</p><p>Opening</p><p>Open</p><p>Closing</p><p>Destroy</p> | <p>Closed → Opening</p><p>Opening → Open</p><p>Open → Closing</p><p>Closing → Closed</p><p>Any State → Destroy</p> |

Now, we will move on to creating states and connections between them. Open a Door State Machine by double-clicking on it in the Scene Tree.

### Transition: Closed → Opening

Let's create a Closed and Opening states for our Door State Machine: rename “State 1” as “Closed"; add a new state and name it “Opening”. Using the Connector Tab on the Toolbar, create a connection between Closed and Opening.

![Transition Closed -> Opening](https://4240499350-files.gitbook.io/~/files/v0/b/gitbook-x-prod.appspot.com/o/spaces%2F-Lt-sE9MYKe9pZOcHwg5%2Fuploads%2FzNUatjXHnWyz6StNueT5%2F0?alt=media)

#### Configuring a Transition Rule

Next step is to set the transition rule. Click on the dotted line and the Trigger Panel will appear. Using the Key trigger, we will create a transition rule for our Door State Machine from the Closed state to the Opening state. Select Key down, and enter 0 in the input field. This means that we have created the following transition rule: the door will start opening when key 0 is pressed. Now, the dotted line has become solid since the connection is configured. When you hover over the line, a description of the created rule will be shown (in our case, KeyDown: 0). Close the Door State Machine by clicking on the Closed button at the right end of the title bar.

![Transition Rule: Key Down](https://4240499350-files.gitbook.io/~/files/v0/b/gitbook-x-prod.appspot.com/o/spaces%2F-Lt-sE9MYKe9pZOcHwg5%2Fuploads%2FX59nUXHq1GNL637I8zax%2F1?alt=media)

![Transition Key Down "0"](https://4240499350-files.gitbook.io/~/files/v0/b/gitbook-x-prod.appspot.com/o/spaces%2F-Lt-sE9MYKe9pZOcHwg5%2Fuploads%2FablpkD0G6XOMyEnLbRgM%2F2?alt=media)

#### Binding the State Opening to an Animation

Let's create an animation that will work with the state Opening. To add Animation to the Scene Tree, go to the Toolbar and click on the Animation icon. Let’s rename the Animation as “Animation Opening”. Now, switch to the Animation mode. Hover over the Door on the Scene Tree and add it to the Timeline using the context menu.

![Add Door object to time line](https://4240499350-files.gitbook.io/~/files/v0/b/gitbook-x-prod.appspot.com/o/spaces%2F-Lt-sE9MYKe9pZOcHwg5%2Fuploads%2Fjkp3bwM3SPxjDgJJO2SD%2F3?alt=media)

Let our door rise 2 meters up in 1.5 seconds, when its State Machine is in the Opening state. To do it, add an animatable parameter, clicking on the plus (+), which will appear if you hover over Door on the Timeline Panel (Properties → Position Y).

![Add property Position Y to animate](https://4240499350-files.gitbook.io/~/files/v0/b/gitbook-x-prod.appspot.com/o/spaces%2F-Lt-sE9MYKe9pZOcHwg5%2Fuploads%2FhipTk6vNGVZ6nixpHka3%2F4?alt=media)

![Set animation for Door](https://4240499350-files.gitbook.io/~/files/v0/b/gitbook-x-prod.appspot.com/o/spaces%2F-Lt-sE9MYKe9pZOcHwg5%2Fuploads%2FC9XW0xKlAEINtzA39yCk%2F5?alt=media)

### State Machine State trigger

Now we need to create a trigger to start this animation. Switch to the Trigger Panel, and choose State Machine State. This trigger has 3 possible options:

*<mark style="color:blue;">**State Machine State Start**</mark>* – the animation will start when the state of the state machine begins. For example, the animation starts, when the state machine has switched to the state Opening

<mark style="color:blue;">**State Machine State Stop**</mark> - the animation will start when the state machine stops or changes (when the door opening state ends).

<mark style="color:blue;">**State Machine State Continue**</mark> – the animation will continue while the state machine is in this door opening state.

<div data-full-width="true"><img src="https://4240499350-files.gitbook.io/~/files/v0/b/gitbook-x-prod.appspot.com/o/spaces%2F-Lt-sE9MYKe9pZOcHwg5%2Fuploads%2FgARgBXBO71JnkafOVyKK%2F6?alt=media" alt="Add State Machine into trigger"></div>

For our Door, let’s choose State Machine State Start. Next, we need to select the State Machine to which we want to bind the Animation Opening: Select State Machine Select → Door State Machine.

Then, we select the required state of the Door State Machine: Select State → Opening.

![Select state "Opening"](https://4240499350-files.gitbook.io/~/files/v0/b/gitbook-x-prod.appspot.com/o/spaces%2F-Lt-sE9MYKe9pZOcHwg5%2Fuploads%2FwTB7VWxaGSJLAOP9ik96%2F7?alt=media)

As a result, we have our Door State Machine, which switches from the Closed state to the Opening state by hitting the 0 button. When the states change (Closed → Opening), the animation of the door opening starts. Let's switch to the Game mode, and press the 0 button. Did it work? 😊

### Binding the State Closed to an Animation

Let’s also create an animation “Animation Closed” for the Closed state. Let’s say, our door changes color while the Door State Machine is in the Closed state. Add an Animation to the Scene Tree, and name it “Animation Closed”. Create a trigger to start this animation. Trigger/Timeline Panels appear when you click on the animation you need in the Scene Tree in the Animation mode. Go to the Trigger Panel, select State Machine State, then State Machine State Continue. This means that Animation Closed will run while the state machine is in the Closed state.

![Add State Machine into trigger](https://4240499350-files.gitbook.io/~/files/v0/b/gitbook-x-prod.appspot.com/o/spaces%2F-Lt-sE9MYKe9pZOcHwg5%2Fuploads%2FGgsw1xXTdrDlgpnCawfx%2F8?alt=media)

Next, you need to select the State Machine and the state itself to which you want to bind the Closed animation. Then, in the input fields, select:

> <mark style="color:orange;">Select State Machine → Door State Machine</mark>;
>
> <mark style="color:orange;">Select State → Closed</mark>.

![Select state "Closed"](https://4240499350-files.gitbook.io/~/files/v0/b/gitbook-x-prod.appspot.com/o/spaces%2F-Lt-sE9MYKe9pZOcHwg5%2Fuploads%2FbzHydx6GaT7jh53EPUgO%2F9?alt=media)

Next, add the Door to Timeline; then, select an animatable parameter – Color. Let our door change color from white to pink while it is in the Closed state.

![Add color propery to timeline](https://4240499350-files.gitbook.io/~/files/v0/b/gitbook-x-prod.appspot.com/o/spaces%2F-Lt-sE9MYKe9pZOcHwg5%2Fuploads%2F0pbp6f81vhDnayRruem4%2F10?alt=media)

![Adjust color transition](https://4240499350-files.gitbook.io/~/files/v0/b/gitbook-x-prod.appspot.com/o/spaces%2F-Lt-sE9MYKe9pZOcHwg5%2Fuploads%2FAAyymzKMD4uJtGeOoKH2%2F11?alt=media)

Ready! Switch to Game mode and see how our door changes colors while its State Machine is in the Closed state. But as soon as we press the 0 button, the animation will stop, because the Door State Machine has changed its state.

### **Transition: Opening** → **Open**

Let's create the state Open for our Door State Machine and a transition from the Opening state to the Open state.

#### Creating the State Open

Click on Door State Machine in the Scene Tree, add a new state in the pop-up window.

<figure><img src="https://4240499350-files.gitbook.io/~/files/v0/b/gitbook-x-prod.appspot.com/o/spaces%2F-Lt-sE9MYKe9pZOcHwg5%2Fuploads%2FnpzJMMCYU2jaVwlihxck%2F12?alt=media" alt=""><figcaption></figcaption></figure>

Click on the dotted line. Let's set up the rule when the door should switch from the Opening state to the Open state: when the Animation Opening ends. To do this, add an Animation trigger to the panel that appears; select Animation Stop from the drop-down list. Next, select the previously created Animation Opening. Thus, the transition of the Door State Machine from the Opening state to the Open state will occur when the Animation Opening ends.

![Adjust Animation trigger to "Animation Ended" condition](https://4240499350-files.gitbook.io/~/files/v0/b/gitbook-x-prod.appspot.com/o/spaces%2F-Lt-sE9MYKe9pZOcHwg5%2Fuploads%2FGgL24W4qFBcKLLJASJhP%2F13?alt=media)

![Add Animation Opening](https://4240499350-files.gitbook.io/~/files/v0/b/gitbook-x-prod.appspot.com/o/spaces%2F-Lt-sE9MYKe9pZOcHwg5%2Fuploads%2FxvkyX6zDJWyNgdjuXolS%2F14?alt=media)

### Binding the State Open to an Animation

For the Open state, we will create a new animation - Animation Open. Let the door turn green when the Door State Machine switches to the Open state.

Add a new Animation using the Toolbar , switch to the Animation mode, click on our new animation - Animation Open, then add the Door to the Timeline. Next, add an animatable parameter

&#x20;<mark style="color:orange;">Materials → Color</mark>, select the green color.

![Add color property to timeline](https://4240499350-files.gitbook.io/~/files/v0/b/gitbook-x-prod.appspot.com/o/spaces%2F-Lt-sE9MYKe9pZOcHwg5%2Fuploads%2FqAQI6Kbv3URPYFqt8HOQ%2F15?alt=media)

Switch to the Trigger Panel, select the State Machine State Start trigger. Next, select:

> <mark style="color:orange;">Select State Machine → Door State Machine</mark>;
>
> <mark style="color:orange;">Select State → Open</mark>.

![Add State Machine to trigger](https://4240499350-files.gitbook.io/~/files/v0/b/gitbook-x-prod.appspot.com/o/spaces%2F-Lt-sE9MYKe9pZOcHwg5%2Fuploads%2FYNAdImEQj22a7L6o5UVu%2F16?alt=media)

![Select "Open" state](https://4240499350-files.gitbook.io/~/files/v0/b/gitbook-x-prod.appspot.com/o/spaces%2F-Lt-sE9MYKe9pZOcHwg5%2Fuploads%2FqUDSbewkFdGiFIai995q%2F17?alt=media)

In a game mode: after pressing the 0 button, the Door State Machine moved from the Closed state to the Opening state. The door opened; and the Door State Machine went from the Opening state to the Open state. As a result, the Door has turned green; the Animation Open has started.

### **Transition: Open** → **Closing**

Let's make a more interesting example when the door starts to close when the Main Character moves away from the door. To do this, you need to create a Collider. In the Toolbar, choose Collider. The size and position of the Collider can be changed by Gizmo Arrows or Properties Tab. Let's name the collider - Door Collider.

![Create Door collider](https://4240499350-files.gitbook.io/~/files/v0/b/gitbook-x-prod.appspot.com/o/spaces%2F-Lt-sE9MYKe9pZOcHwg5%2Fuploads%2FqzUDU7Sn98YZAcwyBGJV%2F0?alt=media)

### Configuring a Transition Rule

Now, go to the Door State Machine and create a connection between the Open state and the Closing state. We create a new rule: the transition from the Open state to the Closing state occurs when the collision of our Main Character and the Collider stops. In other words, when the Main Character leaves the collider space, moves away from the door.

To do this, click on the dotted line and choose the Collision Ended trigger. Then, we select the MainCharacter Body and the Door Collider as objects of the collision.

![Set collision condition in trigger](https://4240499350-files.gitbook.io/~/files/v0/b/gitbook-x-prod.appspot.com/o/spaces%2F-Lt-sE9MYKe9pZOcHwg5%2Fuploads%2F4rImz4VXx9bNfIh5IPt6%2F1?alt=media)

![Set collider to no collision with Main Character](https://4240499350-files.gitbook.io/~/files/v0/b/gitbook-x-prod.appspot.com/o/spaces%2F-Lt-sE9MYKe9pZOcHwg5%2Fuploads%2FACHMgRRbroY7sG8q4Alq%2F2?alt=media)

### Animation Closing

Now let's create an animation of closing the door in the Scene Tree (using Toolbar) and name it “Animation Closing”. In Animation mode, click on Animation Closing, add our Door to the Timeline, select an animatable parameter:&#x20;

> <mark style="color:orange;">Properties → Position Y</mark>;

&#x20;add the formula by which our door will close, i.e. returns to its initial position within one second (Position Y = origin -2).

![Add Door Position Y to timeline](https://4240499350-files.gitbook.io/~/files/v0/b/gitbook-x-prod.appspot.com/o/spaces%2F-Lt-sE9MYKe9pZOcHwg5%2Fuploads%2FUWs7G0gjxsw2hfGt5fUA%2F3?alt=media)

Go to the Trigger Panel and create the trigger for Animation Closing. Select the State Machine&#x20;

> <mark style="color:orange;">State trigger → State Machine State Start</mark>.&#x20;

Then, choose:

> <mark style="color:orange;">Select State Machine →Door State Machine</mark>;&#x20;
>
> <mark style="color:orange;">Select State → Closing</mark>.

![Adjust State Machine trigger and it's state Closing](https://4240499350-files.gitbook.io/~/files/v0/b/gitbook-x-prod.appspot.com/o/spaces%2F-Lt-sE9MYKe9pZOcHwg5%2Fuploads%2FrgnwpDWO3FUf91T3R5RP%2F4?alt=media)

Therefore, as soon as the state of the Door State Machine changes from the Open state to the Closing, the Animation Closing starts. And the transition from one state to another will occur when the Main Character leaves the Door Collider.

Let's switch to the Game mode and see what we've got. For visibility, you can enable the Physics Colliders mode.

![Check in collider view in game mode](https://4240499350-files.gitbook.io/~/files/v0/b/gitbook-x-prod.appspot.com/o/spaces%2F-Lt-sE9MYKe9pZOcHwg5%2Fuploads%2FpMC9imvGszAJuVvKEbhw%2F5?alt=media)

We see that the door is closed, we press 0. After that, the door opens. Let the Main Character run under the Door. When he leaves the Door Collider space, the Door State Machine changes its state to Closing, and the Door begins to close (Animation Closing has started).

### **Transition: Closing** → **Closed**

Now let's make the transition of the Door State Machine from the Closing state to the Closed state. For this purpose, we will use the Animation Closing: the Door State Machine will switch to the Closed state when Animation Closing ends.

In edit mode, open the Door State Machine and set the connection between the states Closing and Closed.

![Set new state Closing](https://4240499350-files.gitbook.io/~/files/v0/b/gitbook-x-prod.appspot.com/o/spaces%2F-Lt-sE9MYKe9pZOcHwg5%2Fuploads%2FKGbqbERKU0kpnV8bfXrB%2F6?alt=media)

Let's set the rule for the state transition. Click on the dotted line, select the Animation Stop trigger. Next, select the animation you need, in this case, Animation Closing.

![Adjust transition trigger](https://4240499350-files.gitbook.io/~/files/v0/b/gitbook-x-prod.appspot.com/o/spaces%2F-Lt-sE9MYKe9pZOcHwg5%2Fuploads%2FGLUebmvuLtgbcVXcvXdJ%2F7?alt=media)

![Condition is End of Animation Closing](https://4240499350-files.gitbook.io/~/files/v0/b/gitbook-x-prod.appspot.com/o/spaces%2F-Lt-sE9MYKe9pZOcHwg5%2Fuploads%2FjwnyYfWkvk3PSDzQBO3x%2F8?alt=media)

#### Results in the Game mode

Let's switch to the Game mode. The Door State Machine is in the Closed state, so the door changes color from white to pink (Animation Closed). The Animation Opening will start when the Door State Machine switches from the Closed state to the Opening state. This will happen when we press the 0 button. After that, the Door opens and at the end of the Animation Opening, the Door State Machine switches to the Open state. When the Main Character leaves the collider space, the door will begin to close (Animation Closing) and the Door State Machine will have the Closing state. As soon as the Animation Closing is over, the Door State Machine will return to its initial state - Closed state.

### Any State

We already know that Any State is a special state in the state machine; it means that a transition from any state can occur to one state. For example, in our case, the door can collapse in any state (opening, open, closing, closed).

> <mark style="color:orange;">Any State → Destroy</mark>

Let's now configure the transition from Any State to the new state of the Door State Machine - Destroy. This will mean that the Door State Machine can switch to the Destroy state from any state (in our case, from all 4 states). To do this, you need to create a Destroy state and use the Connector tool to draw an arrow from the Any State to the Destroy state.

![Create connection between Any State and Destroy state](https://4240499350-files.gitbook.io/~/files/v0/b/gitbook-x-prod.appspot.com/o/spaces%2F-Lt-sE9MYKe9pZOcHwg5%2Fuploads%2FpQUATNTAOBZsGdubjoKk%2F9?alt=media)

Next, we set up the transition rule. Click on the dotted line between Any state and Destroy and go to the Trigger Panel. Let our door collapse when we press the G button. Select the Key Down trigger and type G in the input field.

![Set trigger to transition on G key](https://4240499350-files.gitbook.io/~/files/v0/b/gitbook-x-prod.appspot.com/o/spaces%2F-Lt-sE9MYKe9pZOcHwg5%2Fuploads%2FcSMpvmrHn2tpOIhNiZMO%2F10?alt=media)

#### Animation Destroy

Let’s prepare the animation of the door collapse and name it “Animation Destroy”. Inside the door we put 4 door blocks (boxes) that together make up the size of the door. These 4 objects should be physical and dynamic, as they will fall down when the door is destroyed.

![Create parts of destroyed Door](https://4240499350-files.gitbook.io/~/files/v0/b/gitbook-x-prod.appspot.com/o/spaces%2F-Lt-sE9MYKe9pZOcHwg5%2Fuploads%2FSiSwirBBLotq9Rj17pxk%2F11?alt=media)

Add 4 boxes to the Scene Tree using the Toolbar and drag them into the Door. Use the Inspector Panel to set the Physics, Position and Size of the new objects.

![Resize boxes](https://4240499350-files.gitbook.io/~/files/v0/b/gitbook-x-prod.appspot.com/o/spaces%2F-Lt-sE9MYKe9pZOcHwg5%2Fuploads%2F5tPFF19NBoyrrfRENpKY%2F12?alt=media)

You may also add the Initial Velocities Features to make the objects fly apart when the Door is destroyed.

![Set physics properties](https://4240499350-files.gitbook.io/~/files/v0/b/gitbook-x-prod.appspot.com/o/spaces%2F-Lt-sE9MYKe9pZOcHwg5%2Fuploads%2F9a1onXGzXLo2PCH22Ss3%2F13?alt=media)

Disable boxes in the Scene Tree; so, they don't fall out as soon as the game starts.

![Disable boxed and make the child of the door object](https://4240499350-files.gitbook.io/~/files/v0/b/gitbook-x-prod.appspot.com/o/spaces%2F-Lt-sE9MYKe9pZOcHwg5%2Fuploads%2FsmyVNV83tSZSjOP7rbOZ%2F14?alt=media)

Then, switch to the Animation mode, click on Animation Destroy in the Scene Tree and the Timeline Panel will appear. Add the Door and its boxes to the Timeline. For this animation, we need to disable the main door and to enable 4 boxes.

![Setup animation for enabling parts of the door](https://4240499350-files.gitbook.io/~/files/v0/b/gitbook-x-prod.appspot.com/o/spaces%2F-Lt-sE9MYKe9pZOcHwg5%2Fuploads%2Fgl7lGtWE1WZmqgjVte6H%2F15?alt=media)

![Set them enable](https://4240499350-files.gitbook.io/~/files/v0/b/gitbook-x-prod.appspot.com/o/spaces%2F-Lt-sE9MYKe9pZOcHwg5%2Fuploads%2FgZeKGsdTdcCn6zdFJyib%2F16?alt=media)

Next, go to the Trigger Panel. The Animation Destroy should start when the Door State Machine switches to the Destroy state. Therefore, choose State Machine State Start trigger, and then select:

> <mark style="color:orange;">Select State Machine → Door State Machine</mark>;
>
> <mark style="color:orange;">Select State → Destroy</mark>.

![Create State Machine trigger](https://4240499350-files.gitbook.io/~/files/v0/b/gitbook-x-prod.appspot.com/o/spaces%2F-Lt-sE9MYKe9pZOcHwg5%2Fuploads%2FRU6tGhHX9d3g5CMn7IA2%2F17?alt=media)

Let's see what we got! Go to the Game mode, press the G button and check if the door collapses when the Door State Machine is in the closed state. How about other states?

![Test yor animations](https://4240499350-files.gitbook.io/~/files/v0/b/gitbook-x-prod.appspot.com/o/spaces%2F-Lt-sE9MYKe9pZOcHwg5%2Fuploads%2FuCYC0D1IlXBWQpZCROQx%2F18?alt=media)

Thus, we have created the State Machine that has 5 states and 5 transitions between them. You can repeat all of this, as well as create more complex transitions and rules for your state machine.&#x20;

Go for it!


# Game Flow

When creating even a small game, it's easy to lose control of the logic of game interactions or the thread of the narrative.

To get the most control over your project, we created the Game Flow tool. It's a scene object with a visual node editor, where you can design your game before you even put a single game object on the stage.

Game Flow links between the Animation, Trigger, State Machine, and Game Flow objects and sets the interaction and narrative logic for your game.

### Creating Game Flow

To get started with Game Flow, you need to create a Game Flow object in the Stage Tree using the toolbar.

<figure><img src="https://4240499350-files.gitbook.io/~/files/v0/b/gitbook-x-prod.appspot.com/o/spaces%2F-Lt-sE9MYKe9pZOcHwg5%2Fuploads%2FAtI8i2qntcBijVMn1boX%2FFrame%201.png?alt=media&amp;token=0233f909-ce05-4402-9341-2ef358f56e16" alt=""><figcaption></figcaption></figure>

Select the Game Flow object in the scene tree by double-clicking it in the scene tree. The Game Flow editing window opens.

<figure><img src="https://4240499350-files.gitbook.io/~/files/v0/b/gitbook-x-prod.appspot.com/o/spaces%2F-Lt-sE9MYKe9pZOcHwg5%2Fuploads%2FVMnkCEJQQhupCm7eYsTo%2FFrame%202.png?alt=media&amp;token=c4bc3e98-6069-48f6-9564-3ed8c2f44868" alt=""><figcaption></figcaption></figure>

<figure><img src="https://4240499350-files.gitbook.io/~/files/v0/b/gitbook-x-prod.appspot.com/o/spaces%2F-Lt-sE9MYKe9pZOcHwg5%2Fuploads%2FMxsTieif1rRYhGubfV8I%2FFrame%203.png?alt=media&amp;token=62f4a22c-9c1d-4d8a-b6cb-c5167f5a4044" alt=""><figcaption></figcaption></figure>

There are two nodes Start and End on the default Game Flow canvas, we'll talk about them in another section.

On the left side of the window, on the toolbar there is a toolbox for working with Game Flow. Select the tool for creating any node, for example animation, and click it on the canvas.

<figure><img src="https://4240499350-files.gitbook.io/~/files/v0/b/gitbook-x-prod.appspot.com/o/spaces%2F-Lt-sE9MYKe9pZOcHwg5%2Fuploads%2Fm2JhRurwVTWe11RQNJOd%2FFrame%204.png?alt=media&amp;token=27b77b94-bd00-4328-be33-67048e83b74c" alt=""><figcaption></figcaption></figure>

In the menu that appears, there are two options:

* Create node with creating a new object
* Create node from existing object

<figure><img src="https://4240499350-files.gitbook.io/~/files/v0/b/gitbook-x-prod.appspot.com/o/spaces%2F-Lt-sE9MYKe9pZOcHwg5%2Fuploads%2FHs5ISoMxjyhnzEme3YYh%2FFrame%205.png?alt=media&amp;token=ec6f1cc2-05cf-4436-80b0-cb0ddfb9d1cb" alt=""><figcaption></figcaption></figure>

Choosing "With creation of new object", you will create a node and object in the scene tree, which will be located in the Game Flow hierarchy which you edit.

<figure><img src="https://4240499350-files.gitbook.io/~/files/v0/b/gitbook-x-prod.appspot.com/o/spaces%2F-Lt-sE9MYKe9pZOcHwg5%2Fuploads%2F6V2azEE386hCYrLbZ1w0%2FFrame%206.png?alt=media&amp;token=14ce8a49-d2df-4a88-9b74-a96e089a930d" alt=""><figcaption></figcaption></figure>

Choosing "From existing object" you can select an object of that type from already existing in the scene tree.

<figure><img src="https://4240499350-files.gitbook.io/~/files/v0/b/gitbook-x-prod.appspot.com/o/spaces%2F-Lt-sE9MYKe9pZOcHwg5%2Fuploads%2FHHZfeor1kyBlo9HX8LRK%2FFrame%207.png?alt=media&amp;token=a1acb1d8-7dfa-4b01-83c1-fb4c312f7f5b" alt=""><figcaption></figcaption></figure>

<figure><img src="https://4240499350-files.gitbook.io/~/files/v0/b/gitbook-x-prod.appspot.com/o/spaces%2F-Lt-sE9MYKe9pZOcHwg5%2Fuploads%2FSy57HEI34pfFqPfeLrok%2FFrame%208.png?alt=media&amp;token=79349d85-8eaa-4f48-84b2-6f3314967ef8" alt=""><figcaption></figcaption></figure>

<figure><img src="https://4240499350-files.gitbook.io/~/files/v0/b/gitbook-x-prod.appspot.com/o/spaces%2F-Lt-sE9MYKe9pZOcHwg5%2Fuploads%2FJQsbV60vK5kfd2BJAxMr%2FFrame%209.png?alt=media&amp;token=21b632d0-f2c3-4d5e-9a57-0d3cb07eacbe" alt=""><figcaption></figcaption></figure>

Double-clicking on the created node opens the related edit panel of the object. The timeline will open for animation, the setup panel for trigger, and the canvas of the state machine will open for the state machine.

<figure><img src="https://4240499350-files.gitbook.io/~/files/v0/b/gitbook-x-prod.appspot.com/o/spaces%2F-Lt-sE9MYKe9pZOcHwg5%2Fuploads%2FnWkREuc9fdabHKwfBVej%2FFrame%2010.png?alt=media&amp;token=03d53938-43eb-460c-bb2e-85fcd0149f65" alt=""><figcaption></figcaption></figure>

### Game Flow Connections

The created nodes can be linked with each other:

* select the "Pointer" tool
* move the cursor to the source node (from which you want to draw the links). (For a state machine, hover over the desired stack.
* hover over the link start arrow (any arrow, they are equivalent) and holding the left mouse button drag to another node
* when you hover on the target node and it is highlighted with a blue circle, release it
* select the desired type of connection and the connection between the nodes is created.

<figure><img src="https://4240499350-files.gitbook.io/~/files/v0/b/gitbook-x-prod.appspot.com/o/spaces%2F-Lt-sE9MYKe9pZOcHwg5%2Fuploads%2F4eomTnH2zy8Y3YyG5exS%2FFrame%2011.png?alt=media&amp;token=3e0d99d9-f6e8-466f-9fa1-69efca3f6301" alt=""><figcaption></figcaption></figure>

<figure><img src="https://4240499350-files.gitbook.io/~/files/v0/b/gitbook-x-prod.appspot.com/o/spaces%2F-Lt-sE9MYKe9pZOcHwg5%2Fuploads%2F8iYhpdgx6afU7Iuti1l8%2FFrame%2012.png?alt=media&amp;token=24a8b0f1-1339-484c-b5b1-40c65e5565f0" alt=""><figcaption></figcaption></figure>

<figure><img src="https://4240499350-files.gitbook.io/~/files/v0/b/gitbook-x-prod.appspot.com/o/spaces%2F-Lt-sE9MYKe9pZOcHwg5%2Fuploads%2FOID8XcGOXYmcGGJJ6y0V%2FFrame%2013.png?alt=media&amp;token=da83947c-191a-47e2-b3ef-369ed6c378b1" alt=""><figcaption></figcaption></figure>

Some nodes can only be source nodes:

* The trigger can be connected to Animations and Game Flow, but cannot be connected to other triggers and state machines.
* State machines can be connected to Animations and Game Flow, but cannot be connected to triggers and other state machines
* Node Start can be combined with Animations and Game Flow, but not with triggers and stats of other machines

Animations and Game Flow can be connected to each other in any way.

### Types of Game Flow connections

As with triggers, there are three types of connections between nodes in Game Flow.

* <mark style="color:green;">**Started**</mark>: means that the next node in the connection will run when the current node's object starts its work.
* <mark style="color:orange;">**Continue**</mark> : means that the next node in the connection will work as long as the object of the current node will continue its work
* <mark style="color:red;">**Ended**</mark> : means that the next connected node will work when the current node object finishes its job

In fact, the trigger connections from different objects are trigger events of the related objects, all of which you can find in the lists of trigger events when you create them in the Trigger panel - Animation, Trigger, Game Flow, State Machine with state

Note: The Continue state cannot be passed to Game Flow and End nodes.

### Start and End nodes

The Start and End nodes are used when creating a Sub Game Flow. Sub Game Flow is a Game Flow that is embedded in another Game Flow.

<figure><img src="https://4240499350-files.gitbook.io/~/files/v0/b/gitbook-x-prod.appspot.com/o/spaces%2F-Lt-sE9MYKe9pZOcHwg5%2Fuploads%2FBMPeE4xfwoiD4tYbdKWO%2FWindow%201.png?alt=media&amp;token=514d8f2a-2927-45cc-b140-0f537f7777a3" alt=""><figcaption></figcaption></figure>

The Start note is needed to start a Sub Game Flow. When a signal comes to the node from the client (the Game Flow which contains this Sub Game Flow), the next after the Start node is started and this Sub Game Flow is considered to be working. First the Sub Game Flow goes to the Started state, and then to Continue. All Sub Game Flow connections start working, if the Game Flow has been turned off before.

<figure><img src="https://4240499350-files.gitbook.io/~/files/v0/b/gitbook-x-prod.appspot.com/o/spaces%2F-Lt-sE9MYKe9pZOcHwg5%2Fuploads%2FLMrVwF7g3E7sNSKvlh1Z%2FWindow%202.png?alt=media&amp;token=88e20cf6-89a3-493d-bc80-71b460c87b37" alt=""><figcaption></figcaption></figure>

The End node is needed to stop Sub Game Flow, when the node receives a signal from internal object of this Sub Game Flow, it goes to Ended state and all its internal connections stop working.

<figure><img src="https://4240499350-files.gitbook.io/~/files/v0/b/gitbook-x-prod.appspot.com/o/spaces%2F-Lt-sE9MYKe9pZOcHwg5%2Fuploads%2FDKTZikwcGc39DGHnso7h%2FWindow%203.png?alt=media&amp;token=d5f0a3a5-baa9-40b7-a879-9034a42f8857" alt=""><figcaption></figcaption></figure>

Note: For predictable operation of nested Sub Game Flow, we recommend to turn them off inside Sub Game Flow itself or in the scene tree. In this case, no connections inside will be triggered until the Start node signal appears, even if some object inside works.

### Commentary node

To help yourself in development and not to forget what this or that object in your Game Flow is for, you can leave notes with a comment node. We strongly recommend leaving comments when you create assets that other users will use, this will greatly improve the understanding of your asset by other game developers and make your asset popular.

Create a comment node.

<figure><img src="https://4240499350-files.gitbook.io/~/files/v0/b/gitbook-x-prod.appspot.com/o/spaces%2F-Lt-sE9MYKe9pZOcHwg5%2Fuploads%2FdD6QPcYuSZzhhwhaekJD%2FFrame%2014.png?alt=media&amp;token=fa9f7f53-7896-4019-9eb1-1290f4687b32" alt=""><figcaption></figcaption></figure>

<figure><img src="https://4240499350-files.gitbook.io/~/files/v0/b/gitbook-x-prod.appspot.com/o/spaces%2F-Lt-sE9MYKe9pZOcHwg5%2Fuploads%2FF9e3NYEVpBJBEV2mwOvb%2FFrame%2015.png?alt=media&amp;token=f0e9f9c8-8dd0-4fd3-95ed-d5eab2d43a28" alt=""><figcaption></figcaption></figure>

Write the comment you want.

<figure><img src="https://4240499350-files.gitbook.io/~/files/v0/b/gitbook-x-prod.appspot.com/o/spaces%2F-Lt-sE9MYKe9pZOcHwg5%2Fuploads%2F42gveA36wQPSFTc7Iuxf%2FFrame%2016.png?alt=media&amp;token=ad346bd6-7330-48cc-aa6e-303690e43147" alt=""><figcaption></figcaption></figure>

If necessary, connect the comment to the desired node.

<figure><img src="https://4240499350-files.gitbook.io/~/files/v0/b/gitbook-x-prod.appspot.com/o/spaces%2F-Lt-sE9MYKe9pZOcHwg5%2Fuploads%2FTkqm8gq70gxUYeFVchev%2FFrame%2017.png?alt=media&amp;token=b80c96c4-ec54-4696-85c8-01d6a0ae7dec" alt=""><figcaption></figcaption></figure>

You can connect one comment node to any number of nodes.

### Combining connections with triggers

Connections between objects can be completed with trigger events. To do this, double-click on the necessary connection between objects.

Add the desired trigger events in the Game Flow Editor window in the Trigger Panel.

Now trigger events will be triggered when all conditions specified by the initial object, the trigger event type and the additional trigger event in the relation are fulfilled.


# Prefabs and Assets

An **Asset** is a term that generally stands for anything that goes into a video game – characters, objects, sound effects, maps, textures, materials, environments, etc. Asset Browser is where all the assets in MANU that you create or import from Manu Marketplace are located.

To use an asset in your game, it needs to be turned into a **Prefab**.

**Prefab** object that can be reused in the scene the number of times you want. All changes in the

**Prefab** will be passed between all **Prefab-instances** throughout the project.

How to export prefabs as asset, learn in [this chapter](/learn/manual/assets).

<figure><img src="https://4240499350-files.gitbook.io/~/files/v0/b/gitbook-x-prod.appspot.com/o/spaces%2F-Lt-sE9MYKe9pZOcHwg5%2Fuploads%2FoDQ5nKRxWEYuoKAU5KL3%2FGroup%201649.png?alt=media&amp;token=31fe70e8-f75e-47c3-9c0f-5be7b0ee9d13" alt=""><figcaption></figcaption></figure>

<figure><img src="https://4240499350-files.gitbook.io/~/files/v0/b/gitbook-x-prod.appspot.com/o/spaces%2F-Lt-sE9MYKe9pZOcHwg5%2Fuploads%2FDrr8xBFlDWGC7zdmLtDQ%2FGroup%201650.png?alt=media&amp;token=96b6e8a6-4193-4640-9234-13ba351deea9" alt=""><figcaption></figcaption></figure>

### Create Prefab

Prefab allows you to create, configure, and store an object complete with all its components, property values, and child objects as a reusable asset. To create a prefab, select **Create Prefab** from the drop-down menu using the `RBM`.
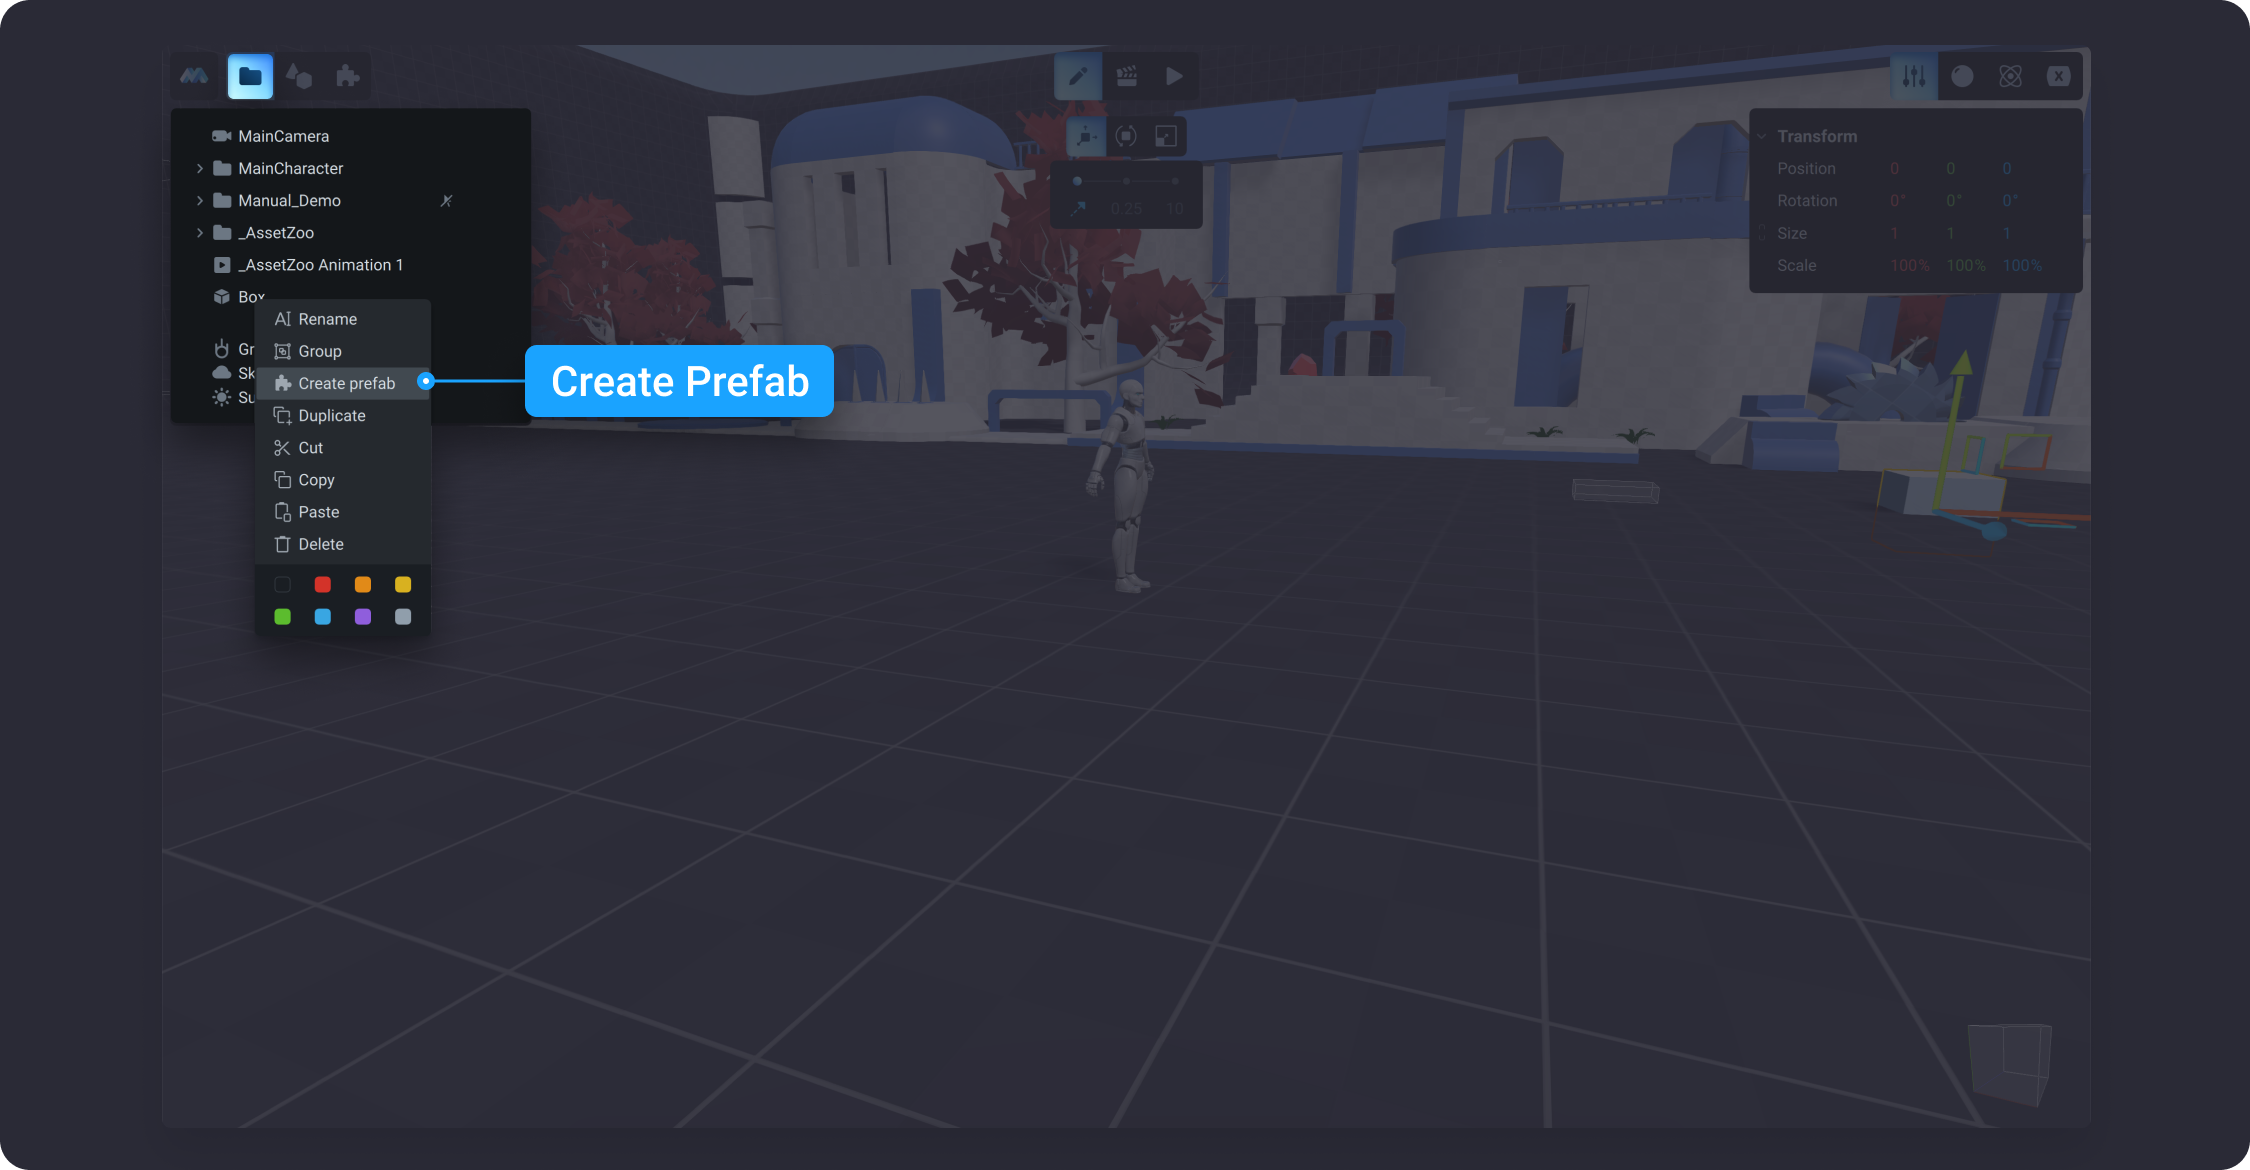
![](https://dl.dropboxusercontent.com/s/rq4rfkn2cpl1nu3/002.png?dl=0)

### Rename Prefab <a href="#docs-internal-guid-325896ed-7fff-21ea-64b0-b98b43c03047" id="docs-internal-guid-325896ed-7fff-21ea-64b0-b98b43c03047"></a>

To rename a prefab, select one from the Scene tree, click the `RMB` and select **Rename prefab**. If you rename the prefab, all instances of the same prefab will be renamed as well.&#x20;

![](https://dl.dropboxusercontent.com/s/xraym2xhg5x7t5p/003.png?dl=0)

Please note that each prefab’s name consists of two parts: `<Prefab’s Name> - <Object Name>`. Let’s say you created a box that has a default object name - *“Box”*, you then turned it into a prefab, so your new prefab’s name is *“Box - Box”*. If you want to rename the left *“Box”* to something else, use the **Rename prefab** option. If you want to change the object’s name, use the **Rename** option instead.

### Duplicate Prefab

A duplicate of a prefab is called a prefab’s instance. To duplicate a prefab, select the prefab and choose the **Duplicate** option from the drop-down menu using the `RBM`.&#x20;

After duplicating a prefab, the prefab’s name remains the same but with a count number added to it. For example, if the first instance of the prefab’s name is *“Box - Box”*, its duplicate’s name will be *“Box - Box 2”*.

If a prefab contains a group of other objects and animations, they will be duplicated into a new instance as well, including their materials, animations, and physics settings.&#x20;

{% hint style="success" %}
Prior to duplicating a prefab, we recommend that you set up the desired animations first inside this prefab group. The animations will be automatically retargeted to the objects that are inside the new prefab instance. This operation allows you to create multiple interactive objects in the game without having to manually edit each animation in every new prefab instance.
{% endhint %}

![](https://dl.dropboxusercontent.com/s/jdvvg05hbzmen5t/004.png?dl=0)

### Detach Prefab

Detaching a prefab turns it back into an object and removes the prefab’s name from it. To detach a prefab, select one from the Scene, click `RMB` and select `<Detach Prefab>` from the drop-down menu. Detached prefab will not synchronise between other instances or it's duplicates.&#x20;

![](https://dl.dropboxusercontent.com/s/iyjw8swpf24nen3/006.png?dl=0)

### Copy / Cut / Paste / Delete Prefabs <a href="#docs-internal-guid-6bba4d6e-7fff-6611-16f1-61fc03ca49fb" id="docs-internal-guid-6bba4d6e-7fff-6611-16f1-61fc03ca49fb"></a>

You can also complete other operations with prefabs, such as copy, cut, paste, and delete, using the respective options in the drop-down menu called by the `RMB`.

![](https://dl.dropboxusercontent.com/s/olobmg15pur3om6/005.png?dl=0)

In addition, you can copy and paste the prefabs into a new project in MANU. To do that, select a prefab in the Scene tab, click `RMB` and select `<Copy>` from the drop-down menu. Then, go to the main menu by clicking on the MANU icon, select File followed by either `<New>` or `<Open>` a different project you would like to paste a prefab to. After opening a different project, use RMB in the Scene tab and select `<Paste>`. Note that if you use these steps to copy and paste the same prefab multiple times into a new project, each time the system will treat it as a separate prefab group instead of one group of prefabs.

### Edit Prefab Instances

In MANU, you can edit objects and their parameters in prefab instances. All changes completed to material and physics settings will be automatically applied to all other instances of a prefab group. Note that with this operation all transform settings of the prefab’s root object will **NOT** be transferred into other instances. This allows you to freely place different prefabs instances around the game.

As noted earlier, if you would like to ad

d a new animation to a prefab instance, the changes will not be synced with other instances. For a new animation to be synced with other instances, here are some workaround steps you may find helpful. After you completed adding and setting up a new animation, use the `RMB` to `<Cut>` and then `<Paste>` the prefab instance into the Scene tree. This way, you will be able to synchronize animation edits with other prefabs.

![](https://dl.dropboxusercontent.com/s/62no1twsw6ij1mo/007.png?dl=0)


# Gravity

In MANU, gravity is one of the default units of every scene that can be found in the Scene panel. Gravity is applied to all dynamic objects in the Scene, except the Main Character. To learn more about the gravity settings for the Main Character, go to Main Character Settings > Gravity and Mass (link). In physics terms, gravity is the natural force that causes things to fall toward the earth. Gravity is a global setting that is applied to a certain level in a game.&#x20;

In MANU, the value for gravity is generally fine left at its default, which is -9.78 on the Y axis. It determines the force of gravity in the real world. Changing this value would simulate a lower or higher force of gravity that could vary from -100 to 100.

![](https://dl.dropboxusercontent.com/s/27zo9jiazrphvtf/001.png?dl=0)


# Sky

A sky is a type of background that the Main Camera draws before it renders a frame. This type of background creates a sense of depth and makes the 3D environment seem larger than it is. In MANU, the sky is one of the default units of every scene that is available in the [Scene panel](/learn/manual/scene-panel) of [Edit mode](/learn/manual/workspace-modes/edit-mode).

The *Sky* itself can contain three different colors that merge together to create the illusion of distant three-dimensional surroundings. MANU can also use a *Sky* to generate ambient lighting in your game.

To change the *Sky* settings in *Edit mode*, use settings in the Inspector panel for *Gradient*.

![](https://dl.dropboxusercontent.com/s/deilrb1j5lp6cnq/001.png?dl=0)

The numeric value for gradient determines the degree of *scattering* that varies from 0 to 100. The higher the value for scattering, the more blended the sky colors appear in the game.

![](https://dl.dropboxusercontent.com/s/60wopsgdoybu4b4/002.png?dl=0)

## Animating

Animating the sky can be useful if you would like to add daylight change in your game. For example, you can make the sunny daylight sky turn into the sunset. The guidelines below specify animation settings that could help you create such an effect.

{% embed url="<https://dl.dropboxusercontent.com/s/qsrmi1q20gwbscc/v001.webm>" %}


# Variables

In MANU you can use an object component such as a variable to store, change and use data. A variable is a named container in which data of a certain type can be stored. You can use data of the following types:

* <img src="https://4240499350-files.gitbook.io/~/files/v0/b/gitbook-x-prod.appspot.com/o/spaces%2F-Lt-sE9MYKe9pZOcHwg5%2Fuploads%2FoGzXXykkFxhXIh49OOIO%2Fnumb%20outline.png?alt=media&amp;token=8d47f861-1b65-4c0c-a8bf-0ccb4a5df73c" alt="" data-size="line">Number - any number with a length of 6 characters excluding a dot
* <img src="https://4240499350-files.gitbook.io/~/files/v0/b/gitbook-x-prod.appspot.com/o/spaces%2F-Lt-sE9MYKe9pZOcHwg5%2Fuploads%2F1RMvx3Ra46hcPwIv4ace%2Fbool_outline.png?alt=media&amp;token=389b30dc-daa5-4154-8f32-9a44ae1fafa1" alt="" data-size="line">Boolean - a true/false value
* <img src="https://4240499350-files.gitbook.io/~/files/v0/b/gitbook-x-prod.appspot.com/o/spaces%2F-Lt-sE9MYKe9pZOcHwg5%2Fuploads%2Fc2lDEl37uouvdP9MNQX3%2FObj_outline.png?alt=media&amp;token=24d12dac-e532-4710-ab89-296cf9b914c5" alt="" data-size="line">Object - a pointer to an object
* <img src="https://4240499350-files.gitbook.io/~/files/v0/b/gitbook-x-prod.appspot.com/o/spaces%2F-Lt-sE9MYKe9pZOcHwg5%2Fuploads%2FvNklETIJKJiYGpmuRcw4%2FTag.png?alt=media&amp;token=54195cca-ed27-4d0e-9ddc-38584cff5d27" alt="" data-size="line">Tag - a reference to a tag

![](https://4240499350-files.gitbook.io/~/files/v0/b/gitbook-x-prod.appspot.com/o/spaces%2F-Lt-sE9MYKe9pZOcHwg5%2Fuploads%2Fjh1jZLzhX6tJdHkY7cJ0%2Fimage.png?alt=media\&token=9c9b2023-cade-4e5e-abcb-c1d4e5b19da6)

Using variables you can store, modify and retrieve data stored in them. Create and describe the properties of objects in the game.

Variable values assigned to objects can receive any animations and triggers within the scene.

The same types variables can be created and used within one animation. Such variables calls local variables.


# Number

A variable of the "Number" type, as its name implies, can only store numeric values. You can use these values with other variables and object properties that have or use numeric values. A numeric variable can store numbers from 0.00009 to 999999.

### How to set the Number Variable? <a href="#id-91dirr523zpe" id="id-91dirr523zpe"></a>

The Number Variable can be set in the Inspector Panel. To do this, select the object in the Scene Tree and:

* Go to the Inspector Panel and click on Variables Tab. After that, the Variables Panel will appear in the upper right corner of the screen.
* Click on the plus (“Add variable” button) and you will see a drop-down list with the variables that MANU has.

![](https://4240499350-files.gitbook.io/~/files/v0/b/gitbook-x-prod.appspot.com/o/spaces%2F-Lt-sE9MYKe9pZOcHwg5%2Fuploads%2FmNcc0kS37djTdHDTnmEB%2Fimage.png?alt=media\&token=ff63a05d-4f04-4794-9cf4-45f90d190872)

* Name variable if you need.
* Select “Number” from the list or leave it "Number" by default.

![](https://4240499350-files.gitbook.io/~/files/v0/b/gitbook-x-prod.appspot.com/o/spaces%2F-Lt-sE9MYKe9pZOcHwg5%2Fuploads%2F8JewyQcy0zyxhLWSF9Uz%2Fimage.png?alt=media\&token=20c24575-e0b9-4038-b989-2d5121a67095)

### How to change variable in Animations?

You can change variable value in animations:

* Select an object that has the variable you need and add it to the timeline&#x20;

<figure><img src="https://4240499350-files.gitbook.io/~/files/v0/b/gitbook-x-prod.appspot.com/o/spaces%2F-Lt-sE9MYKe9pZOcHwg5%2Fuploads%2FVKGXehbYmn65IaZKceXP%2Fimage.png?alt=media&amp;token=98096a14-3a96-4d0d-b0a1-b4c41c4cf8ab" alt=""><figcaption></figcaption></figure>

* In the animated properties, select the need variable&#x20;

<figure><img src="https://4240499350-files.gitbook.io/~/files/v0/b/gitbook-x-prod.appspot.com/o/spaces%2F-Lt-sE9MYKe9pZOcHwg5%2Fuploads%2Fk7pvCK9bVyDUXlkN9zr9%2Fimage.png?alt=media&amp;token=bb23b5a2-722e-4633-a733-48de8244e0a0" alt=""><figcaption></figcaption></figure>

* Select the target keyframe and change the value of the variable to the one you want.

<figure><img src="https://4240499350-files.gitbook.io/~/files/v0/b/gitbook-x-prod.appspot.com/o/spaces%2F-Lt-sE9MYKe9pZOcHwg5%2Fuploads%2FotNPpBWqAUiuq5a1ENNl%2Fimage.png?alt=media&amp;token=b98a9022-9ddc-4e43-9812-a7b07f47979a" alt=""><figcaption></figcaption></figure>

### How to use variables in formulas?

You can always use variables in formulas for calculations in your game.&#x20;

* To access the value of a variable in the formula bar, type "$".&#x20;
* The formula object picker will open. In the picker, select the desired object and its variable.

<figure><img src="https://4240499350-files.gitbook.io/~/files/v0/b/gitbook-x-prod.appspot.com/o/spaces%2F-Lt-sE9MYKe9pZOcHwg5%2Fuploads%2FqADZLgmNLW95ES3FIjZo%2Fimage.png?alt=media&amp;token=a4ca2ee8-4966-47bf-8dfd-c166898f7e12" alt=""><figcaption></figcaption></figure>

* The added variable will be used given the arithmetic operations in your formula.

<figure><img src="https://4240499350-files.gitbook.io/~/files/v0/b/gitbook-x-prod.appspot.com/o/spaces%2F-Lt-sE9MYKe9pZOcHwg5%2Fuploads%2Fdp2CKTkkL5eho2daGvoV%2Fimage.png?alt=media&amp;token=5852317e-3533-4228-8161-d44bf4352045" alt=""><figcaption></figcaption></figure>


# Boolean

A Boolean variable, is a variable of logical type whose value can be True or False. Most often such a variable is used to determine whether an object has a property or not. As well as to set this property through animations.

To set a variable of this type:&#x20;

* In the components tab of the object, select Variables&#x20;
* Create a new variable Select Boolean type&#x20;

![](https://4240499350-files.gitbook.io/~/files/v0/b/gitbook-x-prod.appspot.com/o/spaces%2F-Lt-sE9MYKe9pZOcHwg5%2Fuploads%2FJfZaP0q3Occ7Vu8JNVt2%2Fimage.png?alt=media\&token=ef22c205-faaf-4e8c-bde1-a8a746911ae3)

* Set the initial value of the variable. A toggle on corresponds to a True value, a toggle off corresponds to a False value.

![](https://4240499350-files.gitbook.io/~/files/v0/b/gitbook-x-prod.appspot.com/o/spaces%2F-Lt-sE9MYKe9pZOcHwg5%2Fuploads%2FIUC4T5miJ4sHS0bYLtdJ%2Fimage.png?alt=media\&token=b7e2dfd4-6a51-49c7-a6c9-d02f70e9af23)

To toggle the value of a variable, add it to the timeline using the object selection to which it is assigned.&#x20;

<figure><img src="https://4240499350-files.gitbook.io/~/files/v0/b/gitbook-x-prod.appspot.com/o/spaces%2F-Lt-sE9MYKe9pZOcHwg5%2Fuploads%2FPSy98gWcUvA60sbRBTtt%2Fimage.png?alt=media&amp;token=2c0947f0-9be4-4227-84c3-ef1854b3c184" alt=""><figcaption></figcaption></figure>

Or create a local variable in the animation and use it.

<figure><img src="https://4240499350-files.gitbook.io/~/files/v0/b/gitbook-x-prod.appspot.com/o/spaces%2F-Lt-sE9MYKe9pZOcHwg5%2Fuploads%2FOllhV3Vk0EUjxjLRpDhF%2Fimage.png?alt=media&amp;token=57fbd455-7498-442a-bdfa-d38ec1ca6bb1" alt=""><figcaption></figcaption></figure>

<figure><img src="https://4240499350-files.gitbook.io/~/files/v0/b/gitbook-x-prod.appspot.com/o/spaces%2F-Lt-sE9MYKe9pZOcHwg5%2Fuploads%2FQXACWrEFORAJigpHEhFF%2Fimage.png?alt=media&amp;token=c4448da1-871b-47ce-a920-76ee0c993d3f" alt=""><figcaption></figcaption></figure>


# Object

Along with Numeric and Boolean variables, there is an Object type variable in MANU. An object type variable is a variable where any object can be stored. Almost every object in the Scene Tree can have variables.

### How to set the Object Variable? <a href="#id-91dirr523zpe" id="id-91dirr523zpe"></a>

The Object Variable can be set in the Inspector Panel. To do this, select the object in the Scene Tree and:

* Go to the Inspector Panel and click on Variables Tab. After that, the Variables Panel will appear in the upper right corner of the screen.
* Click on the plus (“Add variable” button) and you will see a drop-down list with the variables that MANU has.
* Select “Object” from the list.

![](https://4240499350-files.gitbook.io/~/files/v0/b/gitbook-x-prod.appspot.com/o/spaces%2F-Lt-sE9MYKe9pZOcHwg5%2Fuploads%2F8v1DWG90Z9GgNSND5fBe%2F0.png?alt=media)

### How to rename Object Variables? <a href="#tnzt3kagke0c" id="tnzt3kagke0c"></a>

By default, a set Object variable will have the name Var\_1 (there can be a subsequent number instead of 1 if you have already set other variables earlier). You can assign any name to your Object variable. To do this, click on the name of the variable (for example, Var\_1) and enter the name you need in the input field. The variable name can be any name.

![](https://4240499350-files.gitbook.io/~/files/v0/b/gitbook-x-prod.appspot.com/o/spaces%2F-Lt-sE9MYKe9pZOcHwg5%2Fuploads%2FcVfMBshoTuSVcdWG5o81%2F1.png?alt=media)

![](https://4240499350-files.gitbook.io/~/files/v0/b/gitbook-x-prod.appspot.com/o/spaces%2F-Lt-sE9MYKe9pZOcHwg5%2Fuploads%2FEXNyafLrIXoE1yGR2Eqa%2F2.png?alt=media)

### How to assign an object to an Object variable?/How to set a value for an Object variable? <a href="#p456ih73gqt9" id="p456ih73gqt9"></a>

By default, no value is assigned to the Object variable. Therefore, next to the Object variable name you will see the “No object" option. You can leave it as it is. Alternatively, you can choose an object that you will need at the start of the game. Thereby, you will set the initial value for the Object variable.

To assign an object to an Object variable:

* Click on “No object". You will see a list of objects that you have in the Scene. You can assign any objects to an Object variable.
* Then, just select the object from the list.

![](https://4240499350-files.gitbook.io/~/files/v0/b/gitbook-x-prod.appspot.com/o/spaces%2F-Lt-sE9MYKe9pZOcHwg5%2Fuploads%2FRBDMou2q3cwzVPRZc4SM%2F3.png?alt=media)

### How can we use Object variables in animations? <a href="#id-160t92bk9ayl" id="id-160t92bk9ayl"></a>

1. Object variables can be easily switched on tracks in the Timeline Panel. In other words, we can change the value of the Object variable on Timeline.

![](https://4240499350-files.gitbook.io/~/files/v0/b/gitbook-x-prod.appspot.com/o/spaces%2F-Lt-sE9MYKe9pZOcHwg5%2Fuploads%2FWWMKIf7zyO6enVFCrKuM%2F4.png?alt=media)

![](https://4240499350-files.gitbook.io/~/files/v0/b/gitbook-x-prod.appspot.com/o/spaces%2F-Lt-sE9MYKe9pZOcHwg5%2Fuploads%2FbNDzEcUw5saZsCAch8PL%2F5.png?alt=media)

![](https://4240499350-files.gitbook.io/~/files/v0/b/gitbook-x-prod.appspot.com/o/spaces%2F-Lt-sE9MYKe9pZOcHwg5%2Fuploads%2FqZMidNQ2Dxc92Sq0Y1Or%2F6.png?alt=media)

1. You can animate the Object variables using all parameters. In this case, the object that is currently in it (in this Object variable) will be animated.

![](https://4240499350-files.gitbook.io/~/files/v0/b/gitbook-x-prod.appspot.com/o/spaces%2F-Lt-sE9MYKe9pZOcHwg5%2Fuploads%2FIKqwxP7XZhKNIoOMcwcd%2F7.png?alt=media)

![](https://4240499350-files.gitbook.io/~/files/v0/b/gitbook-x-prod.appspot.com/o/spaces%2F-Lt-sE9MYKe9pZOcHwg5%2Fuploads%2F8E1VwFeS3cP5fYPNfpf5%2F8.png?alt=media)

The object type variable can contain any object and all parameters can be used to animate these objects (regardless of whether this parameter applies to this object or not).

![](https://4240499350-files.gitbook.io/~/files/v0/b/gitbook-x-prod.appspot.com/o/spaces%2F-Lt-sE9MYKe9pZOcHwg5%2Fuploads%2FhksJ01zV6xLsHEdtkJsj%2F9.png?alt=media)

Sometimes we do not even know which object is in the Object variable, we can still create tracks in the Timeline and change their value.

For example, for a Box and other Primitives, we can use parameters such as Rotation, Position, Materials, Physics, etc. However, we will not be able to animate Light Intensity and Light Color parameters, which relate to Light objects (light sources or lanterns).

Therefore, if you create animations with these parameters (Light Intensity and Light Color), and there is a Box in the Object variable, then the animation simply will not be played. But as soon as there is a Light object in the Object variable, the animation will start.

### How to use an Object variable for assets? <a href="#id-9pkg4thq5bb3" id="id-9pkg4thq5bb3"></a>

In your game, you can include imported assets that also use object variables. These variables can be configured for other objects where these assets were used. The object variable allows you to quickly switch the asset to use it (asset) by other objects in your Scene.

For example, let's take an asset like a weapon that was created by another user (not by you). The user who created the asset could configure it for the characters in his scene. Therefore, when you add this asset (weapon) to your scene, the weapon may not work in your game.

But you may switch the Object variable which this weapon is configured to and which is responsible for the weapon’s targets. As a result, you will quickly get a working external asset in your Scene.


# Tag

{% hint style="info" %}
The tool is in development
{% endhint %}

Variables of type Tag use tags in the value of the variable. At the moment it is possible to use a variable of this type only in trigger conditions of Collision type or for animation of a variable by this tag.


# Tags

A tag is a keyword that allows you to access some object that has this tag.

In MANU, you can assign a tag to almost all objects. Tags can be used as animation objects or objects in triggers. Because of this, you can access the parameters and variables of objects that have this tag.&#x20;

Thus, the tag allows you to select some common parameters even for dissimilar objects and animate them at the same time. This makes it easier to work with a large number of identical objects or objects with similar parameters.

## **Creating tags** <a href="#i612ihow8ngi" id="i612ihow8ngi"></a>

Let's look at a simple example. In the Scene, there are green and red buttons, as well as a Clock with a clock hand.

![](https://4240499350-files.gitbook.io/~/files/v0/b/gitbook-x-prod.appspot.com/o/spaces%2F-Lt-sE9MYKe9pZOcHwg5%2Fuploads%2Fmz3tA1VsCZFRnoRVfUUm%2F0?alt=media)

Let's say when the Main Character jumps on the green button, the clock hand will move clockwise; and when the Main Character jumps on the red button, then the clock hand will rotate counterclockwise. Normally, we would need to create an animation for each button. We would make 4 animations where the same clock hand would be used as the animation target.

In MANU, we can use Tags to manage multiple objects through just one animation.

### **Tag “green”** <a href="#gtjwzxdg6qy7" id="gtjwzxdg6qy7"></a>

Let's start with the green buttons.&#x20;

* Click on the green button.&#x20;
* Then go to the Inspector Panel on the right; find Tags with the input field there.
* To add a tag, click on the input field and start typing. For example, “green”.
* Press Enter and you have just created a Tag.

![](https://4240499350-files.gitbook.io/~/files/v0/b/gitbook-x-prod.appspot.com/o/spaces%2F-Lt-sE9MYKe9pZOcHwg5%2Fuploads%2FxMcbbnw0Rsvurj758YVd%2F1?alt=media)

![](https://4240499350-files.gitbook.io/~/files/v0/b/gitbook-x-prod.appspot.com/o/spaces%2F-Lt-sE9MYKe9pZOcHwg5%2Fuploads%2Ff4QFrvZh4hNfNgBWETxX%2F2?alt=media)

Now we pick the second green button.&#x20;

* Then we go to the Inspector Panel on the right and click on the tag input field.&#x20;
* After that we will see a dropdown list with created tags.&#x20;
* Since we have created only one “green” tag so far, we see only it in our list.&#x20;
* As we create new tags, we will have a bigger list of tags.&#x20;
* Next, we assign this tag “green” to the second green button.

![](https://4240499350-files.gitbook.io/~/files/v0/b/gitbook-x-prod.appspot.com/o/spaces%2F-Lt-sE9MYKe9pZOcHwg5%2Fuploads%2FFhqPTm339byMJKZTy40t%2F3?alt=media)

For convenience and visibility, we can mark tags with colors. Let's put our tag in green.

* Just hover over the created tag in the input field and by right-clicking open the context menu.&#x20;
* Then, choose a green color.&#x20;

Color marking is needed to distinguish tags from each other or to highlight more important tags.

![](https://4240499350-files.gitbook.io/~/files/v0/b/gitbook-x-prod.appspot.com/o/spaces%2F-Lt-sE9MYKe9pZOcHwg5%2Fuploads%2FIgxB8FfGwu6ZpAoxTsVo%2F4?alt=media)

#### Animation <a href="#fj2ndr7v3t1" id="fj2ndr7v3t1"></a>

Now we will create an animation that will move the clock hand clockwise. Let's call this animation - Animation Clockwise (Animation CW).

Open the Timeline Panel, add a clock hand (or Arrow) as animation target. Let it rotate 30 degrees in half a second.

![](https://4240499350-files.gitbook.io/~/files/v0/b/gitbook-x-prod.appspot.com/o/spaces%2F-Lt-sE9MYKe9pZOcHwg5%2Fuploads%2FjAttsB6M8lluQqmaBKBP%2F5?alt=media)

Next, go to the Trigger Panel and choose the following trigger: Collision->Continue. Let's choose the Main Character and the green tag as the objects of the collision.

&#x20;So, while the interaction of our Main Character with another object that has the “green” tag continues, then our animation will go on and the clock hand will be moving clockwise.

![](https://4240499350-files.gitbook.io/~/files/v0/b/gitbook-x-prod.appspot.com/o/spaces%2F-Lt-sE9MYKe9pZOcHwg5%2Fuploads%2FPnTDjgcOeibCKzZK8x1K%2F6?alt=media)

In fact, we can change any properties/parameters that are peculiar to the object. If they have some of their common properties that fall under this tag, then we can animate them.&#x20;

Objects can be of different types and animation can be any. However, if a certain parameter is missing for some objects united by one tag, then animation for these objects will not be performed, but only for those that have this parameter.

The green button can be copied and it will be duplicated along with the tag and the animation we created.

![](https://4240499350-files.gitbook.io/~/files/v0/b/gitbook-x-prod.appspot.com/o/spaces%2F-Lt-sE9MYKe9pZOcHwg5%2Fuploads%2FMddyHMvPiKPdwHWn1NpB%2F7?alt=media)

#### Game mode <a href="#ujddcae4nq8" id="ujddcae4nq8"></a>

Switch to the game mode. We see that as soon as our Main Character hops on the object with the tag “green”, the clock hand begins to rotate clockwise.

### **Tag “red”** <a href="#id-8ejfavgl23hj" id="id-8ejfavgl23hj"></a>

Let's now create a tag for the red button and call it “red”. For convenience, we will mark it in red.

![](https://4240499350-files.gitbook.io/~/files/v0/b/gitbook-x-prod.appspot.com/o/spaces%2F-Lt-sE9MYKe9pZOcHwg5%2Fuploads%2FIj4pnsP64UfGkkvMLySe%2F8?alt=media)

Next, we will assign the tag “red” to all red buttons. Let's create a new animation – Animation Counterclockwise (Animation CCW). In the Timeline Panel, we will select the appropriate animatable parameter for our clock hand (Arrow) to make it move counterclockwise.

![](https://4240499350-files.gitbook.io/~/files/v0/b/gitbook-x-prod.appspot.com/o/spaces%2F-Lt-sE9MYKe9pZOcHwg5%2Fuploads%2F1Pe1EplK0v0Bz3r3ytks%2F9?alt=media)

In the Trigger Panel, we will select the Collision Continue Trigger. We choose our Main Character and the red tag as the objects of the collision. This will mean that the Animation CCW created by us will continue while the Main Character interacts with an object that has the tag “red”. In our case, these are red buttons.

![](https://4240499350-files.gitbook.io/~/files/v0/b/gitbook-x-prod.appspot.com/o/spaces%2F-Lt-sE9MYKe9pZOcHwg5%2Fuploads%2FOdKdmsliisN9YluN73fv%2F10?alt=media)

#### Game mode <a href="#id-2pkhomejat8q" id="id-2pkhomejat8q"></a>

Let’s switch to the game mode. Now, when the Main Character jumps on the red buttons, the clock hand moves counterclockwise; and when it jumps on the green ones, the clock hand rotates clockwise.

&#x20;If we need more red and green buttons, then we should not create new animations for them. It's enough to assign the created tags to them. We can also create other objects and assign tags to them (“red” or “green”), the clock hand will react to them accordingly.

### **Tag as an animation target** <a href="#sssh2xu5otmn" id="sssh2xu5otmn"></a>

In MANU, you can animate all objects with one tag at the same time. To do this, just add a tag to the Timeline Panel, select Animatable Parameters and the desired trigger.

Thus, all objects with the same tag will be animated. So, the target of the animation will not be one object, but all objects that have this tag.

![](https://4240499350-files.gitbook.io/~/files/v0/b/gitbook-x-prod.appspot.com/o/spaces%2F-Lt-sE9MYKe9pZOcHwg5%2Fuploads%2FJIdOwp4Dp1jeM7FEAjcq%2F11?alt=media)

For example, let's add an animation where all objects with the tag “green” will move along the Y axis when the Main Character jumps on them.

&#x20;To do this, add the tag “green” to the Time Panel, select the Position Y parameter and set the needed values for it.

![](https://4240499350-files.gitbook.io/~/files/v0/b/gitbook-x-prod.appspot.com/o/spaces%2F-Lt-sE9MYKe9pZOcHwg5%2Fuploads%2FNfwADPtwX5WgifwfcPlA%2F12?alt=media)

In the Trigger Panel, choose the Collision Continue Trigger.

![](https://4240499350-files.gitbook.io/~/files/v0/b/gitbook-x-prod.appspot.com/o/spaces%2F-Lt-sE9MYKe9pZOcHwg5%2Fuploads%2FRdzDUYscBwoDswwqiDWE%2F13?alt=media)

In the game mode, you will see that when the Main Character jumps on the green button, all objects with the tag “green” will start moving up and down along the Y-axis.

![](https://4240499350-files.gitbook.io/~/files/v0/b/gitbook-x-prod.appspot.com/o/spaces%2F-Lt-sE9MYKe9pZOcHwg5%2Fuploads%2F667PqccTIhnVTvSdOahL%2F14?alt=media)

### **Rename tag** <a href="#owrvri96s0z5" id="owrvri96s0z5"></a>

If in the process of the game development you have a need to rename the tag, click on the object with the tag. Hover over the tag and double click on it. Then just rename the tag. For example, “green” to “supergreen”.

![](https://4240499350-files.gitbook.io/~/files/v0/b/gitbook-x-prod.appspot.com/o/spaces%2F-Lt-sE9MYKe9pZOcHwg5%2Fuploads%2FM1Ncvx1rKN6B23YxAgJW%2F15?alt=media)

***Note:*** A tag can't consist of two or more words; tags can have only one word. You can use letters and numbers in the tag name. Moreover, special characters cannot be used in the tag name, except for the underscore "\_" .&#x20;

Some examples of tag names: super\_green or 123.

![](https://4240499350-files.gitbook.io/~/files/v0/b/gitbook-x-prod.appspot.com/o/spaces%2F-Lt-sE9MYKe9pZOcHwg5%2Fuploads%2Fsm8LDC2ZKZ0IibH5sHLb%2F16?alt=media)

You can also rename the tag using the context menu that appears when you right-click on the tag in the Inspector Panel on the right. Just select Rename Tag from the suggested menu.

![](https://4240499350-files.gitbook.io/~/files/v0/b/gitbook-x-prod.appspot.com/o/spaces%2F-Lt-sE9MYKe9pZOcHwg5%2Fuploads%2F9zjhjy3Tsdg9OXb2xnNF%2F17?alt=media)

### **Removing a tag from an object** <a href="#tqeczlhh04oq" id="tqeczlhh04oq"></a>

To remove a tag from an object, click on the object. In the Inspector Panel on the right, hover over the tag. Next, (x) - a remove button will appear on the tag. Click on it and the tag will be removed from the object. The selected object no longer has this tag and created animations stop working for it. Also you can place field cursor after tag and press "Backspace" to delete tag.&#x20;

![](https://4240499350-files.gitbook.io/~/files/v0/b/gitbook-x-prod.appspot.com/o/spaces%2F-Lt-sE9MYKe9pZOcHwg5%2Fuploads%2F5gvubgSOEafcBfZumixx%2F18?alt=media)

### **Deleting a tag from a project** <a href="#id-4agksoh8pp8p" id="id-4agksoh8pp8p"></a>

To delete the tag completely from the project, click on any object that has this tag. Go to the Inspector Panel and right-click on the tag. Then select Delete Tag from the appeared context menu.

![](https://4240499350-files.gitbook.io/~/files/v0/b/gitbook-x-prod.appspot.com/o/spaces%2F-Lt-sE9MYKe9pZOcHwg5%2Fuploads%2FzdtS8zEISV8jjBhpINAH%2F19?alt=media)

When you select this option, you will receive a warning that this tag is used by some objects in the scene. The warning shows how many objects and animations depend on this tag. Therefore, the removal of the tag must be authorized.

![](https://4240499350-files.gitbook.io/~/files/v0/b/gitbook-x-prod.appspot.com/o/spaces%2F-Lt-sE9MYKe9pZOcHwg5%2Fuploads%2F85vd5T2uEWvhxr0CX2Fs%2F20?alt=media)

If you delete the tag, then all the animations linked with it will be “No object". In this case, you can delete the animation or make a Retarget on another object.

***Note:*** The action of removing a tag from a project is an irreversible step/process. You will not be able to return the tag back, only create it again.

## **Using Tags in the Scene Tree Hierarchies**

MANU allows you to create a hierarchy of folders in the Scene Tree and assign a tag to the entire folder. This will mean that the tag will be assigned to all objects located in the folder. By creating hierarchies, you can create only one tag that will control animations in the entire scene.

**Scene with light sources**

Let's look at the following scene. Suppose we have a Scene with a building and several light sources (lights in the building, including lights in two different rooms, and outdoor lights), which are controlled only by one tag “Lights”.

![](https://4240499350-files.gitbook.io/~/files/v0/b/gitbook-x-prod.appspot.com/o/spaces%2F-Lt-sE9MYKe9pZOcHwg5%2Fuploads%2FHbnr95sYnbMS4T9xYVJu%2F0?alt=media)

**Game mode**

Let’s see how it works in the game mode. In the Scene, we see 4 buttons in front of the building. The first button controls the light in the entire scene. This means that when the Main Character steps on it, all light sources in the Scene turn on, including outdoor and indoor lights.

![](https://4240499350-files.gitbook.io/~/files/v0/b/gitbook-x-prod.appspot.com/o/spaces%2F-Lt-sE9MYKe9pZOcHwg5%2Fuploads%2F4ozwYtjGl4D00Mylb1uh%2F1?alt=media)

The second button controls the light only outside the building. The streetlights will turn on as soon as the Main Character jumps on the second button.

![](https://4240499350-files.gitbook.io/~/files/v0/b/gitbook-x-prod.appspot.com/o/spaces%2F-Lt-sE9MYKe9pZOcHwg5%2Fuploads%2F1x98oJgdGVp3iytbWbFv%2F2?alt=media)

The third button turns on the light inside the building (in all rooms) when the Main Character and the third button collide.

![](https://4240499350-files.gitbook.io/~/files/v0/b/gitbook-x-prod.appspot.com/o/spaces%2F-Lt-sE9MYKe9pZOcHwg5%2Fuploads%2F0oS5Z2dxmZS4fhDD7ThD%2F3?alt=media)

The fourth button turns on the light in the first room and the fifth button turns on the light in the second room if the Main Character steps on them accordingly.

![](https://4240499350-files.gitbook.io/~/files/v0/b/gitbook-x-prod.appspot.com/o/spaces%2F-Lt-sE9MYKe9pZOcHwg5%2Fuploads%2FXzIHIO4OCcGcMpOpWcrq%2F4?alt=media)

![](https://4240499350-files.gitbook.io/~/files/v0/b/gitbook-x-prod.appspot.com/o/spaces%2F-Lt-sE9MYKe9pZOcHwg5%2Fuploads%2F8IcvVyeIPbICFbzsbyZv%2F5?alt=media)

The sixth button changes the light parameters throughout the scene while the Main Character is standing on this button

![](https://4240499350-files.gitbook.io/~/files/v0/b/gitbook-x-prod.appspot.com/o/spaces%2F-Lt-sE9MYKe9pZOcHwg5%2Fuploads%2FDFGkvZfBrqyNQyjNIxsi%2F6?alt=media)

**Tag “Lights” and hierarchy**

Now let's see how the lighting control is implemented in this scene.

In the Scene Tree, we create a hierarchy of folders that describes the structure of the building.

![image34.png](https://4240499350-files.gitbook.io/~/files/v0/b/gitbook-x-prod.appspot.com/o/spaces%2F-Lt-sE9MYKe9pZOcHwg5%2Fuploads%2FlwVfcGUaypIaDtmoUKiY%2F7?alt=media)

In order to control the lighting in the entire scene, we don't need to create different tags for each light source. We create only one tag “Lights”and assign it to all light sources in the Scene.

![image32.png](https://4240499350-files.gitbook.io/~/files/v0/b/gitbook-x-prod.appspot.com/o/spaces%2F-Lt-sE9MYKe9pZOcHwg5%2Fuploads%2FFBMQQDfRdDYXqXD2PkKB%2F8?alt=media)

![](https://4240499350-files.gitbook.io/~/files/v0/b/gitbook-x-prod.appspot.com/o/spaces%2F-Lt-sE9MYKe9pZOcHwg5%2Fuploads%2F6Au7aqnaW7jQIsFJR3vx%2F9?alt=media)

Therefore, a properly organized hierarchy in the Scene Tree and the tag “Lights” will help us in controlling the lighting in the scene.

**Animation for outdoor lights**

To create an animation for outdoor lights, click the Add Object button on the Timeline Panel and select an object from the pop-up list. In our case, we should choose the Outdoor folder. Next, we choose Tags from the menu (at the very bottom of the list) and the tag “Lights”.

![](https://4240499350-files.gitbook.io/~/files/v0/b/gitbook-x-prod.appspot.com/o/spaces%2F-Lt-sE9MYKe9pZOcHwg5%2Fuploads%2FspM3Kkw2iIoYz3Paf7no%2F10?alt=media)

Now the tag parameters inside the Outdoor folder are available for change. So, choose parameters and the trigger that are needed.

![](https://4240499350-files.gitbook.io/~/files/v0/b/gitbook-x-prod.appspot.com/o/spaces%2F-Lt-sE9MYKe9pZOcHwg5%2Fuploads%2FVh637ArnwasQSD1dlLJw%2F11?alt=media)

![](https://4240499350-files.gitbook.io/~/files/v0/b/gitbook-x-prod.appspot.com/o/spaces%2F-Lt-sE9MYKe9pZOcHwg5%2Fuploads%2FkUQxOTYvPHKdF4WRsBcy%2F12?alt=media)

And we are done! We have created animations for all objects in the Outdoor folder that have the tag “Lights”.

**Animation for other light sources in the Scene**

All animations in this Scene are created in the same way as for streetlights. The only thing is that each animation refers to its own object, or in our case a folder.

![](https://4240499350-files.gitbook.io/~/files/v0/b/gitbook-x-prod.appspot.com/o/spaces%2F-Lt-sE9MYKe9pZOcHwg5%2Fuploads%2Ful82KNOShs7rBCp3tbzd%2F13?alt=media)


# Lightmapping

Calculating lighting in a scene is one of the most time-consuming tasks of any engine. Often due to the use of a large number of lighting sources the performance of the game can drop significantly, which will naturally annoy players, even if your game is very interesting.

Lightmapping is a technology that on the one hand improves the performance of your game, and on the other hand gives you a high quality image that is close to what we see in the real world.

Lightmapping involves baking light sources into textures and then ignoring the calculation of these sources during the game. As an additional bonus you get a picture with realistic lighting, shadows and occlusion of the environment.

<figure><img src="https://lh3.googleusercontent.com/xJNHDHmeetkC7RTRJyeOQmDsDJ_NeR5XFZxMQ7E9tq65FQSn2sPtjb_qvf5EavU0EN2hNA3254BzPf0u6N6C83nT2tM0mseXFNkKNgykurVdMOJo7i_Tab8tkKgWiG_3V5VcHaUkeGYKeHrN53USQGI" alt=""><figcaption></figcaption></figure>

### General recommendations for using lightmapping

The process of baking lightmaps is a resource-intensive operation, both in terms of time and performance of your computer.

Therefore, it is advisable to make a decision about using lightmapping at the initial stage of development, it will help you to build your game scenes correctly and avoid wasting time and your efforts.

We advise you to bake light sources at the moment when gameplay and appearance of the game or a separate scene of the game will be fully completed, it will significantly reduce the development time.

For mobile development, try to avoid lightmapping altogether or use low quality settings.

### Preparation for baking

Before the lightmap baking process, you need to decide which objects will be baked and which will not. In the vast majority of cases, only static objects are suitable for baking. We do not recommend using dynamic or kinematic objects for lightmapping. Use the opportunity to bake dynamic and kinematic objects as experiments, perhaps the end result will satisfy you.

Do not use a large number of dynamic or mixed light sources.

When baking closed rooms, locations that are illuminated only by artificial light, turn off Sun in the environment objects, so you get the right result. Otherwise, the picture may be illuminated more than you designed it to be

Combine light sources and objects with materials with Emissive map, to achieve faster and better results, instead of using a large number of light sources.

<figure><img src="https://lh3.googleusercontent.com/MhgY2iopLLVMXtdRsP1q0CNn9piz66QTdMa3lYTcLJhu_xT4h8a_-BQyss72u2D4MnCZ50oSR9qPBA9-AlPNZpIcGo5at2B5xRJ06_ld8l-GoOVVN4dJfmBfFf6zQKNZrJdrV6kyFdskBrgLHplgpaE" alt=""><figcaption></figcaption></figure>

To mark an object as ready to be baked, in the Object Inspector under the Properties tab, in the Lightmapping section, turn on the Bake in Lightmaps toggle.

<figure><img src="https://lh6.googleusercontent.com/PdgQJ51xva-qKL7PoyaGn6FjSZixs3_air7b8B1nkfyiuwWDhkc_EYKMjTIL_QvuvawOk1ZGstwSHsDtYxXzSCTcg05LDfYADZeWf34SDhWSRIvx-q3so6dRHT6QznGJ6spq_xArfnKgTIuLXUZnv3A" alt=""><figcaption></figcaption></figure>

Light sources in the lightmapping section, in the Object Type setting have 3 options:

* Realtime - means that this light source will not be taken into count when baking lightmaps and will behave and be calculated like a normal light source. Dynamic objects will be illuminated by this source. Baked objects are not illuminated by this type of source.

<figure><img src="https://lh4.googleusercontent.com/IfEtL9j5AuKKqltEFla9fWxxnpf0c3PBEzVJ-DwZj6-FqA2Smmgd7nCsf7-oCeccdxMpCDfH3B0J0JRxiSnnfryMN13TiKLZ89f1djhS0-YCcj5L0W9_zxW7kNjRNqtpoEeCeWLN32znf8qsq0_6pjM" alt=""><figcaption></figcaption></figure>

* Baked - means that this light source will be taken into count when the lightmap is baked. This source will immediately stop affecting the scene as if it were turned off. Don't worry, after the lightmap is baked you will see the result of its effect on the scene. To see this source, change its type to Realtime or Mixed.

<figure><img src="https://lh3.googleusercontent.com/Jl-0dk9sRywKMnXqCz-bZ42za4epm7RotcyUavt4I-O1NeeAsvd8-35px9VBNzBMRKmNWzR3cIgESzya2rqNVKE8j5PnZAa1yGekmtKXwprHz82kIM83N7BLHJowHeza4Rk2rlAOBSbN8WZv9_0rYGc" alt=""><figcaption></figcaption></figure>

* Mixed - means that this light source will be taken into count when baking lightmaps, but will affect both dynamic and static objects without lightmaps. This light source will have no effect on baked objects. Use such a source in places where the appearance of dynamic objects (for example, the protagonist or NPC) is unavoidable.

<figure><img src="https://lh4.googleusercontent.com/WTkm3_IHH5bY5KQ4XJAu0DqEUBeG_yIwPZ1tMAyzXsrG9D8z5hHAOxOz1Z4A3w_0SEK5bDP-CiaBVV8Jrtdz_n-sXK92_v3aXkoIjgHVQJTfAPy90YPXqvaQH02IefVdeb9YgWGH8YvW2dl6JNJtmnY" alt=""><figcaption></figcaption></figure>

To select objects that will be baked with a certain quality, there is the Baking Volume tool. Before creating baking volumes, decide which objects require high baking quality, and which objects can be shown with lower quality.

As a rule, with high quality you can bake important details of the scene, the player's view and interaction with which will be relatively long. With lower quality you can bake the environment and large objects in the scene that the player will see from a distance or is unlikely to keep his eyes on them.

* To create a volume, select the Baking Volume tool in the main MANU toolbar and click on it.The volume will be created in the scene in the selected hierarchy.

<figure><img src="https://lh4.googleusercontent.com/63_sZXGoqAFVcYDUwgbHYuCLrU0RJogMSjcxTFxLTZ3K5EB7FSnoPN-JRnWDDCu49joLCk6meX1DvfMWBqJXlxpk_JZ7WTec82jIOCXGhq4eSx_2WSLBsSicKZHTyGlzFRG1WjpXlof4iV1ngQfmyOc" alt=""><figcaption></figcaption></figure>

* Drag the volume to the location of the objects you want to bake.<br>

  <figure><img src="https://lh3.googleusercontent.com/G3OkipG03tGarltORB4Gst7q_Zg_GrBbvqYsHerM8pKfJ5x-whxy6vTMmAvUa6V7BllHOOrZHPhbiFO7JJZJMqf2TkE8H9SHyAkg9EABYBO9UVNWy4M0OHzDYwP-fDu7d_LNUFJjlHOcfb0imSsgAvg" alt=""><figcaption></figcaption></figure>
* Enable the volume transformation gizmo (it is preferable to use this gizmo instead of the regular object transformation gizmo).
* Transform the gizmo so that the objects you are going to bake are completely inside it. Lightmaps of objects that are not inside the volume will not be baked completely.

<figure><img src="https://lh6.googleusercontent.com/wg_ZwbggjjsPuwO3DzVTTADa5f3E1D8MCk1C2o9QKuPhYgytJRY9VWqSdCWR_i77hLw26_NgEJRHY0zWxuMafqOa-QVkXKaiYg4cZM2-BRK-iLql_xQhiqscmtzrkh6n0ObL3j-3J47MMv0cCVJKp3Q" alt=""><figcaption></figcaption></figure>

* Repeat the action for other objects or locations creating other volumes.

### Recommendations for creating Baking volumes.

* Divide game locations into different volumes.
* Do not create large volumes with many objects inside. The process of baking large volumes is time-consuming, fixing one bug in a large volume will require rebaking the entire volume and doubles the time.

<figure><img src="https://lh4.googleusercontent.com/WAevSrwBV60EkuLuE_Kl8WeOinwJpRwbRmf1f5rJmAMEN4bAkTnr7AlrOBLwGYyzwY_40JvJ6rPUgFix4Zq82NllDDqURk8EiDG86mMca3Z8hLcr7Qpk7xkyAUaYqB2djhYzePJk8o_j6jvCr8MkOxo" alt=""><figcaption></figcaption></figure>

* Try not to overlap volumes partially, this can lead to lightmap conflicts and needlessly increase the game's resources.

<figure><img src="https://lh6.googleusercontent.com/ZHEpxooJHJBSlP3BzojcLve--X1hIDQaiicvZ5Nu92ANn1ndDQpDmIUKqMdl6a19O7HJCd8uzeDjDL5SbfwmyXWaT5UscTjc-AOty_xwTRiX_pFXUwHW-QzWtR6F2kFdnC7CkxIxMNIxOlYjKwqAepU" alt=""><figcaption></figcaption></figure>

* If one volume includes another volume completely, set Exclude other volumes at the larger volume so that the larger volume does not overbake the results of the smaller volume.

<figure><img src="https://4240499350-files.gitbook.io/~/files/v0/b/gitbook-x-prod.appspot.com/o/spaces%2F-Lt-sE9MYKe9pZOcHwg5%2Fuploads%2FAmDsnZqW4Z809hN3sjkZ%2FGroup%2014.png?alt=media&amp;token=65abdac9-3ba6-42ce-9fd8-5edbe95b5707" alt=""><figcaption></figcaption></figure>

* Follow the bake sequence, bake the smaller volumes first, which the larger volumes include. Then, remembering to set Exclude other volumes to the larger volumes, bake the larger volumes.

<figure><img src="https://lh6.googleusercontent.com/dS9E2lWF76fjgqvnuoL2T5AEIQJNbXvJ3p_WKzKjxoS10XHBZLnmWU8HjAOCKVDtH_W4I9TSXPfaSKnnitHxM406Uc_8cReFnVgHhw8uqEVMFMCTX0lroygRlYwmz1O_ChCvCDJf41jZOJivK0Jnoo0" alt=""><figcaption></figcaption></figure>

### Quality settings for the baking volume

The volume quality settings are set individually for each volume. Editing the quality settings will also affect only that volume.

By default there are 4 quality settings in MANU:

* Low - intended for checking how the scene, object or several objects will look like after using lightmapping technology. In some cases you can use this quality for large objects or locations that the player is unlikely to visit. And also for low-lighted locations.

![](https://lh6.googleusercontent.com/FHtqwHYaBY1v0-6ArRVFvjv6SjuyyUtTuWzLwTZXNYazvgTKehsasjbqoX68hEdIv4gm7-snOsDaf9HmDsZUajbshOojS9UQ4Ta8hIPNll6DA8YGmQXW-Eu30X6WThrPkKY0z2StirC_0rc5dbg8HBs)

* Medium - intended for baking more parts of scenes and objects. Use this quality to bake environments, medium and large objects, rooms and buildings.

![](https://lh6.googleusercontent.com/bvsuxPcpXIcxGTxphP7jNkOVoWENztJJ_MdshttKVv2xfoCm9sZ0Mosw0KHF6t6oQJ7HwdtC50YncUzpx-AZS0i8GFYYlN6imq6PUdV0W8eaW4RJ5wAKuMYeAnV88jZCryd9ABEg7QJoEPBoK43N-MY)

* High - designed to bake objects, locations and rooms that the player will have continuous and interaction with. Objects and locations that you want to focus the player's attention on and show their beauty.

![](https://lh3.googleusercontent.com/f37pnPuF8MQkFMLc1iRHw52J5N3suUi3KsK5evr8vd6UnJqqrIbfqY9w69p6KRBNZ2cAEG3hemswWnoTUz0sPtsbimBWTs-cxGjFENj9GFZvFWyxM-Pi-THLWfEWcOlSMX4rxam11dgisJllEbw-AaU)

* Ultra - we recommend using this quality for the same objects that you would set the quality High, but you want to impress players with good hardware. Keep in mind that the time to bake in this quality increases significantly, as well as consumed computer resources. And greatly affects the performance of the game.

![](https://lh6.googleusercontent.com/XcZ9APLbX9RgNkh2aEBuCCGD1tLSWxrbFDhBoUSlO0-62KZ3czxeDOEtk7KYDfzFcaesXfpHNU5gAByNyRKS8VQZ19f_xWaD24YmbcqkQWa5zauARmAI4fjVBYHndjV7KGkP5IFySFX5FUeDVeElz1c)

You can customize any quality setting to your needs by clicking on the Settings icon in the corner of any setting. The changed settings will be applied only for the selected quality and volume.

![](https://lh6.googleusercontent.com/UkG32D2nJ7MQG3z15Hodb6Cd5uAV6jXlNLaXUMe5c25Gp62jBUVvPVMpb8SiyVRXYfMi8rorAkcRNL5eF4-c5rmrhO3OxYf_gS1Oso0wEubDLwQdyo2RbYswYJw3hXPjTic2RAI3InxZrcQyo7z--P8)

We do not recommend baking all objects with High quality, because it can greatly affect performance and the amount of disk resources used.

We also do not recommend beginners to customize the baking quality. Adjust only if you understand the purpose of the settings, their impact on the quality of the final result, the time spent to achieve it and the resources it may affect.

<figure><img src="https://lh5.googleusercontent.com/EDV2CRCBwPRsGgs2MimrEAc09CKth-cyGgahxOhJA_t9UQc0_-HCCgQATUGYz-RG0Ub_aTvcIuTe2MQ_i7C5swgkqpIS6A5qV6RrxzPwgo2olvY5NILSoaVGkH6Qhq3uwxEChelFXtktxCpml6Hf8UM" alt=""><figcaption></figcaption></figure>

The following settings have a serious impact on quality, time and resources.&#x20;

* Bounces - the number of reflections of the tracing ray. Higher value - better quality, longer baking time.&#x20;
* Samples - number of samples for one trace beam. Higher value - better quality, longer baking time.&#x20;
* Texels per unit - number of texels (texture pixels) per one unit of game space. Higher value - better texture quality, more resources on disk. Use a value of degree 2 for this parameter .&#x20;
* Resolution - resolution of the lightmap map.Higher value - better texture quality, more resources on disk. Use a degree 2 value for this parameter.

### Baking process and result

Once you have defined the settings you can click on the Bake Volume button and the baking process will start.

<figure><img src="https://lh4.googleusercontent.com/jO1FG4SjnP23gWUhyrEu9AR_MCB5mICIJKBamnorXbVi1RGAlvTySZnthW5ukq7QH2leRf1PPXY6_E4n1PYtezCss3bRjAONSvReXCUXG-k9PRNOjpukhaQLpqYhuCx60FlXuAIt307EqyJWaVPsTUY" alt=""><figcaption></figcaption></figure>

Depending on the quantity and complexity of the geometry of the objects to be baked, as well as the quality of baking, the baking process will take different lengths of time. Experiment and you will find the optimal ratio of quality to time.

You can cancel baking at any time by clicking the "Cancel" button in the modal progress window.

![](https://lh4.googleusercontent.com/1YGfpfBgKCtUCh4nsH095qKX6CFPygxWdsfXJSw7517Kqctb73EbrpljIJKBjgil5vlrD-ZbKypT7Hh0SlwAM1HSsRdIXQ8T4MgaMXy0_cplzPaZR8GMnYqdJEfj7z1goV9WD9CQaHcQVNmAeZ5Tj3M)

After volume baking is finished, you will immediately see the result in the scene, the baked textures will be applied to the objects included in the volume.

If some objects have not changed, check if you have set the "Bake in lightmaps" setting and if they are in the selected volume.

If some of the objects seem darker than before baking, check whether the light sources are Baked or Mixed.

If you do not like the baking results, you can reset them using the Reset Baking button.

![](https://lh3.googleusercontent.com/IVjo9LaoNEoYZ2SVyFqCzZPks77Y7PqYBZMARgroWR7fv3DljJDunUKAInTo26Jjq6j2fvbeRZZnP352EUAxv7kVrFucTDs-MPq8bCK25kOP06TBv2BG_Kno_UQw6X8TmiVZc1iyWdHgervyScGFIf8)


# Paint Group

MANU offers Paint Group as a unique and very convenient tool that allows you to quickly create game objects of large structure. This tool is based on the mechanism of Geometry Instancing, which is used to create objects of the same type (equal mesh data). Its technological meaning is that we create one object that has its own sub objects with their own transformation matrix. This matrix is implemented on one large object. Geometry Instancing helps to visualize multiple copies of a single mesh object in the Scene at once. This mechanism is used most often to create objects of repeated geometry, such as grass, trees, buildings, etc.

Using the Paint Group tool, you may draw many objects at once with a single render call, saving CPU resources.

Paint Group allows you to place objects in the Scene as you like, as well as build dependencies for these objects. Paint Group will help you to do it more interactively and quickly. With this tool, it is like being a painter: you are drawing, applying brushstrokes like an artist. Only instead of a canvas, you have a game scene, and instead of a brush, you use the object you need.

Application examples: Paint Group comes in handy when you need to create objects that should appear repeatedly in a Scene, for example, trees in the forest, clouds in the sky. This can be done quickly by simply right-clicking on the Scene.

### How to create a Paint Group? <a href="#id-85esot5kwhip" id="id-85esot5kwhip"></a>

You can create a Paint Group by clicking on the “brush” button in the Toolbar. After that, the new object - Paint Group - will appear in the Scene Tree.

<div align="left"><figure><img src="https://4240499350-files.gitbook.io/~/files/v0/b/gitbook-x-prod.appspot.com/o/spaces%2F-Lt-sE9MYKe9pZOcHwg5%2Fuploads%2FhYzi0lsxQY9IgDjNrMBo%2F0.png?alt=media" alt=""><figcaption></figcaption></figure></div>

![](https://4240499350-files.gitbook.io/~/files/v0/b/gitbook-x-prod.appspot.com/o/spaces%2F-Lt-sE9MYKe9pZOcHwg5%2Fuploads%2FuHtENO5oLSui9KvmJIt0%2F1.png?alt=media)

Paint Group is like a container in which we can add objects, which should be rendered within the Paint Group. Next, we will clone these objects within this Paint Group.

The objects placed in the Paint Group and which we are going to multiply in the Scene will be called **Samples.** You can add the same objects to the Brush Samples. For example, if you want them to be the same shape, but different colors.

New objects that appear in the Scene as a result of using the Paint Group tool will be called **Instances**. And the process of creating instances is called **Instantiation.** Only objects with geometry can be instantiated.

When we create an instance, we sort of re-produce this object within our Paint Group. Technologically, this is different from creating a copy, visually not. An important difference between instances and ordinary objects in MANU is that the created instances do not appear in the Scene Tree. We do not have access to them as to ordinary objects in the Scene.

### How do I put an object in the Paint Group?/How to add samples to the Paint Group? <a href="#v2jvcs9q97eb" id="v2jvcs9q97eb"></a>

There are 2 ways to put objects in the Paint Group, by using the Scene Tree or the Paint Group Panel.

### In the Scene Tree: <a href="#i5g96c6q2jjq" id="i5g96c6q2jjq"></a>

* Go to the Scene Tree and create the Paint Group and objects you need;
* Then, simply drag the objects in the Scene Tree to the already created Paint Group;
* To drag objects, hold down the right mouse button and drag the object to the Paint Group;
* The objects will acquire the brush icon, which means that they have become a sample of this Paint Group and can be instantiated.

![](https://4240499350-files.gitbook.io/~/files/v0/b/gitbook-x-prod.appspot.com/o/spaces%2F-Lt-sE9MYKe9pZOcHwg5%2Fuploads%2FggU4rD3nO59IoZqvgmih%2F2.png?alt=media)

### In the Paint Group Inspector: <a href="#id-7gy9gpfpa0nt" id="id-7gy9gpfpa0nt"></a>

* Click on the Paint Group in the Scene Tree, and the Paint Group Inspector will appear in the upper right corner of the screen;
* You will see (+) next to the Brush Samples section. This is the option to add the objects you need to the Paint Group;

![](https://4240499350-files.gitbook.io/~/files/v0/b/gitbook-x-prod.appspot.com/o/spaces%2F-Lt-sE9MYKe9pZOcHwg5%2Fuploads%2FLSBizLg65S9wBvVeOX18%2F3.png?alt=media)

* After clicking on (+), a drop-down list will appear with objects that can be placed in our Paint Group (a list of objects that can be instantiated);

![](https://4240499350-files.gitbook.io/~/files/v0/b/gitbook-x-prod.appspot.com/o/spaces%2F-Lt-sE9MYKe9pZOcHwg5%2Fuploads%2Fp6K6u68ns1CAoKIH5YiI%2F4.png?alt=media)

* Next, we select the objects we need to instantiate, for example, the Tree 1;
* Now, it has become a brush sampler of the Paint Group;
* Next, we just click on the Scene and place the instances where we need them.

All created instances will be saved in this Paint Group. When you delete the Paint Group, all created instances will be deleted along with it, since it is considered as one object.

As we can see in the screenshot: we created several instances of the trees, but their representation did not appear in the Scene Tree:

![](https://4240499350-files.gitbook.io/~/files/v0/b/gitbook-x-prod.appspot.com/o/spaces%2F-Lt-sE9MYKe9pZOcHwg5%2Fuploads%2FewJodoCAdHbZ4ST1M5hF%2F5.png?alt=media)

### How to manage brush samples in a Paint Group? <a href="#id-5crv6vd07fi" id="id-5crv6vd07fi"></a>

### Changing the sequence <a href="#q5cian7picyc" id="q5cian7picyc"></a>

In the Brush Sample section, objects (samples) are arranged in a certain sequence with which they will be instantiated in the Scene. This sequence can be changed. You can simply adjust it in the Brush Samples section. Select the object you need, right-click it and drag it up or down.

### Duplicate & Delete <a href="#z7du8gadwjhk" id="z7du8gadwjhk"></a>

To increase the frequency of occurrence of a certain object in the Scene, you may need an object duplication function. Or vice versa, you will need to delete some objects in the Paint Group. If you need to delete or duplicate the brush sample, just:

* Hover over the sample you need;
* You will see 2 icons “duplicate” and “delete” to the right of the sample;
* Click on the icon you need. And the sample will be deleted or duplicated according to the choice you made.

![](https://4240499350-files.gitbook.io/~/files/v0/b/gitbook-x-prod.appspot.com/o/spaces%2F-Lt-sE9MYKe9pZOcHwg5%2Fuploads%2FIHjcEGplZvU7Nu9pf0Xj%2F6.png?alt=media)

It is important to remember that when you delete an object from the Brush Samples section, it will be removed from the Paint Group . If this object is not in the Paint Group, it also cannot be in the Scene.

### Applying materials to samples <a href="#id-6e3mbf52vzp0" id="id-6e3mbf52vzp0"></a>

If you change the material for a sample, it will be applied to all already created instances and will be applied to newly created instances in the future.

To do it, choose the object/sample you need in the Scene Tree, go to the Material Panel and choose the material. The selected material will be immediately applied to all relevant instances in the Scene.

![](https://4240499350-files.gitbook.io/~/files/v0/b/gitbook-x-prod.appspot.com/o/spaces%2F-Lt-sE9MYKe9pZOcHwg5%2Fuploads%2FTo7Dw97gpojbwlbaCOrT%2F7.png?alt=media)

![](https://4240499350-files.gitbook.io/~/files/v0/b/gitbook-x-prod.appspot.com/o/spaces%2F-Lt-sE9MYKe9pZOcHwg5%2Fuploads%2FBvGncvoyTS6i6BkqKMFF%2F8.png?alt=media)

### Paint options in the Paint Group Inspector <a href="#blovw3csika7" id="blovw3csika7"></a>

Let's now look at the paint options presented in the Paint Group Inspector. The Paint Group tool offers 3 modes for rendering instances: Looped order, Random order and Manual.

![](https://4240499350-files.gitbook.io/~/files/v0/b/gitbook-x-prod.appspot.com/o/spaces%2F-Lt-sE9MYKe9pZOcHwg5%2Fuploads%2FrZQHr9doYag4DZBjYy0k%2F9.png?alt=media)

### Looped order mode <a href="#dd5edoaknc0t" id="dd5edoaknc0t"></a>

Looped order is used when you need objects in the Scene to be placed according to a certain cyclic order. Instances will be put according to the sequence that formed in the Brush Samples section. The sequence will be looped. You can change this sequence by dragging samples in the Brush Samples section.

![](https://4240499350-files.gitbook.io/~/files/v0/b/gitbook-x-prod.appspot.com/o/spaces%2F-Lt-sE9MYKe9pZOcHwg5%2Fuploads%2F744HzDBJMTel8uMD6g04%2F10.png?alt=media)

### Random order mode <a href="#fm62trwmro8u" id="fm62trwmro8u"></a>

If you choose the Random order mode, the objects will be drawn in random order in the Scene. Objects from the Brush Samples section will be selected randomly. This mode is convenient when you, for example, create a forest and you need the trees to grow in a random sequence. In this case, it is better to entrust the formation of randomness to the computer.

![](https://4240499350-files.gitbook.io/~/files/v0/b/gitbook-x-prod.appspot.com/o/spaces%2F-Lt-sE9MYKe9pZOcHwg5%2Fuploads%2F4O1PinNtDAyYvbKG05Lj%2F11.png?alt=media)

![](https://4240499350-files.gitbook.io/~/files/v0/b/gitbook-x-prod.appspot.com/o/spaces%2F-Lt-sE9MYKe9pZOcHwg5%2Fuploads%2FlGe2d9Qxigy4DV2kkhPW%2F12.png?alt=media)

### Manual mode <a href="#uwbsc4j0lecm" id="uwbsc4j0lecm"></a>

Sometimes you will need a Manual Instance Setting Mode. In this mode, the selected sample will be instantiated all the time. If you want to change the sample, you need to choose the new one in the Brush Samples section.

![](https://4240499350-files.gitbook.io/~/files/v0/b/gitbook-x-prod.appspot.com/o/spaces%2F-Lt-sE9MYKe9pZOcHwg5%2Fuploads%2FHJoMD3mNVXShVxQ91APm%2F13.png?alt=media)

![](https://4240499350-files.gitbook.io/~/files/v0/b/gitbook-x-prod.appspot.com/o/spaces%2F-Lt-sE9MYKe9pZOcHwg5%2Fuploads%2FZlNw1vZ03Qx87igle3yp%2F14.png?alt=media)

### Brush modes <a href="#jvl30ss3blu" id="jvl30ss3blu"></a>

Next, let's move on to the brush modes (or modes of your right mouse button). There are 3 brush modes: Single sample, Matrix sample, Erase samples.

![](https://4240499350-files.gitbook.io/~/files/v0/b/gitbook-x-prod.appspot.com/o/spaces%2F-Lt-sE9MYKe9pZOcHwg5%2Fuploads%2FkCkkIhmm45oF96SE78FH%2F15.png?alt=media)

### Erase samples mode <a href="#ftthqtofwdgq" id="ftthqtofwdgq"></a>

First, let's look at the Erase samples mode. There are 2 of them in the Paint Group Inspector: Circle erase and Spherical erase. Using them, you may delete instances in the Scene, but other objects (not instances) will not be affected.

![](https://4240499350-files.gitbook.io/~/files/v0/b/gitbook-x-prod.appspot.com/o/spaces%2F-Lt-sE9MYKe9pZOcHwg5%2Fuploads%2FHq7UhcJd8L0bEIDzdSiO%2F16.png?alt=media)

#### Circle erase <a href="#mqni4w4wen6f" id="mqni4w4wen6f"></a>

When the Circle erase mode is selected, a Circle will appear on the screen. Holding down the right mouse button, you can drive across the screen with the mouse. All objects that fall within the circle radius will be marked in red and will be removed when you release the right mouse button.

![](https://4240499350-files.gitbook.io/~/files/v0/b/gitbook-x-prod.appspot.com/o/spaces%2F-Lt-sE9MYKe9pZOcHwg5%2Fuploads%2FLcWrVJyRRxhd6gQVcr0L%2F17.png?alt=media)

#### Spherical erase <a href="#a29kb38vmg66" id="a29kb38vmg66"></a>

Spherical erase is a mode for deleting objects in the Scene by volume. In this mode, a Sphere appears in the Scene. Click the right mouse button and drag the Sphere over the surface of the Scene. By doing this, you will mark in red the objects that need to be deleted. When you release the left mouse button, all marked objects will be deleted/erased.

![](https://4240499350-files.gitbook.io/~/files/v0/b/gitbook-x-prod.appspot.com/o/spaces%2F-Lt-sE9MYKe9pZOcHwg5%2Fuploads%2FKsuEjQSCfnUZxXOzJgvH%2F18.png?alt=media)

#### Erase radius <a href="#rpljerjw31jd" id="rpljerjw31jd"></a>

The radius size of the Sphere and Circle can be adjusted using the "Erase radius" option. For Circle erase, the radius is set in screen pixels, and for Spherical erase - in scene units.

The large radius will help to remove objects faster and from a larger area. A small radius will help to remove objects pointwise.

### Single sample brush mode <a href="#cm5dxgu4jfu" id="cm5dxgu4jfu"></a>

In the single sample brush mode, after each mouse click, one instance will appear in the Scene. This mode has its own settings for the object instantiation: Randomize sequence, Randomize rotation, Randomize scale, Surface offset.

![](https://4240499350-files.gitbook.io/~/files/v0/b/gitbook-x-prod.appspot.com/o/spaces%2F-Lt-sE9MYKe9pZOcHwg5%2Fuploads%2FehEsZjTtCq8GeZzEFmok%2F19.png?alt=media)

You can configure these settings manually, or generate them automatically within the parameters set by you. There is a Randomize sequence option for this.

#### Randomize sequence <a href="#bkysyielriej" id="bkysyielriej"></a>

It is important to remember that the New sequence takes into account all the parameters that are presented for randomization.

If we need to generate a new sequence of instances, we can enable the Generate setting. After you click the “**Generate**” button, a new instance will be generated within the settings we have selected. It is randomly generated.

![](https://4240499350-files.gitbook.io/~/files/v0/b/gitbook-x-prod.appspot.com/o/spaces%2F-Lt-sE9MYKe9pZOcHwg5%2Fuploads%2F9Tei4VvV3WvRwYBVLhsp%2F20.png?alt=media)

You can select the “**Auto Generate next**” setting in order not to constantly regenerate new instances. In this case, a new angle/position/size will be auto-generated each time for each subsequent instance. So, all instances will have a different slope or size within the parameters we have already set.

<figure><img src="https://4240499350-files.gitbook.io/~/files/v0/b/gitbook-x-prod.appspot.com/o/spaces%2F-Lt-sE9MYKe9pZOcHwg5%2Fuploads%2FgiNDjOWs0MkzIZYa7Fqe%2Fimage.png?alt=media&amp;token=d9cd650a-7e2c-4bc4-b25e-88cb37bfd9d4" alt=""><figcaption></figcaption></figure>

To enable the “Auto Generate next” setting, simply drag the slider to the right (from gray to green).

![](https://4240499350-files.gitbook.io/~/files/v0/b/gitbook-x-prod.appspot.com/o/spaces%2F-Lt-sE9MYKe9pZOcHwg5%2Fuploads%2F8fdDrb9dT3NxtSgO8EDR%2Fimage.png?alt=media\&token=69a46d28-fbfc-40f6-9e25-97df7ff5ff4f)

#### Randomize rotation <a href="#ngifitcqo3lr" id="ngifitcqo3lr"></a>

If you twist Randomize rotation settings, you can change the position of the object relative to the X, Y, Z axes. And then the instances will be drawn according to the selected settings.

If the “Auto-generate next” option is enabled, each next instance will have a different angle of rotation.

<figure><img src="https://4240499350-files.gitbook.io/~/files/v0/b/gitbook-x-prod.appspot.com/o/spaces%2F-Lt-sE9MYKe9pZOcHwg5%2Fuploads%2FgVKx2jWoctGzg4DZas5g%2Fimage.png?alt=media&amp;token=b0350317-41df-4e3e-b6cb-d949fe86c7c7" alt=""><figcaption></figcaption></figure>

#### Randomize scale <a href="#mxkl54yog10y" id="mxkl54yog10y"></a>

Randomize Scale allows you to set the scaling parameters for the instances that you will draw. Randomize Scale is combined across all 3 axes. Using this parameter, you can adjust the size of the object as a percentage of the sample size. For example, we will determine that the size of our instances should be at least 72% of the sample size, and no more than 150% of the sample size.

![](https://4240499350-files.gitbook.io/~/files/v0/b/gitbook-x-prod.appspot.com/o/spaces%2F-Lt-sE9MYKe9pZOcHwg5%2Fuploads%2FsSismjw1sxahvpVXkAOG%2Fimage.png?alt=media\&token=b02f714e-4f0f-419a-9cfb-6f0fb23dbb13)

<figure><img src="https://4240499350-files.gitbook.io/~/files/v0/b/gitbook-x-prod.appspot.com/o/spaces%2F-Lt-sE9MYKe9pZOcHwg5%2Fuploads%2FB68mLEqavoOSKAmKNzKQ%2Fimage.png?alt=media&amp;token=43e22791-272f-48d3-8fcd-64bc2913b258" alt=""><figcaption></figcaption></figure>

If you need to change the size of the instances only along one axis (X, Y or Z) or to do it differently along different axes, you may use the Unlock Axis option.

![](https://4240499350-files.gitbook.io/~/files/v0/b/gitbook-x-prod.appspot.com/o/spaces%2F-Lt-sE9MYKe9pZOcHwg5%2Fuploads%2F5R166zqZteVXNIeFqimR%2Fimage.png?alt=media\&token=7d288290-87c0-472a-9435-f9bfeab96711)

To enable this option, click on the icon, which is next to the Randomize scale section. After that the new parameters will appear. They allow you to set different values for different axes.

![](https://4240499350-files.gitbook.io/~/files/v0/b/gitbook-x-prod.appspot.com/o/spaces%2F-Lt-sE9MYKe9pZOcHwg5%2Fuploads%2Fznliy9BNadB9g0JN2y0f%2Fimage.png?alt=media\&token=6ee8082f-3a08-4aa0-b7ee-c6ed08e8b356)

<figure><img src="https://4240499350-files.gitbook.io/~/files/v0/b/gitbook-x-prod.appspot.com/o/spaces%2F-Lt-sE9MYKe9pZOcHwg5%2Fuploads%2FHGM2jZqvpfjJqWkhxz8E%2Fimage.png?alt=media&amp;token=71e3bf20-b5c3-4ff0-a035-a10d307a55e6" alt=""><figcaption></figcaption></figure>

#### Surface offset <a href="#y1e9npkd443g" id="y1e9npkd443g"></a>

With the Surface offset setting, you can adjust the offset of the instance from the surface on which it is placed. This setting is necessary if you need to raise or lower the instance relative to its original location.

![](https://4240499350-files.gitbook.io/~/files/v0/b/gitbook-x-prod.appspot.com/o/spaces%2F-Lt-sE9MYKe9pZOcHwg5%2Fuploads%2FQoyyf40GPIfhZeMfC13y%2Fimage.png?alt=media\&token=915c6495-0c8e-4a6f-b58e-c4dad3f045f9)

<figure><img src="https://4240499350-files.gitbook.io/~/files/v0/b/gitbook-x-prod.appspot.com/o/spaces%2F-Lt-sE9MYKe9pZOcHwg5%2Fuploads%2Fuu4TeYJ5WubYaaZIekAh%2Fimage.png?alt=media&amp;token=e46d278d-2e64-405d-8ab9-47b9c31d2dcb" alt=""><figcaption></figcaption></figure>

#### Align to normal <a href="#id-4vz1e153nawj" id="id-4vz1e153nawj"></a>

All objects that can be instantiated in MANU are in the mode of sticking to the surface on which they are placed. The angle of inclination of the object will always depend on the surface that will be under this instance and where its normal will be directed.

![](https://4240499350-files.gitbook.io/~/files/v0/b/gitbook-x-prod.appspot.com/o/spaces%2F-Lt-sE9MYKe9pZOcHwg5%2Fuploads%2F0q27zvYABCOwEnsst7Ph%2Fimage.png?alt=media\&token=5fc08343-1ef1-4e66-a7ea-e2ee724d9909)

<figure><img src="https://4240499350-files.gitbook.io/~/files/v0/b/gitbook-x-prod.appspot.com/o/spaces%2F-Lt-sE9MYKe9pZOcHwg5%2Fuploads%2Fxo35E9yAgJWnFRnspcWQ%2Fimage.png?alt=media&amp;token=28803b03-3b84-4cd0-b56f-6d4dd6145318" alt=""><figcaption></figcaption></figure>

The normal vector is a vector that shows the direction of the perpendicular of the planes of triangles and quadrilaterals (that is, the polygons that make up 3D objects in game development).

Instances take into account those meshes that are under them: those meshes that are not included in the Paint Group.

In MANU, the Align to normal option is enabled by default.This means that objects are instantiated considering the direction of their normal. They will be placed perpendicular to the surface on which they will be put.

![](https://4240499350-files.gitbook.io/~/files/v0/b/gitbook-x-prod.appspot.com/o/spaces%2F-Lt-sE9MYKe9pZOcHwg5%2Fuploads%2FjgkFHh860wRcjga2YBfd%2Fimage.png?alt=media\&token=98c60954-8974-493c-bde0-a79cf8e27637)

<figure><img src="https://4240499350-files.gitbook.io/~/files/v0/b/gitbook-x-prod.appspot.com/o/spaces%2F-Lt-sE9MYKe9pZOcHwg5%2Fuploads%2FYuIP666QYds0UqEMeUel%2Fimage.png?alt=media&amp;token=d2fe170f-dd05-4ed1-a8f2-c0ed029e78eb" alt=""><figcaption></figcaption></figure>

If we disable this option, then all instances will be instantiated in the direction of the Y-axis. So, they will ignore the shape of the object (mesh) on which they will be put and will also ignore the sticking mod&#x65;**.**

### Matrix sample brush mode <a href="#w4t2jmz2gsb5" id="w4t2jmz2gsb5"></a>

In the Matrix sample brush mode, you can create a matrix of objects and then instantiate it in the Scene in large arrays. Here, the Matrix is a certain array of objects of a certain dimension. After placing the matrix of objects in the Scene, you may edit it pointwise.

You can customize the matrix yourself by selecting a specific sequence of objects. To do it, use the **Matrix** section and its settings. If you need to create a random matrix where objects are placed randomly switch to the **Randomize** section after configuring the matrix.

#### Matrix <a href="#gswnyooghwzb" id="gswnyooghwzb"></a>

Let's first look at the settings in the Matrix section. Here, you select the number of objects in your matrix, and also adjust their location in the matrix relative to the original location of objects in the Scene.

![](https://4240499350-files.gitbook.io/~/files/v0/b/gitbook-x-prod.appspot.com/o/spaces%2F-Lt-sE9MYKe9pZOcHwg5%2Fuploads%2FQe1XNohpY8NISJTVzHAg%2Fimage.png?alt=media\&token=421456fa-05a2-4171-86b9-5d708bd6d38a)

In MANU, by default, the instantiation matrix is an array of size 3x1x3. This means that 3 objects are located on the X-axis, 1 object is on Y, and 3 objects are on Z. This is a standard matrix. It can be changed and customized, here, in the Matrix section.

<figure><img src="https://4240499350-files.gitbook.io/~/files/v0/b/gitbook-x-prod.appspot.com/o/spaces%2F-Lt-sE9MYKe9pZOcHwg5%2Fuploads%2FMt2cidOgxXltBZVhPBxd%2Fimage.png?alt=media&amp;token=94dbf980-848f-4da7-9a8f-1890e0562fde" alt=""><figcaption></figcaption></figure>

You can set the number of objects you need along the X, Y, Z axes. To do it, use Count by X, Count by Y, Count by Z options in the Matrix distribution section. Simply, move the sliders to increase or decrease the number of objects along the axes.

![](https://4240499350-files.gitbook.io/~/files/v0/b/gitbook-x-prod.appspot.com/o/spaces%2F-Lt-sE9MYKe9pZOcHwg5%2Fuploads%2Fvkrrnrh7NztUNiAgaZ1v%2Fimage.png?alt=media\&token=b801ab07-3994-4fe7-9d96-37a84c45d616)

In addition, you can move objects in the matrix relative to their original location in the Scene. For this purpose, use the settings "X Offset", "Y Offset" and "Z Offset".

![](https://4240499350-files.gitbook.io/~/files/v0/b/gitbook-x-prod.appspot.com/o/spaces%2F-Lt-sE9MYKe9pZOcHwg5%2Fuploads%2FsxrZQ6uZlRebXOeRx2Sc%2Fimage.png?alt=media\&token=5427c9d3-fc54-4dad-bd94-fb589a40acc7)

This is how the matrix of 100 trees looks, where 10 trees are located on the X-axis, 1 is on the Y-axis, and 10 are on the Z-axis.

<figure><img src="https://4240499350-files.gitbook.io/~/files/v0/b/gitbook-x-prod.appspot.com/o/spaces%2F-Lt-sE9MYKe9pZOcHwg5%2Fuploads%2FP0QKfXiHqqt5jt3mDZ7T%2Fimage.png?alt=media&amp;token=21609527-6e6b-44f9-ba20-bcd5bdeee6c8" alt=""><figcaption></figcaption></figure>

#### Randomize <a href="#twes3koopipb" id="twes3koopipb"></a>

Let's now switch to the Randomize section and add randomness to our matrix. Let's make our matrix uneven. This way we will achieve a natural effect, for example, if we want to draw a forest.

![](https://4240499350-files.gitbook.io/~/files/v0/b/gitbook-x-prod.appspot.com/o/spaces%2F-Lt-sE9MYKe9pZOcHwg5%2Fuploads%2FY90flRLgAhimWfq8pCxt%2Fimage.png?alt=media\&token=49b251e0-7e03-411d-a0a8-681db5230e8d)

**Randomize position**

With these settings, you can change the distance between objects in the matrix along the X, Y, Z axes. Using these settings, you can place objects in the matrix closer or further from each other.

![](https://4240499350-files.gitbook.io/~/files/v0/b/gitbook-x-prod.appspot.com/o/spaces%2F-Lt-sE9MYKe9pZOcHwg5%2Fuploads%2Fyn4y8AKMbRPfFwYv5UhK%2Fimage.png?alt=media\&token=2f1ec80b-ad49-4a10-9150-f13c303534d7)

<figure><img src="https://4240499350-files.gitbook.io/~/files/v0/b/gitbook-x-prod.appspot.com/o/spaces%2F-Lt-sE9MYKe9pZOcHwg5%2Fuploads%2FvymdVNenSnbFvRusVFhr%2Fimage.png?alt=media&amp;token=65d0eb95-1bbb-4fa8-b53d-841e1dd1255b" alt=""><figcaption></figcaption></figure>

**Random sequence**

In the Randomize section, you can also set the sequence of drawing the matrix (instances of the matrix): Generate or Auto generate next. When the “Generate” button is pressed, a new matrix will be generated taking into account the set values of the randomization parameters. When the “Auto generate next” option is enabled, a new matrix will be automatically generated after each instantiation.

**Randomize rotation**

You can also set the Randomize rotation settings for objects in the matrix. All objects will have a different angle of rotation relative to the selected coordinate axes.

You can set the values by turning the sliders. Or you can write the values manually. To do it, just click on the field inside of the slider and type the value you need.

![](https://4240499350-files.gitbook.io/~/files/v0/b/gitbook-x-prod.appspot.com/o/spaces%2F-Lt-sE9MYKe9pZOcHwg5%2Fuploads%2FSFOCpGfl70rZwGvvi97G%2Fimage.png?alt=media\&token=d28e624b-4281-4838-bcb8-54cabff1aa75)

<figure><img src="https://4240499350-files.gitbook.io/~/files/v0/b/gitbook-x-prod.appspot.com/o/spaces%2F-Lt-sE9MYKe9pZOcHwg5%2Fuploads%2FBm3LqTU3B9YtvPOwBvpt%2Fimage.png?alt=media&amp;token=74b340fa-0653-4ef0-b81f-04ec21bc633a" alt=""><figcaption></figcaption></figure>

These values will be used for both directions of rotation. For example, if we specify 15 degrees, then the object can rotate both by +15 degrees and by -15 degrees (i.e. the range will double for each specified degree).

![](https://4240499350-files.gitbook.io/~/files/v0/b/gitbook-x-prod.appspot.com/o/spaces%2F-Lt-sE9MYKe9pZOcHwg5%2Fuploads%2FKBUYdDJrNVIUFw1AvkOo%2Fimage.png?alt=media\&token=7901dc1c-a843-4fbe-b0ca-6b4a4ad297bf)

**Randomize scale**

We can also randomize the scale of objects in the matrix. The objects will change size equally in all three axes relative to the samples’ sizes.

![](https://4240499350-files.gitbook.io/~/files/v0/b/gitbook-x-prod.appspot.com/o/spaces%2F-Lt-sE9MYKe9pZOcHwg5%2Fuploads%2FlcCWvV2GzLK5ejyuf7UD%2Fimage.png?alt=media\&token=a2d6eb60-b35d-45fc-9d84-6d2ad8e07b4d)

This parameter can be unlocked. Click on the Unlock Axes icon, which is located to the right of the Randomize Scale section, and new options will appear. Using them, you can randomize the size of objects along the X, Y, Z axes in different ways.

![](https://4240499350-files.gitbook.io/~/files/v0/b/gitbook-x-prod.appspot.com/o/spaces%2F-Lt-sE9MYKe9pZOcHwg5%2Fuploads%2FueTmymS7UL4ZRJZ1Hf9T%2Fimage.png?alt=media\&token=cf90c4cf-045e-44d3-843a-f1ed72820991)

![](https://4240499350-files.gitbook.io/~/files/v0/b/gitbook-x-prod.appspot.com/o/spaces%2F-Lt-sE9MYKe9pZOcHwg5%2Fuploads%2FXbIq2bzhtjpYggFxpO3A%2Fimage.png?alt=media\&token=f1aa62c4-2b64-4f8f-8725-4d6d5cf7cfd8)

Now, just by clicking, fill the space in the Scene with the matrix you created.

<figure><img src="https://4240499350-files.gitbook.io/~/files/v0/b/gitbook-x-prod.appspot.com/o/spaces%2F-Lt-sE9MYKe9pZOcHwg5%2Fuploads%2F08TRERhcKTl2lAT8DQib%2Fimage.png?alt=media&amp;token=f134fe15-ca3f-4247-b44f-bfa118750af2" alt=""><figcaption></figcaption></figure>

In a few seconds you managed to place a huge number of objects in the Scene. All this was rendered as one big object. This is the main advantage of the Paint Group tool. With this tool, you can create many objects of the same type without reducing the performance of the game.

### Instantiation of Animation <a href="#id-80jgdzfh82z7" id="id-80jgdzfh82z7"></a>

You can animate instances of the Paint group. To do it:

* Create an animation of a 3D object and make the object a child of this animation.
* Next, make this animation a sample of the Paint Group and instantiate it.

In the Game mode, you will see that all these instances are animated as you specified in the animation.

<figure><img src="https://4240499350-files.gitbook.io/~/files/v0/b/gitbook-x-prod.appspot.com/o/spaces%2F-Lt-sE9MYKe9pZOcHwg5%2Fuploads%2FkaGPw4Ud5G68ivIl1cf9%2Fimage.png?alt=media&amp;token=6fc1de32-3b82-4a16-8509-eb5bcd0865eb" alt=""><figcaption></figcaption></figure>

<figure><img src="https://4240499350-files.gitbook.io/~/files/v0/b/gitbook-x-prod.appspot.com/o/spaces%2F-Lt-sE9MYKe9pZOcHwg5%2Fuploads%2F3tYA0zH0eZ7QZdW8ZvUM%2Fimage.png?alt=media&amp;token=d55ab6e4-37ca-418b-b4d9-d7d9f28659df" alt=""><figcaption></figcaption></figure>

<figure><img src="https://4240499350-files.gitbook.io/~/files/v0/b/gitbook-x-prod.appspot.com/o/spaces%2F-Lt-sE9MYKe9pZOcHwg5%2Fuploads%2FSlRtclDOK4dRnQwSj2lF%2Fimage.png?alt=media&amp;token=a96d2624-6f90-4c8c-988e-5c389aba3f53" alt=""><figcaption></figcaption></figure>

You can also animate objects using a State Machine. To do it:

* Make a 3D object a child of a State Machine.
* Describe the animations of this object using the states of this State Machine. Note: animations can be outside the State Machine hierarchy.
* Next, make a sample from this State Machine and instantiate it in the Paint Group.

In the Game mode, you will see that all instances are animated according to the current state of the State Machine.

<figure><img src="https://4240499350-files.gitbook.io/~/files/v0/b/gitbook-x-prod.appspot.com/o/spaces%2F-Lt-sE9MYKe9pZOcHwg5%2Fuploads%2FSLRh1tv9Sudaa9IRDgv3%2Fimage.png?alt=media&amp;token=0a4d3e75-5b87-4e1b-8b05-d8f15014f9e9" alt=""><figcaption></figcaption></figure>

<figure><img src="https://4240499350-files.gitbook.io/~/files/v0/b/gitbook-x-prod.appspot.com/o/spaces%2F-Lt-sE9MYKe9pZOcHwg5%2Fuploads%2F97WvPPW4KgyCOpb1umHE%2Fimage.png?alt=media&amp;token=3691a260-7d8e-4852-a989-54337a832f21" alt=""><figcaption></figcaption></figure>

Thus, by combining different modes of instantiating and deleting instances, you will be able to create large and object-rich scenes with great speed. You will be able to detail them much faster than if you just use copying objects. At the same time, you will not consume computer resources significantly.


# Export Game & Assets

There always comes a point in development when you want to show your game to other people and probably make money from the result of your work. Then you will have to deliver your game to other users. They don't have to download MANU at all to appreciate the result of your work, for that you can simply export the game to different platforms.

MANU gives you the ability to export to:

* Disk as Windows and macOS desktop applications
* MANU Marketplace
* Mobile apps for iOS and Android (coming soon)&#x20;

You can even develop community of MANU developers and share your Assets with the world. (This option will soon be able to generate revenue for you).

The list of available platforms for export is constantly expanding, stay tuned for our news.


# Export Games to MANU Marketplace

Let's say you have created a cool game, and now you want to share it with friends or colleagues. In MANU, this can be done in two ways:

1\)    You can export the game to an external disk or USB stick and transfer it to your friend. He will launch MANU, open your game and play it.

2\)    The second option is to use a special platform: MANU Marketplace (follow the link to [manu.org](https://manu.org/)). MANU has its own platform on the marketplace, and also has functionality for using this platform.

The main function of the MANU Marketplace is to present your games (created in MANU) and play other users' games. Here, users can also share experiences, comments or just have fun and play games.

To export your game or assets to the MANU Marketplace, you need to sign in to your User profile on the MANU Marketplace website: [Manu.org](https://manu.org/).

## How to access MANU Marketplace?/How to create a User profile on the MANU Marketplace? <a href="#fob1kfnnpkxk" id="fob1kfnnpkxk"></a>

If you are on the MANU Marketplace website (<https://manu.org/>):

●      You can sign in by clicking the “Sign in” button that is located in the upper right corner of the screen.

<figure><img src="https://4240499350-files.gitbook.io/~/files/v0/b/gitbook-x-prod.appspot.com/o/spaces%2F-Lt-sE9MYKe9pZOcHwg5%2Fuploads%2FHpkHpBlDXWhtu4vYdfEp%2Fimage.png?alt=media&amp;token=2257a80b-f0b3-4edb-89c8-7c9c4dfe3eb7" alt=""><figcaption></figcaption></figure>

●      Use your Google or Facebook account to proceed with registration.

<figure><img src="https://4240499350-files.gitbook.io/~/files/v0/b/gitbook-x-prod.appspot.com/o/spaces%2F-Lt-sE9MYKe9pZOcHwg5%2Fuploads%2Fu5ZmKscpay7ZtO2UN4UM%2Fimage.png?alt=media&amp;token=bc8b34ba-6bd0-45ad-b347-c236c667517d" alt=""><figcaption></figcaption></figure>

●      During the registration you will be asked to review and agree to the terms and conditions for the use of the MANU Marketplace website.

<figure><img src="https://4240499350-files.gitbook.io/~/files/v0/b/gitbook-x-prod.appspot.com/o/spaces%2F-Lt-sE9MYKe9pZOcHwg5%2Fuploads%2FLuIhO2iiRlY26NdajCu6%2Fimage.png?alt=media&amp;token=c8a1165d-79ac-4310-a1a5-a04ee4dfaa1a" alt=""><figcaption></figcaption></figure>

●      After you click on the *<mark style="color:blue;">**“Agree”**</mark>* button, you will create your own  Profile on the MANU Marketplace.

To manage your User profile, click on the User Profile icon that is located in the upper right corner of the screen.

## How to export games to the MANU Marketplace?

First, you have to make sure that your game is finished and ready to be exported. After that, in MANU:

●      Go to the Main Menu (located in the upper left corner of the screen) and click on it.

●      Next, click on *<mark style="color:blue;">**File>Export to Game Store**</mark>*.

<figure><img src="https://4240499350-files.gitbook.io/~/files/v0/b/gitbook-x-prod.appspot.com/o/spaces%2F-Lt-sE9MYKe9pZOcHwg5%2Fuploads%2FeE7eeorWyECFSwnzRWE7%2Fimage.png?alt=media&amp;token=7712c3a9-20d2-47a5-9f17-cbbe299c0817" alt=""><figcaption></figcaption></figure>

●      You will be asked to save your game before exporting, if some game changes have not been saved prior to this moment.

<figure><img src="https://4240499350-files.gitbook.io/~/files/v0/b/gitbook-x-prod.appspot.com/o/spaces%2F-Lt-sE9MYKe9pZOcHwg5%2Fuploads%2FWvBVxhSHeHQrC0USfczt%2Fimage.png?alt=media&amp;token=eef78ba6-44fd-4b56-a22b-b73ed73766a3" alt=""><figcaption></figcaption></figure>

●      Next, a pop-up window will appear telling you what you need to do to export the game to the MANU Marketplace. This pop-up window will also contain an input field for entering code.

<figure><img src="https://4240499350-files.gitbook.io/~/files/v0/b/gitbook-x-prod.appspot.com/o/spaces%2F-Lt-sE9MYKe9pZOcHwg5%2Fuploads%2F4tlu32B3HiOlm1grEydy%2Fimage.png?alt=media&amp;token=f9cbea4d-9614-45fb-924f-1020c28c4ffc" alt=""><figcaption></figcaption></figure>

Let's act according to the instructions from this pop-up window and open the MANU Marketplace website:

●      Create your profile in MANU Marketplace if it has not been created before (to know how to do it, please read above).

●      Click on the User Profile icon which is located in the upper right corner of the screen.

●      Then, choose Games from the drop-down list.

<figure><img src="https://4240499350-files.gitbook.io/~/files/v0/b/gitbook-x-prod.appspot.com/o/spaces%2F-Lt-sE9MYKe9pZOcHwg5%2Fuploads%2Fb4XEVqzK1ffS30ZGKOmH%2Fimage.png?alt=media&amp;token=2812cc46-fa8b-4c9e-bd07-c03af4586814" alt=""><figcaption></figcaption></figure>

●      After that, you will be given an option to Create a new game. Click on it.

<figure><img src="https://4240499350-files.gitbook.io/~/files/v0/b/gitbook-x-prod.appspot.com/o/spaces%2F-Lt-sE9MYKe9pZOcHwg5%2Fuploads%2FEOFfdNET0lF6nEWokUiX%2Fimage.png?alt=media&amp;token=108ea795-3545-4434-8cf4-09bb44eedfba" alt=""><figcaption></figcaption></figure>

●      Now the profile page of your game has opened up. Fill out the Game profile, so that users can learn more about your game:

\-        Give the game the proper name. The name must be unique and contain no special characters.

\-        Add categories that the game may belong to. You can choose a maximum of five categories.

\-        Add a description to your game, so that users can understand what your game is about.

\-        Add game banners, pictures and videos of the game.

<figure><img src="https://4240499350-files.gitbook.io/~/files/v0/b/gitbook-x-prod.appspot.com/o/spaces%2F-Lt-sE9MYKe9pZOcHwg5%2Fuploads%2F03DWj488zupWb6GtEJ1N%2Fimage.png?alt=media&amp;token=a4b89154-f195-428f-b975-9c2e7dc195db" alt=""><figcaption></figcaption></figure>

●      Going down a bit, on the right you will see information about how much free disk space is left. Note: each user is provided with 1 GB of space for free.

Above this information you will see a reminder about how to export a game to the Manu Marketplace (MANU→ File →Export to Game Store).

Below on the right, you will see a field with the generated code. You can generate a new code or copy it using the corresponding icons to the right of the code.

Note: for each export, you need to generate a new code. A unique code will be required both for uploading a completely new game, and for a new version of a game which is already available on the MANU Marketplace.

<figure><img src="https://4240499350-files.gitbook.io/~/files/v0/b/gitbook-x-prod.appspot.com/o/spaces%2F-Lt-sE9MYKe9pZOcHwg5%2Fuploads%2FFWaHniSOrtM2IpHUBQTh%2Fimage.png?alt=media&amp;token=083f6628-3555-4b28-908c-36c6bf9c3b6e" alt="" width="321"><figcaption></figcaption></figure>

After you copy the code, go to MANU:

●      Paste this code into the *<mark style="color:blue;">**"Enter code”**</mark>* field in the pop-up window.

●      Next, click on the *<mark style="color:blue;">**Export Game**</mark>* button. After that, the process of exporting the game to the MANU Marketplace will begin.

<figure><img src="https://4240499350-files.gitbook.io/~/files/v0/b/gitbook-x-prod.appspot.com/o/spaces%2F-Lt-sE9MYKe9pZOcHwg5%2Fuploads%2FSiOWTUaZ6LHwSgFahHWc%2Fimage.png?alt=media&amp;token=cdb2ecf3-33cd-4b75-a1ae-5dac5c1ea2b9" alt=""><figcaption></figcaption></figure>

●      In case of successful export of your game to the MANU Marketplace, a pop-up window will appear telling about the successful completion of the  process.

<figure><img src="https://4240499350-files.gitbook.io/~/files/v0/b/gitbook-x-prod.appspot.com/o/spaces%2F-Lt-sE9MYKe9pZOcHwg5%2Fuploads%2Fv03R8kb1dwaYW0GDLVps%2Fimage.png?alt=media&amp;token=854f03fe-25bd-4535-92dd-ec9d1dc44724" alt=""><figcaption></figcaption></figure>

●      Next, press the Close button in that pop-up window  and go to the Game Profile on the  MANU Marketplace.

<figure><img src="https://4240499350-files.gitbook.io/~/files/v0/b/gitbook-x-prod.appspot.com/o/spaces%2F-Lt-sE9MYKe9pZOcHwg5%2Fuploads%2FSPOVnRJIPqfWygRPYKSC%2Fimage.png?alt=media&amp;token=e934e884-84fe-4788-991e-69db3387869e" alt=""><figcaption></figcaption></figure>

●      Refresh the page on the MANU Marketplace website and you will see that your game has already been uploaded to this website. The game is ready to be  launched. But the game has not been published yet, only you can see it.

![](https://4240499350-files.gitbook.io/~/files/v0/b/gitbook-x-prod.appspot.com/o/spaces%2F-Lt-sE9MYKe9pZOcHwg5%2Fuploads%2FaXEpZ7CQcrhCL2CgsAIZ%2Fimage.png?alt=media\&token=ca3e9ed3-01b2-4b27-b1e9-e12aa5e71624)

### How to publish the uploaded game on the MANU Marketplace?

When the game is uploaded to the MANU Marketplace, it is in unpublished state. Therefore, it is not yet available to other users. In order to publish the game on the MANU Marketplace and make it available to other users:

●      Go to the Game profile on the MANU Marketplace.

●      Then, next to the word *<mark style="color:blue;">**“Published”**</mark>* you will see a white slider. Move it to the right (from white to green).&#x20;

<figure><img src="https://4240499350-files.gitbook.io/~/files/v0/b/gitbook-x-prod.appspot.com/o/spaces%2F-Lt-sE9MYKe9pZOcHwg5%2Fuploads%2FGTdP2RHlaFE22npKbx57%2Fimage.png?alt=media&amp;token=cf796485-6bb6-4c19-b379-d7d7cf28f010" alt=""><figcaption></figcaption></figure>

![](https://4240499350-files.gitbook.io/~/files/v0/b/gitbook-x-prod.appspot.com/o/spaces%2F-Lt-sE9MYKe9pZOcHwg5%2Fuploads%2F70ZpL74Jvp8fauGO7ma3%2Fimage.png?alt=media\&token=c31802fe-5783-4b21-b332-e195020924fd)

&#x20;

●      Now your game has appeared on the MANU Marketplace  website.

●      You can easily share a link to download your game with your friends. Copy the link using the hyperlink icon (located to the right of the word *<mark style="color:blue;">**“Published”**</mark>*) and send it.

Now try to search for your game on the MANU Marketplace website. The easiest way to find the game is to look in the categories which it falls under. These are the categories that you have chosen for your game at the stage of filling out the game profile.

Note: you can keep your game unpublished for your own use. In this case, the Published slider should be moved to the left.

![](https://4240499350-files.gitbook.io/~/files/v0/b/gitbook-x-prod.appspot.com/o/spaces%2F-Lt-sE9MYKe9pZOcHwg5%2Fuploads%2FwDKSKFeXjgETx835FeGa%2Fimage.png?alt=media\&token=79834fb2-1a2c-43ae-991b-b1ed9c151b91)

### How to launch the uploaded game on the MANU Marketplace?

After exporting the game to the MANU Marketplace, you can launch it, play it and test it. For these purposes, you will need the MANU Launcher. Launcher is a separate program. It is a game player on the marketplace. You and other users can use this player to play your game. So, install MANU Launcher first to play games if you have not downloaded it yet:

●      Сlick on the *<mark style="color:blue;">**Launch**</mark>* button.

●      Then, you will be asked if you need to download the Launcher.

●      After giving  permission, a page will open with the option to download the Launcher for Windows and for MacOS.

<figure><img src="https://4240499350-files.gitbook.io/~/files/v0/b/gitbook-x-prod.appspot.com/o/spaces%2F-Lt-sE9MYKe9pZOcHwg5%2Fuploads%2FXOMpmFRg8YKCaC3rvkAI%2Fimage.png?alt=media&amp;token=79fc71a9-c499-4bdb-ae61-78a907e9111a" alt=""><figcaption></figcaption></figure>

If you already have the MANU Launcher installed, then:

●      Click on the *<mark style="color:blue;">**Launch**</mark>* button, and it  will take you to the game download page.

●      You will be asked if you want to allow this page to open the app “MANU Launcher.app”.

●      After you give your permission, the game will start loading in the MANU Launcher.

When the download is finished, you will be able to play the game and check if everything is ok (if everything is as it should be).

&#x20;

<figure><img src="https://4240499350-files.gitbook.io/~/files/v0/b/gitbook-x-prod.appspot.com/o/spaces%2F-Lt-sE9MYKe9pZOcHwg5%2Fuploads%2FX4edZGK0vYyQJwOR7has%2Fimage.png?alt=media&amp;token=dfc9bd7d-1e82-458e-9d15-007889b227c4" alt=""><figcaption></figcaption></figure>

&#x20;


# Export Assets to Marketplace

Along with the Games section, there is an Assets section on the MANU Marketplace. In this section, users can exchange assets. Assets are like “building blocks” for creating games. Assets can be objects, as well as objects combined into a group or a set of some objects (for example, to create mountains or a set of tools). All these objects (assets) can already be animated and ready to work. So, they can immediately work as a game object in the Scene (for example, bots or skeletons).

## How to export assets to MANU Marketplace? <a href="#a856ef871cxl" id="a856ef871cxl"></a>

Before exporting, make sure that your Asset is ready, completed and grouped as needed.

Note: only Prefabs can be exported to the MANU Marketplace.

To make your object a prefab:

●        In the Scene Tree, hover over the object you need and right-click.

●        Next, select the Create prefab option from the drop-down list.

<figure><img src="https://4240499350-files.gitbook.io/~/files/v0/b/gitbook-x-prod.appspot.com/o/spaces%2F-Lt-sE9MYKe9pZOcHwg5%2Fuploads%2FHT7njd40ifKpUgCiAqlx%2Fimage.png?alt=media&amp;token=d9d0e6ac-d975-4017-b91d-957e1304d462" alt=""><figcaption></figcaption></figure>

If the icon of your object in the Scene Tree turns blue, then your object has become a prefab and is ready to be exported  to the MANU Marketplace.

<figure><img src="https://4240499350-files.gitbook.io/~/files/v0/b/gitbook-x-prod.appspot.com/o/spaces%2F-Lt-sE9MYKe9pZOcHwg5%2Fuploads%2FYWKXIYggZVkZ1IWb9olU%2Fimage.png?alt=media&amp;token=130dd10e-d44a-47cf-a082-129356759fae" alt=""><figcaption></figcaption></figure>

When the Object has become a Prefab, it will appear in the Asset Browser. You can check this by going to the Asset Browser, which is located on the Left Panel (in the upper left corner of the screen). All created prefabs will be placed in the Asset Browser.

To proceed with exporting assets to the MANU Marketplace:

●        Open the Asset Browser in MANU.

●        Select the asset (object) that you want to export.

●        At the top of the Asset Browser window, you will see the “Export to Manu Marketplace" button. Click on it.

<figure><img src="https://4240499350-files.gitbook.io/~/files/v0/b/gitbook-x-prod.appspot.com/o/spaces%2F-Lt-sE9MYKe9pZOcHwg5%2Fuploads%2F6V6Dz05MbCxVr0TLU2KD%2Fimage.png?alt=media&amp;token=97b943ed-e059-48e2-92db-0e065bf3d1e9" alt=""><figcaption></figcaption></figure>

●        Next, a window with instructions will appear explaining what you need to do to export the asset to the MANU Marketplace.

<figure><img src="https://4240499350-files.gitbook.io/~/files/v0/b/gitbook-x-prod.appspot.com/o/spaces%2F-Lt-sE9MYKe9pZOcHwg5%2Fuploads%2FT3vrgCz0IQ970gwnrjoK%2Fimage.png?alt=media&amp;token=6bb45e7d-d5bc-49b9-ab12-40a24011b13a" alt=""><figcaption></figcaption></figure>

Let's now go to the MANU Marketplace website:

●        Sign in to your profile and go to the Assets section.

<figure><img src="https://4240499350-files.gitbook.io/~/files/v0/b/gitbook-x-prod.appspot.com/o/spaces%2F-Lt-sE9MYKe9pZOcHwg5%2Fuploads%2FRKI9w8XtgaTnCrkmHHsW%2Fimage.png?alt=media&amp;token=07137d42-86e1-4423-965f-2f986d53cc79" alt=""><figcaption></figcaption></figure>

●        Next, a window will open with the “Create new asset” option, click on it.

<figure><img src="https://4240499350-files.gitbook.io/~/files/v0/b/gitbook-x-prod.appspot.com/o/spaces%2F-Lt-sE9MYKe9pZOcHwg5%2Fuploads%2F4INLrmY8WTExeKwkF9Zz%2Fimage.png?alt=media&amp;token=7787432b-5795-4908-8e53-193ff3037e8e" alt=""><figcaption></figcaption></figure>

●        You will be taken to the profile page of a new asset. The new Asset profile is empty.  Fill it in (indicating name, categories, description) and add asset banners and pictures.

<figure><img src="https://4240499350-files.gitbook.io/~/files/v0/b/gitbook-x-prod.appspot.com/o/spaces%2F-Lt-sE9MYKe9pZOcHwg5%2Fuploads%2FsuTCDtVbJQr31AF8df6m%2Fimage.png?alt=media&amp;token=d13f3236-360f-42ea-95a7-8dacad7b79ce" alt=""><figcaption></figcaption></figure>

●        In the lower right corner, you will see the code that you need to copy.

After receiving the code, we go back to MANU:

●        Paste the code into the “Enter code” field in the pop-up window.

●        Click on the Export Asset  button in the pop-up window, and the asset will start exporting to the MANU Marketplace.

●        After the successful completion of the Asset export to the MANU Marketplace, press the Close button.

<figure><img src="https://4240499350-files.gitbook.io/~/files/v0/b/gitbook-x-prod.appspot.com/o/spaces%2F-Lt-sE9MYKe9pZOcHwg5%2Fuploads%2FHdwkHSpDy2L44el6YM3g%2Fimage.png?alt=media&amp;token=0ed8d7b1-e7b0-42a8-83bf-34c8fc3ef66a" alt=""><figcaption></figcaption></figure>

Next, we go back to the Asset profile on the MANU Marketplace. Here, we can publish it, so that it is available to all users or keep it for our use only.

<figure><img src="https://4240499350-files.gitbook.io/~/files/v0/b/gitbook-x-prod.appspot.com/o/spaces%2F-Lt-sE9MYKe9pZOcHwg5%2Fuploads%2FKvAx0DQ3eLOqruc5lDBx%2Fimage.png?alt=media&amp;token=fcd34cf3-e36c-4798-91b4-e7d0b7533c89" alt=""><figcaption></figcaption></figure>

![](https://4240499350-files.gitbook.io/~/files/v0/b/gitbook-x-prod.appspot.com/o/spaces%2F-Lt-sE9MYKe9pZOcHwg5%2Fuploads%2FSd8avg0nRe5q7Gv7cmNo%2Fimage.png?alt=media\&token=73af150f-2e6b-46e4-8d38-ce7b145bda17)

![](https://4240499350-files.gitbook.io/~/files/v0/b/gitbook-x-prod.appspot.com/o/spaces%2F-Lt-sE9MYKe9pZOcHwg5%2Fuploads%2FgWR2WTkGSbIsPG6bVClR%2Fimage.png?alt=media\&token=f1f901eb-d068-4f23-ada4-bf33169e7bda)

### Downloading and importing assets <a href="#id-25a184h1hdo4" id="id-25a184h1hdo4"></a>

After  you make your asset published, it will appear in the Assets section of the MANU Marketplace (in the categories to which you have assigned it). This asset can be downloaded by clicking on the Download button. Asset will be downloaded as a regular zip file.

<figure><img src="https://4240499350-files.gitbook.io/~/files/v0/b/gitbook-x-prod.appspot.com/o/spaces%2F-Lt-sE9MYKe9pZOcHwg5%2Fuploads%2FiWNtcUCrJNC02CtVdKxO%2Fimage.png?alt=media&amp;token=3331680b-bb93-46bb-af43-676b2866891a" alt=""><figcaption></figcaption></figure>

To import assets to MANU:

●        You need to go to the MANU Asset browser.

●        At the top of the Asset Browser window, there is an Import button. Click on it and  the standard file selection dialog  will open.

●        Select the downloaded asset and it will appear in the Asset browser.

<figure><img src="https://4240499350-files.gitbook.io/~/files/v0/b/gitbook-x-prod.appspot.com/o/spaces%2F-Lt-sE9MYKe9pZOcHwg5%2Fuploads%2FkCl8zZhZYJXTbwmKo84C%2Fimage.png?alt=media&amp;token=df210427-a582-4176-bef0-f3e47d5f9056" alt=""><figcaption></figcaption></figure>

●        After that, you may use the new asset in your game.


# Export Game on Mobile devices


# Export Game on disk

MANU allows you to export your game into a standalone desktop application for both Windows and MacOS. This article describes the steps to complete it.

{% tabs %}
{% tab title="Windows" %}
The guidelines below explain the game export on Windows.

1\. Go to the `Main Menu` > `File` > `Export`.

![](https://dl.dropboxusercontent.com/s/toh5bsdy8rrwtb5/001.png?dl=0)

2\. In the prompt pop-up window, put your Project Name, select the Location and the Platform for export, then click the Export button. If the location for your export is set to the Documents folder, it will create a new subfolder called either Windows or macOS. You will find the exported game in either of these subfolders.&#x20;

![](https://dl.dropboxusercontent.com/s/s83f6sx5tkdw3jv/002.png?dl=0)

3\. When the export is completed successfully, you will see the Success window.

![](https://dl.dropboxusercontent.com/s/b2plscw4y9i9oc9/003.png?dl=0)

4\. To run the game as a standalone application, go to the folder on Windows where you exported your game. In our example, the Project Name was “Game Title”. Click on this folder, find an *launcher.exe* file and double click on it. That should start the game in a windowed mode. On Windows, click `ALT+Enter` to run the exported game in a Full Screen mode. To return this action, hit `ALT+Enter` again.

![](https://dl.dropboxusercontent.com/s/5wr3wxklb8g9bkf/005.png?dl=0)
{% endtab %}

{% tab title="MacOS" %}
The guidelines below explain the game export on MacOS.

1\. Go to the `Main Menu` > `File` > `Export`

![](https://dl.dropboxusercontent.com/s/toh5bsdy8rrwtb5/001.png?dl=0)

2\. In the prompt pop-up window, put your Project Name, select the Location and the Platform for export, then click the Export button. You can export your game to publish it on both platforms. On MacOS, look for the file called *GameTitle.app*

![](https://dl.dropboxusercontent.com/s/s83f6sx5tkdw3jv/002.png?dl=0)

3\. When the export is completed successfully, you will see the Success window.

![](https://dl.dropboxusercontent.com/s/b2plscw4y9i9oc9/003.png?dl=0)

4\. To run the game as a standalone application, go to the folder on macOS where you exported your game. In our example, the Project Name was “Platformer Kit Demo”. Click on this folder, find an *Platformer Kit Demo.app* file and double click on it.  (More information here <https://support.apple.com/guide/mac-help/open-a-mac-app-from-an-unidentified-developer-mh40616/mac>)

![](https://dl.dropboxusercontent.com/s/ii7x63f5erfohn9/004.png?dl=0)
{% endtab %}
{% endtabs %}


# Lightmapping

Calculating lighting in a scene is one of the most time-consuming tasks of any engine. Often due to the use of a large number of light sources the performance of the game can drop significantly, which will naturally annoy players, even if your game is very interesting.

Lightmapping is a technology that on the one hand improves the performance of your game, and on the other hand gives you a high quality image that is close to what we see in the real world.

Lightmapping involves baking light sources into textures and then ignoring the calculation of these sources during the game. As an added bonus, you get a picture with realistic lighting, shadows and occlusion of the environment.

### General recommendations for using lightmapping

The process of baking lightmaps is a resource-intensive operation, both in terms of time and performance of your computer.

Therefore, it is advisable to make the decision to use lightmapping at the initial stage of development, it will help you to build your game scenes correctly and avoid wasting time and your efforts.

We recommend to bake light sources at the moment when the gameplay and appearance of the game or a separate scene of the game will be fully completed, it will significantly reduce the development time.

For mobile development, try to avoid lightmapping at all or use low quality settings.

### Preparing for baking

Before baking a lightmap, you need to decide which objects will be baked and which will not. In the vast majority of cases, only static objects are suitable for baking. We do not recommend using dynamic or kinematic objects for lightmapping. Use the opportunity to bake dynamic and kinematic objects as experiments, perhaps the end result will satisfy you.

Do not use a large number of dynamic or combined light sources.

When baking closed rooms, locations that are illuminated only by artificial light, turn off the Sun in the environment objects, so you will get the right result. Otherwise, the picture may be illuminated more than you intended

Combine light sources and objects with materials with Emissive map, to achieve faster and better results, instead of using a large number of light sources.

To mark an object as ready to be baked, in the Object Inspector under the Properties tab, in the Lightmapping section, turn on the Bake in Lightmaps toggle.

Light sources in the lightmapping section, in the Object Type setting have 3 options:

* Realtime - means that this light source will not be taken into account when baking lightmaps and will behave and be calculated like a normal light source. Dynamic objects will be illuminated by this source. Baked objects are not illuminated by this type of source.
* Baked - means that this light source will be taken into account when the lightmap is baked. This source will immediately stop affecting the scene as if it were turned off. Don't worry, after the lightmap is baked you will see the result of its effect on the scene. To see this source, change its type to Realtime or Mixed.
* Mixed means that this light source will be count during lightmap baking, but will affect both dynamic and static objects without lightmap. This light source will have no effect on baked objects. Use such a source in places where the appearance of dynamic objects (for example, the Main Character or NPC) is inevitable.

To select objects that will be baked with a certain quality, there is the Bake Volume tool. Before creating bake volumes, decide which objects require high bake quality and which can be shown with lower quality.


# Post Processing

You probably use filters in Instagram or Photoshop to make the picture more colorful and lively. Post-processing does about the same thing in game development. Post-processing is a tool that allows you to work with a complete picture (when all the processes for creating a scene have been completed) to make your picture/scene more spectacular and impressive .

The post-processing tool will help you to change the way the scene looks by adding visual effects and by correcting some areas that you do not like.  All these post processes are related to cinematography.

<figure><img src="https://4240499350-files.gitbook.io/~/files/v0/b/gitbook-x-prod.appspot.com/o/spaces%2F-Lt-sE9MYKe9pZOcHwg5%2Fuploads%2FLbYelMYkPXEi5jgUCNS0%2Fimage.png?alt=media&amp;token=11be6f44-9e4e-4444-9dd0-c1e70137f2aa" alt=""><figcaption><p>Post processing effects applied</p></figcaption></figure>

<figure><img src="https://4240499350-files.gitbook.io/~/files/v0/b/gitbook-x-prod.appspot.com/o/spaces%2F-Lt-sE9MYKe9pZOcHwg5%2Fuploads%2FyL4KbB3ngUNGIJWIHLxG%2Fimage.png?alt=media&amp;token=3c8c0e3c-0417-4e4e-92f7-9f18f360d293" alt=""><figcaption><p>No post processing effects</p></figcaption></figure>

Actually, such post-processing effects can be done with the help of materials, but it will take a lot of time and require special knowledge. In addition, it will affect game performance. And some visual effects cannot be achieved at all without the post-processing tool.

When we use a post-processing tool, we always work with the final picture. Nothing in the scene changes (no materials are changed or applied). If we switch to Edit mode, (after applying one of the post processes) we will see that everything remains as it is.

Post-processing only affects the final picture, which we will have in the Game mode. It does not have any effect on objects or materials. Therefore, using this tool does not hit the performance of the game much.

## How to set up post-processing?

* You may find all the post-processing settings on the Main Camera. Therefore, to manage the post-processing tool, first, we need to turn on the Main Camera in the Scene Tree.
* Next, we select the Main Camera in the Scene Tree. After that, the Inspector Panel will appear in the right corner.

<figure><img src="https://4240499350-files.gitbook.io/~/files/v0/b/gitbook-x-prod.appspot.com/o/spaces%2F-Lt-sE9MYKe9pZOcHwg5%2Fuploads%2F1KPJvoqT01lCzzSfe7hT%2Fimage.png?alt=media&amp;token=10c99253-037c-4179-88f5-d019345cb8a0" alt=""><figcaption></figcaption></figure>

* Then, we click on the Post-processing Tab in the Inspector Panel.
* Next, we need to make sure that Camera preview is enabled on the Gismo Panel. This will allow us to look at the Scene through the Main Camera. In the Main Camera mode, we will see how our game world will be seen by the game camera (in game mode).

<figure><img src="https://4240499350-files.gitbook.io/~/files/v0/b/gitbook-x-prod.appspot.com/o/spaces%2F-Lt-sE9MYKe9pZOcHwg5%2Fuploads%2Fk53SdPViajG06HEHIsQU%2Fimage.png?alt=media&amp;token=d802965e-65e8-4ba0-8f55-455875a68793" alt=""><figcaption></figcaption></figure>

Note: We can only view post-processing effects and their impact in the Main Camera mode.

<figure><img src="https://4240499350-files.gitbook.io/~/files/v0/b/gitbook-x-prod.appspot.com/o/spaces%2F-Lt-sE9MYKe9pZOcHwg5%2Fuploads%2FeqLTimzQkBQ2aZ123fs3%2Fimage.png?alt=media&amp;token=47d42b1b-e04d-4b1d-b3d0-6ea7beb85d19" alt=""><figcaption></figcaption></figure>

* Now look at the Post-processing Panel.  In the horizontal scroll (at the very top of the panel) you can find all the post processes that are pre-configured in MANU. Scroll and choose the ones you need.

<figure><img src="https://4240499350-files.gitbook.io/~/files/v0/b/gitbook-x-prod.appspot.com/o/spaces%2F-Lt-sE9MYKe9pZOcHwg5%2Fuploads%2FIFVxF9N8uLZVaNNmEvzL%2Fimage.png?alt=media&amp;token=9a18b6c5-9802-4c72-ae8d-6eb1a4e0b84f" alt=""><figcaption></figcaption></figure>

* To turn on the post process, simply move the slider to the right (from gray to green). And the post-processing will be applied immediately to your picture (your scene).

We can combine all the post processes. We can turn on several of them and they will overlap each other giving our picture an artistic quality. When we start combining all the post processes together, we will achieve other new effects.

## Post-processing effects in MANU

Let's now look at the post processes that MANU has. By scrolling the horizontal scroll menu in the Post-processing Panel, you will see that there are 6 of them: Depth of field, Chromatic aberration, Bloom, Color correction, Screen Space Ambient Occlusion,  and Screen Space Light  Reflection. Let's look at them in more detail.

<br>

\ <br>


# Depth of Field  (DOF)

DOF is the depth of field of the camera. When we turn it on, we will see that it has 3 settings: focus distance, focus range and aperture. Using  these parameters, you can adjust the focus of a person's gaze. You can make it so that everything that is important will be in focus, and everything else will be blurred.

<figure><img src="https://4240499350-files.gitbook.io/~/files/v0/b/gitbook-x-prod.appspot.com/o/spaces%2F-Lt-sE9MYKe9pZOcHwg5%2Fuploads%2FbLbus5X0bcDZZM1fY18g%2Fimage.png?alt=media&amp;token=f3e7836c-2364-410b-97ff-444fddd2d2a9" alt=""><figcaption></figcaption></figure>

![](https://4240499350-files.gitbook.io/~/files/v0/b/gitbook-x-prod.appspot.com/o/spaces%2F-Lt-sE9MYKe9pZOcHwg5%2Fuploads%2FlUDjqAxjW0Xetlhf2stX%2Fimage.png?alt=media\&token=e675bb1f-a53a-4752-976e-c11fe5a718f6)

### Focus distance

Focus distance is the distance at which the blur occurs (this is when the focus of the camera lens is shifted to some distance).

The greater the focus distance, the more distant objects are in focus. And the smaller the focus distance, the more nearby objects we have come into focus.

You can adjust this parameter by moving the slider to the right or left.

When Focus Distance equals 0.1, all objects that are at the focus distance of 0.1 units come into focus and they look clear.

<figure><img src="https://4240499350-files.gitbook.io/~/files/v0/b/gitbook-x-prod.appspot.com/o/spaces%2F-Lt-sE9MYKe9pZOcHwg5%2Fuploads%2FlgAhKFs5wOQSCt6Ybtks%2Fimage.png?alt=media&amp;token=1d353500-5c11-4380-9fed-a0bc7685b45a" alt=""><figcaption></figcaption></figure>

When we start to increase Focus Distance (for example, to 600 units), now we have objects in focus that are 600 units away from us.

<figure><img src="https://4240499350-files.gitbook.io/~/files/v0/b/gitbook-x-prod.appspot.com/o/spaces%2F-Lt-sE9MYKe9pZOcHwg5%2Fuploads%2FltLd6C9i617t08iYHyQL%2Fimage.png?alt=media&amp;token=dfa7a5fe-71be-42bd-8a47-218a350ea933" alt=""><figcaption></figcaption></figure>

Note: It is very important to point out that the focus distance depends very much on such settings in the camera as Far plane and Near Plane. These values set the limits for the focus distance values. The blur will occur at the selected distance and up to the value specified in the Far Plane, which indicates where the scene will be drawn. The scene will not be drawn further after this value. You will see these parameters (Far plane and Near Plane) if you switch to the Properties Tab in the Inspector Panel.

<figure><img src="https://4240499350-files.gitbook.io/~/files/v0/b/gitbook-x-prod.appspot.com/o/spaces%2F-Lt-sE9MYKe9pZOcHwg5%2Fuploads%2FbrdFJDQZGLMDc73jDqfM%2Fimage.png?alt=media&amp;token=f3d52632-da1e-44f6-8add-1422500dbe36" alt=""><figcaption></figcaption></figure>

### Aperture

Aperture is an imitation of the camera's aperture. This parameter shows how much the objects that are out of focus are blurred.

Try to enlarge it and you will see that some objects begin to blur more (they lose their outline).

You can set the Aperture value manually by entering the value in the input field or by moving the slider in a circle on the graphical image of the aperture (which resembles a part of the camera lens called the aperture).

With a larger aperture value, we have more blurring in the Scene.

<figure><img src="https://4240499350-files.gitbook.io/~/files/v0/b/gitbook-x-prod.appspot.com/o/spaces%2F-Lt-sE9MYKe9pZOcHwg5%2Fuploads%2FRvFZbmvGx5lAQC9vVhrI%2Fimage.png?alt=media&amp;token=ee04dcf4-fa84-446a-a955-901e59e4a57a" alt=""><figcaption></figcaption></figure>

<figure><img src="https://4240499350-files.gitbook.io/~/files/v0/b/gitbook-x-prod.appspot.com/o/spaces%2F-Lt-sE9MYKe9pZOcHwg5%2Fuploads%2FbL1BDakCzOTOV2UMKwuf%2Fimage.png?alt=media&amp;token=b05bab60-ced7-4151-b928-b66f4795c31b" alt=""><figcaption></figcaption></figure>

### Focus range

This setting allows you to control the range where the blur will occur. The lower the focus range value, the less sharpness we have in the picture from the set focus distance. With the Focus Range parameter, you can adjust what should be in focus and out of focus from the line we are looking at (from the already specified focus distance).

Look at the screenshot below: we see that our foreground is blurred. Somewhere in the center of the Scene we have a focus, at a distance of 0.7 units from us. Beyond the focus distance, the focus on objects begins to blur.&#x20;

<figure><img src="https://4240499350-files.gitbook.io/~/files/v0/b/gitbook-x-prod.appspot.com/o/spaces%2F-Lt-sE9MYKe9pZOcHwg5%2Fuploads%2FkH8eCdT4X3sNYF7Aje8N%2Fimage.png?alt=media&amp;token=717bacc1-c4b8-4360-9dfd-4e080d6ee5ac" alt=""><figcaption></figcaption></figure>

When we raise the focus range value to 12, then everything that is in focus from our focus distance (0.7) will be more clearly shown. The image which was previously blurred will be clearer.

<figure><img src="https://4240499350-files.gitbook.io/~/files/v0/b/gitbook-x-prod.appspot.com/o/spaces%2F-Lt-sE9MYKe9pZOcHwg5%2Fuploads%2FIyPQmVpBLPUfdSZHfBuV%2Fimage.png?alt=media&amp;token=e2004655-8c4e-4985-b6a4-a6d5563506a8" alt=""><figcaption></figcaption></figure>

Let's look at an example where Focus Distance is 1 and Focus Range is 0. This means that at a distance from us and up to 1 units from us, everything will be blurred.

<figure><img src="https://4240499350-files.gitbook.io/~/files/v0/b/gitbook-x-prod.appspot.com/o/spaces%2F-Lt-sE9MYKe9pZOcHwg5%2Fuploads%2Fqrr3y3gWjRl42zyEM1TQ%2Fimage.png?alt=media&amp;token=f36879a3-4f77-486b-ac83-1cc36eb01e2f" alt=""><figcaption></figcaption></figure>

Application: Using Focus Range, we can highlight/emphasize the Main Character in the Scene. For example, if we need the Main Character to be in focus, and everything that is closer to us


# Chromatic Aberrations

Chromatic aberration also makes the image on the screen cinematic. This post process creates an established image of the lens in our brain. Seeing this image, we understand that we are now looking through the camera.

Chromatic aberration is related to the color effect that occurs on the edges of the lenses. The lens has a non-uniform thickness. Therefore, light travels different distances through the lens (in the medium) and exits in some places refracted at different frequencies. Different frequency means different wavelengths and different colors. As a result, colored edge effects (or rainbow effect) appear on the lenses.

Such effects can be noticed if you look through a camera or a telescope.

<figure><img src="https://4240499350-files.gitbook.io/~/files/v0/b/gitbook-x-prod.appspot.com/o/spaces%2F-Lt-sE9MYKe9pZOcHwg5%2Fuploads%2FHKoHlBy2Pa2RZUTFO7Qh%2Fimage.png?alt=media&amp;token=acab2f7e-9939-440f-b8a8-38b756a640bc" alt=""><figcaption></figcaption></figure>

### Scale&#x20;

This post process has only one parameter - Scale. When you increase this parameter, the picture begins to blur and display in such a way that a rainbow appears at the edges of the image. This rainbow is a dispersion, which is called aberration.<br>

<figure><img src="https://4240499350-files.gitbook.io/~/files/v0/b/gitbook-x-prod.appspot.com/o/spaces%2F-Lt-sE9MYKe9pZOcHwg5%2Fuploads%2FVcINkO6VO59C19OhuL1e%2Fimage.png?alt=media&amp;token=cb3d3ce8-fc09-4c30-b3ef-11416efdd005" alt=""><figcaption></figcaption></figure>


# Bloom

Using Bloom, you can make a gradation of bright and dark areas on the screen. This post process brightens and blurs the light areas, but does not touch the dark ones. As a result, Bloom creates a glow effect in the Scene.

<figure><img src="https://4240499350-files.gitbook.io/~/files/v0/b/gitbook-x-prod.appspot.com/o/spaces%2F-Lt-sE9MYKe9pZOcHwg5%2Fuploads%2FOKYifNlGBWjL0yiK6yWe%2Fimage.png?alt=media&amp;token=ae600520-9aa4-46b8-b077-d52c41a442af" alt=""><figcaption></figcaption></figure>

Bloom has 4 parameters: Intensity, Iterations, Threshold and Soft Threshold.

### Intensity

When you increase the Intensity value, all the bright objects in the Scene begin to acquire a halo of glow. This glow is not real, in fact, the object does not glow. Go to the Edit mode, to verify this.

The Intensity parameter is responsible for the intensity of the entire post process, as well as for the blurring around bright objects and how much these objects will glow.

<figure><img src="https://4240499350-files.gitbook.io/~/files/v0/b/gitbook-x-prod.appspot.com/o/spaces%2F-Lt-sE9MYKe9pZOcHwg5%2Fuploads%2FAyHo0M3FCT9nGF2lo4fd%2Fimage.png?alt=media&amp;token=315adfc6-c0ca-4ebf-a7da-f4283dc6f6de" alt=""><figcaption></figcaption></figure>

<figure><img src="https://4240499350-files.gitbook.io/~/files/v0/b/gitbook-x-prod.appspot.com/o/spaces%2F-Lt-sE9MYKe9pZOcHwg5%2Fuploads%2F6MdtQfD9BoBIc3VDl8PD%2Fimage.png?alt=media&amp;token=3f5d59aa-3a34-4331-b842-d2c85b4d1edc" alt=""><figcaption></figcaption></figure>

### Iterations&#x20;

The Iterations parameter is responsible for the number of blur iterations that our image is exposed to on the screen. This parameter enhances the effect of blurring on the image.

Note: If Intensity is 0 (minimum value), Iterations will not show anything, no matter how you increase or decrease it.  Other parameters will not show anything either.

<figure><img src="https://4240499350-files.gitbook.io/~/files/v0/b/gitbook-x-prod.appspot.com/o/spaces%2F-Lt-sE9MYKe9pZOcHwg5%2Fuploads%2FmE8iUeH1ieHC5dvCcEfV%2Fimage.png?alt=media&amp;token=6b4ded77-52a3-4308-a3a2-7d6576862b65" alt=""><figcaption></figcaption></figure>

When Intensity equals 1 (maximum value), almost all colors in the Scene fall into the illumination range. Bright colors will become even brighter. The gray will turn into almost white.&#x20;

<figure><img src="https://4240499350-files.gitbook.io/~/files/v0/b/gitbook-x-prod.appspot.com/o/spaces%2F-Lt-sE9MYKe9pZOcHwg5%2Fuploads%2FBrrxIWn8UM2FcC7hDPE8%2Fimage.png?alt=media&amp;token=bbcb36a7-07d2-4437-955f-04bb5cf9d430" alt=""><figcaption></figcaption></figure>

And if the value of Iterations equals 5, it means that our image on the screen has passed 5 iterations of blurring. If we reduce Intensity, then we reduce the Intensity of the Bloom effect itself.

If we increase the Iteration value, then our image will undergo more blur iterations.

It is important to point out the difference between Intensity and Iterations: Intensity controls the intensity of the Bloom effect. The Iterations parameter is responsible for how many times this picture will be blurred. The greater the value of Iterations, the more the picture will be blurred.

### Threshold

Threshold is responsible for the range of colors which the Bloom effect will be applied to.

When Threshold is 0 and Soft Threshold is 0, the entire color range (that is in the scene) participates in the blur effect.

If Threshold is 1 and Soft Threshold is 0, then no colors will blur, since we have removed all colors from our range.

![](https://4240499350-files.gitbook.io/~/files/v0/b/gitbook-x-prod.appspot.com/o/spaces%2F-Lt-sE9MYKe9pZOcHwg5%2Fuploads%2FAygzbDzAahdLeX6uaPNA%2Fimage.png?alt=media\&token=2956dd0f-fcda-4bf6-b35e-ed383b75238f)

<figure><img src="https://4240499350-files.gitbook.io/~/files/v0/b/gitbook-x-prod.appspot.com/o/spaces%2F-Lt-sE9MYKe9pZOcHwg5%2Fuploads%2FnasIy9bMgYVis42Wrg5C%2Fimage.png?alt=media&amp;token=5a2b7a61-524a-4144-8fa4-7181613bc4b8" alt=""><figcaption></figcaption></figure>

### Soft Threshold

Soft Threshold cuts off the colors that will participate in the Bloom effect.

Threshold and Soft Threshold are interrelated. They both are responsible for the color range that falls under the Bloom effect. Both parameters can be configured by entering values manually.&#x20;

You can also use graphs to set values for Threshold and Soft Threshold by moving the graph lines. The graph is a color range control.

![](https://4240499350-files.gitbook.io/~/files/v0/b/gitbook-x-prod.appspot.com/o/spaces%2F-Lt-sE9MYKe9pZOcHwg5%2Fuploads%2F66NunYyjC0WfrsrCT6iK%2Fimage.png?alt=media\&token=d5704869-9739-457f-9607-b0bf4cf7244e)

<figure><img src="https://4240499350-files.gitbook.io/~/files/v0/b/gitbook-x-prod.appspot.com/o/spaces%2F-Lt-sE9MYKe9pZOcHwg5%2Fuploads%2FOJOkb8W36BbUMJFFAxuM%2Fimage.png?alt=media&amp;token=96ab9265-8760-47cc-8e41-55b10edd4ae2" alt=""><figcaption></figcaption></figure>

<br>


# Color Correction

Color Correction is responsible for changing the colors of the scene image. It will help to eliminate any color imbalances or create new color effects.

This post process has 4 parameters: Gamma, Brightness, Contrast and Saturation.&#x20;

If your picture seems faded to you, it can be corrected by color correction parameters. They will make your picture more impressive and spectacular.

<figure><img src="https://4240499350-files.gitbook.io/~/files/v0/b/gitbook-x-prod.appspot.com/o/spaces%2F-Lt-sE9MYKe9pZOcHwg5%2Fuploads%2FgZ11Ldk20CjWdwbEe3bm%2Fimage.png?alt=media&amp;token=3101f21a-375b-49e4-ac95-290d4db36707" alt=""><figcaption></figcaption></figure>

### Gamma

Gamma is responsible for color correction of monitor/screen brightness.&#x20;

The Gamma parameter can be compared to how we perceive colors in different places. For example, when we go outside from a dark room, at first everything seems bright outside. It even may hurt our eyes due to the bright light.&#x20;

And when we go back into the room, everything around us will seem much darker than everything really is. This happens because our eyes change their sensitivity to light. Gamma imitates this perception of color and light.

When we increase the Gamma parameter, our picture becomes lighter. Accordingly, when we reduce this parameter, our picture becomes darker.

<figure><img src="https://4240499350-files.gitbook.io/~/files/v0/b/gitbook-x-prod.appspot.com/o/spaces%2F-Lt-sE9MYKe9pZOcHwg5%2Fuploads%2F2O9M939TgehEkvyBBv1k%2Fimage.png?alt=media&amp;token=9ba6eb38-2396-4ce8-a64a-89004750a8fd" alt=""><figcaption></figcaption></figure>

### Brightness

Using the Brightness parameter, you can adjust the brightness of the colors in the Scene. The higher the brightness, the brighter the colors in the Scene.

When Brightness is 0, this is the normal brightness, which we have determined using our light sources in the Scene.

<figure><img src="https://4240499350-files.gitbook.io/~/files/v0/b/gitbook-x-prod.appspot.com/o/spaces%2F-Lt-sE9MYKe9pZOcHwg5%2Fuploads%2F0DHfT7jEJ1fISzPhBuFJ%2Fimage.png?alt=media&amp;token=8520c6f9-cacc-4901-8ae6-81e9e4558e30" alt=""><figcaption></figcaption></figure>

If Brightness is 100%, it means that we have increased the brightness by 2 times.

<figure><img src="https://4240499350-files.gitbook.io/~/files/v0/b/gitbook-x-prod.appspot.com/o/spaces%2F-Lt-sE9MYKe9pZOcHwg5%2Fuploads%2FNyJtUD1CTb1nWhqUwyW6%2Fimage.png?alt=media&amp;token=72e07c80-878a-4ea1-813e-973ed7456f3b" alt=""><figcaption></figcaption></figure>

The brightness can be changed up to  400%, which is the maximum brightness value.

If we reduce the brightness, then our picture will begin to darken. If we reduce the brightness by 2 times, then the scene will be completely dark.

<figure><img src="https://4240499350-files.gitbook.io/~/files/v0/b/gitbook-x-prod.appspot.com/o/spaces%2F-Lt-sE9MYKe9pZOcHwg5%2Fuploads%2FCLQk79eZZAEOrzFxjMxq%2Fimage.png?alt=media&amp;token=39581637-c20b-42e5-a6af-facedb54e2fe" alt=""><figcaption></figcaption></figure>

Application: Using the Brightness parameter, you can create various appearances of the Main Character in the Scene.

### Contrast &#x20;

The Contrast setting adjusts the contrast between dark and light areas in the Scene. The more it is, the greater the contrast between the brightest and darkest areas of the image. Bright colors become even brighter, dark ones even darker.

<figure><img src="https://4240499350-files.gitbook.io/~/files/v0/b/gitbook-x-prod.appspot.com/o/spaces%2F-Lt-sE9MYKe9pZOcHwg5%2Fuploads%2FH0AOSy5u9gIJ9kNh8hoJ%2Fimage.png?alt=media&amp;token=5f34c881-864d-4542-be48-536f78846e8c" alt=""><figcaption></figcaption></figure>

The Contrast value can be increased up to 400%. In this case, the brightest colors will be visible, and everything that is more or less gray will be dark.

<figure><img src="https://4240499350-files.gitbook.io/~/files/v0/b/gitbook-x-prod.appspot.com/o/spaces%2F-Lt-sE9MYKe9pZOcHwg5%2Fuploads%2Fc9MzmsH1f7PiA853nI7v%2Fimage.png?alt=media&amp;token=1459c709-9949-4791-ae73-26e2eb5f22f1" alt=""><figcaption></figcaption></figure>

If we reduce contrast by 2 times (to -100%%), the whole Scene will be gray (by mixing the darkest and the lightest colors, we will get gray).

<figure><img src="https://4240499350-files.gitbook.io/~/files/v0/b/gitbook-x-prod.appspot.com/o/spaces%2F-Lt-sE9MYKe9pZOcHwg5%2Fuploads%2FpJrDZ71wn3fdVpLp6oQ2%2Fimage.png?alt=media&amp;token=d011bef2-6871-4af8-8974-a1e05309ada7" alt=""><figcaption></figcaption></figure>

### Saturation

Saturation adjusts the color richness/intensity of the image.

If we increase Saturation to 100%, the colors of the scene become more juicy. If we increase this parameter to 200%, the colors become even more saturated.

<figure><img src="https://4240499350-files.gitbook.io/~/files/v0/b/gitbook-x-prod.appspot.com/o/spaces%2F-Lt-sE9MYKe9pZOcHwg5%2Fuploads%2FOUshEpsdgZM8NbrKvmuH%2Fimage.png?alt=media&amp;token=27ca16aa-3508-42e6-9dce-bf7819025aa8" alt=""><figcaption></figcaption></figure>

At a Saturation value of 400%, all colors will strive for maximum saturation.

<figure><img src="https://4240499350-files.gitbook.io/~/files/v0/b/gitbook-x-prod.appspot.com/o/spaces%2F-Lt-sE9MYKe9pZOcHwg5%2Fuploads%2FmqdOXFIAo4Bp1Wy1lCK2%2Fimage.png?alt=media&amp;token=289f43fb-07dd-4e29-96f3-79f7b8cec749" alt=""><figcaption></figcaption></figure>

If we reduce the Saturation by 2 times (to -100%), we will get a completely gray picture.

<figure><img src="https://4240499350-files.gitbook.io/~/files/v0/b/gitbook-x-prod.appspot.com/o/spaces%2F-Lt-sE9MYKe9pZOcHwg5%2Fuploads%2FTqRhpZq01n8SN5dQoM54%2Fimage.png?alt=media&amp;token=71909b1f-d2d4-4c38-bb67-001b322e6b24" alt=""><figcaption></figcaption></figure>

When we begin to reduce the saturation of the image to - 200% and below, various mathematical changes begin to occur. Due to them, it is possible to get new effects without using other parameters and tools.

<figure><img src="https://4240499350-files.gitbook.io/~/files/v0/b/gitbook-x-prod.appspot.com/o/spaces%2F-Lt-sE9MYKe9pZOcHwg5%2Fuploads%2FFevuHc7oIvHj0pKmIdU1%2Fimage.png?alt=media&amp;token=b9f8af32-de34-4d40-a693-3e359d66a6d0" alt=""><figcaption></figcaption></figure>

By combining the Color correction settings, you can get your own picture. It all depends on your desire.

<br>


# Screen Space Ambient Occlusion (SSAO)

SSAO helps to manage the occlusion of the environment through the screen effect. Occlusion is a shadow that occurs as a result of multiple reflection of the light beam between two planes that are located at an angle of less than 180 degrees relative to each other.

<figure><img src="https://4240499350-files.gitbook.io/~/files/v0/b/gitbook-x-prod.appspot.com/o/spaces%2F-Lt-sE9MYKe9pZOcHwg5%2Fuploads%2Ft2NRBOSlSDvhpWI4423t%2Fimage.png?alt=media&amp;token=b235edbd-af23-4ad4-9b8e-681b278a6a32" alt=""><figcaption></figcaption></figure>

SSAO works with shading at the intersection of two planes. It helps to achieve a more realistic picture.

The effect of self-shadowing can be created using Materials and  the Ambient Occlusion parameter (for more information, go to  the Materials). But it will not work if you need to achieve this effect on objects where materials have not been applied.

In the real world, if objects are located close to each other, one of the objects should have self-shading. If it does not happen, the objects may look artificially in the Scene. The SSAO post process is just right for solving this problem. This effect occurs on the screen space. Like all post processes, it is applied to the final picture.

Let's look at the example below. Before applying SSAO there were objects that did not affect each other at all.&#x20;

<figure><img src="https://4240499350-files.gitbook.io/~/files/v0/b/gitbook-x-prod.appspot.com/o/spaces%2F-Lt-sE9MYKe9pZOcHwg5%2Fuploads%2FVUXSlbtZU6CAYmCoJcMN%2Fimage.png?alt=media&amp;token=131b3fdd-4031-4db6-aedc-27b4245635c8" alt=""><figcaption></figcaption></figure>

After turning on SSAO, the picture became more realistic. The intersections of the objects have become darker. This is how the SSAO post process works, it adds shadings between objects (in areas where their planes intersect).

<figure><img src="https://4240499350-files.gitbook.io/~/files/v0/b/gitbook-x-prod.appspot.com/o/spaces%2F-Lt-sE9MYKe9pZOcHwg5%2Fuploads%2FF41CGQo2KRouunrfvLgH%2Fimage.png?alt=media&amp;token=b1e2f4fa-a9d5-47dc-94a1-ecc7135f72de" alt=""><figcaption></figcaption></figure>

SSAO has 2 parameters: Radius and Intensity.

### Radius

Radius is measured in units and determines the occlusion radius. A large radius is useful for huge objects (for example, houses or skyscrapers).

For small objects, we set an acceptable radius. For example, 0.1.

<figure><img src="https://4240499350-files.gitbook.io/~/files/v0/b/gitbook-x-prod.appspot.com/o/spaces%2F-Lt-sE9MYKe9pZOcHwg5%2Fuploads%2FDzR4aGnOPkBVNIPwFadv%2Fimage.png?alt=media&amp;token=d3899f0f-bf87-4762-b14d-087e42893018" alt=""><figcaption></figcaption></figure>

### Intensity

Intensity affects the intensity of shading. The higher the value of this parameter, the darker the shading between objects.

When we turn on the SSAO post process, we see that a soft shadow appears in all areas where there are intersections of planes.

<figure><img src="https://4240499350-files.gitbook.io/~/files/v0/b/gitbook-x-prod.appspot.com/o/spaces%2F-Lt-sE9MYKe9pZOcHwg5%2Fuploads%2FaImeYIR2SGQ8AGEyxdfX%2Fimage.png?alt=media&amp;token=0fedb3b4-342d-4cc0-8781-408c06fe8cc3" alt=""><figcaption></figcaption></figure>

<br>


# Screen Space Local Reflections (SSLR)

You can create a reflection effect using materials or other tools, but it is very difficult to do. Especially if there are many objects in the Scene that should self-reflect in each other. In addition, they also may have different degrees of reflection.

SSLR is applicable to flat surfaces, such as puddles or metal surfaces.

<figure><img src="https://4240499350-files.gitbook.io/~/files/v0/b/gitbook-x-prod.appspot.com/o/spaces%2F-Lt-sE9MYKe9pZOcHwg5%2Fuploads%2FpKEdfDkdZ3aJZvlntNTi%2Fimage.png?alt=media&amp;token=e4661a6f-4e65-4ef5-bd0f-cc323971f5a4" alt=""><figcaption></figcaption></figure>

This post process works with objects that have PBR materials. For such objects, we set a certain value of the Roughness parameter (you can read more in the Materials).

The value of the Roughness parameter directly affects the result of using the SSLR post process. By enabling SSLR, you will see a reflection on flat surfaces to which the PBR material is applied and the Roughness parameter is set. The lower the value of this parameter, the clearer/sharper  the reflection is.

SSLR has 2 parameters: Offset and Fade.

### Offset

Offset is used to simulate full reflection. With the Offset parameter,  you can determine at what angle objects should be reflected on a flat surface.

When offset is 0.1, the reflection occurs from the angle of total reflection. As if the objects are standing in front of a mirror.&#x20;

<figure><img src="https://4240499350-files.gitbook.io/~/files/v0/b/gitbook-x-prod.appspot.com/o/spaces%2F-Lt-sE9MYKe9pZOcHwg5%2Fuploads%2FoYeQvkQgPImfBc844CuC%2Fimage.png?alt=media&amp;token=74b7431d-ce2d-4025-8d92-394b154cf365" alt=""><figcaption></figcaption></figure>

And when we increase this parameter, the angle of reflection changes. After some time, the angle of reflection will be such that the reflection  will disappear completely.

<figure><img src="https://4240499350-files.gitbook.io/~/files/v0/b/gitbook-x-prod.appspot.com/o/spaces%2F-Lt-sE9MYKe9pZOcHwg5%2Fuploads%2FAw3U5vrxh2pPznIfs5EC%2Fimage.png?alt=media&amp;token=b0b15d34-ad10-4d8a-ae61-838ac07565ee" alt=""><figcaption></figcaption></figure>

### Fade

Fade simulates the attenuation of reflection on flat surfaces.

For example, a lunar  path on the water surface. When the sea is agitated from the winds, the lunar path practically disappears and  turns into a collection of flashing glare randomly scattered on the surface of the water.

The further into the distance we look (at the lunar path), the more clearly we see the moon, which is reflected in this path. Аnd if we look at the section of the lunar path that is closer to us, we just might not see the moon at all. Fade will help to create the effect of blurring reflections on flat surfaces.

<figure><img src="https://4240499350-files.gitbook.io/~/files/v0/b/gitbook-x-prod.appspot.com/o/spaces%2F-Lt-sE9MYKe9pZOcHwg5%2Fuploads%2FrHslZaiLNXwVjYwlydXM%2Fimage.png?alt=media&amp;token=0364c8aa-e2d8-4883-94ac-231765b2748d" alt=""><figcaption></figcaption></figure>

All post processes can be combined and used to achieve the image quality  we want. Using post processes, you can make the picture more artistic without using materials or other tools. But at the same time, you do not reduce the performance of your game.<br>

Therefore, experiment and find out what is best for you and what you like best. There are no correct answers and mandatory parameter values, it all depends on you and your preferences.

&#x20;

<br>


# Formulas

This article describes the examples of formulas you can use in Animation mode to set up custom behaviors.

## Functions

| Syntax                                       | Description                                                                                           | Use Examples                             |
| -------------------------------------------- | ----------------------------------------------------------------------------------------------------- | ---------------------------------------- |
| `random(YOUR_MAX_VALUE)`                     | Random integer in the range from 0 to YOUR\_MAX\_VALUE                                                | `random(234)`                            |
| `random(YOUR_MIN_VALUE, YOUR_MAX_VALUE)`     | Random integer in the range from YOUR\_MIN\_VALUE to YOUR\_MAX\_VALUE                                 | `random(1, 100)`                         |
| `getLocalPositionX('YOUR OBJECT NAME')`      | Local X-coordinate of the first object that comes across in the scene with the name YOUR OBJECT NAME  | `getLocalPositionX('car') + 1`           |
| `getGlobalPositionX('YOUR OBJECT NAME')`     | Global X-coordinate of the first object that comes across in the scene with the name YOUR OBJECT NAME | `getGlobalPositionX('car') + 1`          |
| `getLocalPositionY('YOUR OBJECT NAME')`      | Local Y-coordinate of the first object that comes across in the scene with the name YOUR OBJECT NAME  | `a + getLocalPositionY('airplane') * 2`  |
| `getGlobalPositionY('YOUR OBJECT NAME')`     | Global Y-coordinate of the first object that comes across in the scene with the name YOUR OBJECT NAME | `a + getGlobalPositionY('airplane') * 2` |
| `getLocalPositionZ('YOUR OBJECT NAME')`      | Local Z-coordinate of the first object that comes across in the scene with the name YOUR OBJECT NAME  | `getLocalPositionZ('My Object') - 5`     |
| `getGlobalPositionZ('YOUR OBJECT NAME')`     | Global Z-coordinate of the first object that comes across in the scene with the name YOUR OBJECT NAME | `getGlobalPositionZ('My Object') - 5`    |
| `getLocalRotationX('YOUR OBJECT NAME')`      | Local X-angle in degrees of the first object on the scene named YOUR OBJECT NAME                      | `getLocalRotationX('Plane')`             |
| `getGlobalRotationX('YOUR OBJECT NAME')`     | Global X-angle in degrees of the first object on the scene named YOUR OBJECT NAME                     | `getGlobalRotationX('Plane')`            |
| `getLocalRotationY('YOUR OBJECT NAME')`      | Local Y-angle in degrees of the first object on the scene named YOUR OBJECT NAME                      | `getLocalRotationY('Plane')`             |
| `getGlobalRotationY('YOUR OBJECT NAME')`     | Global Y-angle in degrees of the first object on the scene named YOUR OBJECT NAME                     | `getGlobalRotationY('Plane')`            |
| `getLocalRotationZ('YOUR OBJECT NAME')`      | Local Z-angle in degrees of the first object on the scene named YOUR OBJECT NAME                      | `getLocalRotationZ('Plane')`             |
| `getGlobalRotationZ('YOUR OBJECT NAME')`     | Global Z-angle in degrees of the first object on the scene named YOUR OBJECT NAME                     | `getGlobalRotationZ('Plane')`            |
| `getGlobalSizeInMetersX('YOUR OBJECT NAME')` | Returns the X-size of a physical body in meters. The global AABB (axis aligned bounding box) is used  | `getGlobalSizeInMetersX('Phys Mesh')`    |
| `getGlobalSizeInMetersY('YOUR OBJECT NAME')` | Returns the Y-size of a physical body in meters. The global AABB (axis aligned bounding box) is used  | `getGlobalSizeInMetersY('Phys Mesh')`    |
| `getGlobalSizeInMetersZ('YOUR OBJECT NAME')` | Returns the Z-size of a physical body in meters. The global AABB (axis aligned bounding box) is used  | `getGlobalSizeInMetersZ('Phys Mesh')`    |
| `getViewportWidth()`                         | Returns width of viewport in pixels                                                                   | `getViewportWidth()`                     |
| `getViewportHeight()`                        | Returns height of viewport in pixels                                                                  | `getViewportHeight()`                    |

## System Variables

| Name       | Description                                                                                                      | Use Examples                       |
| ---------- | ---------------------------------------------------------------------------------------------------------------- | ---------------------------------- |
| `origin`   | The value assigned to the previous keyframe. In the first keyframe, it is equal to the value from the scene.     | `origin+10`                        |
| `iterator` | The number in the order of the keyframe in the clip to which this keyframe belongs. The countdown starts from 0. | `cos(2*pi*iterator/(amount-1))*10` |
| `amount`   | The number of keyframes in the animation track that this keyframe belongs to.                                    | `sin(2*pi*iterator/(amount-1))*10` |
| `pi`       | Pi number                                                                                                        | `2piR`                             |

## Object Variables

| Syntax                                  | Description                                                                        | Use Examples                                    |
| --------------------------------------- | ---------------------------------------------------------------------------------- | ----------------------------------------------- |
| `${object name}.variableName`           | User's custom variable                                                             | `${My character}.countOfCollectedCoins`         |
| `Letters`, `numbers`, `symbols` `_` `-` | Variables created within a certain animation timeline that are applied to it only. | `Var2*25` , `SomeUsersVar-5` , `randomDistance` |

## Operations and Functions

### Arithmetic and Assignment Operators

| Operator | Definition                                                                                                                             | Use Examples             |
| -------- | -------------------------------------------------------------------------------------------------------------------------------------- | ------------------------ |
| `+`      | Addition between x and y.                                                                                                              | `x + y`                  |
| `-`      | Subtraction between x and y.                                                                                                           | `x - y`                  |
| `*`      | Multiplication between x and y.                                                                                                        | `x * y`                  |
| `/`      | Division between x and y.                                                                                                              | `x / y`                  |
| `%`      | Modulus of x with respect to y.                                                                                                        | `x % y`                  |
| `^`      | x to the power of y.                                                                                                                   | `x ^ y`                  |
| `:=`     | Assign the value of x to y. Where y is either a variable or vector type.                                                               | `y := x`                 |
| `+=`     | Increment x by the value of the expression on the right-hand side. Where x is either a variable or vector type.                        | `x += abs(y - z)`        |
| `-=`     | Decrement x by the value of the expression on the right-hand side. Where x is either a variable or vector type.                        | `x[i] -= abs(y + z)`     |
| `*=`     | Assign the multiplication of x by the value of the expression on the righthand side to x. Where x is either a variable or vector type. | `x *= abs(y / z)`        |
| `/=`     | Assign the division of x by the value of the expression on the right-hand side to x. Where x is either a variable or vector type.      | `x[i + j] /= abs(y * z)` |
| `%=`     | Assign x modulo the value of the expression on the right\| \| \| hand side to x. Where x is either a variable or vector type.          | `x[2] %= y ^ 2`          |

### Equalities and Inequalities

| Operator     | Definition                                 | Use Examples         |
| ------------ | ------------------------------------------ | -------------------- |
| `==` or `=`  | True only if x is strictly equal to y.     | `x == y`             |
| `<>` or `!=` | True only if x does not equal y.           | `x <> y` or `x != y` |
| `<`          | True only if x is less than y.             | `x < y`              |
| `<=`         | True only if x is less than or equal to y. | `x <= y`             |
| `>`          | True only if x is greater than y.          | `x > y`              |
| `>=`         | True only if x greater than or equal to y. | `x >= y`             |

### Boolean Operations

| Operator | Definition                                                                                                          | Use Examples                          |
| -------- | ------------------------------------------------------------------------------------------------------------------- | ------------------------------------- |
| `true`   | True state or any value other than zero (typically 1).                                                              |                                       |
| `false`  | False state, value of exactly zero.                                                                                 |                                       |
| `and`    | Logical AND, True only if x and y are both true.                                                                    | `x and y`                             |
| `mand`   | Multi-input logical AND, True only if all inputs are true. Left to right short-circuiting of expressions.           | `mand(x > y, z < w, u or v, w and x)` |
| `mor`    | Multi-input logical OR, True if at least one of the inputs are true. Left to right short-circuiting of expressions. | `mor(x > y, z < w, u or v, w and x)`  |
| `nand`   | Logical NAND, True only if either x or y is false.                                                                  | `x nand y`                            |
| `nor`    | Logical NOR, True only if the result of x or y is false.                                                            | `x nor y`                             |
| `not`    | Logical NOT, Negate the logical sense of the input.                                                                 | `not(x and y) == x nand y`            |
| `or`     | Logical OR, True if either x or y is true.                                                                          | `x or y`                              |
| `xor`    | Logical XOR, True only if the logical states of x and y differ.                                                     | `x xor y`                             |
| `xnor`   | Logical XNOR, True iff the biconditional of x and y is satisfied.                                                   | `x xnor y`                            |
| `&`      | Similar to AND but with left to right expression short circuiting optimization.                                     | `(x & y) == (y and x)`                |
| `\|`     | Similar to OR but with left to right expression short circuiting optimization.                                      | `(x \| y) == (y or x)`                |

### General Purpose Functions

| Function   | Definition                                                                                                                 | Use Examples                                        |
| ---------- | -------------------------------------------------------------------------------------------------------------------------- | --------------------------------------------------- |
| `abs`      | Absolute value of x.                                                                                                       | `abs(x)`                                            |
| `avg`      | Average of all the inputs.                                                                                                 | `avg(x,y,z,w,u,v) == (x + y + z + w + u + v) / 6`   |
| `ceil`     | Smallest integer that is greater than or equal to x.                                                                       |                                                     |
| `clamp`    | Clamp x in range between r0 and r1, where r0 < r1.                                                                         | `clamp(r0,x,r1)`                                    |
| `equal`    | Equality test between x and y using normalized epsilon.                                                                    |                                                     |
| `erf`      | Error function of x.                                                                                                       | `erf(x)`                                            |
| `erfc`     | Complimentary error function of x.                                                                                         | `erfc(x)`                                           |
| `exp`      | e to the power of x.                                                                                                       | `exp(x)`                                            |
| `expm1`    | e to the power of x minus 1, where x is very small.                                                                        | `expm1(x)`                                          |
| `floor`    | Largest integer that is less than or equal to x.                                                                           | `floor(x)`                                          |
| `frac`     | Fractional portion of x.                                                                                                   | `frac(x)`                                           |
| `hypot`    | Hypotenuse of x and y.                                                                                                     | `hypot(x,y) = sqrt(x*x + y*y)`                      |
| `iclamp`   | Inverse-clamp x outside of the range r0 and r1. Where r0 < r1. If x is within the range it will snap to the closest bound. | `iclamp(r0,x,r1)`                                   |
| `inrange`  | In-range returns 'true' when x is within the range r0 and r1. Where r0 < r1.                                               | `inrange(r0,x,r1)`                                  |
| `log`      | Natural logarithm of x.                                                                                                    | `log(x)`                                            |
| `log10`    | Base 10 logarithm of x.                                                                                                    | `log10(x)`                                          |
| `log1p`    | Natural logarithm of 1 + x, where x is very small.                                                                         | `log1p(x)`                                          |
| `log2`     | Base 2 logarithm of x.                                                                                                     | `log2(x)`                                           |
| `logn`     | Base N logarithm of x. where n is a positive integer.                                                                      | `logn(x,8)`                                         |
| `max`      | Largest value of all the inputs.                                                                                           | `max(x,y,z,w,u,v)`                                  |
| `min`      | Smallest value of all the inputs.                                                                                          | `min(x,y,z,w,u)`                                    |
| `mul`      | Product of all the inputs.                                                                                                 | `mul(x,y,z,w,u,v,t) == (x*y*z*w*u*v*t)`             |
| `ncdf`     | Normal cumulative distribution function.                                                                                   | `ncdf(x)`                                           |
| `nequal`   | Not-equal test between x and y using normalized epsilon.                                                                   |                                                     |
| `pow`      | x to the power of y.                                                                                                       | `pow(x,y) == x ^ y`                                 |
| `root`     | Nth-Root of x. where n is a positive integer.                                                                              | `root(x,3) == x^(1/3)`                              |
| `round`    | Round x to the nearest integer.                                                                                            | `round(x)`                                          |
| `roundn`   | Round x to n decimal places where n > 0 and is an integer.                                                                 | `roundn(x,3) roundn(1.2345678,4) == 1.2346`         |
| `sgn`      | Sign of x, -1 where x < 0, +1 where x > 0, else zero.                                                                      | `sgn(x)`                                            |
| `sqrt`     | Square root of x, where x >= 0.                                                                                            | `sqrt(x)`                                           |
| `sum`      | Sum of all the inputs.                                                                                                     | `sum(x,y,z,w,u,v,t) == (x + y + z + w + u + v + t)` |
| `swap <=>` | Swap the values of the variables x and y and return the current value of y.                                                | `swap(x,y) or x <=> y`                              |
| `trunc`    | Integer portion of x.                                                                                                      | `trunc(x)`                                          |

### Trigonometry Functions

| Function   | Definition                                               | Use Examples  |
| ---------- | -------------------------------------------------------- | ------------- |
| `acos`     | Arc cosine of x expressed in radians. Interval \[-1,+1]  | `acos(x)`     |
| `acosh`    | Inverse hyperbolic cosine of x expressed in radians.     | `acosh(x)`    |
| `asin`     | Arc sine of x expressed in radians. Interval \[-1,+1]    | `asin(x)`     |
| `asinh`    | Inverse hyperbolic sine of x expressed in radians.       | `asinh(x)`    |
| `atan`     | Arc tangent of x expressed in radians. Interval \[-1,+1] | `atan(x)`     |
| `atan2`    | Arc tangent of (x / y) expressed in radians. \[-pi,+pi]  | `atan2(x,y)`  |
| `atanh`    | Inverse hyperbolic tangent of x expressed in radians.    | `atanh(x)`    |
| `cos`      | Cosine of x.                                             | `cos(x)`      |
| `cosh`     | Hyperbolic cosine of x.                                  | `cosh(x)`     |
| `cot`      | Cotangent of x.                                          | `cot(x)`      |
| `csc`      | Cosecant of x.                                           | `csc(x)`      |
| `sec`      | Secant of x.                                             | `sec(x)`      |
| `sin`      | Sine of x.                                               | `sin(x)`      |
| `sinc`     | Sine cardinal of x.                                      | `sinc(x)`     |
| `sinh`     | Hyperbolic sine of x.                                    | `sinh(x)`     |
| `tan`      | Tangent of x.                                            | `tan(x)`      |
| `tanh`     | Hyperbolic tangent of x.                                 | `tanh(x)`     |
| `deg2rad`  | Convert x from degrees to radians.                       | `deg2rad(x)`  |
| `deg2grad` | Convert x from degrees to gradians.                      | `deg2grad(x)` |
| `rad2deg`  | Convert x from radians to degrees.                       | `rad2deg(x)`  |
| `grad2deg` | Convert x from gradians to degrees.                      | `grad2deg(x)` |

### String Processing

| Function                                    | Definition                                                                                                                                                                                                                                                                                                                                                  | Use Examples                                                                                                                                                                                                                                                                                                                        |   |   |                                                                                |
| ------------------------------------------- | ----------------------------------------------------------------------------------------------------------------------------------------------------------------------------------------------------------------------------------------------------------------------------------------------------------------------------------------------------------- | ----------------------------------------------------------------------------------------------------------------------------------------------------------------------------------------------------------------------------------------------------------------------------------------------------------------------------------- | - | - | ------------------------------------------------------------------------------ |
| `=`, `==`, `!=`, `<>`, `<=`, `>=`, `>`, `<` | All common equality/inequality operators are applicable to strings and are applied in a case sensitive manner. In the following example x, y and z are of type string.                                                                                                                                                                                      | `not((x <= 'AbC') and ('1x2y3z' <> y)) or (z == x)`                                                                                                                                                                                                                                                                                 |   |   |                                                                                |
| `in`                                        | True only if x is a substring of y.                                                                                                                                                                                                                                                                                                                         | `x in y or 'abc' in 'abcdefgh'`                                                                                                                                                                                                                                                                                                     |   |   |                                                                                |
| `like`                                      | True only if the string x matches the pattern y. Available wildcard characters are '\*' and '?' denoting zero or more and zero or one matches respectively.                                                                                                                                                                                                 | `x like y or 'abcdefgh' like 'a?d*h'`                                                                                                                                                                                                                                                                                               |   |   |                                                                                |
| `ilike`                                     | True only if the string x matches the pattern y in a case insensitive manner. Available wildcard characters are '\*' and '?' denoting zero or more and zero or one matches respectively.                                                                                                                                                                    | `x ilike y or 'a1B2c3D4e5F6g7H' ilike 'a?d*h'`                                                                                                                                                                                                                                                                                      |   |   |                                                                                |
| `[r0:r1]`                                   | <p>The closed interval <code>\[r0,r1]</code> of the specified string. Given a string x with a value of 'abcdefgh' then (see example). </p><p>Note: Both r0 and r1 are assumed to be integers, where r0 <= r1. They may also be the result of an expression, in the event they have fractional components truncation will be performed. (eg: 1.67 --> 1)</p> | <p><code>x\[1:4] == 'bcde'</code></p><p><code>x\[ :5] == x\[:10 / 2] == 'abcdef'</code></p><p><code>x\[2 + 1: ] == x\[3:] =='defgh'</code> </p><p><code>x\[ : ] == x\[:] == 'abcdefgh'</code> </p><p><code>x\[4/2:3+2] == x\[2:5] == 'cdef'</code></p>                                                                              |   |   |                                                                                |
| `:=`                                        | <p>Assign the value of x to y. Where y is a mutable string or string range and x is either a string or a string range. </p><p></p><p>Note: For options 7 and 8 the shorter of the two ranges will denote the number of characters that are to be copied.</p>                                                                                                | <p><code>y := x</code></p><p><code>y := 'abc'</code></p><p><code>y := x\[:i + j]</code></p><p><code>y := '0123456789'\[2:7]</code> <code>y := '0123456789'\[2i + 1:7]</code></p><p><code>y := (x := '0123456789'\[2:7])</code> </p><p><code>y\[i:j] := x</code> </p><p><code>y\[i:j] := (x + 'abcdefg'\[8 / 4:5])\[m:n]</code> </p> |   |   |                                                                                |
| `+`                                         | Concatenation of x and y. Where x and y are strings or string ranges.                                                                                                                                                                                                                                                                                       | <p><code>x + y</code> </p><p><code>x + 'abc'</code> </p><p><code>x + y\[:i + j]</code></p><p><code>x\[i:j] + y\[2:3] + '0123456789'\[2:7]</code></p><p><code>'abc' + x + y                                                                                                                                                          |   |   | 6. 'abc' + '1234567'</code></p><p><code>(x + 'a1B2c3D4' + y)\[i:2j]</code></p> |
| `+=`                                        | Append to x the value of y. Where x is a mutable string and y is either a string or a string range.                                                                                                                                                                                                                                                         | <p><code>x += y</code> </p><p><code>x += 'abc'</code> </p><p><code>x += y\[:i + j] + 'abc'</code> </p><p><code>x += '0123456789'\[2:7]</code></p>                                                                                                                                                                                   |   |   |                                                                                |
| `<=>`                                       | Swap the values of x and y. Where x and y are mutable strings.                                                                                                                                                                                                                                                                                              | `x <=> y`                                                                                                                                                                                                                                                                                                                           |   |   |                                                                                |
| `[]`                                        | The string size operator returns the size of the string being actioned.                                                                                                                                                                                                                                                                                     | <p><code>'abc'\[] == 3</code> </p><p><code>var max\_str\_length := max(s0\[],s1\[],s2\[],s3\[])</code> </p><p><code>('abc' + 'xyz')\[] == 6</code> </p><p><code>(('abc' + 'xyz')\[1:4])\[] == 4</code></p>                                                                                                                          |   |   |                                                                                |

### Control Structures

| Structure       | Definition                                                                                                                                                                                                                                                                                | Use Examples                                                                                                                                                                                                                                                                                                                                                                                                                                                                                       |   |   |                                                  |
| --------------- | ----------------------------------------------------------------------------------------------------------------------------------------------------------------------------------------------------------------------------------------------------------------------------------------- | -------------------------------------------------------------------------------------------------------------------------------------------------------------------------------------------------------------------------------------------------------------------------------------------------------------------------------------------------------------------------------------------------------------------------------------------------------------------------------------------------- | - | - | ------------------------------------------------ |
| `if`            | If x is true then return y else return z.                                                                                                                                                                                                                                                 | <p><code>if (x, y, z)</code> </p><p><code>if ((x + 1) > 2y, z + 1, w / v)</code> </p><p><code>if (x > y) z;</code>  </p><p><code>if (x <= 2\*y) { z + w };</code></p>                                                                                                                                                                                                                                                                                                                              |   |   |                                                  |
| `if-else`       | The if-else/else-if statement. Subject to the condition branch the statement will return either the value of the consequent or the alternative branch.                                                                                                                                    | <p><code>if (x > y) z; else w;</code> </p><p><code>if (x > y) z; else if (w != u) v;</code> </p><p><code>if (x < y) { z; w + 1; } else u;</code> </p><p><code>if ((x != y) and (z > w))</code> </p><p><code>{</code> </p><p><code>y := sin(x) / u;</code> </p><p><code>z := w + 1;</code> </p><p><code>}</code></p><p><code>else if (x > (z + 1))</code></p><p><code>{</code> </p><p><code>w := abs (x - y) + z;</code> </p><p><code>u := (x + 1) > 2y ? 2u : 3u;</code> </p><p><code>}</code></p> |   |   |                                                  |
| `switch`        | The first true case condition that is encountered will determine the result of the switch. If none of the case conditions hold true, the default action is assumed as the final return value. This is sometimes also known as a multi-way branch mechanism.                               | <p><code>switch</code> </p><p><code>{</code></p><p><code>ase x > (y + z) : 2 \* x / abs(y - z);</code> </p><p><code>case x < 3 : sin(x + y);</code> </p><p><code>default : 1 + x;</code> </p><p><code>}</code></p>                                                                                                                                                                                                                                                                                 |   |   |                                                  |
| `while`         | The structure will repeatedly evaluate the internal statement(s) 'while' the condition is true. The final statement in the final iteration will be used as the return value of the loop.                                                                                                  | <p><code>while ((x -= 1) > 0)</code> </p><p><code>{</code> </p><p><code>y := x + z;</code> </p><p><code>w := u + y;</code> </p><p><code>}</code></p>                                                                                                                                                                                                                                                                                                                                               |   |   |                                                  |
| `repeat/until`  | The structure will repeatedly evaluate the internal until statement(s) 'until' the condition is true. The final statement in the final iteration will be used as the return value of the loop.                                                                                            | <p><code>repeat</code> </p><p><code>y := x + z;</code> </p><p><code>w := u + y;</code> </p><p><code>until ((x += 1) > 100)</code></p>                                                                                                                                                                                                                                                                                                                                                              |   |   |                                                  |
| `for`           | The structure will repeatedly evaluate the internal statement(s) while the condition is true. On each loop iteration, an 'incrementing' expression is evaluated. The conditional is mandatory whereas the initializer and incrementing expressions are optional.                          | <p><code>for (var x := 0; (x < n) and (x != y); x += 1)</code> </p><p><code>{</code> </p><p><code>y := y + x / 2 - z;</code> </p><p><code>w := u + y;</code> </p><p><code>}</code></p>                                                                                                                                                                                                                                                                                                             |   |   |                                                  |
| `break break[]` | Break terminates the execution of the nearest enclosed loop, allowing for the execution to continue on external to the loop. The default break statement will set the return value of the loop to NaN, where as the return based form will set the value to that of the break expression. | <p><code>while ((i += 1) < 10)</code> </p><p><code>{</code> </p><p><code>if (i < 5)</code> </p><p> <code>j -= i + 2;</code> </p><p><code>else if (i % 2 == 0)</code> </p><p><code>break;</code></p><p><code>else                                                                                                                                                                                                                                                                                   |   |   | break\[2i + 3];</code> </p><p><code>}</code></p> |
| `continue`      | Continue results in the remaining portion of the nearest enclosing loop body to be skipped.                                                                                                                                                                                               | <p><code>for (var i := 0; i < 10; i += 1)</code> </p><p><code>{</code> </p><p><code>if (i < 5)</code> </p><p><code>continue;</code> </p><p><code>j -= i + 2;</code> </p><p><code>}</code></p>                                                                                                                                                                                                                                                                                                      |   |   |                                                  |
| `return`        | Return immediately from within the current expression. With the option of passing back a variable number of values (scalar, vector or string).                                                                                                                                            | <p><code>return \[1];</code> </p><p><code>return \[x, 'abx'];</code> </p><p><code>return \[x, x + y,'abx'];</code> </p><p><code>return \[];</code> </p><p><code>if (x < y)</code> </p><p><code>return \[x, x - y, 'result-set1', 123.456];</code></p><p><code>else</code> </p><p><code>return \[y, x + y, 'result-set2'];</code></p>                                                                                                                                                               |   |   |                                                  |
| `?:`            | Ternary conditional statement, similar to that of the above denoted if-statement.                                                                                                                                                                                                         | <p><code>x ? y : z</code> </p><p><code>x + 1 > 2y ? z + 1 : (w / v)</code> </p><p><code>min(x,y) > z ? (x < y + 1) ? x : y : (w \* v)</code></p>                                                                                                                                                                                                                                                                                                                                                   |   |   |                                                  |
| `~`             | Evaluate each sub-expression, then return as the result the value of the last sub-expression. This is sometimes known as multiple sequence point evaluation.                                                                                                                              | <p><code>~~(i := x + 1, j := y / z, k := sin(w/u)) == (sin(w/u)))</code> </p><p><code>~~{i := x + 1; j := y / z; k := sin(w/u)} == (sin(w/u)))</code></p>                                                                                                                                                                                                                                                                                                                                          |   |   |                                                  |
| `[*]`           | Evaluate any consequent for which its case statement is true. The return value will be either zero or the result of the last consequent to have been evaluated.                                                                                                                           | <p><code>\[\*]</code></p><p><code>{</code> </p><p><code>case (x + 1) > (y - 2) : x := z / 2 + sin(y / pi);</code> </p><p><code>case (x + 2) < abs(y + 3) : w / 4 + min(5y,9);</code> </p><p><code>case (x + 3) == (y \* 4) : y := abs(z / 6) + 7y;</code> </p><p><code>}</code></p>                                                                                                                                                                                                                |   |   |                                                  |
| `[]`            | The vector size operator returns the size of the vector being actioned.                                                                                                                                                                                                                   | <p><code>v\[]</code> </p><p><code>max\_size := max(v0\[],v1\[],v2\[],v3\[])</code></p>                                                                                                                                                                                                                                                                                                                                                                                                             |   |   |                                                  |


# Keyboard shortcuts

* LMB - light mouse button
* RMB - right mouse button

| Mac                       | Windows                    | Description                             |
| ------------------------- | -------------------------- | --------------------------------------- |
| `CMD+N`                   | `CTRL+N`                   | Create new project                      |
| `CMD+O`                   | `CTRL+O`                   | Open project                            |
| `CMD+S`                   | `CTRL+S`                   | Save project                            |
| `CMD+W`                   | `CTRL+W`                   | Close project                           |
|                           |                            |                                         |
| `CMD+Z`                   | `CTRL+Z`                   | Undo                                    |
| `CMD+SHIFT+Z`             | `CTRL+SHIFT+Z`             | Redo                                    |
|                           |                            |                                         |
| `CMD+\`                   | `CTRL+\`                   | Hide/Show UI                            |
|                           |                            |                                         |
|                           |                            |                                         |
| `CMD+C`                   | `CTRL+C`                   | Copy                                    |
| `CMD+V`                   | `CTRL+V`                   | Paste                                   |
| `CMD+X`                   | `CTRL+X`                   | Cut                                     |
| `CMD+D`                   | `CTRL+D`                   | Duplicate                               |
| `CMD+BACKSPACE` ,`DELETE` | `CTRL+BACKSPACE` ,`DELETE` | Delete                                  |
|                           |                            |                                         |
| `CMD+I`                   | `CTRL+I`                   | Import                                  |
| `CMD+E`                   | `CTRL+E`                   | Export                                  |
|                           |                            |                                         |
| `ALT+W`,`ALT+LMB Drag`    | `ALT+W`,`ALT+LMB Drag`     | Camera (fly orbit) - up                 |
| `ALT+S`,`ALT+LMB Drag`    | `ALT+S`,`ALT+LMB Drag`     | Camera (fly orbit) - down               |
| `ALT+A`,`ALT+LMB Drag`    | `ALT+A`,`ALT+LMB Drag`     | Camera (fly orbit) - left               |
| `ALT+D`,`ALT+LMB Drag`    | `ALT+D`,`ALT+LMB Drag`     | Camera (fly orbit) - right              |
|                           |                            |                                         |
| `W`,`WHEEL_UP`            | `W`,`WHEEL_UP`             | Camera (fly free) - forward / Zoom In   |
| `S`,`WHEEL_DOWN`          | `S`,`WHEEL_DOWN`           | Camera (fly free) - backward / Zoom Out |
| `A`,`SPACE+LMB Drag`      | `A`,`SPACE+LMB Drag`       | Camera (fly free) - left                |
| `D`,`SPACE+LMB Drag`      | `D`,`SPACE+LMB Drag`       | Camera (fly free) - right               |
| `E`, `SPACE+LMB Drag`     | `E`,`SPACE+LMB Drag`       | Camera (fly free) - up                  |
| `Q`, `SPACE+LMB Drag`     | `Q`,`SPACE+LMB Drag`       | Camera (fly free) - down                |
|                           |                            |                                         |
| `SHIFT+W` ,`RMB Drag`     | `SHIFT+W` ,`RMB Drag`      | Camera (rotate) - up                    |
| `SHIFT+S` ,`RMB Drag`     | `SHIFT+S` ,`RMB Drag`      | Camera (rotate) - down                  |
| `SHIFT+A` ,`RMB Drag`     | `SHIFT+A` ,`RMB Drag`      | Camera (rotate) - left                  |
| `SHIFT+D` ,`RMB Drag`     | `SHIFT+D` ,`RMB Drag`      | Camera (rotate) - right                 |


# FAQ

### **Q: What is the recommended computer configuration for running MANU?**

{% hint style="success" %}
We recommend follow configuration for common platforms%

**Windows:** Requires a 64-bit processor, Windows 64 Bit or higher, Quad-core or higher, 8 Gb RAM DirectX11 support SSD

**MacOS:** Requires a 64-bit processor, MacOS Catalina or higher, Quad-core or higher, 8Gb RAM Metal 2 support SSD
{% endhint %}

### **Q:** How to install MANU?

{% hint style="success" %}
[How to install MANU link](/learn/manual/installing-manu).
{% endhint %}

### **Q:** MacOS gives "Fails to verify the developer "MANU.app". Do you really want to open this file?" error and won't run, what to do?

{% hint style="success" %}
Select MANU in Applications

Perform right click on MANU application icon

Select **Open**

In opened window select **Open**
{% endhint %}

### Q: How to create a new project?

{% hint style="success" %}
Select **Create project** in Welcome window
{% endhint %}

<figure><img src="https://4240499350-files.gitbook.io/~/files/v0/b/gitbook-x-prod.appspot.com/o/spaces%2F-Lt-sE9MYKe9pZOcHwg5%2Fuploads%2FVs7nEGDLhqpW8KESPa2d%2Fimage.png?alt=media&amp;token=cf596e2c-b37d-435e-8924-206bc7113c0c" alt=""><figcaption></figcaption></figure>

{% hint style="success" %}
In Project creation window select desired template, name your project and press **Create.**
{% endhint %}

<figure><img src="https://4240499350-files.gitbook.io/~/files/v0/b/gitbook-x-prod.appspot.com/o/spaces%2F-Lt-sE9MYKe9pZOcHwg5%2Fuploads%2FkZ84YBmH7XaGDNxF87Uo%2Fimage.png?alt=media&amp;token=46afef28-2fe3-4075-a481-48f51575a3b7" alt=""><figcaption></figcaption></figure>

### Q: What type of project template should I select?

{% hint style="success" %}
It depends on what type of game mechanics you want to do in your project. If you are the beginner, we recommend you start with **Platformer Kit template**, to learn basics of MANU.
{% endhint %}

### Q: Where is my project located?

{% hint style="success" %}
By default projects saving in your Documents folder. You always can change location of the project in Create project window, by clicking on a folder icon, under name of project.
{% endhint %}

### Q: How to rotate the camera?

{% hint style="success" %}
There is some methods:

By click and hold **Right mouse button** and moving mouse.

By hold **Alt (Option)** + **Left mouse button** and moving mouse.

By hold **Alt (Option)** + **WASD keys**

More information in the [Keyboard shortcuts](/learn/keyboard-shortcuts).
{% endhint %}

### **Q: How to create other 3D objects, not just boxes?**

{% hint style="success" %}
Click with Left mouse button in the right bottom corner of a icon of a Box object. In appeared popup you can select other 3D object.
{% endhint %}

### Q: How to move objects through the scene?

{% hint style="success" %}
Select needed object.

In Gizmo toggle under Mode toggle select **Move** icon.

<img src="https://4240499350-files.gitbook.io/~/files/v0/b/gitbook-x-prod.appspot.com/o/spaces%2F-Lt-sE9MYKe9pZOcHwg5%2Fuploads%2FDVuEAKFwNwYFMWZvfCdZ%2Fimage.png?alt=media&amp;token=8833f636-b8ea-432a-9ef8-9dab9f59e0ef" alt="" data-size="line">

In a viewport **Move gizmo** appears on selected object.

![](https://4240499350-files.gitbook.io/~/files/v0/b/gitbook-x-prod.appspot.com/o/spaces%2F-Lt-sE9MYKe9pZOcHwg5%2Fuploads%2FzO3XegbLJ0jenevaa5TH%2Fimage.png?alt=media\&token=0664b228-5fae-497c-81e0-bd09cc85be36)

Move cursor on one of the Gizmo axis (<mark style="color:red;">Red :X</mark>, <mark style="color:green;">Green:Y</mark>, <mark style="color:blue;">Z:Blue</mark>)

Click and Hold cursor on selected axis and move mouse. Object will also move along selected axis.

Also you can move object in selected plane.

Move cursor on one of the Gizmo axis on colored square between axises. (<mark style="color:red;">Red</mark>-<mark style="color:green;">Green</mark>: XY plane, <mark style="color:red;">Red</mark>-<mark style="color:blue;">Blue</mark>: XZ plane, <mark style="color:green;">Green</mark>-<mark style="color:blue;">Blue</mark>: YZ plane)

Click and Hold cursor on selected square and move mouse. Object will also move in selected plane.

More information learn in the [Transforms chapter](/learn/manual/transforms).
{% endhint %}

### Q: How to rotate objects?

{% hint style="success" %}
Select needed object.

In Gizmo toggle under Mode toggle select **Rotate** icon.

<img src="https://4240499350-files.gitbook.io/~/files/v0/b/gitbook-x-prod.appspot.com/o/spaces%2F-Lt-sE9MYKe9pZOcHwg5%2Fuploads%2FvTiIdUOSll3Nl4SlDm0F%2Fimage.png?alt=media&amp;token=b3c04a16-34f2-4b4e-acc2-cb021810e8e2" alt="" data-size="line">

In a viewport **Rotate gizmo** appears on selected object.

![](https://4240499350-files.gitbook.io/~/files/v0/b/gitbook-x-prod.appspot.com/o/spaces%2F-Lt-sE9MYKe9pZOcHwg5%2Fuploads%2FfTl3kglltolnk5C80Ejy%2Fimage.png?alt=media\&token=b55c209e-bc9c-471b-8ccf-39b3f0507509)

Move cursor on one of the Gizmo axis (<mark style="color:red;">Red :X</mark>, <mark style="color:green;">Green:Y</mark>, <mark style="color:blue;">Z:Blue</mark>)

Click and Hold cursor on selected axis and move mouse. Object will rotate along selected axis by 1 degree.
{% endhint %}

### Q: How to Scale objects?

{% hint style="success" %}
Select needed object.

In Gizmo toggle under Mode toggle select **Scale** icon.

<img src="https://4240499350-files.gitbook.io/~/files/v0/b/gitbook-x-prod.appspot.com/o/spaces%2F-Lt-sE9MYKe9pZOcHwg5%2Fuploads%2FU9sgjBPdx3IwknJ9XrwS%2Fimage.png?alt=media&amp;token=f6dd04d7-8337-442c-9790-b8d37e53aaf3" alt="" data-size="line">

In a viewport **Scale gizmo** appears on selected object.

![](https://4240499350-files.gitbook.io/~/files/v0/b/gitbook-x-prod.appspot.com/o/spaces%2F-Lt-sE9MYKe9pZOcHwg5%2Fuploads%2F3XwH2s28jX4w9ZbAcFxA%2Fimage.png?alt=media\&token=f7b7601a-ef02-46c4-a462-ac9ca2324f9c)

Move cursor on one of the Gizmo axis (<mark style="color:red;">Red :X</mark>, <mark style="color:green;">Green:Y</mark>, <mark style="color:blue;">Z:Blue</mark>)

Click and Hold cursor on selected axis and move mouse. Object will scale along selected axis.

Also you can scale object in selected plane.

Move cursor on one of the Gizmo axis on colored square between axises. (<mark style="color:red;">Red</mark>-<mark style="color:green;">Green</mark>: XY plane, <mark style="color:red;">Red</mark>-<mark style="color:blue;">Blue</mark>: XZ plane, <mark style="color:green;">Green</mark>-<mark style="color:blue;">Blue</mark>: YZ plane)

Click and Hold cursor on selected square and move mouse. Object will scale in selected plane.

More information learn in the [Transforms chapter](/learn/manual/transforms).
{% endhint %}

### Q: How to move objects a certain distance?

{% hint style="success" %}
While Move gizmo selected, there is a **Snap control** under gizmo toggle with two snap settings. Selecting one of them you can adjust exact step of **Move gizmo.**

Select the first setting and **Snapping grid** will appears on the Movie gizmo.

![](https://4240499350-files.gitbook.io/~/files/v0/b/gitbook-x-prod.appspot.com/o/spaces%2F-Lt-sE9MYKe9pZOcHwg5%2Fuploads%2FMFRI5FDRTygFAi6RHMEl%2Fimage.png?alt=media\&token=fb8164f3-d5f9-4388-a6d4-5a4a9e9d0645)

Now, while you will move selected object by grid step setting value.

![](https://4240499350-files.gitbook.io/~/files/v0/b/gitbook-x-prod.appspot.com/o/spaces%2F-Lt-sE9MYKe9pZOcHwg5%2Fuploads%2F6pWauJ89gXPXu6Tdnqod%2Fimage.png?alt=media\&token=8342fddd-3233-492c-bd9e-46b1188fe8bf)

{% endhint %}

### Q: How to create a new material or change object's color?

{% hint style="success" %}
Select 3D object

In object inspector select **Material** tab

![](https://4240499350-files.gitbook.io/~/files/v0/b/gitbook-x-prod.appspot.com/o/spaces%2F-Lt-sE9MYKe9pZOcHwg5%2Fuploads%2FDg4jVD0h9xx0AksCUJbK%2Fimage.png?alt=media\&token=68be7c8c-1d66-4683-84a8-48e50fcbbb5a)

Click on **Create new material** icon in the right from Select Material...

New material would be created with PBR Shader.&#x20;

![](https://4240499350-files.gitbook.io/~/files/v0/b/gitbook-x-prod.appspot.com/o/spaces%2F-Lt-sE9MYKe9pZOcHwg5%2Fuploads%2F366qwWyynhakNU6qXMit%2Fimage.png?alt=media\&token=2f4fd42c-ff8d-46b7-89b3-f15bcb23caff)\
\
To change color of the object adjust **Albedo Tint** parameter.

![](https://4240499350-files.gitbook.io/~/files/v0/b/gitbook-x-prod.appspot.com/o/spaces%2F-Lt-sE9MYKe9pZOcHwg5%2Fuploads%2FaclXx6UCxA3gdisc6vib%2Fimage.png?alt=media\&token=1689b2a7-4387-4828-b14f-f6234c07c7d5)\
\
To learn more explore [Materials chapter](/learn/manual/materials).
{% endhint %}

### Q: How to group objects together?

{% hint style="success" %}
Select object

Click right mouse button on it and open context menu

Select **Group**

Selected object moved to group

To add other objects in created group just Drag\&Drop them in it, one by one.

For now, functionality of multiselect is not developed. Keep an eye for updates.
{% endhint %}

### Q: How to light the scene?

{% hint style="success" %}
Hover and click on **Spot Light** icon in main toolbar.

<img src="https://4240499350-files.gitbook.io/~/files/v0/b/gitbook-x-prod.appspot.com/o/spaces%2F-Lt-sE9MYKe9pZOcHwg5%2Fuploads%2FjgxFv0KwjeiWmXgKjP2y%2Fimage.png?alt=media&amp;token=d02b295b-bc28-47c6-a2dc-54b7e8545c00" alt="" data-size="original">

New lightsource created in scene.&#x20;

<img src="https://4240499350-files.gitbook.io/~/files/v0/b/gitbook-x-prod.appspot.com/o/spaces%2F-Lt-sE9MYKe9pZOcHwg5%2Fuploads%2F8CKEZaNiYMKn8sHd4R5h%2Fimage.png?alt=media&amp;token=b0725d3d-d155-492d-9e8a-27b888826641" alt="" data-size="original">

You can adjust it's settings, such as color, intensity and range in object inspector, on the left of screen.

![](https://4240499350-files.gitbook.io/~/files/v0/b/gitbook-x-prod.appspot.com/o/spaces%2F-Lt-sE9MYKe9pZOcHwg5%2Fuploads%2Fq1cGAyKX5NtFhF2gziO2%2Fimage.png?alt=media\&token=fabffd7f-f83e-4340-83c0-85147b7e06e2)\
\
You can use **Move** and **Rotate** gizmos to set lightsource in desired position.
{% endhint %}

### Q: How to change Sun color?

{% hint style="success" %}
Select **Project** tab in top left corner of a screen.

![](https://4240499350-files.gitbook.io/~/files/v0/b/gitbook-x-prod.appspot.com/o/spaces%2F-Lt-sE9MYKe9pZOcHwg5%2Fuploads%2FRmHeyai2SFjJ0qcMlklq%2Fimage%201.png?alt=media\&token=dd570cd6-e61e-46b5-b011-f8f33fd4b55a)<br>

Select **Sun** in Environment section

![](https://4240499350-files.gitbook.io/~/files/v0/b/gitbook-x-prod.appspot.com/o/spaces%2F-Lt-sE9MYKe9pZOcHwg5%2Fuploads%2FUWy0x7uBUshWa0PkYgZm%2Fimage.png?alt=media\&token=b5d48917-a580-4967-9300-66ceea169176)

\
Change Sun **Color** parameter in object inspector to the right.\
![](https://4240499350-files.gitbook.io/~/files/v0/b/gitbook-x-prod.appspot.com/o/spaces%2F-Lt-sE9MYKe9pZOcHwg5%2Fuploads%2FtMjj7kslSDVglp8ZIpTF%2Fimage.png?alt=media\&token=923a809c-ee0f-48b0-af7c-7896539bbccd)\ <br>
{% endhint %}

### Q: How to make the main character not pass through created objects?

{% hint style="success" %}
Main Character and other object can physicaly interact with other objects if they have Physics component.

To add **Physics** component to the object, select it and switch to **Physics** tab below object inspector

![](https://4240499350-files.gitbook.io/~/files/v0/b/gitbook-x-prod.appspot.com/o/spaces%2F-Lt-sE9MYKe9pZOcHwg5%2Fuploads%2FUB4JPlp10KN5VdVW4pPm%2Fimage.png?alt=media\&token=50eca733-cbea-4dd1-ac61-94045e0711de)<br>

Set parameter **Physical** to **YES** by clicking on it

![](https://4240499350-files.gitbook.io/~/files/v0/b/gitbook-x-prod.appspot.com/o/spaces%2F-Lt-sE9MYKe9pZOcHwg5%2Fuploads%2FZw4MCc0sy9nOm4ntVyC3%2Fimage.png?alt=media\&token=0c46d3b5-27f5-4380-958d-405c78f114e3)\
\
Now click on **Rigidbody** parameter value

![](https://4240499350-files.gitbook.io/~/files/v0/b/gitbook-x-prod.appspot.com/o/spaces%2F-Lt-sE9MYKe9pZOcHwg5%2Fuploads%2F9X0uZnWDmKvWhWc4AcLD%2Fimage.png?alt=media\&token=7c88a43c-d1ec-44d7-80bb-ac9973d61c19)<br>

There are four types on Physical objects. But for now you may choose from three:

**Static** - is good for creating objects which would be static in scene, such as floor, walls, static platforms, rocks etc.&#x20;

**Dynamic** - is good for objects which can be moved in scene naturaly like common physic objects, such as barells, light boxes, chairs, bottles etc.

**Kinematic** - is good for objects which would be animated and would interracting with Main Character or other scene objects, such as moving platforms, doors, enemies, traps, vehicles etc.

Know more in [Physics chapter](/learn/manual/physics).
{% endhint %}

### Q: How animate object?

{% hint style="success" %}
Hover and click on **Animation** icon in main toolbar.

![](https://4240499350-files.gitbook.io/~/files/v0/b/gitbook-x-prod.appspot.com/o/spaces%2F-Lt-sE9MYKe9pZOcHwg5%2Fuploads%2FFBbCmDPnBcdyNsdaNH9x%2FFrame%201866.png?alt=media\&token=5b02ff41-7646-480b-9261-1827d4eee1b8)<br>

**Animation** object would be created in Scene tree

Switch to Animation mode in Mode toggle.

![](https://4240499350-files.gitbook.io/~/files/v0/b/gitbook-x-prod.appspot.com/o/spaces%2F-Lt-sE9MYKe9pZOcHwg5%2Fuploads%2F5elh44M84JFNdun99Egm%2FAnimation.png?alt=media\&token=7b96f673-cb69-4a2b-9659-6e7f0882816c)<br>

**Timeline** pannel would be appeared at the bottom of a screen

![](https://4240499350-files.gitbook.io/~/files/v0/b/gitbook-x-prod.appspot.com/o/spaces%2F-Lt-sE9MYKe9pZOcHwg5%2Fuploads%2FbTxjAaQE2YAaTXznTTse%2Fimage.png?alt=media\&token=8d61180a-c07a-434c-bd04-07e6d5139391)<br>

Click on the leftmost icon Timeline, **Add object**

In appeared **Object picker** select needed object to animate (***Box*** for example)

![](https://4240499350-files.gitbook.io/~/files/v0/b/gitbook-x-prod.appspot.com/o/spaces%2F-Lt-sE9MYKe9pZOcHwg5%2Fuploads%2FesyGadZEgAdzZsrHLgQE%2Fimage.png?alt=media\&token=f407f345-3754-43b6-a1cc-127991217ac6)

\
Object to animate added to Timeline

![](https://4240499350-files.gitbook.io/~/files/v0/b/gitbook-x-prod.appspot.com/o/spaces%2F-Lt-sE9MYKe9pZOcHwg5%2Fuploads%2FT9AbbDhjYk3r24EgLkvl%2Fimage.png?alt=media\&token=ed2ffa67-8337-4e7f-86a4-52abb9021f11)\
\
Hover on object in Timeline and click on "**+**" icon on it. Animatable Parameter selector would popup.

![](https://4240499350-files.gitbook.io/~/files/v0/b/gitbook-x-prod.appspot.com/o/spaces%2F-Lt-sE9MYKe9pZOcHwg5%2Fuploads%2Fc6HJtiRemd24zNyK8sLm%2Fimage.png?alt=media\&token=4aa11bde-fcf9-462e-92a6-16187b2ad286)<br>

Select Parameter to animate (Position by X for example)

![](https://4240499350-files.gitbook.io/~/files/v0/b/gitbook-x-prod.appspot.com/o/spaces%2F-Lt-sE9MYKe9pZOcHwg5%2Fuploads%2FcU3zh7ks2V5MufwDabvm%2Fimage.png?alt=media\&token=8f2db9a6-24c5-4f0b-9633-8501af7f4813)<br>

Parameter Position X would be added to Timeline and first keyframe of this parameter would be added. Click on a keyframe (red dot on timeline) and change it's value from "origin" to "0".

![](https://4240499350-files.gitbook.io/~/files/v0/b/gitbook-x-prod.appspot.com/o/spaces%2F-Lt-sE9MYKe9pZOcHwg5%2Fuploads%2FlkmeyUGyp8ZkUzqPdYpQ%2Fimage.png?alt=media\&token=474092f8-4c4c-4991-a087-2484ba69f097)<br>

Hover and click on **Position X** track around 2.0 seconds timeline position. In appeared popup enter value "2" and click outside popup.

<img src="https://4240499350-files.gitbook.io/~/files/v0/b/gitbook-x-prod.appspot.com/o/spaces%2F-Lt-sE9MYKe9pZOcHwg5%2Fuploads%2FRTkhFsAaIqlhcHdgqvHT%2Fimage.png?alt=media&amp;token=c8c17833-1005-4383-81ad-524e89cff78c" alt="" data-size="original"><br>

Select keyframe at 4 seconds similar previous step and set keyframe value to "0".

Click on the **Loop** control in Timeline panel. Animation loop is toggled now.\
![](https://4240499350-files.gitbook.io/~/files/v0/b/gitbook-x-prod.appspot.com/o/spaces%2F-Lt-sE9MYKe9pZOcHwg5%2Fuploads%2FOeXrYXiIZSs5yn2pb0l0%2Fimage.png?alt=media\&token=45992cb1-2d91-4b0e-98fc-a5bd2e584598)

Animation created. We just need to start it on the game start.

Switch Timeline tab to Trigger panel

![](https://4240499350-files.gitbook.io/~/files/v0/b/gitbook-x-prod.appspot.com/o/spaces%2F-Lt-sE9MYKe9pZOcHwg5%2Fuploads%2F8sLCiU3sZ41QGRkLlugE%2FTrigger.png?alt=media\&token=82cb22f8-b2af-45cb-a30f-e302470fb6ca)\
\
In Trigger panel click on **Add Trigger** button

![](https://4240499350-files.gitbook.io/~/files/v0/b/gitbook-x-prod.appspot.com/o/spaces%2F-Lt-sE9MYKe9pZOcHwg5%2Fuploads%2FXzPXcCTMPYWBygWJ7Wha%2Fimage.png?alt=media\&token=c9948ded-e2b4-49c2-88a2-8e000626614c)<br>

In Trigger event popup select "On Launch Scene"

![](https://4240499350-files.gitbook.io/~/files/v0/b/gitbook-x-prod.appspot.com/o/spaces%2F-Lt-sE9MYKe9pZOcHwg5%2Fuploads%2FuMAKv3m9lhiCBnQapgqA%2Fimage.png?alt=media\&token=27a3cef3-cdc0-4007-b975-ca2a57e96c1a)<br>

Now toggle Game Mode

![](https://4240499350-files.gitbook.io/~/files/v0/b/gitbook-x-prod.appspot.com/o/spaces%2F-Lt-sE9MYKe9pZOcHwg5%2Fuploads%2FHpCbEmIK4YvFuTueRIyd%2FGame.png?alt=media\&token=be1e8ce7-09b1-45e3-ab72-4154b0fa9ca0)<br>

You'll see the Box object (or other, if you selected it) is moving looped from position 0 (by X) to position 2 and back to 0.

Know more in [Animation](/learn/manual/timeline) and [Trigger](/learn/manual/triggers) chapters.
{% endhint %}

### Q:How to add something in the timeline?

{% hint style="success" %}
There to ways to add object in the timeline.

**First way**

Click on the leftmost icon Timeline, **Add object**

In appeared **Object picker** select needed object to animate (***Box*** for example)

![](https://4240499350-files.gitbook.io/~/files/v0/b/gitbook-x-prod.appspot.com/o/spaces%2F-Lt-sE9MYKe9pZOcHwg5%2Fuploads%2FesyGadZEgAdzZsrHLgQE%2Fimage.png?alt=media\&token=f407f345-3754-43b6-a1cc-127991217ac6)

\
Object to animate added to Timeline

![](https://4240499350-files.gitbook.io/~/files/v0/b/gitbook-x-prod.appspot.com/o/spaces%2F-Lt-sE9MYKe9pZOcHwg5%2Fuploads%2FT9AbbDhjYk3r24EgLkvl%2Fimage.png?alt=media\&token=ed2ffa67-8337-4e7f-86a4-52abb9021f11)<br>

**Second way**

In Animation mode hover cursor on needed object (don't select it) and click right mouse button.

![](https://4240499350-files.gitbook.io/~/files/v0/b/gitbook-x-prod.appspot.com/o/spaces%2F-Lt-sE9MYKe9pZOcHwg5%2Fuploads%2FgHuCJCavea74cmNEYFDK%2Fimage.png?alt=media\&token=b75fd854-b023-4c4a-8740-46bfcaf3cdb9)<br>

In appeared context menu select **Add to timeline**

![](https://4240499350-files.gitbook.io/~/files/v0/b/gitbook-x-prod.appspot.com/o/spaces%2F-Lt-sE9MYKe9pZOcHwg5%2Fuploads%2FmnbI2rKKkvapThCOjayW%2Fimage.png?alt=media\&token=6deeaef1-7055-4951-a9c3-1c9f6ac43c6e)<br>

Object added in Timeline

![](https://4240499350-files.gitbook.io/~/files/v0/b/gitbook-x-prod.appspot.com/o/spaces%2F-Lt-sE9MYKe9pZOcHwg5%2Fuploads%2FT9AbbDhjYk3r24EgLkvl%2Fimage.png?alt=media\&token=ed2ffa67-8337-4e7f-86a4-52abb9021f11)<br>
{% endhint %}

### Q: I created an object animation, but it doesn't work when I run the game, what to do?

{% hint style="success" %}
Several options are possible here:

1. You didn't set trigger which start animation of object
2. Trigger events are not get true
3. Object have Rigidbody property set to Static or Dynamic, those Rigidbody types can't be animated
4. Coordinates set in keyframes of object are wrong or too small
5. You animate object outside of your field of view

{% endhint %}

### **Q: How to import an object?**

{% hint style="success" %}
In **Edit Mode** goto **Main Menu** (MANU logo in top left corner) next **File**>**Import**

![](https://4240499350-files.gitbook.io/~/files/v0/b/gitbook-x-prod.appspot.com/o/spaces%2F-Lt-sE9MYKe9pZOcHwg5%2Fuploads%2FyZI3INFyHK6jEwJp53Fy%2Fimage.png?alt=media\&token=5a3e1b80-13b4-441e-be37-f30ad3532134)<br>

In opened Explorer or Finder select 3D file to import. MANU supports .obj, .fbx, .dae file formats.
{% endhint %}

### Q: How to add fog?

{% hint style="success" %}
Switch to Project panel

![](https://4240499350-files.gitbook.io/~/files/v0/b/gitbook-x-prod.appspot.com/o/spaces%2F-Lt-sE9MYKe9pZOcHwg5%2Fuploads%2FVcPOaupzqy4DLa2c7g8q%2Fimage.png?alt=media\&token=ab3d44c0-d0f8-4b54-bf25-dc6bb5687916)<br>

Select **Fog** in **Evironment** and toggle it's switch **Enabled.**&#x20;

![](https://4240499350-files.gitbook.io/~/files/v0/b/gitbook-x-prod.appspot.com/o/spaces%2F-Lt-sE9MYKe9pZOcHwg5%2Fuploads%2FAe6vZ7ry2pGpsqzWilvk%2Fimage.png?alt=media\&token=b782138a-174b-413c-92f6-c0f57b29ca07)<br>

In inspector you can choose 3 different types of fog and adjust fog range and it's color.
{% endhint %}

### Q: How to enable the mouse in First and Third person?

{% hint style="success" %}
To enable mouse look in Game Mode in First or Thrid person mode press "**\~**" (tilda) on keyboard.
{% endhint %}

### Q: How to play a sound?

{% hint style="success" %}
**To place sound in Scene**

Click **Speaker** object in main **Toolbar**

<img src="https://4240499350-files.gitbook.io/~/files/v0/b/gitbook-x-prod.appspot.com/o/spaces%2F-Lt-sE9MYKe9pZOcHwg5%2Fuploads%2FyKlc8GHdFWuZRfSvo3vw%2Fimage.png?alt=media&amp;token=12af9bed-827e-4d6b-a9e6-9b477eb8cde0" alt="" data-size="original"><br>

**Speaker** object would be created

![](https://4240499350-files.gitbook.io/~/files/v0/b/gitbook-x-prod.appspot.com/o/spaces%2F-Lt-sE9MYKe9pZOcHwg5%2Fuploads%2FQZfJIEeqScmb8JZxSqZY%2Fimage.png?alt=media\&token=e1b3b65b-891e-4539-a1a9-981ef92044d2)<br>

Adjust parameters of **Speaker** in Inspector, minimum and maximum sound **Attenuation**\
![](https://4240499350-files.gitbook.io/~/files/v0/b/gitbook-x-prod.appspot.com/o/spaces%2F-Lt-sE9MYKe9pZOcHwg5%2Fuploads%2FhJC905glgNFme8B4BhVG%2Fimage.png?alt=media\&token=78ed846a-7da2-4096-92eb-0ade9a49699b)<br>

Create Animation or select existed. Switch to **Animation mode**.

![](https://4240499350-files.gitbook.io/~/files/v0/b/gitbook-x-prod.appspot.com/o/spaces%2F-Lt-sE9MYKe9pZOcHwg5%2Fuploads%2FJeTMwfrEbuNrZpRsOsPi%2Fimage.png?alt=media\&token=08d90c82-d5a1-4b1d-8837-642415a3d0a9)<br>

Click **Add Object** in Timeline toolbar and select created **Speaker**

![](https://4240499350-files.gitbook.io/~/files/v0/b/gitbook-x-prod.appspot.com/o/spaces%2F-Lt-sE9MYKe9pZOcHwg5%2Fuploads%2Fz03khJalYNv1L5w1JmC2%2Fimage.png?alt=media\&token=266328cc-3537-4f58-b471-1ed7f5d728f5)<br>

**Speaker** will appeared in timeline

![](https://4240499350-files.gitbook.io/~/files/v0/b/gitbook-x-prod.appspot.com/o/spaces%2F-Lt-sE9MYKe9pZOcHwg5%2Fuploads%2Fr7rKzbSHpr5o0TEPqNVl%2Fimage.png?alt=media\&token=fc9ba0c5-289f-4f63-b261-8ec8bb39527a)\
\
Click **Speaker** track and click **Add Animatable Parameter** icon and select **Audio Track** in object picker

![](https://4240499350-files.gitbook.io/~/files/v0/b/gitbook-x-prod.appspot.com/o/spaces%2F-Lt-sE9MYKe9pZOcHwg5%2Fuploads%2FnHDhrZ9GKD6Z8vrSZNkI%2Fimage.png?alt=media\&token=aa3192ac-7f3e-4384-ab3e-d38e7f64dacb)\
\
Click on **Audio Track** desired time position

In poped Explorer (Finder) select audio file you want

Audio Track would be filled with selected **Sound**

![](https://4240499350-files.gitbook.io/~/files/v0/b/gitbook-x-prod.appspot.com/o/spaces%2F-Lt-sE9MYKe9pZOcHwg5%2Fuploads%2FipXcz2FNOszk8bEF1azI%2Fimage.png?alt=media\&token=778173cc-2ddc-44a7-8a52-76dcfc3b77d5)<br>

Click on track in Timeline to adjust its parameters\
![](https://4240499350-files.gitbook.io/~/files/v0/b/gitbook-x-prod.appspot.com/o/spaces%2F-Lt-sE9MYKe9pZOcHwg5%2Fuploads%2FQYk6vDliO5UxfQ5Lj5yr%2Fimage.png?alt=media\&token=9a55e51c-60c1-41fa-8506-8e3d78a74d07)<br>

Don't forger to set **Trigger** to start sound (On Launch Scene for example)\
![](https://4240499350-files.gitbook.io/~/files/v0/b/gitbook-x-prod.appspot.com/o/spaces%2F-Lt-sE9MYKe9pZOcHwg5%2Fuploads%2FLZwRetHtKmSbZSDOIAOO%2Fimage.png?alt=media\&token=53e49292-98ee-4f62-aafc-6e810a5e400e)\
\
**To apply Sound to Animation**

Click on Add sound in Timeline toolbar\
![](https://4240499350-files.gitbook.io/~/files/v0/b/gitbook-x-prod.appspot.com/o/spaces%2F-Lt-sE9MYKe9pZOcHwg5%2Fuploads%2FZ1PwzfcWGi572ZtnCwie%2Fimage.png?alt=media\&token=05f2f896-6821-4d8d-a3ed-47aa4a78395f)<br>

Audio track would be added in timeline\
![](https://4240499350-files.gitbook.io/~/files/v0/b/gitbook-x-prod.appspot.com/o/spaces%2F-Lt-sE9MYKe9pZOcHwg5%2Fuploads%2FE0N7hErFb0VXJForgp7u%2Fimage.png?alt=media\&token=1da8f2a1-b5f8-4d0d-8305-4e34b64b1443)<br>

Click on Audio Track desired time position.

In poped Explorer (Finder) select audio file you want

Selected sound would be placed on timeline

![](https://4240499350-files.gitbook.io/~/files/v0/b/gitbook-x-prod.appspot.com/o/spaces%2F-Lt-sE9MYKe9pZOcHwg5%2Fuploads%2Fg4wUsQpXVSg5BqWrNkpp%2Fimage.png?alt=media\&token=e98fb46d-5d85-4f98-94f6-a8fad83ed0ce)<br>

Also dont forget apply **Trigger** to start animation. For example **Collision trigger** for Main Character and Box (don't forget make Box Physic)\
![](https://4240499350-files.gitbook.io/~/files/v0/b/gitbook-x-prod.appspot.com/o/spaces%2F-Lt-sE9MYKe9pZOcHwg5%2Fuploads%2FPAudW3F0fP5WDnp9dlZj%2Fimage.png?alt=media\&token=dda1b546-476a-4e9d-ba53-2ab103da9220)

\
Start **Game Mode** and check collision. Sound would be played.<br>

Know more in [Speaker](/learn/manual/speaker) chapter&#x20;
{% endhint %}


# Contact Support

This section describes the options you could use to report a bug or contact our support team.

## Report a Bug

To report a bug or an issue you have experienced with MANU, please click[ Report a Bug](https://www.surveymonkey.com/r/ReportBugMANU).  The more details you provide, the quicker we will be able to assist you.

## Email Support Team

For any other technical issues, reach out to us via the [Discord Chat](http://bit.ly/MANU_Discord) or send us an email to <manu@manu.co>


# Changelog

Here you can find descriptions of all major Fixes and Improvements.

### MANU-1.1.3-alpha (October **25**, 2021)

**Fixes and improvements:**

* Project files are now being put in one .tar package while exporting to MacOS from Windows
* Fixed rare interface font issues on some MacBook computers

### MANU-1.1.2-alpha (July 9, 2021)

**Fixes and improvements:**

* &#x20;Fixed some occasional game exporting malfunctions

### MANU-1.1.1-alpha (May 13, 2021)

**Fixes and improvements:**

* Fixed the issue with UI panel ‘Transform’ freezing sometimes while switching between objects
* Fixed some issues leading to sudden client crashes

### MANU-1.1.0-alpha (April 22, 2021)

**Win/Mac desktop export** **Custom main character and its animation support**

**3D models skins and its animation support**

**PBR (Physics-Based Rendering) support**&#x20;

**Game prefab support and ability to clone and/or change parameters of multiple objects**&#x20;

**New UI of MANU Video Game Maker**&#x20;

**New ‘Welcome’ window UI**

**Innovative trigger system**

* Ability to tune and combine settings of animation launch for in-game or player event
* Ability to clone animation launch condition or animation itself
* Support of keyboard input for triggers
* Animation launch when user Start/Stop/Continue another animation or animations
* Animation launch when user Start/Stop/Continue main character state machine settings
* Support of ‘No Collision’ trigger type
* Ability to enable or disable triggers
* Tuning of user settings of game objects in timeline

**Animation workflow development and improvement:**

* Ability to combine animations in timeline to make another single fragment of animation
* Ability to Drag and drop game objects order in timeline
* Ability to enable/disable animation in timeline
* New settings ‘Offset’ and ‘Tiling’ for animation materials
* Ability to tune lighting brightness
* Users are now able to tune sound volume of animation
* Tuning of animation physics settings

**Support of ‘Ghost’ type of physical object**

**Users are now able changer parameters of multiple objects simultaneously**

**Added grid and Move by step and Rotate by step grid functions**

**Users are now able to set color markers in project nodes to simplify navigation**&#x20;

**It is now possible to change/reimport game objects in the projects and keep all the settings of previous objects**

**Users are now able to set custom parameters for game objects, both numerical and logical**

**Improved formula editor, including highlight of syntaxis and autocomplete support**

**Added smart auto volume settings, depending on camera (listener) position**

**Improved game camera workflow and control**

**Added recording of project log to simplify polishing**

**Other fixes and improvements:**

* Fixed rendering speed
* Fixed memory leaks
* Animation system optimization
* Main character workflow optimization
* Physics workflow optimization

### MANU-1.0.2-alpha (August 17, 2020)

🛠 **Fixes:**

* We've eliminated issues with heavy memory leaks when the Main Character is selected in the Edit Mode.
* You can now create as many keyframes as you want and won't run into any mismatches amongst them.
* Fixed bugs with gizmo - it no longer disappears when you leave the Game Mode. – Dynamic Objects no longer disappear.
* Validated Camera Limits to avoid the use of inverted values.
* Fixed Undo-Redo and Duplicate operations to ensure this feature responds to all changes made in the scene.
* Hotkey (CTRL + S) no longer affects Camera settings.
* Fixed crash issues caused by the following operations: window resize, switching between modes, character modifications, physics and graphics calculations, and memory leaks.

💎 **Improvements:**

* The Physics Tab becomes visible by default when the collider edit tool is selected.
* Changes in the Transform Panel are now re-calculated instantly in the 3D view.

### MANU-1.0.1-alpha (June 2, 2020)

**📢 WHAT'S NEW?**

* Now shared textures will be applied automatically across different models and materials.
* We've implemented the update system into the launcher window, that will inform you, when the new version is available, and what features or fixes will be delivered with the update.
* MANU is now fully portable: all required libraries are included, so you don't need to install them.
* All lists work much faster now, especially, when you need to collapse or expand them.
* The Scene Tree is now using more icon types to separate various objects, so it will be easier to add proper objects to the timeline.
* Unsupported or broken models will not cause crashes: Instead, MANU will warn you about the specific issue.
* From now on, global objects Sun and Sky can be added to the animation from the Scene Tree.
* All values typed in keyframes will be applied automatically.
* Groups can now be ungrouped.
* A horizontal scroll is now supported in all panels.
* Retarget is now limited to the supported features of the specific object type.
* Overall performance and stability are now improved.